Set Up Discord Bot Webhooks Locally with Python — No Server Required
 Lightning Developer
Webhooks offer an efficient way to interact with Discord servers without the need to run a persistent bot or constantly poll for events. Whether you're building a simple notification system or a more complex bot feature, webhooks provide a straightforward approach to send data into Discord channels or receive interactions.
In this guide, you’ll learn how to set up and test Discord bot webhooks locally using Python (Flask) and Pinggy, a secure tunneling tool that lets you expose your local development server to the internet.
What Are Discord Webhooks?
A Discord webhook is an HTTP endpoint that allows external applications to send messages into a Discord text channel. They’re commonly used for:
Posting alerts (e.g., GitHub pushes, CI/CD updates)
Integrating with APIs or scripts
Enabling bot-like behavior without a full bot framework
Unlike a typical bot, webhooks don’t require a WebSocket connection and are much easier to implement for one-way communication.
Why Use Pinggy?
For local development, Discord’s webhook service needs to reach your Flask server. Pinggy provides a secure tunnel to your localhost, allowing your server to receive HTTP requests from the outside world without deploying to a cloud service.
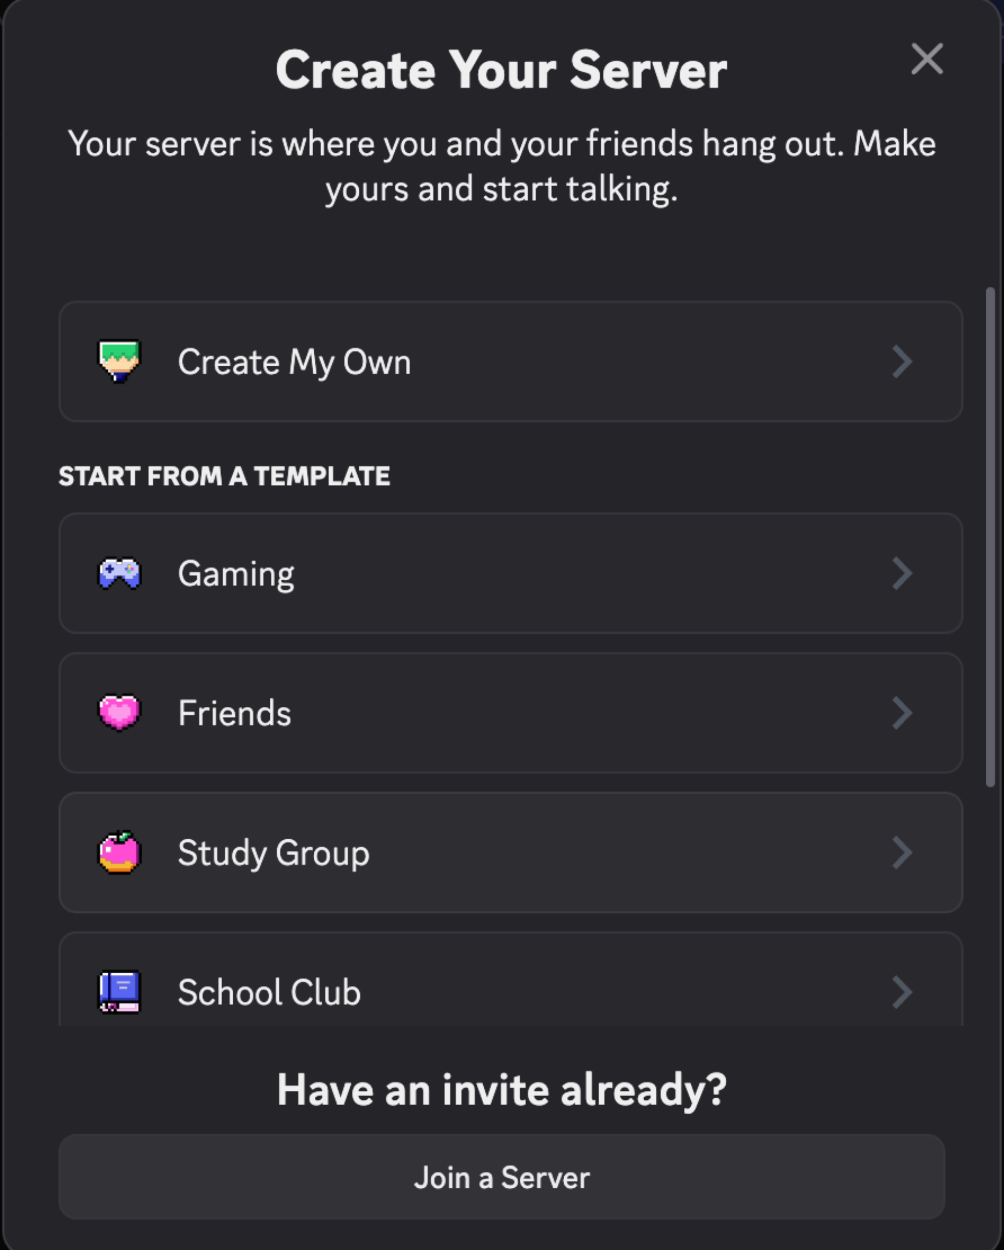
Step 1: Create a Discord Server and Channel
Open Discord and create a new server.

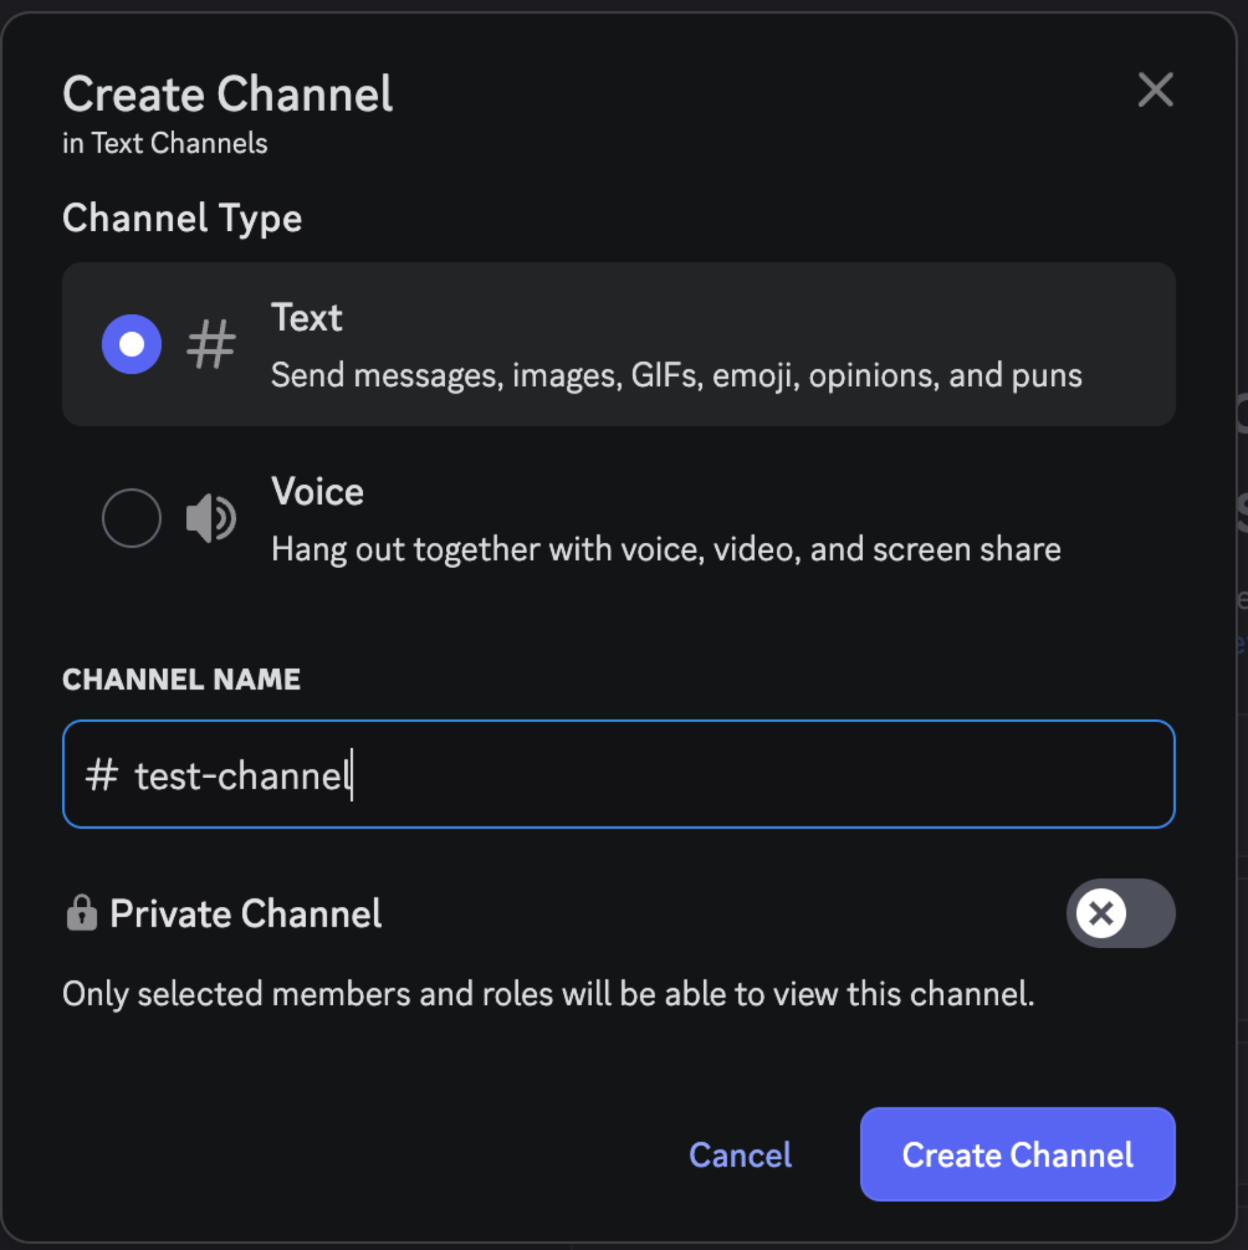
Add a text channel for webhook messages (e.g.,
#alerts).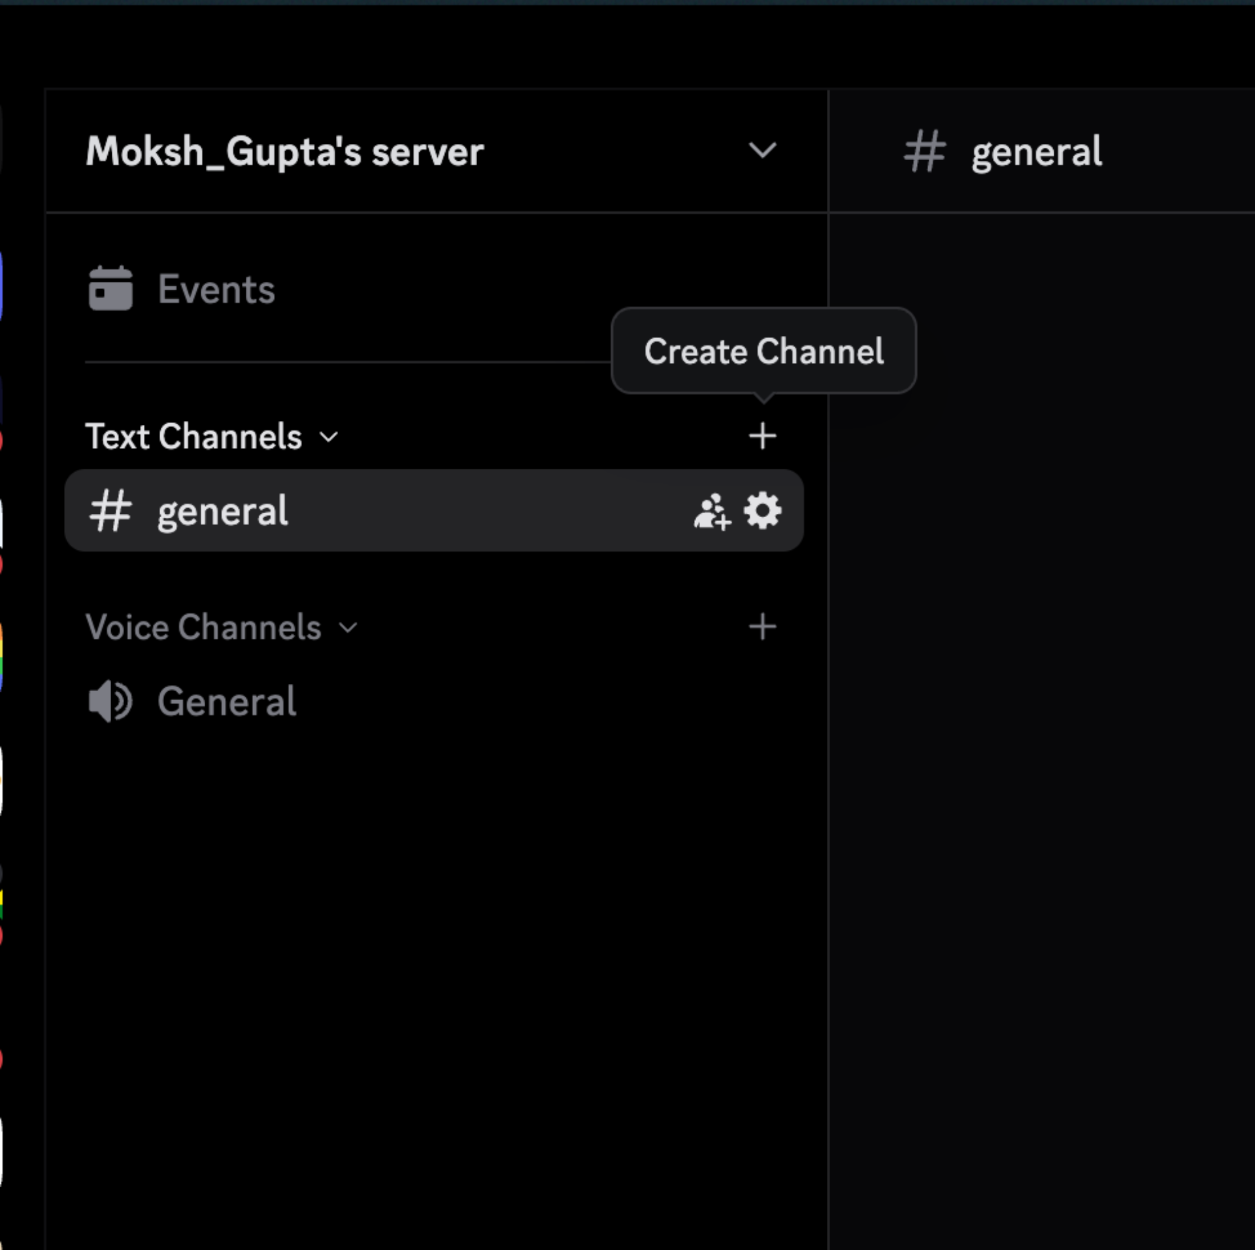
Enable Developer Mode under Settings → Advanced.

Right-click your new channel → Copy Channel ID.

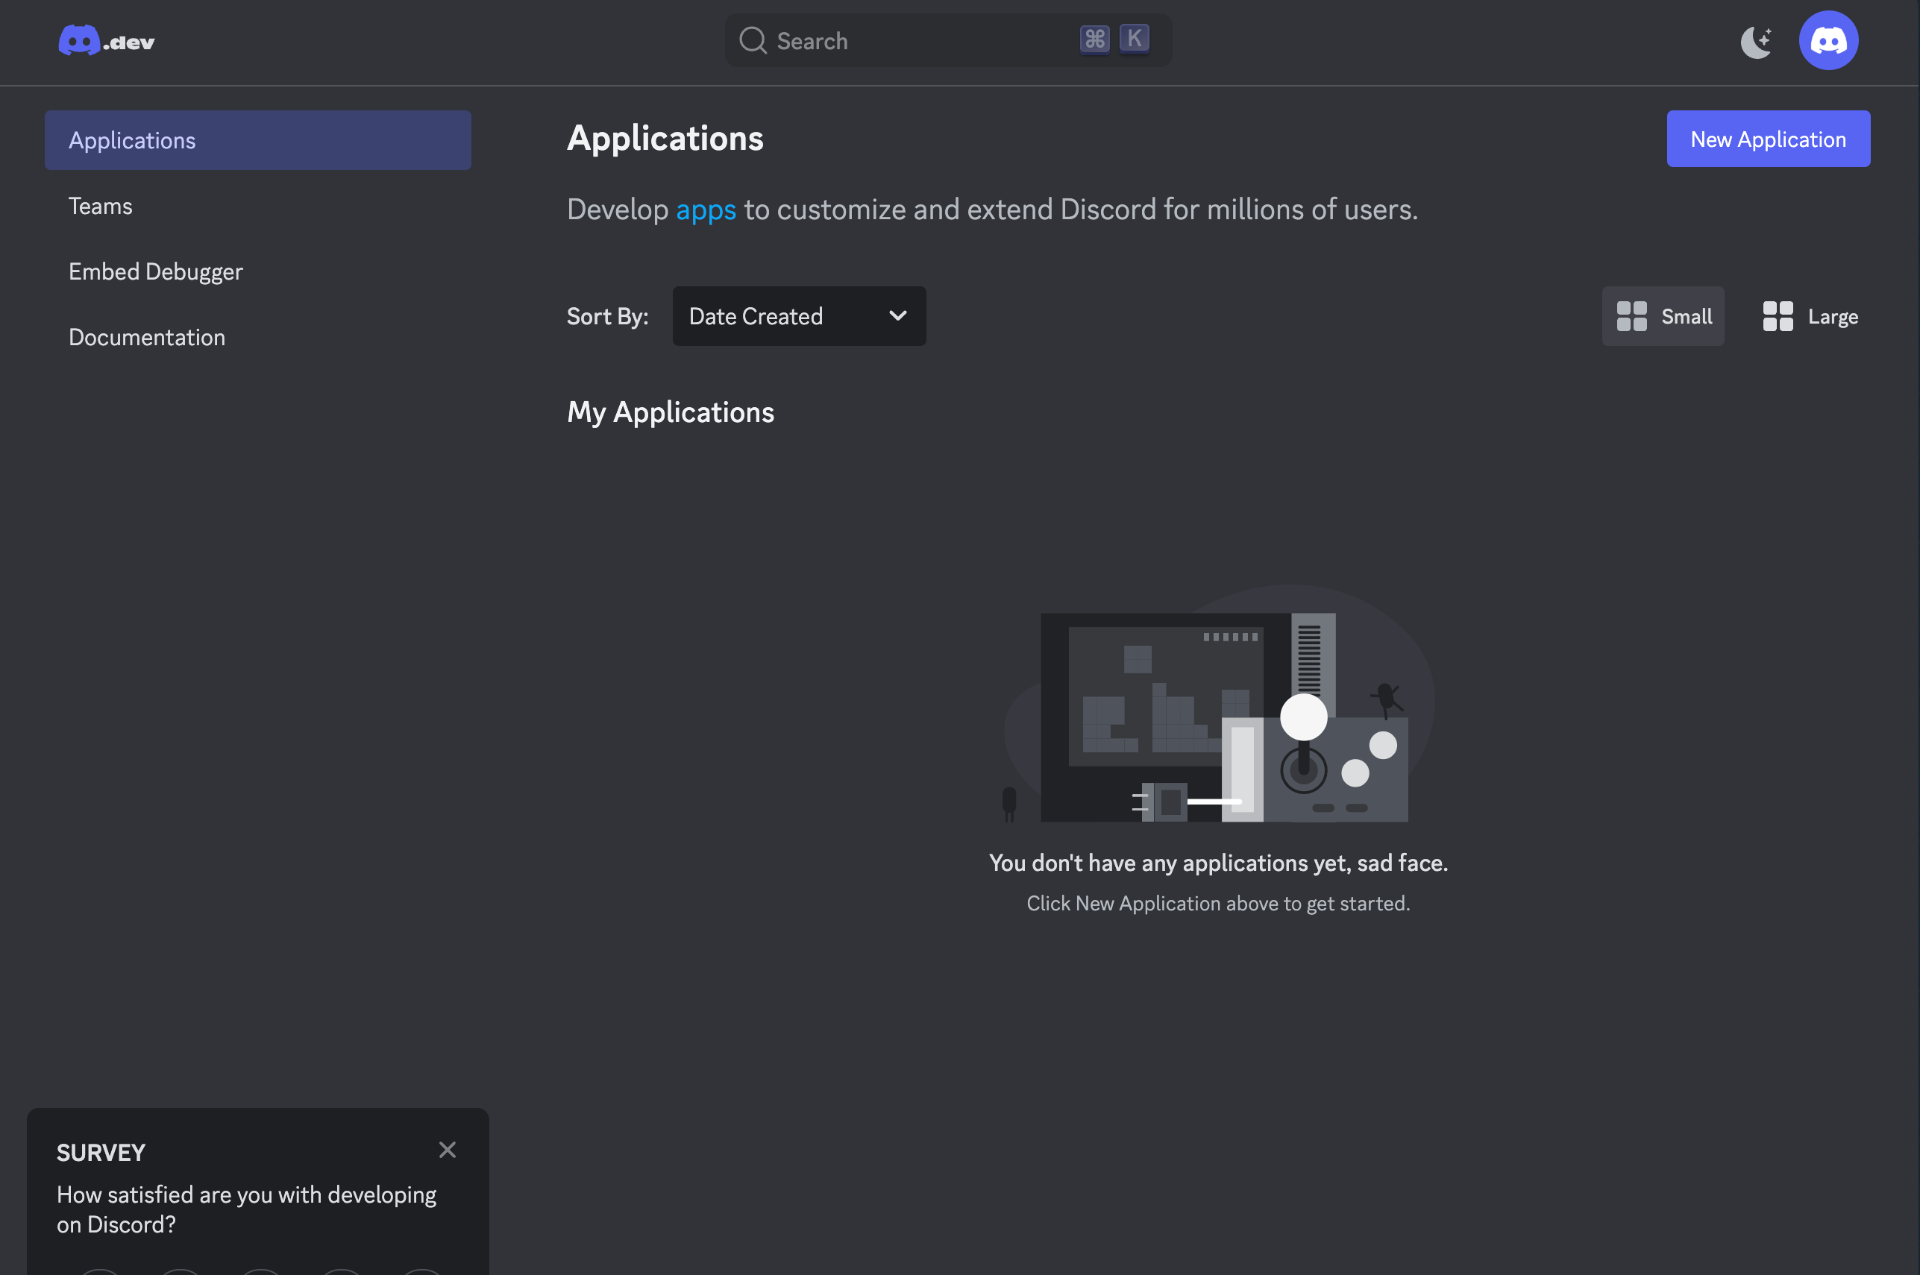
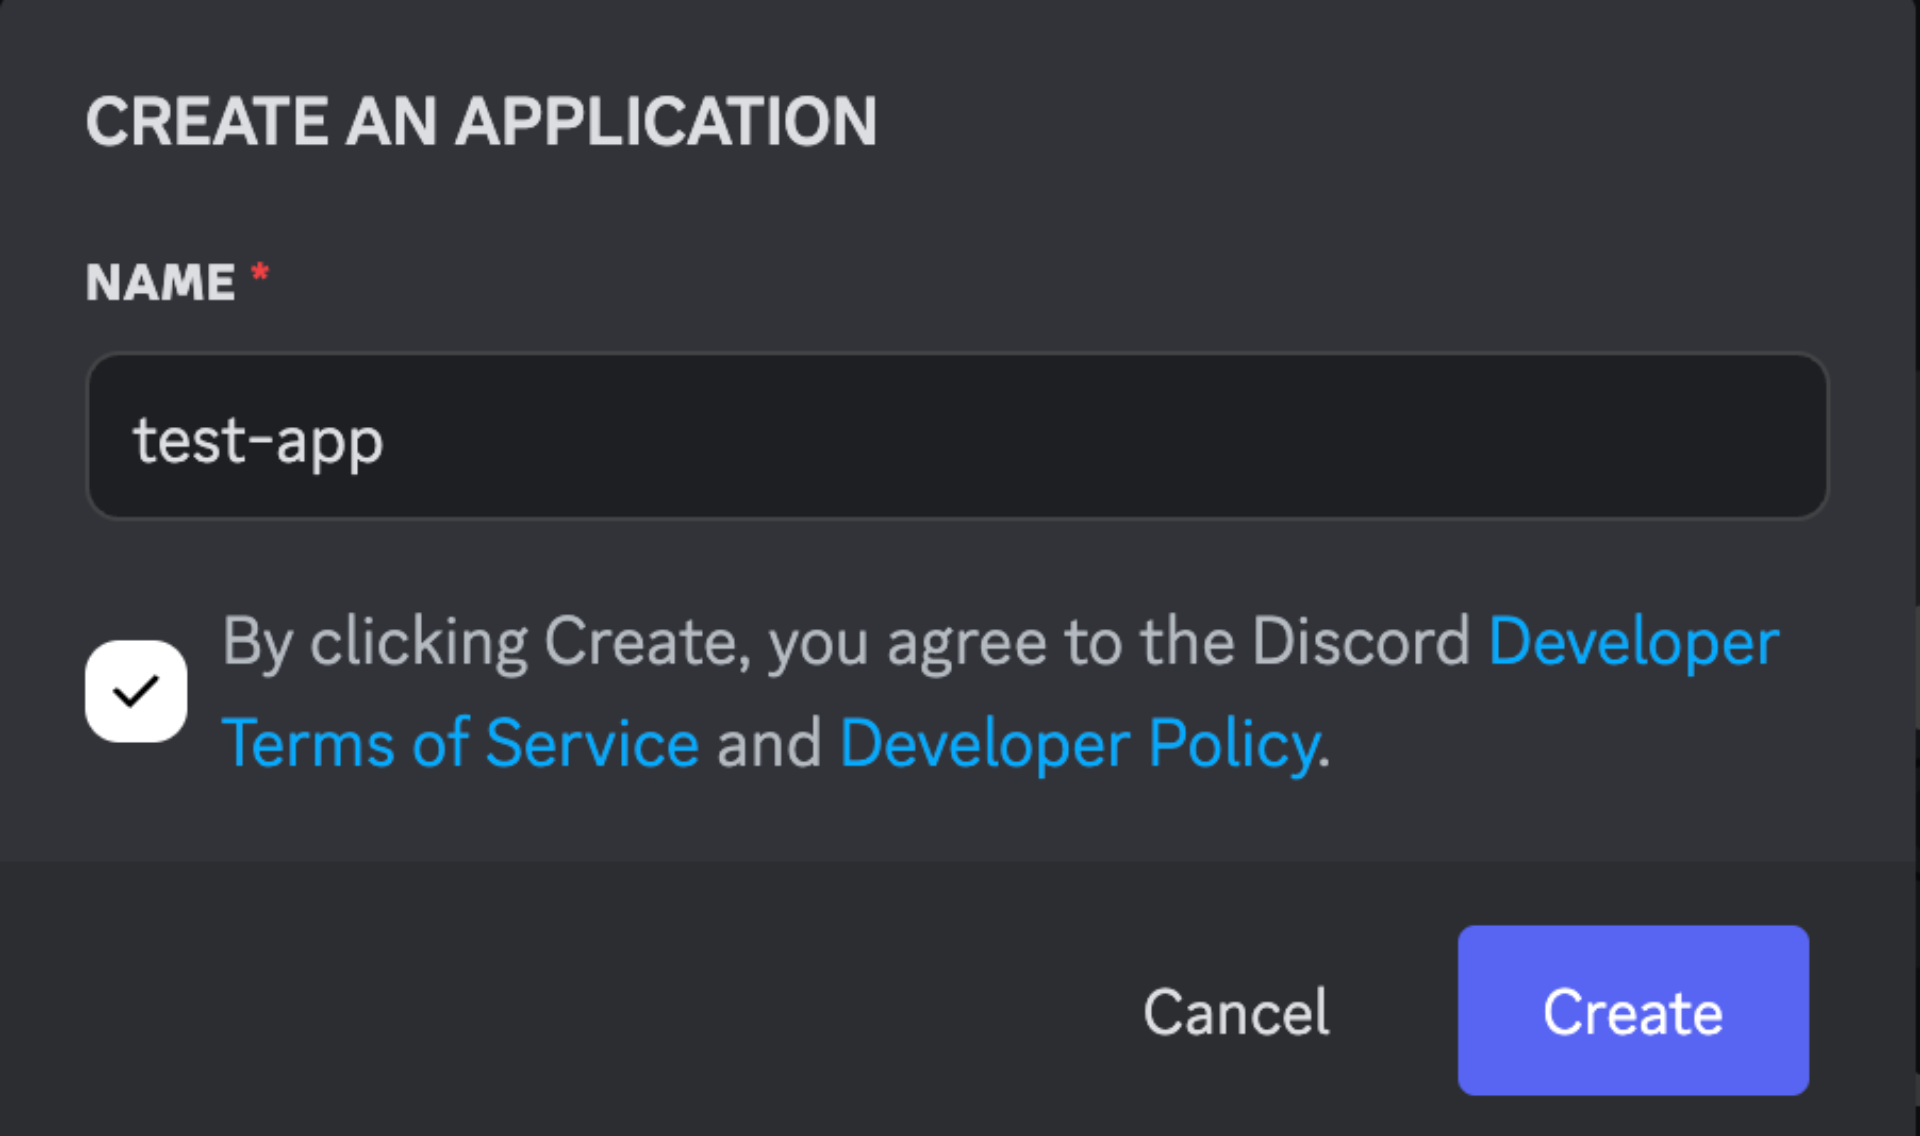
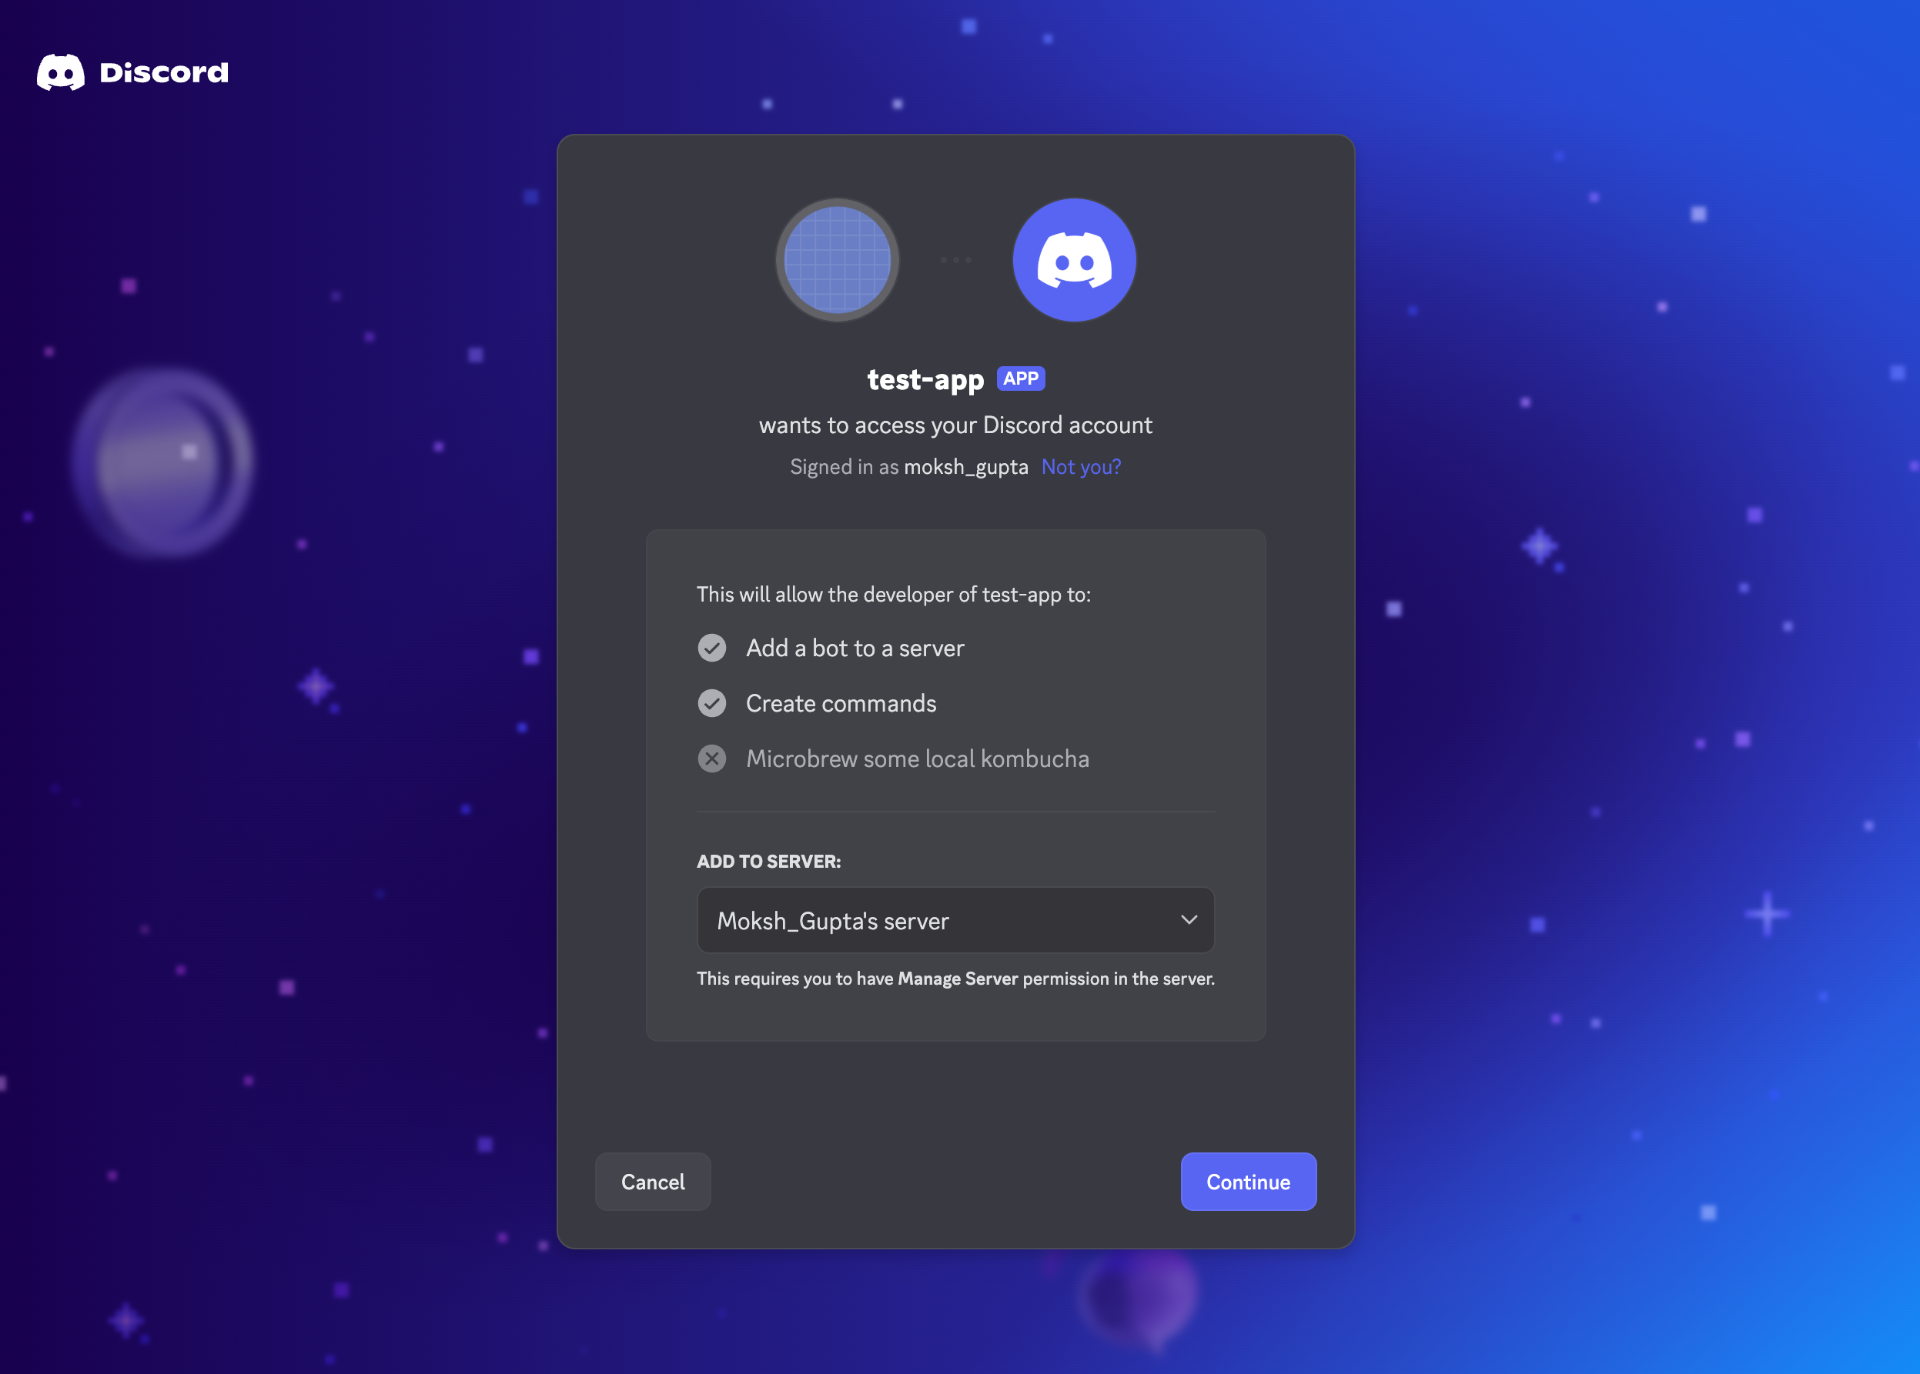
Step 2: Create a Discord Application and Bot
Go to the Discord Developer Portal.
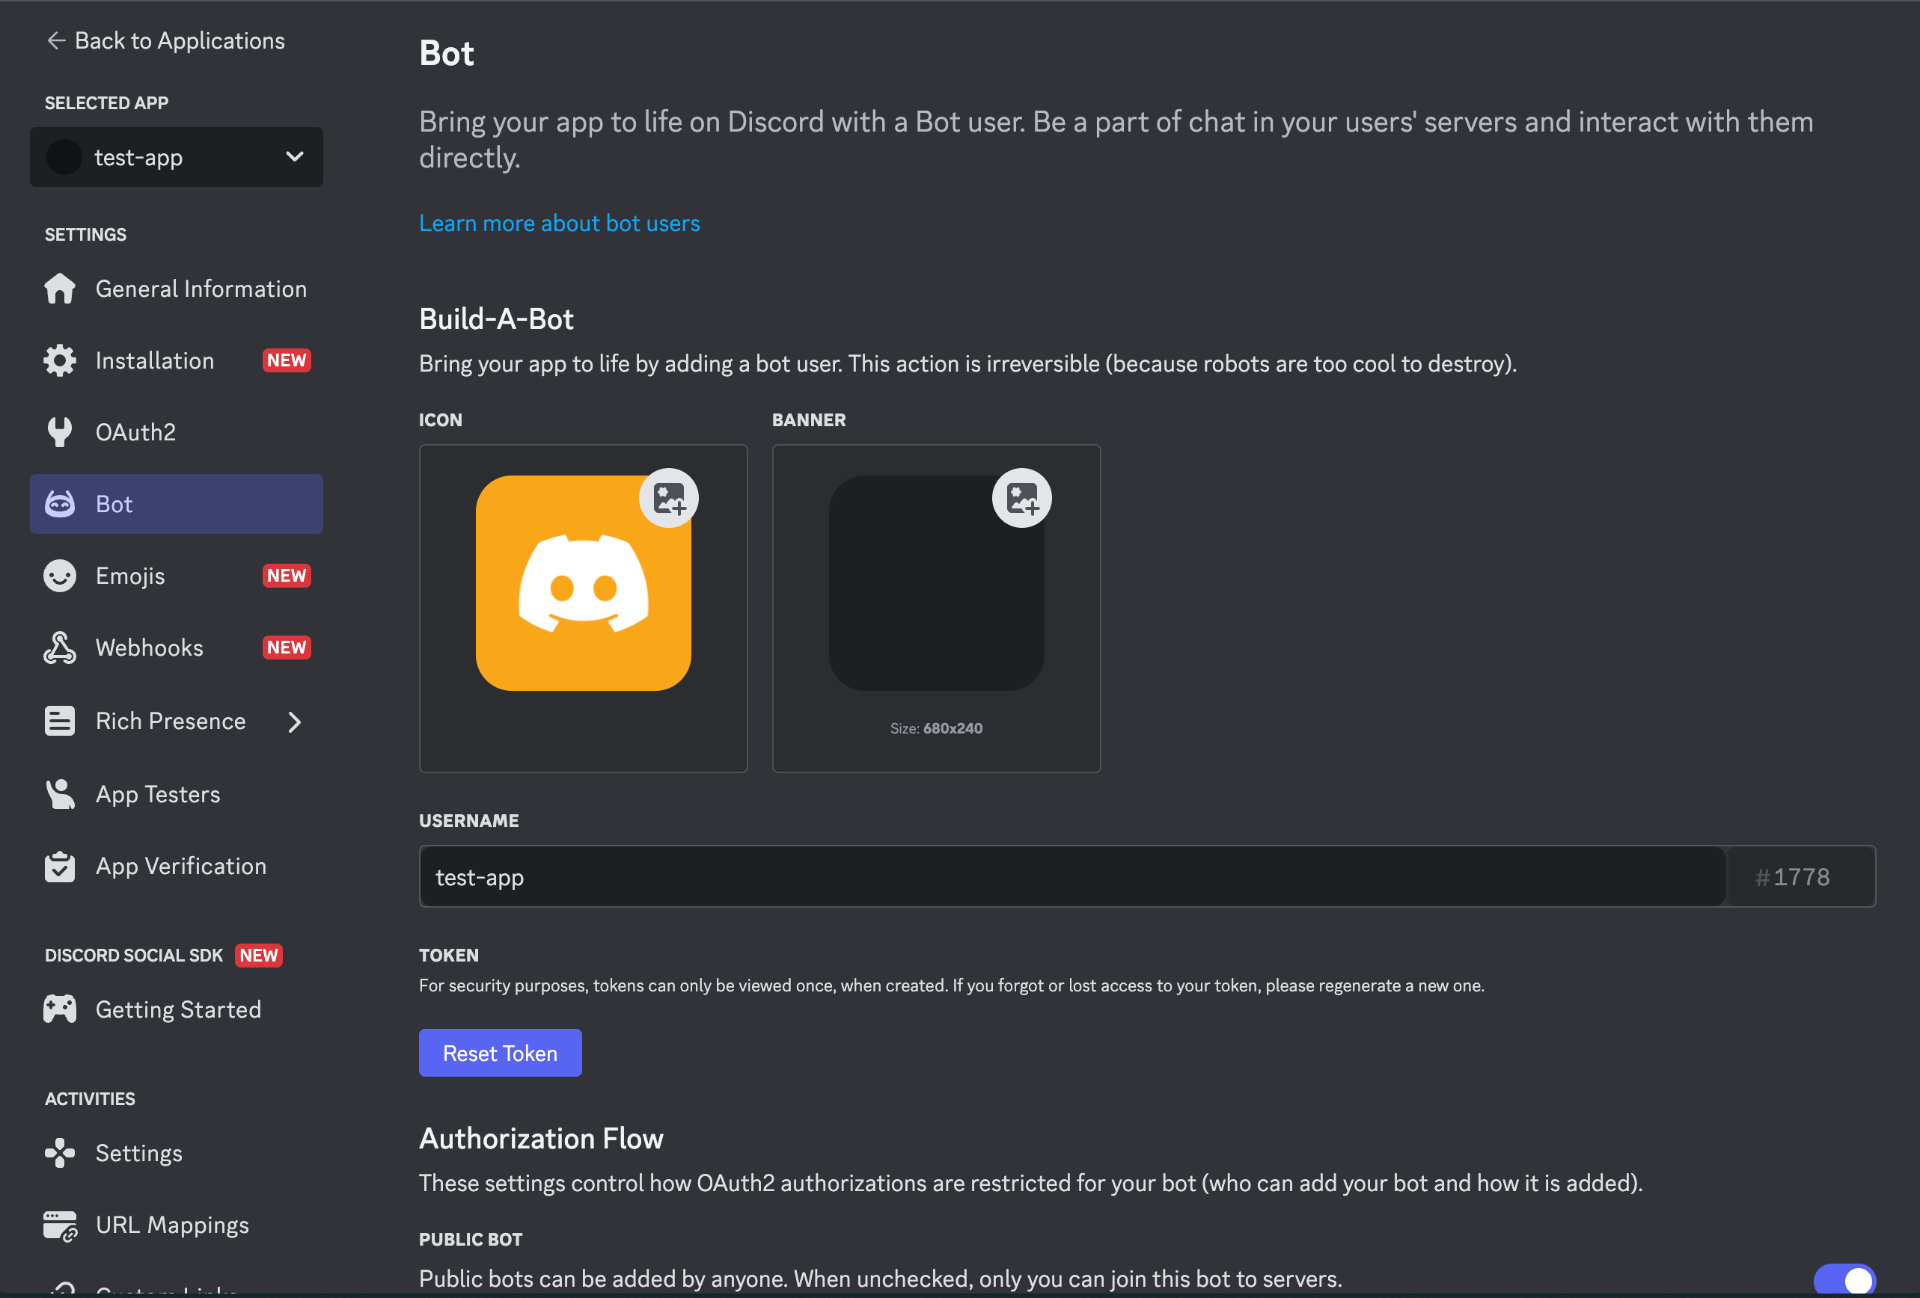
Create a new application and add a bot.
Copy the Bot Token for authentication.

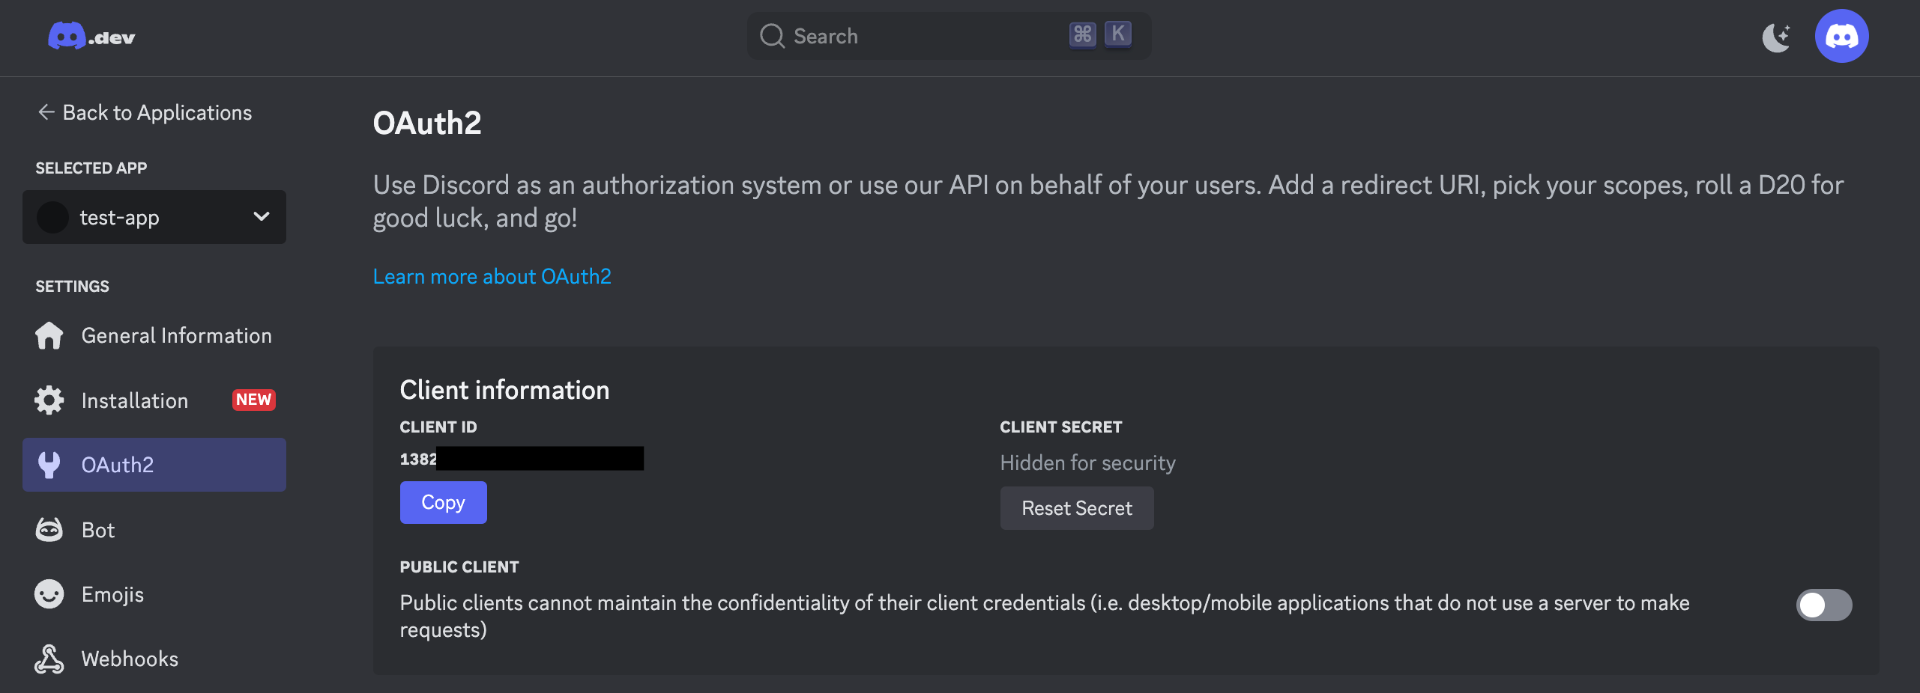
Under OAuth2 → URL Generator, choose:
Scope:
botPermissions:
Manage Webhooks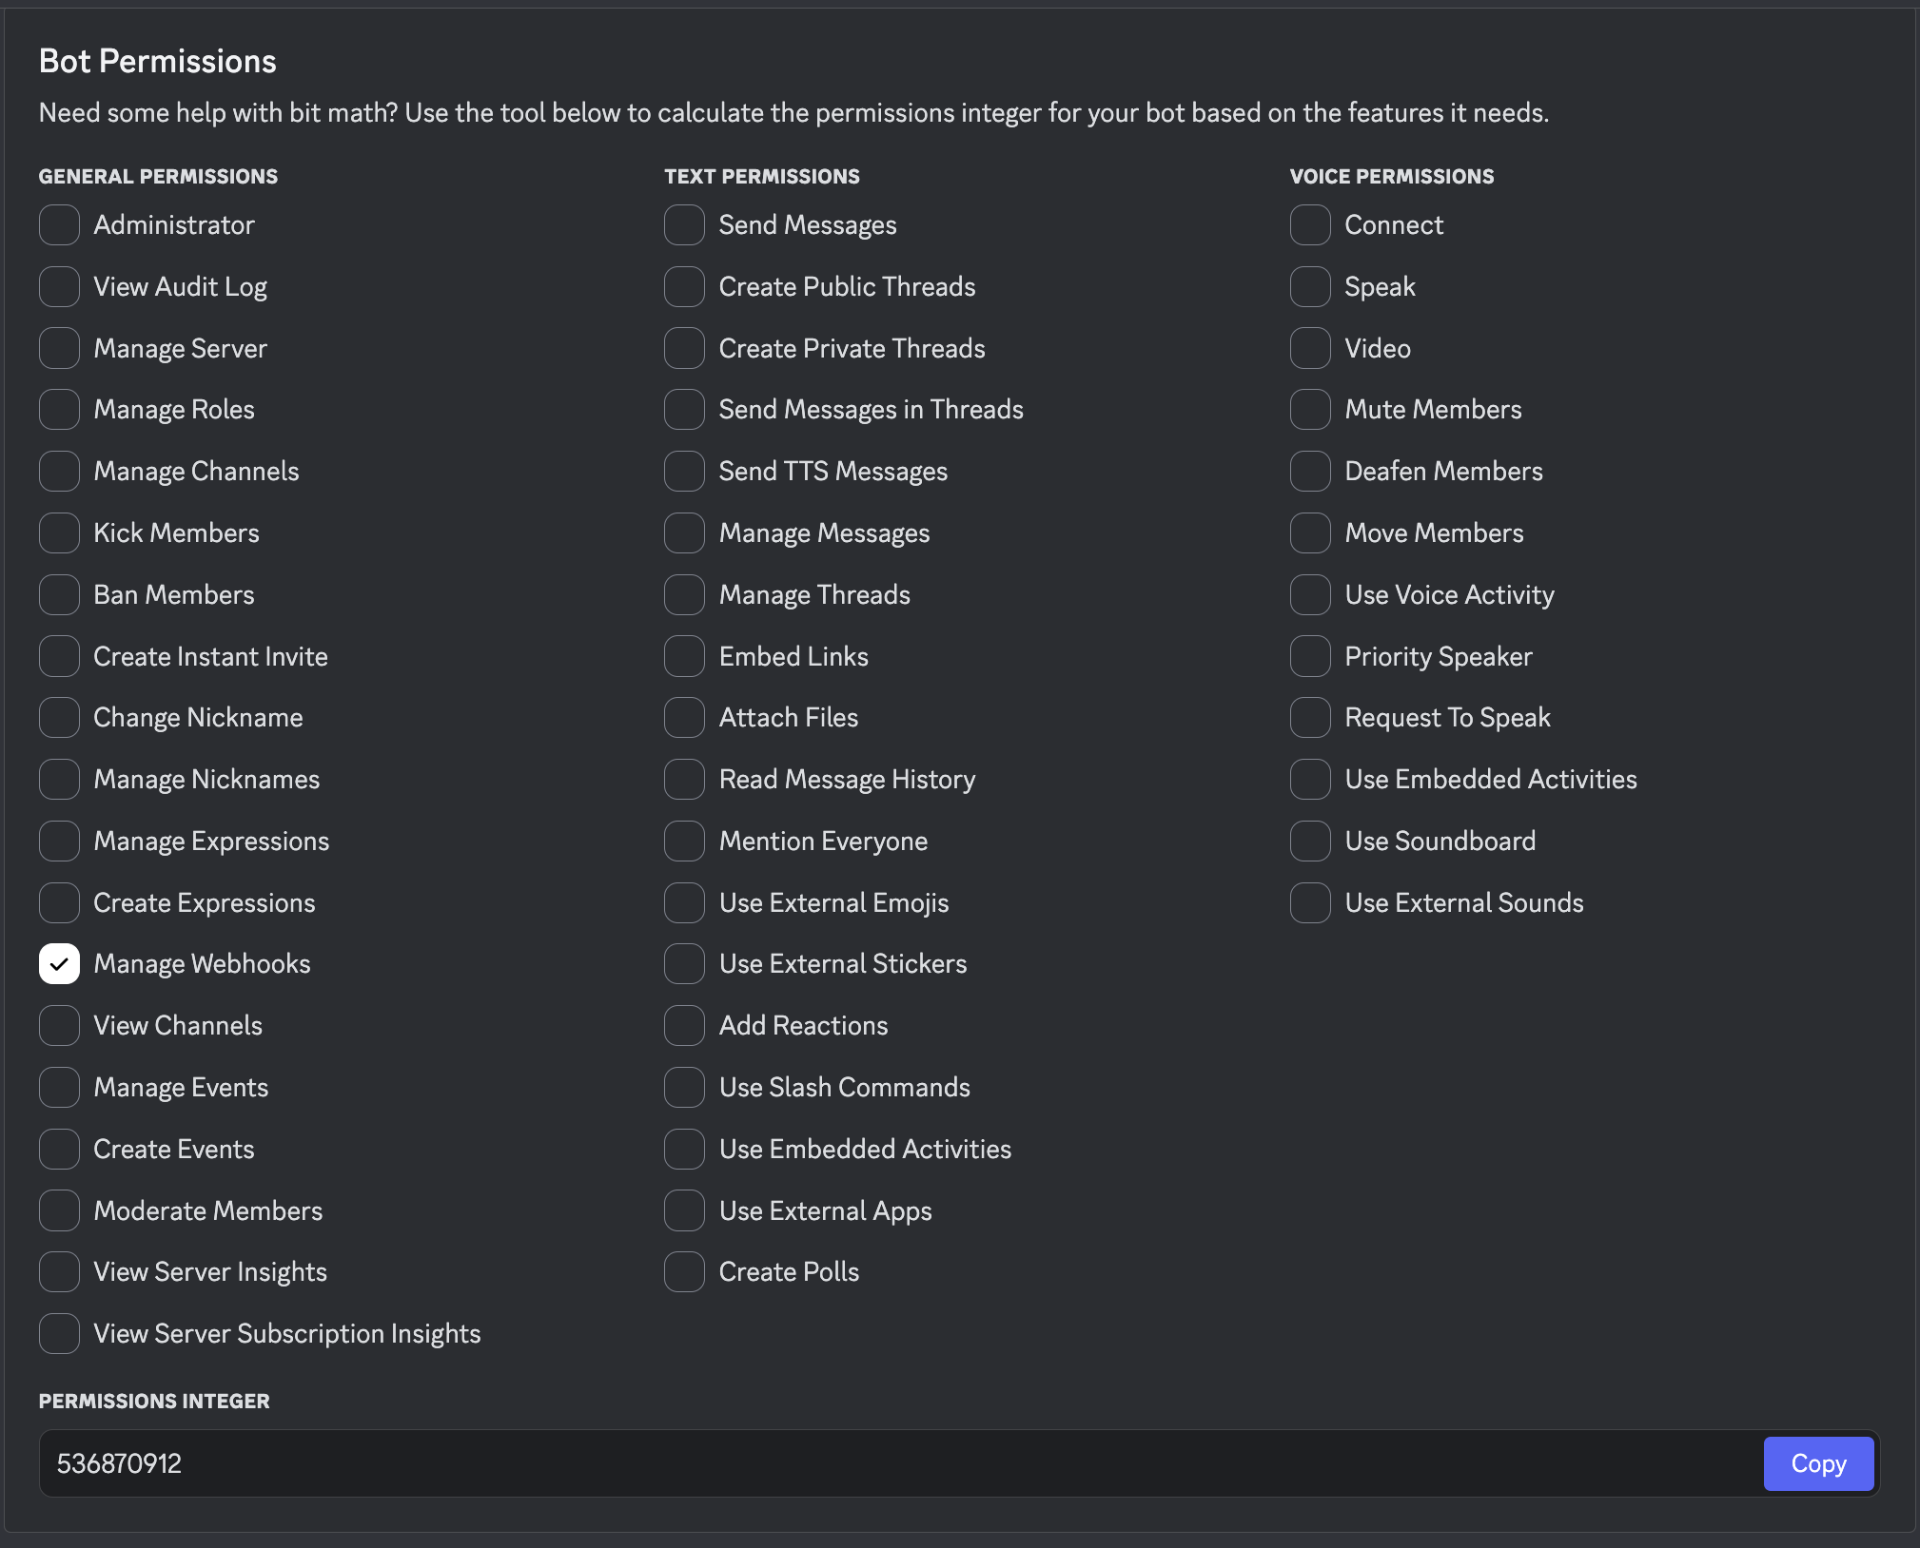
- Authorize the bot to your server using the generated URL.
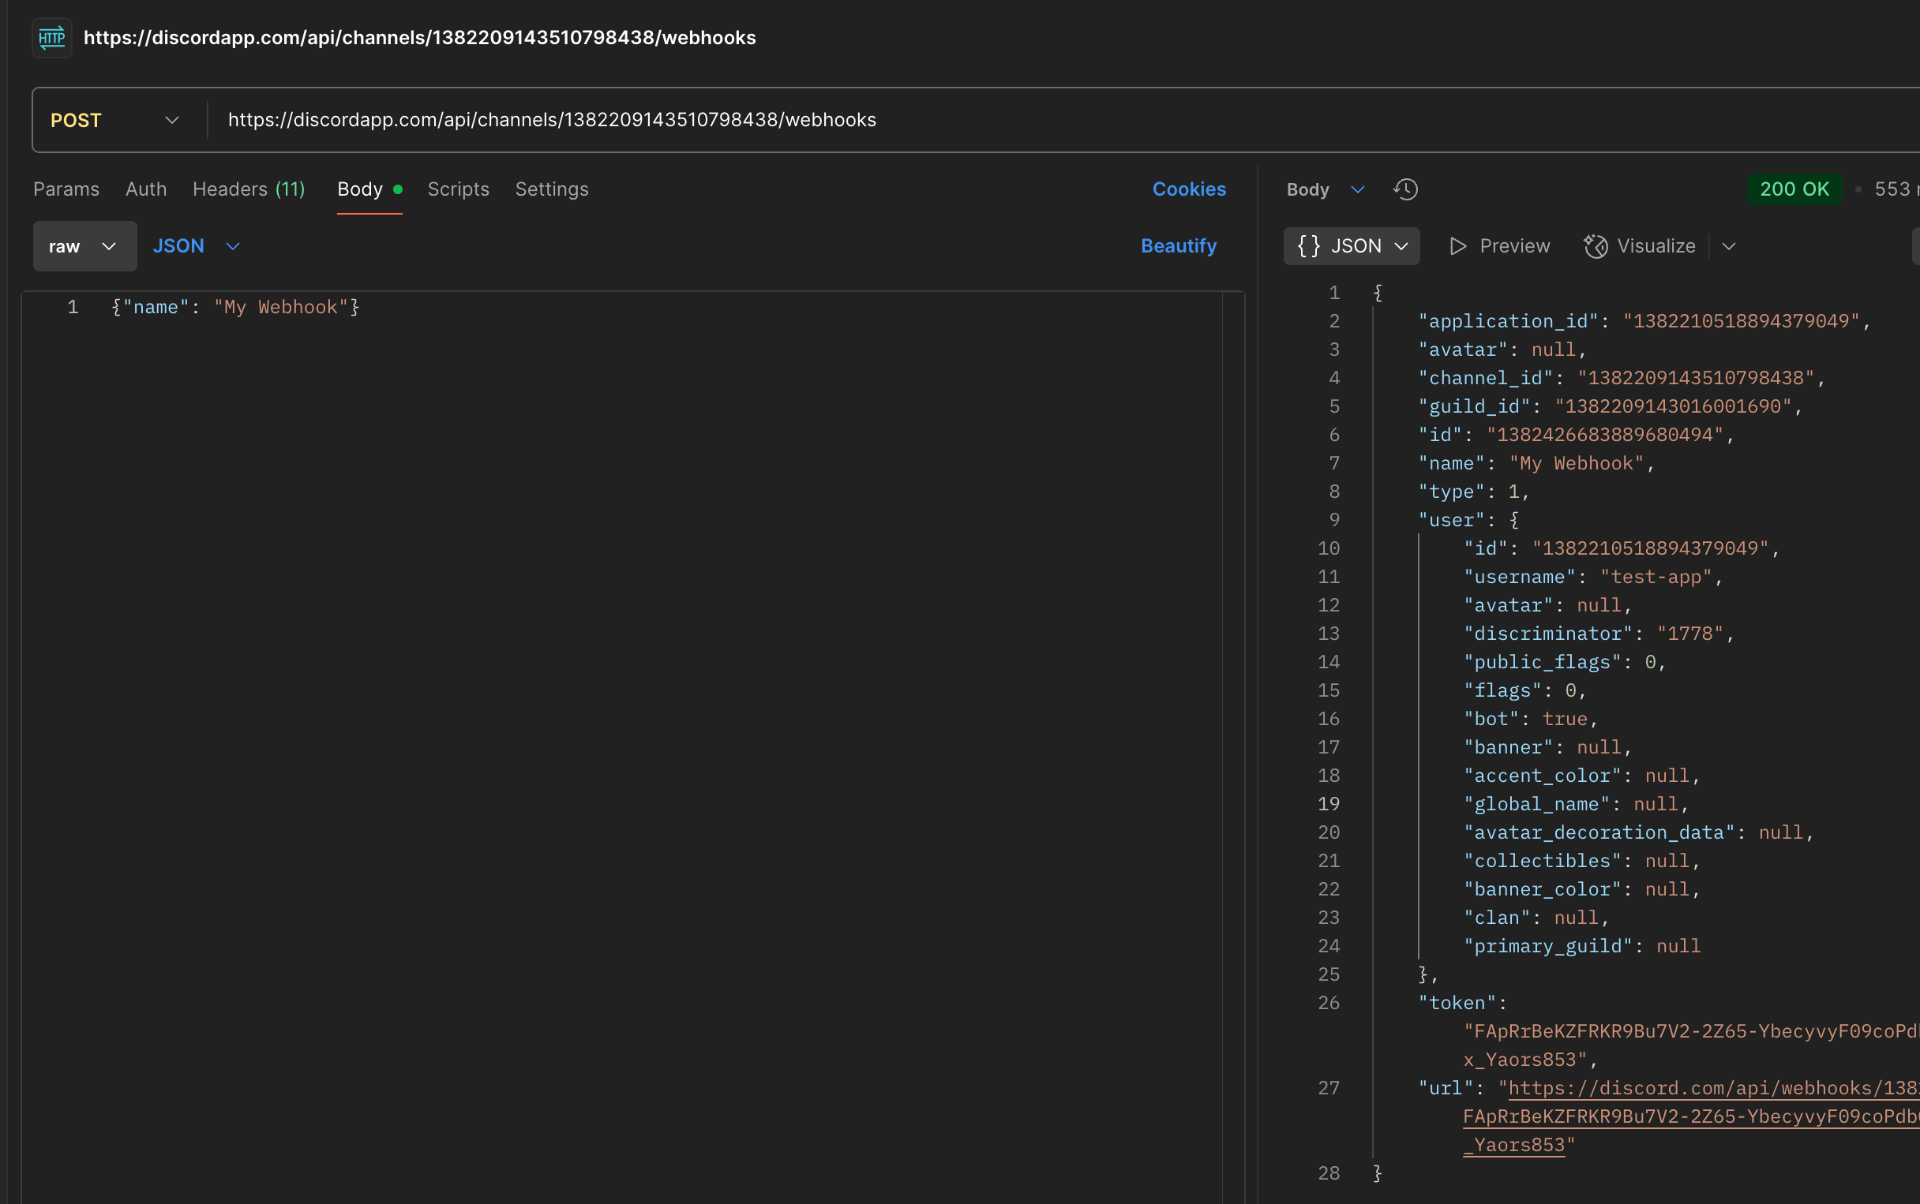
Step 3: Create a Webhook via the Discord API
Use the following command to create a webhook:
curl -X POST "https://discord.com/api/channels/<CHANNEL_ID>/webhooks" \
  -H "Authorization: Bot <BOT_TOKEN>" \
  -H "Content-Type: application/json" \
  -d '{"name": "My Webhook"}'
After running the command, note down the id and token from the response:
https://discord.com/api/webhooks/<WEBHOOK_ID>/<WEBHOOK_TOKEN>
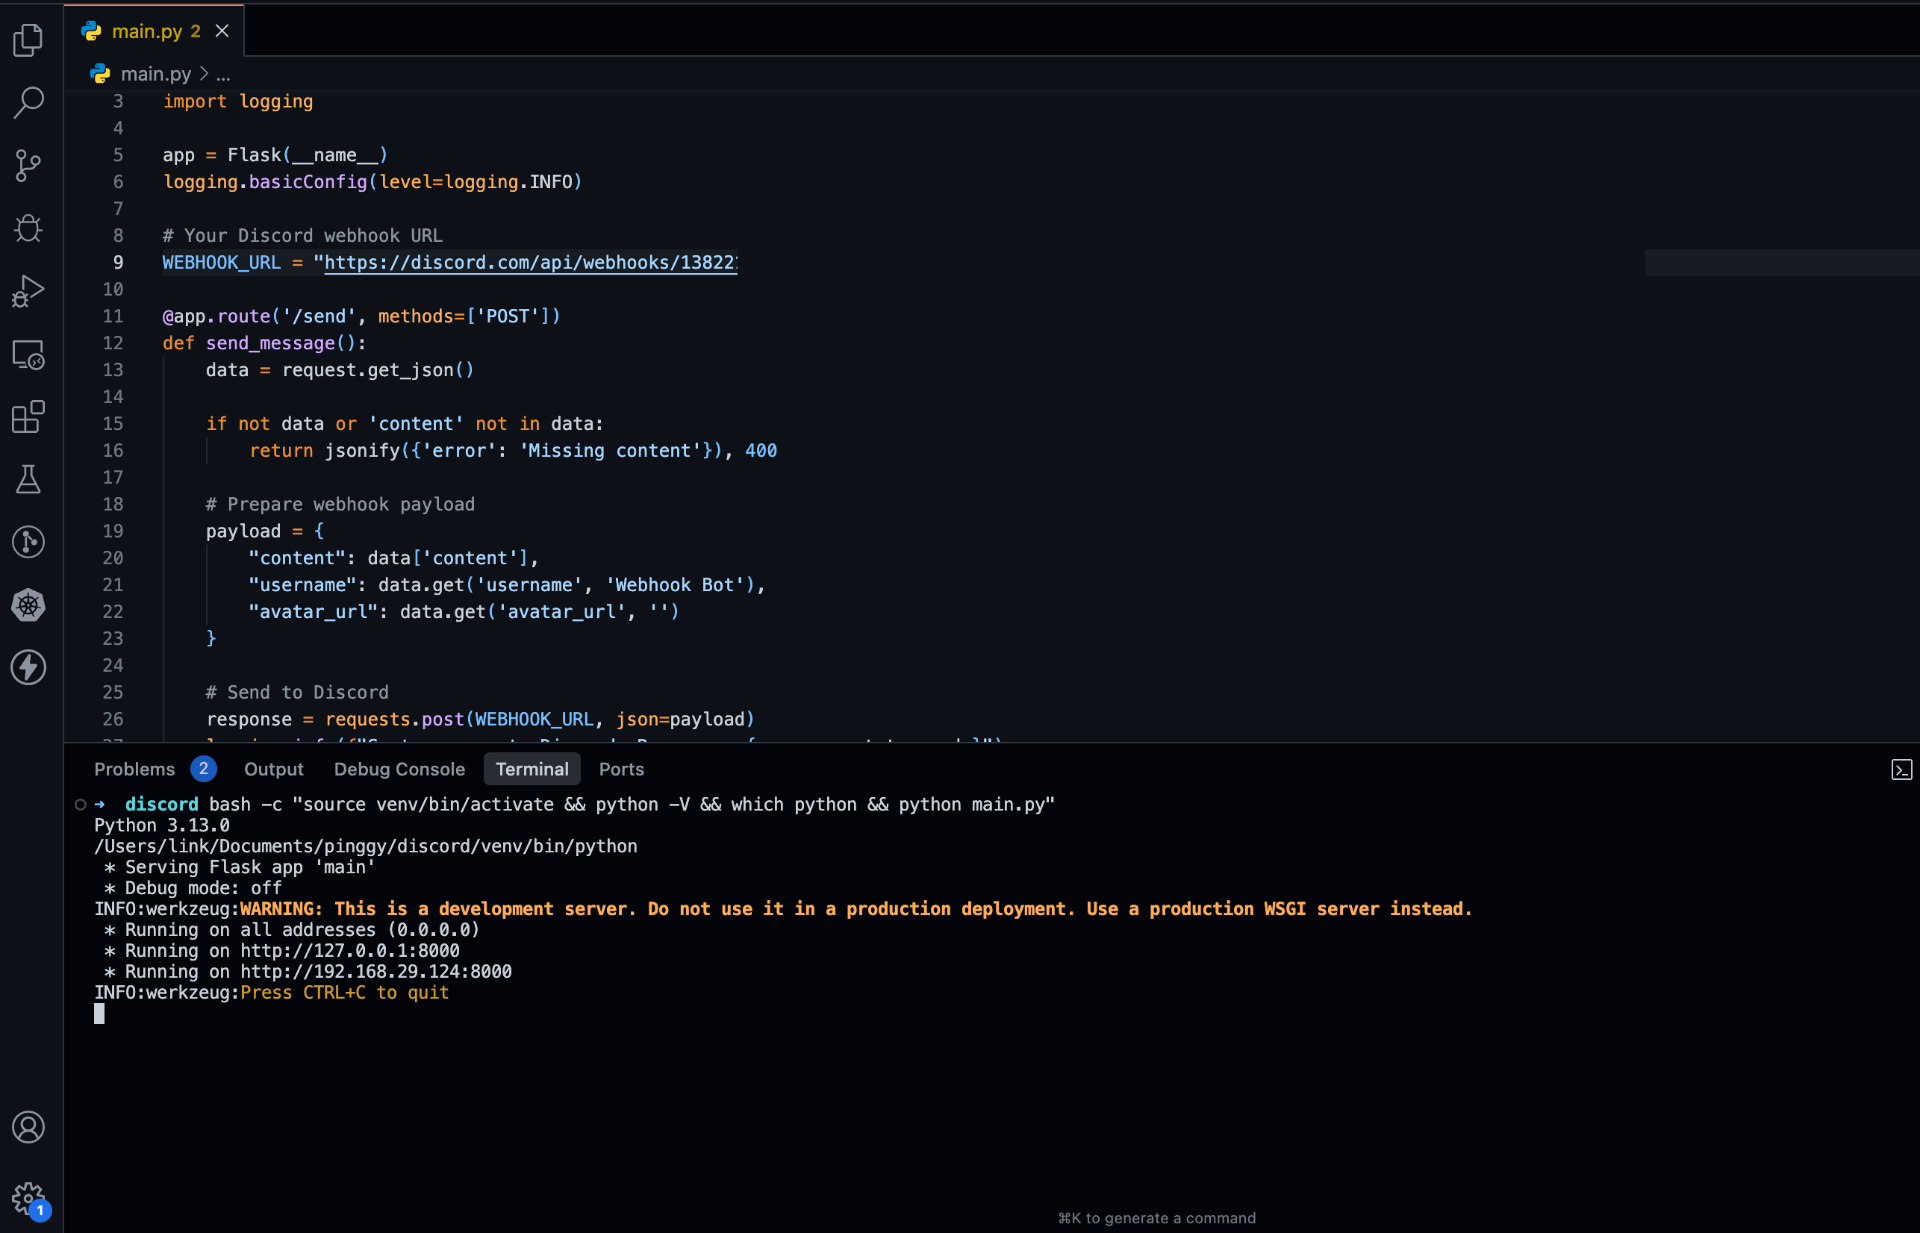
Step 4: Build a Local Server with Flask
Create a file discord_webhook.py:
from flask import Flask, request, jsonify
import requests

app = Flask(__name__)
WEBHOOK_URL = "https://discord.com/api/webhooks/WEBHOOK_ID/WEBHOOK_TOKEN"

@app.route('/send', methods=['POST'])
def send_message():
    data = request.get_json()
    if 'content' not in data:
        return jsonify({'error': 'Missing message content'}), 400

    payload = {
        "content": data['content'],
        "username": data.get('username', 'Webhook Bot'),
        "avatar_url": data.get('avatar_url', '')
    }

    response = requests.post(WEBHOOK_URL, json=payload)
    return jsonify({'status': 'sent' if response.status_code == 204 else 'failed'}), response.status_code

@app.route('/health', methods=['GET'])
def health_check():
    return jsonify({'status': 'ok'})

if __name__ == '__main__':
    app.run(host='0.0.0.0', port=8000)
Install the required dependencies:
pip install flask requests
Run your Flask server:
python discord_webhook.py
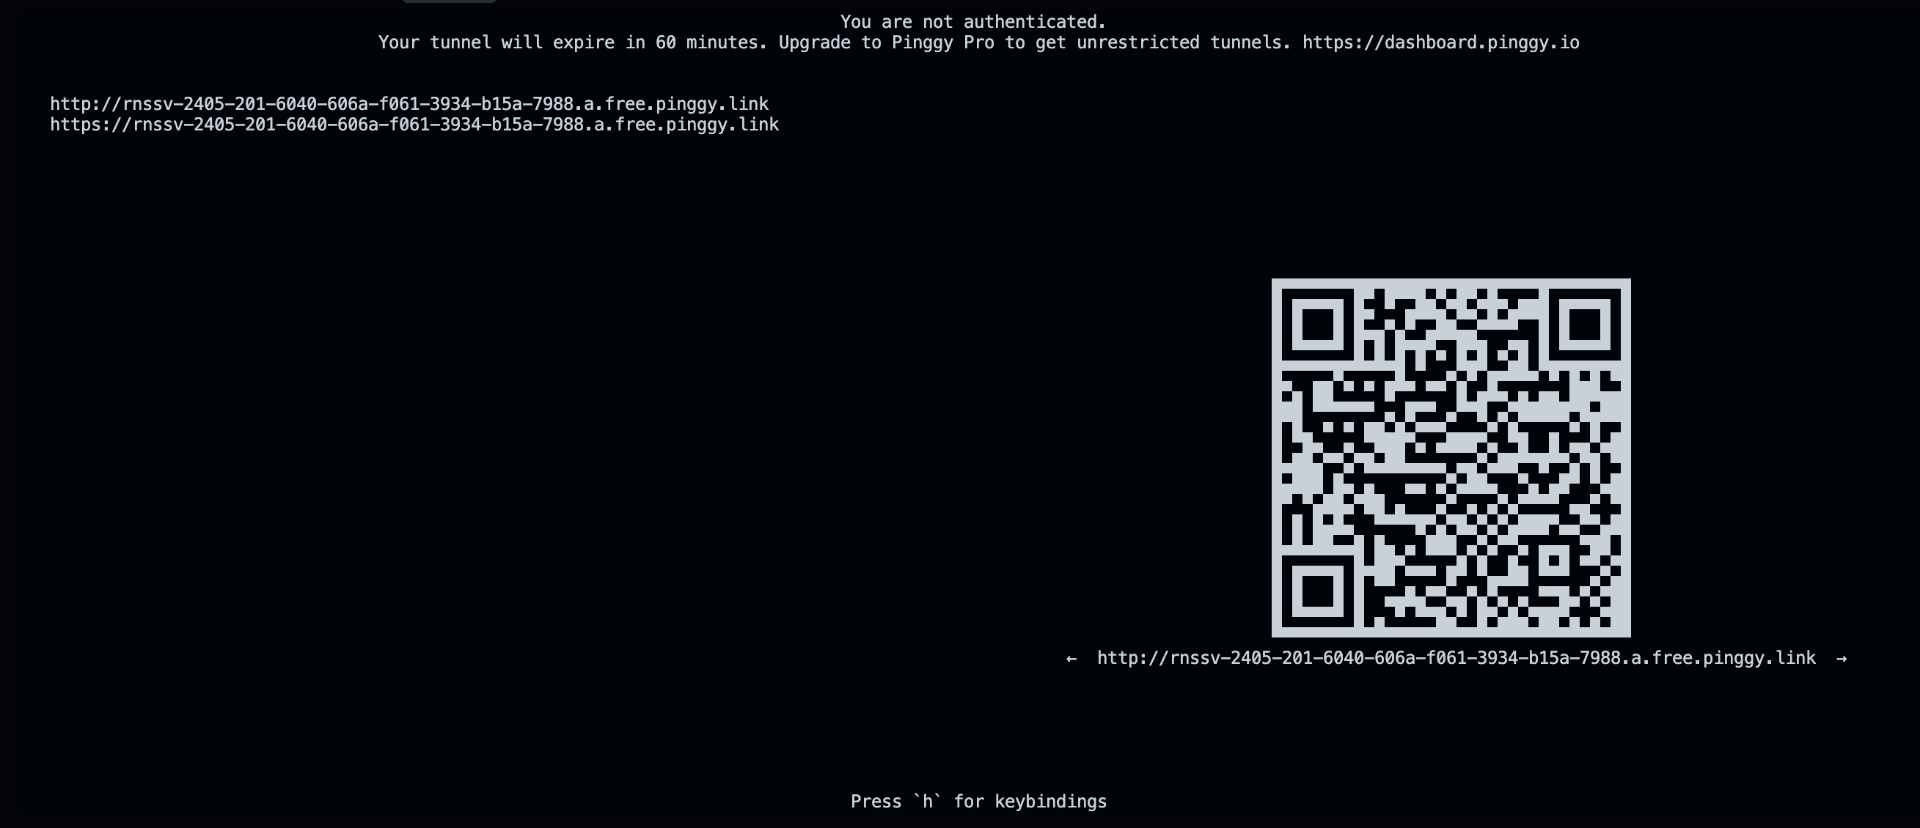
Step 5: Expose Your Local Server with Pinggy
To make your Flask server accessible from Discord:
ssh -p 443 -R0:localhost:8000 a.pinggy.io
Pinggy will generate a public HTTPS URL (e.g., https://randomname.a.pinggy.link).
Step 6: Test the Webhook
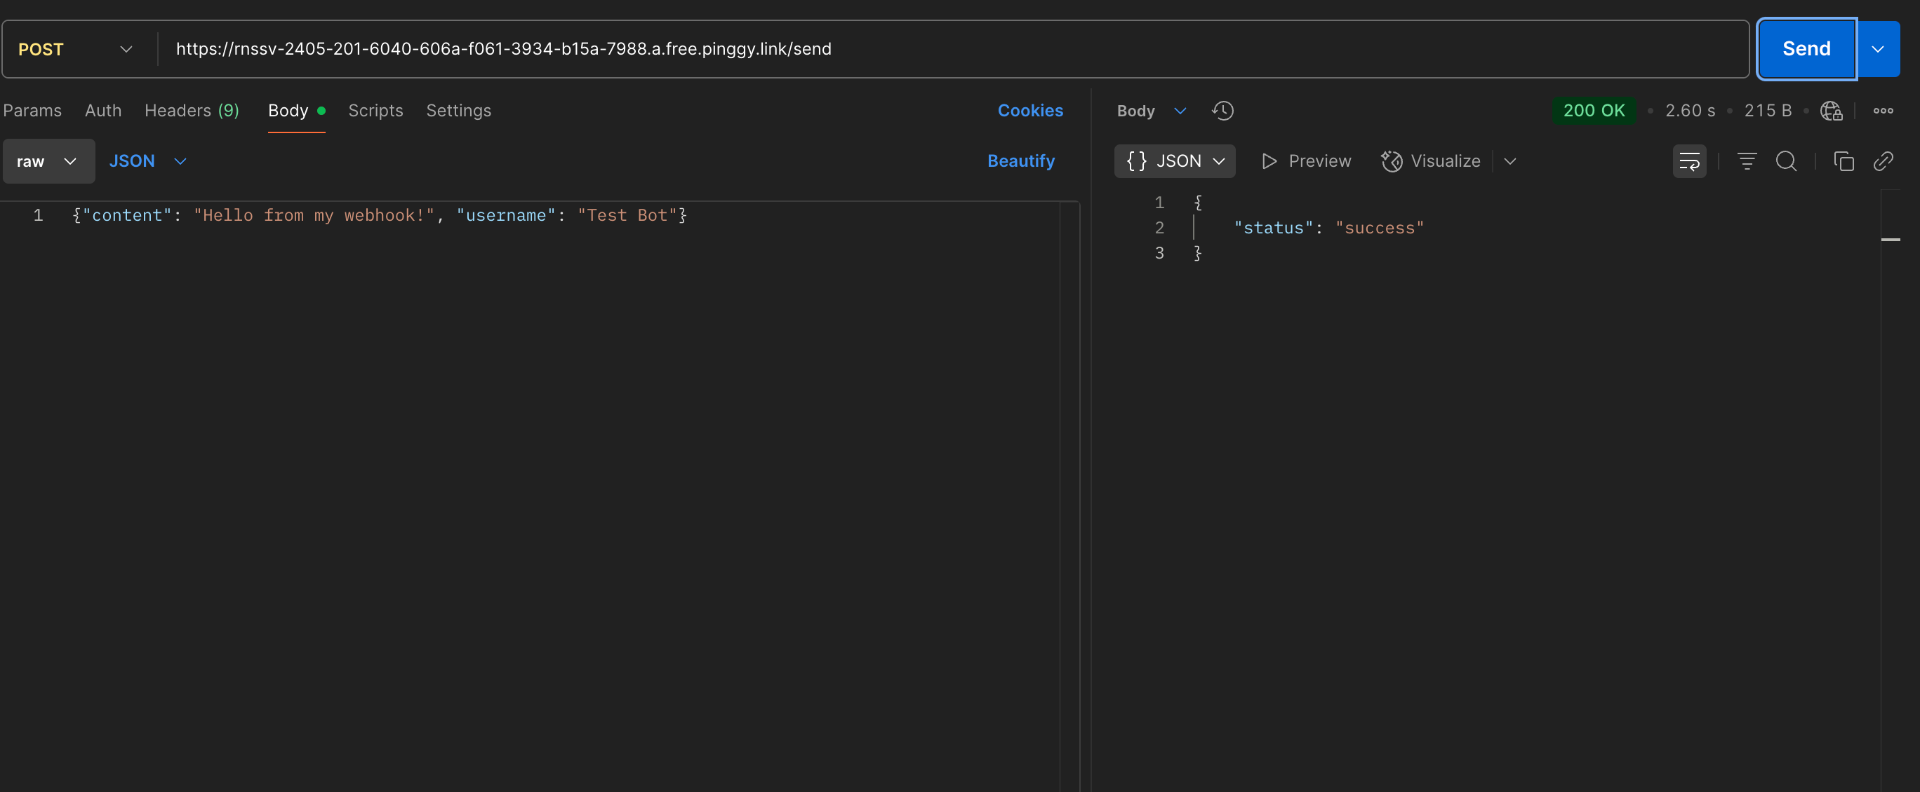
Send a test POST request:
curl -X POST "https://your-subdomain.a.pinggy.link/send" \
  -H "Content-Type: application/json" \
  -d '{"content": "Hello from Pinggy!", "username": "PinggyBot"}'
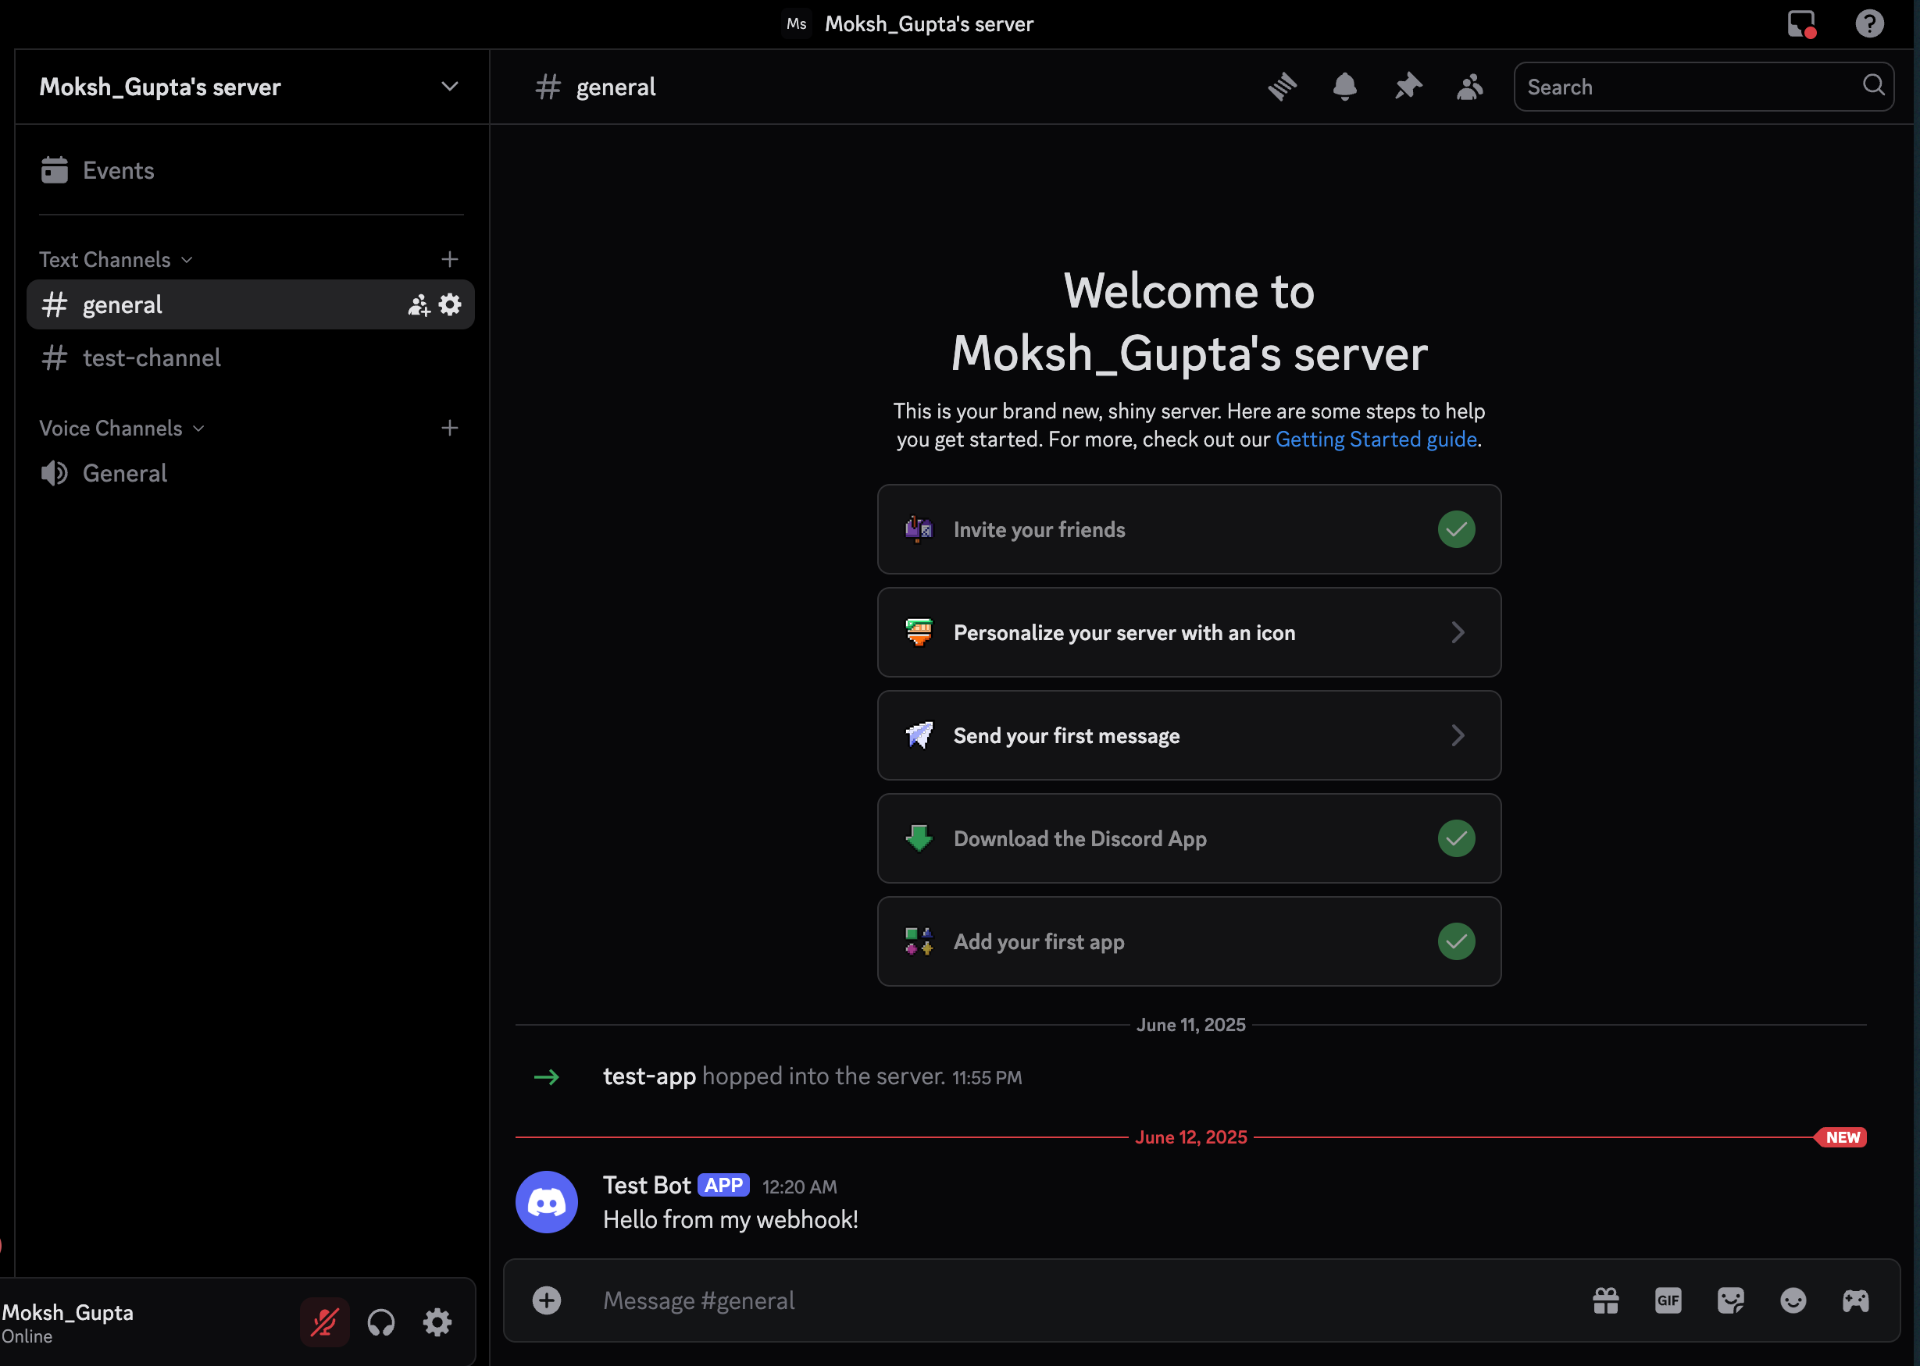
If successful, the message will appear in your Discord channel.
(Optional) Handling Discord Interactions
For two-way interaction (e.g., responding to slash commands), Discord can send HTTP requests to your endpoint. Here’s a basic Flask route to handle that:
@app.route('/discord-interactions', methods=['POST'])
def interaction():
    data = request.get_json()
    if data.get("type") == 1:
        return jsonify({"type": 1})  # PING
    if data.get("type") == 2:
        return jsonify({
            "type": 4,
            "data": {"content": f"You triggered /{data['data']['name']}"}
        })
Make sure to set your Interactions Endpoint URL in the Developer Portal to your Pinggy link (e.g., https://your-subdomain.a.pinggy.link/discord-interactions).
(Optional) Verify Discord Signatures
Discord signs requests to ensure authenticity. Here's how to verify them:
import nacl.signing
from nacl.exceptions import BadSignatureError

@app.route('/discord-interactions', methods=['POST'])
def verify_and_handle():
    signature = request.headers['X-Signature-Ed25519']
    timestamp = request.headers['X-Signature-Timestamp']
    body = request.data.decode()

    verify_key = nacl.signing.VerifyKey(bytes.fromhex(PUBLIC_KEY))
    try:
        verify_key.verify(f"{timestamp}{body}".encode(), bytes.fromhex(signature))
    except BadSignatureError:
        return jsonify({"error": "Invalid signature"}), 401

    # Process the interaction...
Replace PUBLIC_KEY with your app's public key from the Developer Portal.
Conclusion
Setting up and testing Discord webhooks locally doesn’t require deploying to a cloud server or paying for hosting. With Flask and Pinggy, you can quickly prototype and debug your bot’s webhook functionality in real-time.
This method is especially useful for:
Developers building Discord bots
Automation scripts that notify users
Quick integration tests before deployment
References
Subscribe to my newsletter
Read articles from Lightning Developer directly inside your inbox. Subscribe to the newsletter, and don't miss out.
Written by