How to Design a Cookie Roller Using 3D CAD Software
 Juliana Misiko
How to Design a Cookie Roller Using 3D CAD Software
Baking and design may seem like an unlikely pair, but with 3D modeling tools like SelfCAD, creativity in the kitchen can start at the computer. A cookie roller, a tool used to emboss patterns onto cookie dough, combines functional design with artistic expression. Instead of settling for generic shapes, designers can create personalized, intricate patterns tailored for any occasion. This article explores the process of designing a custom cookie roller using SelfCAD, highlighting how accessible digital tools can bring unique ideas from concept to creation, blending the art of baking with the precision of 3D modeling.
To access the interactive tutorial to this article, check out; https://www.selfcad.com/tutorials/735q255j1av145h5wt5j4qs6u5bd3u21x511
Once you’ve launched the editor;
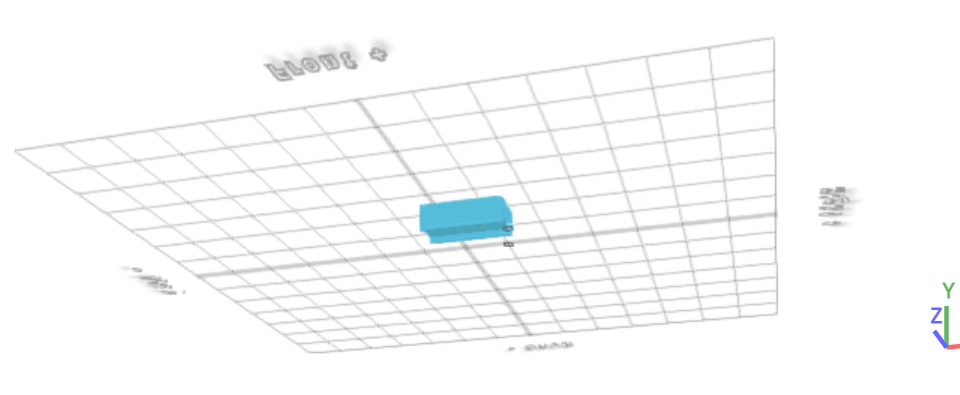
From the 3D Shapes category on the toolbar choose cube; Set height to 25, depth to 50, position y to 25.
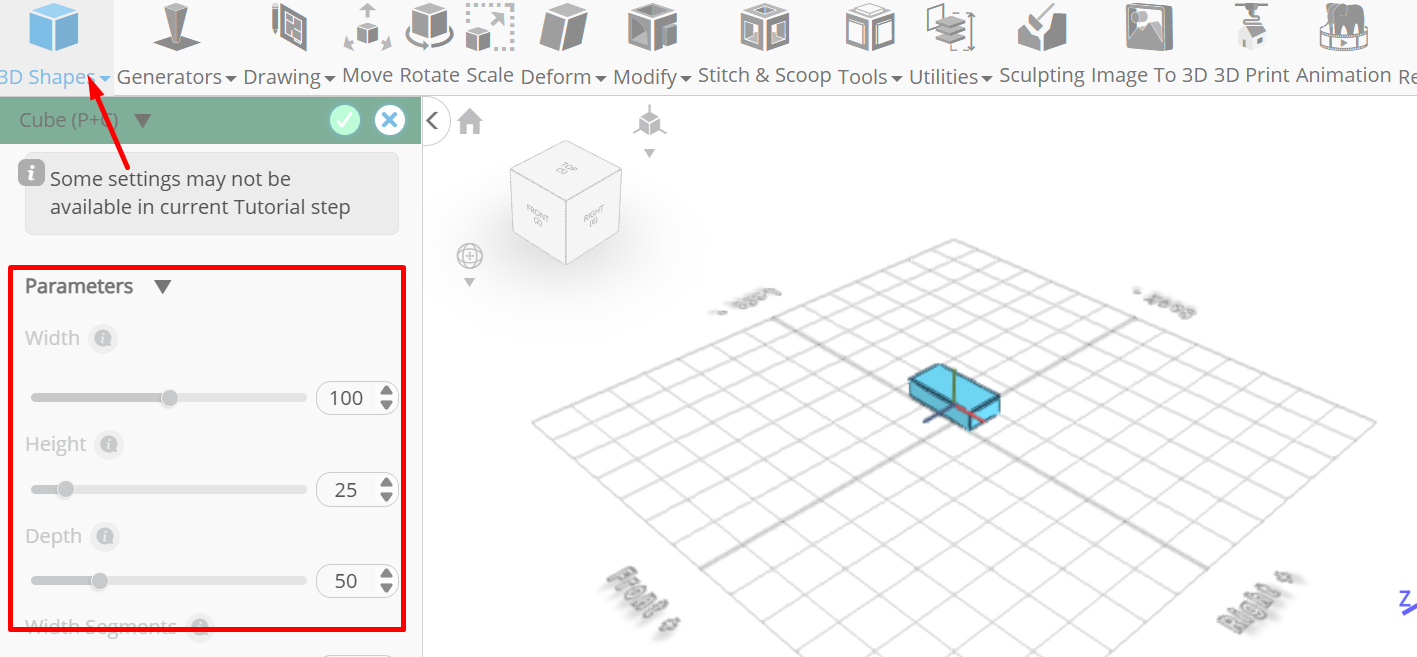
Tick the checkmark finalize cube
From the 3D Shapes category on the toolbar choose cylinder; Set top radius to 5, Bottom radius to 5, vertical segments to 128, position y to 20, position z to 20, rotation z to 90.
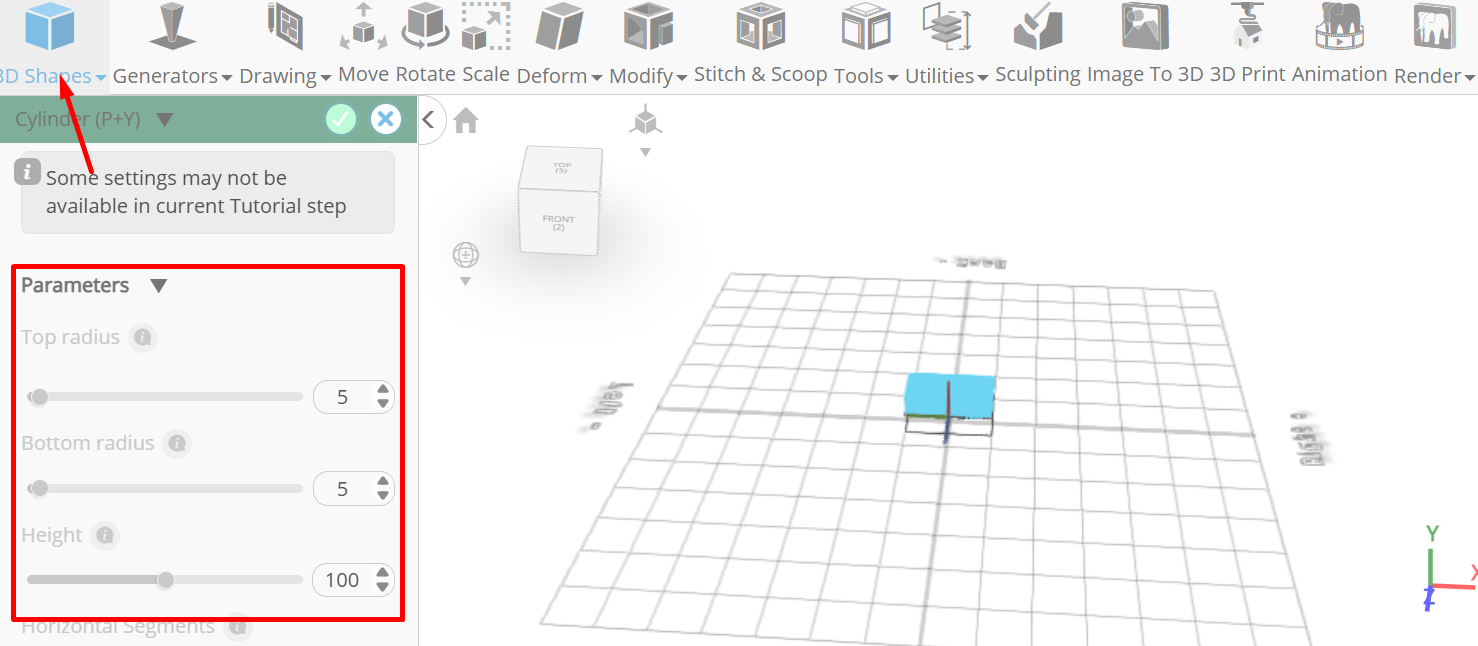
Tick the checkmark to finalize cylinder
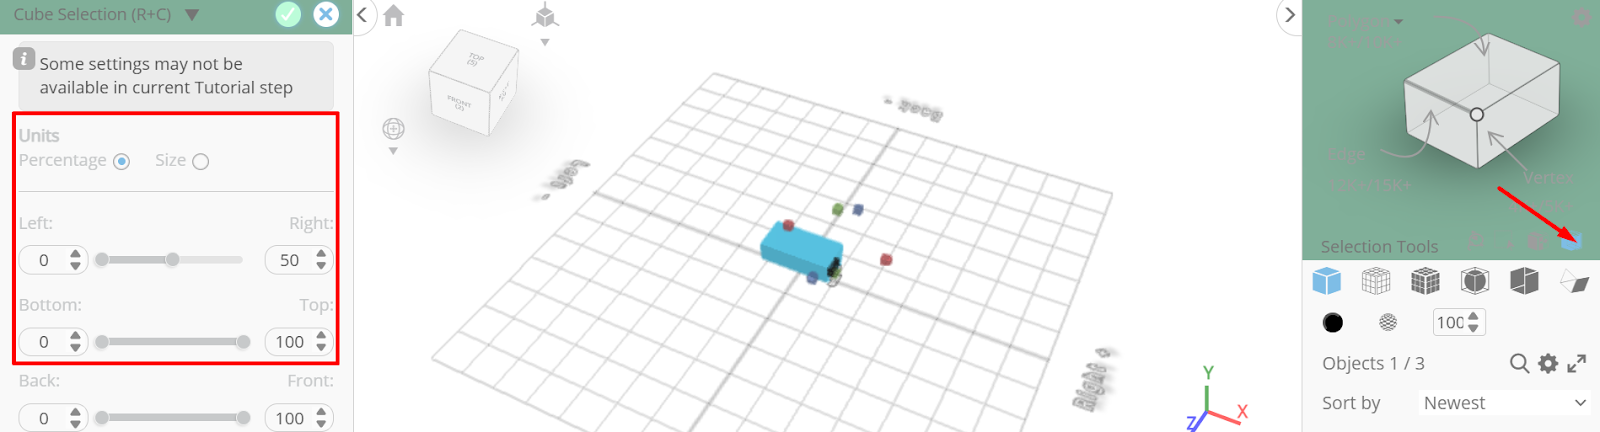
From the right panel choose cube selection; Set units to percentage, top to 50
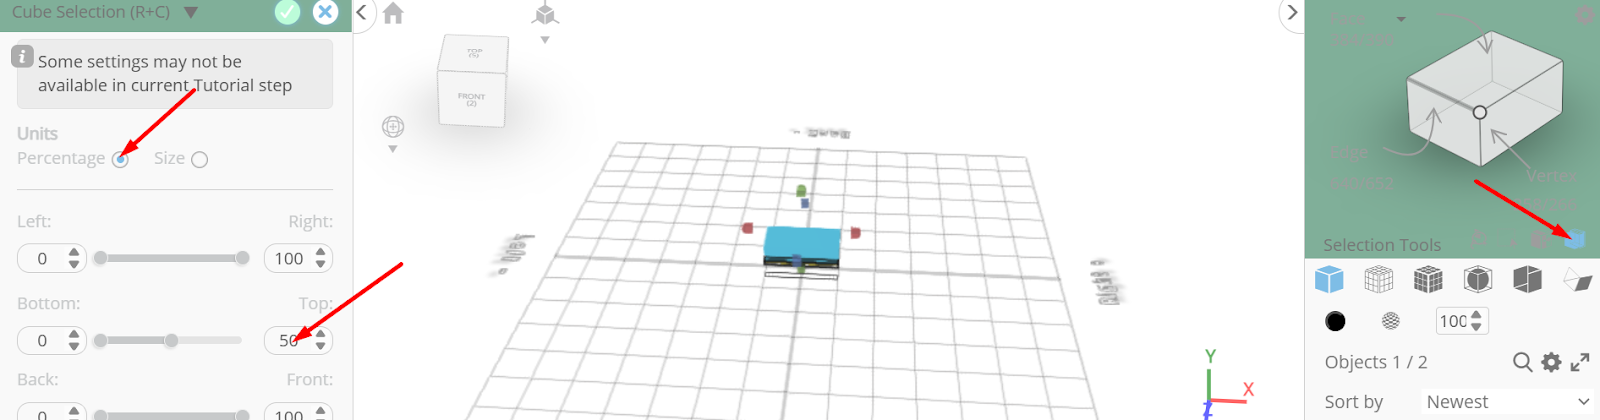
Tick the checkmark to finalize cube selection
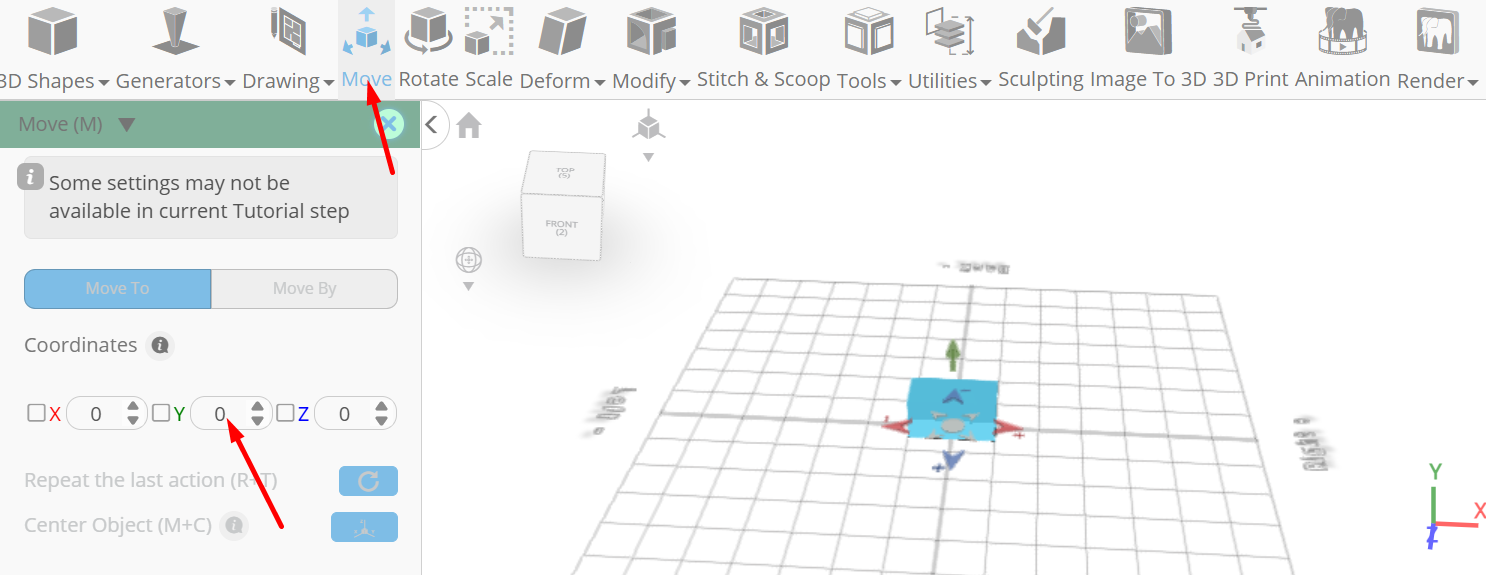
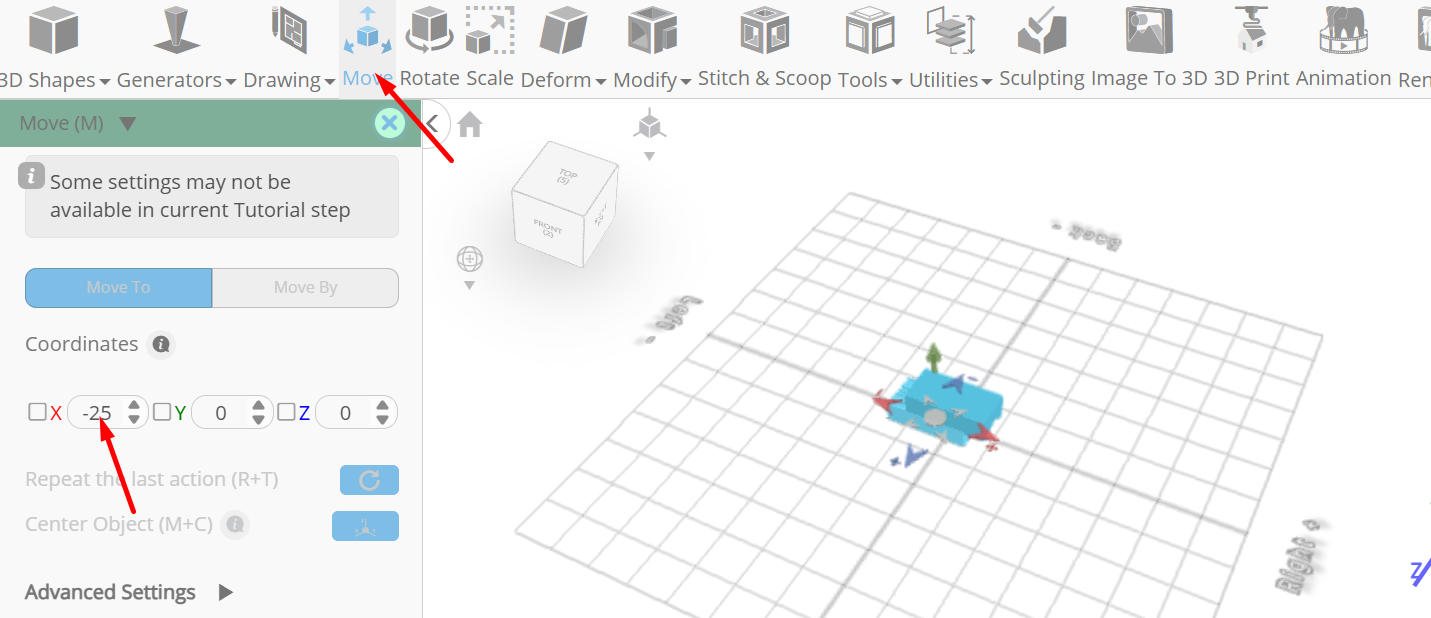
Click move on the toolbar; Set y to 18 using highlighted gizmo
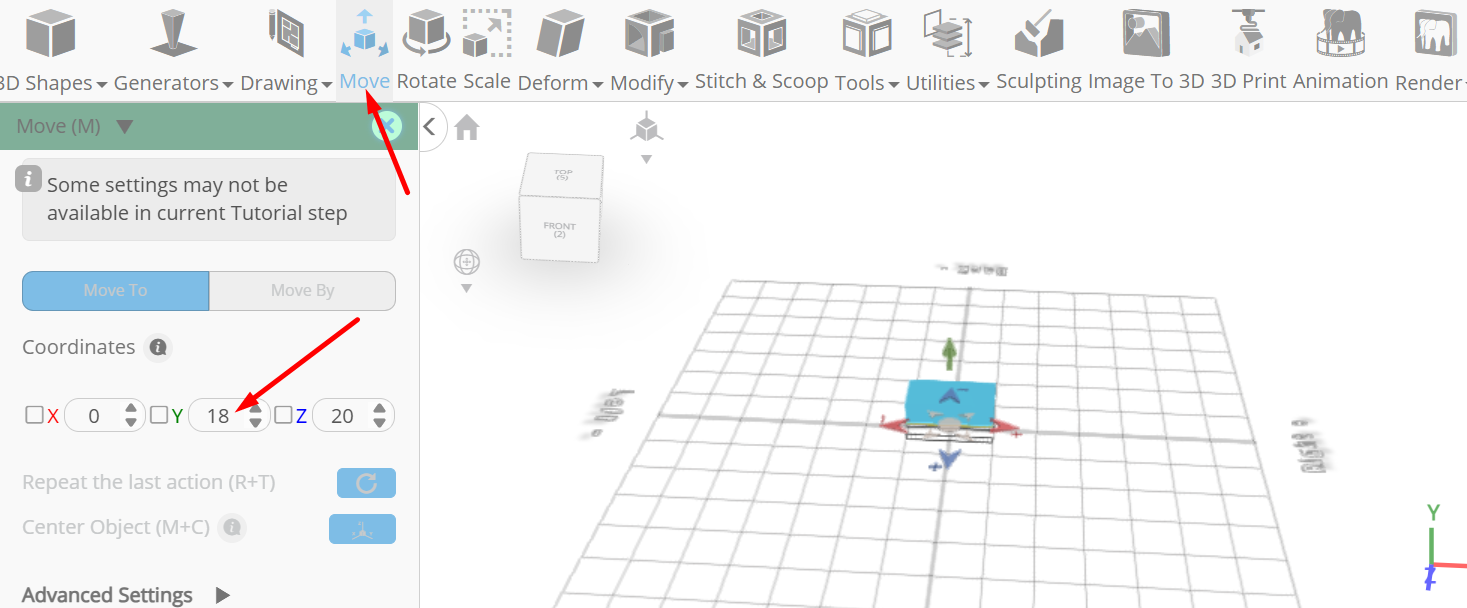
Click ‘x’ to close transformation panel
Click on highlighted region to deselect it
Click highlighted part on selection cube to turn off region selection
From the utilities category on the toolbar choose mirror; Set create copy to true, direction to back, offset to 15

Tick the checkmark to finalize mirror
Click on mesh 4 to select it. Click on mesh 8 to deselect
Click copy button to copy selected objects; Click move on the toolbar; Set y to 0.
Click ‘x’ to close transformation panel
Click on mesh 8, 8(1), 4 to select. Click on 4(1) to deselect
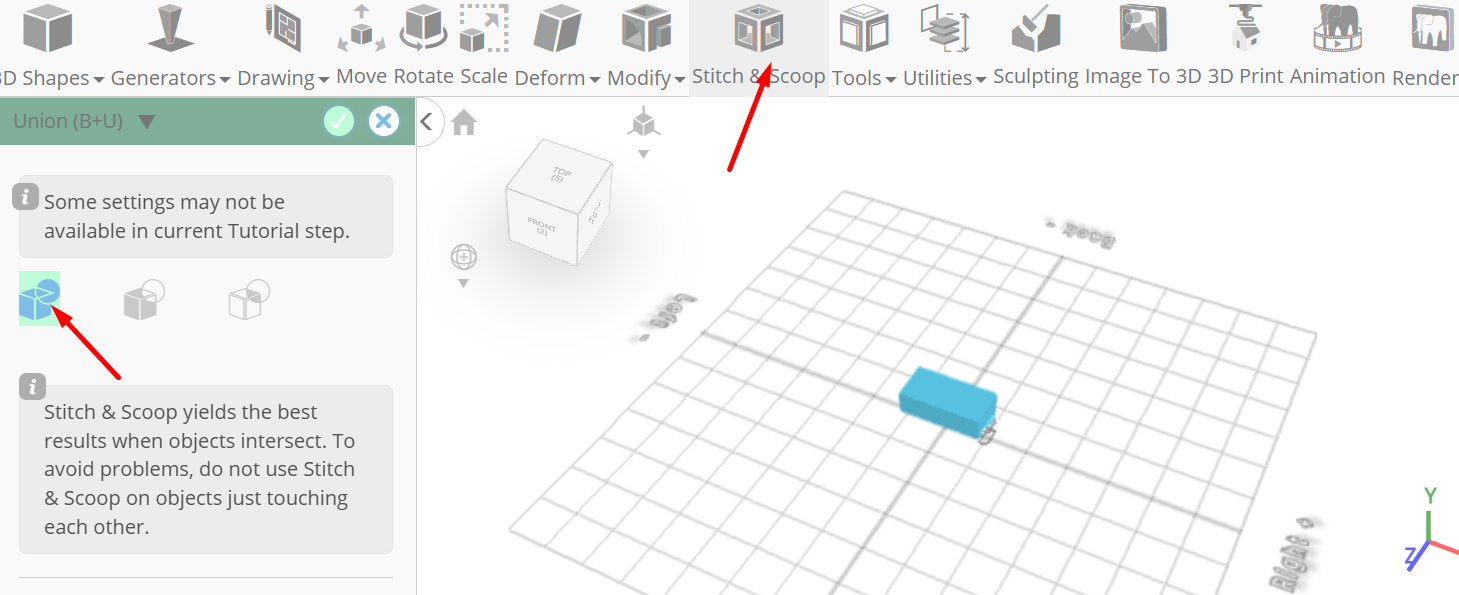
Click stitch & scoop on the toolbar; From the tool panel choose union.
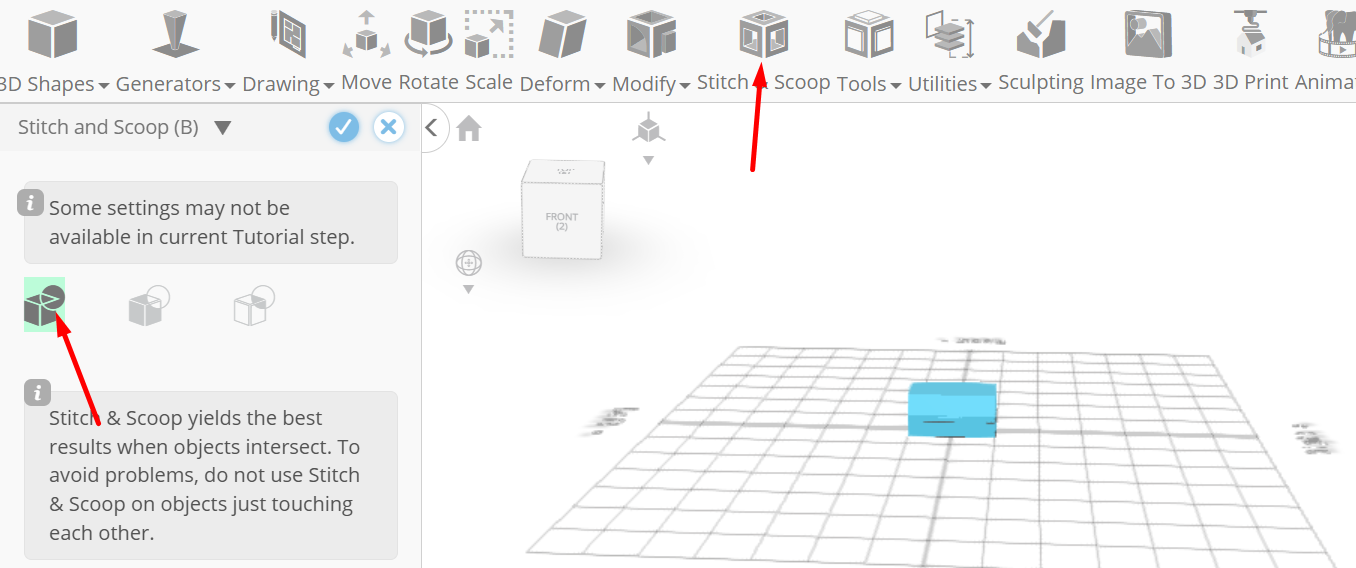
Tick the checkmark to finalize union
Click on mesh 4(1) to select
Click stitch & scoop on the toolbar; from the tool panel choose difference, Choose union 1 to subtract and set keep subtracted object to true
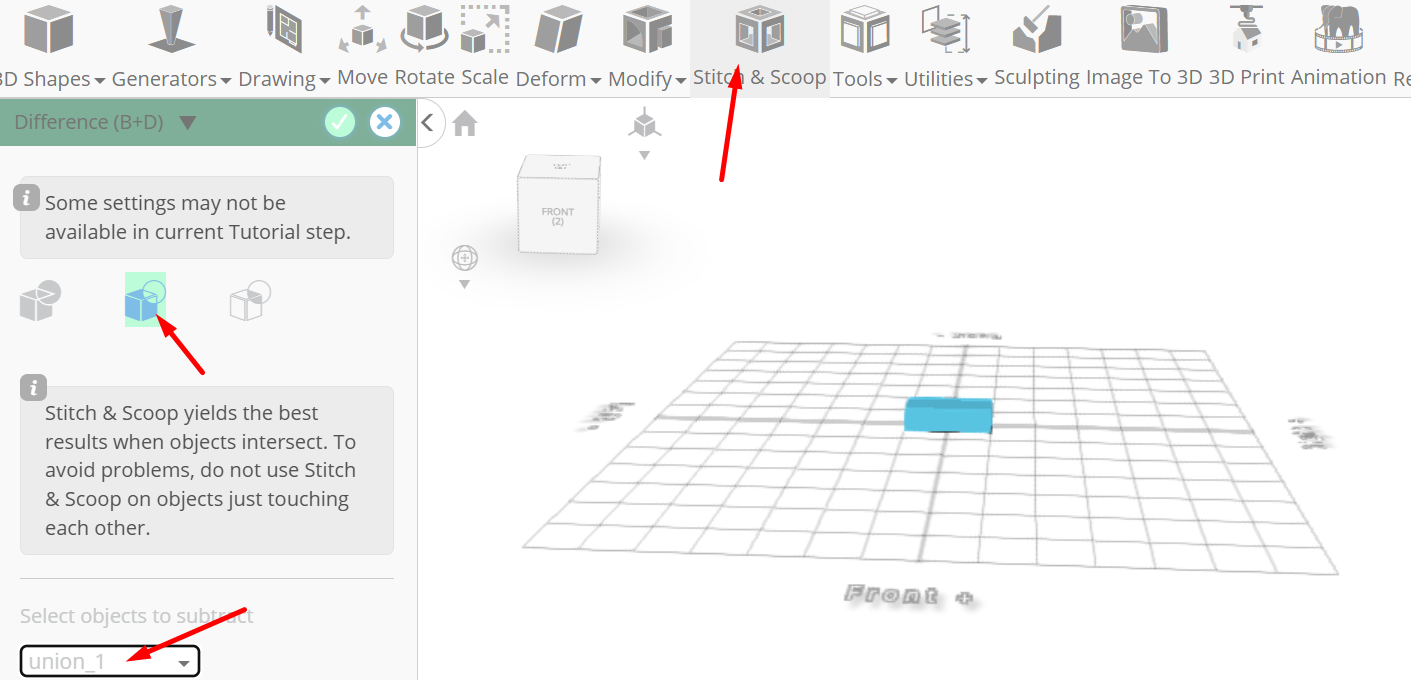
Tick the checkmark to finalize difference
Click on union 1 to deselect
Click hide button to hide selected object
From the 3D Shapes category on the toolbar choose cylinder; Set top radius to 1, Bottom radius to 5, height to 10, vertical segments to 128, position x to 50, position y to 20, position z to -5, rotation x to 90.
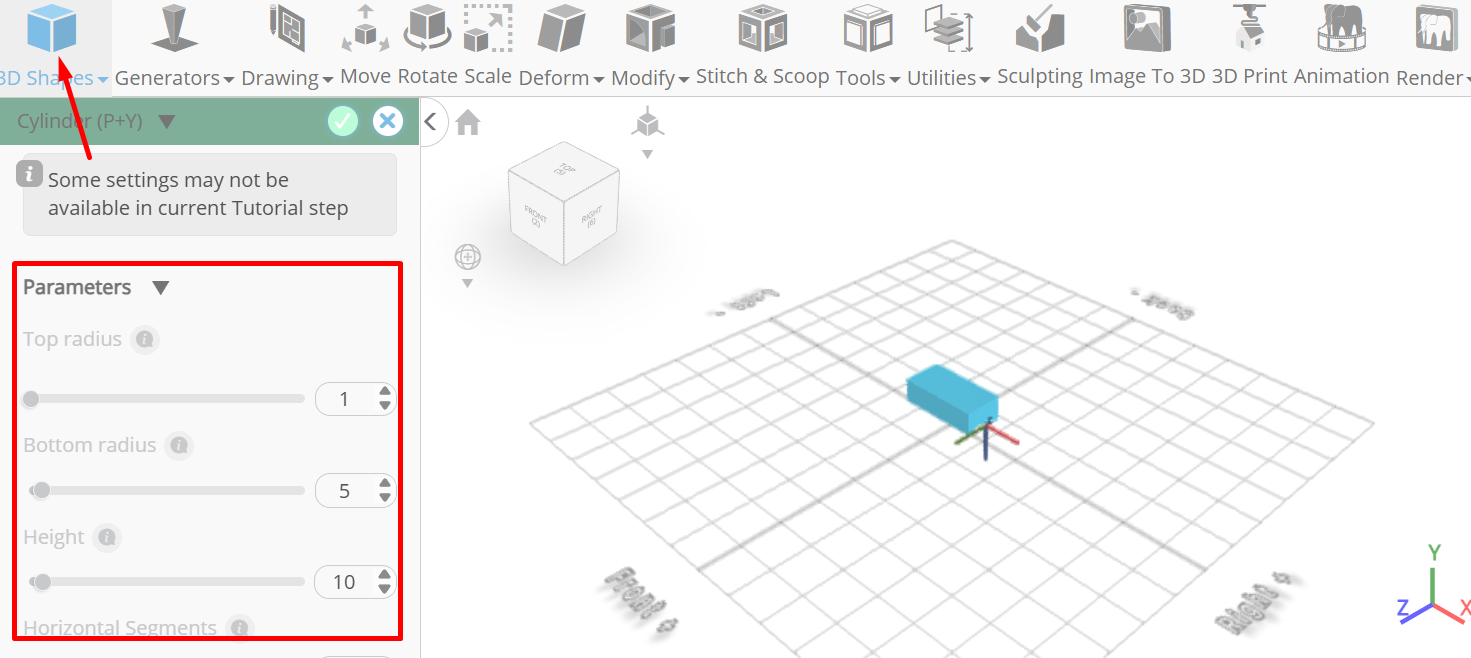
Tick the checkmark to finalize cylinder
Click to activate polygon selection; Click on highlighted region to select it
Click to activate edge selection
From the modify category on the toolbar choose fillet; Set intensity to 0.5, level to 5
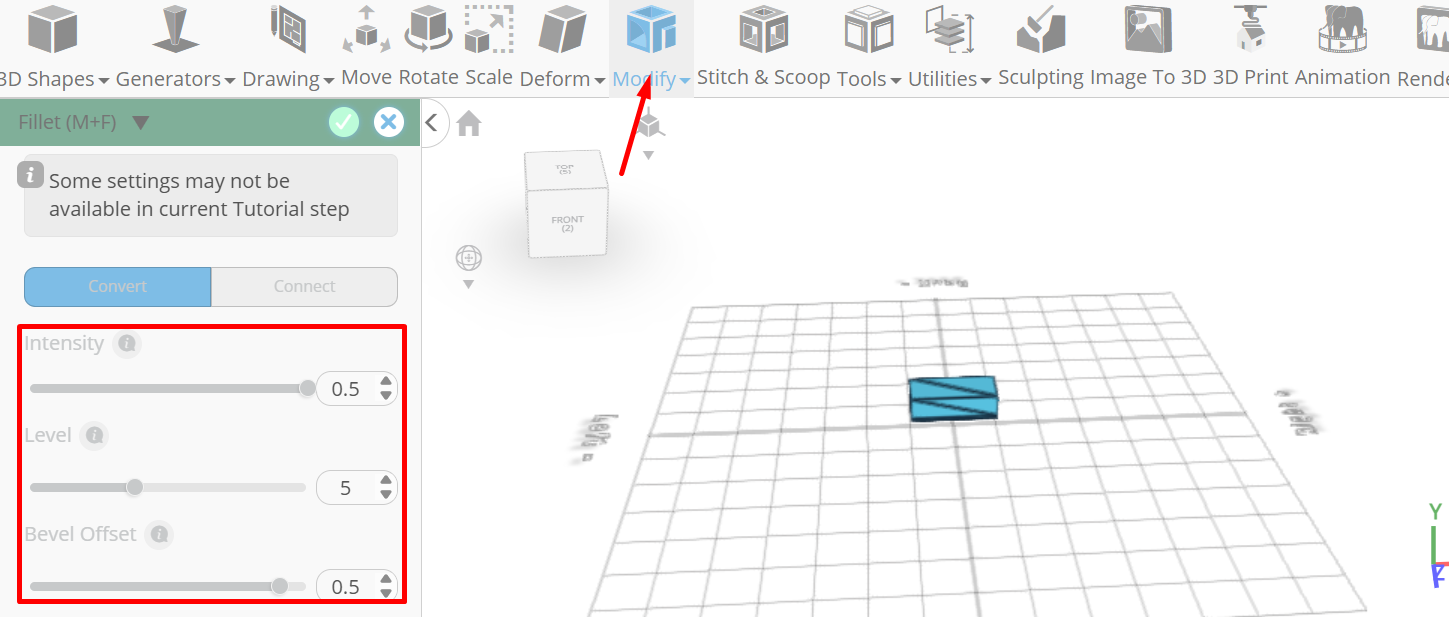
Tick the checkmark to finalize fillet
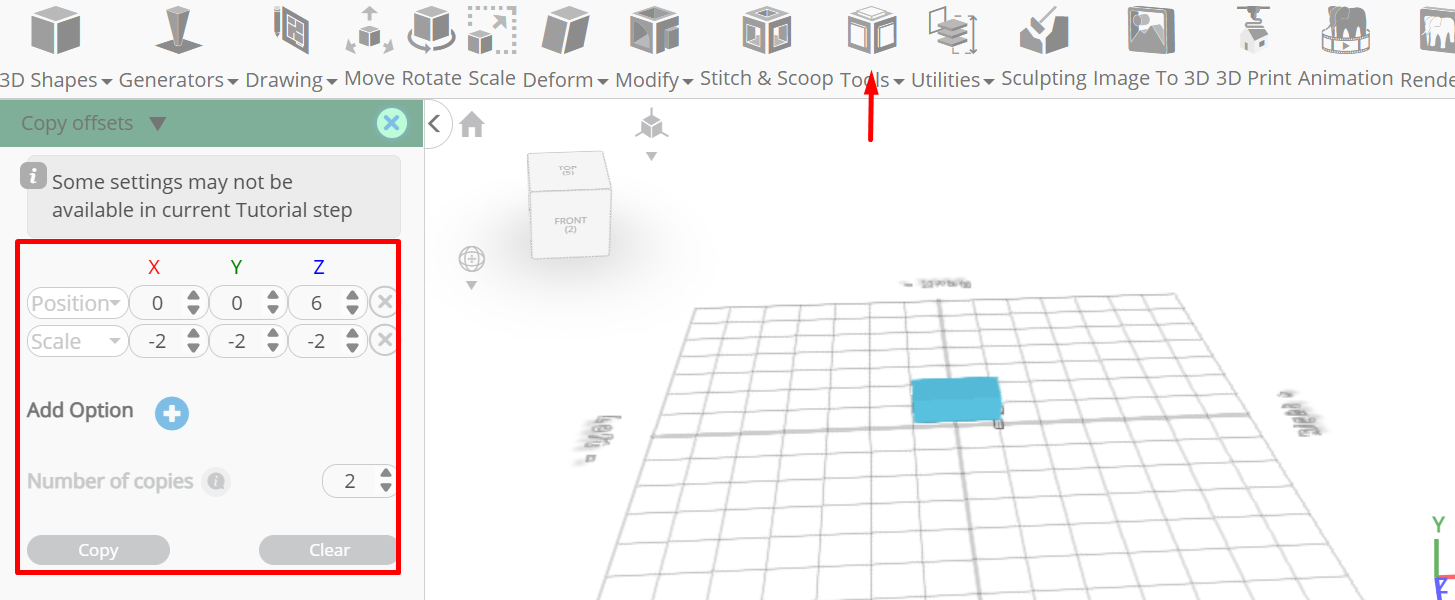
From the tools category on the toolbar choose copy offsets; Set z to 6, Click add option to add next macro step; Set operation to scale, x to -2, y to -2, z to -2, amount of copies to 2, Click copy button to create copies.
Click ‘x’ to close copy offsets panel
From the 3D Shapes category on the toolbar choose capsule; Set top radius to 1, bottom radius to 1, height to 7, position x to 50, position y to 24, position z to -10, rotation x to 90

Tick the checkmark to finalize capsule
Click on mesh 12(2), mesh 12(1), mesh 12 to select
Click stitch & scoop on the toolbar; From the tool panel choose union.
Tick the checkmark to finalize union
From the right panel choose cube selection; Set units to percentage, right to 50
Tick the checkmark to finalize cube selection
Click move on the toolbar; Set x to -52.5 using highlighted gizmo
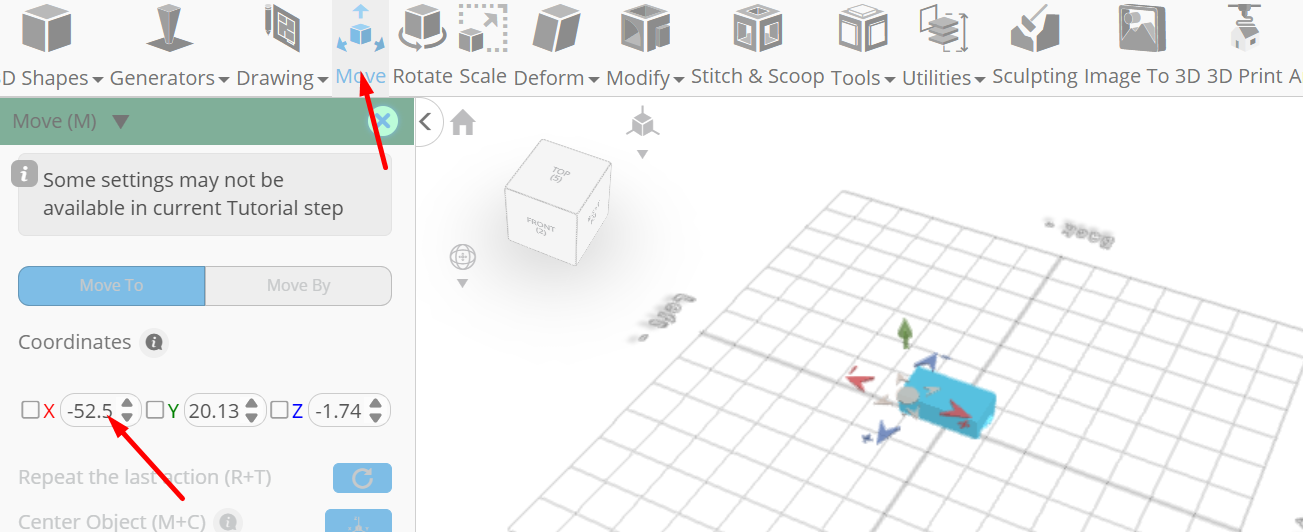
Click ‘x’ to close transformation panel
Click on highlighted region to deselect it
Click on union 1 to select it
Click stitch & scoop on the toolbar; from the tool panel choose difference, Choose union 2 to subtract and set keep subtracted object to true
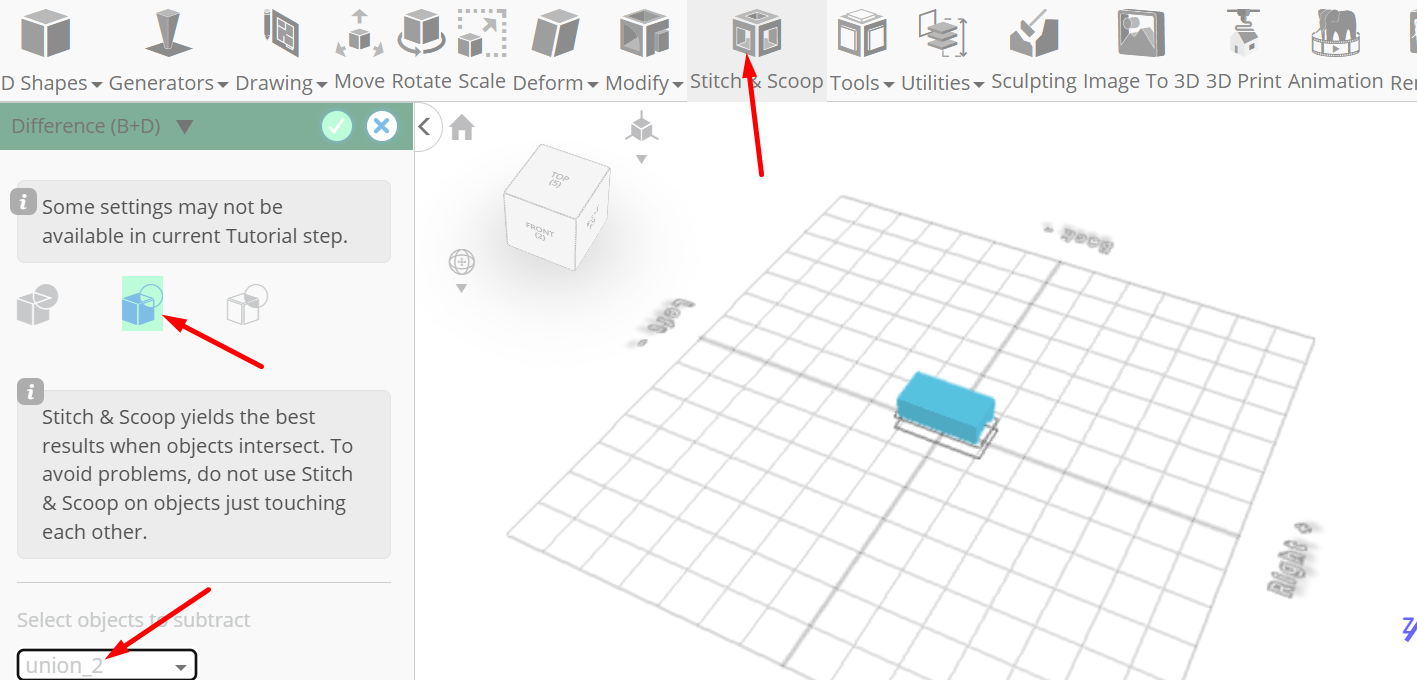
Tick the checkmark to finalize difference
Click show button to show difference 1
Click on difference 1 to select it. Click on difference 2 to deselect; Click stitch & scoop on the toolbar; from the tool panel choose difference, Choose union 2 to subtract.
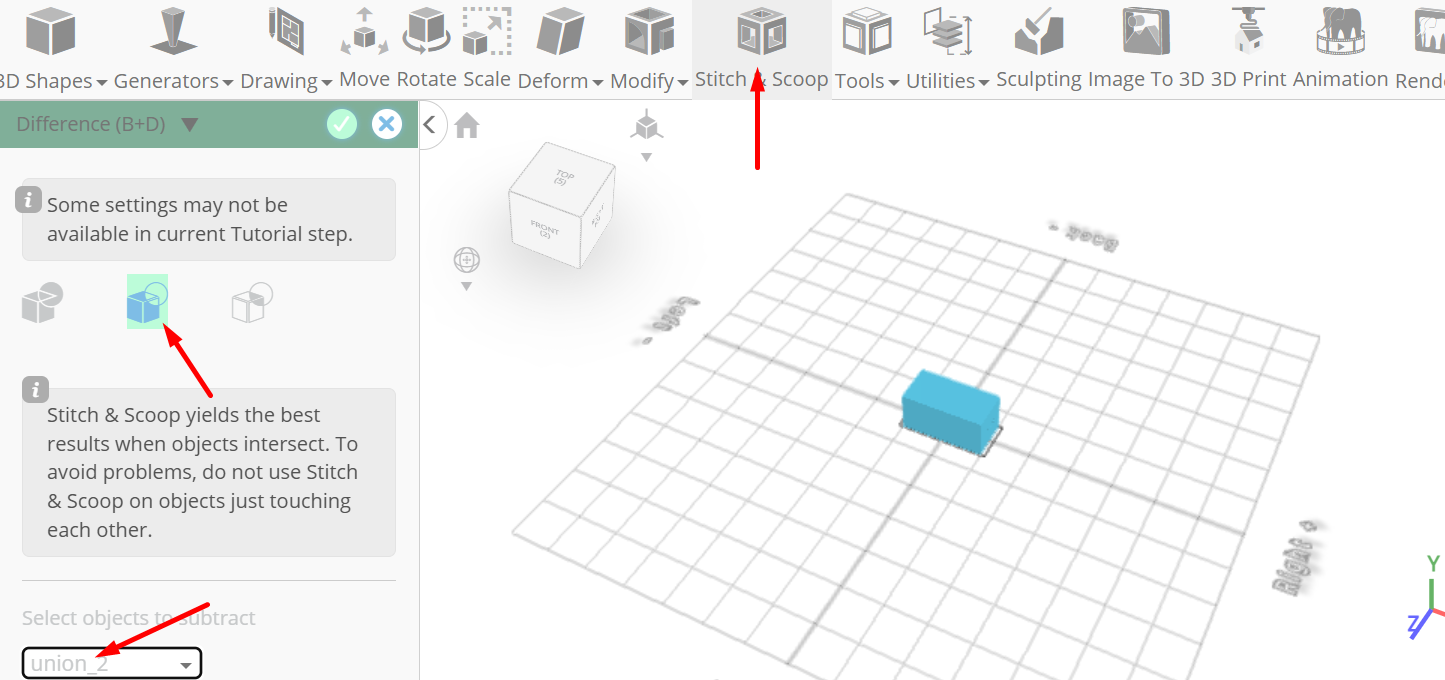
Tick the checkmark to finalize difference
Click move on the toolbar; Set x to -25 using highlighted gizmo
Click ‘x’ to close transformation panel
Click on difference 2 to select it
From the right panel choose materials; Set settings to textures, texture category to basic, Click basic 1 button to apply texture
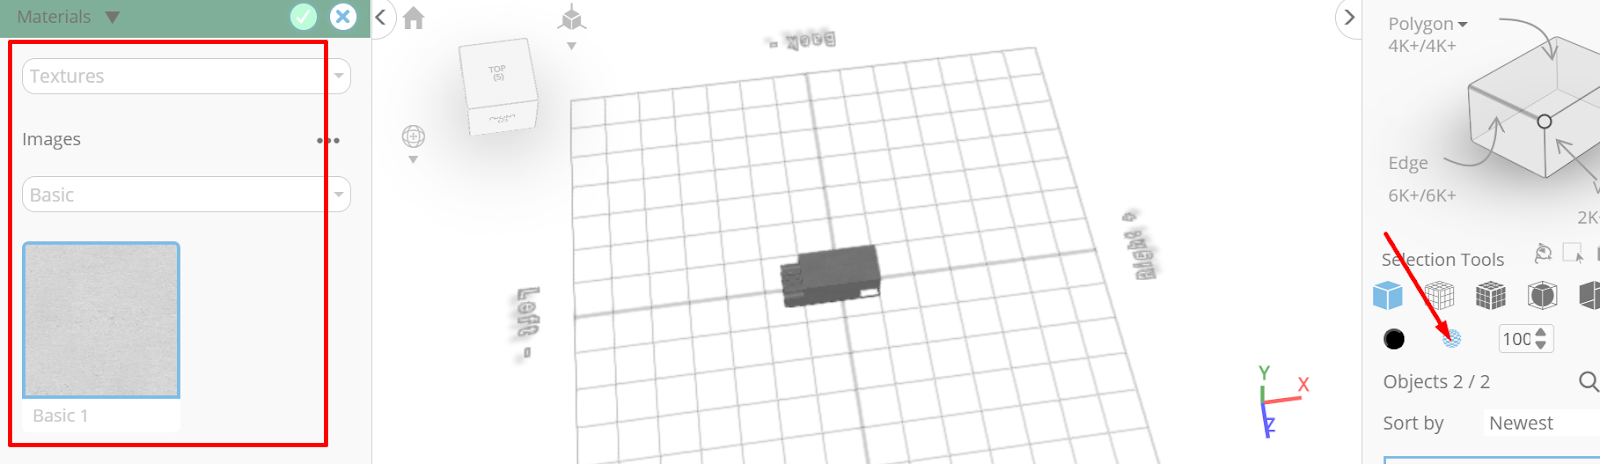
Tick the checkmark to finalize materials
As you continue honing your design skills, remember that SelfCAD offers a wealth of resources to support your learning journey. To deepen your understanding and explore more advanced features, consider checking out the interactive tutorials (https://www.selfcad.com/tutorials) available on the SelfCAD website. The tutorials page provides a treasure trove of guides, tips, and tricks that cater to designers of all levels.
More structured learning experience can also be accessed at the SelfCAD Academy (https://www.selfcad.com/academy/curriculum/), https://www.youtube.com/@3dmodeling101, and 3D Modeling 101 series (https://www.youtube.com/playlist?list=PL74nFNT8yS9DcE1UlUUdiR1wFGv9DDfTB). This comprehensive resource offers in-depth courses taught by industry experts, allowing you to master the intricacies of SelfCAD at your own pace.
Subscribe to my newsletter
Read articles from Juliana Misiko directly inside your inbox. Subscribe to the newsletter, and don't miss out.
Written by