How to Design a Creative Vase Using 3D CAD Software
 Juliana Misiko
How to Design a Creative Vase Using 3D CAD Software
Vases have long been more than just containers, they are expressions of art, culture, and personal style. With the advent of digital design tools like SelfCAD, anyone can now bring their creative vision to life through 3D modeling. Designing a vase in SelfCAD allows for endless experimentation with shape, symmetry, and texture, all without the limitations of traditional pottery methods. This article will walk through the process of designing a creative, customized vase using SelfCAD, showcasing how digital tools can transform imagination into a tangible, functional piece of art.
To access the interactive tutorial to this article, check out; https://www.selfcad.com/tutorials/2p1p3gq3z4n4h475061311x1jm1m5t1w641e
Once you’ve launched the editor;
From the 3D Shapes category on the toolbar choose cylinder; Set top radius to 10, Bottom radius to 20, height to 150,
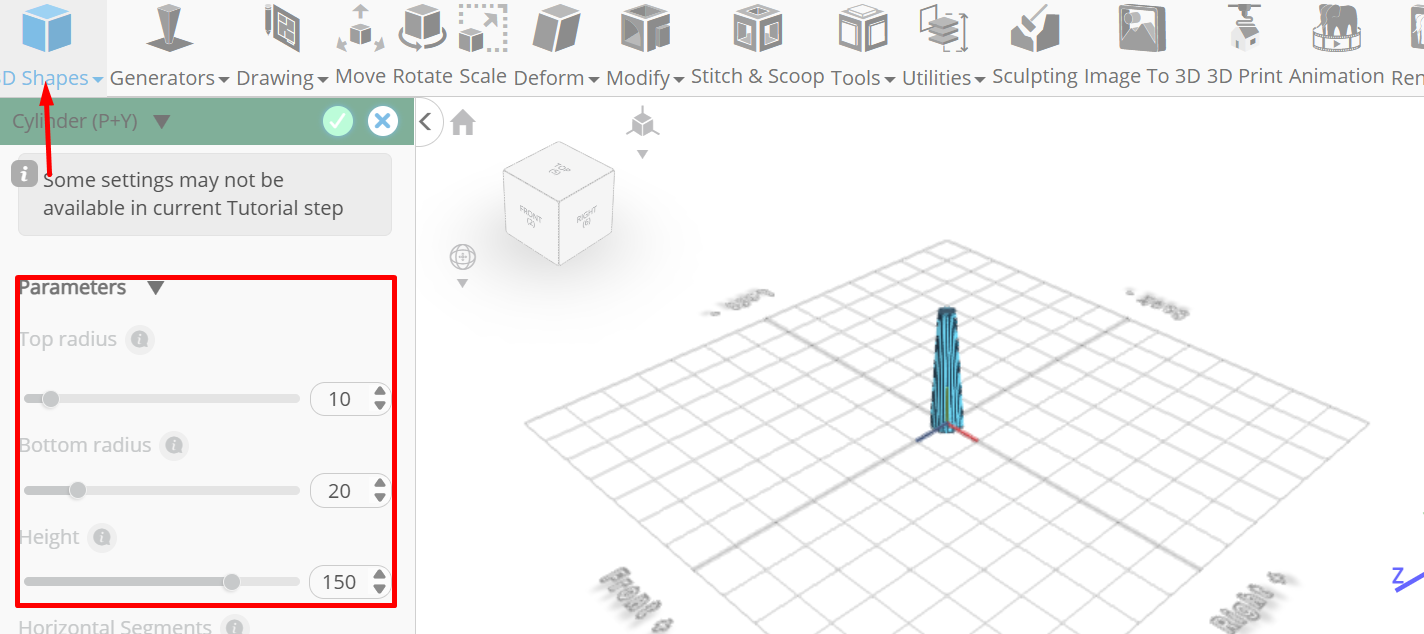
Tick the checkmark to finalize cylinder
Click to activate edge selection
Click on the gear icon to open the advanced selection tools; Set ring selection to true, Click on highlighted edge to select ring from the object, Set custom pattern to true
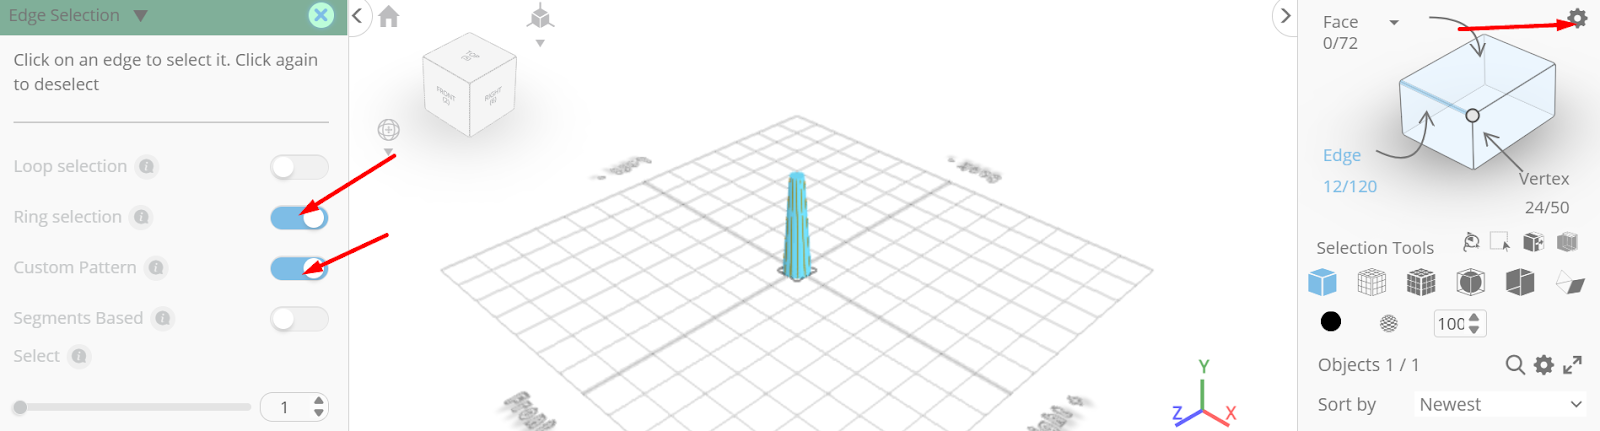
Click ‘x’ to close selection settings panel
Click scale on the toolbar; Set x to 35, z to 35
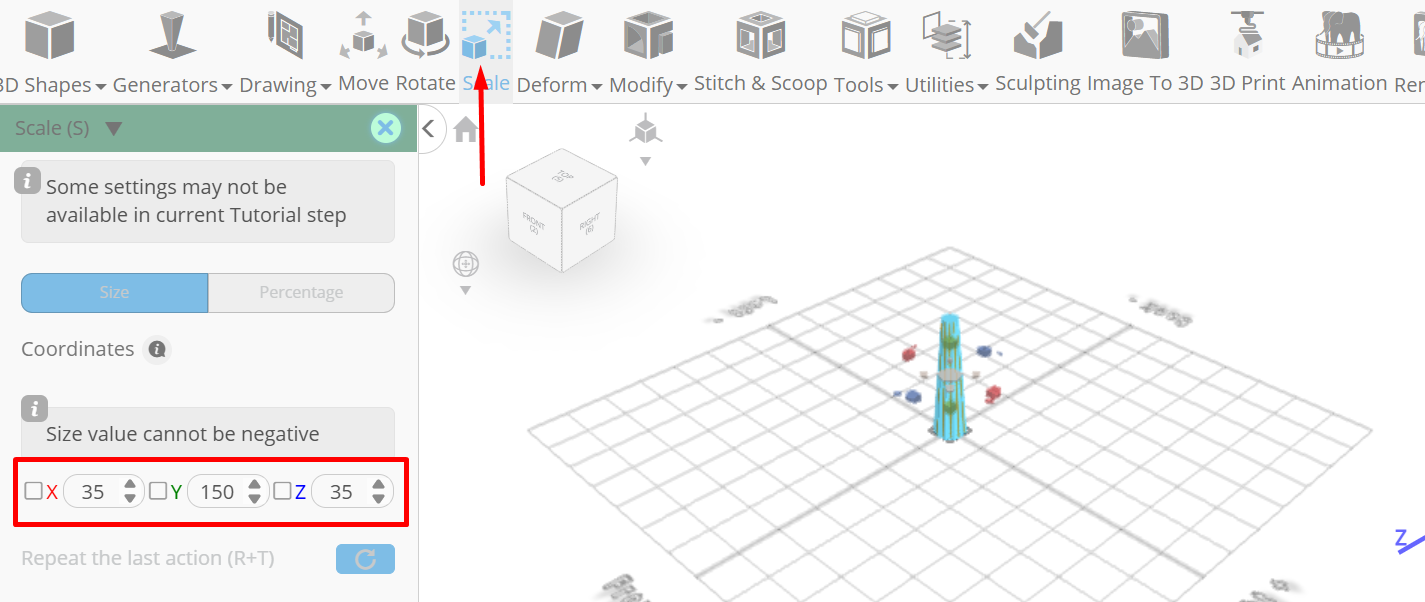
Click ‘x’ to close transformation panel
Click on highlighted region to deselect it
From the modify category on the toolbar choose resolution; Set detail level to 5
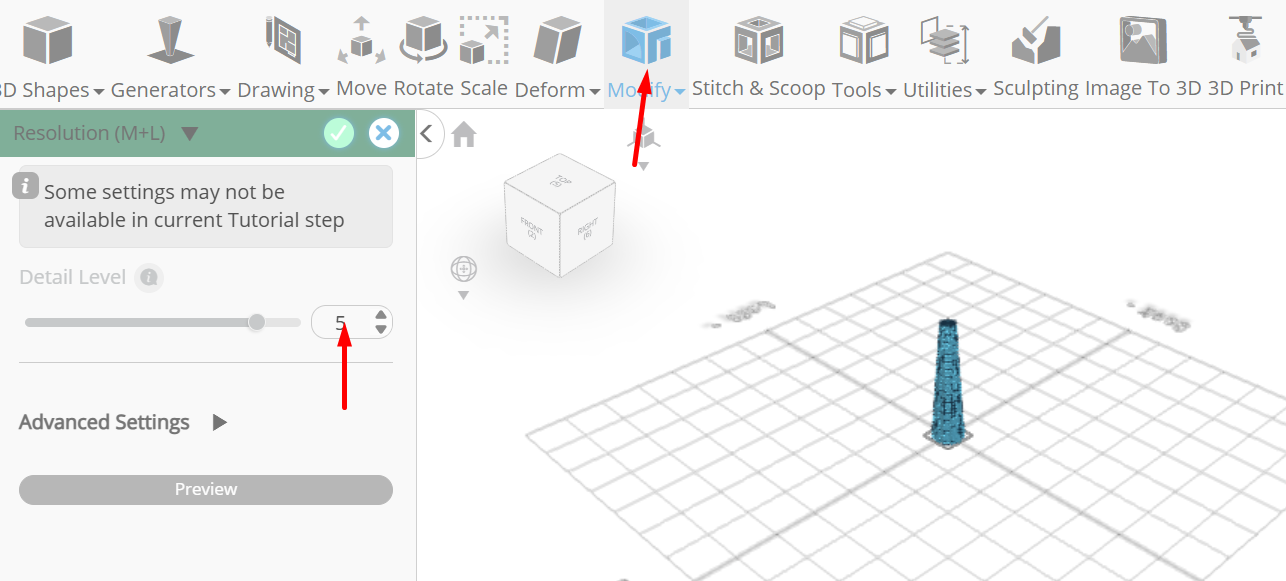
Tick the checkmark to finalize resolution
From the deform category on the toolbar choose inflate; Set x to 25, y to 25, z to 25 using highlighted gizmo
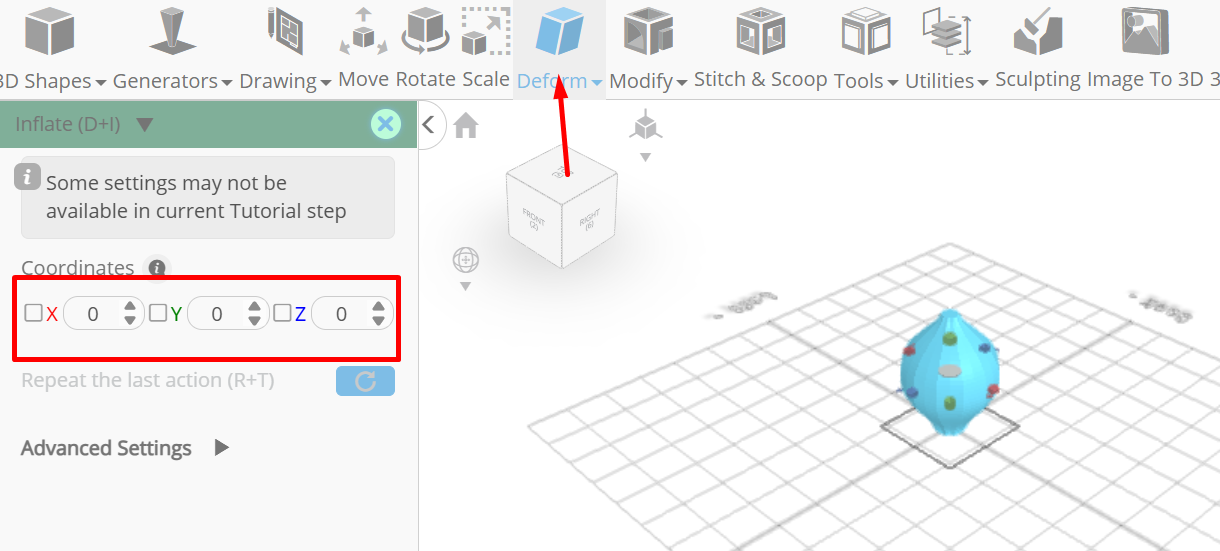
Click ‘’x’ to close transformation panel
Click to activate polygon selection; Click on highlighted region to select it
From the modify category on the toolbar choose extrusion; Set extrusion amount to 60
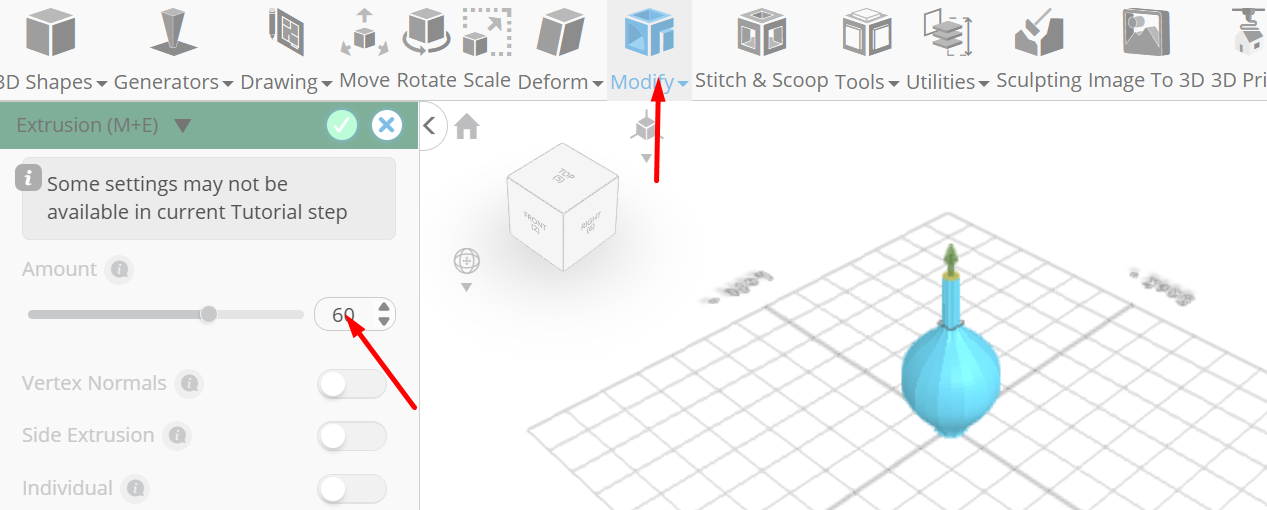
Tick the checkmark to finalize extrusion
Click delete button to delete selected objects
From the modify category on the toolbar choose add thickness; Set thickness to 2

Tick the checkmark to finalize add thickness
From the deform category on the toolbar choose twist; Set y to 135
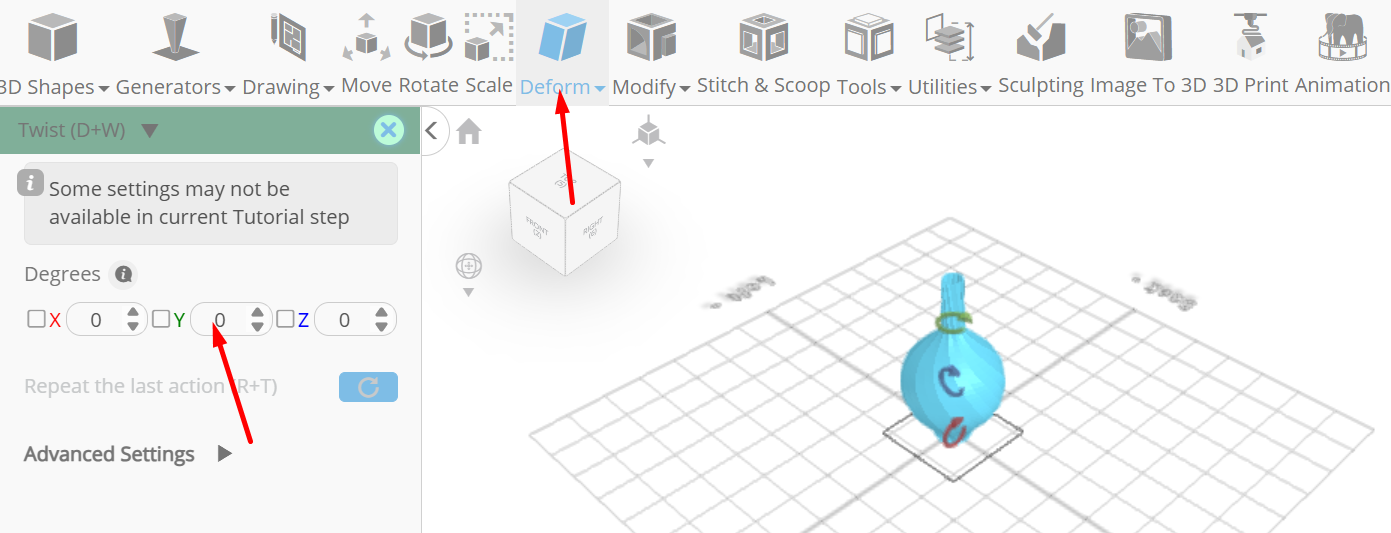
Click ‘x’ to close transformation panel
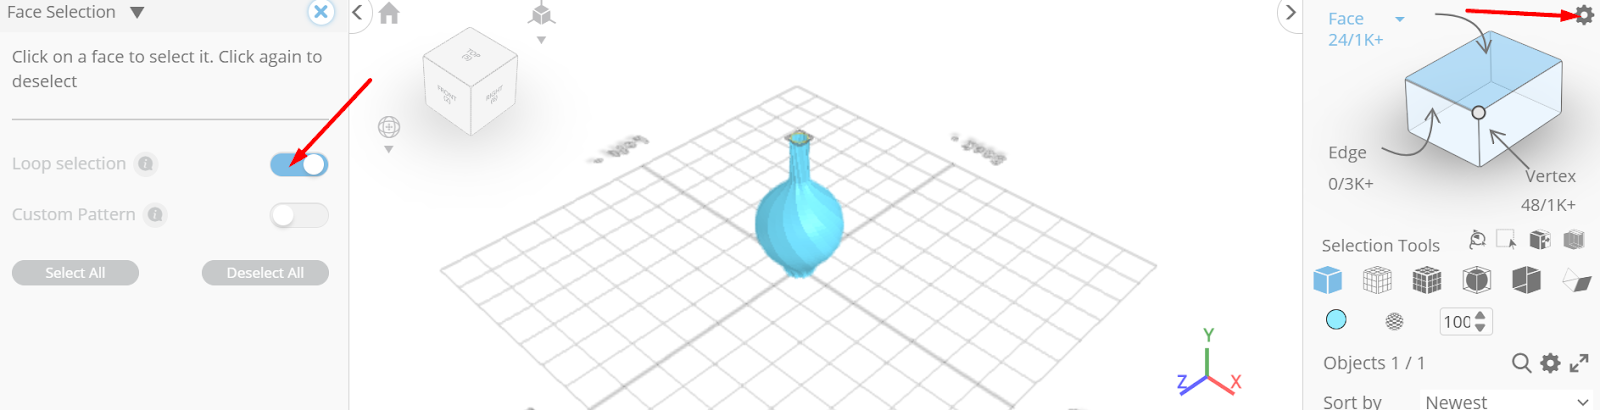
Click to activate face selection
Click on the gear icon to open the advanced selection tools; Set loop selection to true, Click on highlighted face to select loop from the object
From the deform category on the toolbar choose skew; Set plane to back/front, y to -25
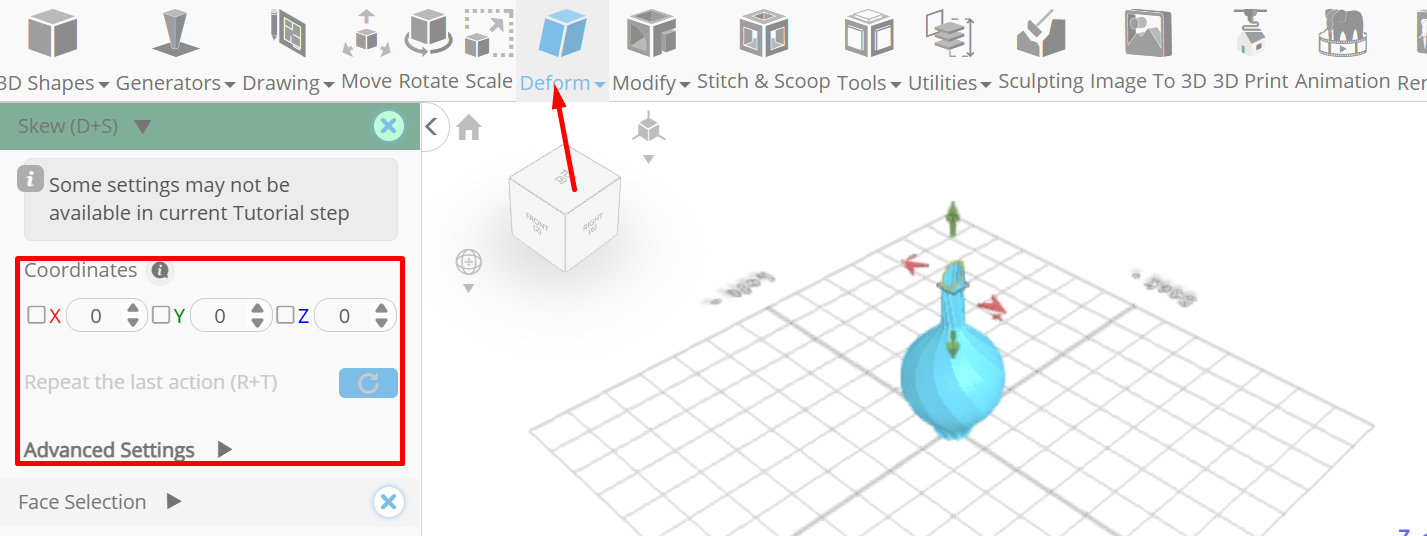
Click ‘x’ to close transformation panel
As you continue honing your design skills, remember that SelfCAD offers a wealth of resources to support your learning journey. To deepen your understanding and explore more advanced features, consider checking out the interactive tutorials (https://www.selfcad.com/tutorials) available on the SelfCAD website. The tutorials page provides a treasure trove of guides, tips, and tricks that cater to designers of all levels.
More structured learning experience can also be accessed at the SelfCAD Academy (https://www.selfcad.com/academy/curriculum/), https://www.youtube.com/@3dmodeling101, and 3D Modeling 101 series (https://www.youtube.com/playlist?list=PL74nFNT8yS9DcE1UlUUdiR1wFGv9DDfTB). This comprehensive resource offers in-depth courses taught by industry experts, allowing you to master the intricacies of SelfCAD at your own pace.
Subscribe to my newsletter
Read articles from Juliana Misiko directly inside your inbox. Subscribe to the newsletter, and don't miss out.
Written by