10 Best Product Photography Backgrounds for 2025
 ProdShot Creator
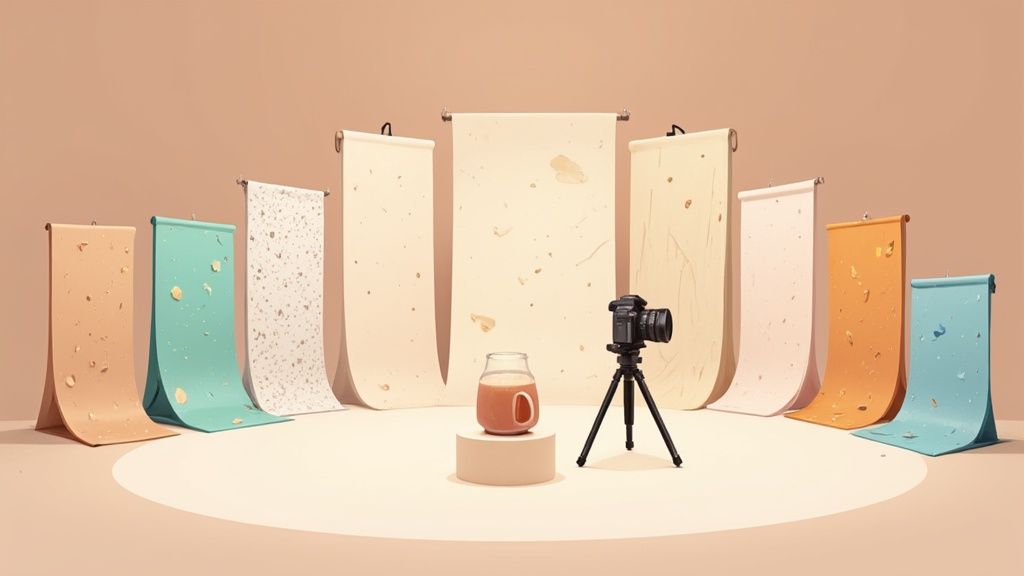
Beyond the Product: How Backgrounds Define Your Brand's Story
In e-commerce, the first visual impression is often the final one. While your product is the star, the stage it occupies, its background, plays a critical supporting role. The right product photography backgrounds do more than just fill empty space; they communicate quality, establish a specific mood, and help tell a story that connects with your ideal customer. A thoughtful backdrop can be the deciding factor that turns a casual scroller into a loyal buyer.
This guide moves past generic advice to deliver a curated list of ten versatile and professional background options. We will explore the specific advantages of each material, from the clean, universal appeal of seamless white paper to the rugged authenticity of concrete and industrial textures. You will gain actionable insights and practical tips for selecting, setting up, and mastering the perfect backdrop for your brand's unique identity. Prepare to transform your product images from simple pictures into compelling visual assets that drive sales. This comprehensive roundup is designed for everyone from Shopify store owners to social media creators, providing the knowledge needed to create stunning, high-converting visuals.
1. White Seamless Paper
The undisputed industry standard, white seamless paper is a foundational tool for creating clean, professional product photography backgrounds. This large roll of non-reflective paper is draped from a stand to create a smooth, continuous background without a visible horizon line or corner. This technique, known as an 'infinity cove' or 'cyclorama,' eliminates distracting shadows and visual clutter, making the product the sole focus.
Its widespread adoption, heavily influenced by Amazon's marketplace requirements, stems from its effectiveness. The pure white background makes it simple to isolate products, ensuring they pop on the screen. This is crucial for e-commerce, where clarity and focus directly impact sales. From Apple's minimalist gadget shots to ASOS's crisp apparel listings, the goal is the same: present the product in its truest form without any distractions. The matte finish diffuses light evenly, preventing harsh glares and making it easier to achieve consistent, professional lighting.
How to Master the White Background
Achieving a perfect white background requires more than just unrolling paper. The key is precise lighting control. You need to light the background and the product independently.
- Separate Lighting: Use a minimum of two lights pointed exclusively at the background. This ensures the paper is evenly lit and eliminates any shadows cast by your product.
- Exposure Control: Intentionally overexpose the background by one to two stops relative to your product. This technique "blows out" the white, turning it into pure digital white (#FFFFFF) in the final image, which is the standard for most e-commerce platforms.
- Product Placement: Position your product several feet away from the background's curve. This prevents the background lights from spilling onto your product and stops your product from casting noticeable shadows on the paper.
The infographic below summarizes the key technical specifications for working with seamless paper.
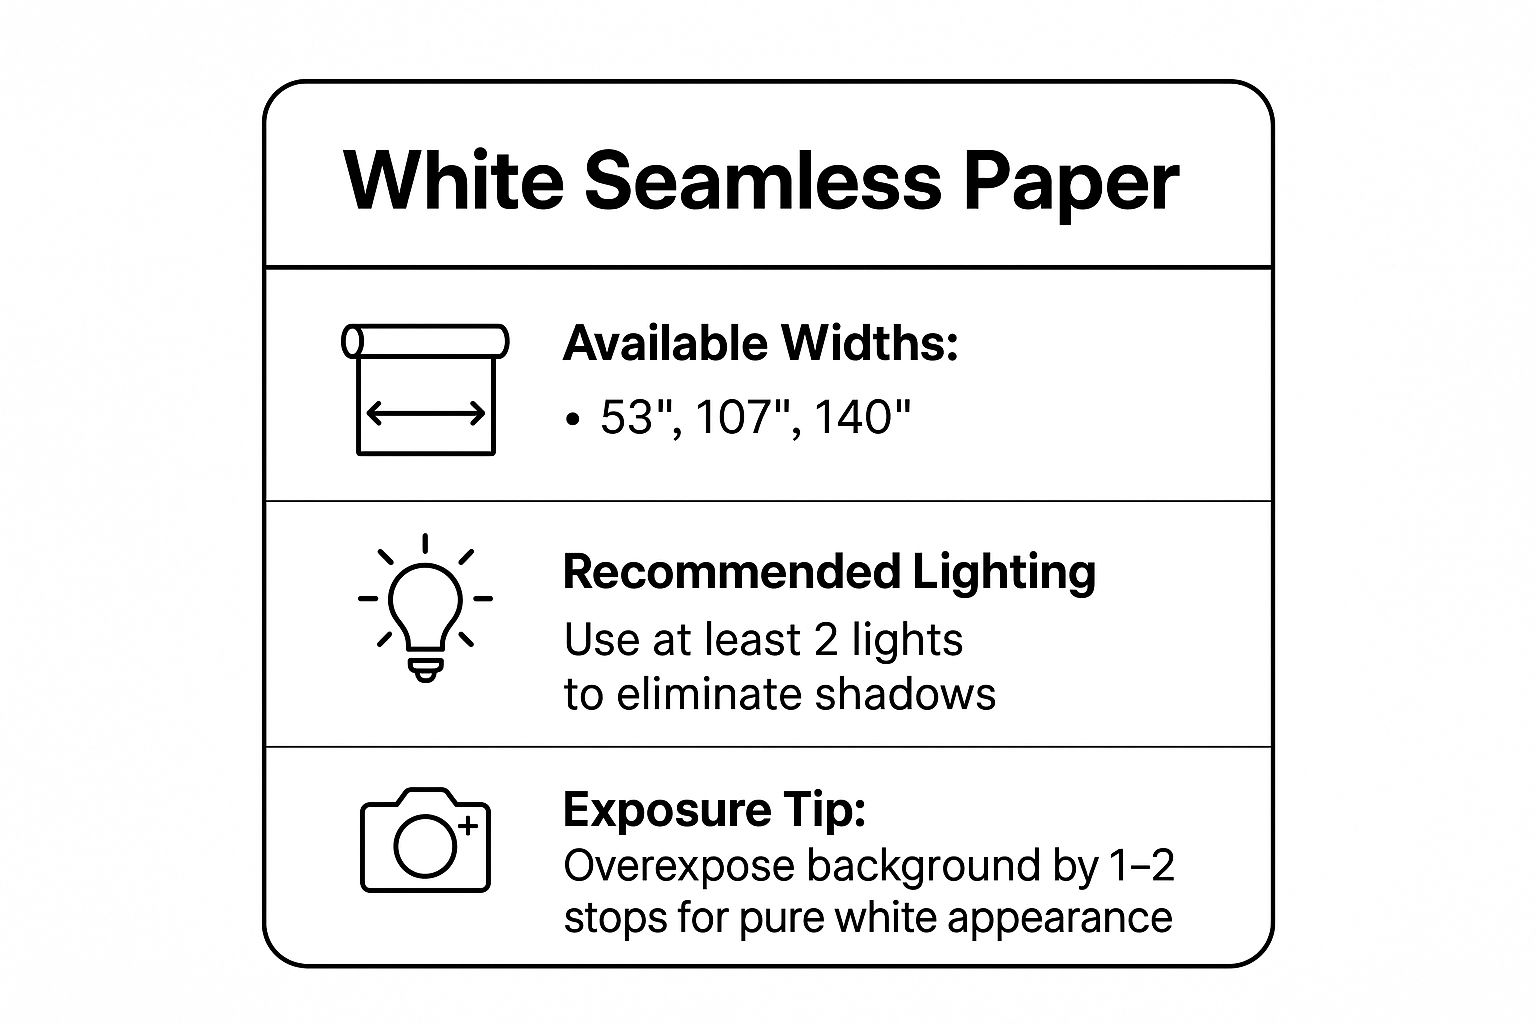
As the data highlights, achieving that pure white look is a technical process of balancing light and exposure, not just a choice of material.
For a visual guide on setting up your seamless paper and lighting it effectively, this tutorial provides a step-by-step walkthrough.
2. Natural Wood Surfaces
For products that need to convey warmth, authenticity, and craftsmanship, natural wood surfaces are an exceptional choice. Unlike sterile studio backdrops, materials like reclaimed barn wood, polished hardwood, or weathered planks provide organic texture and a tangible sense of quality. This type of product photography background connects the item to a natural, rustic, or artisanal world, making it ideal for storytelling.

This approach has been popularized by the vibrant communities on Pinterest and Etsy, where handmade goods thrive. It’s also a go-to for food photographers creating rustic menu visuals and outdoor gear brands grounding their products in nature. The varied grains, knots, and tones of wood add depth and character that a flat color cannot, instantly elevating the perceived value of everything from artisanal coffee to handmade jewelry. The key is to create a scene that feels both intentional and real.
How to Master Natural Wood Backgrounds
Successfully using wood requires attention to detail to ensure the texture enhances, rather than distracts from, your product. The goal is to balance the wood's character with the product's features.
- Emphasize Texture with Light: Use side lighting or a single key light positioned at a low angle. This will cast soft shadows across the wood grain, making its texture and details pop without creating harsh reflections.
- Prepare the Surface: Ensure the wood is clean and free of dust. For a more refined look, you can lightly sand and seal the surface to create a consistent, smooth finish that’s less likely to snag delicate products like fabrics.
- Complementary Tones: Choose a wood tone that complements your product. A dark walnut can make bright, colorful products stand out, while a light pine or birch works well for darker, more muted items. Avoid color combinations that clash or blend together.
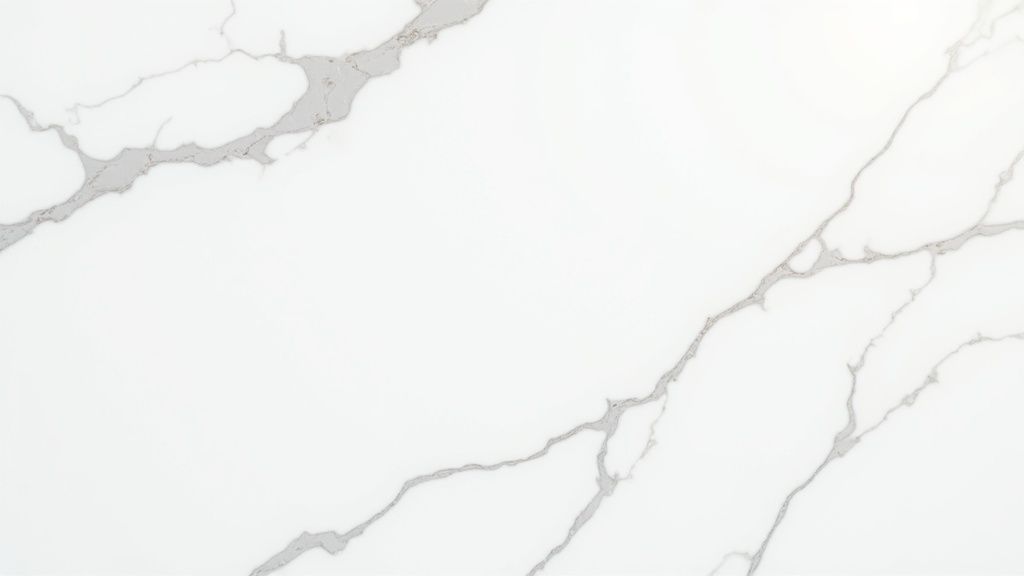
3. Marble and Stone Textures
For products that need to convey luxury, elegance, and quality, marble and stone textures are unparalleled product photography backgrounds. Whether using genuine slabs of marble, granite, or slate, or more practical vinyl or composite alternatives, these surfaces provide a sense of weight, permanence, and sophistication. The unique, organic veining and subtle texture of stone create a visually rich backdrop that enhances high-end items without overpowering them.
This approach is a favorite among luxury brands for a reason. High-end jewelry from Tiffany & Co., premium skincare from La Mer, and gourmet food presentations all benefit from the classic, opulent feel that stone provides. The natural patterns ensure no two shots are exactly alike, adding an exclusive character to the imagery. This technique is particularly effective for cosmetics, watches, and artisanal goods where the goal is to elevate the product's perceived value and craftsmanship. For more inspiration on using textured surfaces in your shoots, you can explore various techniques used for home decor product photos.
How to Master Marble and Stone
Working with stone, especially polished varieties, requires careful management of light and reflections to bring out its best qualities.
- Control Reflections: Polished stone is highly reflective. Use a polarizing filter on your lens to minimize or eliminate distracting glare and reveal the deep colors and patterns of the stone.
- Emphasize Texture: To highlight the natural texture of slate or unpolished granite, position your key light at a low, 45-degree angle. This creates soft, raking shadows across the surface, giving it depth and dimension.
- Choose Wisely: Real stone slabs are heavy and expensive. For a budget-friendly and portable option, consider high-quality printed vinyl backdrops or lightweight composite panels that convincingly replicate the look of real marble or stone.
- Keep it Clean: Dust, fingerprints, and smudges are highly visible on stone surfaces. Before shooting, clean the surface with a lint-free cloth and a cleaner appropriate for the material to ensure a flawless finish.
4. Fabric and Textile Backgrounds
For products that benefit from a sense of mood, texture, and lifestyle context, fabric and textile backgrounds offer a soft, versatile alternative to hard surfaces. Materials like linen, silk, velvet, and even simple cotton can add depth and tactile appeal that enhances the product's story. Unlike the rigid uniformity of paper or vinyl, fabric drapes naturally, creating gentle folds and highlights that add organic visual interest to the composition.
This approach is highly effective for conveying a specific brand aesthetic. For example, a rustic, handmade soap company might use coarse linen to emphasize natural ingredients, while a luxury watch brand could use draped silk to evoke elegance and sophistication. The trend has been popularized across platforms like Pinterest and Instagram, where lifestyle integration is key. Independent sellers on Etsy frequently use textiles to create a warm, bespoke feel for their products, from soft cottons for baby items to rich velvet for vintage clothing.
How to Master Fabric Backgrounds
Using fabric effectively is about managing its natural properties to complement, not distract from, your product. The key is in the preparation and styling.
- Preparation is Key: Always steam or iron your chosen fabric just before the shoot. Wrinkles and creases can look unprofessional and draw attention away from the product. A handheld steamer is an invaluable tool for this.
- Control the Draping: Don't just lay the fabric flat. Experiment with draping it over a box or prop to create graceful curves and shadows. The way the fabric is arranged can guide the viewer's eye and add a dynamic quality to the shot.
- Color and Texture Synergy: Choose a fabric whose color and texture support your product. A smooth, shiny product might look stunning against a matte, textured fabric like burlap, creating a compelling contrast. Conversely, a soft cashmere sweater would be beautifully complemented by a silky, smooth background.
- Mind the Static: Fabrics, especially synthetics, can attract dust and lint. A quick spray with an anti-static product can keep your background looking clean and free of distracting specks throughout the shoot.
5. Gradient Color Backgrounds
Moving beyond solid colors, gradient backgrounds introduce a subtle yet powerful sense of depth and professionalism. This technique involves a smooth transition from one color to another, often from a lighter to a darker shade of the same hue, or between complementary colors. The result is a dynamic, polished backdrop that adds visual interest without overpowering the product, making it feel more three-dimensional and premium.
This sophisticated approach is highly effective for modern, high-end products. Tech companies like Samsung use gentle gradients to enhance the sleek design of their smartphones, while cosmetic brands leverage them to create mood-specific color stories for their makeup lines. The smooth color falloff draws the eye naturally toward the product, providing a soft, elegant context that feels less stark than a solid white or black background. It’s one of the most versatile product photography backgrounds for adding a touch of artistic flair.
How to Create Flawless Gradients
Crafting the perfect gradient can be done in-camera with lighting or refined in post-production, but the goal is always a seamless transition.
- Lighting Control: The simplest in-camera method involves lighting. Position a single light source closer to one part of a solid-colored background (like seamless paper) and let the light naturally fall off, creating a gradient. Angling the light from the top or side will produce different effects.
- Shoot in RAW: Always capture your images in RAW format. This file type retains the maximum amount of image data, giving you far more flexibility and control when creating or adjusting gradients in editing software like Photoshop or Lightroom.
- Keep it Subtle: The gradient should complement, not compete with, your product. Test different levels of intensity. A soft, gentle transition is often more effective than a dramatic, high-contrast one, ensuring the product remains the undisputed hero of the shot.
For those looking to generate these effects quickly, AI-powered tools can be a game-changer. You can explore how AI creates stunning product visuals with customizable gradient backgrounds on prodshot.net.
6. Black Velvet and Dark Backgrounds
For creating dramatic, high-contrast images, few product photography backgrounds are as effective as black velvet or other light-absorbing materials. This approach uses an ultra-dark, non-reflective surface to make the product appear to float in a void, creating a sense of luxury, mystery, and intense focus. The key is its ability to absorb light rather than reflect it, which eliminates glare and ensures the background remains a pure, deep black.
This technique is a favorite among jewelers and luxury brands. Think of how premium watch brands like Patek Philippe showcase timepieces, where the dark background makes every metallic glint and gemstone sparkle with intensity. Similarly, fine art auction houses use it to isolate collectible items, ensuring the viewer’s attention is captured by the subject's intricate details. This background choice communicates premium quality and is perfect for products where fine craftsmanship is a primary selling point, such as high-end electronics or automotive parts.
How to Master the Dark Background
Working with dark, light-absorbing backgrounds requires a specific approach to lighting and maintenance to prevent common pitfalls.
- Keep it Clean: Black velvet is a magnet for dust and lint, which become highly visible under studio lights. Use a lint roller generously and frequently on your surface just before and during the shoot.
- Create Separation with Light: Use precise edge lighting, also known as rim lighting, to trace the outline of your product. This technique creates a subtle, bright line around the subject, preventing it from blending into the dark background, especially if the product itself is dark.
- Angle Your Lights: Light the product from the sides or above, never directly from the camera's position. This sculpts the product, highlighting its form and texture while preventing the light from hitting the background and revealing its texture or imperfections.
- Use a Low ISO: To maintain a deep, noise-free black in your final image, shoot with the lowest possible ISO setting on your camera. This ensures the dark areas of your photo remain smooth and truly black, without digital grain.
7. Acrylic and Glass Surfaces
For a modern, high-end aesthetic, acrylic and glass surfaces are premier choices for product photography backgrounds. These transparent or translucent materials create sleek, clean visuals defined by sophisticated reflections and light play. By placing products directly on a sheet of acrylic or glass, photographers can achieve a floating effect or a perfect mirror image, adding depth and a sense of luxury to the shot. This technique is especially effective for small, high-value items where elegance and precision are key selling points.
This approach is heavily favored in industries that prize a polished, contemporary feel. Cosmetic brands like MAC Cosmetics frequently use black or white acrylic to make their vibrant makeup products stand out with sharp, crisp reflections. Similarly, technology companies use these surfaces to highlight the refined design of gadgets and electronics. The goal is to create an environment that feels as clean and meticulously designed as the product itself, communicating quality through the visual context.
How to Master Acrylic and Glass Surfaces
Working with reflective surfaces requires a careful and deliberate approach to lighting and cleanliness. The smallest imperfection can be magnified, so attention to detail is paramount.
- Immaculate Cleaning: Dust is the enemy. Before shooting, thoroughly clean the surface with an anti-static solution and a microfiber cloth. This prevents dust particles from settling on the surface and appearing in your final shots.
- Strategic Lighting and Reflection Control: Your lighting setup will directly influence the reflections. Position your lights to create flattering highlights and avoid unwanted glare. A polarizing filter on your lens is an invaluable tool for precisely managing the intensity and location of reflections.
- Product Placement for Impact: Experiment with positioning. Placing a product directly on the surface creates a strong reflection. Elevating it slightly on a clear stand can produce a more subtle, ethereal shadow, separating it from the background while maintaining the sleek look.
Mastering these reflective product photography backgrounds can elevate your images, but post-production often plays a crucial role in perfecting the final result. For a flawless finish, it may be beneficial to explore professional product photo editing services to handle complex reflection retouching and dust removal.
8. Concrete and Industrial Textures
For brands that want to convey strength, durability, and an urban edge, industrial textures are unmatched product photography backgrounds. Raw concrete, brushed metal, weathered steel, and even aged brick provide a raw, authentic environment that speaks to functionality and modern design. This approach moves beyond a simple color choice, introducing texture and character that can powerfully reinforce a product's intended use and brand identity.
This style is a staple for showcasing rugged products where authenticity is key. Think of tool manufacturers like DeWalt or automotive accessory brands, where a gritty, industrial backdrop instantly communicates toughness. It's also highly effective for men's grooming products with industrial branding or craft spirits with an urban-chic positioning. The texture itself becomes a storytelling element, suggesting the product is built to last or belongs in a sophisticated, modern setting. This contextual relevance creates a stronger connection with the target audience.
How to Master Industrial Textures
Effectively using these surfaces is about balancing texture with product visibility. The goal is to enhance the product, not overwhelm it with a busy background.
- Emphasize Texture with Light: Use strong side lighting or a single key light positioned at a low angle. This technique, known as raking light, casts small shadows across the surface, making the texture of the concrete or metal pop and adding significant depth to the scene.
- Use Lighter Alternatives: Hauling a concrete slab into a studio is impractical. Instead, use high-quality, vinyl-printed photography backdrops or concrete-look panels. These are lightweight, portable, and offer a consistent, realistic texture without the hassle.
- Mindful Product Placement: Position your product carefully. For example, place a sleek watch on a smooth area of the concrete while allowing the rougher texture to frame it. This contrast ensures the product remains the hero of the shot while benefiting from the background's character.
- Clean and Prep Surfaces: If using real materials, ensure they are clean. Use appropriate industrial cleaners for metal or a stiff brush for concrete to remove any distracting dust or grime that isn't part of the desired aesthetic.
9. Seamless Colored Paper
Moving beyond the standard white, seamless colored paper offers a vibrant and effective way to inject personality and brand identity into your product photography backgrounds. Much like its white counterpart, this professional-grade paper creates a smooth, continuous backdrop free of distracting lines or textures. Its main advantage is the immediate emotional and thematic context provided by color, allowing you to create a specific mood or reinforce brand aesthetics with ease.
This technique is a favorite among marketers and brand managers who want to stand out in a crowded marketplace. For example, a beauty brand might use a soft pastel pink to evoke a sense of gentle care for a new skincare line, while a toy company could use a bold primary color like yellow or blue to convey fun and excitement. The key is to use color intentionally. It can complement the product, align with seasonal campaigns like a deep red for a holiday-themed shoot, or match official brand colors to create a cohesive visual identity across all platforms.
How to Master Colored Backgrounds
Working with colored paper introduces a new variable: color accuracy. The color you see in person must translate accurately to the screen, which requires careful management of your lighting and camera settings.
- Complementary Colors: Avoid matching the background color exactly to your product, as this can cause the product to blend in. Instead, use a color wheel to find complementary or analogous colors that make your product pop. For instance, a green product might look stunning against a muted purple or a rich orange background.
- Test Your Lighting: The color of your light source (its temperature) dramatically affects how the paper’s color is rendered. Test your chosen paper under your specific studio lights to see if it shifts warmer (more yellow) or cooler (more blue). Adjust your camera's white balance accordingly to achieve a true-to-life hue.
- Store Properly: Seamless paper rolls are an investment. To maintain their color integrity and prevent fading or damage, store them vertically in a cool, dry place away from direct sunlight. This also helps prevent creases and warping.
10. Natural Outdoor Environments
Moving beyond the studio, natural outdoor environments provide authentic and contextual product photography backgrounds that tell a compelling story. This approach places the product in its intended setting, whether it's a rugged mountain landscape, a bustling city street, or a serene beach. Using the real world as a backdrop connects the product to a specific lifestyle, helping customers visualize themselves using it. This technique is less about isolating the product and more about integrating it into an aspirational narrative.
This method has been mastered by brands that sell an experience, not just an item. Think of Patagonia showcasing a jacket against a dramatic alpine peak, or a skincare brand displaying sunscreen on a sun-drenched, sandy beach. These settings evoke emotion and desire, creating a powerful marketing tool that a plain background cannot replicate. By showing the product in action, you demonstrate its purpose and durability in a way that resonates deeply with the target audience, particularly for lifestyle, travel, and adventure-focused brands.
How to Master Outdoor Environments
Shooting outdoors successfully requires planning and adapting to an uncontrolled environment. The goal is to harmonize your product with its surroundings.
- Scout and Time Your Shoot: Location is everything. Scout potential spots beforehand and plan to shoot during the golden hour (the first hour after sunrise or the last hour before sunset). This period offers soft, warm, and diffused light that is universally flattering.
- Control Natural Light: Even the best natural light needs management. Bring portable reflectors to bounce light into shadowy areas and fill in details on your product. A diffuser can soften harsh midday sun if you cannot shoot during the golden hour.
- Create Subject Separation: Use a wide aperture (e.g., f/1.8 to f/4) to create a shallow depth of field. This technique will blur the background, making your product stand out sharply against the environment while retaining the location's atmospheric feel.
- Have a Backup Plan: The weather is unpredictable. Always have a contingency plan, such as a covered location nearby or an alternate indoor concept, to ensure your shoot day isn't wasted.
Top 10 Product Photography Backgrounds Comparison
| Background Type | Implementation Complexity 🔄 | Resource Requirements ⚡ | Expected Outcomes 📊 | Ideal Use Cases 💡 | Key Advantages ⭐ |
| White Seamless Paper | Low - Simple setup, requires lighting | Moderate - Paper rolls, lighting gear | Clean, infinite white background | E-commerce, product catalogs, technical specs | Cost-effective, professional, shadow-free |
| Natural Wood Surfaces | Medium - Needs maintenance and setup | Moderate - Wood panels, lighting | Warm, organic texture and emotional appeal | Handmade, artisanal, eco-friendly brands | Adds warmth, versatile, reusable |
| Marble and Stone Textures | High - Heavy, less portable | High - Genuine or artificial stone slabs | Luxurious, sophisticated, premium look | Jewelry, luxury goods, premium skincare | Conveys luxury, durable, subtle texture |
| Fabric and Textile Backgrounds | Medium - Draping, wrinkle management | Low - Fabrics, steamers | Soft, approachable, mood-enhancing | Fashion, beauty, lifestyle products | Soft texture, color variety, cost-effective |
| Gradient Color Backgrounds | High - Requires skill, lighting, post | Moderate to High - Specialized papers, digital tools | Polished, visually interesting backgrounds | Brand coordination, tech, cosmetics, sports | Customizable, depth without distraction |
| Black Velvet and Dark Backgrounds | High - Careful lighting, dust control | Moderate - Velvet/dark materials | Dramatic, elegant contrast | Jewelry, luxury watches, fine art | Eliminates reflections, premium appearance |
| Acrylic and Glass Surfaces | High - Reflection control, cleaning | Moderate - Acrylic/glass panels | Modern, sleek, with depth and reflections | Tech, beauty, perfume, modern appliances | Professional look, versatile lighting |
| Concrete and Industrial Textures | Medium - Heavy, texture emphasis | Moderate - Concrete panels, lighting | Rugged, authentic, masculine feel | Tools, automotive, outdoor gear | Authentic, neutral, strong brand message |
| Seamless Colored Paper | Low - Similar to white paper but color | Moderate - Colored paper rolls | Consistent, mood-setting colored backgrounds | Brand color coordination, playful or seasonal themes | Wide color range, professional, cost-effective |
| Natural Outdoor Environments | High - Location dependent, variable lighting | Low to Moderate - Outdoor gear, permits | Authentic, lifestyle-contextual backgrounds | Outdoor, sports, lifestyle products | Emotional connection, natural lighting |
Choosing Your Perfect Backdrop and Streamlining Your Workflow
Throughout this guide, we've explored a diverse palette of product photography backgrounds, each capable of transforming a simple item into a must-have product. From the clean, universal appeal of white seamless paper to the rich, contextual storytelling of natural wood and stone, the right backdrop is far more than just a setting; it's a strategic tool that communicates your brand's voice and your product's value.
Your background choice directly influences customer perception. A minimalist concrete texture might signal modern utility, while a soft linen fabric suggests comfort and natural quality. The key is to move beyond simply picking a backdrop and start strategically selecting one that aligns with your core objectives: your brand identity, the specific product being featured, and the expectations of your target audience on platforms like Shopify, Etsy, or Instagram.
Key Takeaways for Selecting Your Background
To make the best choice every time, consistently ask yourself these critical questions:
- Does this background match my brand's personality? A playful, colorful brand should use different backdrops than a luxury, minimalist one. Consistency across your product gallery builds brand recognition and trust.
- Does this background complement or distract from my product? The hero of your photo is always the product. Your background should enhance its features, colors, and textures without stealing the spotlight. A busy pattern might overwhelm a small, detailed item.
- What story is this background telling? An outdoor scene can tell a story of adventure for a rugged backpack, while a sleek marble slab can imply sophistication for a high-end cosmetic. Use your background to create an aspirational narrative.
Mastering these concepts allows you to create images that not only look professional but also perform better. High-quality, cohesive product photography is directly linked to higher conversion rates, lower return rates, and increased customer confidence. It’s the visual handshake that greets your potential buyer, and getting it right is fundamental to e-commerce success.
Streamlining Your Workflow with Modern Tools
Building a physical inventory of diverse product photography backgrounds can be expensive and time-consuming. Storing seamless paper rolls, heavy concrete slabs, and various fabrics requires significant space and effort. Fortunately, technology provides a powerful and efficient alternative to this traditional approach. The principles of great background selection remain the same, but the execution can be radically simplified.
Instead of dedicating hours to setting up physical scenes for every product variation, you can leverage AI to achieve professional results in minutes. This modern workflow allows you to focus on capturing a clean, well-lit image of your product with your smartphone, then digitally place it onto an infinite variety of backgrounds. This approach empowers you to create a vast and consistent visual catalog without the overhead of a full-scale studio.
Ready to create stunning, studio-quality product photos from your phone in seconds? Try ProdShot to instantly remove your original background and place your product against perfect white, vibrant colors, or AI-generated lifestyle scenes. Elevate your brand and streamline your workflow today.
Subscribe to my newsletter
Read articles from ProdShot Creator directly inside your inbox. Subscribe to the newsletter, and don't miss out.
Written by