Product Photography Editing Tips to Transform Your Images
 ProdShot Creator
Setting Up Your Editing Workspace for Success
The difference between a frustrating late night spent staring at a screen and a smooth, efficient workflow often boils down to your editing environment. A well-organized workspace isn’t just about having a tidy desk; it’s about creating a system that supports accuracy and speed in your product photography editing. Think of it as building your own mission control—every piece of gear and every digital folder should have a clear purpose.
The absolute cornerstone of any professional editing setup is a calibrated monitor. Without one, you’re flying blind with your colors. That perfect, brand-accurate red on your screen might look like a dull orange on a customer’s phone. A monitor calibrator is a small device that measures your screen's color output and builds a custom profile to ensure what you see is what you get. For anyone serious about their work, this isn't a luxury; it's a must-have.
Hardware That Helps, Not Hinders
Beyond a perfectly tuned screen, your choice of input device can make a huge difference. A standard mouse gets the job done, but many photographers who spend hours retouching swear by a graphics tablet. Brands like Wacom make tablets that are invaluable for detailed work. Using a pressure-sensitive pen allows for more natural, precise strokes when you’re dodging, burning, or masking out tricky shapes. It gives you a degree of control that’s nearly impossible to achieve with a mouse, turning clunky clicks into fluid, intuitive movements.
A couple of other hardware factors can also impact your work:
- Ambient Lighting: Try to edit in a room with neutral, dim lighting. Bright or colored lights can fool your eyes and change your perception of the colors on the screen. A simple bias light placed behind your monitor can also help reduce eye strain during long sessions.
- Ergonomics: Never underestimate the power of a good chair and a desk set to the right height. Physical fatigue can cut your focus and productivity short, so make sure your setup is comfortable for the long haul.
Organizing Your Digital World
A messy folder structure is a huge time-waster. When you're juggling hundreds or even thousands of images, a logical system is non-negotiable. A common professional practice is to organize files by date and client or project, with a clear naming convention. For example, a main folder might be named 2024-10-28_ClientName_JewelryShoot. Inside, you’d create subfolders like RAW, EDITED, and FINAL_EXPORTS. This simple structure means you can find any image in seconds instead of digging through a cluttered desktop.
This level of organization is crucial in a growing industry. The demand for professional photographic services, including product photography editing, is part of a market valued at $35.78 billion in 2024, and that number is expected to keep climbing. You can read more about these photography industry trends and statistics to see just how much the field is expanding.
To help you choose the right tools for the job, I've put together a comparison of some of the most popular editing software options available today.
Essential Product Photography Editing Software Comparison
Comparing popular editing software options based on features, pricing, and suitability for product photography
| Software | Best For | Price Range | AI Features | Learning Curve |
| Adobe Photoshop | Professional, detailed retouching and compositing. | Subscription-based (from $22.99/mo). | Generative Fill, AI-powered selections, Neural Filters. | Steep |
| Adobe Lightroom | Batch editing, color correction, and photo organization. | Subscription-based (from $9.99/mo). | AI-powered masking, noise reduction, and presets. | Moderate |
| Skylum Luminar Neo | Quick, AI-driven enhancements and creative effects. | One-time purchase or subscription (from $149). | Sky AI, Portrait AI, Background Removal AI. | Easy |
| Canva | Quick edits, social media graphics, and template-based design. | Free plan available; Pro from $14.99/mo. | Magic Eraser, Magic Edit, Background Remover. | Very Easy |
This table shows a clear trade-off: powerful tools like Photoshop offer unmatched control but have a steeper learning curve, while programs like Luminar Neo and Canva provide incredible AI-driven speed for more straightforward tasks.
The infographic below breaks down where that editing time typically goes for a single product photo.
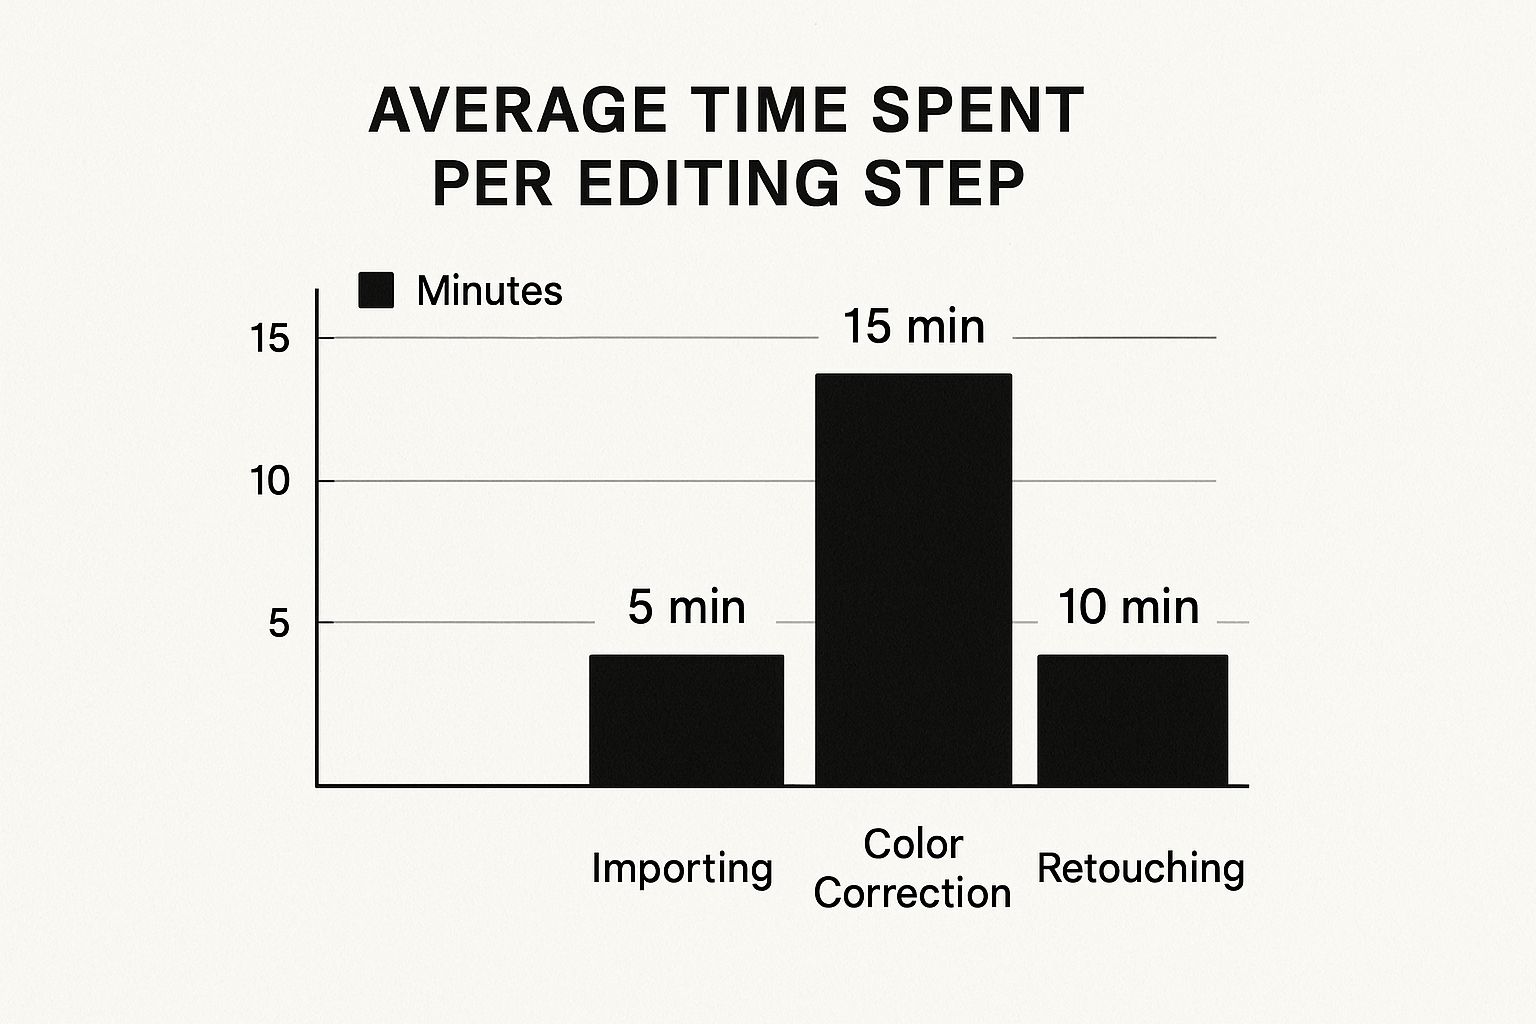
As you can see, color correction often takes up the most time, which again highlights why having an accurate monitor and an efficient workflow is so important. By getting your workspace set up correctly from the start, you can cut down these times significantly and boost your overall productivity.
Mastering Background Removal Without the Headaches
A clean, distraction-free background is often what separates an amateur product shot from a professional, high-converting image. But getting those perfectly crisp edges without spending hours tracing pixels is where many e-commerce sellers get stuck. The great news is that modern product photography editing has moved beyond tedious manual work, blending smart automation with precise touch-ups for fast, clean results.
The secret isn’t choosing between AI tools and manual methods like the Pen Tool; it's about knowing when to use each for the best outcome. For about 80% of standard products with well-defined edges, AI-powered background removal tools are a huge help. They can isolate your product and create a transparent background in seconds, handling the bulk of the work instantly. However, their real power comes from using them as a starting point, not the final step.
The Hybrid Approach: AI Speed Meets Human Precision
Think of AI as your super-fast assistant. It does the initial heavy lifting, but it’s your job to step in for quality control. After running an image through an automated tool, always zoom in and inspect the edges. AI can sometimes struggle with subtle details, like soft shadows you want to keep or the fine strands of hair on a model wearing an apparel item. This is where manual refinement saves the day. Instead of painstakingly selecting the entire product, you’re only correcting small problem areas, which saves an incredible amount of time.
This hybrid workflow is especially important when you’re dealing with common challenges in product photography editing:
- Transparent & Reflective Items: Glassware, jewelry, and metallic products are notoriously tricky. AI tools might get confused by reflections or transparency, cutting out parts of the background seen through the product. A manual touch-up with a soft-edged eraser or a layer mask is essential here to bring back a natural look.
- Fuzzy or Soft-Edged Products: Things like fluffy sweaters, plush toys, or blankets don’t have hard, defined edges. A sharp, hard cutout can look fake and jarring. Advanced selection tools, like the "Select and Mask" feature in Adobe Photoshop with its edge detection sliders, are perfect for creating a softer, more realistic transition.
- Complex Shapes: Imagine a bicycle with all its spokes or a plant with intricate leaves. Selecting these manually is a nightmare. Let an AI tool handle the first pass to get the general shape, then use manual tools like the Quick Selection or Object Selection tool to add or subtract from that initial mask.
Here’s an example of an interface where these powerful selection tools are located, like in Adobe Photoshop.
The screenshot shows a variety of tools that allow for both automated selections, like "Select Subject," and manual refinements, demonstrating how modern software supports this effective hybrid workflow.
Avoiding the "Cut-and-Pasted" Look
One of the biggest giveaways of a poor background removal job is the lack of a grounding shadow. A product floating starkly on a white background just feels unnatural. After removing the background, the final professional touch is to add a subtle, soft contact shadow underneath the product. This small detail tricks the eye into believing the object is sitting on a real surface, making the whole image more believable and polished. For stores on specific platforms, you can learn how to perfectly remove backgrounds for Shopify to meet their unique standards.
By combining the speed of automation with mindful, manual finishing touches, you can achieve flawless backgrounds that make your products stand out and build trust with your customers.
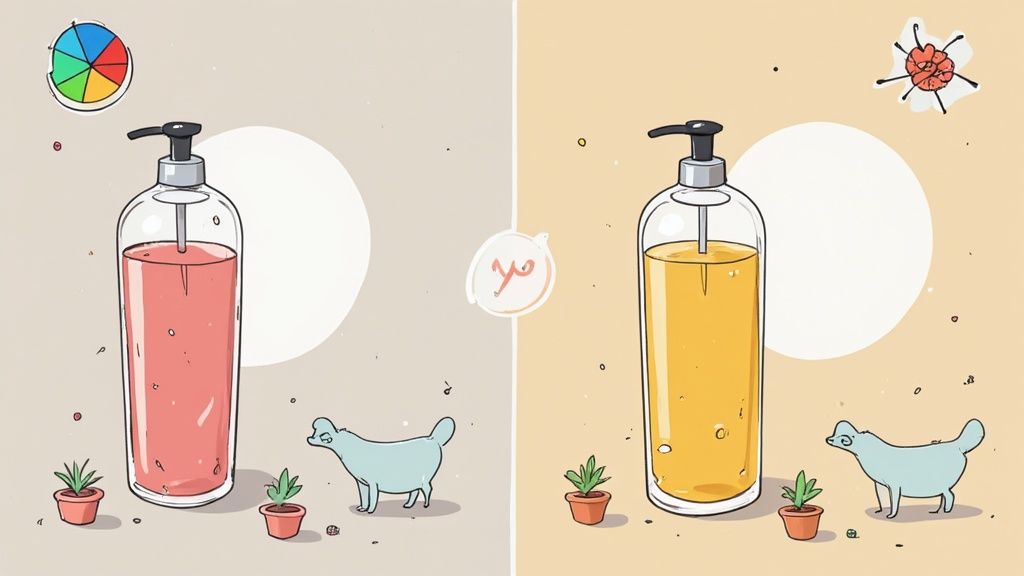
Color Correction That Actually Sells Products
After getting a clean background, the next crucial step in your product photography editing workflow is color correction. This is where you elevate a good photo into one that genuinely drives sales. For online shoppers who can't hold a product, color is a massive part of their buying decision. Getting it right builds trust; getting it wrong leads to disappointed customers and costly returns. The key is to find that sweet spot between making an item look amazing and making sure it accurately reflects what shows up at their door.
This process is about more than just cranking up the saturation. You're aiming for authenticity with a pop of appeal. A common pitfall is overlooking a subtle color cast. Even a slight blue or yellow tint, often from mixed lighting during the shoot, can make a premium product look cheap. Your most effective tool here is precise white balance adjustment. In your editing software, try using the eyedropper tool on a neutral gray or white part of the image. This can instantly fix color casts and bring out the product's true hues.
The Psychology of True-to-Life Color
Remember the last time you bought a shirt online? You probably picked that specific shade of blue based on the product image. If it arrived looking like a pale, washed-out version, you'd feel let down. That’s the core challenge of color correction: preserving customer trust. To nail this, always edit with a reference. Keep the physical product next to you if you can, or use a color-calibrated monitor to compare the on-screen image with real-world tones. This simple check helps you resist the urge to over-saturate, which can create vibrant but fake-looking colors.
Handling Tricky Materials and Scenarios
Not all products play by the same color rules. Different materials reflect light and display color in unique ways, so you'll need to adapt your approach.
- Shiny Metals: Items like jewelry or chrome fixtures often pick up colors from their environment. Instead of applying a single color shift to the whole image, use selective adjustment layers and masks. This lets you neutralize unwanted reflections without changing the metal's natural color.
- Textured Fabrics: For materials like wool or linen, simply boosting saturation can flatten the texture and make it look muddy. A better option is to use a Vibrance adjustment. It smartly enhances muted colors while leaving already saturated areas alone, which helps keep the fabric's details sharp.
- Multi-Material Products: Imagine a sneaker with leather, rubber, and fabric parts. Each material needs its own color correction. By masking each section and applying separate adjustments, you ensure every color is spot-on and the entire product looks cohesive.
Achieving Consistency Across Your Product Line
A signature of professional product photography editing is consistency. When a customer browses your online store, the colors should look and feel consistent from one product to the next. This is especially important for items available in multiple colors. The whites should all be the same shade, and your brand's signature red should be identical in every photo.
A great way to do this is by creating presets or actions in your editing software, like Adobe Photoshop or Lightroom. Once you've perfected the color for one product under certain lighting, save those settings. You can then apply this preset to other photos from the same session, only making small tweaks. This practice not only saves a huge amount of time but also strengthens your brand's visual identity. Businesses that adopt modern editing techniques, including AI, have seen sales jump by up to 27%. You can learn more about these transformative product photography trends and see how technology is boosting e-commerce success.
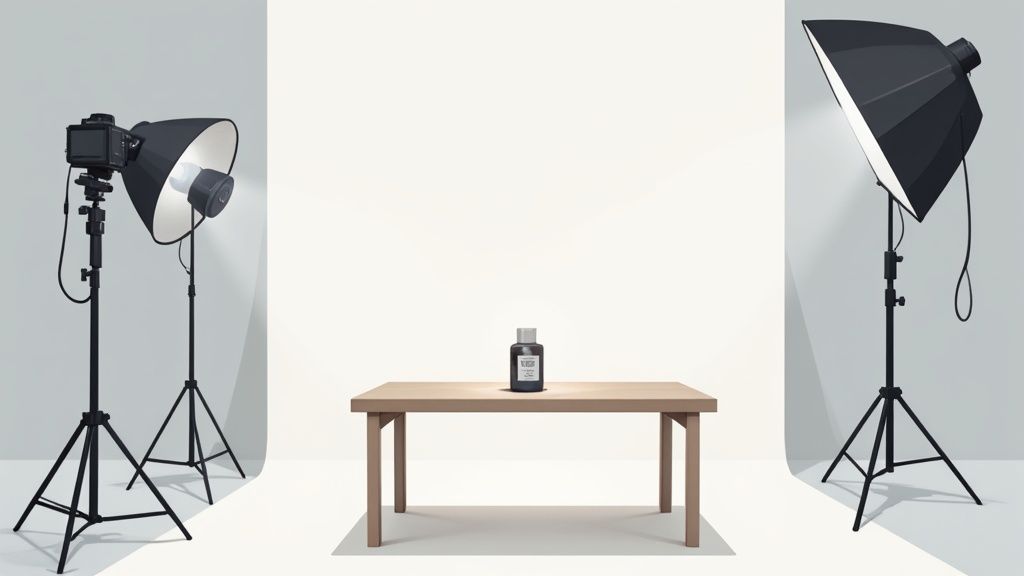
Lighting Enhancement That Creates Drama and Depth
Once you've nailed the background and color correction, it's time to play with light. This is where your product photography editing shifts from simply creating a clear image to crafting one with mood, depth, and a tangible quality that makes customers feel they can reach out and touch the item. Even a photo shot under perfect studio conditions can feel a bit flat; post-production is your chance to sculpt that light, drawing the viewer’s eye and highlighting the product's best features.
The idea isn't to completely change the lighting but to finesse what's already there. A common problem I see is uneven lighting, where one side of a product is just a little brighter than the other. This is an easy fix with a simple gradient mask. By applying a subtle darkening or brightening effect across one side, you can balance the image for a professional look that doesn't feel forced. This trick is a lifesaver for maintaining consistency across a series of photos shot at different times.
Sculpting with Light and Shadow
The real fun begins when you start to manually "paint" with light, a classic technique photographers call dodging and burning. Dodging is selectively lightening areas, and burning is selectively darkening them. Think of it as digital sculpting. By gently burning the edges of a product, you give it more weight and make it feel grounded. By dodging the highlights on a textured surface, you can make that texture pop right off the screen. For a leather handbag, a slight dodge on the grain's ridges paired with a burn in the crevices can make the material look incredibly rich and luxurious.
I always recommend making these adjustments on a separate, non-destructive layer. Set the layer’s blending mode to "Overlay" or "Soft Light." This approach lets you build up the effect gradually and keep things looking natural, which is essential for building customer trust. Subtlety is everything—you want the viewer to feel the dimension, not see your edits.
For really precise control, especially on items with complex shapes, luminosity masks are my go-to tool. These masks let you select parts of your image based on their brightness. This means you can target just the brightest highlights on a piece of jewelry to add a bit of sparkle, without overexposing the rest of the piece. Or, you can deepen shadows to add drama without losing important details. I often use this for metallic items in Adobe Photoshop.
Practical Techniques for Common Product Scenarios
Different products demand different lighting approaches. The techniques that make a soft sweater look cozy won't work for a shiny chrome kettle. To help you tackle this, I've put together a quick guide on how to approach common lighting challenges in your product photography editing.
The table below outlines specific lighting adjustment strategies for different product categories, helping you choose the right technique for the job.
Lighting Enhancement Techniques by Product Type
Description: Specific lighting adjustment strategies for different product categories and materials.
| Product Type | Common Issues | Key Techniques | Tool Recommendations | Time Investment |
| Reflective Items | Glare, distracting reflections | Healing/Clone tools for small spots, gradient masks to tone down broad glare. | Clone Stamp, Gradient Tool | Medium-High |
| Textured Fabrics | Looks flat, detail is lost | Micro-level dodge & burn to enhance texture, subtle use of clarity/texture sliders. | Adjustment Brush, Luminosity Masks | High |
| Matte Plastic | Lacks dimension, looks flat | Global contrast boost, burning edges to define shape, creating a subtle rim light. | Curves Adjustment, Dodge/Burn | Medium |
| Glassware | Edges disappear, distracting light | Add an artificial rim light with a fine brush, darken the background behind the glass. | Fine Brush Tool, Layer Masks | Medium-High |
This table shows that while some fixes are quick, others, like detailing textured fabrics, require more patience but deliver incredible results.
Creating a rim light is a fantastic trick for making a product stand out from its background. It's especially useful for dark products on dark backgrounds or transparent items like glassware. In post-production, you can mimic this effect by painting a very thin, soft white line along the product's edge on a new layer. After applying a slight blur and lowering the opacity, you'll have a believable highlight that beautifully defines the product’s shape. With these focused lighting tweaks, your images will gain a professional polish that stops scrollers in their tracks and helps drive sales.
Detail Enhancement That Makes Products Irresistible
After you've nailed the lighting and colors, it's time to zero in on the details. These are the subtle elements that make a product feel tangible, premium, and something a customer just has to have. The difference between an image that gets a casual scroll and one that stops a shopper in their tracks often comes down to the crispness of textures, sharp edges, and flawless surfaces. This final polish in your product photography editing is how you turn a good photo into a great one.
The idea isn't to create a fake, "retouched" look that screams plastic perfection. In fact, over-editing can backfire and damage customer trust. Your aim is to make the product look its absolute best, as if someone were seeing it in person under ideal lighting. This is where you make materials look touchable and features crystal clear.
Sharpening That Guides the Eye
One of the best ways to bring out detail is through selective sharpening. Instead of applying a universal sharpening filter that can make the whole image look "crunchy" and unnatural, you want to guide the viewer's focus to the most important parts of the product. Ask yourself what a customer would look at closely in a physical store. For a watch, it’s the intricate dial and the texture of the band. For a sweater, it’s the knit pattern and the seams.
You can achieve this in your editing software by using a layer mask to "paint" sharpness only onto these key areas. This technique keeps the softer, out-of-focus parts of the image, like the background, smooth. The result is a beautiful contrast that adds a professional sense of depth to your photo. This focused approach is a signature of high-end product photography editing. To learn more about getting your images just right, you can explore the professional techniques covered on our product photo retouching services page.
Making Textures and Text Pop
For products with complex textures or important text, clarity is essential. Think about a product label that needs to be perfectly readable or showing off the rich grain of a wooden bowl. A more advanced but incredibly powerful technique for this is frequency separation. This method splits your image into two distinct layers: one for color and tone, and another for texture and fine details.
This gives you an amazing level of control. For example, you can:
- Fix blemishes without blurring textures: Smooth out a discolored spot on the color layer while keeping the fabric weave on the detail layer perfectly crisp.
- Boost texture without messing up colors: Sharpen the fine details of a material on the texture layer without making the colors look harsh.
- Clarify text: It's the perfect tool for making text on labels and logos sharp and easy to read, correcting any blurriness that happened during the photoshoot.
This level of precision ensures your edits are effective but invisible to the untrained eye. When you master these detail enhancements, you’re not just cleaning up a picture; you’re building a stronger connection with your customer. You’re showing them every single reason why your product is worth their money, right down to the smallest detail.
Streamlining Your Workflow for Maximum Efficiency
When you're staring down a folder with dozens, or even hundreds, of product photos, your editing process needs to be a well-oiled machine. Tackling each image one by one isn't just slow; it’s a recipe for burnout and inconsistent results. The real key to scaling your product photography editing is building a repeatable system that handles the repetitive tasks while letting you focus on quality. This is exactly how professional studios manage huge volumes of images without sacrificing their signature look.
A fantastic place to start is with custom presets and actions. Think of a preset as a saved "recipe" for your edits. Once you've nailed the color correction, exposure, and contrast for one photo in a batch, you can save those settings. In a program like Adobe Lightroom, you can then apply that preset to every other photo taken under the same lighting. This single trick can easily cut your editing time by more than half.
From Presets to Automated Actions
Actions take this idea even further. An action is essentially a recorded macro—a series of steps you can play back on any image with a single click. For example, in Adobe Photoshop, you could record an action that automatically does the following:
- Applies a specific curve for color correction.
- Adds a subtle sharpening filter.
- Creates a new layer for you to paint in a contact shadow.
- Resizes the image to the exact dimensions your e-commerce platform requires.
By running this action, you’re performing four or five manual steps in an instant. This level of automation is a game-changer for any serious e-commerce seller. When you pair presets for the initial raw adjustments with actions for the finishing touches, you’ve built a powerful assembly line for your photos.
Organization and Quality Control
An efficient workflow isn't just about the editing software; it’s also about how you organize your files and review your work. A messy folder structure is a surefire path to chaos. I always use a clear, scalable naming system. Something as simple as ClientName_Project_Date_ImageNumber.RAW makes finding any specific file quick and painless.
Just as crucial are your quality control (QC) checkpoints. It’s incredibly easy to get "pixel blindness" after looking at the same images for hours. I make it a habit to build short breaks into my workflow and do a final review with fresh eyes, usually the next morning before exporting. That's when you’ll spot a background that's not quite pure white or an edge that’s a bit too sharp. These small habits prevent big mistakes and keep your quality high across the board.
For anyone managing a large number of images or working with a team, a style guide is essential. This document should detail everything from preferred lighting styles and shadow density to the exact hex codes for brand-specific colors. It ensures that whether it's you, a team member, or a freelancer doing the product photography editing, the final images are always consistent and on-brand. If your workload gets overwhelming, looking into professional photo editing services for e-commerce can be a smart move to maintain quality as you grow. A well-designed workflow is all about creating smart systems that save time, minimize errors, and let you focus on what really matters—growing your business.
Export Settings That Maximize Your Image Impact
All the hard work you've poured into editing your product photos—nailing the background removal, correcting the colors, and perfecting the lighting—can fall apart at the very last step. The wrong export settings can turn your sharp images into a pixelated mess or create a file so bulky it makes your website grind to a halt. Getting your export settings right is the final, crucial handoff that ensures your photos look incredible everywhere. It’s all about striking that perfect balance between image quality and file size.
File Format: When to Use JPEG, PNG, or WebP
The file format you select dramatically affects your final image. There’s no single "best" choice; it all comes down to what’s in the photo and where you plan to use it.
- JPEG (Joint Photographic Experts Group): This is the go-to format for most of your product photos, especially those on a solid background. JPEGs are fantastic at compressing images with lots of colors, which helps keep file sizes small. The trick is the quality slider—for web use, exporting at 80-90% quality usually hits the sweet spot, keeping plenty of detail without creating a huge file.
- PNG (Portable Network Graphics): Reach for PNG when you need a transparent background. If you’ve carefully cut out your product to make it float on your e-commerce page, PNG is the only common format that will preserve that transparency. Just be aware that PNG files are typically larger than their JPEG counterparts.
- WebP: This newer format, created by Google, is a game-changer. It supports both solid and transparent backgrounds and provides much better compression, resulting in smaller file sizes than both JPEG and PNG at a similar quality. Platforms like Shopify have embraced it, making it a top choice for speeding up your site.
Color Space, Resolution, and Naming Conventions
Beyond the file type, a few other technical details are essential. For any image destined for the web, always export using the sRGB color space. This is the web standard, and it ensures that the colors you so carefully adjusted will look the same on your customer's screen as they do on yours.
When it comes to resolution, a good rule of thumb is to make your images about 1.5 times the size of the space they will fill on your website. For instance, if the product image container on your site is 800 pixels wide, exporting the image at 1200 pixels wide will keep it looking crisp on high-resolution "Retina" displays. Lastly, give your files descriptive names for a little SEO boost. Instead of IMG_8452.jpg, go with something like blue-suede-sneakers-side-view.jpg. This gives search engines context about your image, which can help people find your products.
Tired of juggling all these technical details? ProdShot removes the guesswork. Just upload your photo, and our AI handles the complete product photography editing workflow—from background removal to smart resizing and optimization. We deliver perfectly polished, platform-ready images every time. Give ProdShot a try for free and discover how easy it is to get professional results in seconds.
Subscribe to my newsletter
Read articles from ProdShot Creator directly inside your inbox. Subscribe to the newsletter, and don't miss out.
Written by