Step-by-Step Guide – Using XL-Connector for Salesforce Sandbox Refresh
 Harshit Sharma
Introduction
Ever refreshed a Salesforce Sandbox and then realised everything you were working on just disappeared?
Refreshing a sandbox is a common and crucial process in any Salesforce org. It’s how you create a fresh copy of your environment, pulled directly from production. The idea is to get an updated setup with the latest metadata, configurations, and data so that developers and admins can safely test new features, flows, or integrations without touching live data.
But here’s the thing. As helpful as a sandbox refresh is, it comes with its fair share of challenges. Once the refresh is complete, your current sandbox setup gets completely overwritten. That means all your custom configurations, test records, and ongoing development work can vanish unless you’ve backed them up.
In this blog, I’ll walk you through how XL-Connector can be used to take backups before the sandbox refresh and restore Salesforce data and metadata as a part of the post-sandbox refresh activity.
Step 1: Back Up Key Data Before Refresh
When you refresh a sandbox, all the metadata gets automatically synced with what’s in your Salesforce production org. That means if you’ve created any test records, custom configurations, or test cases that aren’t in production, they’ll be permanently wiped out.
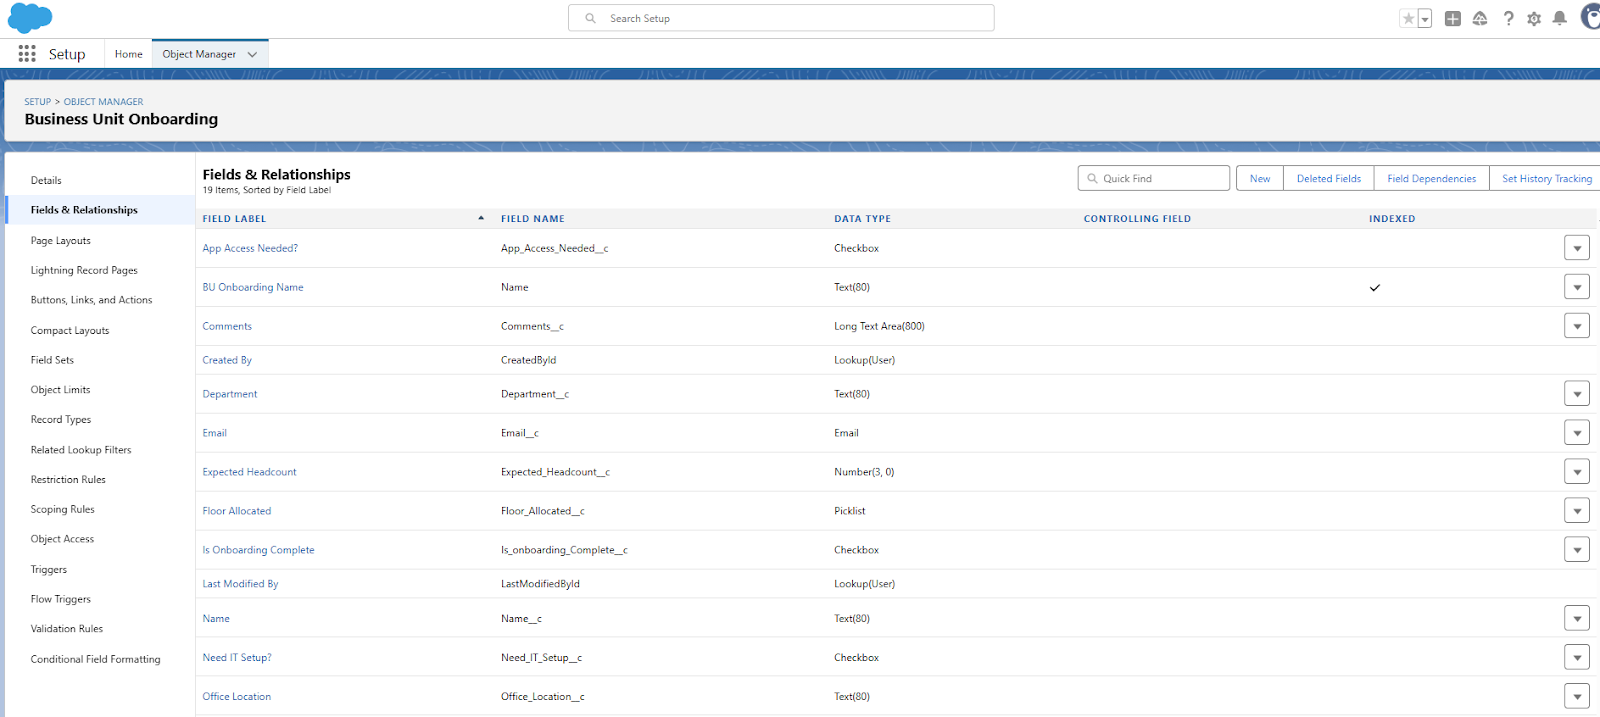
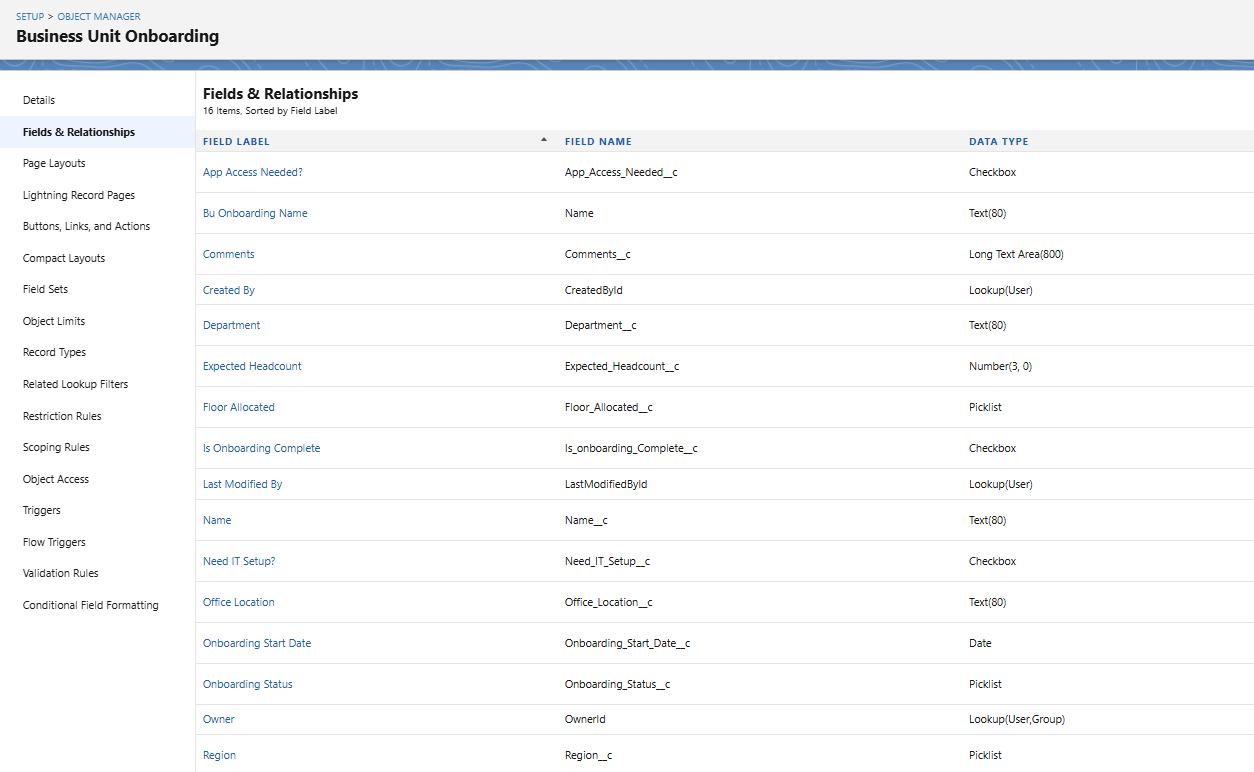
To prevent losing that work, you can use XL-Connector to back up those test records and configurations in the Excel sheet before the refresh. In this example, we’ll walk through how to back up custom fields, validation rules and test records created for the ‘Business Unit Onboarding’ custom object that exists only in the sandbox and not in production.
Open Excel, under the XL-Connector tab, head to the top-left corner and click the Login button to connect XL Connector with your sandbox org.

After connecting your sandbox org in Excel, click on ‘Other Tools’. From the pop-up that appears, choose ‘Manage Fields’, then click ‘Download Fields’ and select the API name of the Business Unit Onboarding object from the list.
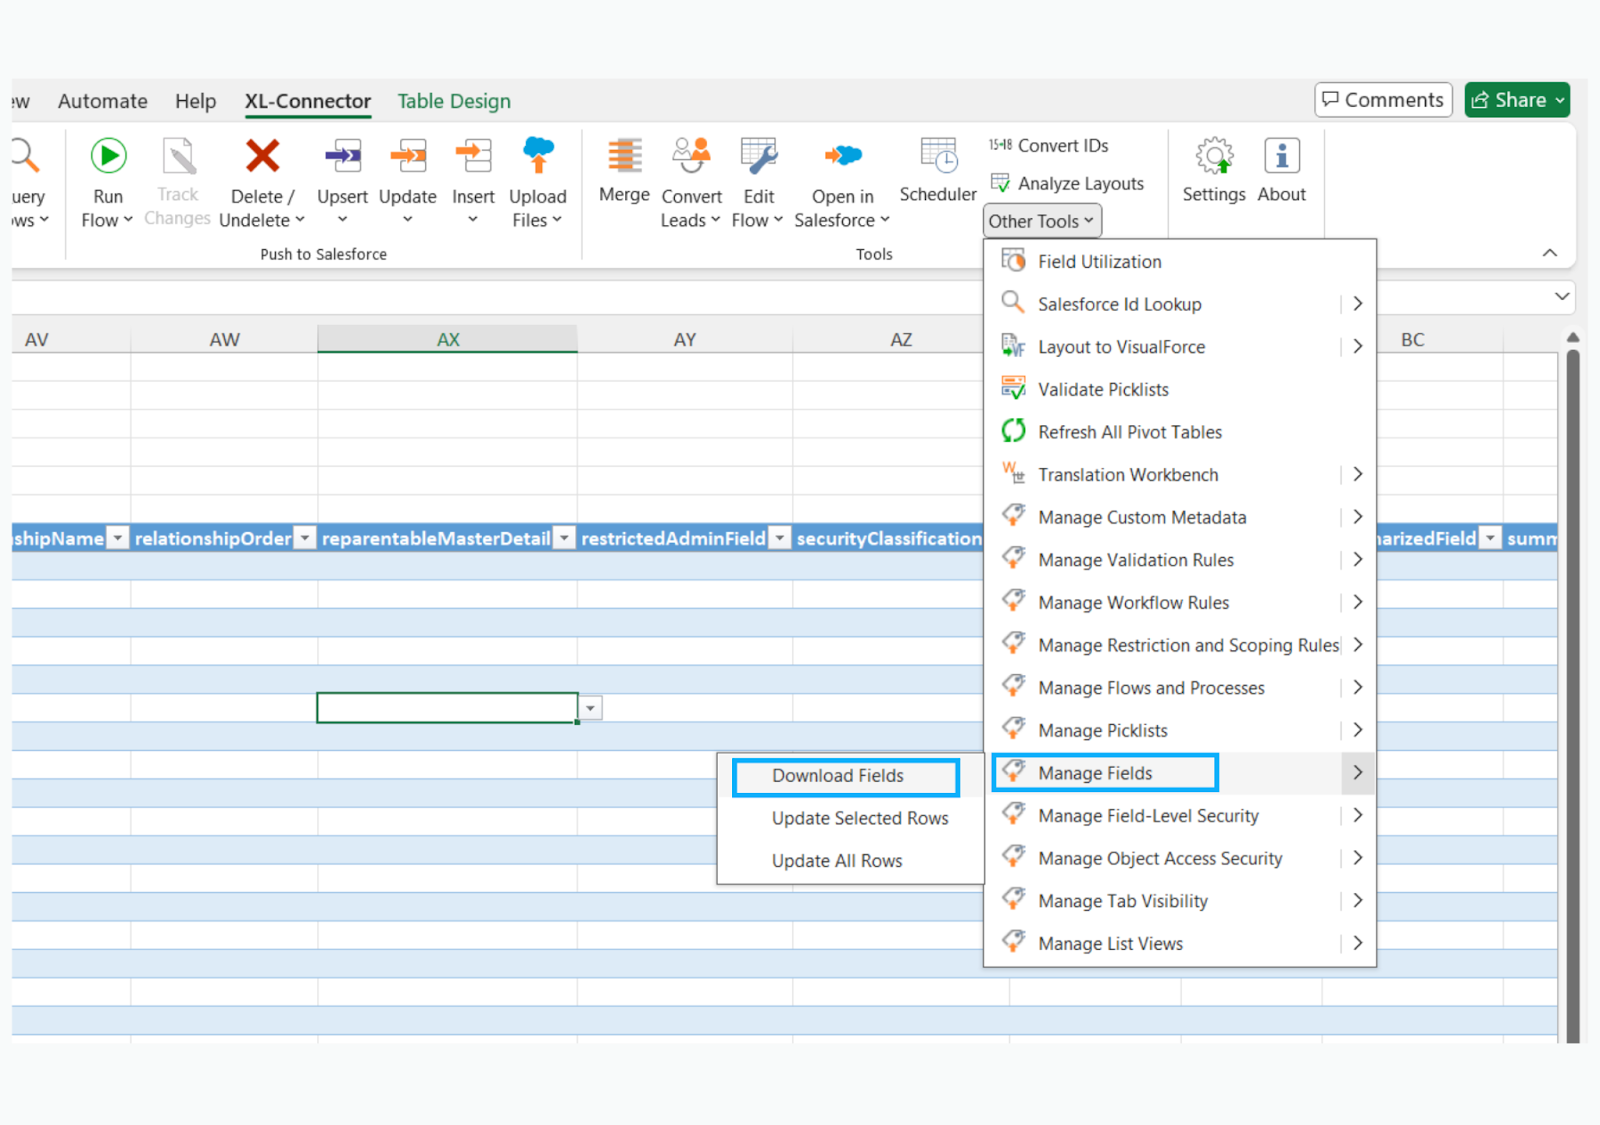
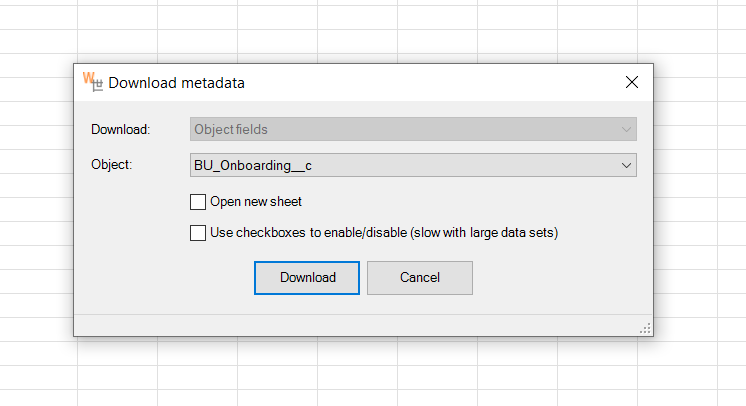
Click on the ‘Download’ button.
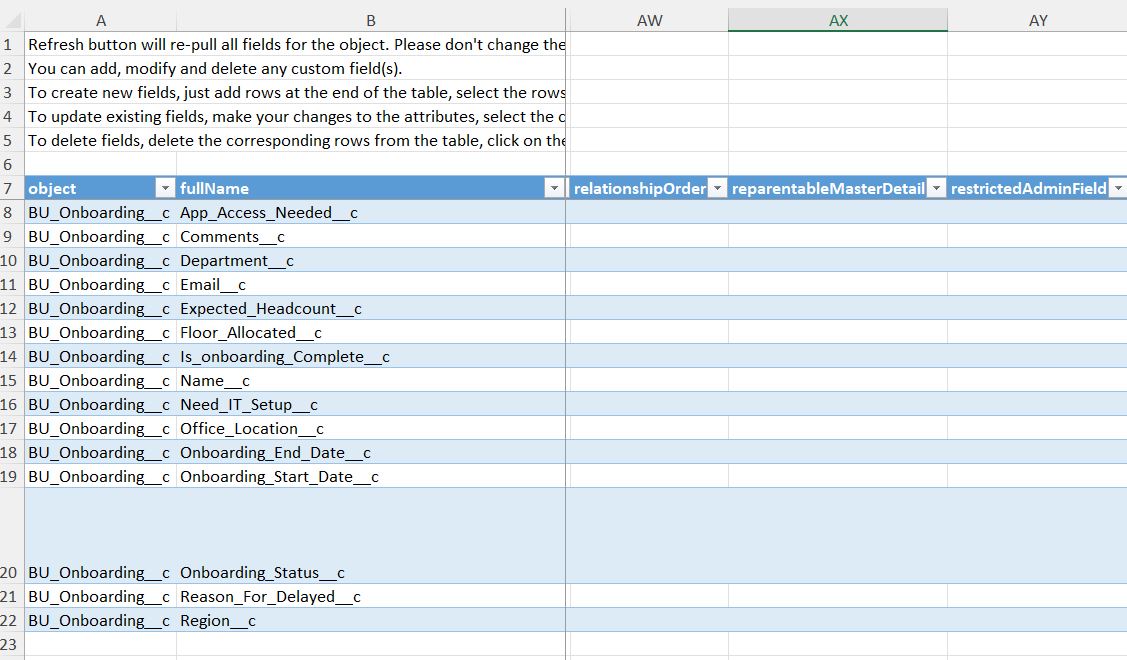
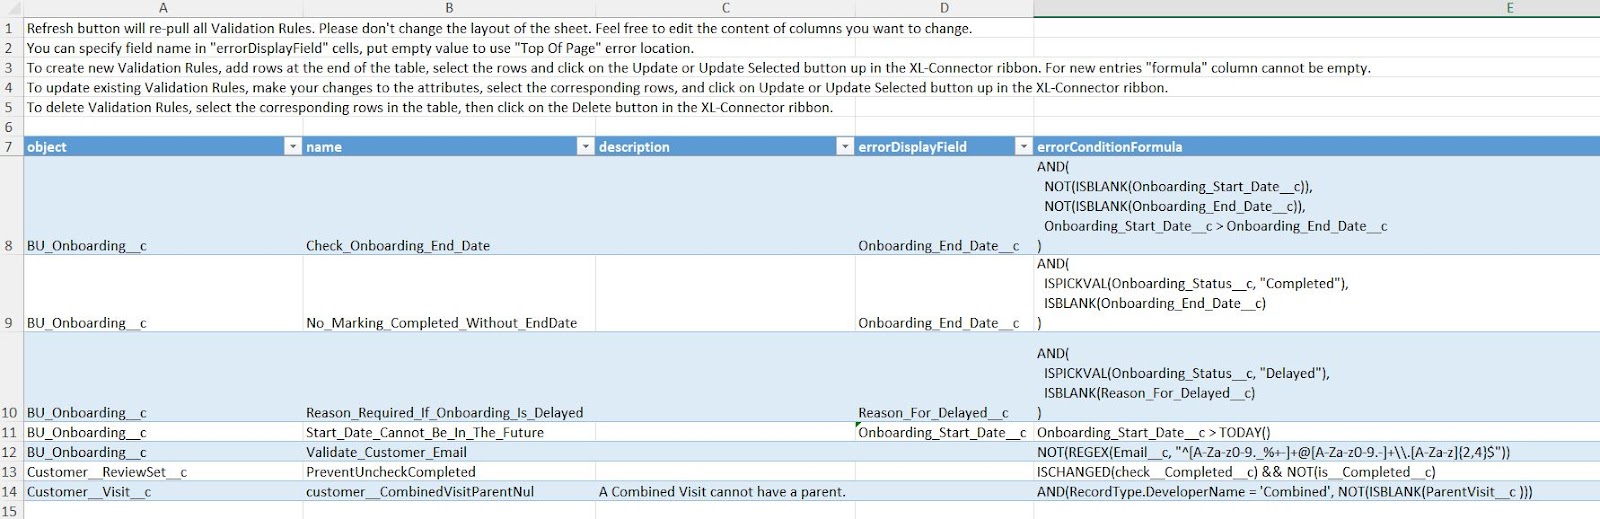
Rows 1 to 5 in the Excel sheet contain helpful instructions to guide you on how to use XL Connector effectively.
In the same way, to back up the validation rules for the ‘Business Unit Onboarding’ object, as a part of our pre-sandbox refresh process, go to the XL-Connector tab, click on ‘Other Tools’, and then select ‘Manage Validation Rules’.
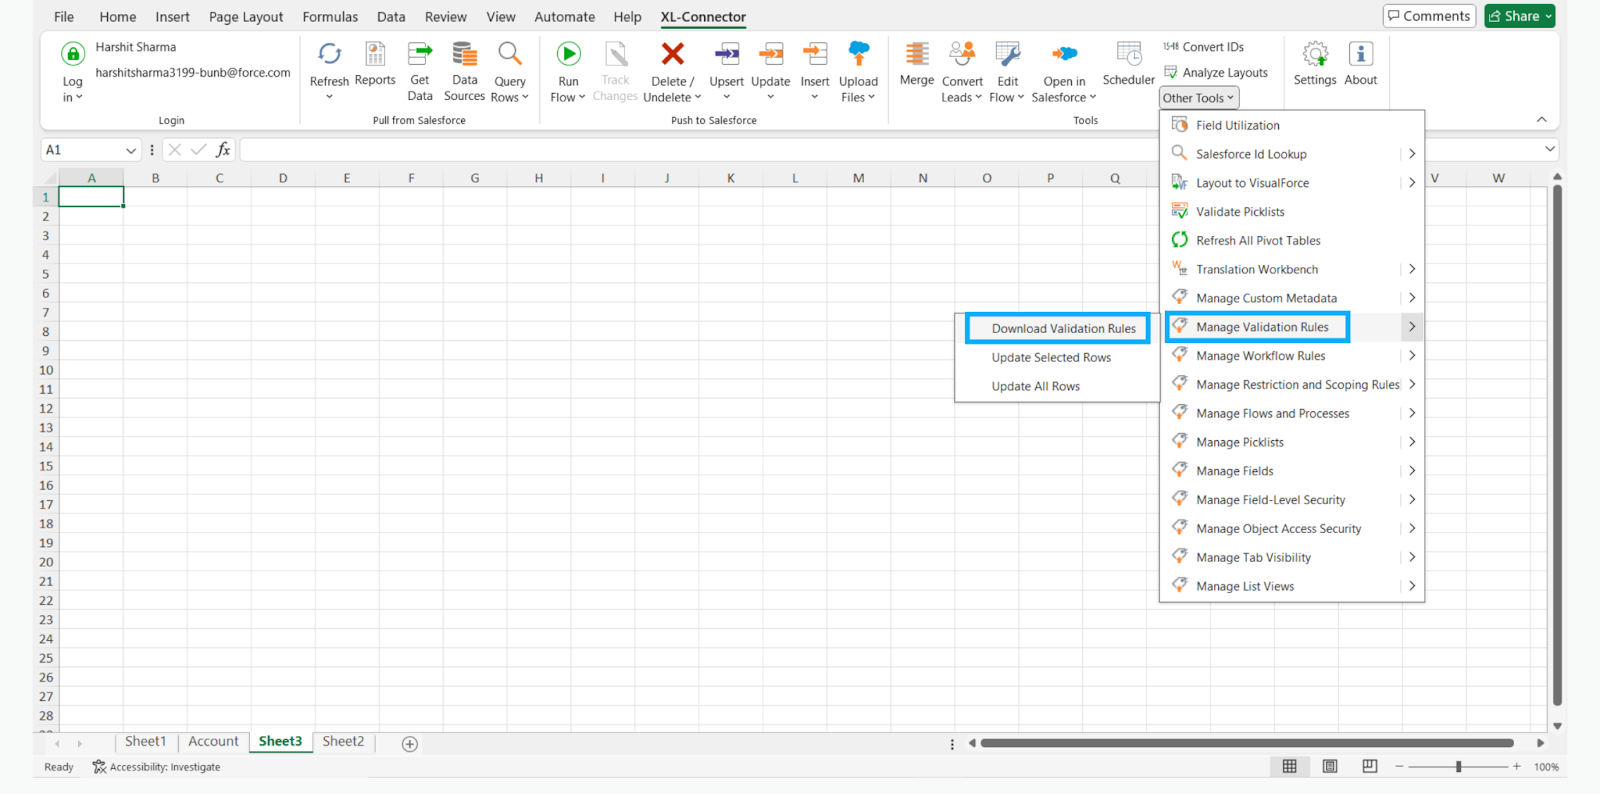
Click on the ‘Download’ button, and all the validation rules present in the sandbox will be downloaded in the Excel sheet.
Any test records you've created in the sandbox, for testing the bulkification of triggers or testing other Salesforce automations, will be deleted during the sandbox refresh if they don’t exist in the production org.
That’s why it is a good idea to back up these records beforehand. Once the refresh is complete, you can easily restore them to your sandbox and continue testing without losing your work.
Here, we'll walk through how to back up all the records from the Business Unit Onboarding object.
In your Excel sheet, go to the XL-Connector tab and click on the ‘Get Data’ button. When the pop-up appears, choose the object and the specific fields you want to pull. XL-Connector will then fetch those records and store them in your Excel sheet as a backup.
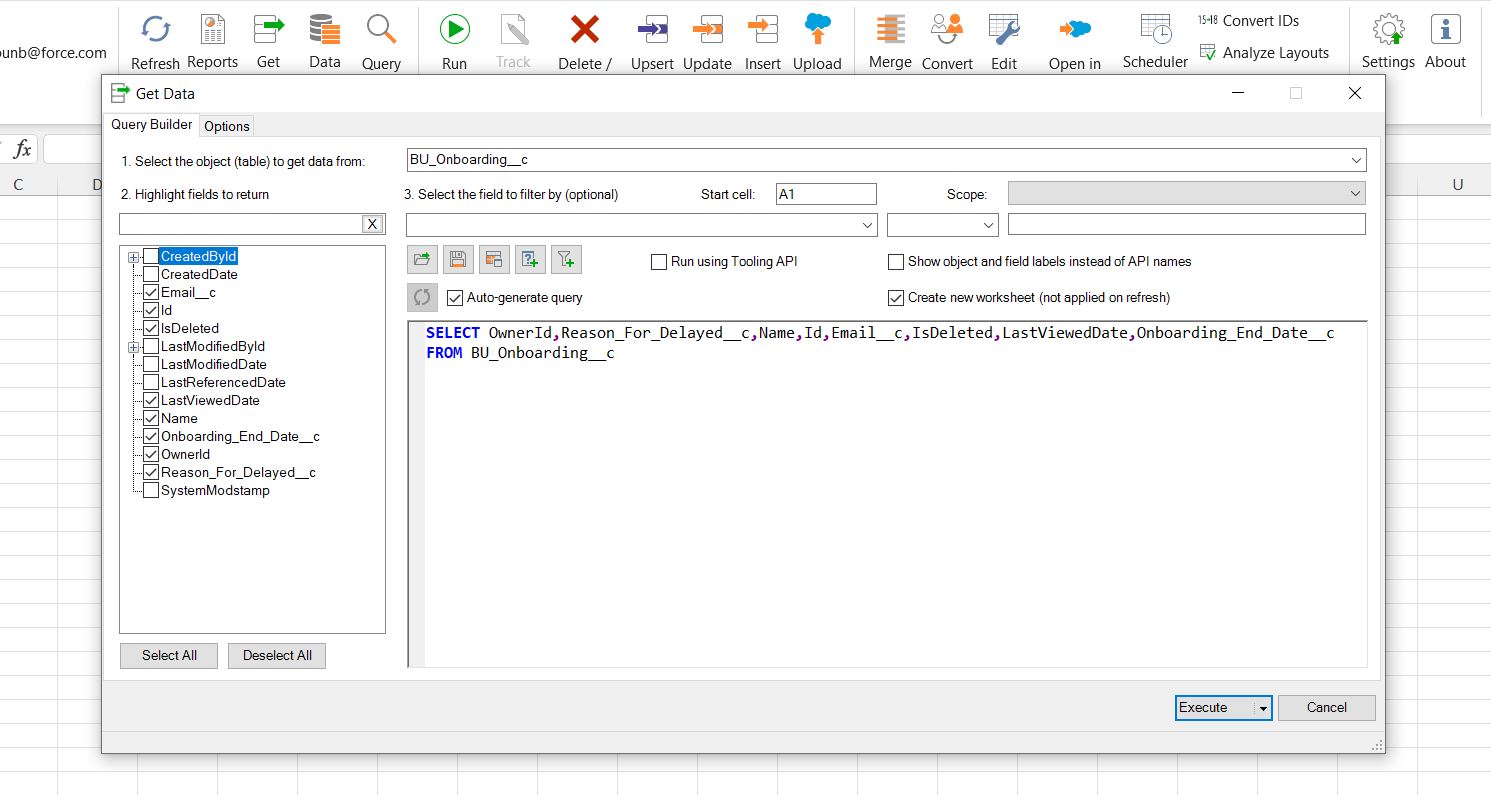
Click on the ‘Execute’ button, and you can see all the records are pulled into the Excel sheet.
Step 2: Refresh your Sandbox org
To start a sandbox refresh, log in to your Salesforce production org.
Click the gear icon and go to Setup, then look for the 'Sandboxes’ section.
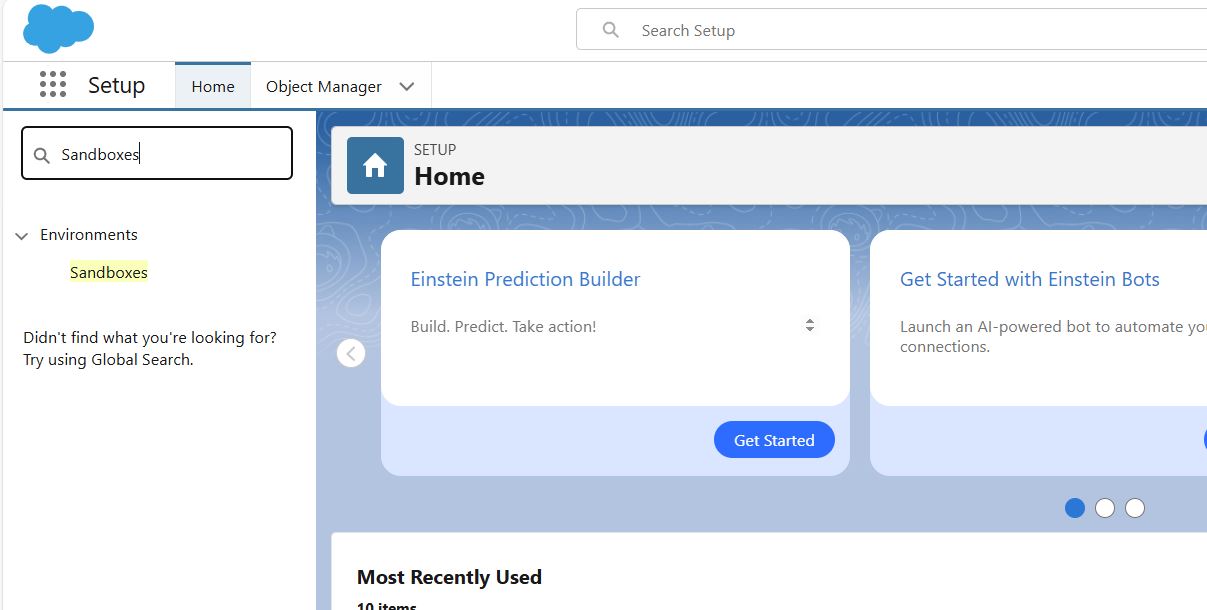
- Here, you can view all sandboxes linked to the production instance.
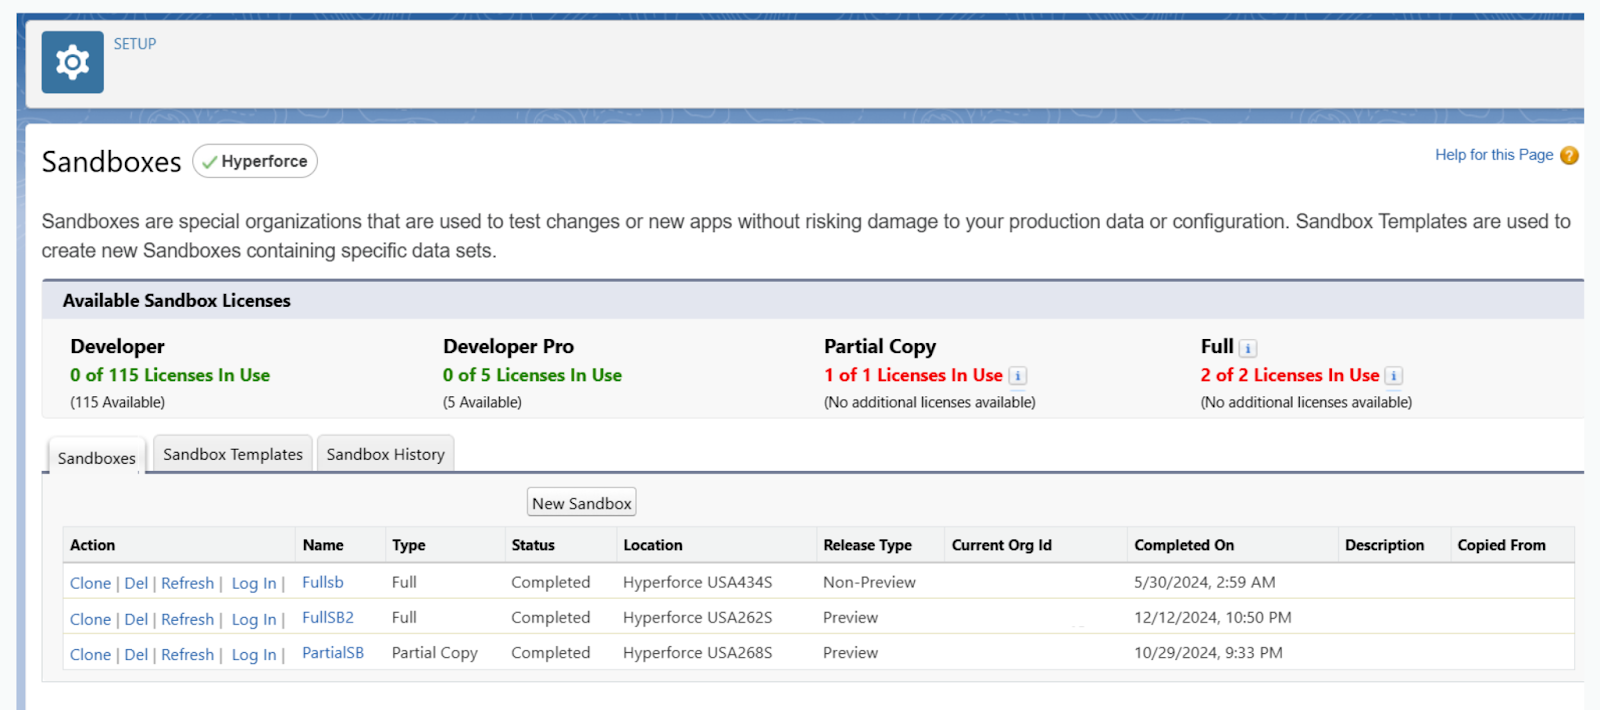
Pick the one you want to refresh and hit the ‘Refresh’ button. You’ll then be asked to choose the type of refresh you want, whether it’s a clone, a copy, or one based on a template.
Select the source from which you want to pull the data, either your production org or another sandbox.
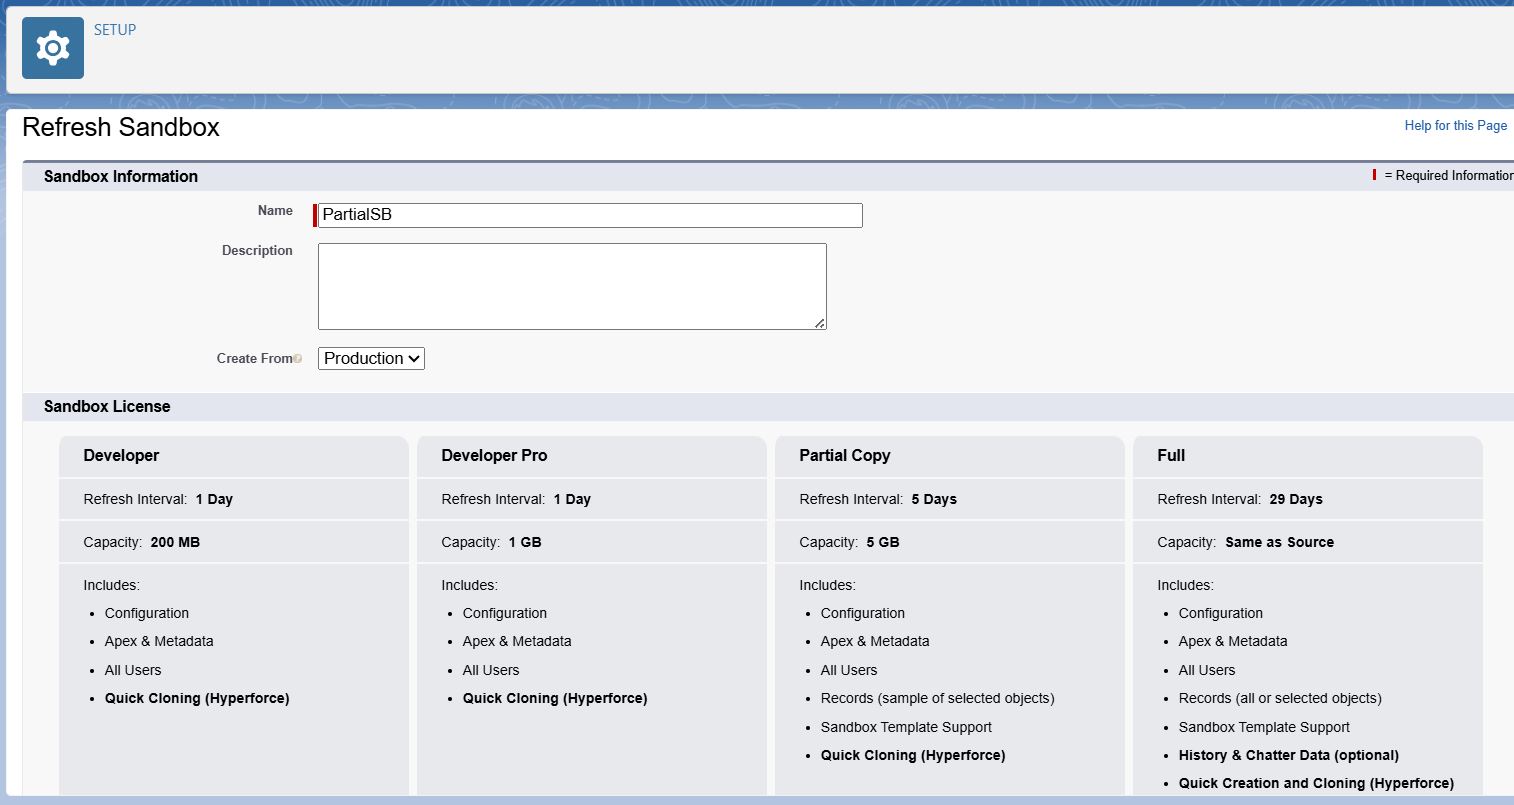
You’ll also get the option to decide which data and metadata to include in the refresh. Once everything looks good, review the summary and confirm the refresh. It is important to note that you need to be logged into the production environment as a Salesforce admin to do this.
Step 3: Restore Data to Refreshed Sandbox
After the sandbox is refreshed, we can restore all the custom fields, validation rules, and records related to the ‘Business Unit Onboarding’ object that we backed up earlier. Since this data will no longer be present in the sandbox, restoring it ensures we can continue our work without having to start from scratch.
Let’s begin by recreating the custom fields for the ‘Business Unit Onboarding’ object in the sandbox org. Open the Excel sheet where you saved the backup of these fields, select the fields you want to restore, then go to the XL-Connector tab and click on ‘Update’, followed by ‘Update Selected’.
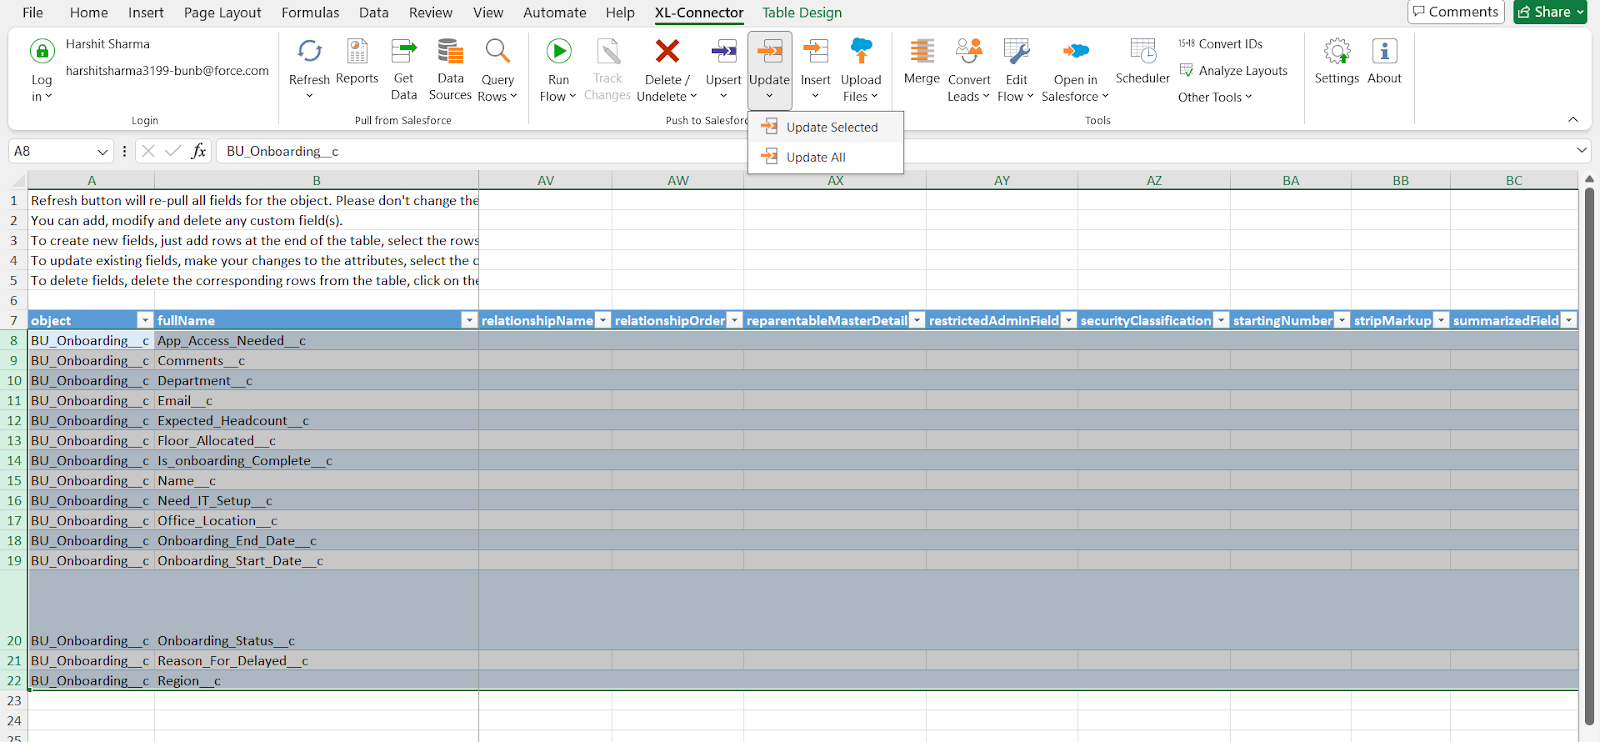
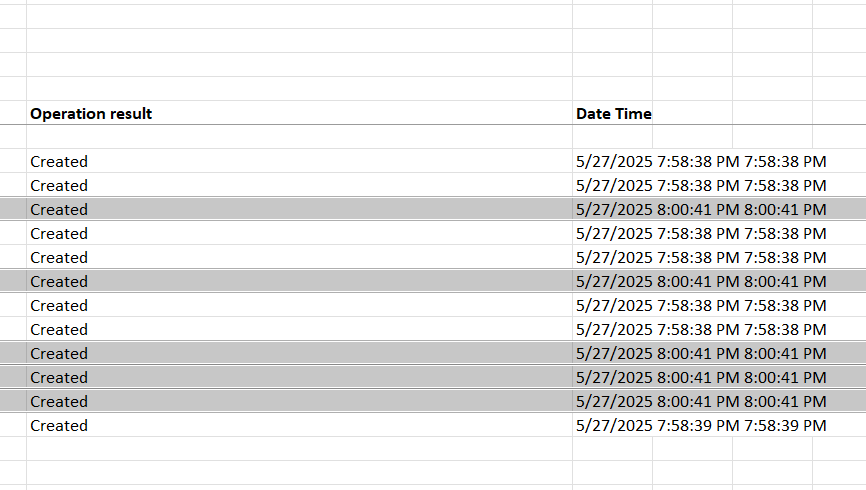
Once the update starts, scroll to the right side of your Excel sheet to check the status column. It will show you whether each update was successful.
After that, log in to your sandbox and navigate to the BU Onboarding object. You should see that all the custom fields have been created successfully.
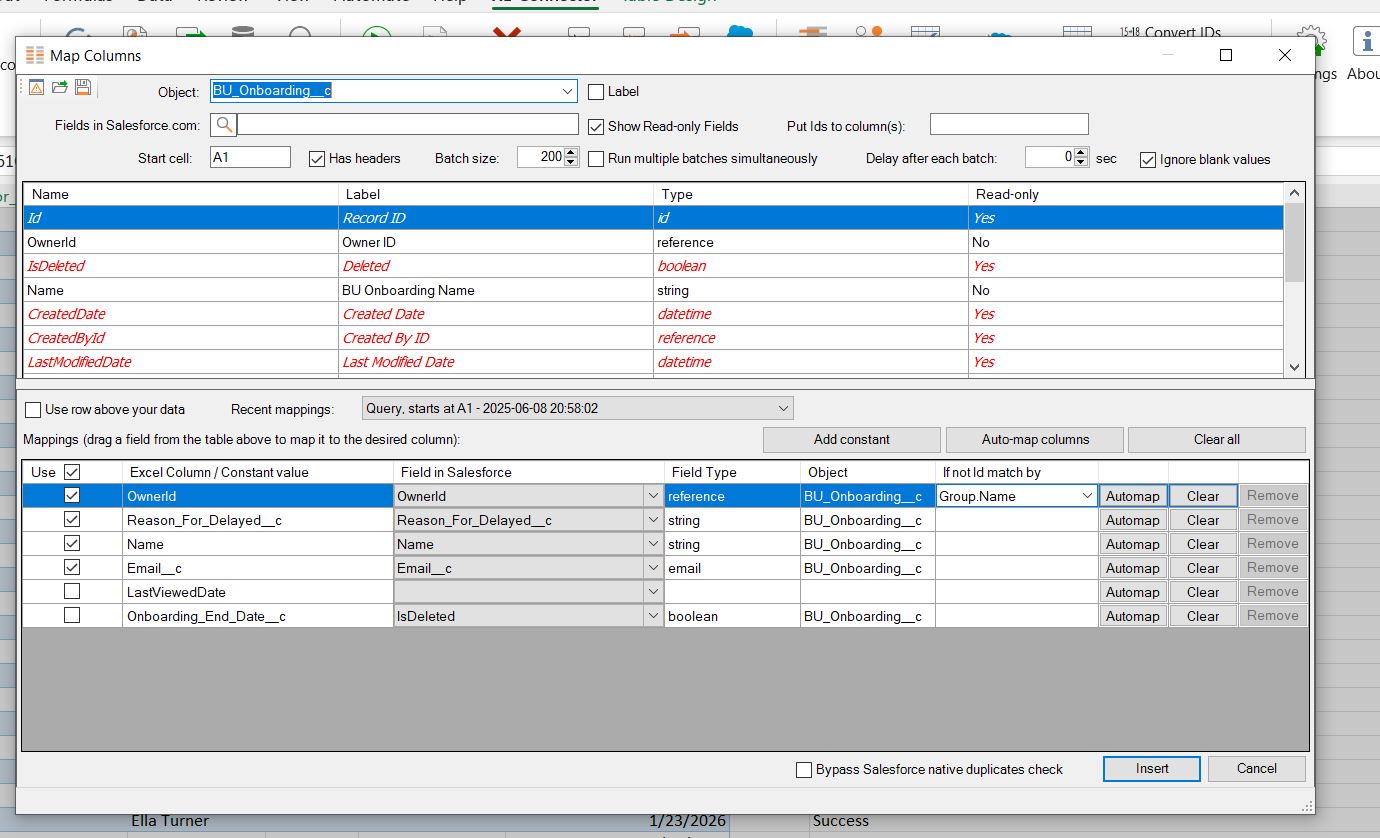
Now it's time to restore the ‘Business Unit Onboarding’ test records that we backed up in the Excel sheet before the sandbox refresh. These records are useful for validating trigger behaviour and testing bulkification logic in the refreshed sandbox environment.
Select all the Excel rows and click on ‘Insert’ and then ‘Insert selected’. A pop-up will be launched to confirm the mapping of the fields for record creation. Once you click ‘Insert, all the records will be created in the Salesforce org.
Tips for Sandbox Refresh
1. Before refreshing the sandbox, please ensure that you back up any custom metadata and test records not included in the production org. This way, once the refresh is complete, you can easily restore them without having to recreate everything manually.
2. After the sandbox is refreshed, you might notice that the email addresses of the users have ".invalid" added at the end. Make sure to remove this so users can log in and access the sandbox again.
3. Keep an eye on the refresh process and watch out for any errors or unexpected issues. Monitoring closely helps you catch and fix problems early, ensuring everything goes smoothly.
4. If the sandbox refresh might impact other users or teams, make sure to communicate the changes ahead of time.
Conclusion
Refreshing a Salesforce sandbox is essential to maintain alignment with your production environment. Yet, this process often results in the loss of critical test data and custom configurations. XL-Connector offers a practical solution, enabling users to efficiently export key metadata and records before a refresh and seamlessly restore them afterwards. Its ease of use and speed make it a valuable tool for any admin or developer looking to streamline their sandbox maintenance process.
Try out XL-Connector by Xappex for Salesforce today and let us know how you feel about it. Plus, feel free to drop a review in the Salesforce AppExchange.
Subscribe to my newsletter
Read articles from Harshit Sharma directly inside your inbox. Subscribe to the newsletter, and don't miss out.
Written by
Harshit Sharma
Harshit Sharma
Hello 👋, I'm Harshit Sharma I am a Salesforce developer by profession. I love to talk about tech and career growth