Serverless email/SMS application
 Mohammad Kasim
Table of contents
- Cloud tools used
- Conditions of the Free Tier
- What the project is about
- How Lambda works
- Create a Lambda Role
- Send Email using SES and Lambda
- Send SMS using SNS and Lambda
- Manage how to send using Step Functions
- Create the REST API Handler using Lambda
- Create and configure the API Gateway
- Code a website and upload it to S3
- Homepage

Cloud tools used
AWS
S3
API Gateway
Lambda
Step Functions
SNS
SES
Programming
python
js & json
html
Conditions of the Free Tier
S3:
5 GB of free storage
20,000 free GET requests & 2,000 free PUT requests
API Gateway:
- 1 Million API Calls Received
Lambda:
1,000,000 free requests per month
Up to 3.2 million seconds of compute time
Step Functions:
- 4,000 state transitions
SNS:
1,000,000 Publishes
100,000 HTTP/S Deliveries
1,000 Email Deliveries
SES:
62,000 Outbound Messages
1,000 Inbound Messages
What the project is about
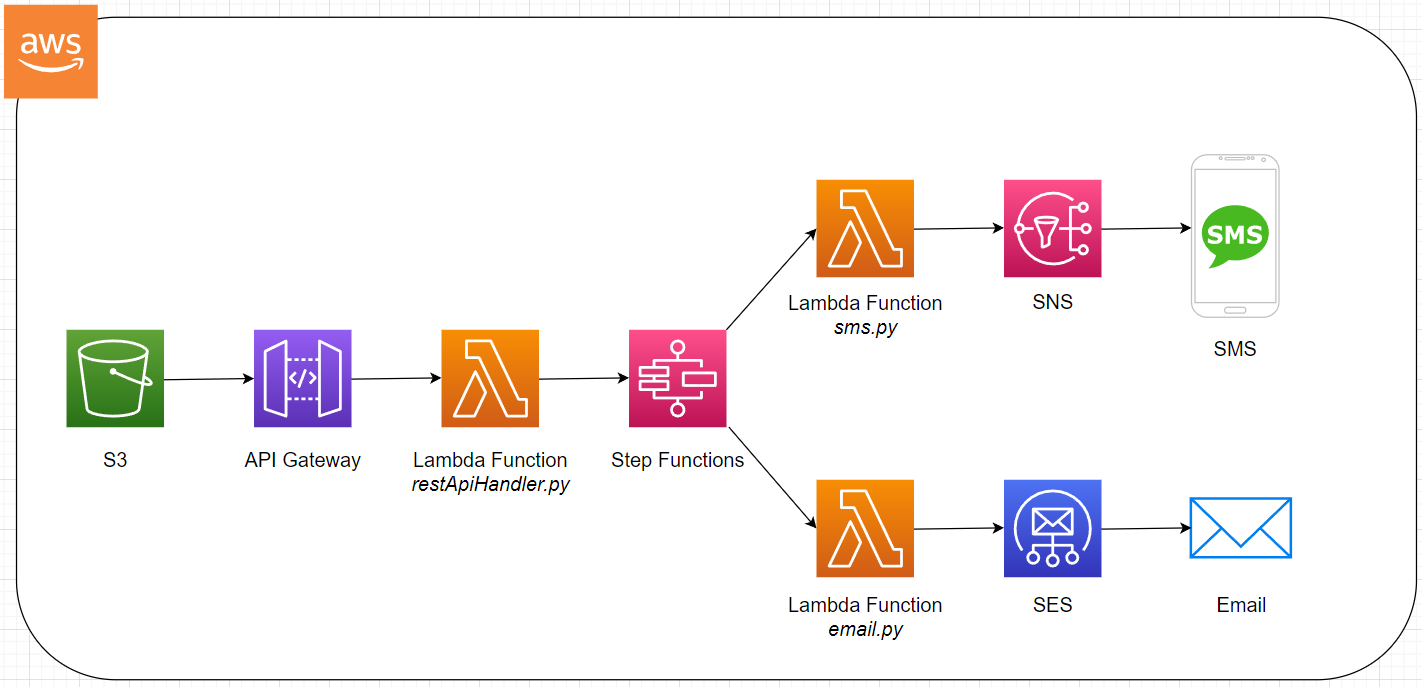
Through this project, you will be able to send an email or a SMS from a website using AWS services. Along the way, you will learn how to:
Execute email and SMS sendings from a website using S3, API Gateway and Lambda;
Manage email and SMS sendings using Step Functions;
Create and send an email with AWS using SES and Lambda;
Create and send a SMS with AWS using SNS and Lambda;
Take a closer look at the infrastructure deployed with this project :
Time to start the project, but before that, the best is to first learn how Lambda works.
How Lambda works
Before starting, it is worth recalling what Lambda is.
See how AWS defines it:
AWS Lambda is a serverless, event-driven compute service that lets you run code for virtually any type of application or backend service without provisioning or managing servers. You can trigger Lambda from over 200 AWS services and software as a service (SaaS) applications, and only pay for what you use.
This definition says enough about how Lambda works, but let's look at it in more detail.
Lambda Event and Response
To work with Lambda, it is essential to know what an event and a response represent.
Events are actions or occurrences that take place in a system. For example, when a user clicks a button on a site, it generates an event containing the information that "a user has clicked a button". An event represents the Input of Lambda.
A response is the result of information processed by a program. For example, when a user asks a program how much is 2+2, the program processes the information "2+2" and returns the result "4" as a response. A response represents the Output of Lambda.
In a traditional scheme, this is referred to as the "Input-Process-Output" (IPO) model:
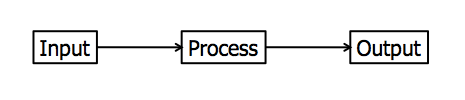
Link: https://en.wikipedia.org/wiki/IPO_model
For Lambda, the IPO model translates in this way:

The purpose of Lambda is therefore to use it to process the event received, and then to send the desired response after processing.
Link with other services
Lambda's strength lies in its ability to interact with other AWS services. It is possible to make instructions such as "send the received data to SQS" or "change the format of an image uploaded to S3" using Lambda.
For this project, Lambda interacts with:
SNS for sending SMS;
SES for sending email;
Step Functions to send data received from an API.
But in order to interact with other services, you need to have permissions to use them.
Permissions
In order for a Lambda function to interact with a service, the function must have what is called a Lambda Role. The Lambda Role contains the permissions of our Lambda function, such as the permission to use all actions of the SNS service for example.
So let's start the practice by creating a Lambda Role that will be used by our Lambda functions.
Create a Lambda Role
Lambda interacts with SES, SNS and Step Functions, so a Lambda Role must be created with execution rights for these three services.
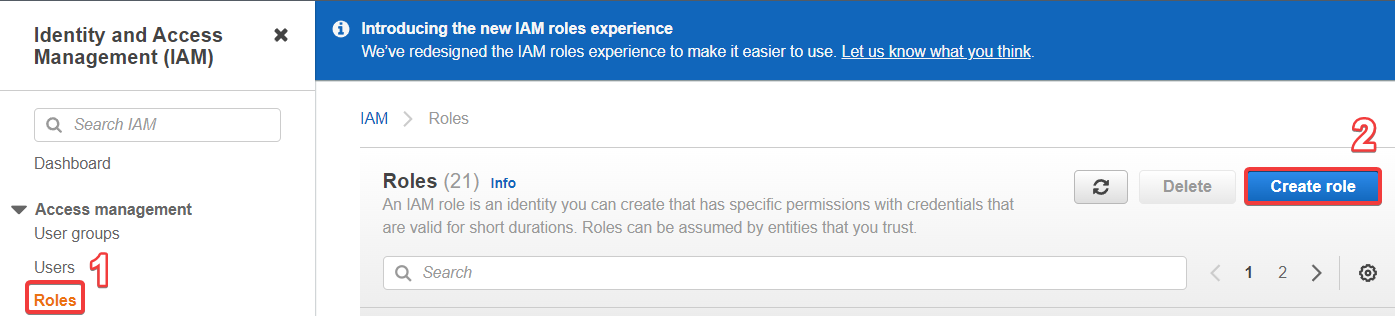
First, go to IAM, and select Roles on the left, then Create Role:
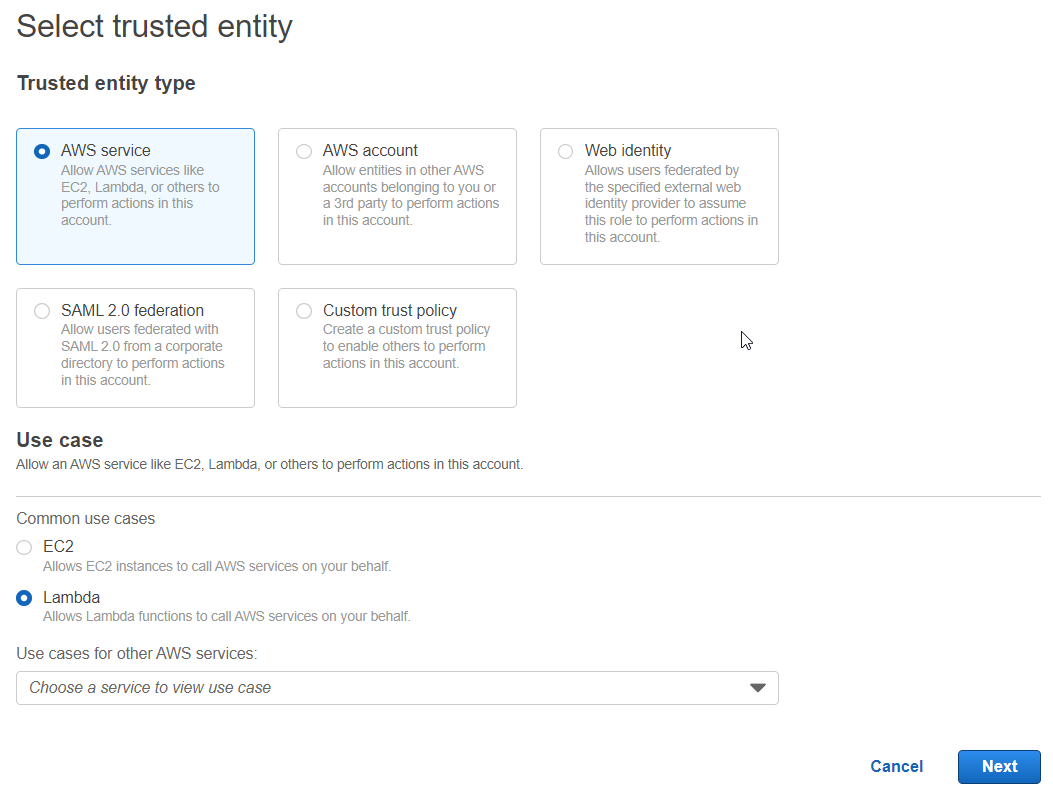
Next, select AWS Service as the Trusted entity type, and for the Use case select Lambda to perform a Lambda Role:
A menu for adding permissions appears:

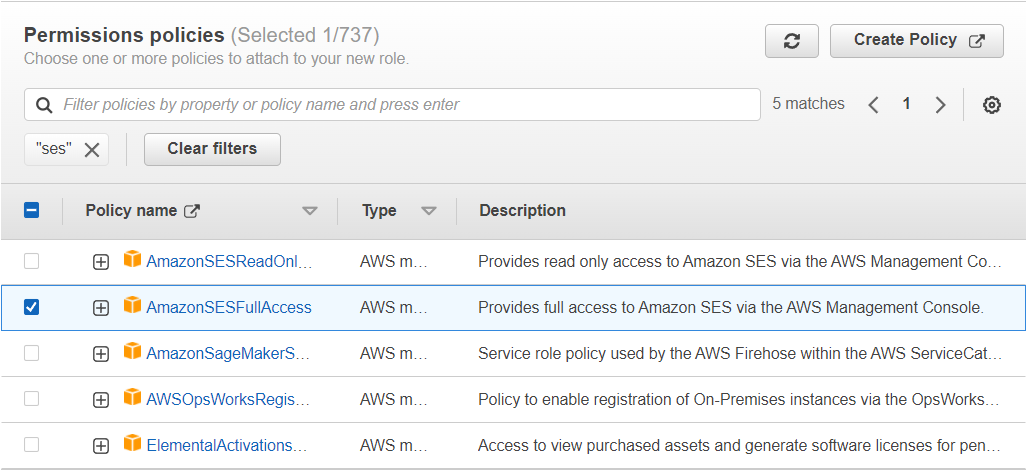
From now on, search for the name of each service, and select Full Access rights in order to send instructions and information to the services.
It is best practice to refine the permissions by using only the rights necessary for the actions you want to do with the services, and to do this you must create our own permissions. Here, to facilitate the execution of the project, the Full Access permissions created by default by AWS are used.
Add the Full Access permissions of SES:
Same for SNS:
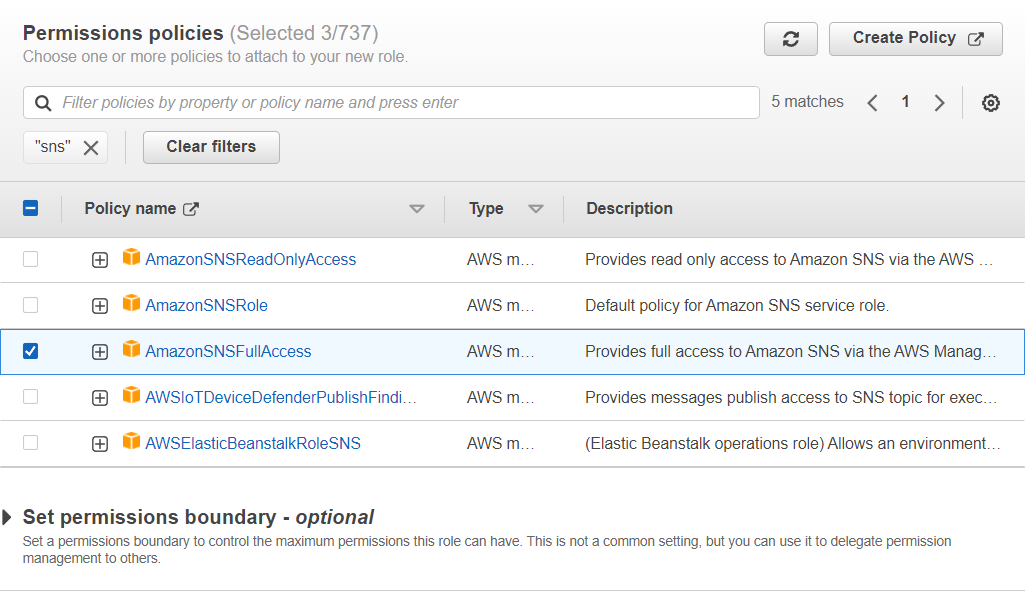
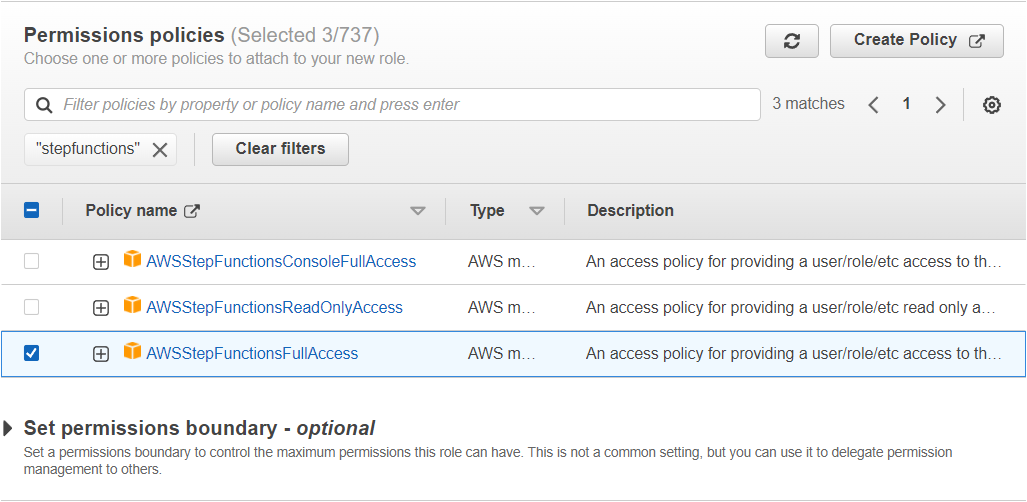
Now all that remains to be done is to validate and create the Lambda Role with the desired name.
Once the Lambda Role has been created, it is time to create the first Lambda function: email.py.
Send Email using SES and Lambda
The first step is to create a Lambda function capable of sending to SES the instruction to send an email.
When writing an email, there are three fields that must be filled in:
the sender's email address
The content of the message
the recipient's email address
The sender's email address is automaticly filled in, and the two other fields will be filled in from the website hosted on S3.
It is therefore necessary to create a Lambda function capable of retrieving the content of the message and the address of the recipient as an event, and to add them to the instruction sent to SES.
Prerequisites before starting
What you should know before using SES is that the service can send emails only from verified email adresses and to verified email addresses. For this project, two addresses will be verified: a source email address and a destination email address.
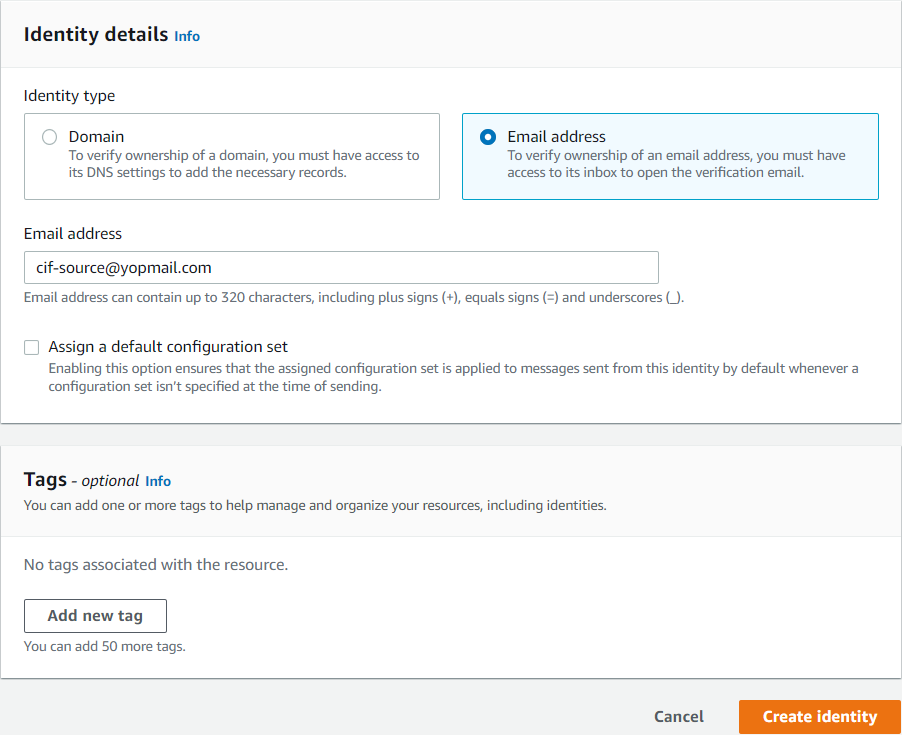
To do this, go to SES, and select Create Identity:
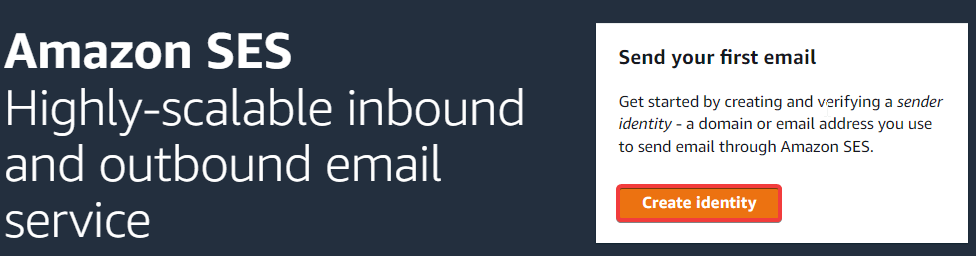
Select Email address as Identity type and fill in the "email address" field with the address that will serve as the source email address. For this example, the source email address is cif-source@yopmail.com:
Check the mailbox and verify the mail address by clicking the link inside the email you just received from AWS. Once validated, this is what should appear in the AWS console:

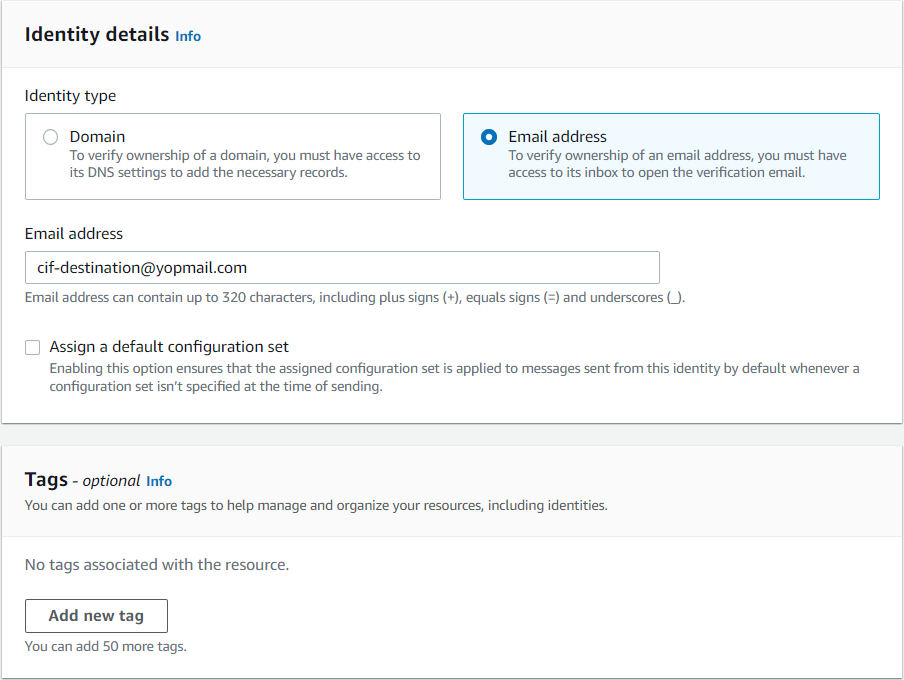
Do the same for the destination email address:
And verify it as well:

Everything is ready. Now time to create the Lambda function email.py.
Create Lambda function email.py
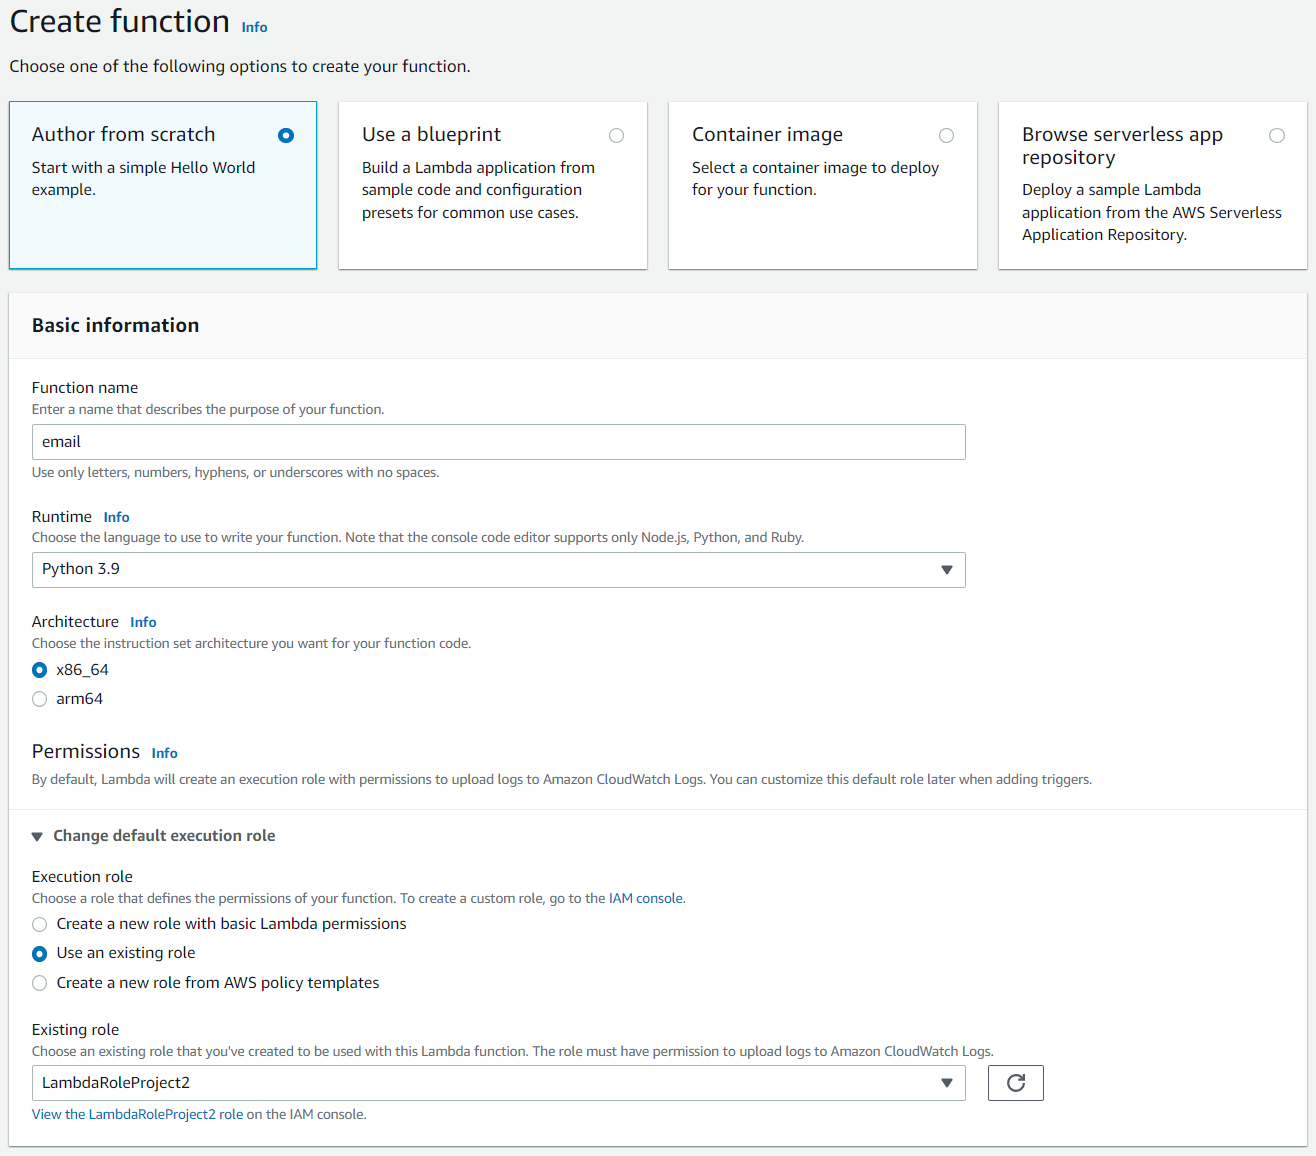
Go to Lambda to create the first function.
The function is called email and uses the Python 3.9 language. In the Permissions tab, choose the newly created Lambda role. You can then create the function:
Once the function is created, go to the Code source menu. This can be seen:

Delete the code contained in lambda_function. Everything is ready, it's time to code.
In order to interact with AWS services in Python, you need to know the Software Development Kit (SDK) used by AWS. An SDK is a toolkit that a platform provides to developers to interact with its services.
For those who struggle to understand what an SDK is, I recommend you watch this great video from IBM explaining it: https://www.youtube.com/watch?v=kG-fLp9BTRo
Here, AWS provides its own SDK for python3 named boto3. More details on this link: https://docs.aws.amazon.com/lambda/latest/dg/lambda-python.html
In order to interact with AWS services, you must first import the boto3 library inside your code:
import boto3
Here, the service to be interacted with is SES. To do this, you have to call the client('ses') class of the boto3 library. This class will be stored in a ses variable to simplify the code:
ses = boto3.client('ses')
The library is imported, and the ses variable is ready, you now have to work on the lambda_handler function. The lambda_handler function is the default function in Lambda. It is inside this function that the events received are managed. It is declared in this way:
def lambda_handler(event, context):
The function contains two arguments: event and context.
Event is the event value received by Lambda (the Input), and context contains information specific to the function (execution time, name, version etc.).
The context argument is of no use here, but for the more curious who want to learn more about the context argument, go to this link: https://docs.aws.amazon.com/lambda/latest/dg/python-context.html
Within this function, the SES appropriate function for sending an email must be filled in. To find the function, let's have a look at the boto3 documentation for SES: https://boto3.amazonaws.com/v1/documentation/api/latest/reference/services/ses.html
After a little research, the function that fits the bill seems to be send_email():

And according to the documentation, three fields are mandatory: Source, Destination and Message. Perfect, the source and destination addresses are ready, and the message will contain what you want.
The send_email function to be added to lambda_handler should look like this:
    ses.send_email(
        Source='cif-source@yopmail.com',
        Destination={
            'ToAddresses': [
                'cif-destination@yopmail.com',
            ]
        },
        Message={
            'Subject': {
                'Data': 'Cloudisfree - Project 2'
            },
            'Body': {
                'Text': {
                    'Data': 'This is my message'
                }
            }
        }
    )
![]()
Be careful, here you do not want to insert a hard-coded destination e-mail address and a hard-coded message, but ONLY a hard-coded source address. The destination address and the message come from the website, so these values will arrive in the event of the Lambda function (remember, the Input)!
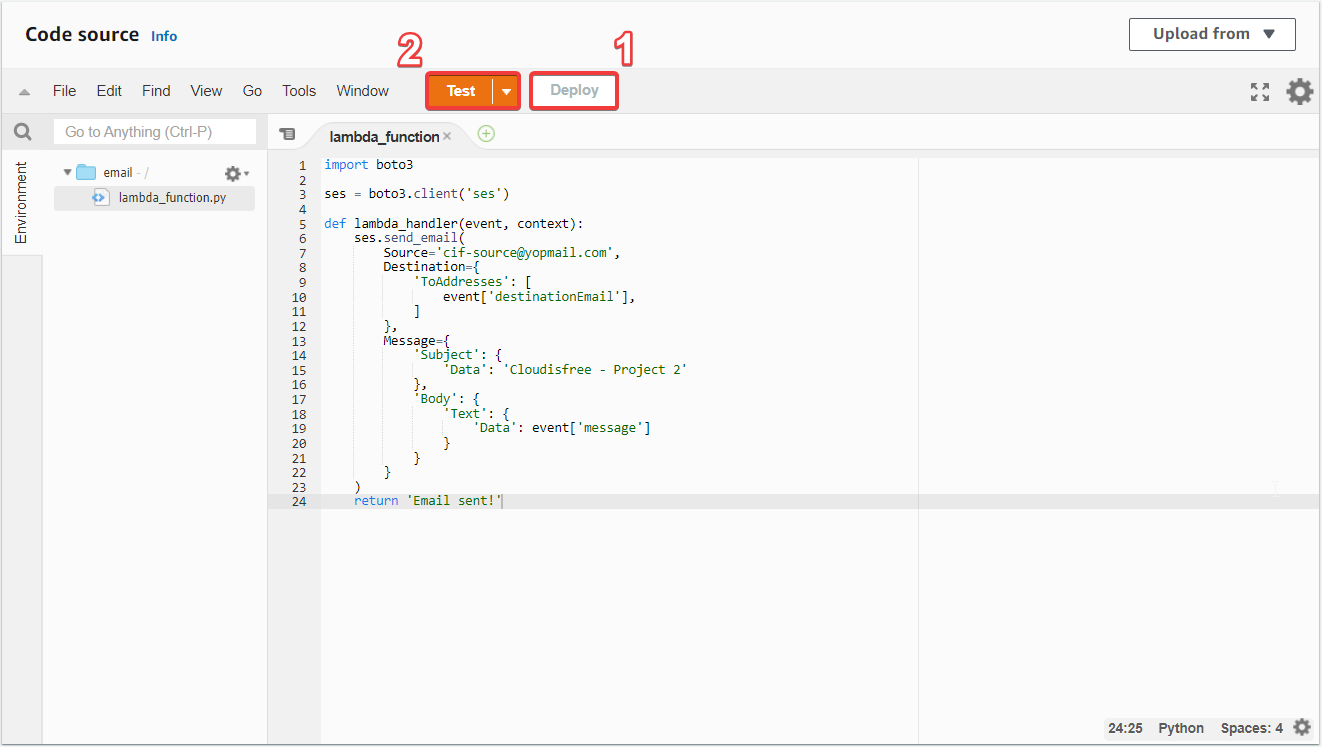
To do this, add two variables "destinationEmail" and "message" from the event, in this way:
    ses.send_email(
        Source='cif-source@yopmail.com',
        Destination={
            'ToAddresses': [
                event['destinationEmail'],
            ]
        },
        Message={
            'Subject': {
                'Data': 'Cloudisfree - Project 2'
            },
            'Body': {
                'Text': {
                    'Data': event['message']
                }
            }
        }
    )
If you look closely, the destination email address and message have been replaced by event['destinationEmail'] and event['message']. This way, the values of the destination email address and the message will be those retrieved from the event.
All that remains is to add a return at the end of the function. It is important to know that the return is received by the one who called the Lambda function. According to the project diagram, it is Step Functions that calls this Lambda function, and Step Functions needs to receive a return in order to operate, but the value of the return does not matter.
Fill in the return at the end of the function, with the value of your choice (in this case the value is "Email sent!"):
return 'Email sent!'
the Lambda function should look like this (with your own source email address):
import boto3

ses = boto3.client('ses')

def lambda_handler(event, context):
    ses.send_email(
        Source='cif-source@yopmail.com',
        Destination={
            'ToAddresses': [
                event['destinationEmail'],
            ]
        },
        Message={
            'Subject': {
                'Data': 'Cloudisfree - Project 2'
            },
            'Body': {
                'Text': {
                    'Data': event['message']
                }
            }
        }
    )
    return 'Email sent!'
It is now time to Deploy and Test the code:
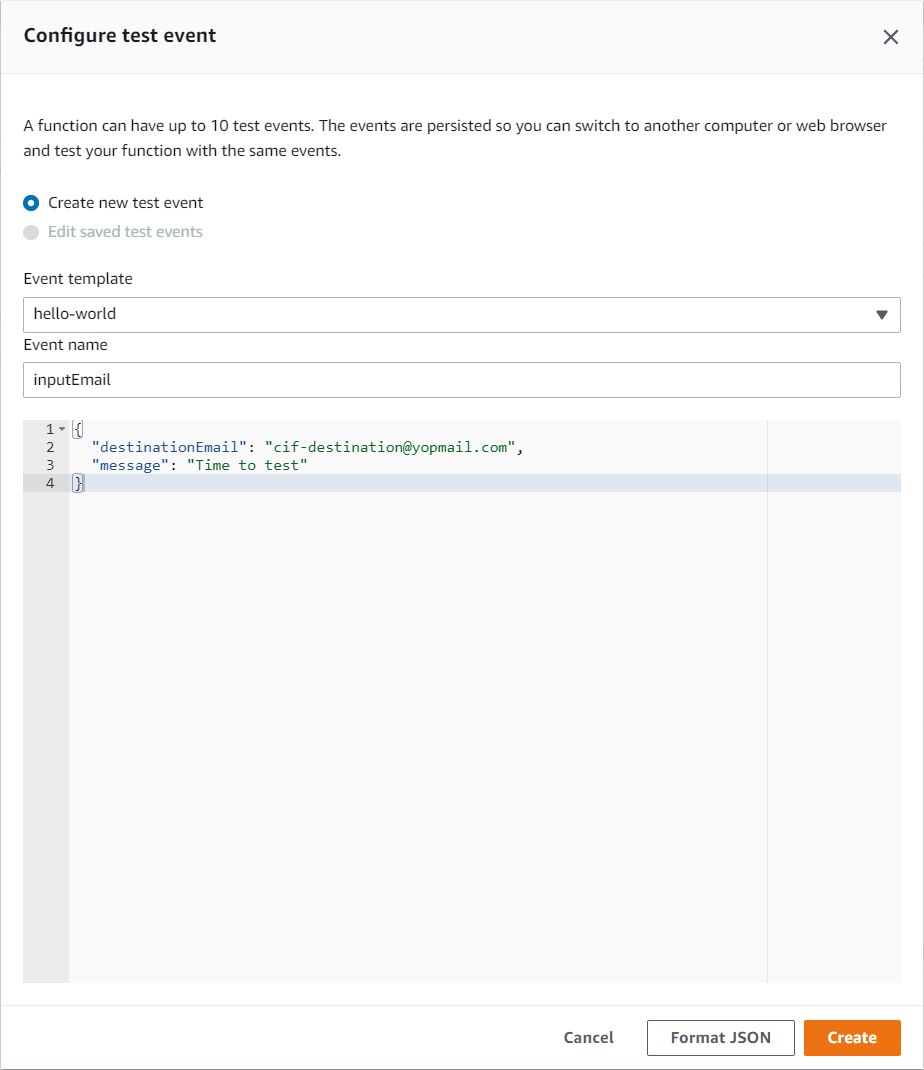
The last step is to configure a test event to simulate the reception of an event. To do this, fill in the destinationEmail and message variables with the desired values. In this example, destinationEmail has the value cif-destination@yopmail.com and message has the value Time to test:
All that remains is to press the Test button, and there should be a Succeeded status displayed in the execution results:
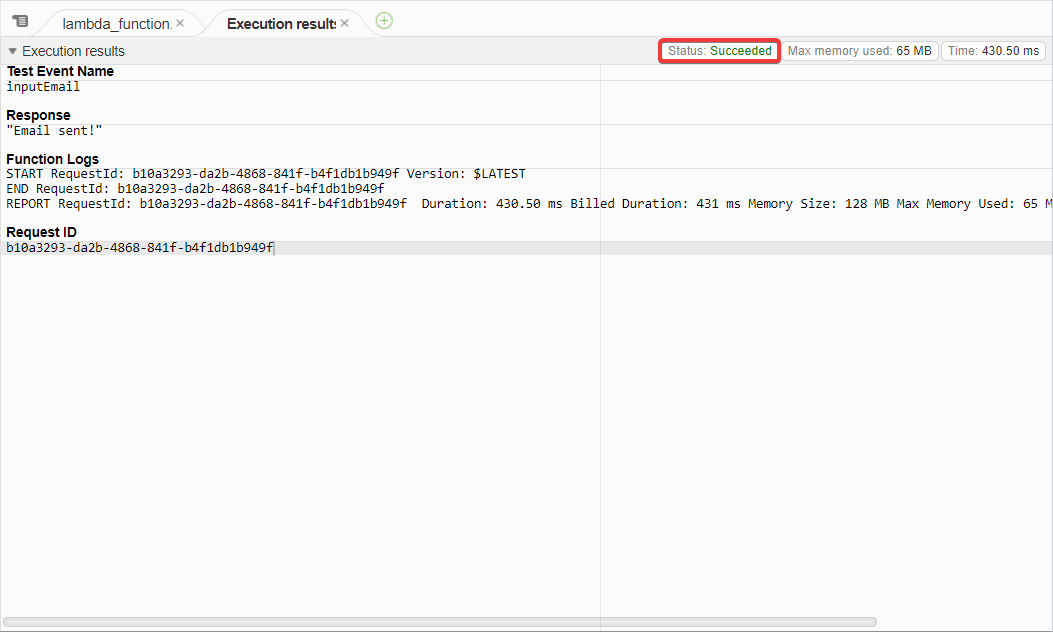
Let's take a look at the destination Mailbox:
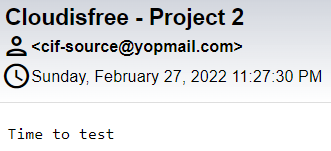
The message was received at the right address with the right message: Mission completed.
The same must now be done for the sms.py function.
Send SMS using SNS and Lambda
The first step is to create a Lambda function capable of sending to SNS the instruction to send a SMS.
When sending a SMS, there are two fields that must be filled in:
The content of the message
the recipient's phone number
Those two fields will be filled in from the website hosted on S3.
Like email.py, it is necessary to create a Lambda function capable of retrieving the content of the message and the phone number of the recipient as an event, and to add them to the instruction sent to SNS.
Prerequisites before starting
Like SES does with emails, SNS can only send messages to verified numbers, but no need to have a source phone number, AWS will bring one for you. All you have to do is add a single number that will receive the SMS to the list of verified phone numbers, your phone number for example.
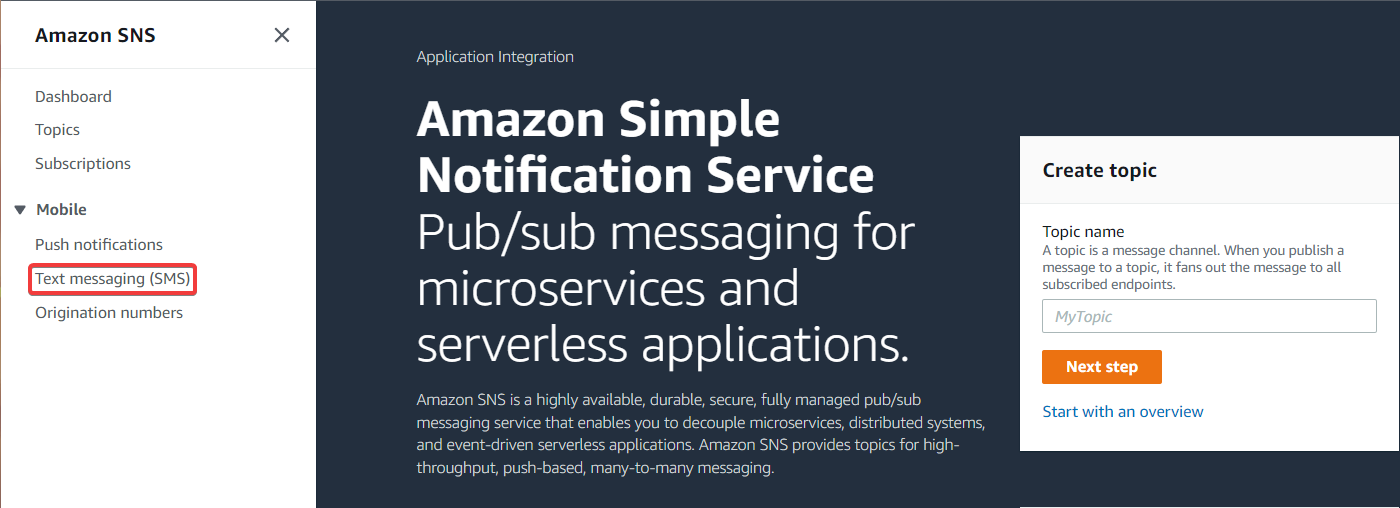
To do so, go to SNS, and select Text Messaging (SMS) at the left:
Then, in the Account Information menu, you should see this:
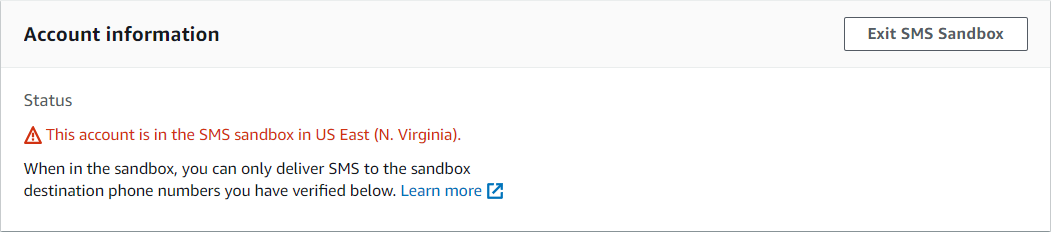
By default, an AWS account is in an SMS sandbox, so the phone number must be verified. If this is your case, it's not a problem, you just need to verify the phone number for the project.
For those who are not in the SMS sandbox, it may be that someone on your team with access to the AWS account has asked to leave it, so you can skip the phone number verification step and move directly to the Create Lambda function sms.py part.
For those interested, you can have more information about SMS sandbox right there: https://docs.aws.amazon.com/sns/latest/dg/sns-sms-sandbox.html
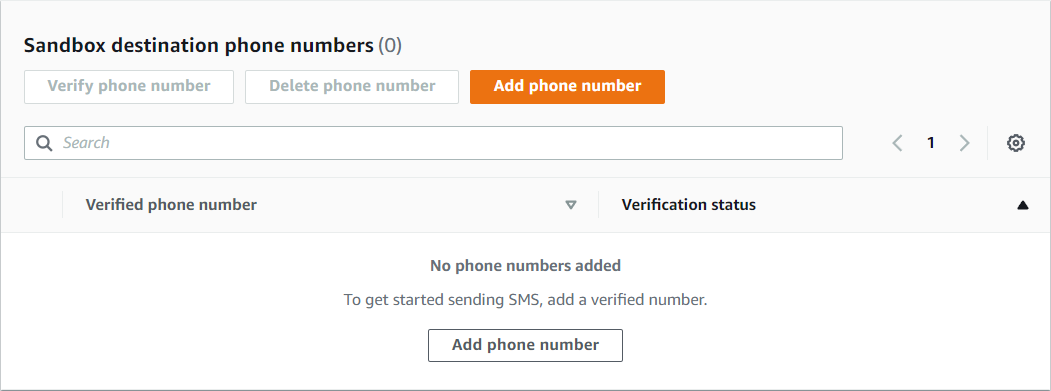
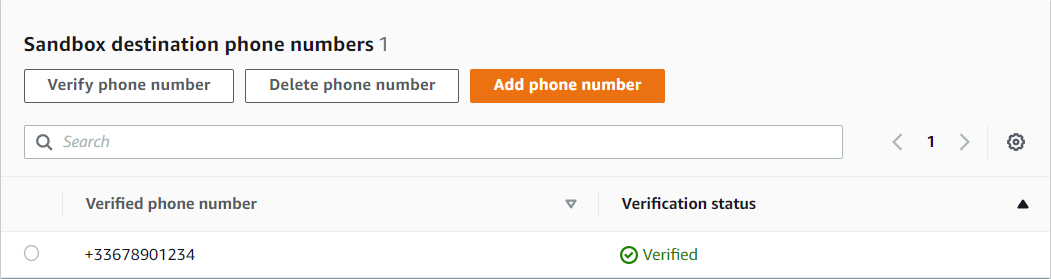
To check the phone number, go to the Sandbox destination phone numbers menu and select Add phone number:
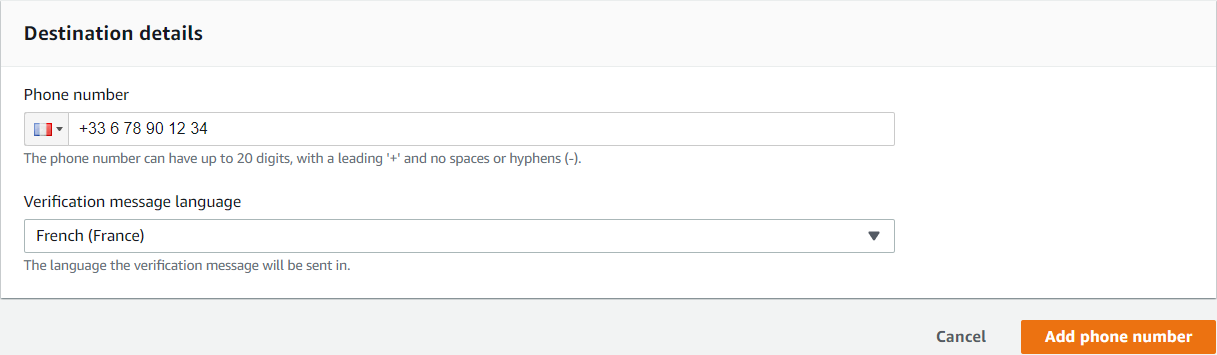
Add your phone number with the area code, and select the verification message language of your choice:
All that remains is to enter the Verification code received by SMS:
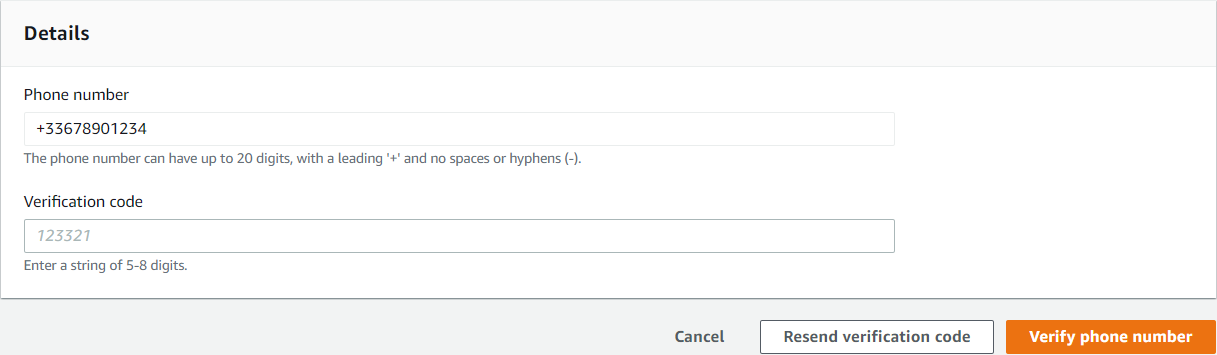
The number is now verified:
Everything is ready. Now time to create the Lambda function sms.py.
Create Lambda function sms.py
Go to Lambda to create the second function.
The function is called sms and uses the Python 3.9 language. In the Permissions tab, choose the newly created Lambda role. You can then create the function:

Once the function is created, go to the Code source menu. This can be seen:

Delete the code contained in lambda_function. Everything is ready, it's time to code.
As before, in order to interact with AWS services, you must first import the boto3 libraries inside your code:
import boto3
Here, the service to be interacted with is SNS. To do this, you have to call the client('sns') class of the boto3 library. This class will be stored in a sns variable to simplify the code:
sns = boto3.client('sns')
Create the function lambda_handler, which, to remind you, is the default function in Lambda where the events received are managed:
def lambda_handler(event, context):
Within this function, the SNS appropriate function for sending a SMS must be filled in. To find the function, let's have a look at the boto3 documentation for SNS: https://boto3.amazonaws.com/v1/documentation/api/latest/reference/services/sns.html
After a little research, the function that fits the bill seems to be publish():

And according to the documentation, two fields are required: Message, and something to send the message (PhoneNumber in our case). The phone number is ready, and the message will contain what you want.
The publish function to be added to lambda_handler should look like this:
    sns.publish(
        PhoneNumber='+33678901234',
        Message='Time to test'
    )
So, as for email.py, by adding the variables contained in event, we get this:
    sns.publish(
        PhoneNumber=event['phoneNumber'],
        Message=event['message']
    )
All that remains is to add a return at the end of the function, which is REQUIRED for Step Functions to operate:
return 'SMS sent!'
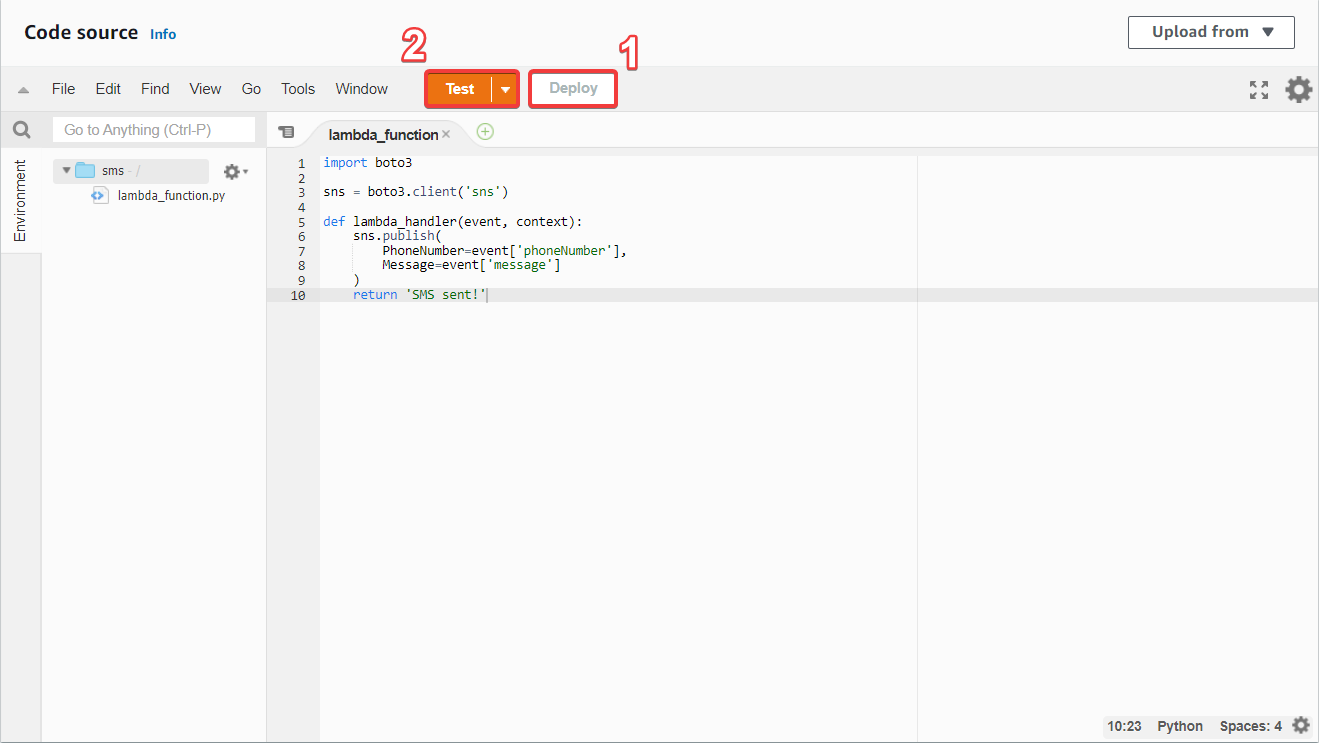
the Lambda function should look like this:
import boto3

sns = boto3.client('sns')

def lambda_handler(event, context):
    sns.publish(
        PhoneNumber=event['phoneNumber'],
        Message=event['message']
    )
    return 'SMS sent!'
It is now time to Deploy and Test the code:
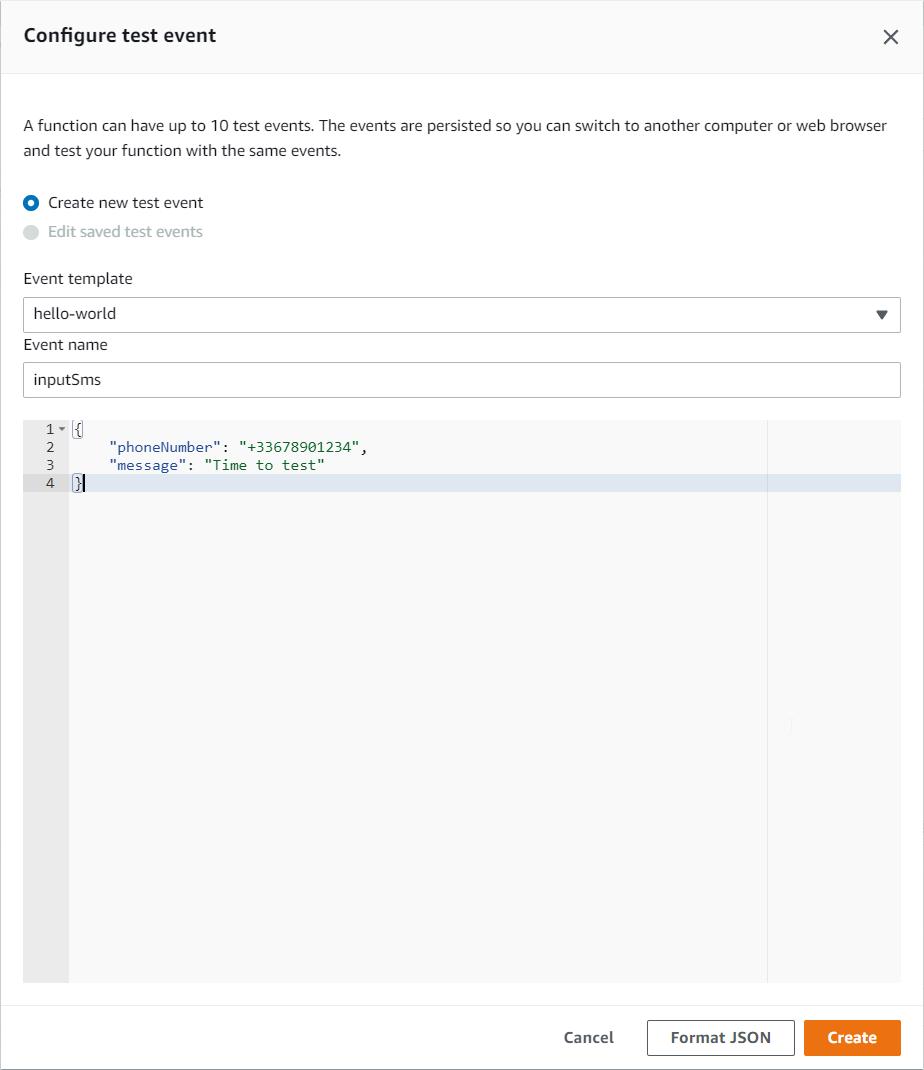
The last step is to configure a test event to simulate the reception of an event. To do this, fill in the phoneNumber and message variables with the desired values. In this example, phoneNumber has the value +33678901234 and message has the value Time to test:
All that remains is to press the Test button, and there should be a Succeeded status displayed in the execution results:
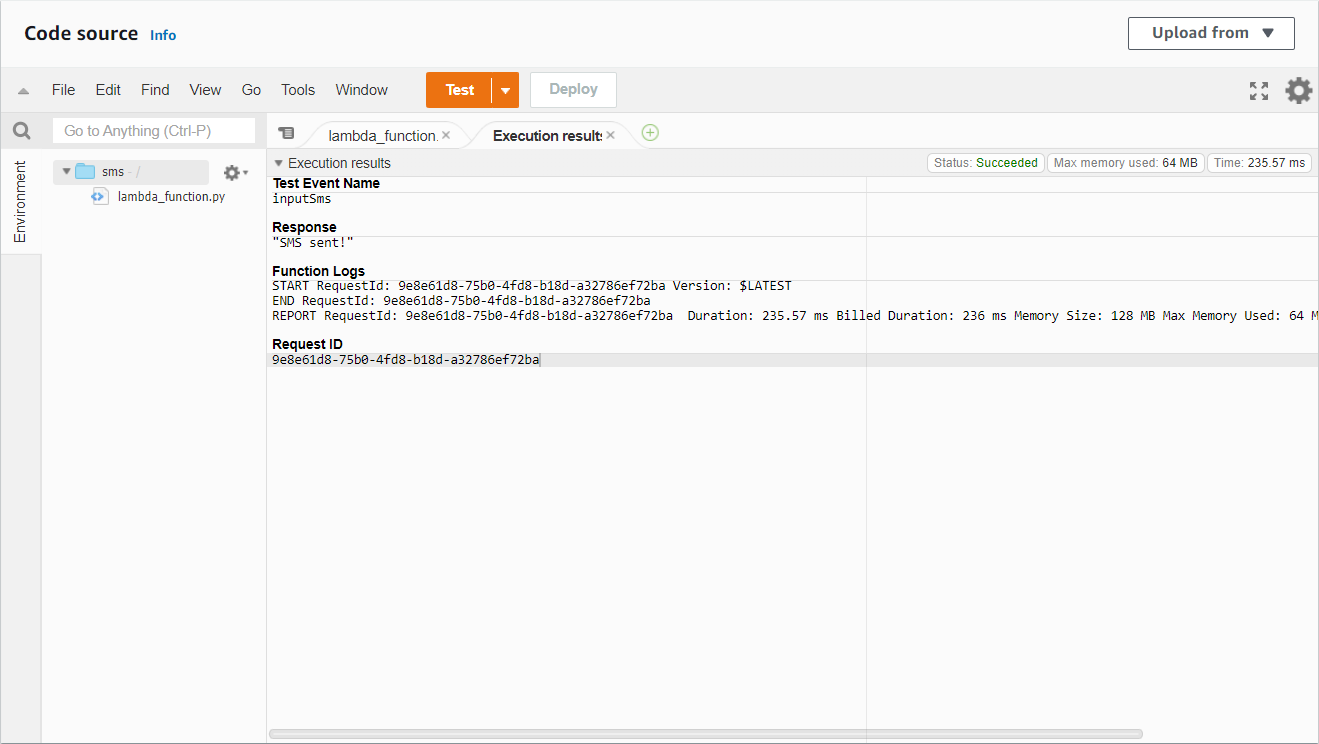
You received an SMS a few seconds after running the test: Congratulations, you know how to send an SMS with Lambda.
The email.py and sms.py scripts are ready, it's time to link them to Step Functions, which will transfer the data and execute the scripts.
Manage how to send using Step Functions
Before starting, it is worth explaning what Step Functions is.
See how AWS defines it:
AWS Step Functions is a low-code, visual workflow service that developers use to build distributed applications, automate IT and business processes, and build data and machine learning pipelines using AWS services. Workflows manage failures, retries, parallelization, service integrations, and observability so developers can focus on higher-value business logic.
This definition helps to understand how Step Functions works in broad terms, but makes it difficult to visualise the tool. The following will give a much better understanding of Step Functions, which is, contrary to its complex definition, a simple tool to use.
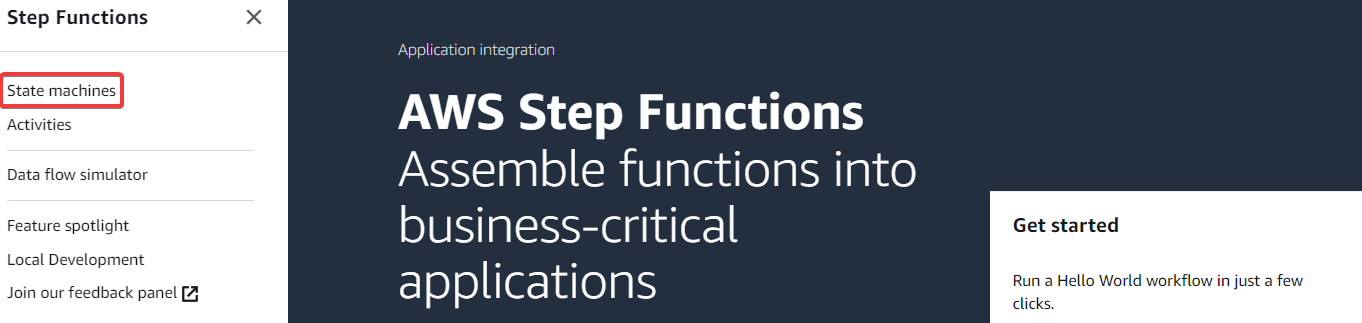
Create Sending State Machine
First, go to Step Functions and select State machines on the left:
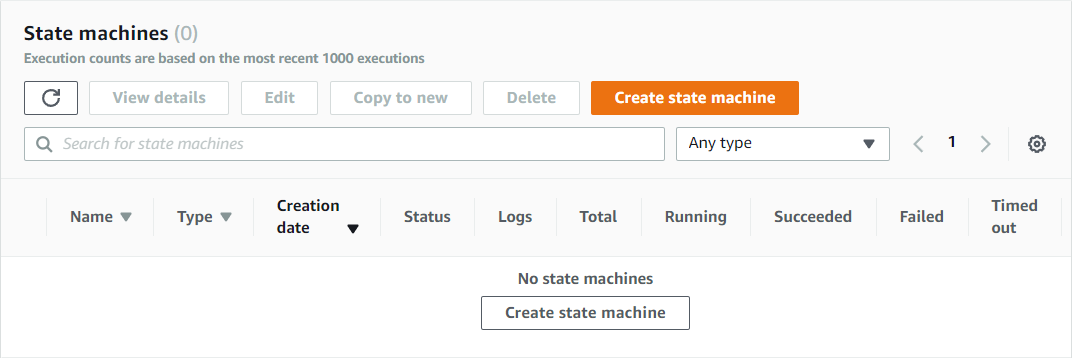
Then select Create state machine:
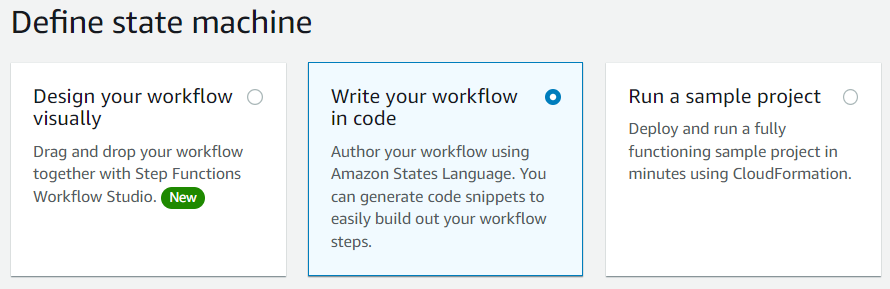
There are now three choices:
Design your worflow visually: This method allows you to create state machines via block diagrams. A new method that is easier to handle, but less effective than the other two.
Write your workflow in code: As the title suggests, workflow is written in code, nothing more to add.
Run a sample project: All you have to do is get a sample project using CloudFormation.
The choice here is to write the workflow in code, which is the best way to get the hang of and understand the tool:
For the Type, to make the wise choice, click on the Help me decide text, and take a look at the comparison table of the Standard and Express types.
What needs to be compared is the pricing between the two types, and ESPECIALLY which of the two types is compatible with the Free Tier. Here is what is offered with the Free Tier for Step Functions:
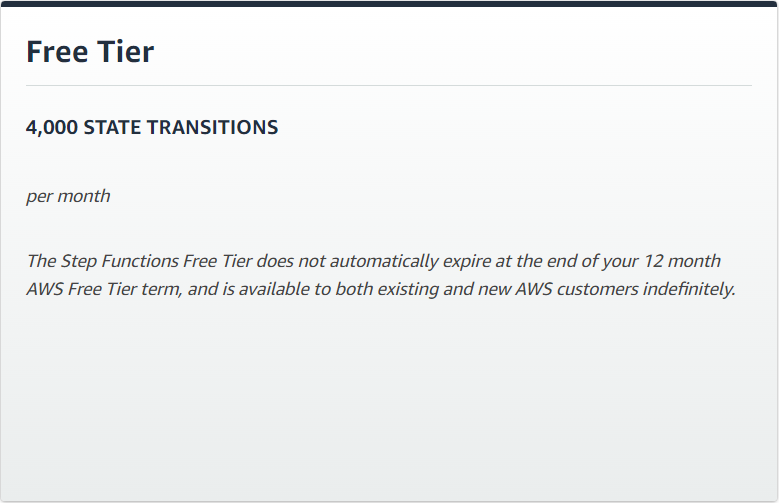
AWS offers 4,000 state transitions per month, and if you take a look at the Standard pricing, this is what you observe:
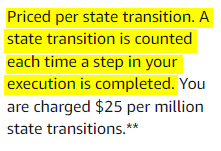
The Standard type is priced per state transitions, where the Express type is priced by the number of execution you run, their duration and memory consumption. In other words, the type eligible for Free Tier is the Standard type. You must therefore select Standard:

Go to the Definition menu:
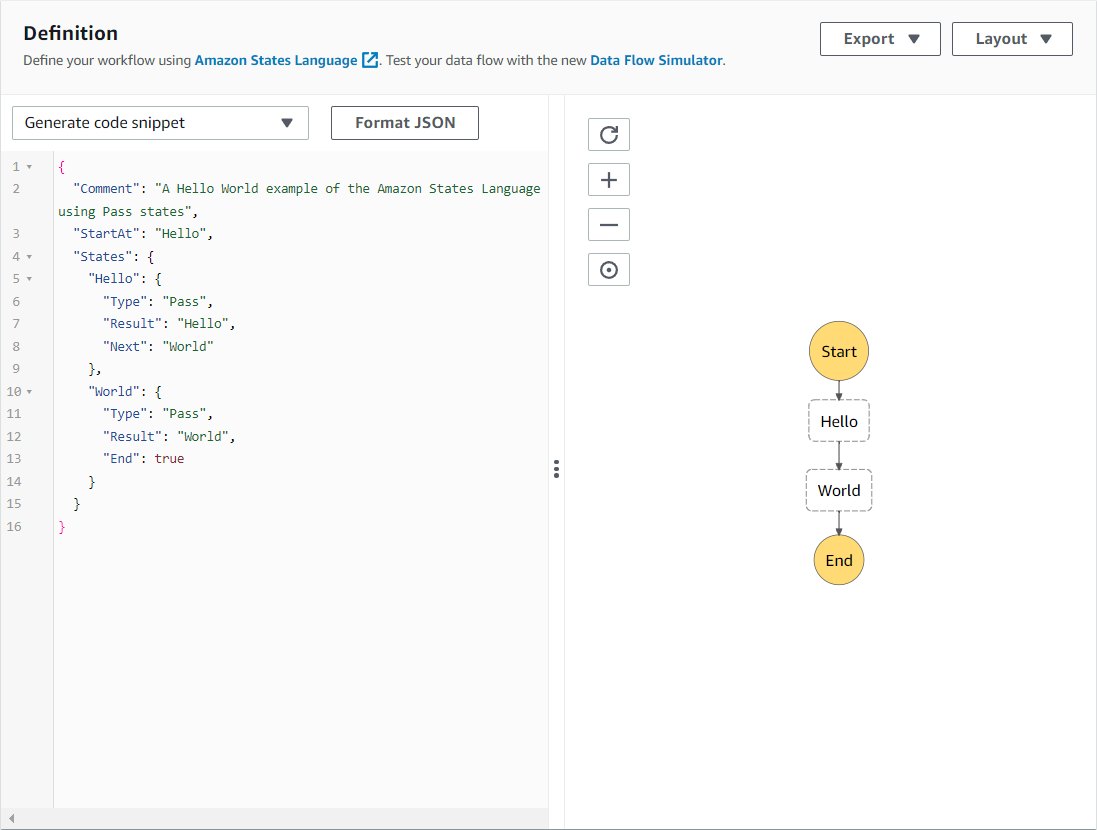
This is where it starts to get interesting. On the left you can see some code written in JSON, which makes the workflow diagram on the right.
All workflows start with a Start and end with an End (it makes sense doesn't it), and the aim is to establish actions between these two. The actions will use the data received at the Input of the workflow (at the Start more precisely). The objective for the project is therefore to set up actions that will process the data received from the website: message, destinationEmail, and phoneNumber.
You have to :
Send the values of the message and destinationEmail variables to the script email.py;
Send the values of the message and phoneNumber variables to the script sms.py.
But you should also consider what type of sending you want to do. Send an email or a SMS? Sometimes you will want to send an email to your uncle, and other times you will want to send an SMS to your friend. For this, you will need a new variable that will be used by your state machine: typeOfSending.
The final goal is to have this workflow diagram:
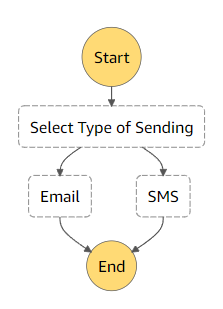
The first action is to select the type of sending, then the chosen sending is processed (an SMS if typeOfSending = sms, or an email if typeOfSending = email).
Enough talk, it's time to create your first state machine, and there's nothing like the documentation to help you: https://docs.aws.amazon.com/step-functions/latest/dg/amazon-states-language-state-machine-structure.html
You can see that a state machine MUST consist of the StartAt and States fields, but to help you, I recommend you add the Comment field which will explain the functionality of the state machine (in case you forget in 2 years why this state machine exists):
{
    "Comment": "State machine for sending SMS & email",
    "StartAt": "Select Type of Sending",
    "States": {
In doing so, Comment explains the functionality of the state machine, StartAt allows you to define which action to start with (in this case Select Type of Sending), and States contains all the states that contain the actions you want to perform.
As seen in the diagram above, Select Type of Sending, Email and SMS are the states, and each performs its own action.
These three states must therefore be created, with an action assigned to them:
the Select type of Sending state will make the choice between the Email or SMS state based on the typeOfSending variable;
the Email state sends the destinationEmail and message variables to the Lambda function email.py;
the SMS state sends the phoneNumber and message variables to the Lambda function sms.py.
Find out more about the states: https://docs.aws.amazon.com/step-functions/latest/dg/concepts-states.html
Start with the first state, Select Type of Sending :
        "Select Type of Sending": {
            "Type": "Choice",
The state is of type Choice, which as its name indicates, allows a choice between several states. Here, the choice will be between the SMS and Email states:
            "Choices": [
                {
                    "Variable": "$.typeOfSending",
                    "StringEquals": "email",
                    "Next": "Email"
                },
                {
                    "Variable": "$.typeOfSending",
                    "StringEquals": "sms",
                    "Next": "SMS"
                }
            ]
        },
In the Choices field, two elements are filled in.
![]()
The following is very important to understand. Once this is understood, the rest is relatively simple: In order to make its choice, the Select Type Of Sending state checks the typeOfSending variable received as Input, checking whether its value is equal to the value of the StringEquals field.
In the first choice, the StringEquals field has the value email, so if typeOfSending = email, then the chosen state will be the value contained in the Next field: the Email state.
In the second choice, the StringEquals field has the value sms, so if typeOfSending = sms, then the chosen state will be the value contained in the Next field: the SMS state.
The Type Of Sending state is now ready, it is time to create the Email and SMS states.
Continue with the second state, Email :
        "Email": {
            "Type" : "Task",
            "Resource": "<lambda_email.py_arn>",
            "End": true
        },
The state is of type Task, which allows to execute a resource by specifying its ARN. Here the resource is the Lambda function email.py. The "End": true field is used to say that this is the last state to be executed.
Finish with the third state, SMS :
        "SMS": {
            "Type" : "Task",
            "Resource": "<lambda_sms.py_arn>",
            "End": true
        }
    }
}
The state is of type Task, and this time, the resource is the Lambda function sms.py. The "End": true field is used to say that this is the last state to be executed too.
In the end, the code looks like this:
{
    "Comment": "State machine for sending SMS & email",
    "StartAt": "Select Type of Sending",
    "States": {
        "Select Type of Sending": {
            "Type": "Choice",
            "Choices": [
                {
                    "Variable": "$.typeOfSending",
                    "StringEquals": "email",
                    "Next": "Email"
                },
                {
                    "Variable": "$.typeOfSending",
                    "StringEquals": "sms",
                    "Next": "SMS"
                }
            ]
        },
        "Email": {
            "Type" : "Task",
            "Resource": "<lambda_email.py_arn>",
            "End": true
        },
        "SMS": {
            "Type" : "Task",
            "Resource": "<lambda_sms.py_arn>",
            "End": true
        }
    }
}
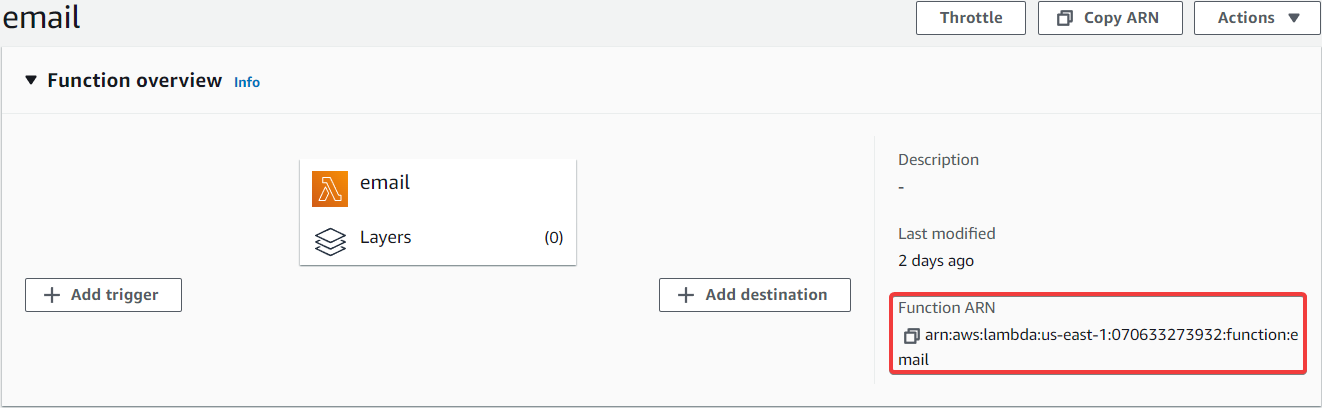
All that remains to be done is to add the ARNs of the Lambda functions email.py and sms.py to the corresponding states:
Once the code is ready, the workflow diagram should change to this one:
If the diagram to the right of the code does not change or does not look like the one seen above, there is an error in the code (a syntax error for example). When the code is correct, the workflow diagram appears automatically. Check that your workflow diagram is the same as the one above.
And it is time to finalise the creation of the state machine, give a name to the state machine:
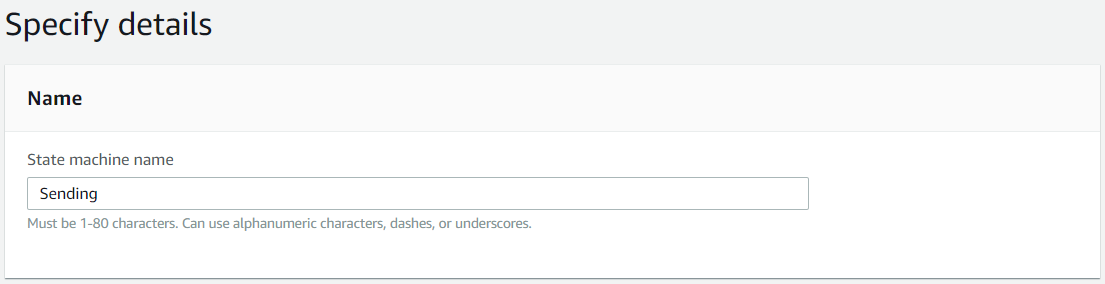
Leave the other values as default and create the state machine.
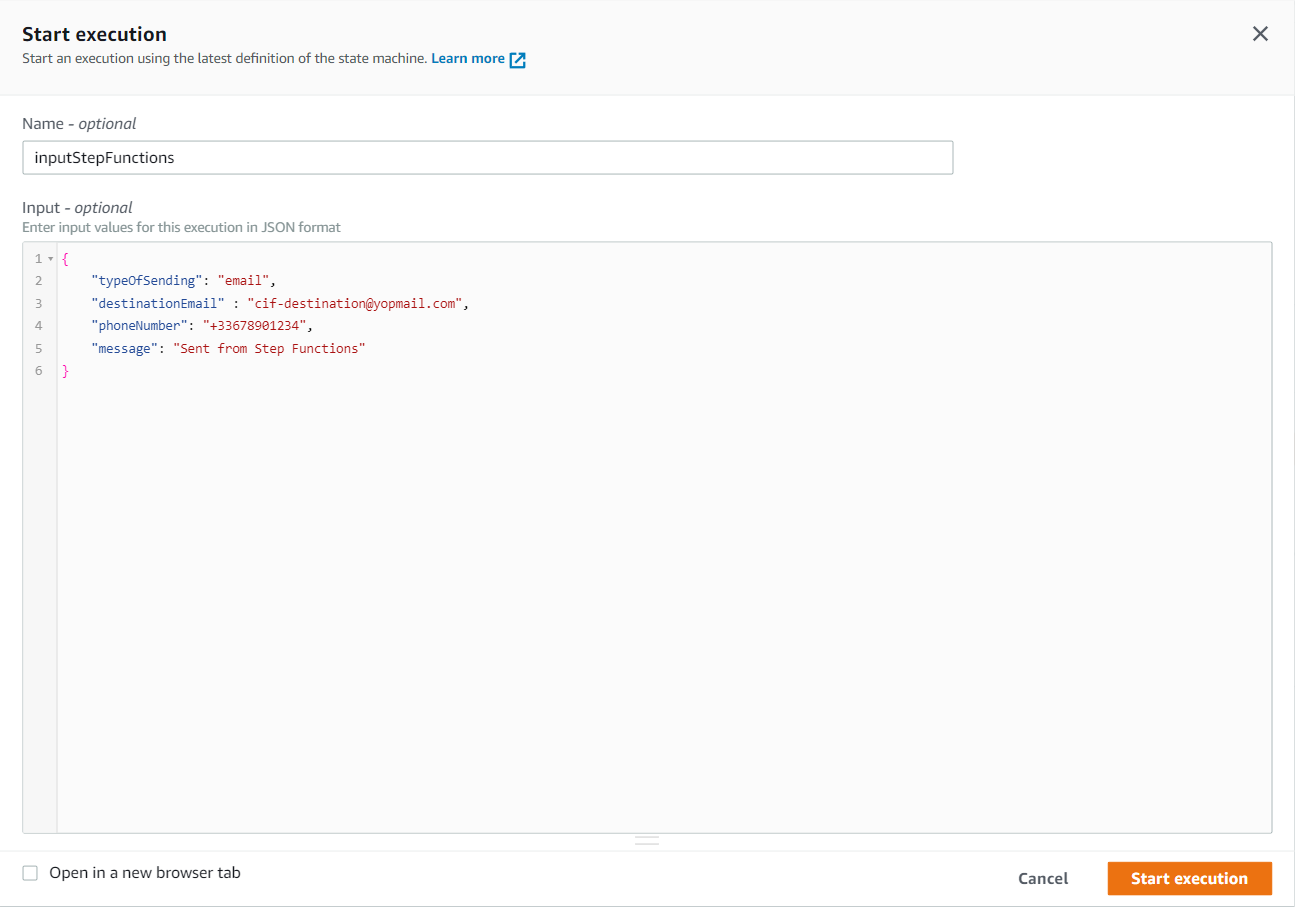
It is time to run the newly created state machine. Click on Start execution:

A window appears, asking for a Test Input for the state machine (just like the Test Event for Lambda). The Input is encoded in JSON, and must contain the variables typeOfSending, destinationEmail, phoneNumber and message:
{
    "typeOfSending": "email",
    "destinationEmail" : "cif-destination@yopmail.com",
    "phoneNumber": "+33678901234",
    "message": "Sent from Step Functions"
}
All that remains is to launch the execution with the desired values:
For this execution, an email must be sent since the typeOfSending variable is set to email, so let's see how this works:

According to Step Functions, everything went well, so the email must have been sent. See the mailbox of the destination email:
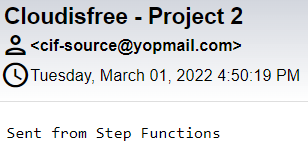
The mail has been received: the state machine works perfectly to send an email. Now time to check if all goes well to send an SMS, by changing the typeOfSending variable to sms:

According to Step Functions, everything went well, and the SMS has been received.
The Sending state machine is now ready for use. It's time to go back to Lambda to attack the third and final Lambda function: restApiHandler.py.
Create the REST API Handler using Lambda
What is a REST API Handler ?
A REST API Handler is a function that retrieves and processes data sent by a REST API.
To learn more about what a REST API is, I refer you to this video from IBM which explains it very well: https://www.youtube.com/watch?v=lsMQRaeKNDk
When a REST API receives data, it stores it in a variable named body, and then sends the body variable to a REST API Handler which will then process the data.
The objective is therefore to create a Lambda function capable of receiving data sent by a REST API (body variable) and returning this data to the desired service (here Step Functions).
Let's see how to create the Lambda function restApiHandler.py.
Create Lambda Function restApiHandler.py
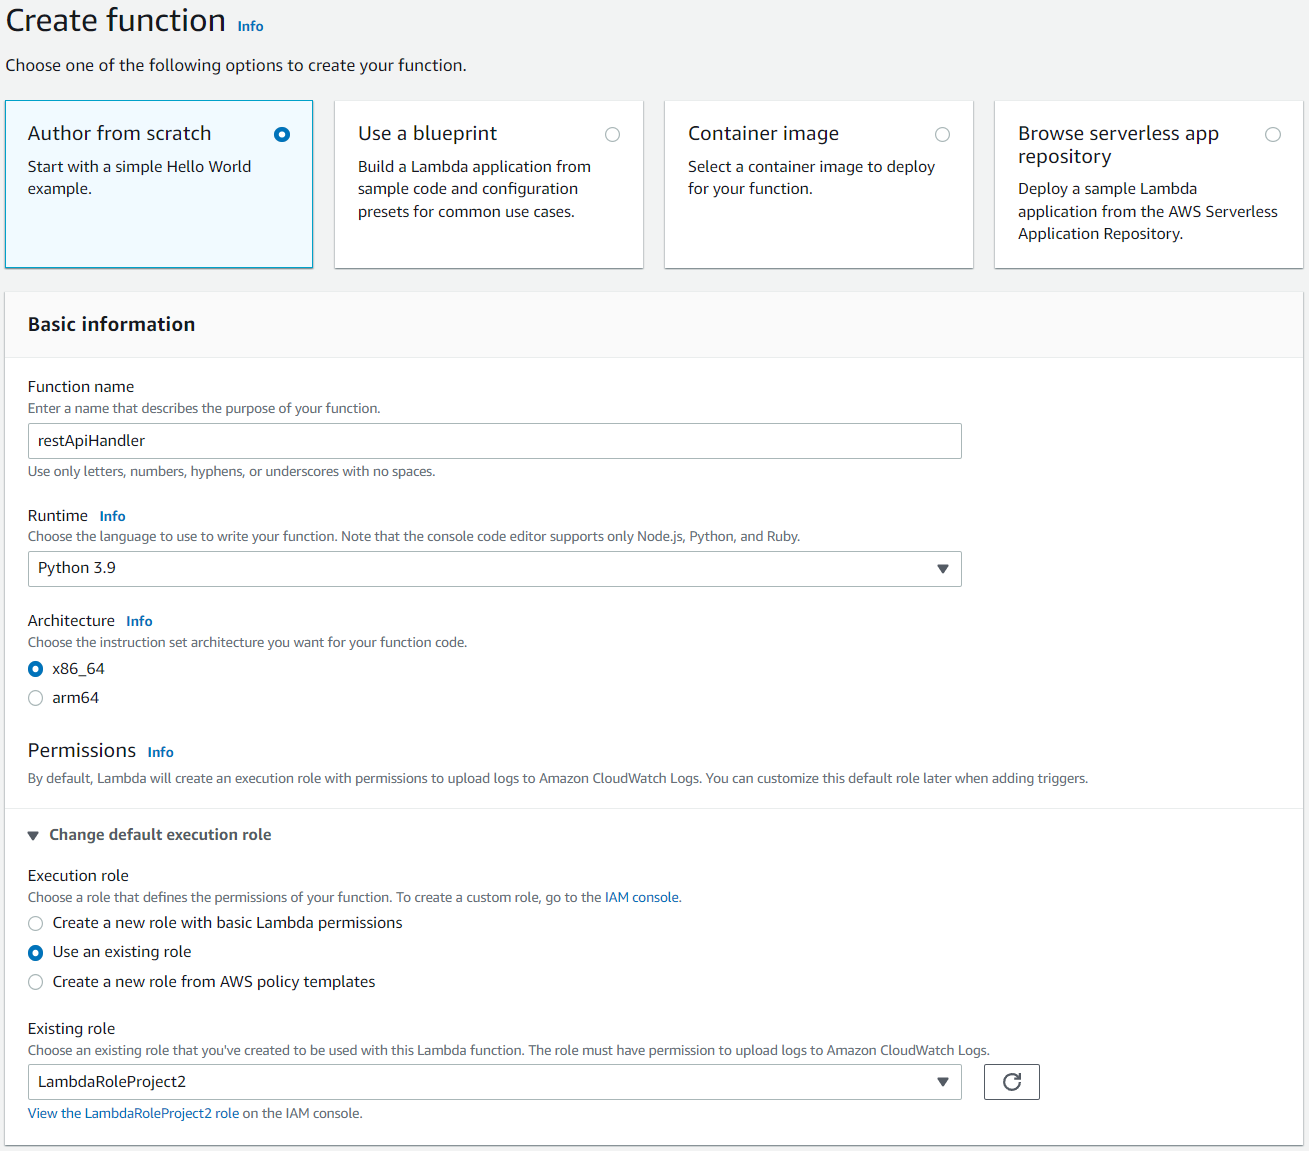
Go to Lambda to create the third and last function.
The function is called restApiHandler.py and uses the Python 3.9 language. In the Permissions tab, choose the Lambda role you created. You can then create the function:
Once the function is created, go to the Code source menu. This can be seen:
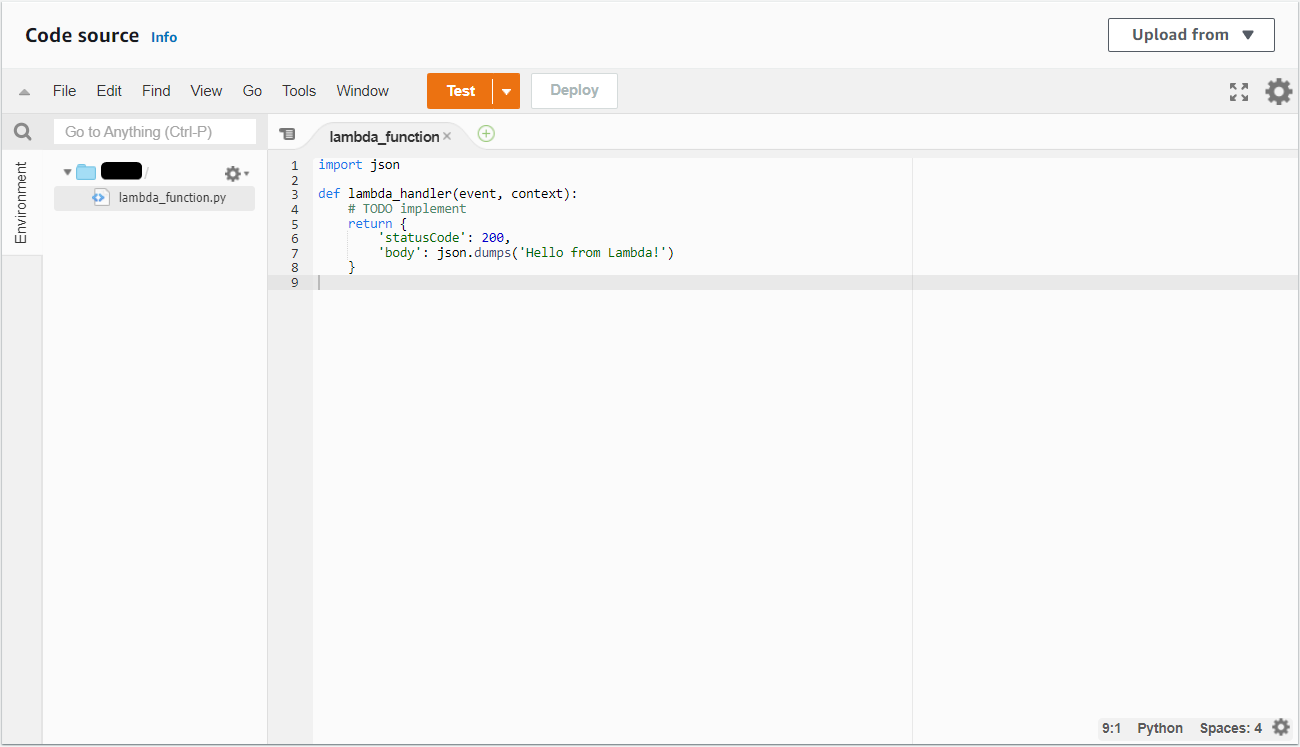
Delete the code contained in lambda_function. Everything is ready, it's time to code.
As always, in order to interact with AWS services, you must first import the boto3 libraries inside your code:
import boto3
New thing here, this Lambda function will use functions to manipulate JSON data, so add the JSON library:
import json
Here, the service to be interacted with is Step Functions. To do this, you have to call the client('stepfunctions') class of the boto3 library. This class will be stored in a sfn variable to simplify the code:
sfn = boto3.client('stepfunctions')
Create the function lambda_handler, which, to remind you, is the default function in Lambda where the events received are managed:
def lambda_handler(event, context):
Within this function, the Step Functions appropriate function for executing a state machine must be filled in. To find the function, let's have a look at the boto3 documentation for Step Functions: https://boto3.amazonaws.com/v1/documentation/api/latest/reference/services/stepfunctions.html
After a little research, the function that addresses the issue seems to be start_execution():

And according to the documentation, only one field is required: stateMachineArn. However, it is necessary here to send data as Input, so the input variable will also be used.
The start_execution function to be added to lambda_handler should look like this:
    sfn.start_execution(
        stateMachineArn="<state_machine_arn>",
        input=event['body']
    )
![]()
It is worth noting that for the input, the event variable called is 'body', since as explained earlier, the API stores the data it receives into a 'body' variable and sends it. Therefore it is in this variable that all other variables are contained.
All that remains is to add a return at the end of the function, which gives the sending result to the API Gateway. Unlike the other scripts (email.py and sms.py), the value returned is important. The Gateway API needs to receive a Status Code and a body in JSON format containing the Status.
Learn more about status codes: https://en.wikipedia.org/wiki/List_of_HTTP_status_codes
The Status Code to be returned when the Lambda function executes correctly is code 200. The Status can contain the value of your choice (try to be as explicit as possible), which gives a result like this:
    return {
        "statusCode": 200,
        "body": json.dumps(
            {"Status": "Instruction sent to the REST API Handler!"},
        )
    }
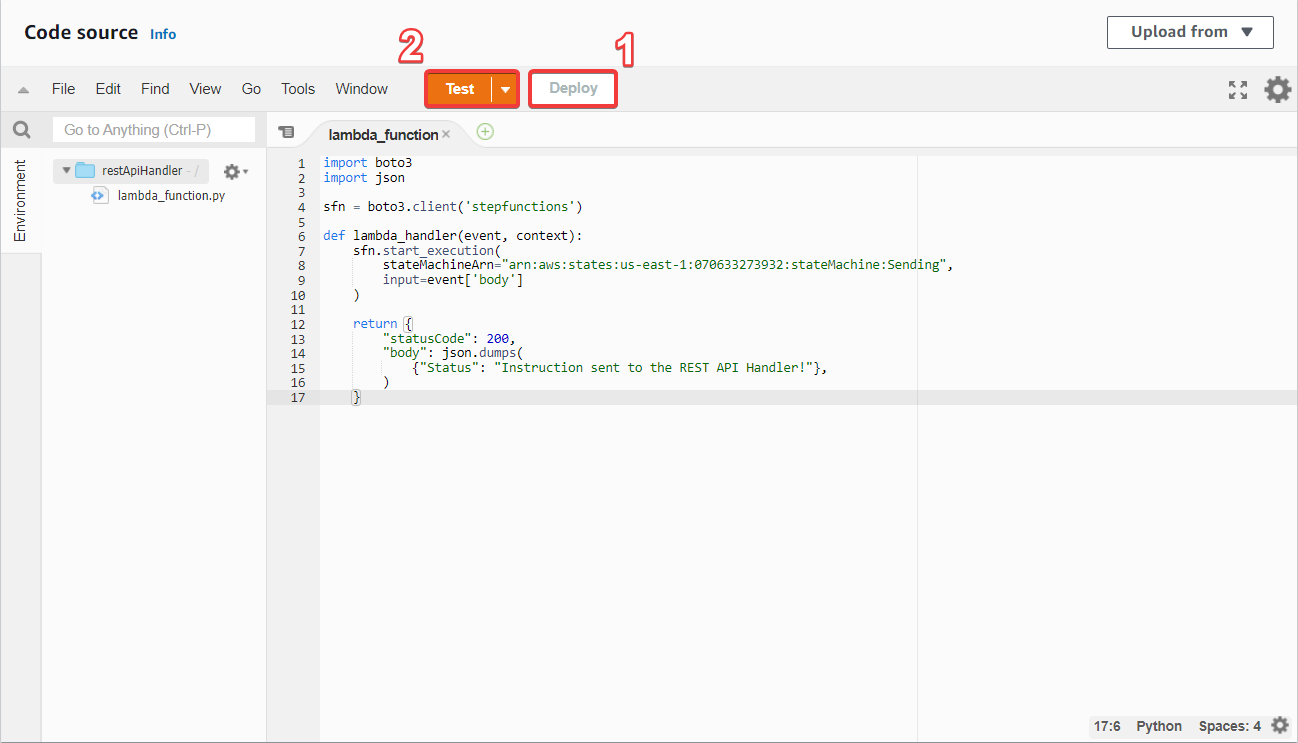
In the end, the Lambda function should look like this:
import boto3
import json

sfn = boto3.client('stepfunctions')

def lambda_handler(event, context):
    sfn.start_execution(
        stateMachineArn="<state_machine_arn>",
        input=event['body']
    )

    return {
        "statusCode": 200,
        "body": json.dumps(
            {"Status": "Instruction sent to the REST API Handler!"},
        )
    }
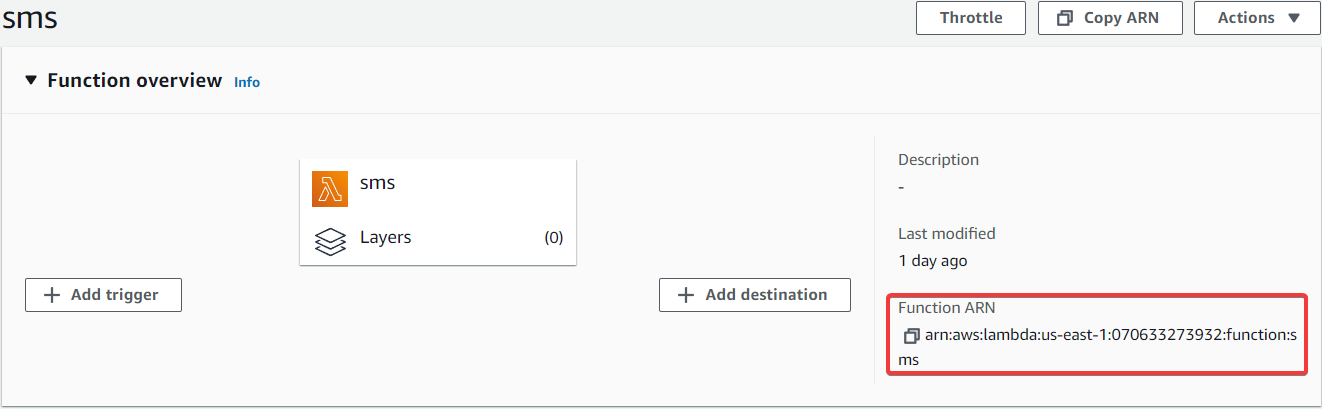
It is now time to see if it works. First copy the ARN of the state machine previously created:
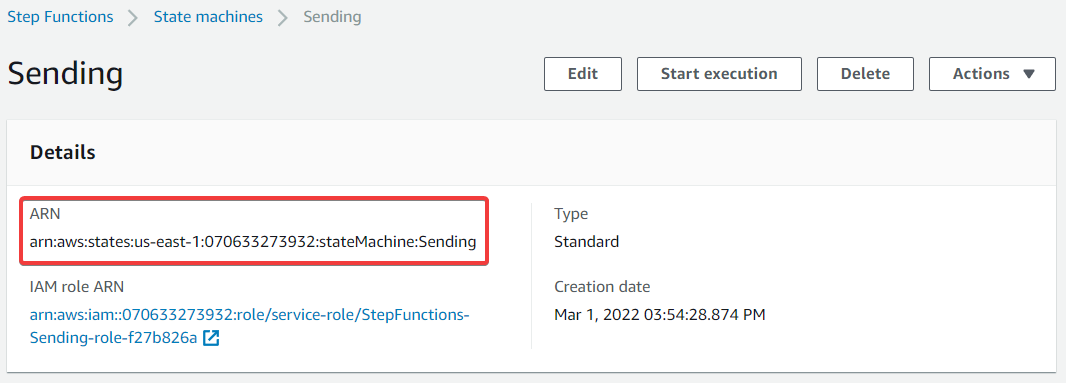
Add it to your code, and now Deploy and Test the code:
The last step is to configure a test event to simulate the reception of an event. To do this, fill in the body variable, but not in just any way. The format must correspond to what Step Functions receives as Input, and according to the documentation, the format for the Input is written as follows:
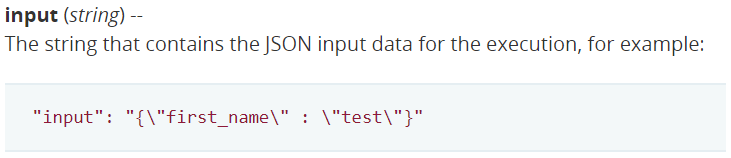
Following the requested format, the Input must look like this:
{
    "body": "{\"typeOfSending\":\"sms\", \"destinationEmail\":\"cif-destination@yopmail.com\", \"phoneNumber\":\"+33678901234\", \"message\":\"Sent from REST API Handler\"}"
}
All that remains is to press the Test button, and there should be a Succeeded status displayed in the execution results:
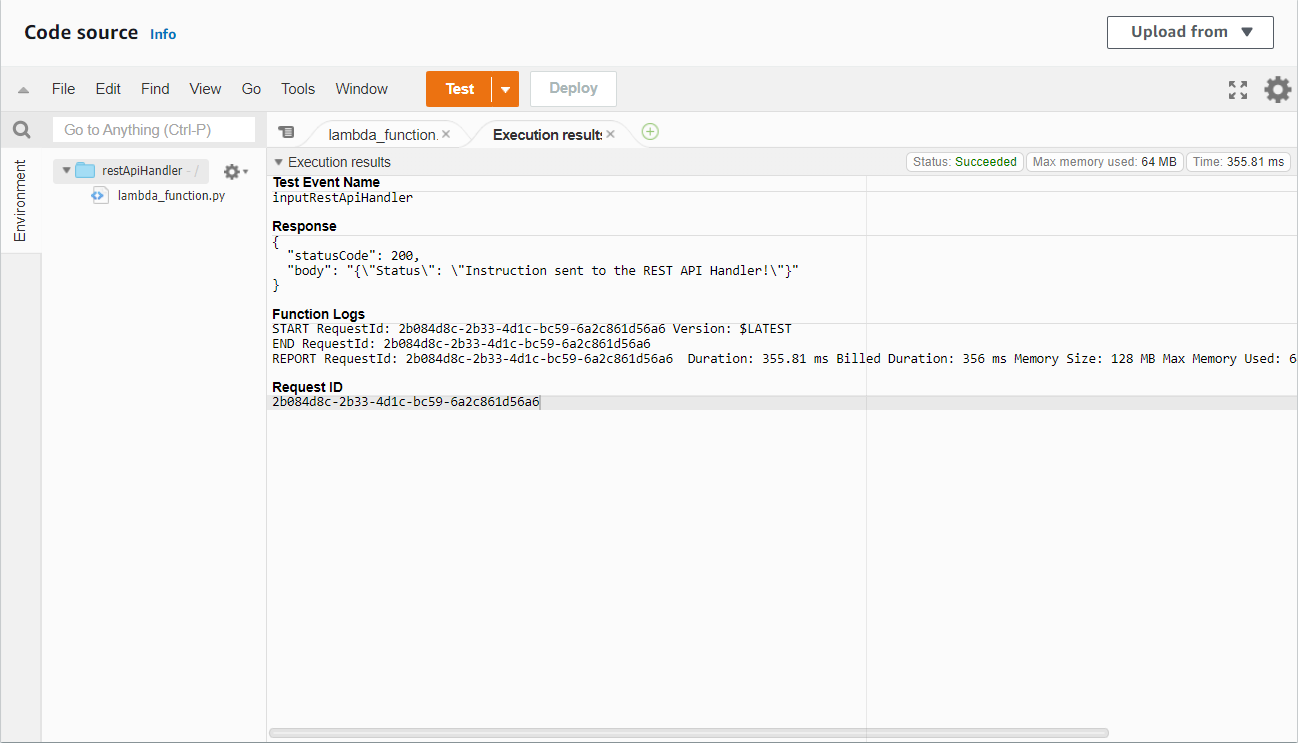
If you received an email or an SMS based on what you have chosen: Congratulations, you know how to receive data from an API and send it to Step Functions.
The restApiHandler.py script is ready, and it's time to link it to API Gateway.
Create and configure the API Gateway
Before starting once more, it is worth recalling what API Gateway is.
See how AWS defines it:
Amazon API Gateway is a fully managed service that makes it easy for developers to create, publish, maintain, monitor, and secure APIs at any scale. APIs act as the "front door" for applications to access data, business logic, or functionality from your backend services. Using API Gateway, you can create RESTful APIs and WebSocket APIs that enable real-time two-way communication applications.
The definition explains very well what API Gateway is. Just remember that API Gateway allows you to create and use APIs.
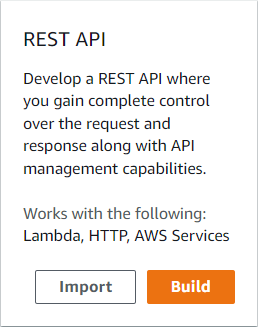
Create a REST API using API Gateway
First, go to API Gateway and Build a REST API:
Here, choose to create a New API of type REST. Give the API a suitable name (SendingAPI in this example) and create the API:

Once the API is created, click on the Actions button and select Create Resource:
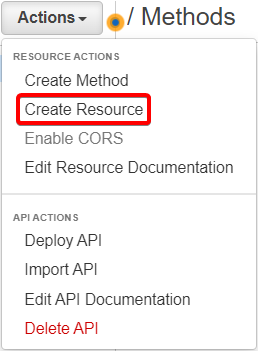
Enter the name of the resource (here sending) and create the resource:
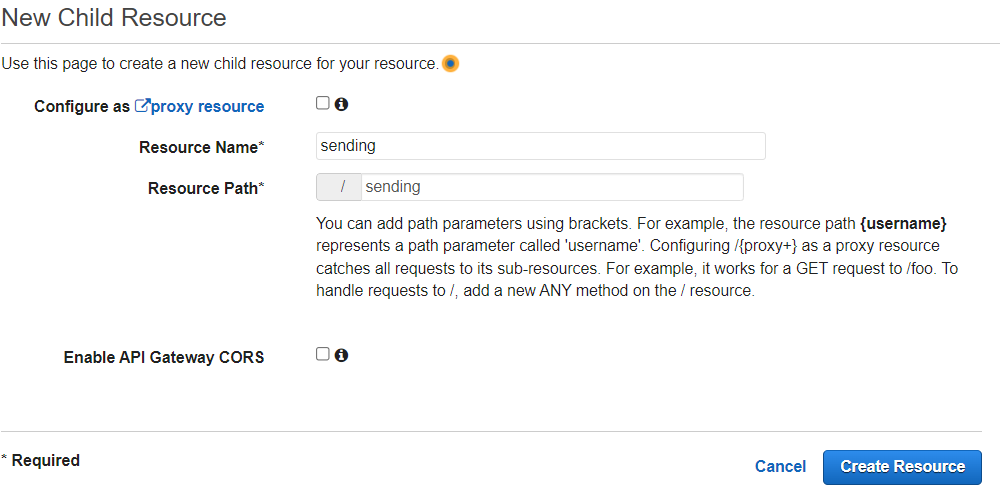
Once the resource created, click on the Actions button and select Create Method
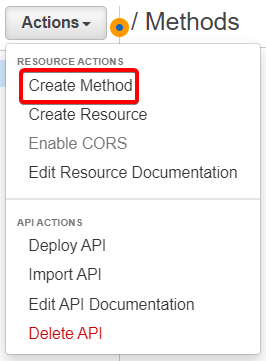
A field will appear, where the POST method should be selected, since the purpose will be to publish the data from the website to the API.
When setting up the POST method, choose Lambda Function as the Integration type, entering the newly created REST API Handler (restApiHandler) in the Lambda Function field, and do NOT forget to Use Lambda Proxy Integration:
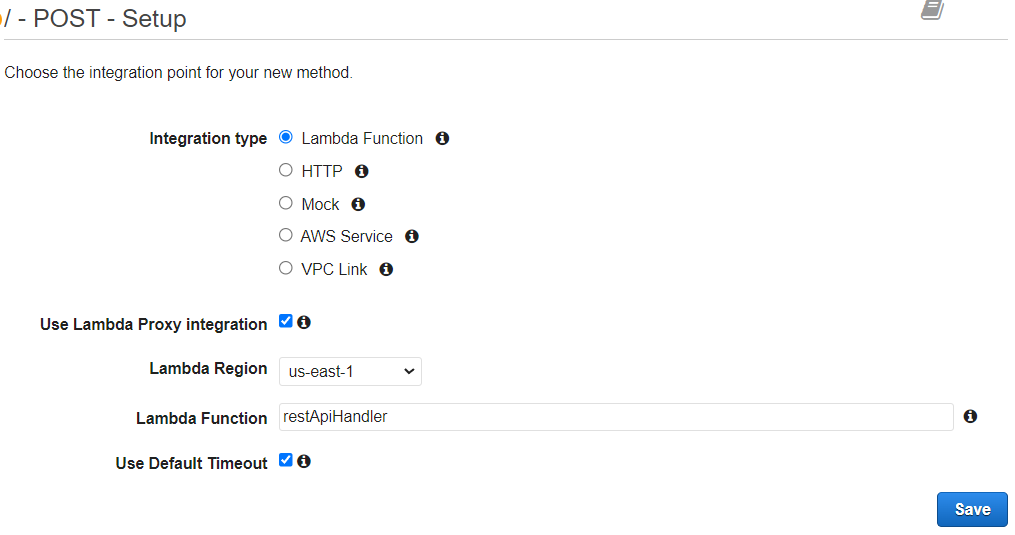
A window will appear asking to add permissions to the Lambda Function, click on OK:
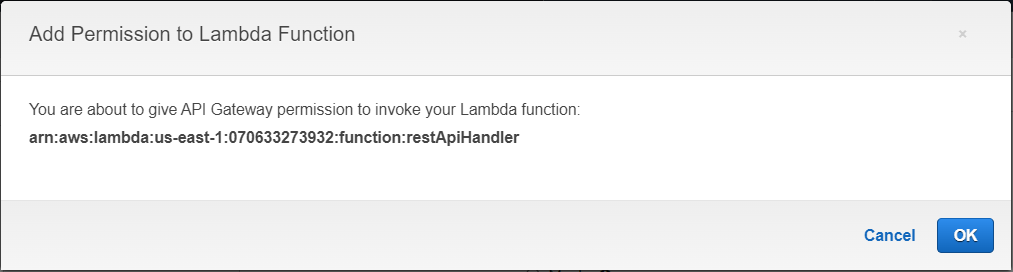
The method is now created and points to the Lambda function restApiHandler.py, so at each POST method from the website, the API Gateway will receive the data and pass it directly to the REST API Handler.
All that remains is to deploy the API, doing Action -> Deploy API:

Make a [New Stage], and choose the Stage name of your choice (sendingStage in this example):
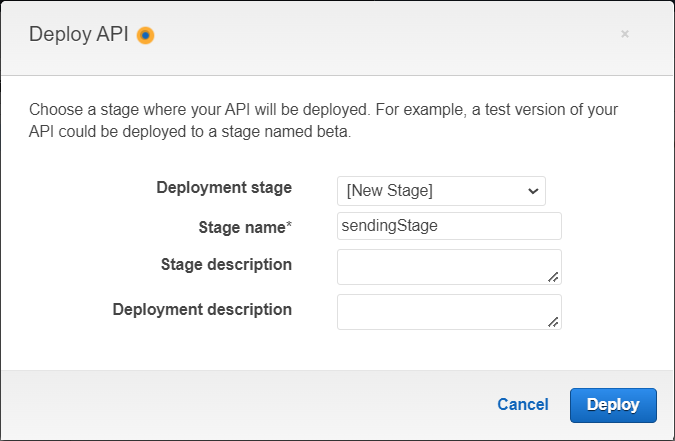
The API is deployed in the newly created stage. It will now be possible to send data to API Gateway via the Invoke URL of the stage:

The Invoke URL is ready. All that remains to be done is to create the website index.html on which the data will be entered, as well as the script formToApi.js that will send the data to the Invoke URL.
Code a website and upload it to S3
Last step before finishing the project: the website.
For this part, you have to:
create a main page on which to fill in the message and destinationEmail/phoneNumber data;
write a script capable of sending the data from the website to the REST API;
upload the website to S3.
It is now time to see how to carry out these three steps.
Create main page index.html
First, for those working on Visual Studio Code, create an HTML file, and write an exclamation mark '!' then press enter to generate a basic HTML template.
For those who do not use Visual Studio Code, copy the HTML page below:
<!DOCTYPE html>
<html lang="en">
<head>
    <meta charset="UTF-8">
    <meta http-equiv="X-UA-Compatible" content="IE=edge">
    <meta name="viewport" content="width=device-width, initial-scale=1.0">
    <title>Document</title>
</head>
<body>

</body>
</html>
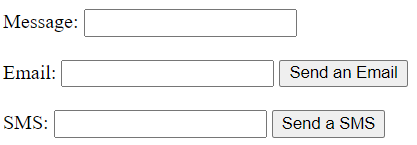
In order to fill in the message and destinationEmail/phoneNumber data, set up a form in the <body>, containing Message, Email and SMS fields, as well as two buttons, one for sending an email and the other for sending an SMS. The result should look like this:
<body>
    <form>
        <div>
            <label>Message:</label>
            <input type="text" name="message">
            <br><br>
            <label>Email:</label>
            <input name="email">
            <button>Send an Email</button>
            <br><br>
            <label>SMS:</label>
            <input name="sms">
            <button>Send a SMS</button>
        </div>
    </form>
</body>
![]()
It is REQUIRED to fill in the name attributes for the <input>, this will be very important for later.
The main page should look like this:
Now you want to send the form data to the formToApi.js script, to do this you must first declare in the <head> the use of the script:
<head>
    <meta charset="UTF-8">
    <meta http-equiv="X-UA-Compatible" content="IE=edge">
    <meta name="viewport" content="width=device-width, initial-scale=1.0">
    <title>Project 2 - Cloud Is Free</title>
    <script src="formToApi.js"></script>
</head>
The objective now is to send an email when the Send an Email button is clicked, and to send a SMS when the Send a SMS button is clicked.
In other words: on click, send the data and the typeOfSending corresponding to the button clicked to the script. To do this, use the onClick attribute, which will launch the formToApi.js script when a button is clicked.
To know more about OnClick: https://www.w3schools.com/tags/ev_onclick.asp
This is what it looks like:
<body>
    <form>
        <div>
            <label>Message:</label>
            <input type="text" name="message">
            <br><br>
            <label>Email:</label>
            <input name="email">
            <button onClick="formToApi(event,'email')">Send an Email</button>
            <br><br>
            <label>SMS:</label>
            <input name="sms">
            <button onClick="formToApi(event,'sms')">Send a SMS</button>
        </div>
    </form>
</body>
The FormToApi() function and its arguments will be explained below when creating the FormToApi.js script.
In the end, the main page should look like this:
<!DOCTYPE html>
<html lang="en">
<head>
    <meta charset="UTF-8">
    <meta http-equiv="X-UA-Compatible" content="IE=edge">
    <meta name="viewport" content="width=device-width, initial-scale=1.0">
    <title>Project 2 - Cloud Is Free</title>
    <script src="formToApi.js"></script>
</head>
<body>
    <form>
        <div>
            <label>Message:</label>
            <input type="text" name="message">
            <br><br>
            <label>Email:</label>
            <input name="email">
            <button onClick="formToApi(event,'email')">Send an Email</button>
            <br><br>
            <label>SMS:</label>
            <input name="sms">
            <button onClick="formToApi(event,'sms')">Send a SMS</button>
        </div>
    </form>
</body>
</html>
The main page index.html is ready, now it's time for the formToApi.js script.
Create POST script formToApi.js
First, create a JavaScript file formToApi.js, in which the formToApi() function will be created:
function formToApi(event, typeOfSending) {
The function has event and typeOfSending as arguments.
The typeOfSending argument is already known to everyone, if its value is email then an email will be sent, and if its value is sms then a SMS will be sent.
The event argument contains the event that occurred when the JS script was called. Here, it is the click on a button (onClick argument) that launched the function formToApi(), and the onClick argument by default redirects to the file containing the function (formToApi.js). You must therefore prevent the redirection to the formToApi.js file and remain on the main page index.html when you click on a button.
And to do this, use the preventDefault() method, which prevents the default action of the onClick argument:
event.preventDefault()
To better understand the preventDefault() method: https://developer.mozilla.org/en-US/docs/Web/API/Event/preventDefault
All you need to remember is that:
event is used to prevent page redirection;
typeOfSending is used to specify the type of sending.
Now that the arguments of the formToApi() function are understood, it is time to send the data to the API.
To do this, create a data variable containing all the variables to be sent to the API, typeOfSending, destinationEmail, phoneNumber and message:
    var data = {
        typeOfSending: ,
        destinationEmail:,
        phoneNumber: ,
        message:
    }
But how can this data be retrieved? It's simple: the value of typeOfSending has been retrieved in the argument typeOfSending of the function, so you just need to call the argument of the same name:
    var data = {
        typeOfSending: typeOfSending,
        destinationEmail: ,
        phoneNumber: ,
        message:
    }
And for the other three arguments, you need to retrieve the values contained in the form, and this will be possible using the name attribute previously filled in. Remember, in index.html, each <input> has a name (for example name="message" for the <input> containing the message).
To do this, use the getElementsByName method, which, as its name suggests, retrieves an element (or elements) based on the name. This gives:
    var data = {
        typeOfSending: typeOfSending,
        destinationEmail: document.getElementsByName('email')[0].value,
        phoneNumber: document.getElementsByName('sms')[0].value,
        message: document.getElementsByName('message')[0].value
    }
To learn more about getElementsByName: https://www.w3schools.com/jsref/met_doc_getelementsbyname.asp
You now need to send this data to the previously created REST API using the fetch() method. Here, this is how fetch() should be written:
    fetch( "<API_url>" , {
        method: "POST",
        headers: {
            "Content-Type": "application/json"
        },
        body: JSON.stringify(data),
        mode: "no-cors"
    })
}
To learn more about fetch(): https://javascript.info/fetch-api
The method fetch() has two arguments, the first containing the URL of the API, and the second containing several options (here method, headers, body and mode). Let's look at these options in detail.
method designates the method to use to interact with the API. Here you want to send data, so you have to use the POST method.
headers contains the headers you want to add to the request. Here you specify that the content (what is in the body) is of type JSON, so you fill in: "Content-Type": "application/json "
body contains the content to be sent during the request. You have to add the data (data variable) in the body, and in JSON format (JSON.stringify) to be readable by the API.
mode specifies the mode you want to use for the request. The mode used here is no-cors in order to receive an opaque response from the API. In some cases, we prefer to get an explicit response from the API (to get an image with a GET method for example), but in this case, it is not a problem to receive an opaque response since the only method that will be used is POST. The no-cors mode strengthens the security since potential attackers won't be able to retrieve anything from the API.
For those who want to know more about opaque responses: https://tpiros.dev/blog/what-is-an-opaque-response/
The script formToApi.js should now look like this:
function formToApi(event, typeOfSending) {

    event.preventDefault()

    var data = {
        typeOfSending: typeOfSending,
        destinationEmail: document.getElementsByName('email')[0].value,
        phoneNumber: document.getElementsByName('sms')[0].value,
        message: document.getElementsByName('message')[0].value
    }

    fetch( "<API_url>" , {
        method: "POST",
        headers: {
            "Content-Type": "application/json"
        },
        body: JSON.stringify(data),
        mode: "no-cors"
    })
}
![]()
When filling the API URL, you need to put the Invoke URL of the API AND the resource containing the POST method at the end of the Invoke URL.
Example:
| Invoke URL | Resource | API URL |
| https://tgykfcp526.execute-api.us-east-1.amazonaws.com/sendingStage | sending | https://tgykfcp526.execute-api.us-east-1.amazonaws.com/sendingStage/sending |
Now is the time to test the website.
In order to test the website, I strongly advise you to set up a local web server. For VSCode users, this tutorial explains very well how to do it: https://www.youtube.com/watch?v=tk8wLMJ7diQ
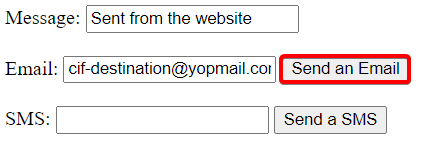
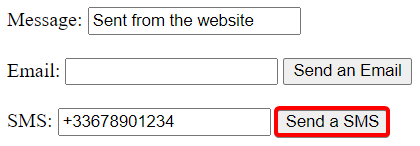
Test the website by going to the main page, and trying to send an email and a SMS:
Wait a few seconds, before going to the mailbox of the destination mail:
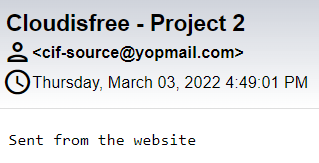
The email has been received, now it's time to send a SMS:
Wait a few seconds, and the SMS should be received.
The website works perfectly, only one last step left in the project: upload the website on S3.
Upload the website on S3
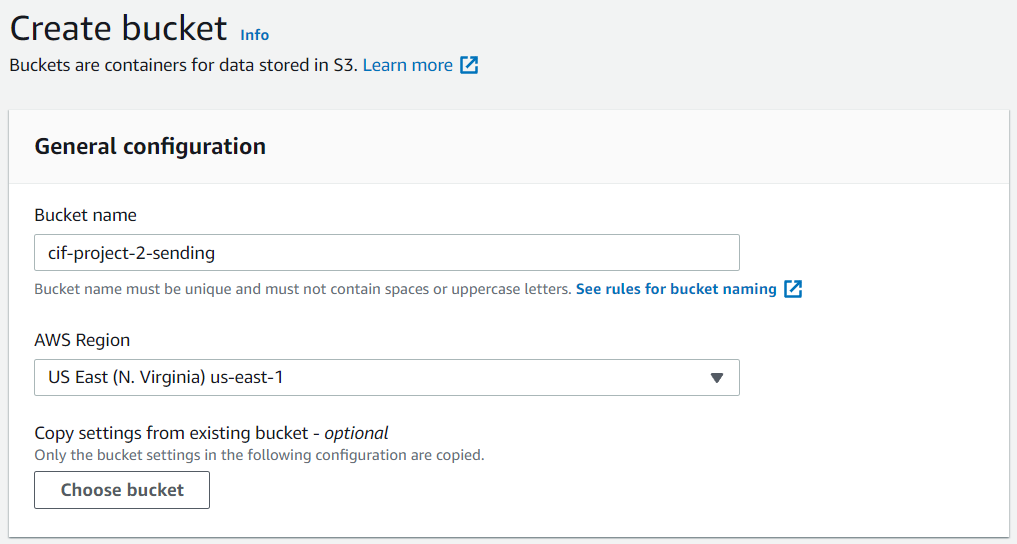
Go to S3 and create a bucket. Assign the bucket name of your choice:
Then allow the bucket to be publicly available on the Internet:
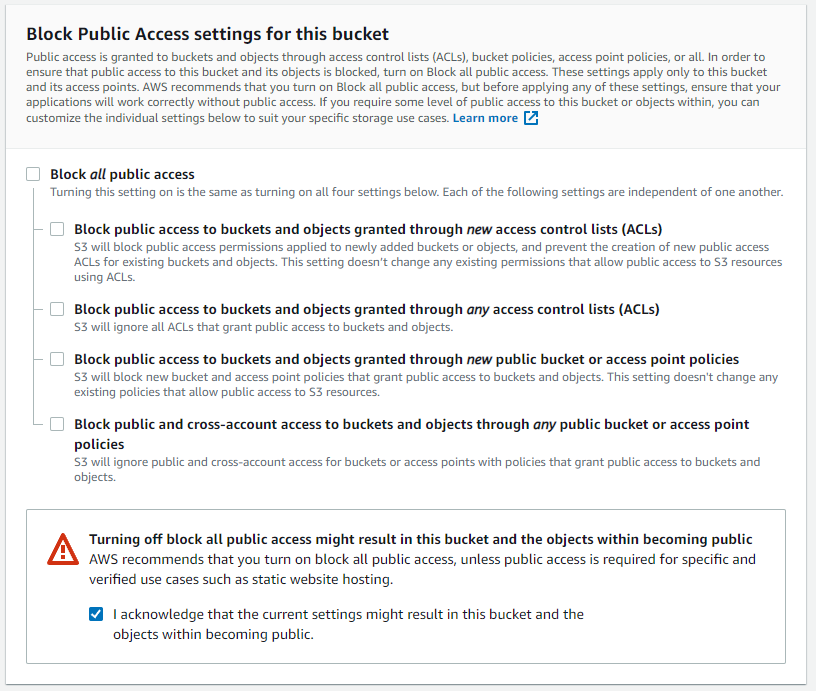
You can then create the bucket.
Once the bucket is created, go to its configuration and upload the index.html and formToApi.js files:

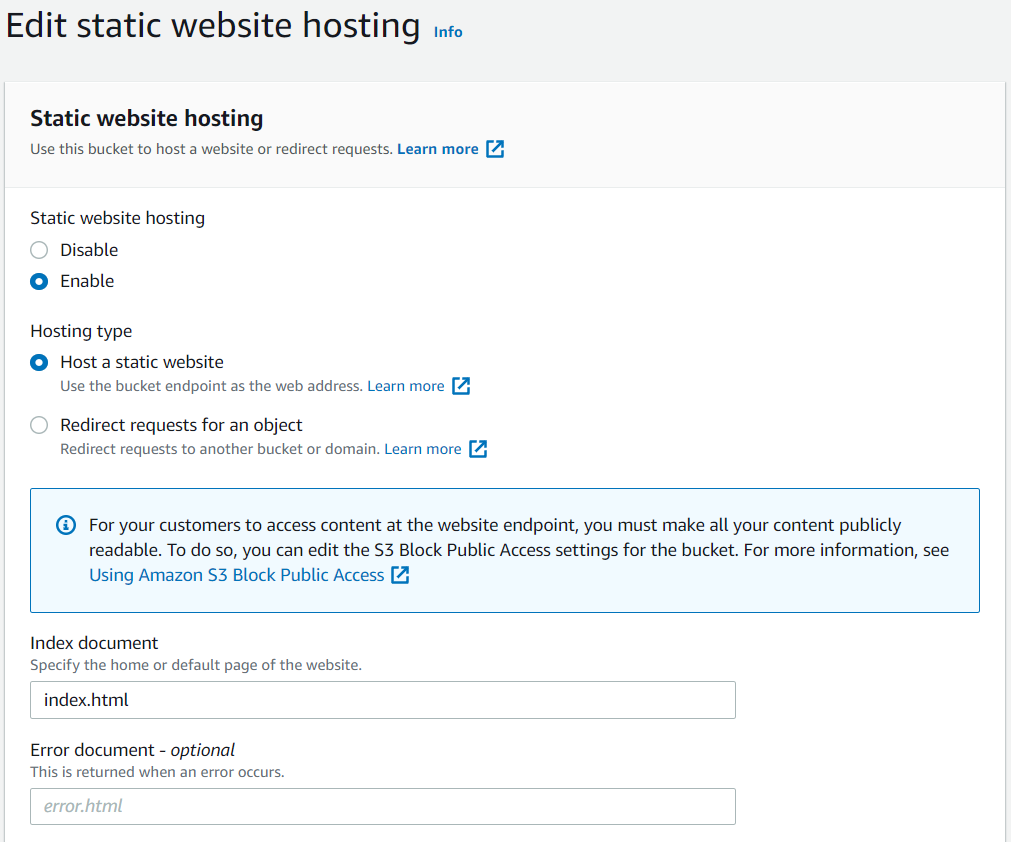
Go to the Properties tab, section Static website hosting (at the very bottom) and click on Edit:

Enable the Static website hosting, and fill in the index.html file in the Index document field before validating the Static website hosting configuration:
Move to Permissions to modify the Bucket Policy:
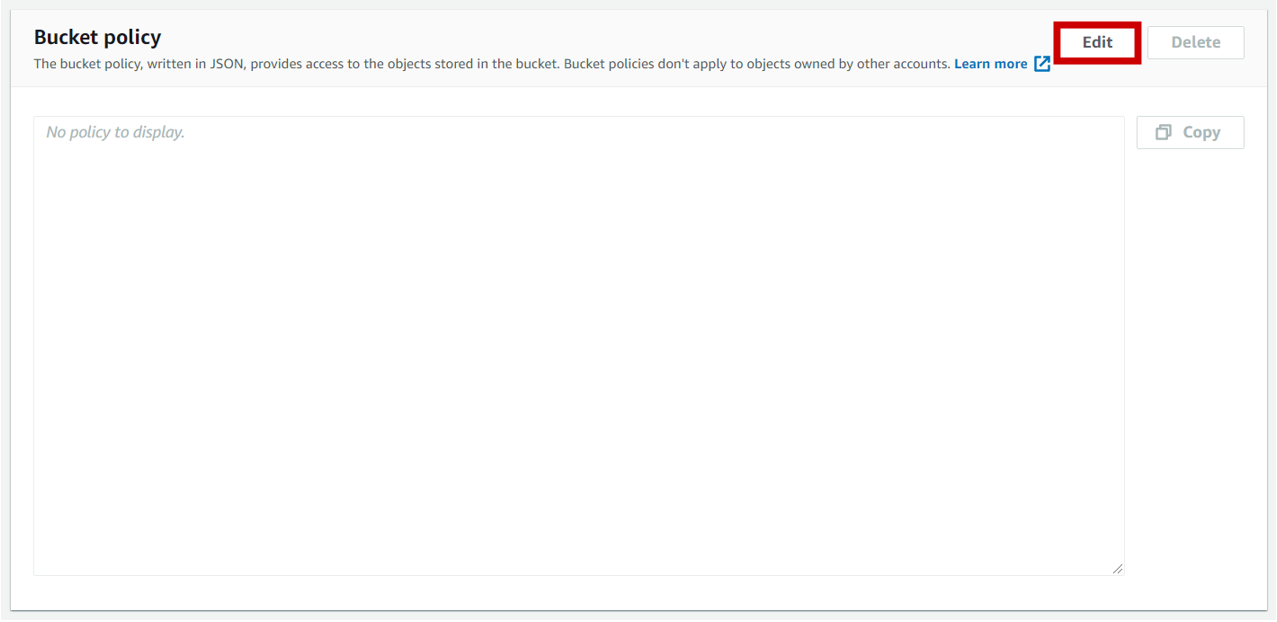
Insert the following policy and modify it slightly before validating:
{
    "Version": "2012-10-17",
    "Statement": [
        {
            "Sid": "PublicReadGetObject",
            "Effect": "Allow",
            "Principal": "*",
            "Action": [
                "s3:GetObject"
            ],
            "Resource": [
                "arn:aws:s3:::bucket_name/*"
            ]
        }
    ]
}
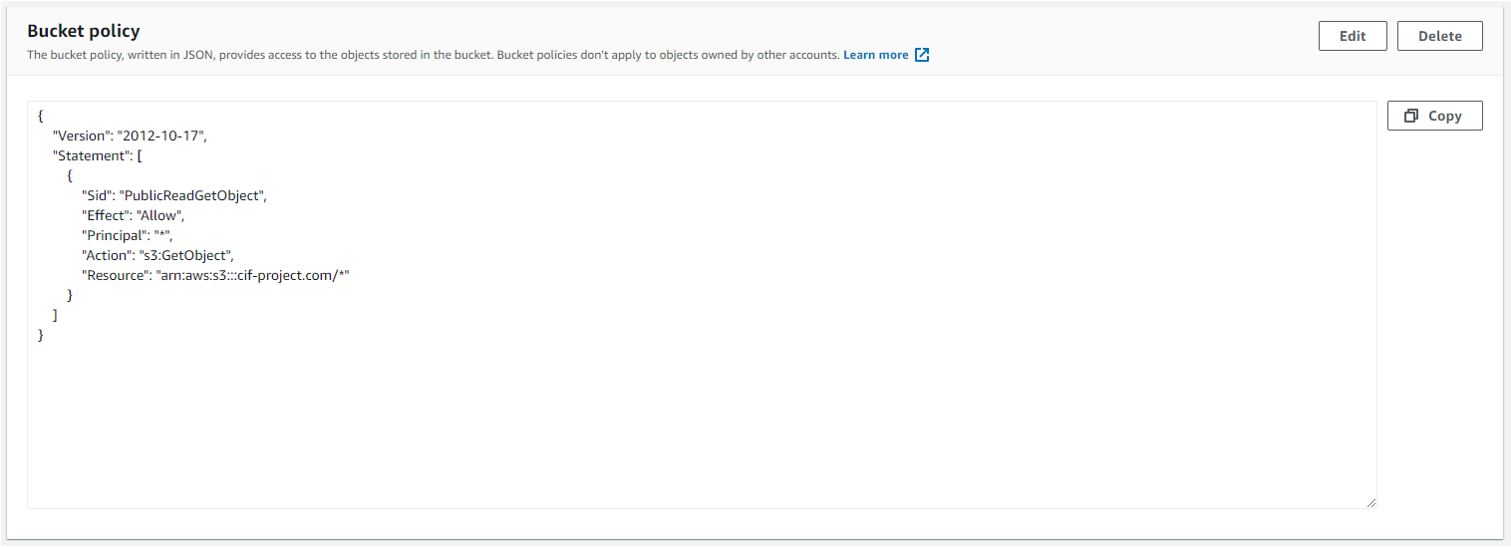
This Bucket policy allows:
Assign read rights to objects via the Action ''s3:GetObject'' ;
The Targeted Resources are the objects in your S3 Bucket.
![]()
Do not forget to replace the *bucket_name* field with the name of the S3 Bucket, and keep the /* at the end of the Resource field, otherwise you won't give access to the Bucket objects!
In this example, the Bucket policy now looks like this:
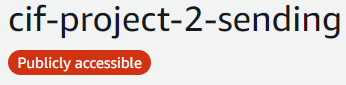
All that remains is to apply the new Bucket policy; the pages of the website will now be publicly accessible. It should be displayed publicly accessible below the name of the S3 Bucket:
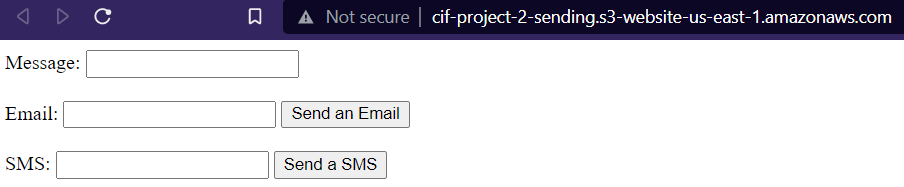
Go back to Properties section Static website hosting and copy the website link into a new tab:
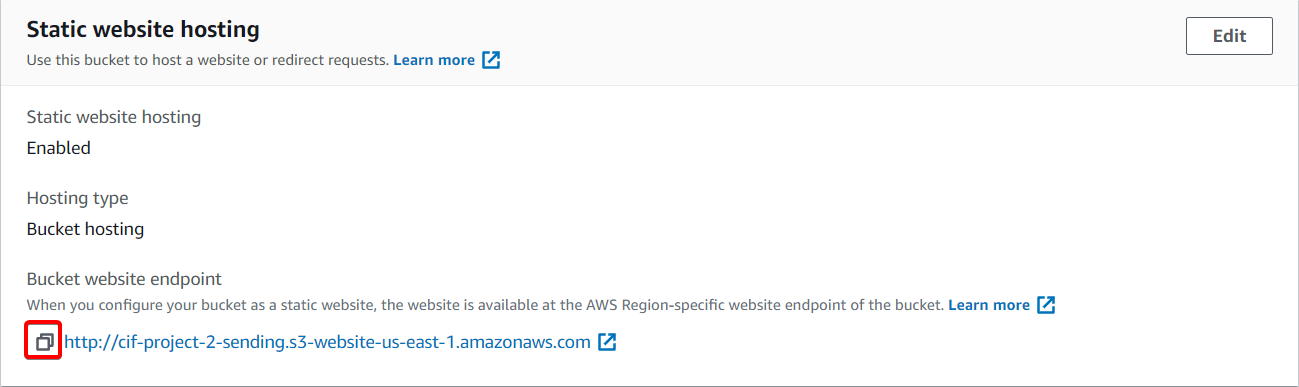
The website hosted on S3 is now accessible:
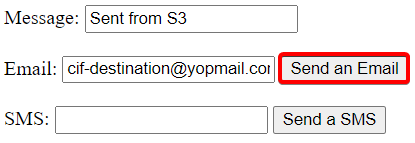
Do a final test, by sending an email from S3:
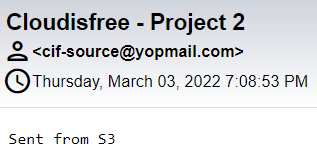
Let's see the destination mailbox:
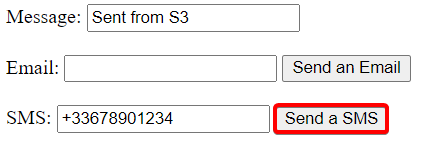
It works. Now time to send a SMS from S3:
If you receive the message: Congratulations!
You have completed Project 2. You are now fully capable of making Serverless services interact with each other and send instructions to them from a website, all using AWS.
Homepage
If you are on the GitHub repository: Go to the website
This site aims to help those wishing to set up practical projects through an interactive and detailed documentation, and this while taking advantage of the Free Tier from Cloud platforms.
No more fear of receiving a hefty bill: follow these steps properly and deploy your first Cloud projects for cheap.
You will learn how to :
Deploy a static website;
Create a Serverless sending application;
Create and manipulate databases using containers;
and other projects that will come in the future.
The projects are currently deployed on AWS, but will be deployed on other Cloud platforms in the future.
Here is an overview of the technologies used for each project:

Ready to start your first project? Then head to the Projects section.
Subscribe to my newsletter
Read articles from Mohammad Kasim directly inside your inbox. Subscribe to the newsletter, and don't miss out.
Written by
Mohammad Kasim
Mohammad Kasim
Tech enthusiast | Code craftsman | DevOps explorer | Turning bugs into features one line at a time 🚀