How to Assemble a Scene From Among-Us Using SelfCAD
 Juliana Misiko
How to Assemble a Scene From Among-Us Using SelfCAD
Bringing a digital scene to life requires more than just modeling individual objects, it involves thoughtful assembly, spatial planning, and creative storytelling. In this article, we will walk through how to assemble a complete scene inspired by the popular game Among Us using SelfCAD. Known for its colorful characters and simple yet iconic environments, Among Us offers a fun and approachable theme for 3D scene creation. Using SelfCAD’s intuitive tools, we’ll explore how to place the scenes in a dynamic layout, and create a cohesive visual narrative that captures the spirit of the game. This project is a great way to practice scene-building while exploring the intersection of design and fan art.
To access the interactive tutorial to this article, check out; https://www.selfcad.com/tutorials/501b10p3x4613v6p3q321w2d2p1ue4v1m6b2
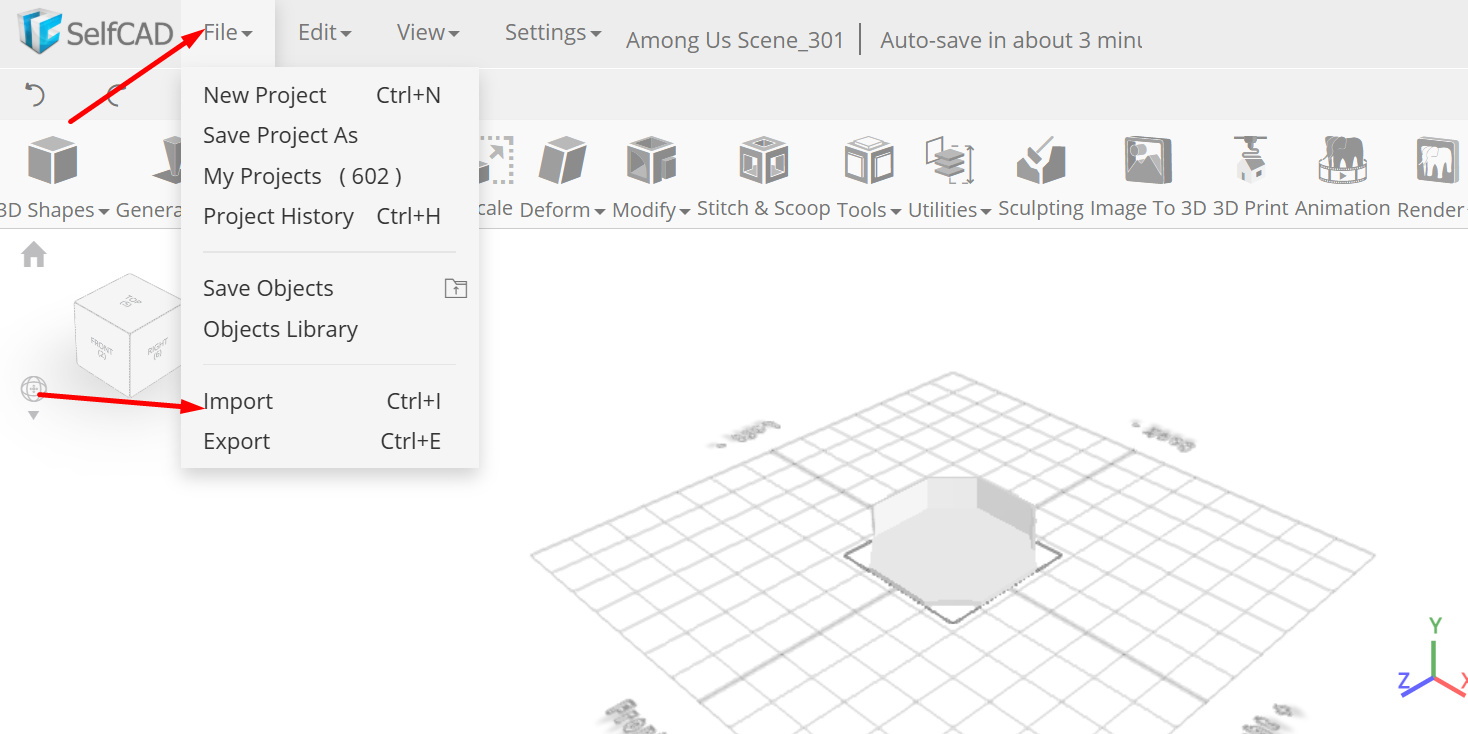
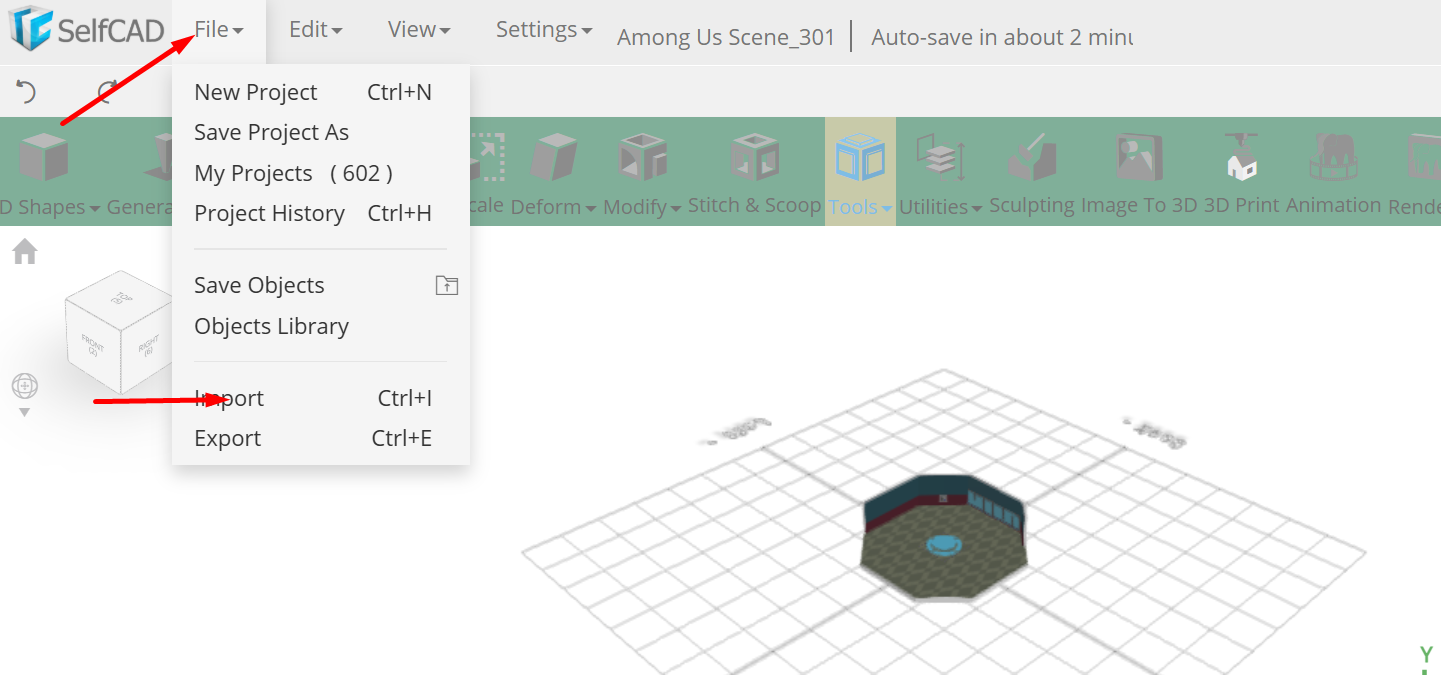
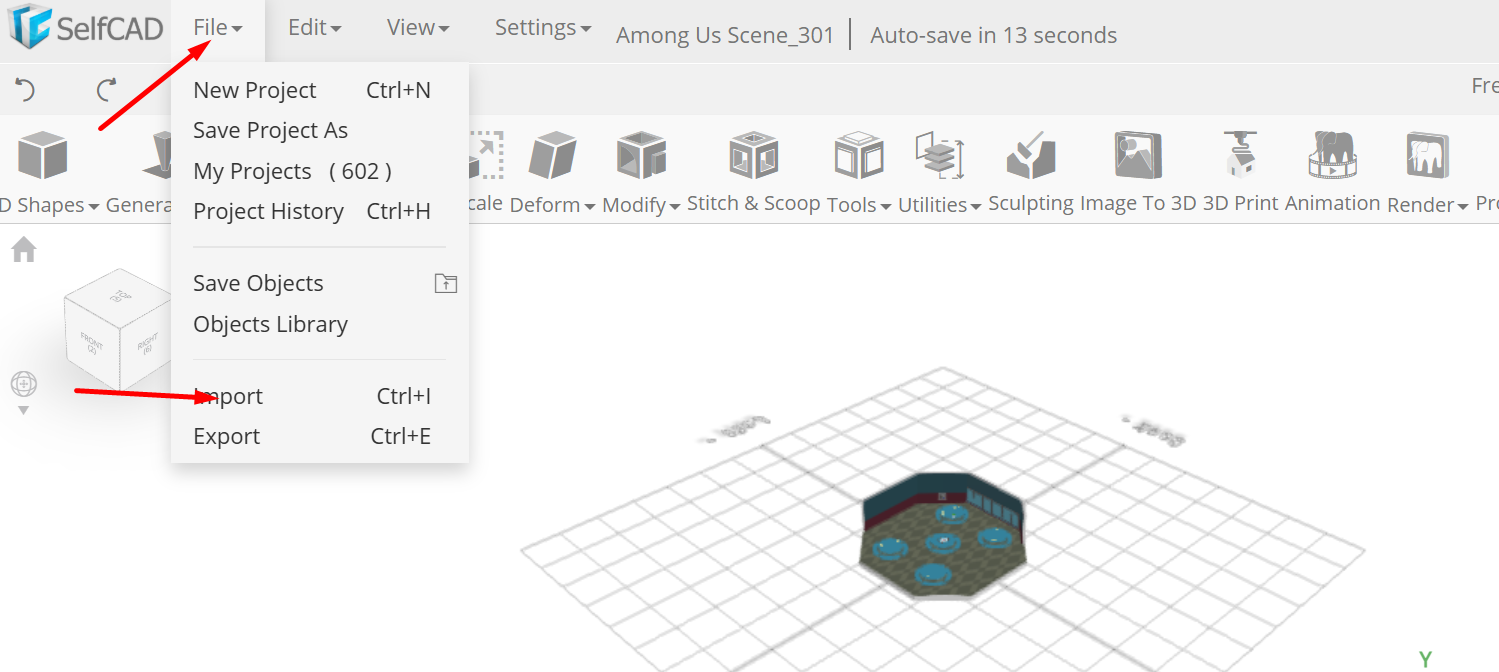
From the file menu on the top toolbar click import, Click load object from tutorial button to add object
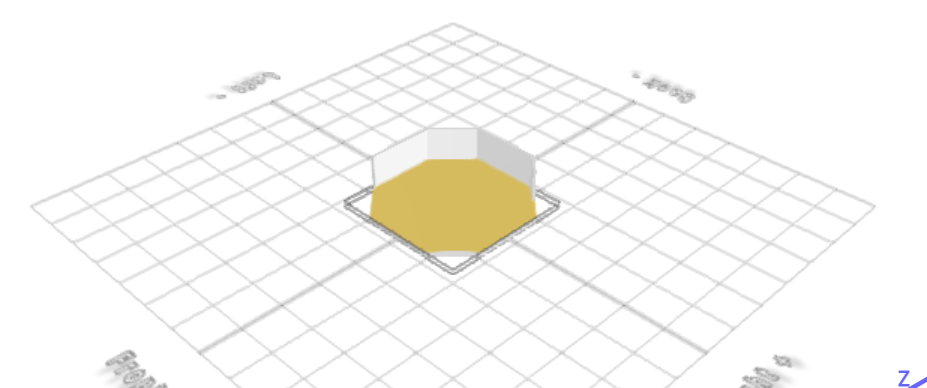
Click to activate polygon selection; Click on highlighted region to select it
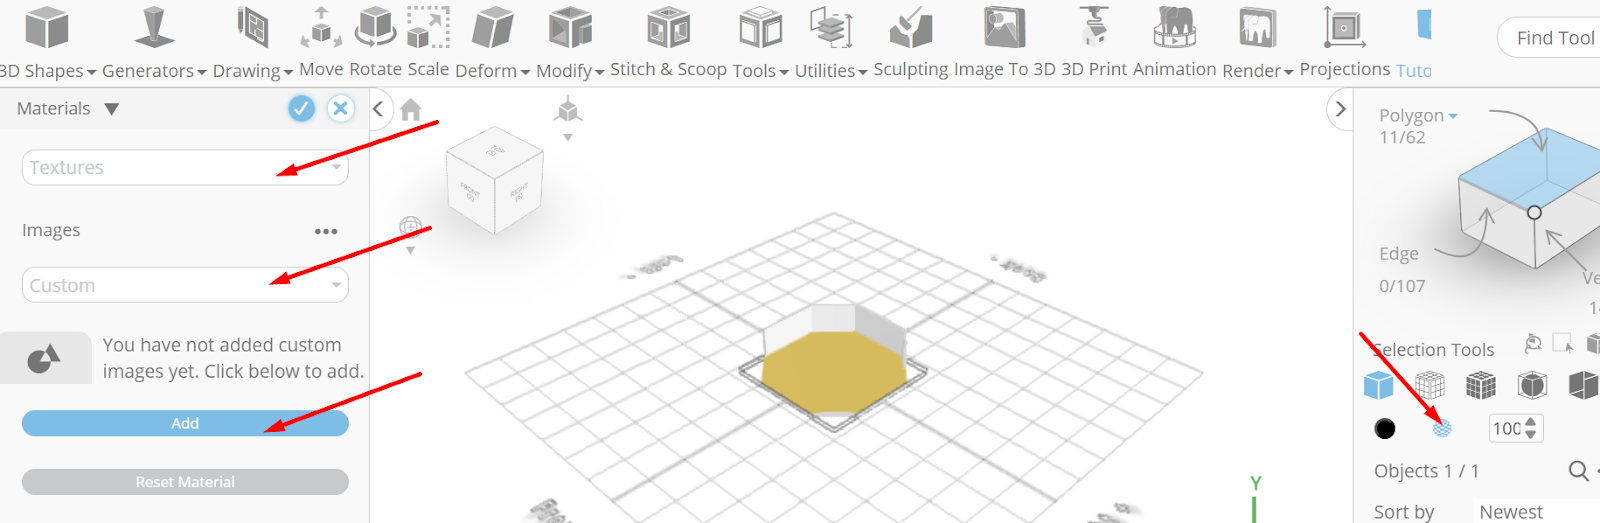
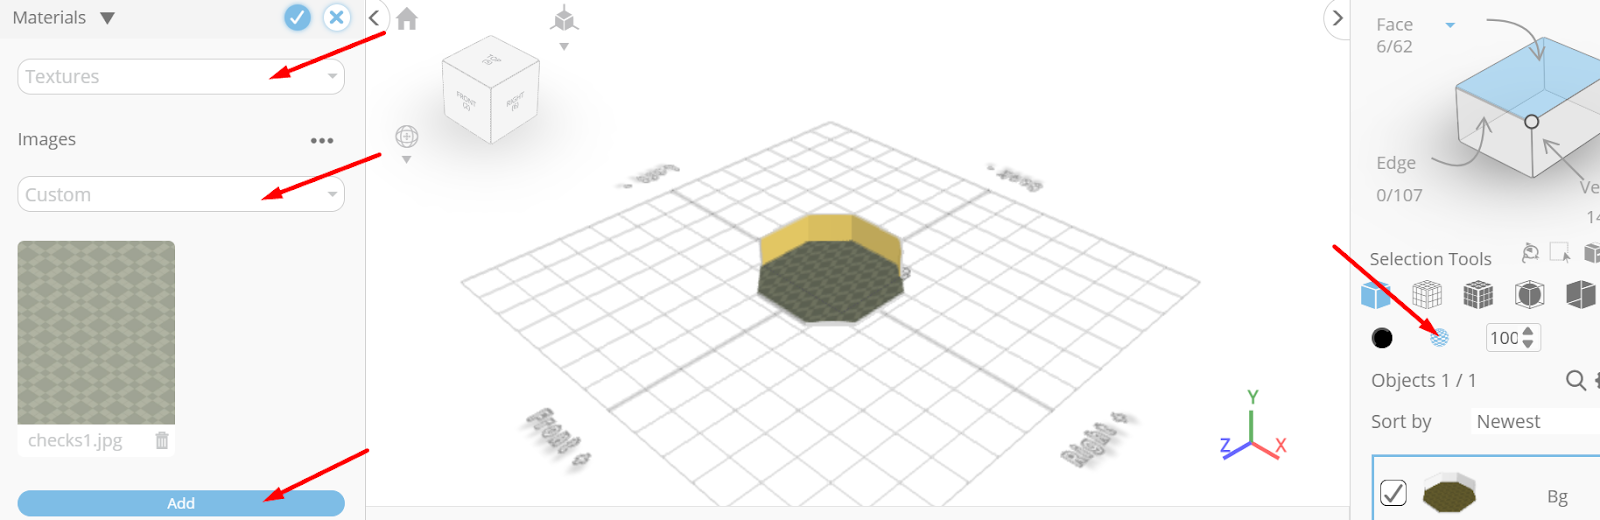
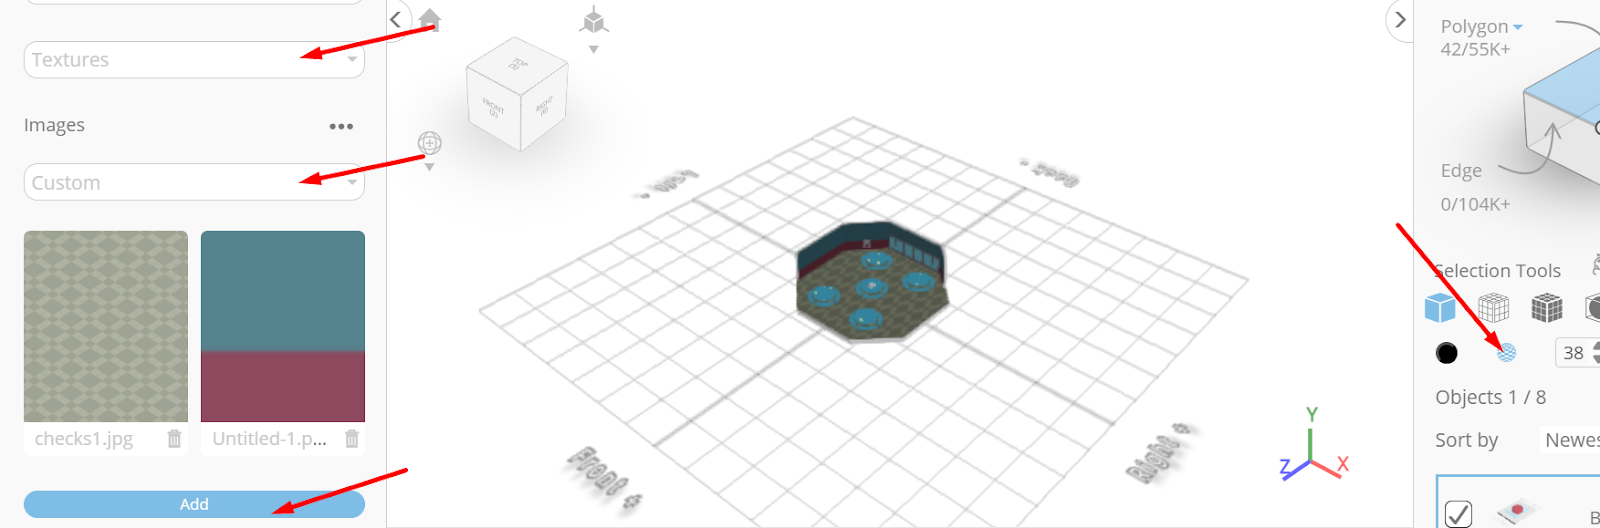
From the right panel choose materials; Set settings to textures, texture category to custom, Click add image button to load new image
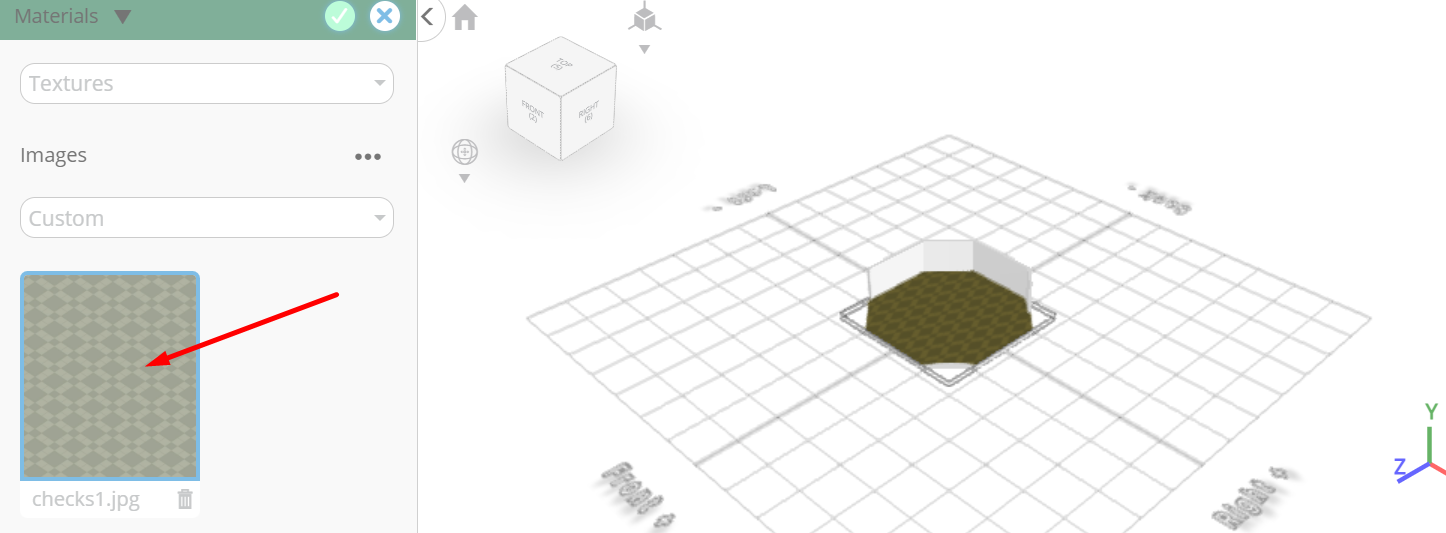
Click load image from tutorial button to add image, Click checks1.jpg button to apply texture
Tick the checkmark to finalize materials
Click on highlighted region to deselect it
Click to activate face selection; Click on the gear icon to open advanced selection tools, set loop selection to true, click on highlighted face to select loop from the object.
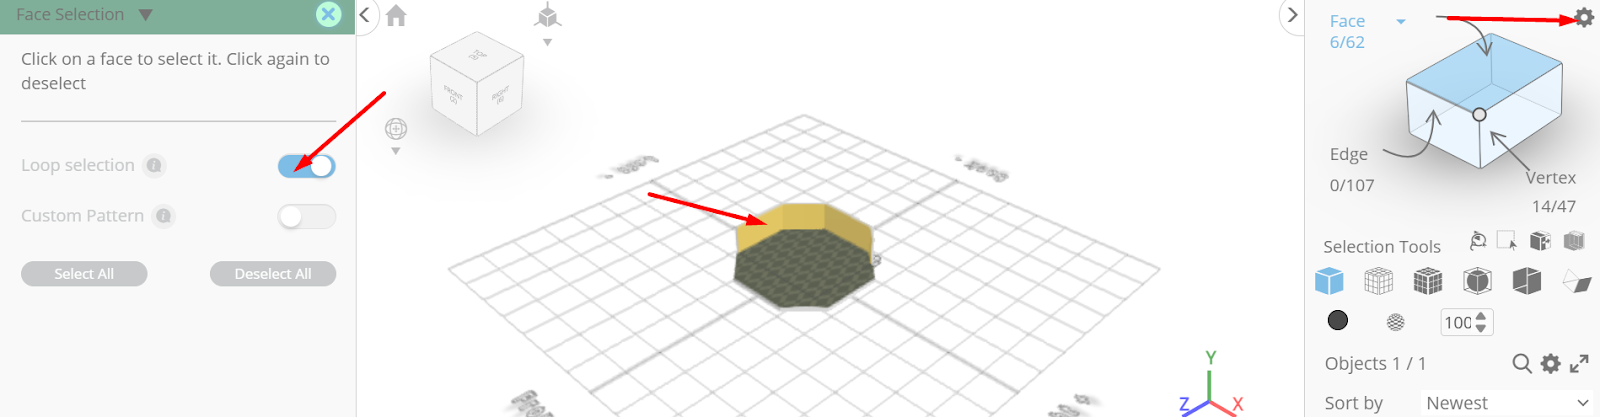
Click ‘x’ to close selection settings panel
From the right panel choose materials; Set settings to textures, texture category to custom, Click add image button to load new image
Click load image from tutorial button to add image, Click untitled1.png button to apply texture
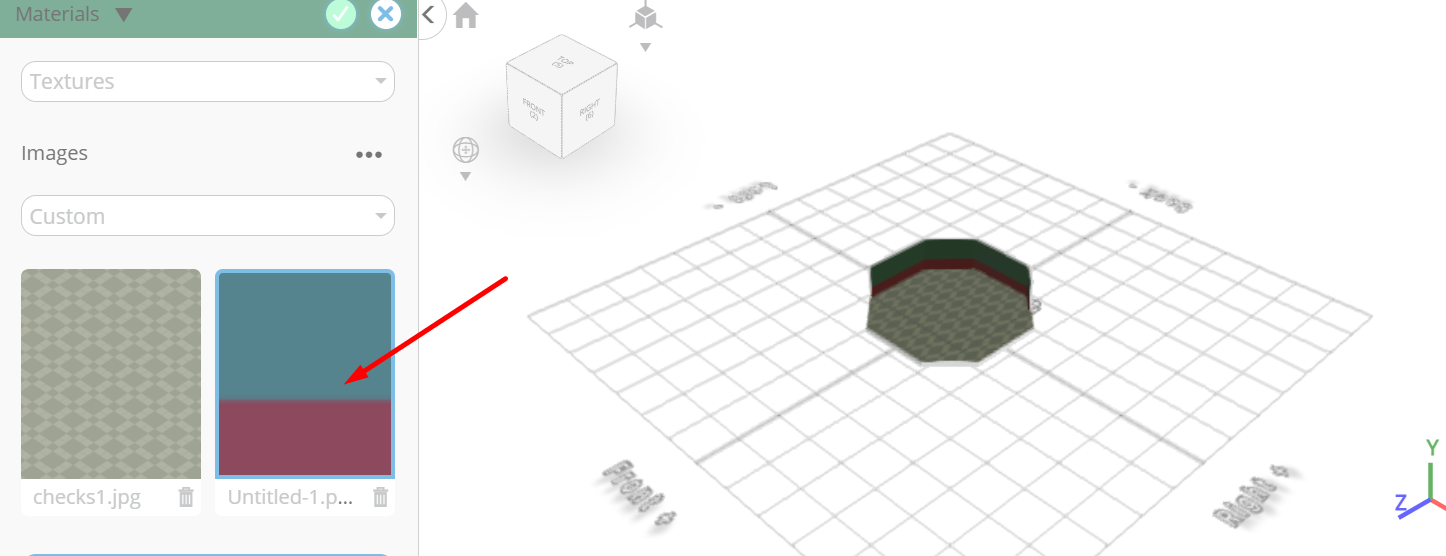
Tick the checkmark to finalize materials
Click highlighted part on selection cube to turn off region selection
From the file menu on the top toolbar click import; Click load object from tutorial button to add object
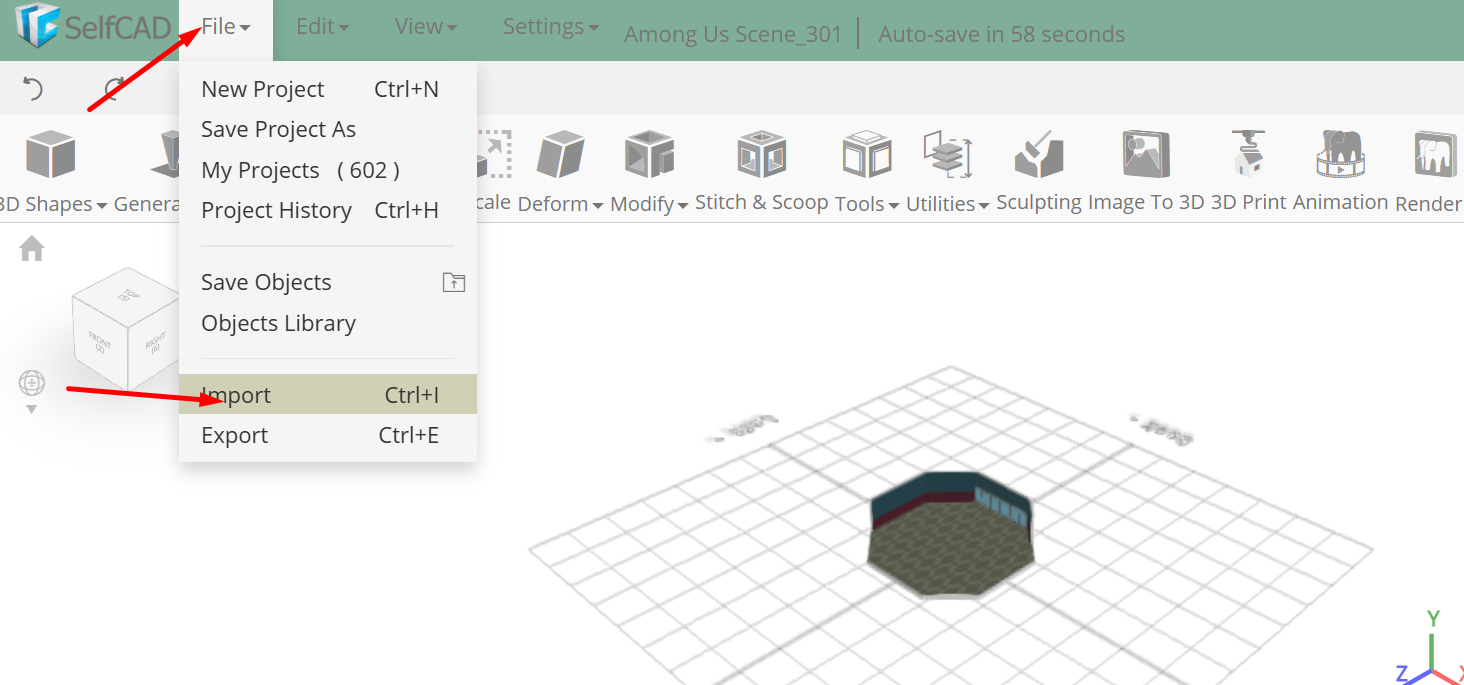
From the file menu on the top toolbar click import, Click load object from tutorial button to add object
From the tools category on the toolbar choose copy offsets. ; Set x to -35, z to -50; Click copy button to create copies.
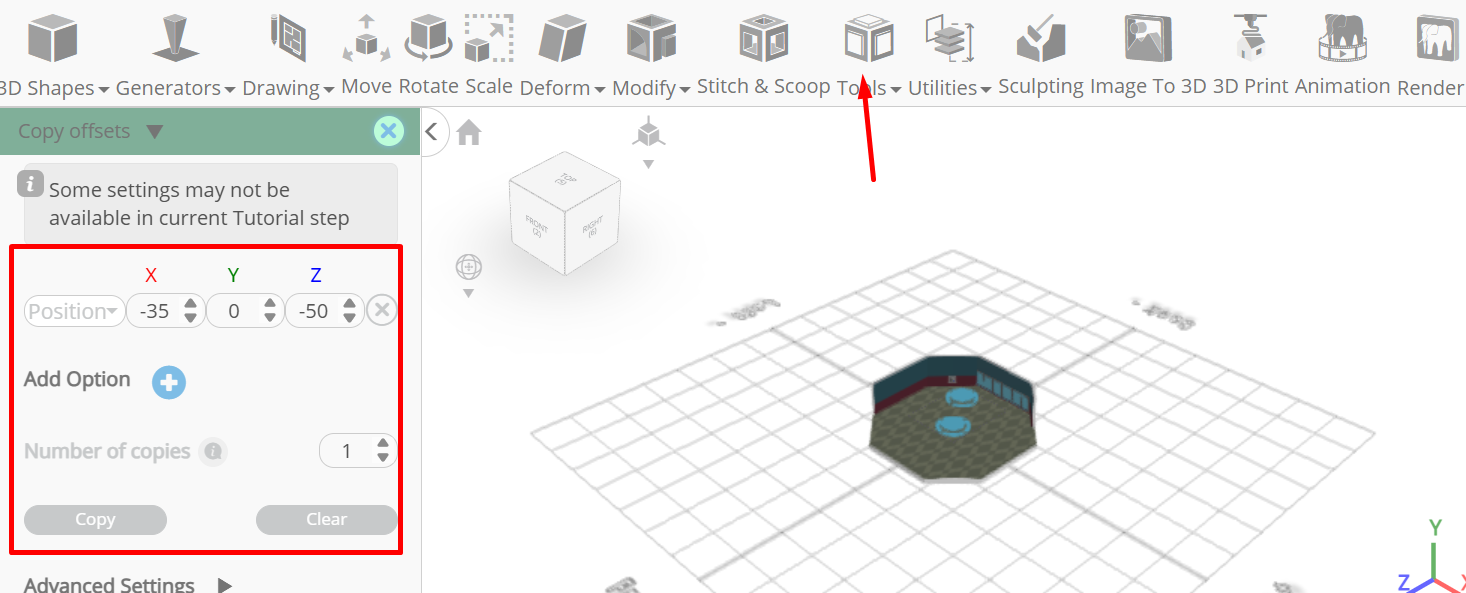
Click ‘x’ to close copy offsets panel
Click on group 2 to deselect
From the utilities category on the toolbar choose mirror; Set create copy to true, direction to right, offset to 14.7
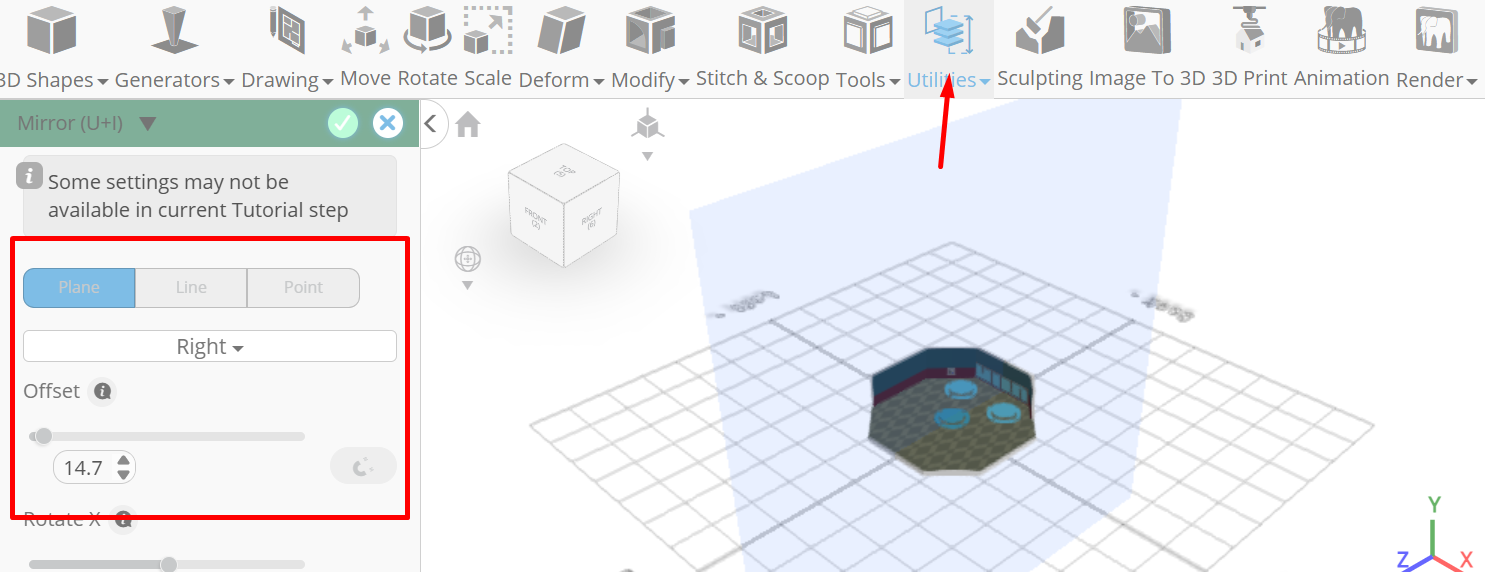
Tick the checkmark to finalize mirror
Click on group 2(2) to select it
From the utilities category on the toolbar choose mirror; Set create copy to true, offset to 30.17
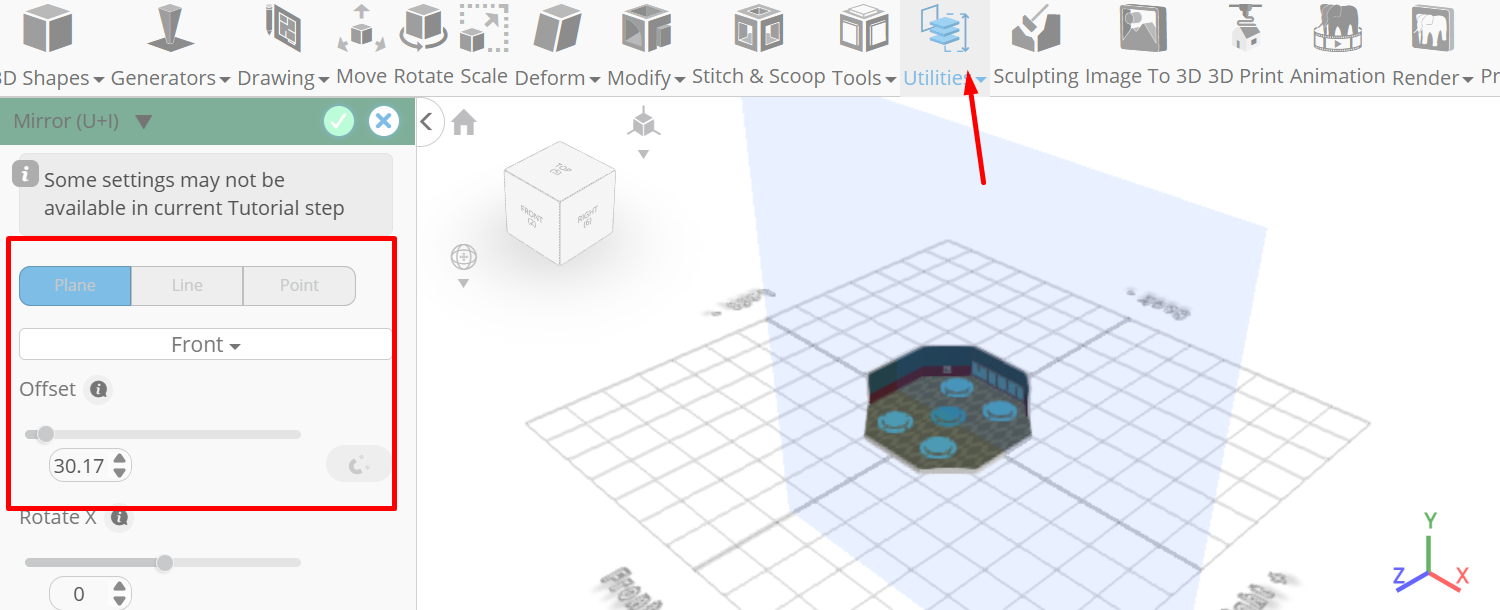
Tick the checkmark to finalize mirror
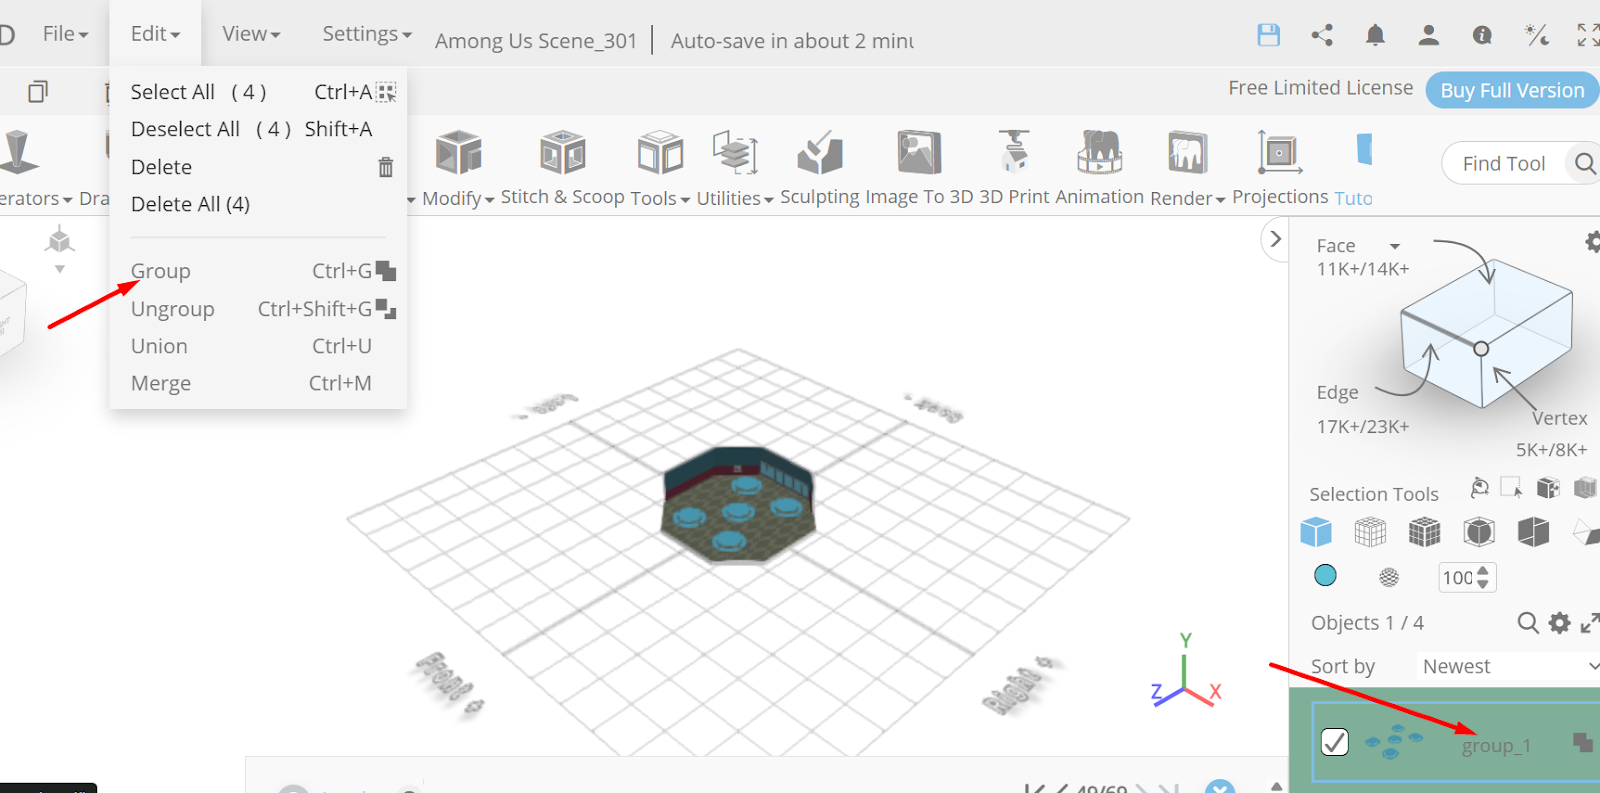
Click on group 2, 2(3), 2(4) to select it
From the edit menu on the top toolbar choose group, Change object name from group 1 to tables
From the file menu on the top toolbar click import, Click load object from tutorial button to add object
Click to activate polygon selection; Click on highlighted region to select it

From the right panel choose materials; Set settings to textures, texture category to custom, Click add image button to load new image
Click load image from tutorial button to add image, Click y&bstripes.jpg button to apply texture
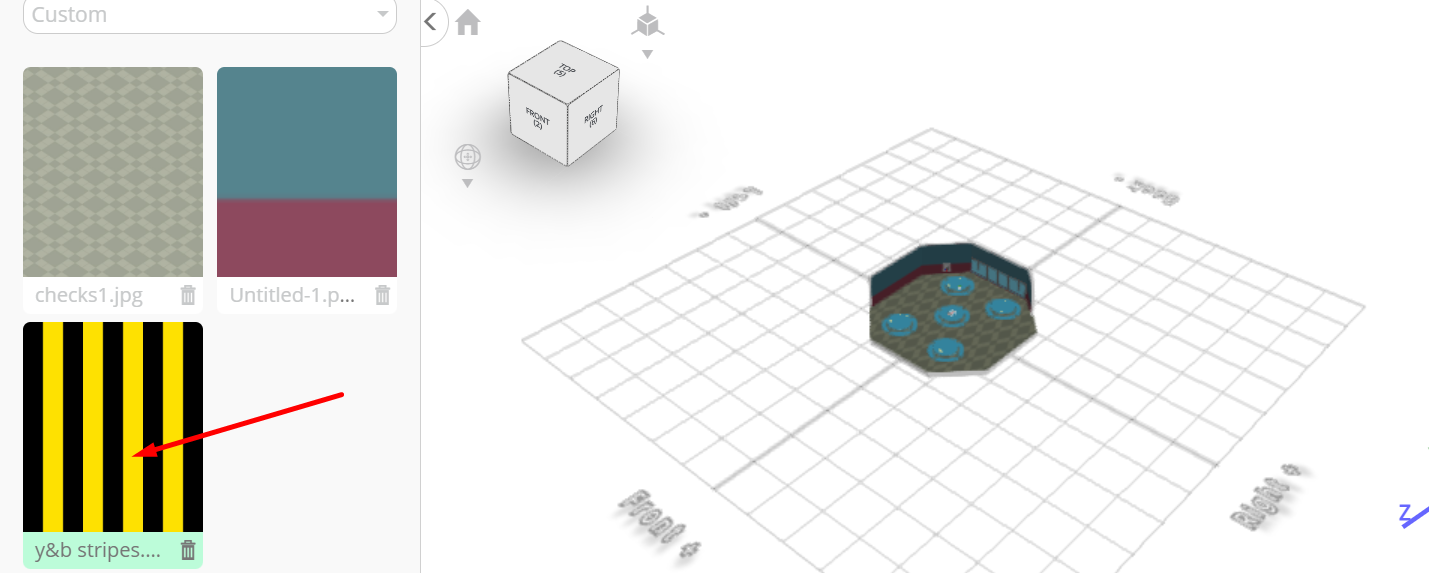
Tick the checkmark to finalize materials
Click highlighted part on selection cube to turn off region selection
As you continue honing your design skills, remember that SelfCAD offers a wealth of resources to support your learning journey. To deepen your understanding and explore more advanced features, consider checking out the interactive tutorials (https://www.selfcad.com/tutorials) available on the SelfCAD website. The tutorials page provides a treasure trove of guides, tips, and tricks that cater to designers of all levels.
More structured learning experience can also be accessed at the SelfCAD Academy (https://www.selfcad.com/academy/curriculum/), https://www.youtube.com/@3dmodeling101, and 3D Modeling 101 series (https://www.youtube.com/playlist?list=PL74nFNT8yS9DcE1UlUUdiR1wFGv9DDfTB). This comprehensive resource offers in-depth courses taught by industry experts, allowing you to master the intricacies of SelfCAD at your own pace.
Subscribe to my newsletter
Read articles from Juliana Misiko directly inside your inbox. Subscribe to the newsletter, and don't miss out.
Written by