How to Design a Simple Bin using 3D CAD Software
 Juliana Misiko
How to Design a Simple Bin using 3D CAD Software
In an age where digital design plays a crucial role in everyday problem-solving, 3D modeling tools like SelfCAD empower users to create practical, real-world objects with ease. One such object, a simple bin or trash can, may seem mundane, but designing it from scratch provides valuable insight into the fundamentals of 3D modeling, including shape manipulation, sizing, and hollowing techniques. This article explores how to design a functional and visually clean bin using SelfCAD, highlighting each step from the initial sketch to the final render. Whether you're a beginner or looking to sharpen your design skills, this project offers a straightforward yet meaningful introduction to product modeling
To access the interactive tutorial to this article, visit https://www.selfcad.com/tutorials/2m5w31523b675cr6h6h1z4p5613356gs5a5a
Once you’ve launched the editor;
From the 3D Shapes Category on the Toolbar, choose Cylinder; Set Top Radius to 40, Bottom Radius to 30, Vertical segments to 8
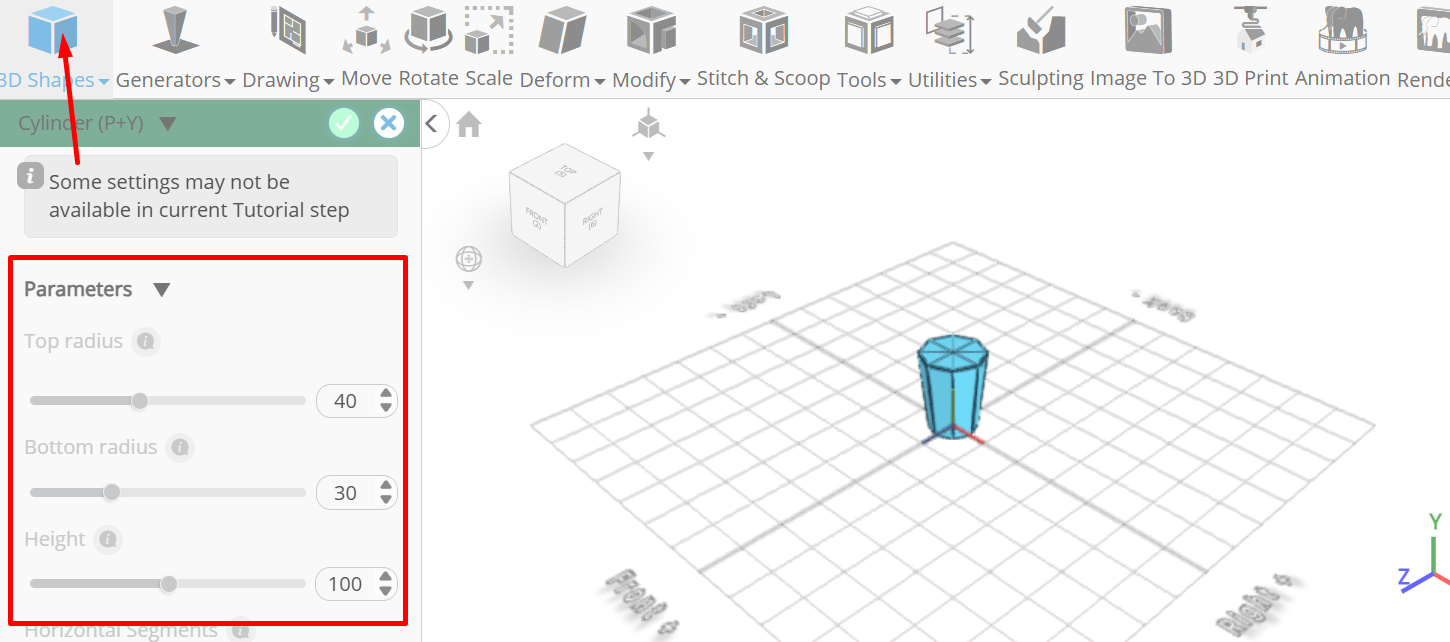
Click to finalize Cylinder
Click to activate Polygon selection; Click on highlighted region to select it
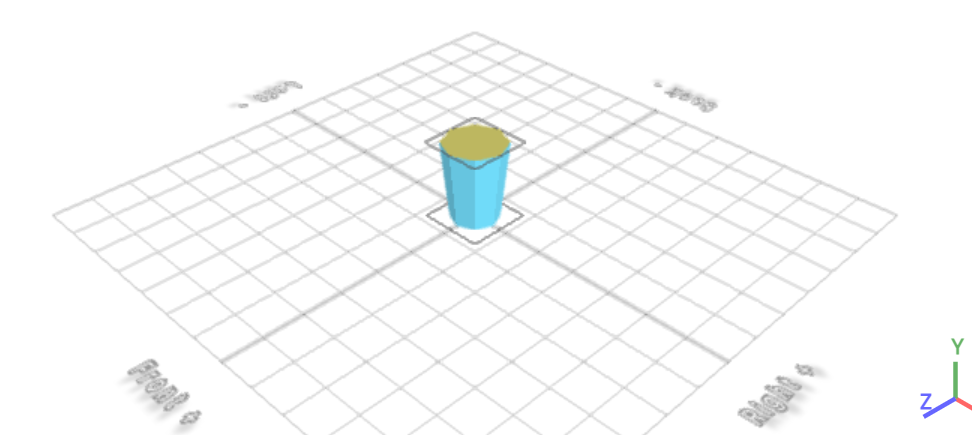
Click Delete button to delete selected object
From the Modify Category on the Toolbar choose Add Thickness. Set Thickness to -3

Click to finalize Add Thickness
From the 3D Shapes Category on the Toolbar, choose Cylinder; Set Top Radius to 40, Bottom Radius to 42, Height to 10, Vertical segments to 8, Position y to 150
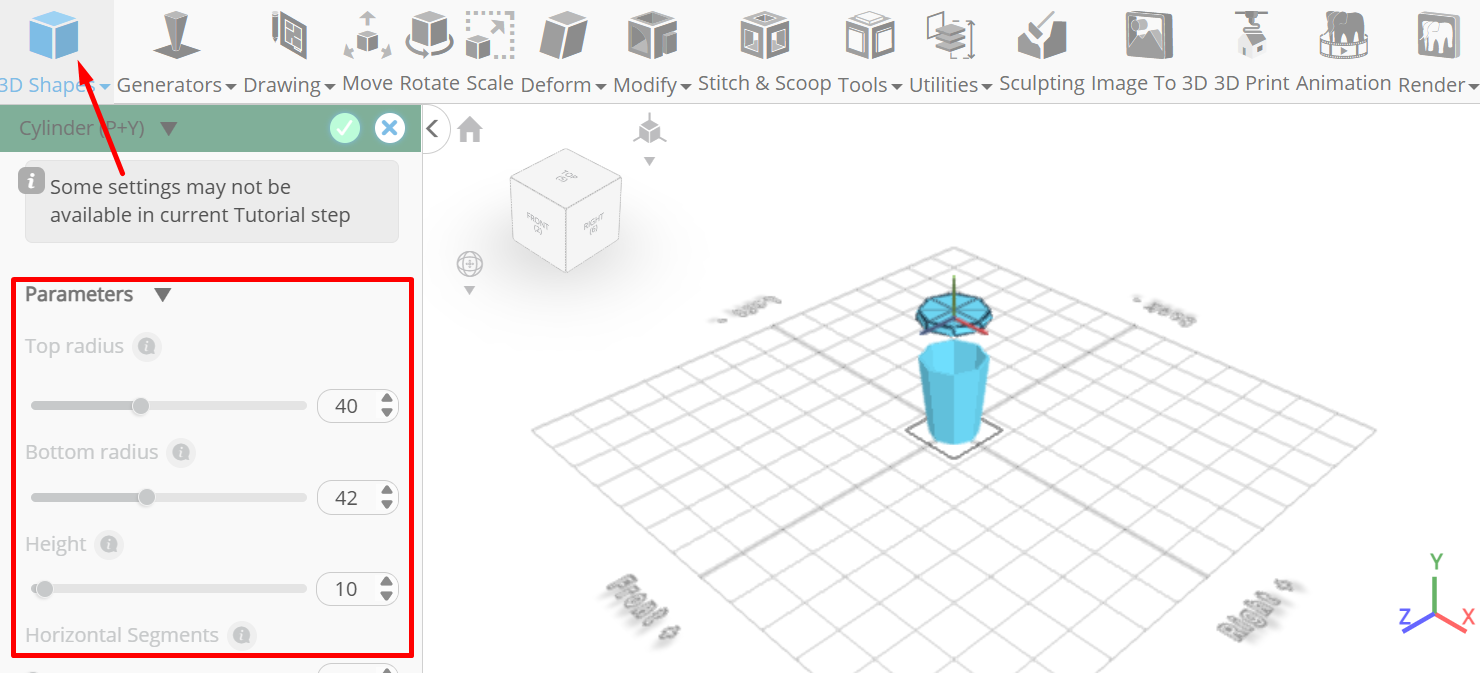
Click to finalize Cylinder
Click on highlighted region to select it
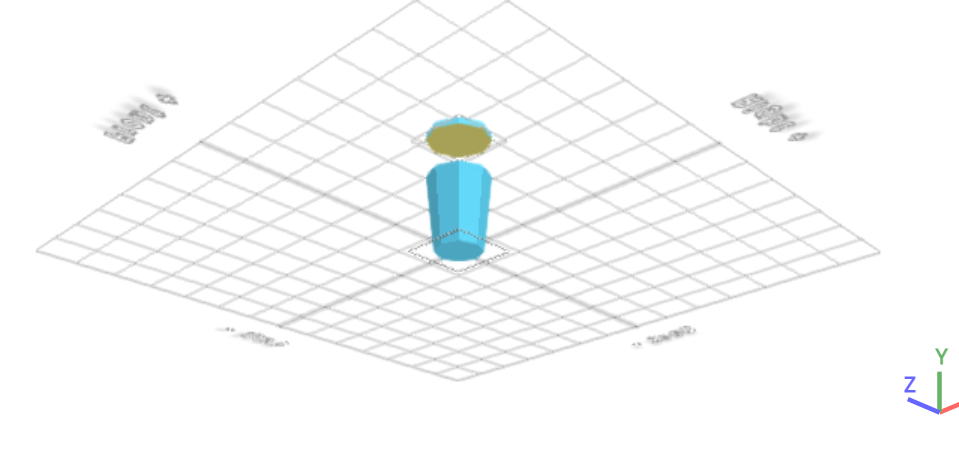
Click Delete button to delete selected object
From the Modify Category on the Toolbar choose Add Thickness. Set Thickness to -2
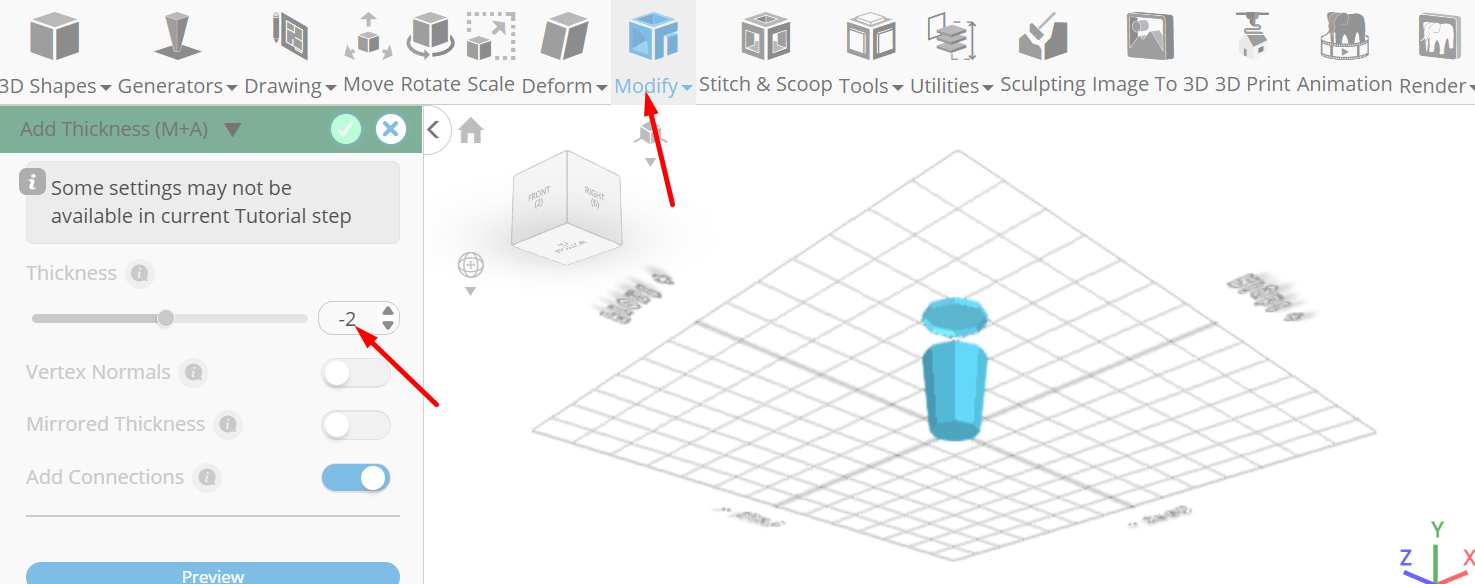
Click to finalize Add Thickness
Click on highlighted region to select it
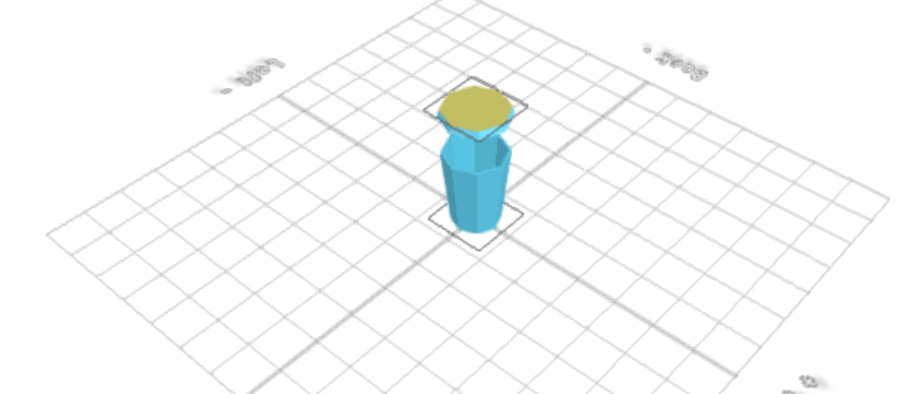
From the Modify Category on the Toolbar, choose Inset. Set Inset Amount to 18
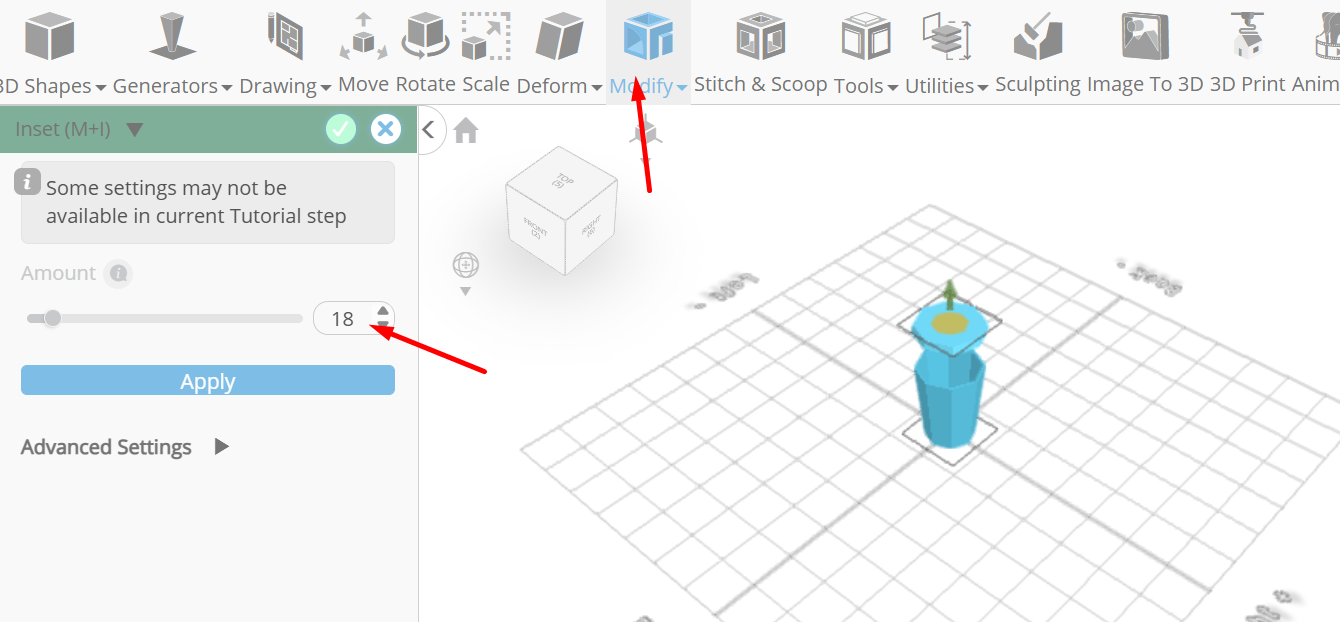
Click to finalize Inset
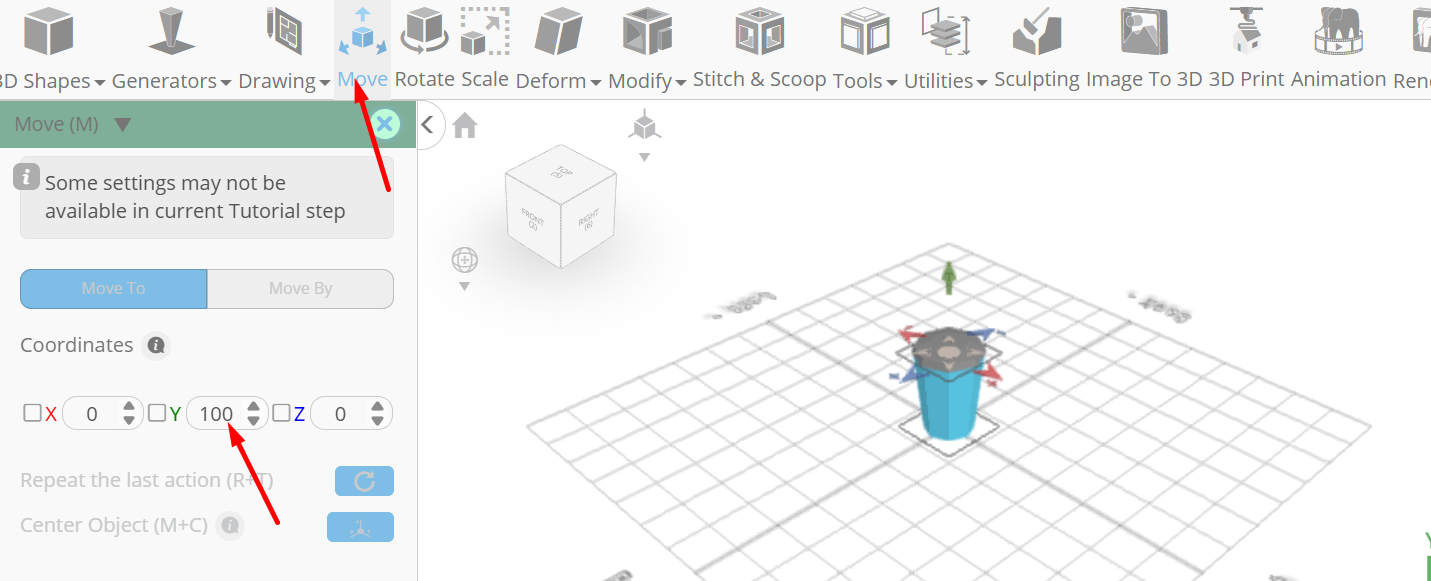
Click Move on the Toolbar. Set y to 165
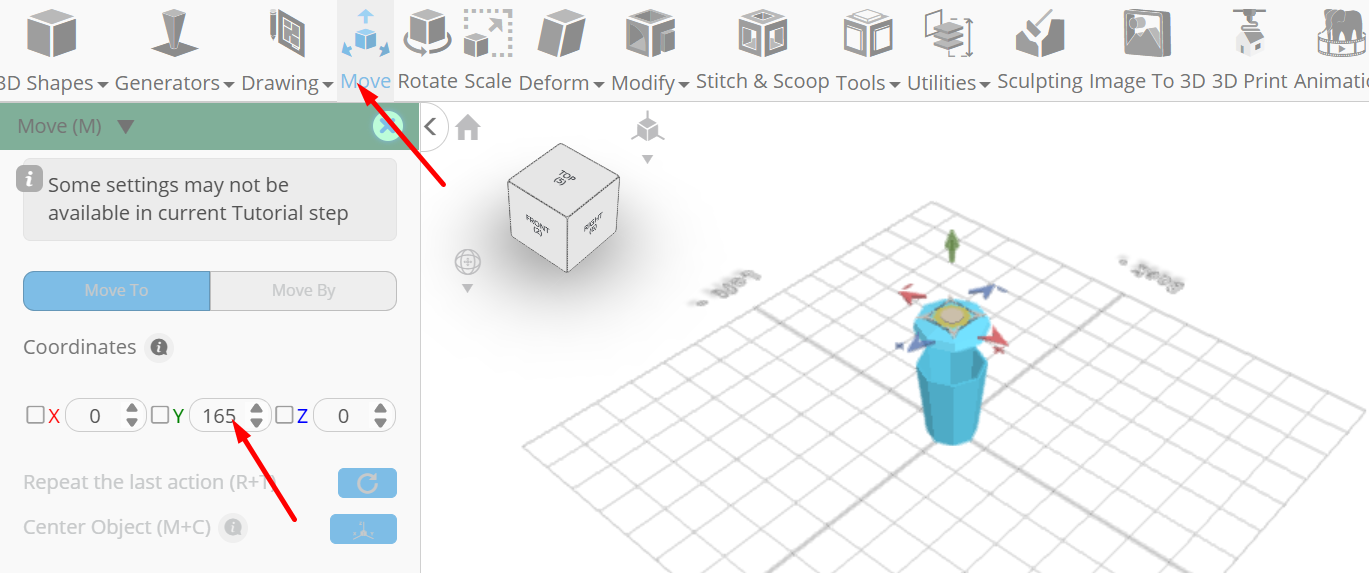
Click ‘x’ to close transformation panel
From the 3D Shapes Category on the Toolbar choose L-Shape; Set Height to 3, Front Width to 2, Front Length to 4, Side Width to 2, Side Length to 6, Position x to -3, Position y to 164, Rotation x to 90
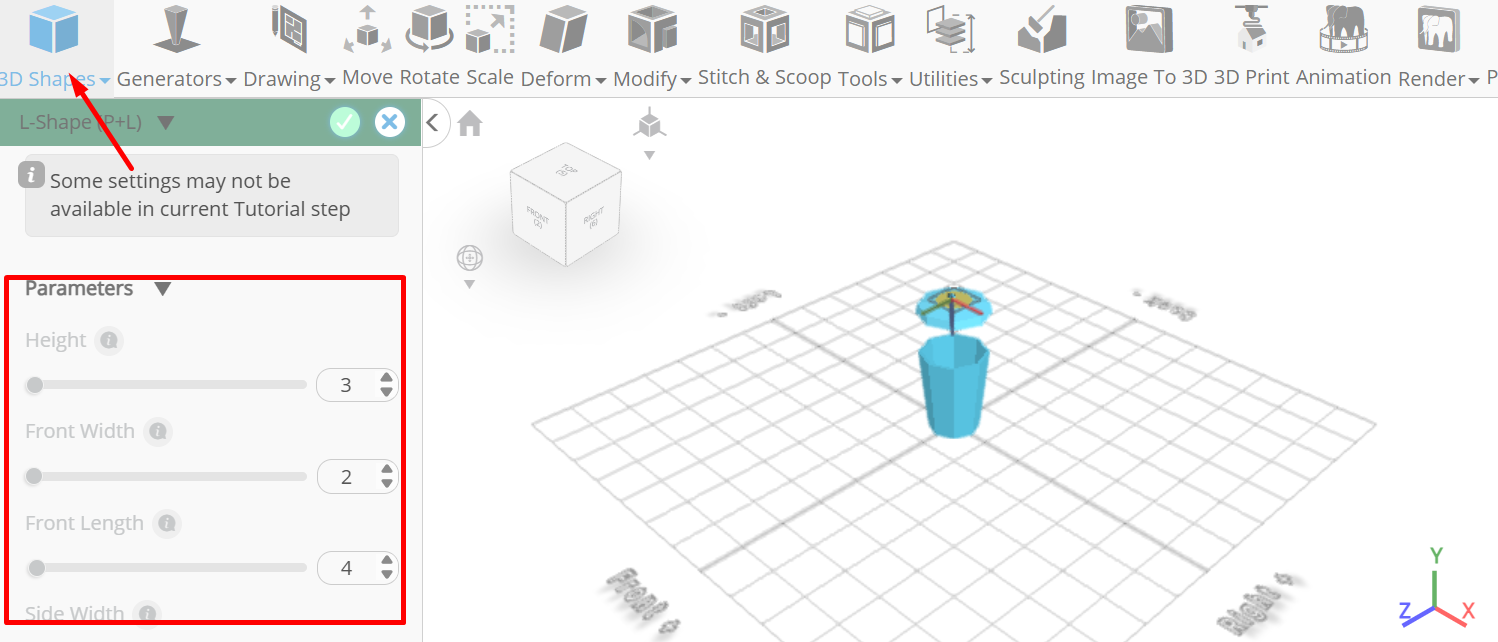
Click to finalize L-Shape
From the Utilities Category on the Toolbar choose Mirror. Set Create Copy to true. Set Direction to right, Offset to -1
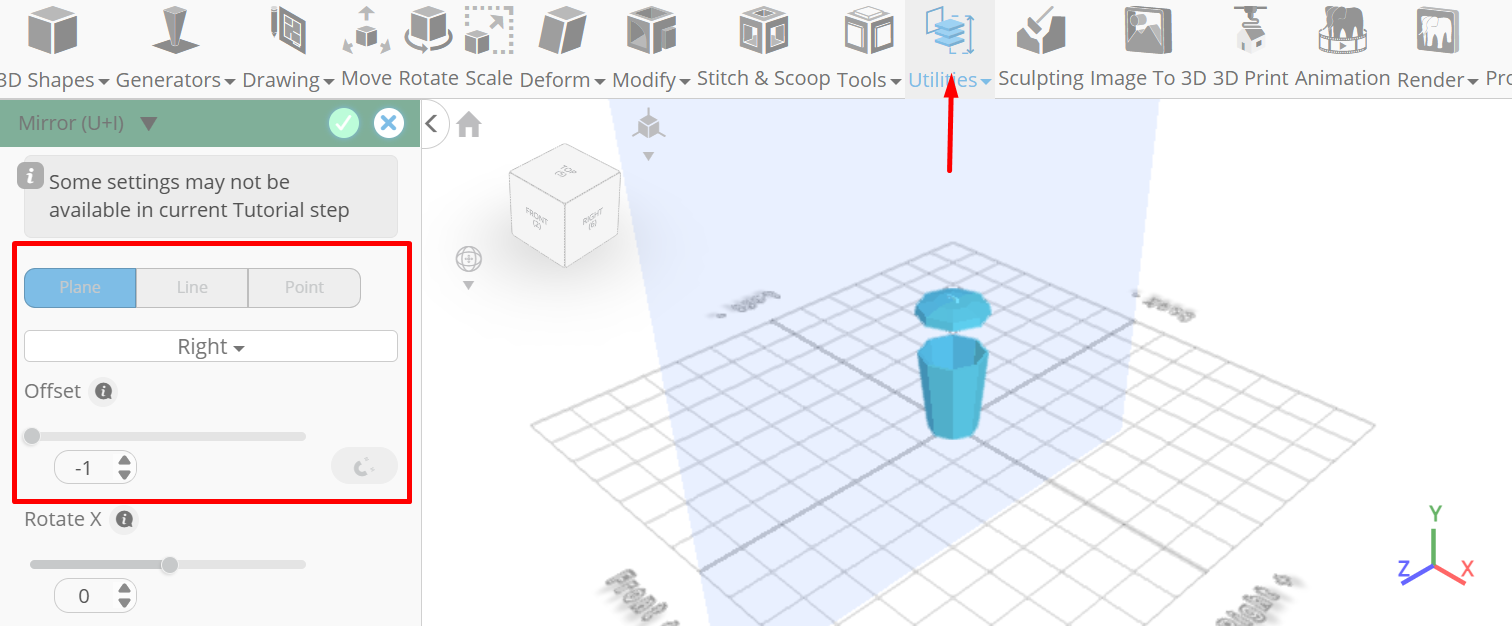
Click to finalize Mirror
Click highlighted part on selection cube to turn off region selection, Click on mesh 8, mesh 12(1) to select
Click Stitch & Scoop on the Toolbar. From the Tool panel choose Union
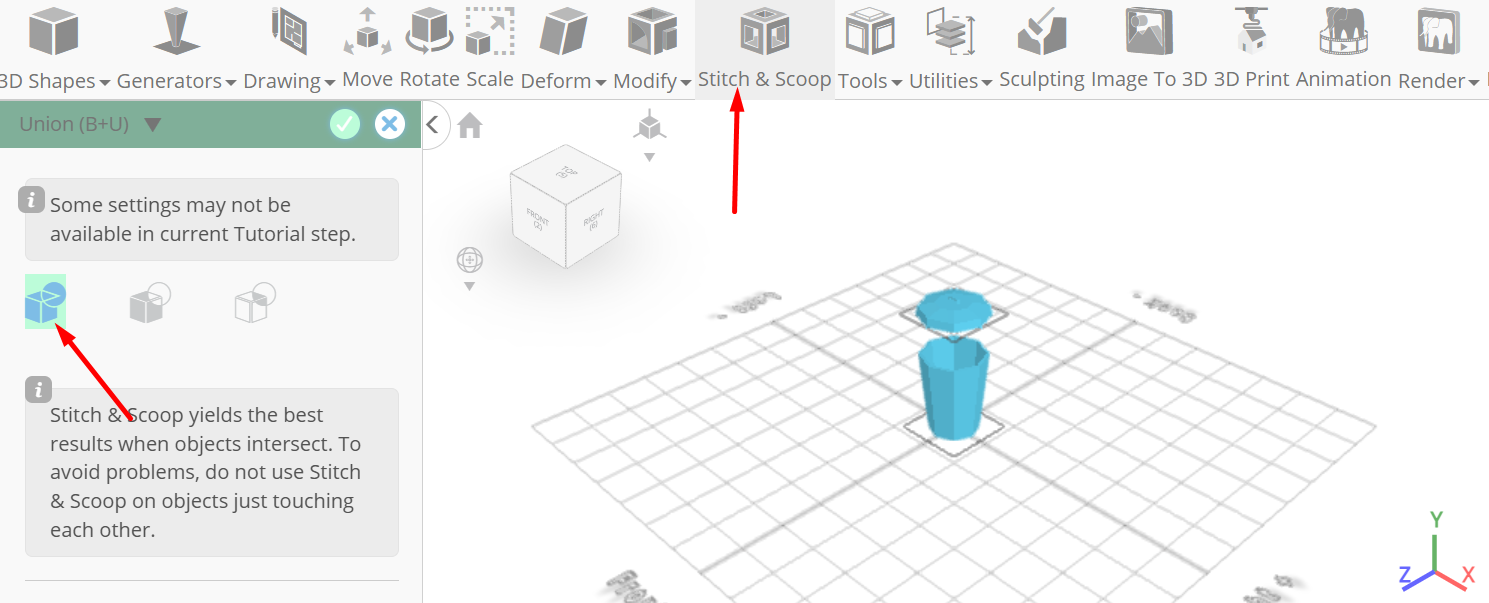
Click to finalize Union
Click color picker button to change color of selected object. Click grey button
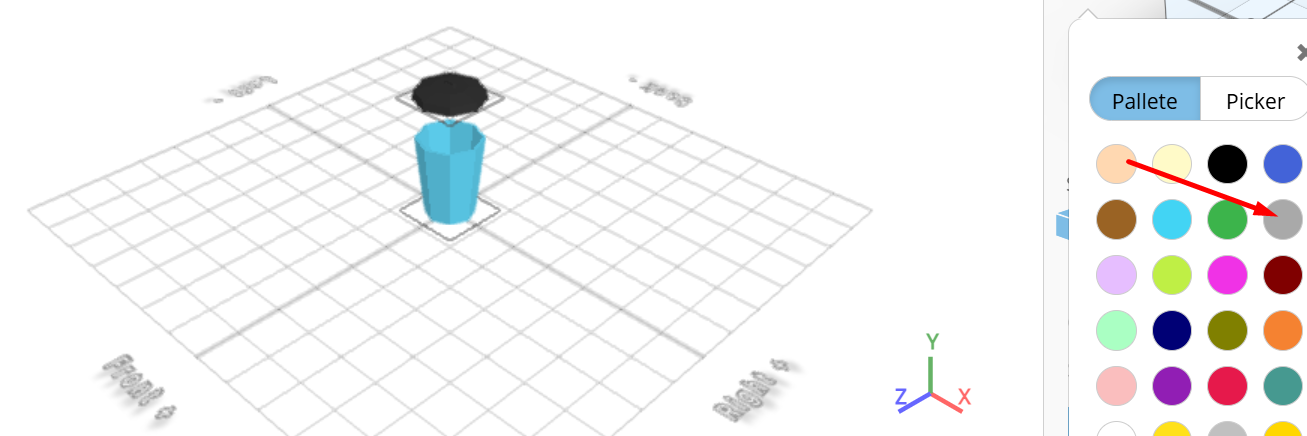
Click OK
Click move on the toolbar; Set y to 100
Click ‘x’ to close transformation panel
Click on mesh 4 to select it. Click on union 1 to deselect
Click color picker button to change color of selected object. Click silver button
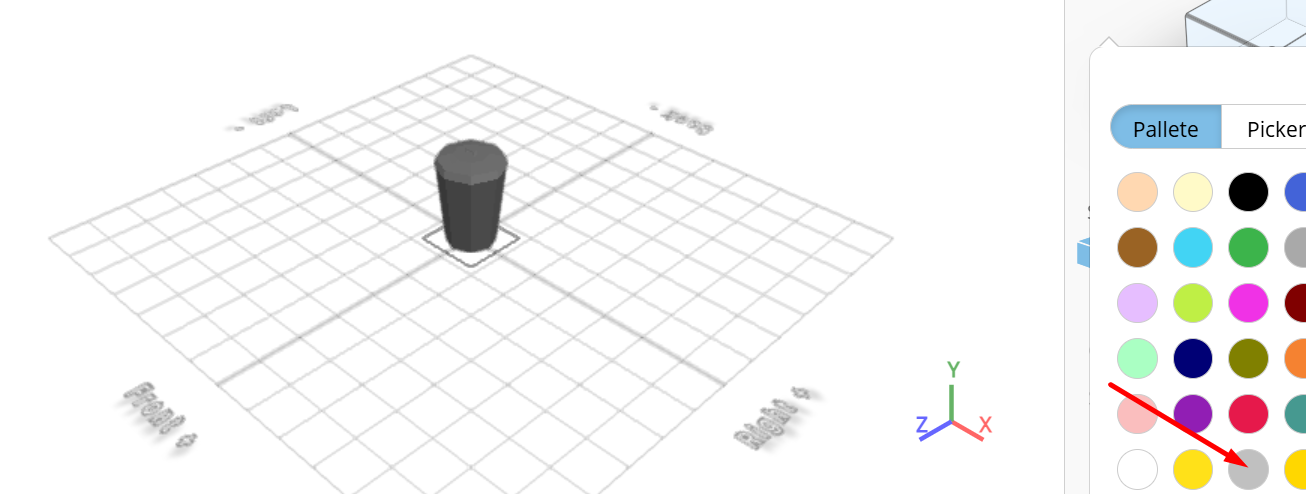
Click ok
As you continue honing your design skills, remember that SelfCAD offers a wealth of resources to support your learning journey. To deepen your understanding and explore more advanced features, consider checking out the interactive tutorials (https://www.selfcad.com/tutorials) available on the SelfCAD website. The tutorials page provides a treasure trove of guides, tips, and tricks that cater to designers of all levels.
More structured learning experience can also be accessed at the SelfCAD Academy (https://www.selfcad.com/academy/curriculum/), https://www.youtube.com/@3dmodeling101, and 3D Modeling 101 series (https://www.youtube.com/playlist?list=PL74nFNT8yS9DcE1UlUUdiR1wFGv9DDfTB). This comprehensive resource offers in-depth courses taught by industry experts, allowing you to master the intricacies of SelfCAD at your own pace.
Subscribe to my newsletter
Read articles from Juliana Misiko directly inside your inbox. Subscribe to the newsletter, and don't miss out.
Written by