7 Essential Product Photography Idea Secrets for 2025
 ProdShot Creator
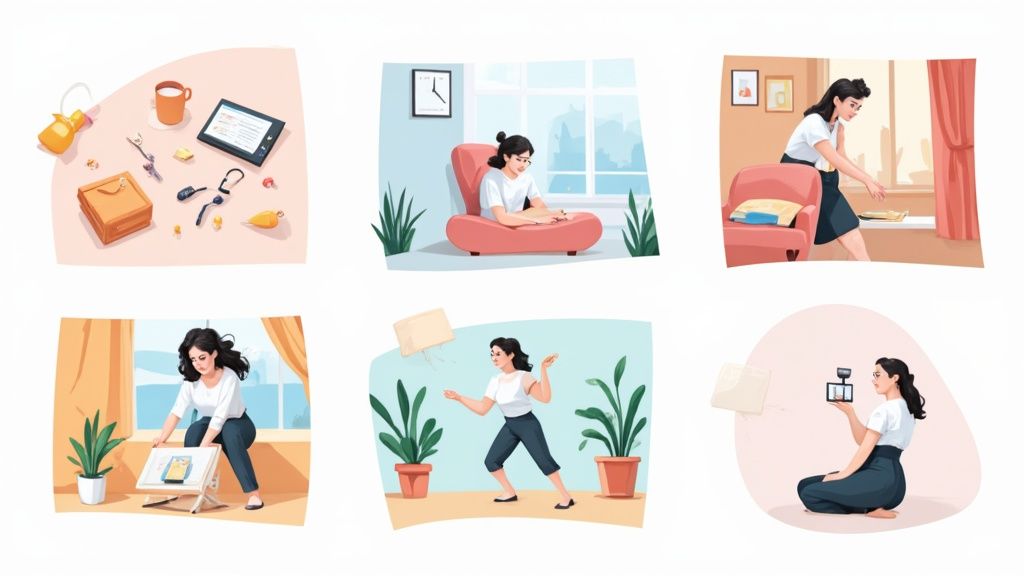
In the crowded digital marketplace, a standard product photo is no longer enough. Your images must not only show what you sell but also tell a story, evoke emotion, and build trust. Generic snapshots get lost in the scroll, but a truly great product photography idea can stop a potential customer in their tracks, transforming casual browsers into loyal buyers. The challenge for e-commerce sellers, however, is moving beyond the obvious without investing in a costly studio or complex equipment. How do you create images that look professional, feel authentic, and drive conversions?
This guide is your blueprint. We're diving deep into seven distinct and powerful product photography concepts that you can implement today. From the minimalist appeal of a perfect flat lay to the immersive experience of a 360-degree view, each idea is broken down into actionable steps. We will explore the specific techniques, equipment needs, and real-world examples to inspire your next photoshoot. Get ready to elevate your brand's visual identity and turn your product gallery into your most powerful sales tool. This curated list moves beyond basic tips, offering practical strategies for Shopify, Etsy, and Amazon sellers aiming to capture attention and boost sales.
1. The Art of the Overhead Shot: Mastering Flat Lay Photography
The flat lay is a powerful product photography idea that presents items from a direct, bird's-eye view. Arranged on a flat surface and shot from above, this minimalist technique creates clean, organized, and highly engaging compositions. It's a favorite for e-commerce sites and social media platforms like Instagram and Pinterest because it showcases products clearly while allowing for creative storytelling. Brands like Glossier and Everlane have mastered this approach, using it to build a distinct and modern visual identity.
The magic of a great flat lay is its ability to communicate a lifestyle or use-case scenario instantly. Instead of just showing a product, you’re showing it in context, making it more relatable and desirable to your target customer. This method is exceptionally effective for collections of items, such as a skincare routine, a complete outfit, or the contents of a subscription box.
The Power of Storytelling Through Props
A common mistake is cluttering a flat lay with random, decorative props. The most impactful overhead shots use props with intention. The key is to choose 2-3 items that directly support the product’s narrative or resonate with the customer's identity.
Actionable Insight: For a bottle of craft gin, don't just add flowers. Instead, style it with a jigger, a sprig of rosemary, and a dried orange slice. This small shift transforms the image from a simple product shot into an invitation to create a delicious cocktail, elevating the perceived value and appeal.
Crafting the Perfect Flat Lay: A Step-by-Step Flow
Achieving a professional-looking flat lay requires a methodical approach. From planning the composition to capturing the final shot, each step builds upon the last. The goal is to create a balanced, well-lit, and visually pleasing image that stops scrollers in their tracks.
This infographic outlines the essential workflow for creating a successful flat lay.

Following this simple three-step process ensures a deliberate and polished final image, preventing the cluttered look of an unplanned shoot.
2. 360-Degree Product Photography
360-degree product photography is an interactive technique that moves beyond static images to give customers a comprehensive, hands-on viewing experience online. By capturing a product from multiple angles (typically 24-36 frames) and stitching them together, you create a seamless, rotating view that the user can control. This immersive product photography idea bridges the gap between digital and physical retail, simulating the act of picking up an item to inspect it from all sides. Major retailers like Amazon and luxury brands like Rolex have popularized this method to build customer confidence and reduce purchasing friction.
The value of this approach lies in its transparency and detail. For complex or high-value items, such as electronics, jewelry, or automotive parts, a 360-degree view allows shoppers to examine every feature, curve, and connection point. This eliminates guesswork and significantly increases the perceived quality and trustworthiness of both the product and the brand. It is a powerful tool for showcasing craftsmanship and intricate design details that a single photo could never fully capture.
The Technical Edge: Ensuring Consistency
A common pitfall in 360-degree photography is inconsistency between frames, which results in a jerky or unprofessional final animation. The goal is to make the rotation feel smooth and natural. This requires precision and a controlled environment.
Actionable Insight: For a pair of high-end sneakers, use a motorized turntable set to a slow, consistent speed. Mark precise intervals (e.g., every 10 degrees for 36 shots) and use continuous lighting instead of a flash. This ensures every image has identical lighting and shadows, creating a flawless, fluid rotation that highlights the shoe's texture and design from every angle.
Achieving a Seamless Spin: A Step-by-Step Flow
Creating a professional 360-degree product view requires a methodical setup. From stabilizing your gear to automating the capture process, each step is crucial for a polished outcome. Investing time in the setup prevents the tedious work of trying to fix inconsistencies in post-production. To truly bring your products to life and create an interactive experience, consider exploring the power of dynamic images.
This video guide walks through the essential workflow for setting up and shooting for a 360-degree animation.
Following a structured process like this is key to efficient production, especially for e-commerce stores with large product catalogs. For those looking to streamline this further, an AI product photo generator can also assist in creating consistent visuals.
3. Lifestyle Context Photography
Lifestyle context is a powerful product photography idea that places your items in real-world scenarios, showing potential customers how they fit into their daily lives. Instead of isolating products on a plain background, this technique integrates them into authentic environments with models and situations that resonate with your target audience. It transforms a simple product shot into a relatable story. Companies like Patagonia and Nike excel at this, showcasing gear in action-packed settings that inspire adventure and achievement.
The goal of lifestyle photography is to sell an experience, not just an item. By showing a watch on a wrist during a business meeting or a backpack on a trail, you help customers visualize themselves using and benefiting from your product. This approach builds an emotional connection and demonstrates the product's value in a tangible, aspirational way. To truly captivate your audience, master visual storytelling techniques that bring your product's narrative to life.

The Power of Authentic Representation
A common misstep is creating overly staged or inauthentic scenes that feel like a generic stock photo. The most effective lifestyle shots feel candid and genuine. The location, model, and activity should all align perfectly with your brand's ethos and your customer’s identity.
Actionable Insight: If you're selling high-end cookware, don't just place it on a pristine, empty counter. Instead, show it on a stove with steam rising from a pot, a hand stirring with a wooden spoon, and fresh ingredients scattered nearby. This tells a story of a delicious meal in the making, making the cookware feel essential to that experience.
Crafting the Perfect Lifestyle Shot: A Step-by-Step Flow
Achieving a natural and compelling lifestyle photograph requires careful planning and execution. From scouting the right location to directing models for candid-looking moments, every detail contributes to the final story. The objective is to create an image that feels both aspirational and attainable.
Here’s a simple workflow for producing authentic lifestyle images:
- Step 1: Define Your Story. Start by outlining the specific lifestyle or scenario you want to portray. Who is your customer, and what does their ideal day look like with your product?
- Step 2: Scout and Style. Find a location that authentically reflects the story. Gather props and wardrobe that enhance the scene without overpowering the product.
- Step 3: Direct for Candid Moments. Guide your models with actions rather than poses. Ask them to perform a task or interact naturally with the product to capture genuine expressions and movements.
4. Macro Detail Photography: Showcasing Impeccable Craftsmanship
Macro photography is a specialized product photography idea designed to capture extreme close-ups, revealing intricate details, textures, and craftsmanship invisible to the naked eye. This technique zooms in on the micro-level features that define a product’s quality, making it an essential tool for luxury goods, technical instruments, and handcrafted items. Brands like Patek Philippe and Leica have long used this method to build a reputation for unparalleled precision and quality.
The power of macro photography lies in its ability to build trust and justify a premium price point. By showcasing the fine weave of a fabric, the flawless cut of a gemstone, or the clean solder on a circuit board, you provide tangible proof of your product’s superior quality. It transforms a simple product into a work of art, appealing to discerning customers who value detail and expert construction.
The Power of Highlighting Hidden Features
A common mistake is simply getting close to the product without a clear purpose. Effective macro shots highlight a specific, compelling feature that tells a story of quality. The goal is to isolate and magnify the details that differentiate your product from competitors.
Actionable Insight: For a handmade leather wallet, don’t just take a close-up of the logo. Instead, use a macro lens to capture the fine, uniform stitching along the edge. This small shift proves the quality of the handiwork, communicating durability and artisanal value far more effectively than a standard shot.
Crafting the Perfect Macro Shot: A Step-by-Step Flow
Achieving a sharp, compelling macro image requires precision and control. From stabilizing your equipment to managing light and focus, every step is critical. The aim is to produce a crystal-clear image that draws the viewer in and highlights the product’s finest attributes.
Here’s a simple workflow to guide your macro photography process:
- Stabilize Your Setup: Mount your camera on a sturdy tripod and use a remote shutter release or a self-timer. This eliminates camera shake, which is greatly exaggerated at high magnifications.
- Control Your Lighting: Use a ring light or twin-lite macro flash for even, shadow-free illumination. Diffused, soft light is key to revealing texture without creating harsh reflections.
- Achieve Pinpoint Focus: Set your aperture to a narrow setting (like f/8 or f/11) to maximize the depth of field. For ultimate sharpness, use focus stacking: take multiple shots, each focused on a slightly different part of the subject, and merge them in post-production software.
Following this methodical process ensures your macro shots are not just close-ups but powerful testaments to your product’s quality.
5. Creative Lighting Techniques: Crafting Mood and Drama
Creative lighting is a powerful product photography idea that moves beyond simple, even illumination. It uses innovative setups, colored gels, shadows, and reflections to create dramatic, eye-catching images. This artistic technique shapes mood and atmosphere, ensuring products stand out in a visually saturated marketplace. It's how brands like Samsung and top-tier beverage companies create futuristic or high-energy campaigns that capture attention instantly.
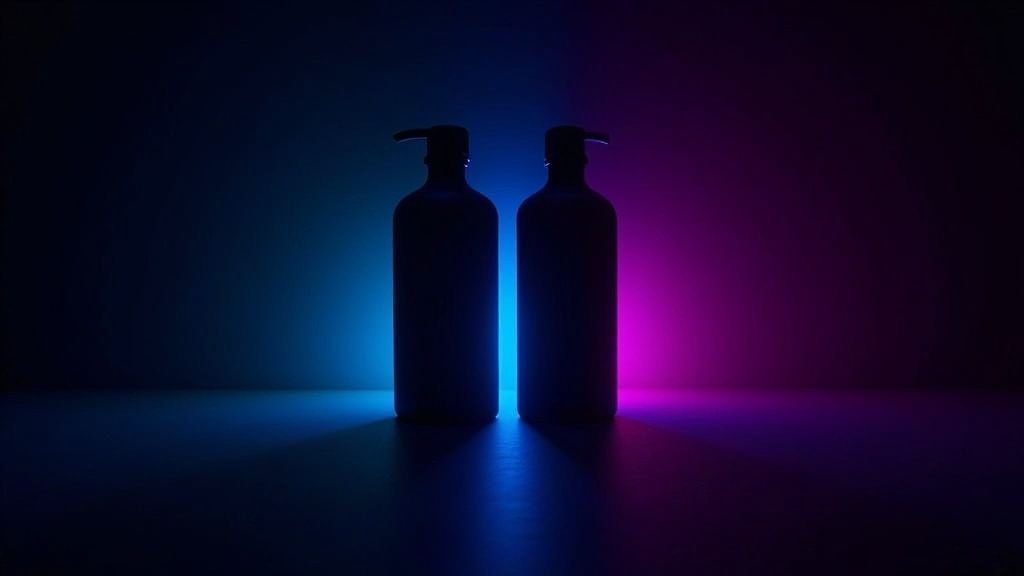
The real advantage of creative lighting is its ability to evoke emotion and build a strong brand identity. Standard lighting shows what a product is; creative lighting shows what a product feels like. This method is perfect for technology, cosmetics, beverages, and automotive products, where mood, sophistication, and energy are key selling points. It transforms a simple object into a hero, giving it a personality that resonates with a specific audience.
The Power of Evoking Emotion with Light
A common misstep is to add colored lights or harsh shadows without a clear purpose. The most effective shots use light to enhance the product's story and brand values. The goal is to create a specific feeling, whether it's the futuristic allure of a new gadget or the dynamic energy of a sports drink.
Actionable Insight: When shooting a new energy drink, don't just light it brightly. Instead, use a combination of neon-colored gels (like electric blue and magenta) and a hint of smoke or mist. This setup suggests power, flavor, and excitement, turning a simple can into an experience waiting to happen and justifying a premium price point.
Mastering Creative Light Setups: A Strategic Flow
Achieving a polished, dramatic look requires careful planning and experimentation. Unlike standard three-point lighting, this approach is more art than science, focusing on creating visual impact while maintaining product clarity. The key is to balance creativity with the commercial need to show the product accurately.
A methodical approach involves these key stages:
- Conceptualize the Mood: Start with a mood board. Define the emotion you want to evoke. Is it luxurious, energetic, mysterious, or futuristic?
- Experiment with Angles: Don’t just light from the front. Use backlighting to create a glowing silhouette or rim lighting to trace the product's edges with light, making it pop from the background.
- Incorporate Gels and Shadows: Place colored gels over your lights to wash the scene in a specific hue. Use objects (like a plant or a slatted board) to cast interesting, intentional shadows across the scene.
- Refine and Capture: Adjust the intensity and position of each light source until the desired balance of drama and clarity is achieved. Often, the final magic happens in post-production, where colors and contrasts are fine-tuned. Learn more about how product photo retouching can enhance creative lighting and bring your vision to life.
6. Minimalist White Background: The E-commerce Gold Standard
The minimalist white background is a foundational product photography idea and the undisputed gold standard for e-commerce. This technique involves isolating a product against a pure, shadowless white backdrop, eliminating all distractions and placing the customer's full attention on the item itself. It creates a clean, professional, and consistent look that is crucial for building trust and ensuring clarity on product pages. This approach has been standardized by major platforms like Amazon and adopted by global brands like Apple for its ability to present products with precision.
The power of this technique lies in its simplicity and effectiveness. For online shoppers who cannot physically touch or inspect a product, a clear, well-lit image on a white background provides the most accurate and honest representation. It removes any ambiguity about color, texture, and form, which is vital for everything from clothing on ASOS to the latest electronics. This method is the backbone of most online catalogs, serving as the primary image that drives conversions.
The Art of Clean, Consistent Lighting
A common challenge with white background photography is achieving an evenly lit, pure white backdrop without harsh shadows or gray spots. The secret is not just about the background material but a deliberate lighting setup designed to separate the product from its environment. The goal is to make the background appear pure white (RGB 255, 255, 255) without overexposing the product itself.
Actionable Insight: Use at least two lights on the background itself, separate from the lights illuminating your product. Aim them at the backdrop from both sides and use a light meter to ensure the background is one to two stops brighter than the light falling on the product. This creates a clean "blowout" effect on the background while keeping the product perfectly exposed.
A Step-by-Step Guide to the Perfect White Background
Achieving a flawless white background shot requires precision both during the shoot and in post-production. This methodical process ensures every product in your catalog looks professional and consistent, which is essential for a polished brand presentation.
This workflow breaks down the core steps for creating a commercial-grade product shot.
- Set Up the Scene: Use a white seamless paper backdrop, a cyclorama wall, or a light tent. Position your product in the center.
- Arrange the Lighting: Place your key and fill lights at 45-degree angles to the product to create soft, even lighting. Use separate lights pointed directly at the background to eliminate shadows.
- Shoot and Edit: Capture the image, aiming for a slightly overexposed background. In post-processing, use tools to select and perfect the white background for a truly clean finish. For sellers on platforms like Shopify, mastering this step is crucial. If you need a streamlined process, you can learn more about how to remove the background from product images.
Following these steps will help you create high-quality, catalog-ready images that meet the demanding standards of modern e-commerce.
7. Ghost Mannequin Technique: Showcasing Apparel in 3D
The ghost mannequin technique is a specialized product photography idea that creates the illusion of clothing being worn by an invisible person. By photographing garments on a mannequin and then digitally removing it in post-production, the final image showcases the natural shape, fit, and drape of the clothing without any distractions. This method is the gold standard for e-commerce apparel, bridging the gap between flat lays and model photography.
This technique is invaluable because it gives customers a clear understanding of how a garment fits in a three-dimensional context, which flat photography cannot achieve. It maintains a clean, consistent, and professional look across a product catalog, something that using live models with different body types can make challenging. Fashion retailers like Zara and major activewear brands use this effect to present their collections with a sleek, uniform aesthetic that focuses entirely on the product.
The Art of the Composite Image
The secret to a successful ghost mannequin effect is not just one photo but a composite of several. The main shot captures the garment on the mannequin, while additional shots capture interior parts like the collar, cuffs, or hem that were obscured. These pieces are then stitched together in post-processing to create a complete, hollow-form image.
Actionable Insight: When shooting a blazer, first capture the full shot on the mannequin. Then, remove the blazer, turn it inside out, and hang it to photograph the inner lining and brand tag area. This second shot provides the "fill" needed to digitally rebuild the neckline in post-production, creating a seamless and realistic final image.
Achieving a Flawless Invisible Look: A Step-by-Step Flow
Creating a convincing ghost mannequin effect requires a meticulous and consistent process. From styling the garment on the mannequin to the final digital composite, each step is crucial for achieving a professional and polished result. The goal is to produce an image that looks realistic and requires minimal, efficient post-processing work.
This approach involves three core stages:
- Styling and Shooting: Meticulously fit the garment to the mannequin, using pins to ensure it sits naturally. Shoot the main image, ensuring consistent lighting and angles.
- Capturing Detail Shots: Photograph any obscured interior details, such as the inside of the collar or cuffs, either on a hanger or a flat surface.
- Post-Production Compositing: In an editing program like Photoshop, layer the images. Carefully mask out the mannequin from the main shot and use the detail shots to fill in the newly visible areas, creating the final "invisible" effect.
7-Method Product Photography Comparison
| Photography Type | Implementation Complexity 🔄 | Resource Requirements ⚡ | Expected Outcomes 📊 | Ideal Use Cases 💡 | Key Advantages ⭐ |
| Flat Lay Photography | Low to moderate 🔄 | Minimal: basic camera, tripod, lighting ⚡ | Clean, organized, shareable images 📊 | Small, flat products like fashion accessories, cosmetics, food, electronics | Cost-effective, easy setup, consistent brand aesthetic ⭐ |
| 360-Degree Product Photography | High 🔄 | Specialized gear: motorized turntable, software, lighting ⚡ | Interactive, comprehensive product views 📊 | Products needing full 3D visualization: watches, electronics, furniture | Reduces returns, boosts confidence & conversions ⭐ |
| Lifestyle Context Photography | High 🔄 | Models, locations, styling, equipment ⚡ | Emotional, relatable storytelling 📊 | Products used in real life: outdoor gear, tech, apparel, home goods | Builds emotional connection & storytelling ⭐ |
| Macro Detail Photography | High 🔄 | Specialized macro lenses, lighting, tripod ⚡ | Extreme close-up detail, craftsmanship 📊 | Luxury, technical products: watches, jewelry, electronics | Highlights quality & precision, enhances trust ⭐ |
| Creative Lighting Techniques | High 🔄 | Advanced lighting gear, gels, props ⚡ | Dramatic, artistic, eye-catching images 📊 | Brands needing strong visual impact: beverages, tech, automotive | Creates unique brand identity, high engagement ⭐ |
| Minimalist White Background | Low 🔄 | Basic lighting setup, seamless white background ⚡ | Clean, distraction-free product images 📊 | E-commerce listings across all categories | Universal compatibility, fast loading, professional ⭐ |
| Ghost Mannequin Technique | Moderate to high 🔄 | Mannequins, styling tools, advanced editing ⚡ | Apparel shown with natural fit 🎯 | Clothing retailers needing clear garment fit presentation | Cost-effective model alternative, consistent catalog images ⭐ |
From Idea to Image: Your Next Steps to Better Product Photos
We’ve navigated through seven powerful approaches to product photography, each offering a unique way to present your items to the world. From the organized appeal of flat lays and the comprehensive view of 360-degree spins to the authentic narrative of lifestyle shots, the path to compelling imagery is diverse and full of potential. The stark clarity of a white background, the intimate focus of macro details, the invisible form of the ghost mannequin, and the dramatic flair of creative lighting all serve a distinct strategic purpose.
The most important takeaway is that you don't have to choose just one. The best visual strategies are often a blend of techniques tailored to different platforms. Use the clean, professional ghost mannequin or white background shots for your primary product listings on Amazon or Shopify, where clarity is king. Then, leverage a dynamic lifestyle or a creatively lit photo for an Instagram post or a Facebook ad to capture attention and tell a richer story. The right product photography idea isn't a single "look" but a versatile toolkit.
Turning Inspiration into Action
Moving from concept to creation is the most critical step. Instead of feeling overwhelmed by all the options, commit to experimenting with one or two new ideas this month.
- Select a Technique: Choose the method from this list that most directly addresses a current weakness in your product gallery or best aligns with your brand's personality. If you sell handcrafted jewelry, perhaps a macro detail shoot is the perfect place to start. If you sell apparel, mastering the ghost mannequin could be a game-changer.
- Execute and Analyze: Dedicate a session to trying the new setup. Take plenty of shots, then compare them against your existing photos. More importantly, measure their performance. Upload the new images to a specific product page and monitor metrics like conversion rate, add-to-cart rate, and even time on page.
- Optimize Your Assets: Creating stunning images is only half the battle. High-resolution photos can significantly slow down your website, harming user experience and SEO. Once you have your fantastic shots, ensure they are web-ready and contribute to a fast-loading store by delving into image optimization for Shopify, a process that balances visual quality with performance.
Ultimately, your product photos are your digital handshake, your virtual storefront, and your 24/7 salesperson. Investing time in improving them is a direct investment in your brand's credibility and your business's bottom line. The journey to scroll-stopping images begins not with a massive budget, but with a single, well-executed product photography idea.
Ready to elevate your product shots without the complex editing? ProdShot instantly removes backgrounds, adds realistic shadows, and lets you place your product in AI-generated scenes, turning any simple photo into a professional-grade image in seconds. Stop wrestling with Photoshop and start creating stunning visuals today with ProdShot.
Subscribe to my newsletter
Read articles from ProdShot Creator directly inside your inbox. Subscribe to the newsletter, and don't miss out.
Written by