AR Display Using MetaQuest Passthrough Feature
 Takashi Yoshinaga
0. Contents of This Article
This article introduces the steps to display 3D objects (cubes) in AR with Meta Quest. You'll learn basic techniques for overlaying virtual objects on the real world, from passthrough feature setup to background transparency.
You can also check the operation in the 01-ShowObject-AR scene of the sample published on GitHub.
This article edits the scene created in the following article to make it AR. Please read this first. However, if you already have a VR scene using Meta XR SDK, you don't need to check the article below.
Displaying Objects in MetaQuest
1. Duplicating the Scene
While it's possible to edit the scene created in the previous article, to try AR conversion without destroying the existing scene, I'll introduce how to duplicate the scene. Skip this if unnecessary.
- Open the scene you want to convert to AR
*This article uses the VR scene ShowObject created previously - Click File -> Save As... to save the current scene with a new name
This article uses *ShowObject-AR - Confirm that the scene name displayed in Hierarchy is ShowObject-AR
2. Enabling Passthrough Feature
[Passthrough Settings in OVR Manager]
- Select OVRCameraRig in the Hierarchy
- Find OVR Manager among the detailed information displayed in the Inspector
- Change Passthrough Support in the Quest Features section to Supported or Required
- Turn ON the Enable Passthrough checkbox in the Insight Passthrough & Guardian Boundary section

[Adding Passthrough Layer]
The operations up to this point enable the passthrough function itself, but passthrough video won't be displayed yet, so add a layer to display the video with the following steps.
- Click Add Component at the bottom of OVRCameraRig's Inspector
- Search for Passthrough in the search area
- Click OVRPassthroughLayer
- Change Placement to Underlay in the OVRPassthroughLayer added to the Inspector

3. Camera Background Settings
The passthrough display setup is mostly complete with the above steps, but if you build now, only the Skybox will be displayed and AR won't work. Finally, change the camera background rendering settings to enable passthrough video display.
[CenterEyeAnchor Settings]
- Open the TrackingSpace child element of OVRCameraRig in the Hierarchy
- Select CenterEyeAnchor child element of TrackingSpace

[Background Transparency]
- Find Camera in the Inspector and change Background Type from Skybox to Solid Color
- Change the color in the Background section to all RGBA values to 0
Setting *A (alpha value) to 0 for transparency is especially important
| Setting Item | Setting Value |
| Background Type | Solid Color |
| R | 0 |
| G | 0 |
| B | 0 |
| A | 0 |
4. Testing
[Installing on Actual Device]
- Connect Quest and PC with USB cable
- Click File -> Build Settings in Unity Editor
- Click Build And Run
- Set installer (apk) name in alphanumeric characters and save
- After installer generation and installation complete, the app automatically starts in Quest
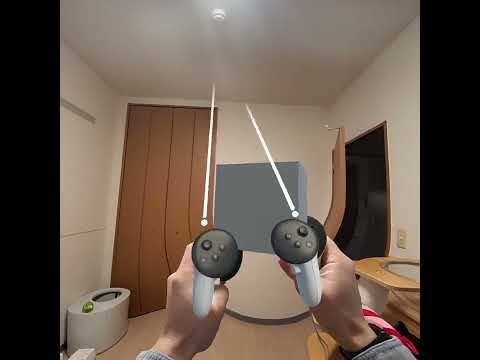
- The cube should be overlaid on the real world. If it appears in a different direction, press and hold the meta (oculus) button on the right controller to reset orientation
- If installation errors occur, review settings or create only the apk with Build and install the app from SideQuest or MetaQuestDeveloperHub
[Using Meta Quest Link (Windows)]
For details, see the official page.
- Connect Quest and PC with USB cable
- Start Quest Link in Quest
- Click the Play button in Unity Editor
- The cube should be overlaid on the real world. If it appears in a different direction, press and hold the meta (oculus) button on the right controller to reset orientation
5. Next Steps
You've now achieved the basics of AR display. However, controller warp (teleport) and turn (viewpoint rotation) are still enabled. While these features are useful in VR, they may compromise consistency with real space in AR.
To achieve a more natural AR experience, next we'll explain how to disable these locomotion features.
Disabling MetaQuest Locomotion
6. Complete List of Meta XR SDK Articles
Subscribe to my newsletter
Read articles from Takashi Yoshinaga directly inside your inbox. Subscribe to the newsletter, and don't miss out.
Written by