Master Photo Editing for Ecommerce Product Images
 ProdShot Creator
In the world of e-commerce, your product images do all the talking. They're often the first—and sometimes only—thing a potential customer looks at, making or breaking a sale before a single word of your description is read. Professional photo editing for ecommerce isn't just about making things look pretty; it's a core business strategy that turns simple product shots into your most effective sales tools.
Why Great Product Images Are Your Best Sales Tool
Think about your own online shopping habits. Before you even glance at the product specs or reviews, your eyes go straight to the photos. You're making a split-second judgment based on what you see. In this digital storefront, images are your silent salesperson, working around the clock to convey quality and value.
This initial visual impression is everything. A blurry, poorly lit photo instantly screams "unprofessional." It makes customers doubt not just the product's quality, but your entire brand's credibility. On the other hand, a crisp, clean, and beautifully edited image builds an immediate sense of trust and legitimacy.
Building Credibility and Answering Questions
Since customers can't physically touch or inspect your product, your photos have to do that job for them. They need to fill in all the sensory gaps. This is where expert editing comes in, ensuring every important detail—from the texture of a sweater to the fine craftsmanship of a watch—is on full display.
When done right, your images answer questions before they're even asked. Can a shopper zoom in and see the tight stitching on a leather wallet? Can they clearly make out the clasp on a necklace? Seeing these details provides a powerful visual confirmation that builds confidence and pushes them closer to making a purchase. Frankly, it's often more persuasive than any sales copy you could write.
The Direct Impact on Sales and Returns
The connection between image quality and your bottom line is direct and measurable. It's not just a theory; professional images perform better. Period. Studies consistently show that high-resolution product photos have a 40% higher chance of being shared on social media. Even more compelling, they can boost conversion rates by up to 94% compared to their low-quality counterparts.
A fantastic way to put these powerful visuals to work is on platforms built for discovery. For instance, applying proven Pinterest strategies for e-commerce can drive significant traffic and sales by reaching an audience that is actively looking for inspiration.
A well-edited photo bridges the gap between seeing a product online and wanting to own it. It eliminates ambiguity, which is a leading cause of cart abandonment and, more importantly, product returns.
The table below breaks down exactly how image quality affects customer behavior and your business metrics.
How Image Quality Directly Impacts Ecommerce Results
This table shows the real-world consequences of your image quality, from building trust to preventing costly returns.
| Image Quality Factor | Impact on Customer Perception | Effect on Business Metrics |
| High-Quality | Builds trust and perceived value. Product seen as premium and reliable. | Higher conversion rates, lower return rates, increased brand loyalty. |
| Medium-Quality | Creates uncertainty. Shoppers may question authenticity or craftsmanship. | Moderate conversion rates, potential for cart abandonment, higher risk of returns. |
| Low-Quality | Signals untrustworthiness. Brand and product appear cheap or unprofessional. | Very low conversion rates, high bounce rates, significant increase in returns. |
Ultimately, investing in photo editing is a direct investment in your business's health. When the product that arrives on a customer's doorstep looks exactly like the one they fell in love with online, satisfaction skyrockets. It's often the single deciding factor that makes a shopper click "Add to Cart" on your site instead of a competitor's.
Choosing Your Ecommerce Photo Editing Software
Before you can even think about the finer points of retouching, you need the right tool for the job. The software you pick will be the single biggest factor in how efficiently you can work, how consistent your images look, and ultimately, the quality of your final product shots. There's no magic "best" tool—the right choice comes down to your store's specific needs, your budget, and how many products you're juggling.
Think of it this way: a professional photographer doing complex composite shots needs a heavy-duty workshop full of specialized gear, something like Adobe Photoshop. But a small boutique owner who just needs clean, bright photos quickly might be better off with a sleek, automated tool that gets the job done fast, like Canva Pro.
For Ultimate Control and Power
When you're talking about professional-grade editing, two names always lead the pack: Adobe Photoshop and Lightroom.
Adobe Photoshop: This is the undisputed industry standard for a reason. It gives you microscopic control over every single pixel. This is where you turn for the tough jobs, like cutting out a fuzzy sweater from its background or combining multiple shots into one perfect "hero" image. If your brand's reputation hinges on flawless, high-end photography, Photoshop is a wise investment.
Adobe Lightroom: While it's from the same family, Lightroom is built for a different, equally critical task: managing and editing photos in bulk. Got 500 photos from a single shoot that all need the same exposure boost and color treatment? Lightroom is your best friend. It’s designed from the ground up to make sorting, culling, and batch-processing large volumes of images a breeze.
These powerhouse tools do come with a subscription fee and a steeper learning curve. But for any serious e-commerce business, their capabilities are often non-negotiable.
For Speed and Simplicity
Let's be honest—not every store owner needs the full Adobe experience. A new generation of incredibly smart, user-friendly tools has cropped up, built specifically for the fast pace of online selling.
Take Canva Pro, for example. Many know it for social media graphics, but its photo editing tools have become surprisingly powerful. It’s fantastic for one-click background removal, quick color enhancements, and getting images ready for marketing campaigns without a steep learning curve.
Another great option is Photoroom. This app really shines at what most e-commerce sellers need most: creating perfect, white-background product shots instantly. It's especially useful for meeting the strict image requirements of marketplaces like Amazon or Shopify. For a startup with a handful of products, a tool like this can slash a full day of editing down to about an hour.
The best software is the one that gets out of your way. The goal is to spend less time clicking buttons and more time creating images that actually drive sales.
Making the Right Choice for Your Store
So, how do you land on the right one? It really boils down to a few key questions you should ask yourself.
- Inventory Size and Variety: A shop selling 2,000 unique, detailed products has very different needs than one with 15 simple items. Big, diverse catalogs almost demand the batch-editing power of Lightroom, while intricate products often require the precision of Photoshop.
- Your Skill Level: Be realistic about your own technical skills and how much time you can actually spend learning software. Tools like Canva and Photoroom are designed to be picked up in minutes. Photoshop is a professional skill that takes time to develop.
- Must-Have Features: Do you just need to remove backgrounds and brighten things up? Or are you doing complex skin retouching on models and creating elaborate lifestyle shots? Make a simple list of your non-negotiable editing tasks first.
- Budget: This one is simple—how much can you spend? Subscriptions get you the latest and greatest features, but many simpler tools offer incredible value with more affordable plans or even capable free versions.
In the end, you might even land on a hybrid approach. Many pros use Lightroom for the initial bulk edits, jump into Photoshop for the hero shots that need extra love, and then use a tool like Canva for quick social media graphics.
If this all sounds overwhelming, remember that doing it yourself isn't the only option. Exploring professional photo editing services for ecommerce can be a smart move. It often saves both time and money, letting you get expert-level results while you focus on what you do best: growing your business.
Creating Flawless Backgrounds That Convert
A clean, non-distracting background is the bedrock of any professional product photo. It’s what separates an amateur-looking shot from one that inspires confidence and drives sales. When you get the background right, your product becomes the undeniable star of the show.
The method you choose to get there really depends on your product and your priorities. I’ve found there’s a constant trade-off between absolute precision and sheer speed. Knowing when to use which technique is the secret to an efficient workflow that doesn’t cut corners on quality.
Balancing Precision and Speed
Let's get practical. Imagine you’re selling an intricate, silver-chain necklace. For something with fine details, tiny gaps, and complex edges, you absolutely need surgical precision. This is where a tool like Photoshop’s Pen Tool is your best friend. It lets you manually trace a perfect, clean path around the product, ensuring every last link is captured flawlessly without any jagged edges or leftover background pixels.
Of course, that manual method, while delivering unmatched quality, is also incredibly time-consuming. It’s just not realistic for a store with hundreds of products.
Now, picture a different scenario: you're launching a new line of basic, solid-colored t-shirts. The product has simple, clean lines. For a large batch like this, a one-click background remover is the hero. Modern photo editing software now offers sophisticated AI-powered background removal features that can process an entire folder of images in minutes, giving you consistent results across your whole catalog.
Key takeaway: Don't use a sledgehammer to crack a nut. Match your background removal technique to the complexity of your product. Use precision tools for high-value, detailed items and lean on AI automation for simpler products in bulk.
Adding Realistic Depth with Shadows
Once the background is gone, you're often left with a product that looks like it's floating in a white void. It can look unnatural and flat, almost like a cheap sticker. The subtle art of adding a realistic drop shadow solves this problem instantly.
A well-executed shadow grounds your product, giving it weight and making it feel tangible to the viewer. It creates a sense of depth that suggests the product actually exists in a real, physical space. It’s a small touch, but without it, the image can feel disconnected and far less professional.
Here are a few tips I've learned for creating natural-looking shadows:
- Softer is Better: Avoid hard, dark, perfectly uniform shadows. Real-life shadows have soft, diffused edges.
- Lower the Opacity: A full-black shadow is almost always too harsh. I usually start with a black shadow, then lower its opacity to around 15-25% so it’s a subtle, transparent grey.
- Consider the Light Source: Think about where the light is coming from. The shadow should fall away from your main light source. If the product is lit from the top-left, the shadow should be cast toward the bottom-right.
This small detail makes a huge difference in perceived quality.

As you can see, background removal and retouching are typically final-stage edits. It makes the most sense to handle them after you've already made core corrections to things like alignment and color.
Consistency Across Your Catalog
Ultimately, your goal is to create a cohesive and professional shopping experience. When a customer browses your category pages, every single product should have the same background style—whether that’s pure white, light grey, or a specific branded color.
This consistency is a powerful visual cue that reinforces your brand’s professionalism. It makes your entire store look more organized, trustworthy, and high-quality. Inconsistent backgrounds, on the other hand, can make a storefront feel messy and disjointed, which can subconsciously erode a customer's trust before they even click on a product. Taking the time to standardize your backgrounds is a one-time effort that pays dividends.
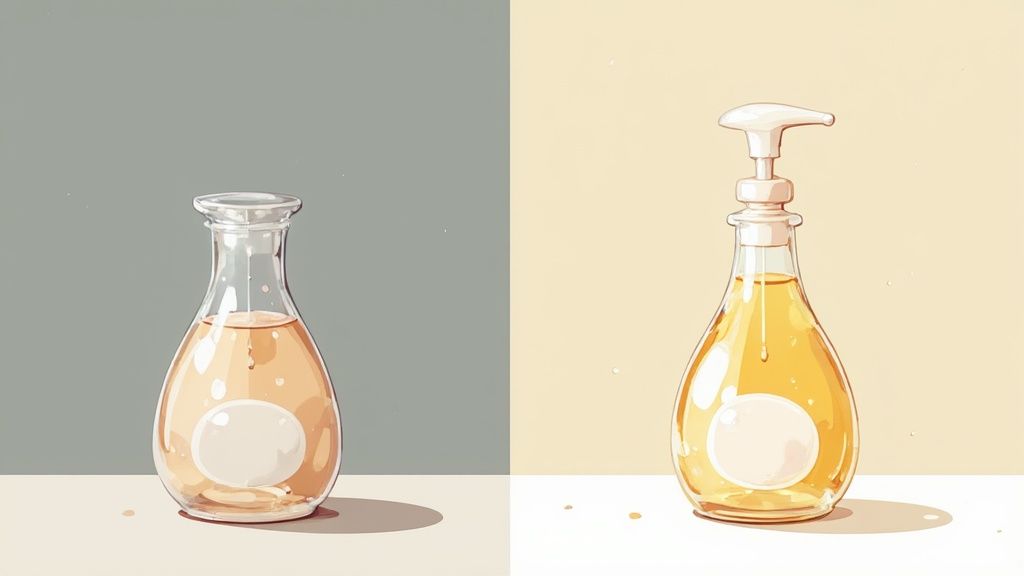
Perfecting Color Accuracy and Lighting
This is the make-or-break moment. It’s where an image either builds unbreakable trust or plants a seed of doubt that leads directly to a customer return. Getting the color and lighting right isn't just an artistic choice; it's a critical business function.
When a product's color on the screen doesn't match what arrives in the box, you’re not just dealing with a disappointed customer. You're facing a preventable return and potentially losing their business for good. The goal isn't to make products look "better," but to make them look accurate. Your job is to faithfully recreate the real-life item on a digital screen.
Making Products Pop with Brightness and Contrast
Before you even think about color, you have to get the foundational lighting right. An image that's too dark hides important details, while one that’s blown out with brightness looks cheap and washes out textures. It's all about finding that sweet spot where the product stands out without looking artificial.
Your main tools for this are the brightness and contrast sliders. Think of brightness as the overall illumination. A slight nudge can make a product feel more vibrant and inviting. But it's the contrast slider that really adds depth. Increasing contrast makes the darks darker and the lights lighter, creating that "pop" that separates the product from its background and defines its shape.
I've seen so many sellers push this way too far, ending up with products that look hyper-realistic and just plain fake. My advice? Keep the actual physical product next to you as you edit. Your goal is to match reality, not create a fantasy.
Mastering True-to-Life Color Correction
Color correction is where most of the magic—and mistakes—happen. This is all about stripping away unnatural color casts and ensuring every hue is spot-on.
The most common culprit here is an incorrect white balance. If your "pure white" background has a yellow or blue tint, every other color in the photo will be thrown off. Most editing software has a white balance tool, usually an eyedropper icon. Just click it on a part of the image that you know should be neutral white or grey, and the software will instantly neutralize the color cast across the entire photo. This one move can honestly solve 80% of your color problems.
Next up are saturation and vibrance, which control the intensity of the colors.
- Saturation boosts every single color equally. Use it with a very light touch, as pushing it too far makes colors look cartoonish and bleed together.
- Vibrance is the smarter tool. It focuses on boosting the less-saturated colors while leaving the already-vibrant ones alone, which almost always gives you a more natural and pleasing result.
Imagine you're selling a deep 'burgundy' sweater. If the white balance is too warm, it might look like 'cherry red' on screen. A customer ordering that sweater and receiving something much darker will feel misled. This is the exact scenario that expert photo editing is meant to prevent.
To truly elevate your images, it helps to go beyond the tools and start mastering the principles of visual design.
Tools for Precision Color Adjustments
For more complex color issues, you'll need to dig deeper than the basic sliders. Professional editing software offers more granular controls that give you command over specific colors.
The HSL (Hue, Saturation, Luminance) panel is a complete game-changer. It lets you target and tweak individual color ranges. For instance, if the blue in your brand's logo looks a little off but the rest of the image is perfect, the HSL panel lets you adjust only the blues. You can shift their hue, dial up their saturation, or change their brightness without touching any other color in the photo.
This level of control is what separates "close enough" from "perfect." It's essential for maintaining brand consistency and achieving pinpoint accuracy. By starting with a solid foundation of proper lighting and then moving to precise color adjustments, you create images that aren't just beautiful, but also trustworthy—a quality that directly impacts your sales and cuts down on returns.
How AI Is Reshaping Ecommerce Photo Editing
The future of photo editing isn’t on the horizon; it's already here, and it’s running on artificial intelligence. For anyone running an online store, AI tools are completely changing the game by automating the kind of tedious work that used to eat up entire days. This isn't just about making things a little faster—it’s a ground-up rework of how we create and manage product photos at scale.
The shift is happening incredibly fast. The global AI market, once valued around $80 billion, skyrocketed to an estimated $279 billion just last year. That's a massive indicator of how quickly businesses are jumping on board. This wave is hitting e-commerce particularly hard, an industry where great visuals are non-negotiable for making sales. You can dig deeper into this trend over at Photoroom.com.
Automating the Tedious Stuff
The most obvious win for e-commerce brands using AI is how it tackles repetitive jobs with both speed and precision. Just think about removing the background from a new collection of products. What used to be a mind-numbing, click-by-click process can now be knocked out in minutes.
AI algorithms are now smart enough to instantly spot the product in your photo, cleanly remove the background, and drop in a perfect white or a specific brand color. This frees up your creative folks to work on what really matters instead of getting lost in tedious pixel-level edits.
Some of the most common tasks now on autopilot include:
- Bulk Background Removal: Running hundreds of photos at once for a clean, consistent catalog look.
- Instant Retouching: Automatically spotting and erasing dust, tiny scratches, or minor flaws on your products.
- Smart Cropping and Resizing: Intelligently framing products to fit the strict image guidelines for marketplaces like Amazon or Etsy.
The real magic of AI isn't just about doing things faster; it's about doing them at scale. A startup can now process thousands of images with the quality and consistency of a huge retailer, leveling the playing field without needing a massive budget.
Creating New Realities with a Click
It's not all about automation, though. AI is also opening up creative doors that were once firmly shut for most businesses. One of the most exciting developments is generating entire lifestyle scenes from a single product shot.
Let's say you have a great photo of a handbag on a simple white background. In the past, creating a lifestyle shot meant booking a studio, hiring a model, and spending a lot of money. Now, you can use an AI product photo generator to place that same handbag onto a marble countertop, maybe next to a latte and some sunglasses. The AI builds a believable scene around it, complete with realistic lighting and shadows, helping customers see the product in a real-world context.
This lets brands create a huge variety of marketing images without ever leaving their office. That one product photo can become dozens of unique lifestyle shots, each tailored for a different social media feed or ad campaign. It makes high-end, engaging visual content accessible to everyone, not just the brands with deep pockets.
Optimizing Images for Web Speed and SEO
You've done all the hard creative work—the lighting is perfect, the colors pop, and your product looks fantastic. But there's one last crucial step that often separates a professional e-commerce site from an amateur one: technical optimization. A stunning product photo is practically worthless if it takes an eternity to load or if Google has no idea what it is.
Let's get this right. Slow-loading pages are an absolute conversion killer. If your product images are massive, they’ll bog down your entire site, frustrate potential buyers, and even harm your search engine rankings. Think about it: research shows that a delay of just one second in page load time can cause a major drop in conversions. The goal isn't just to make the image look good; it's to strike that perfect balance between visual quality and file size.
Choosing the Right File Format
The file format you select has a massive impact on both image quality and how quickly it loads. There's no single "best" format for everything; the right choice really depends on the specific image you're working with.
- JPEG (or JPG): This is your go-to for most product photos. JPEGs are brilliant at compressing complex images with tons of colors—like photos of apparel or detailed lifestyle shots—into very small files while keeping them looking sharp.
- PNG: Reach for PNG when you need a transparent background. After you've meticulously cut out your product, you must save it as a PNG to keep that background transparent. The only downside is that PNG files are typically larger than their JPEG counterparts.
- WebP: This is the modern, high-performance format pushed by Google. WebP offers the best of both worlds: it delivers incredible quality at a much smaller file size than JPEGs or PNGs, and it even supports transparency. With near-universal browser support now, it’s a fantastic choice for giving your site speed a serious boost.
My rule of thumb? Use JPEG for standard photos, PNG for anything needing a transparent background, and switch to WebP whenever you can for the best possible performance.
Resizing and Compressing Images
Never, ever upload a photo directly from your camera to your website. A raw image from a DSLR can easily be over 5000 pixels wide and weigh several megabytes. That's complete overkill for the web. Before you even think about uploading, you need to resize your images to the exact dimensions they will be displayed on your site.
For instance, if your main product image area is 800 pixels wide, resize the image to exactly 800 pixels. Don't upload a giant 5000-pixel photo and let the browser shrink it. That just forces your customer to download a huge file for no reason.
Once it's resized, it's time to compress. Compression is the magic that intelligently removes hidden data from the file to shrink its size, often without any noticeable drop in quality. Tools like TinyPNG or the built-in "Save for Web" feature in Adobe Photoshop are perfect for this. Aim to get your final product images well under 100 KB.
Naming Files and Writing Alt Text for SEO
The last piece of this puzzle is making sure search engines like Google can actually find and understand your images. This all starts with the file name. Generic names like "IMG_DC_001.jpg" tell you and Google absolutely nothing.
Instead, get into the habit of using descriptive, keyword-rich file names that clearly describe the product. This gives search engines valuable context.
- Bad Example:
IMG_7890.jpg - Good Example:
nike-air-max-90-sneaker-white.jpg
Just as important is the alt text (or alternative text). This is a short description that shows up if an image can't load. More critically, it’s what screen readers use to describe the image to visually impaired users, and it’s a huge signal for search engines.
A good alt text is both descriptive and straight to the point.
- Bad Alt Text:
sneaker - Good Alt Text:
A pair of white Nike Air Max 90 sneakers on a white background
By mastering these final optimization steps, you ensure your beautifully edited photos don't just look great—they also load fast and help new customers discover your products through search.
Common Ecommerce Photo Editing Questions
As you get your hands dirty with photo editing, you'll inevitably run into the same questions that trip up even seasoned sellers. It's perfectly normal to second-guess your edits or feel stuck. Let's tackle some of the most common hurdles you'll face.
How Can I Make My Product Photos Consistent?
Brand consistency is everything, and it starts with your images. Manually trying to match every photo is a recipe for frustration. The real secret is creating an editing preset.
In a program like Adobe Lightroom, you can dial in your perfect settings for exposure, contrast, and color, then save them. With that preset, you can apply those exact adjustments to an entire photoshoot in a single click, saving you hours of work.
It's also about setting clear rules for your backgrounds. Decide on a standard and stick to it—whether that’s a pure white background (#FFFFFF) or a consistent light grey. Adopting a uniform shadow style, like a soft drop shadow at a 45-degree angle, also ties everything together beautifully.
Pro Tip: Try to edit an entire batch of photos from the same shoot in one session. When you step away and come back later, your perception of color and light can shift slightly. Editing in one go keeps everything perfectly aligned.
What’s the Biggest Mistake to Avoid?
Without a doubt, the most common and damaging mistake I see is over-editing. It’s so easy to get carried away, pushing the saturation slider to the max or cranking up the brightness to make an image "pop."
The problem? You end up with a product that looks nothing like the real thing. That vibrant red sweater that arrives looking duller or the furniture that's a different shade in person leads to unhappy customers and, ultimately, more returns. Always have the physical product nearby to compare. Your goal should always be accuracy, not just creating a flashy picture.
How Much Retouching Is Too Much?
Walking the line between polishing an image and misrepresenting a product is tricky. You absolutely want to clean up distracting imperfections, but you have to know where to stop.
- What to fix: Definitely remove temporary flaws. Think dust motes, tiny scratches from handling, stray threads, or fingerprints. These aren't part of the product.
- What to leave alone: Never, ever remove the product's inherent characteristics. The grain in a wooden desk, the unique texture of leather, or the weave of a fabric are all part of what the customer is buying.
Erasing these details is misleading. If you're dealing with more than just simple dust removal, it might be time to call in a specialist. Professional product photo retouching can elevate your images while preserving the product's integrity, ensuring they look both polished and authentic.
Subscribe to my newsletter
Read articles from ProdShot Creator directly inside your inbox. Subscribe to the newsletter, and don't miss out.
Written by