Affordable Product Photography A DIY Guide
 ProdShot Creator
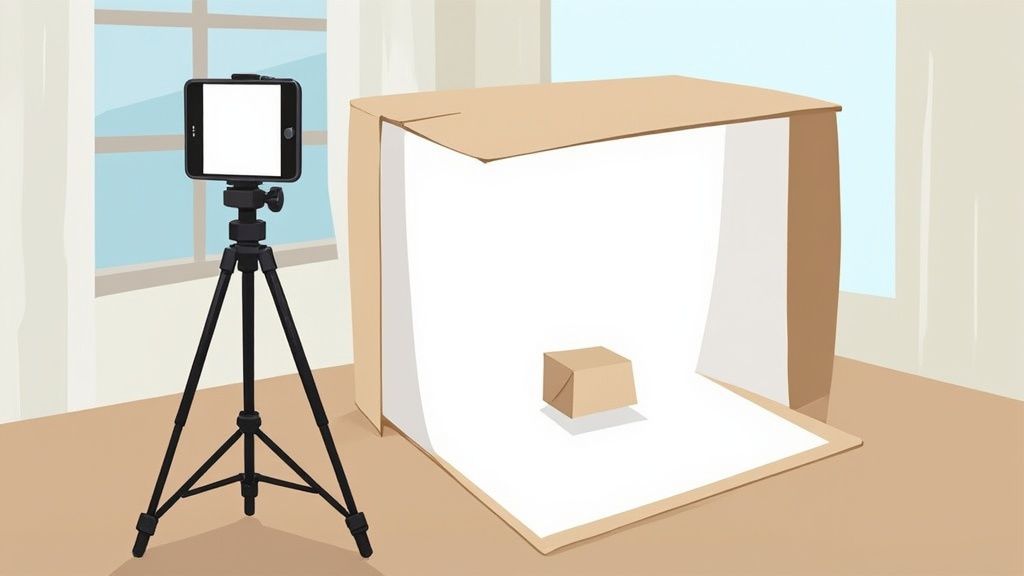
Let's be honest, when you hear "professional product photography," you probably see dollar signs. But what if I told you that you can get stunning, commercial-quality images without that eye-watering invoice? The secret isn't a massive budget; it's about being resourceful. You can get incredible results by combining the powerful camera in your pocket, a few clever DIY tricks, and some surprisingly accessible AI editing tools.
This guide is your roadmap to creating visuals that genuinely sell.
Why You Don't Need a Big Budget for Great Photos
The old myth that you need to spend a fortune on photos is officially busted. For small businesses, scrappy startups, and e-commerce entrepreneurs, creating compelling visuals has shifted from renting expensive studios to using smart, resourceful strategies. The game has totally changed, making high-quality imagery more accessible than ever before.
This shift really comes down to a few game-changing factors:
- Incredible Smartphone Cameras: The phone you use every day is more than capable of capturing crisp, detailed product shots that look amazing online.
- DIY Studio Setups: You can build a surprisingly effective mini-studio for less than the cost of a takeout pizza, often using things you already have, like a simple cardboard box and some white poster board.
- User-Friendly AI Editing: Modern tools can now handle tedious tasks like background removal and color correction in just a few clicks, which means you don't need to be a Photoshop wizard.
The demand for great visuals online has exploded, which has pushed innovation in this exact area. The global product photography market was valued at $129 million back in 2021 and was projected to nearly double by 2028, all thanks to the non-stop growth of e-commerce.
The biggest hurdle for most sellers isn't the price of a fancy DSLR camera. It’s the lingering belief that they can't get professional results without one. Getting past that mental block is the real first step to creating fantastic, affordable product photos that actually convert.
We know the cost of professional product photography can be a significant investment, which is why this guide offers a practical, step-by-step path to getting premium results on your own terms. We'll walk through everything from building your setup to mastering the final edits.
And while our main focus here is on still images, it’s always smart to think about the bigger picture of visual content. For example, this comprehensive e-commerce video production guide can give you even more ideas for creating compelling product visuals that drive sales.
Putting Together Your DIY Photo Studio for Under $50
Believe it or not, you don't need a high-end studio to get stunning product photos. You can actually pull together a remarkably good setup for less than a family dinner out. We’re not talking about complicated gear here; this is all about being resourceful to get those clean, professional shots that sell.
The whole point is to control your shooting environment—specifically, the background and the light. A cluttered kitchen table or harsh overhead lights will sabotage even the best smartphone camera. A simple, controlled setup sidesteps those problems and puts all the focus right where it belongs: on your product.
Your Sub-$50 Shopping List
Let's build that studio. Seriously, you can grab everything on this list from a local dollar store, craft shop, or a big box store like Target or Walmart. You'll easily keep the total under $50, and honestly, you'll probably spend closer to $30.
- White Poster Board (2-3 sheets): This is your secret weapon. One sheet creates that seamless, "infinite" background, and the others are perfect for bouncing light. Cost: ~$5
- White Foam Core Board (2 sheets): A bit more rigid than poster board, these are fantastic for reflecting light and softening shadows. Cost: ~$6
- Cardboard Box (Large): This is the frame for your lightbox. Find one big enough to hold your largest product without feeling cramped. Cost: Free (check your garage!) or ~$5 to buy one.
- White Tissue Paper: Your light diffuser. Taping this over your light source creates that soft, even glow you see in pro shots. Cost: ~$3
- Tape or Clamps: You just need something to hold it all together. Painter's tape or a few binder clips are perfect. Cost: ~$5
- A Table and a Window: You’ve already got these. Your table is the stage, and a nearby window provides the best light you can get—and it's free. Cost: Free
This visual guide shows the basic thinking behind getting started with affordable product photography, from setting a budget to picking your tools.
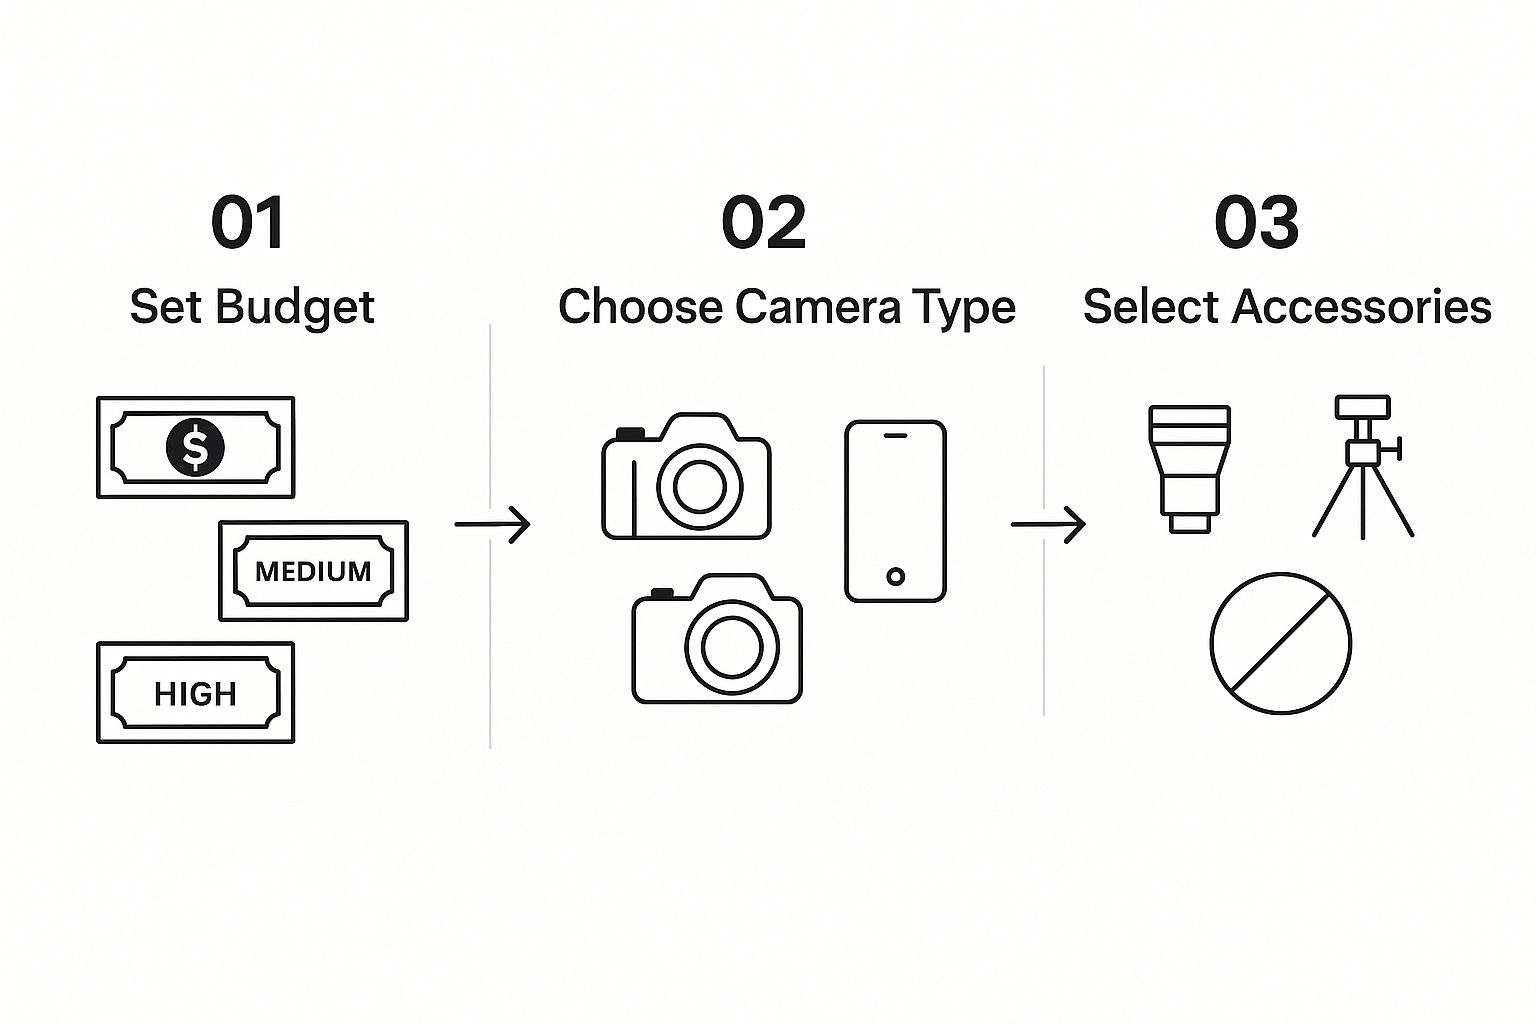
As the infographic highlights, a small budget naturally points you toward using a smartphone and some basic accessories. It's proof you don't need to break the bank to get great results.
Assembling Your Lightbox and Sweep
First up, the lightbox. Cut out large "windows" on three sides of your cardboard box, but leave a two-inch border all the way around to keep it sturdy. Then, from the inside, tape sheets of white tissue paper over these openings. This is what will diffuse your light, whether it’s coming from a desk lamp or the sun.
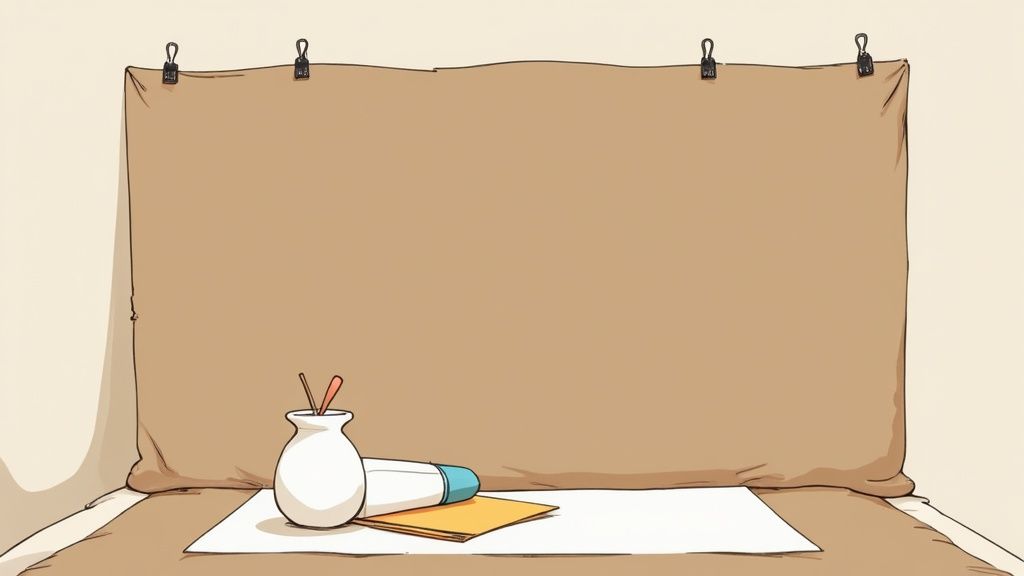
Next is the seamless sweep. This is the key to getting that "floating in a white void" look that’s so common in e-commerce.
- Set up your table next to a wall, ideally near a large window for natural light.
- Put your lightbox on the table.
- Take a sheet of white poster board and gently curve it inside the box, so it runs from the "floor" up the back "wall" without a hard crease.
- Secure the top of the board with a bit of tape or a clamp.
Expert Tip: This simple "sweep" is non-negotiable for clean, professional shots. It gets rid of that distracting horizontal line where the table meets the wall, which instantly makes your photo look better and saves you a ton of editing time.
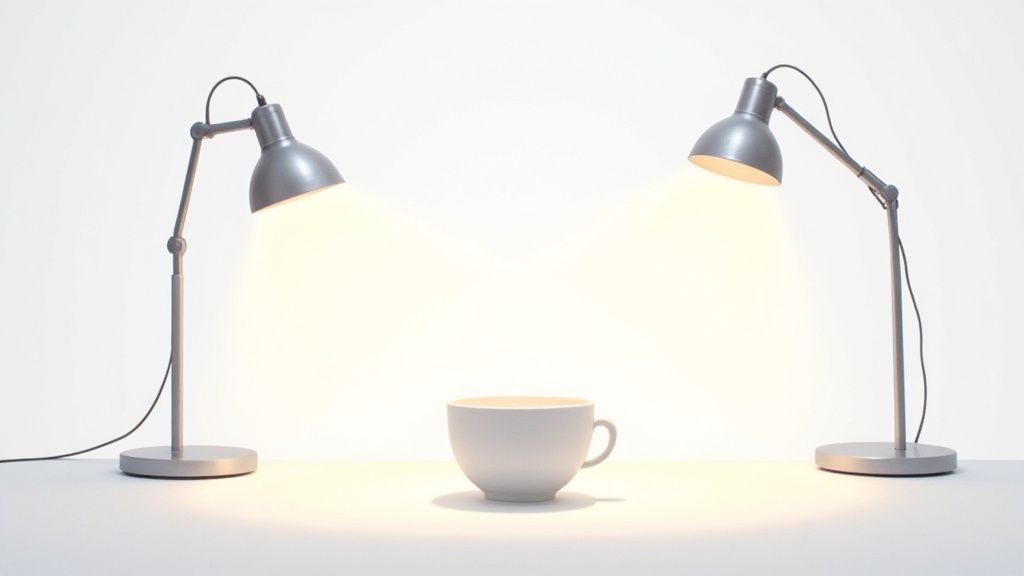
Now, place your product right in the middle of the sweep. Grab your foam core boards—these are your reflectors (or bounce cards). Position one opposite your main light source (the window) to bounce light back onto the shadowy side of your product. This one little trick fills in dark spots and gives you a much more balanced, evenly lit image.
And that's it. You've just built a fully functional photo studio.
Using Your Smartphone Like a Pro Camera
Let's be real: the best camera for getting started with product photography is probably already in your pocket. Modern smartphones have incredible cameras, but most people just leave them on auto. The secret to getting professional-looking shots is to stop letting the phone make all the decisions and start taking manual control.
Your first step from amateur to pro begins with two critical features: focus and exposure lock. You've seen it happen—you frame the perfect shot, and then your phone's camera starts "breathing," constantly refocusing and changing the brightness. This is a nightmare for product shoots where every image needs to look consistent.
There's an easy fix. On your screen, tap and hold on your product. You'll see a little box (usually yellow) pop up, often with a sun icon beside it. This simple action locks both the focus point and the exposure. Now, you can slightly reframe your shot without worrying about the brightness or sharpness changing, keeping your entire photo series perfectly cohesive.
Mastering Your Composition and Framing
With your settings locked in, it's time to think like a photographer. The very first thing you should do is turn on your camera’s gridlines. This overlay splits your screen into a 3x3 grid, helping you apply classic composition techniques like the rule of thirds.
Instead of just plopping your product dead center, try placing it along one of the lines or at an intersection. It's a small adjustment, but it instantly makes your images feel more dynamic and professionally composed.
Next, and this is a big one, you have to fight the urge to pinch-to-zoom. Digital zoom is a quality killer. It doesn't actually get you closer; it just crops the image before you even take it, leaving you with a grainy, pixelated mess.
Don't zoom with your fingers—zoom with your feet. Physically move your phone closer to or farther from the product to get the framing just right. This uses the full power of your camera's sensor, giving you a much sharper, higher-quality image to work with.
For those just starting out, getting a handle on the key settings can feel overwhelming. This table breaks down the essentials you'll want to master for that professional look.
Essential Smartphone Camera Settings for Product Photos
| Setting/Feature | What It Does | Pro Tip for Product Shots |
| Gridlines | Overlays a 3x3 grid on your screen. | Turn this on! Use it to align your product with the rule of thirds for more dynamic compositions. |
| Focus/Exposure Lock | Locks the focal point and brightness. | Tap and hold on your product before shooting to prevent the camera from auto-adjusting. A must for consistency. |
| ISO | Controls the camera's sensitivity to light. | Always use the lowest possible setting (e.g., ISO 100). This minimizes digital noise and keeps your images clean. |
| Shutter Speed | Dictates how long the sensor is exposed to light. | With a tripod, you can use a slower shutter speed to let in more light without causing blur. Perfect for static setups. |
| White Balance | Ensures colors are accurate and not tinted. | Don't rely on "Auto." Set it to match your lighting (e.g., "Daylight") to capture true-to-life product colors. |
Mastering these few settings is what truly elevates your photos from simple snapshots to polished, commercial-quality images.
Unlocking Manual Controls with Mobile Apps
Your phone's native camera app is a great start, but to really get granular control, you'll want to explore third-party camera apps. Apps like Halide (for iOS) or ProCam X (for Android) are game-changers, essentially giving you DSLR-like controls right on your phone.
With a pro-level camera app, you can manually adjust the core pillars of photography:
ISO: As mentioned, this controls light sensitivity. For crisp product shots on a tripod, lock this at its lowest value (like ISO 100) to avoid any distracting grain.
Shutter Speed: This is how long your camera's sensor collects light. For a still product in your DIY studio, a slower shutter speed is your friend—it brightens the image naturally without compromising quality.
White Balance: This setting is your key to accurate colors. Instead of letting "Auto" guess, you can manually set the white balance to match your light source. If you're shooting a pure white product and it looks a bit yellow, a quick white balance adjustment can make it perfectly neutral.
This is the kind of deliberate control that separates a quick pic from a professional photograph.
Shooting Techniques for Compelling Product Images
Alright, your DIY studio is set up and your smartphone is ready to go. Now for the fun part—the actual photoshoot. This is where your products truly come to life. Remember, you’re not just snapping a picture; you’re building a visual case for why someone should buy from you.
Effective staging and consistent shooting angles are the bedrock of any professional-looking online store. When a customer browses your shop, they need to see a cohesive, trustworthy brand, not just a random jumble of photos. That visual consistency is what builds confidence and, ultimately, drives sales.
Master the Essential Shot Types
Every e-commerce brand, from tiny startups to household names, relies on a handful of core image types to tell a complete product story. Think of these as the essential building blocks for a product page that converts. You don't need a dozen different photos, but you absolutely need the right ones.
- The Studio Shot: This is your hero image. It’s your product, perfectly lit, against a clean, seamless white background. It’s all about clarity—no distractions, just the item for sale.
- The Lifestyle Shot: Here’s where you show your product in a real-world context. A ceramic mug on a cozy coffee table, a backpack on a trail—these images help customers picture the item in their own lives.
- The Detail Shot: Time to get up close. A macro shot highlights the quality craftsmanship and unique features. Think about the intricate stitching on a leather wallet, the rich weave of a fabric, or the clasp on a piece of jewelry.
- The Group Shot: This one is perfect for selling bundles, kits, or showing off a product line with multiple color options. It’s a great way to communicate value and variety in a single glance.
A solid mix of these shots gives a comprehensive view, visually answering questions before a customer even thinks to ask them.
Practical Tips for Tricky Products
Let's be honest: not all products are easy to photograph. What works for a simple wooden toy will be a disaster for a highly reflective necklace. Here’s how I’ve learned to tackle two of the most common challenges.
For reflective items like jewelry, glassware, or chrome accessories, the name of the game is diffusion. Your DIY lightbox with tissue paper is an excellent start. You have to avoid direct light at all costs because it creates ugly, distracting hotspots. The trick is to stop thinking about shooting the object itself and start thinking about shooting its reflection in the soft, white environment of your lightbox.
For textured products like knitted scarves or rustic ceramics, you want to do the exact opposite. Here, light is your friend for emphasizing that touchable quality. Try positioning your main light source (like your window) at a sharper angle to the product. This technique creates tiny, defining shadows that pop the surface detail and make the item feel more tangible to the viewer.
Pro Tip: Consistency is king. Always use your tripod and lock in your camera's height and angle for all your main studio shots. This is what creates that clean, professional, and uniform look when a customer is scrolling through your category pages.
The demand for high-quality visuals is huge. It’s what drove the commercial photography market to a valuation of around US$5.1 billion in 2025. With e-commerce photography accounting for nearly 45% of that market, it's clear that top-notch images are no longer a nice-to-have for online sellers. You can dig deeper into the growth of product photography statistics on electroiq.com.
Ultimately, your approach to shooting should be deliberate. Take your time, make small adjustments, and check your shots on a larger screen as you go. Even when your photos look great straight out of the camera, remember that post-production can elevate them from good to great. If you find editing becomes a major bottleneck, exploring professional product photo editing services can be a smart, cost-effective way to get polished, consistent results without the steep learning curve.
Polishing Your Photos with Smart AI Tools
https://www.youtube.com/embed/BST_Y2PdtlE
Post-production is where your good photos become truly great. What used to demand years of mastering complex software like Photoshop can now be accomplished in just a few clicks. This is where AI tools really shine, transforming your DIY shots into something that looks like it came from a professional studio.
The real magic of AI here is how it demolishes the tedious tasks that used to eat up so much time. You can get clean, polished, and compelling images without ever touching a clone stamp or fiddling with layer masks. It’s a massive leap forward in efficiency, especially for small businesses and solo entrepreneurs.
Flawless Backgrounds in Seconds
One of the biggest game-changers is AI-powered background removal. A crisp, pure white background isn't just a preference; it's often a requirement for major e-commerce platforms like Amazon and Shopify. With a tool like ProdShot, you can upload your image and watch the background vanish cleanly, leaving your product perfectly isolated and ready for your storefront.
But it doesn't stop at just removing backgrounds. You can also generate entirely new ones. Imagine placing your product on a rustic wooden table, a sleek marble countertop, or even in a vibrant outdoor setting—all without the expense or hassle of a physical photoshoot. This lets you create powerful lifestyle and contextual images that help customers visualize the product in their own space.
It's worth noting that 76% of small businesses adopting AI product photography tools have reported cost savings of over 80%. The ability to produce studio-grade images in minutes shows just how much AI is leveling the playing field.
Smart Adjustments and Retouching
Beyond backgrounds, AI excels at making intelligent, subtle tweaks that enhance your photos. These tools analyze your image and apply smart corrections, bringing out the best in your product without making it look fake or over-edited.
Here’s a glimpse of what AI can handle for you automatically:
- Color Correction: The algorithms can instantly analyze and adjust colors to be more vibrant and true-to-life. This ensures the product your customer sees on screen is exactly what they'll receive.
- Lighting and Shadow Enhancement: Many AI tools can add realistic shadows, which "grounds" your product and gives it a natural, three-dimensional feel, even on a simple white background.
- Blemish Removal: Tiny imperfections like dust specks, scratches, or fingerprints on your product can be spotted and erased effortlessly, leaving you with a flawless final shot.
If editing still feels like a major chore, you can always hand it off. Specialized photo editing services for ecommerce can take care of all this for you, delivering professional results without you lifting a finger.
Once your images are looking perfect, the final step is getting them ready for your website. It's crucial to optimize your product images and videos for Shopify or whatever platform you use. Properly sized images ensure your site loads quickly, which keeps customers happy and engaged instead of clicking away from a slow-loading page.
Got Questions? Let's Troubleshoot Common Product Photo Problems

Even with the best guide, you're going to run into some head-scratchers when you start shooting. It happens to everyone. Think of this as your personal troubleshooting guide for those common "why is it doing that?!" moments. I've gathered the most frequent questions I hear from people just starting out.
Do I Really Need a Tripod?
Let me be blunt: yes, you absolutely do. A tripod isn't just a nice-to-have accessory; it's probably the single most important piece of gear for getting sharp, professional-looking images. Even if you think you have steady hands, they can't compete with a solid tripod. It kills motion blur, which is crucial if you're not working with super bright studio lights.
But the real magic of a tripod is consistency. It locks your phone or camera into the exact same spot for every single shot of a product line. This is how you achieve that clean, uniform look across your entire store—the kind of look that signals quality and builds customer trust. A cheap tripod is one of the smartest investments you can make.
Why Do My Photos Have a Weird Yellow or Blue Tint?
Ah, the classic white balance problem. Your camera is trying to figure out the color of your light source, and frankly, it's often a bad guesser. This usually happens when you mix different kinds of light, like sunlight from a window and the yellowish glow of an overhead lamp.
The easiest fix is to simplify. Turn off all the other lights in the room and stick to a single source, like a big, bright window.
Pro Tip: Don't trust your camera's "Auto White Balance" setting. Dive into your camera app's settings (or use a better third-party app) and manually set it. If you're using window light, choose the "Daylight" or "Cloudy" preset. Getting your colors right in-camera saves you a massive headache during editing.
How Many Pictures Do I Need for One Product?
You want enough photos to visually answer every question a potential customer might have. While there’s no rigid rule, a great target is 5-8 photos for each product. This gives you plenty of space to show everything that matters without visually cluttering your product page.
A solid photo gallery for any product should include:
- The Hero Shot: Your product looking its best on a clean, simple background.
- In-Context Shots: Show the product being used or styled in a realistic setting. This helps shoppers imagine it in their own lives.
- Detail Close-ups: Get in close to highlight texture, unique features, or craftsmanship.
- Different Angles: Don't forget to show the back, sides, and top.
- A Sense of Scale: Place the product next to a familiar object (like a coin or a coffee mug) or in someone's hand to help people instantly grasp its size.
This mix tells a complete story and gives customers the confidence they need to hit that "buy now" button.
Ready to see how AI can take your shots from good to incredible? ProdShot is a fantastic tool that uses AI to instantly remove backgrounds, fix lighting, and generate beautiful, sales-ready images in just a few clicks. You can give it a try for free and see the difference for yourself.
Subscribe to my newsletter
Read articles from ProdShot Creator directly inside your inbox. Subscribe to the newsletter, and don't miss out.
Written by