How to Trade on Swiv Testnet: A Step-by-Step Guide
 Swiv
Swiv
Looking for the fastest way to start trading perps on-chain?
Swiv is a next-generation perpetual DEX built on Sonic, designed for speed, simplicity, and real-time points. If you’re new to the ecosystem or wondering how to participate in the Swiv testnet, this guide walks you through everything you need, from setting up your wallet to placing your first trade.
Whether you’re here for the leaderboard, the rewards, or to explore cutting-edge DeFi, let’s get you trading in under 10 minutes.
Step 1: Download & Set Up Backpack Wallet
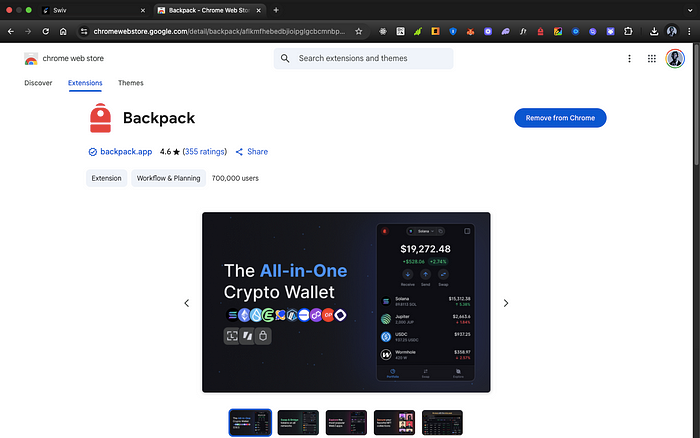
To access Swiv on the Sonic testnet, you’ll need a compatible wallet, we recommend Backpack Wallet.
Here’s how to get started:
Download the Backpack extension for Chrome or Firefox
Create a new wallet and back up your secret recovery phrase
Copy your wallet address, you’ll need it for the faucet
Step 2: Connect to the Sonic Testnet RPC
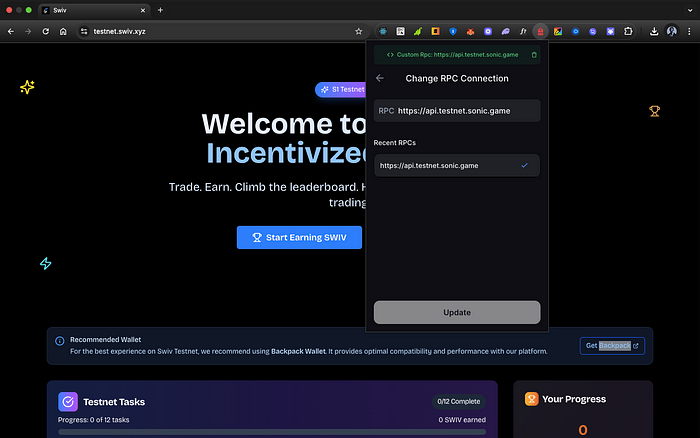
Swiv runs on Sonic Rollups, a fast, low-latency L2 chain optimized for trading.
To connect:
Open Backpack and go to Settings
Go to Networks (Mostly Solana)
Go to RPC Connection
Add a custom RPC:
Name: Sonic Testnet
RPC URL:
https://api.testnet.sonic.game
- Update the RPC connection to the Sonic Testnet network
You’re now connected to Sonic Testnet. Time to fund your wallet.
Step 3: Claim Testnet SOL (Gas)
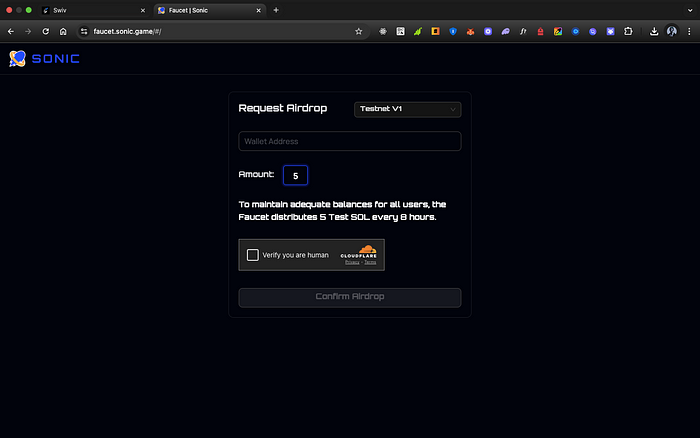
To perform transactions, you’ll need testnet SOL.
Here’s how:
Visit the official faucet: faucet.sonic.game
Paste your wallet address
Click “Request Airdrop”
You’ll receive free testnet SOL within seconds.
Step 4: Connect to Swiv Testnet
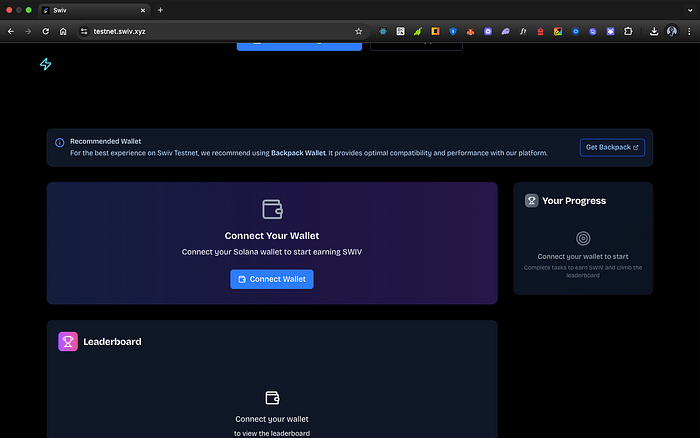
Now that your wallet is ready:
Head to https://testnet.swiv.xyz
Click Connect Wallet
Approve the connection prompt in Backpack
You’re officially inside Swiv, welcome to the future of DeFi trading.
Step 5: Complete Onboarding Tasks & Earn $SWIV
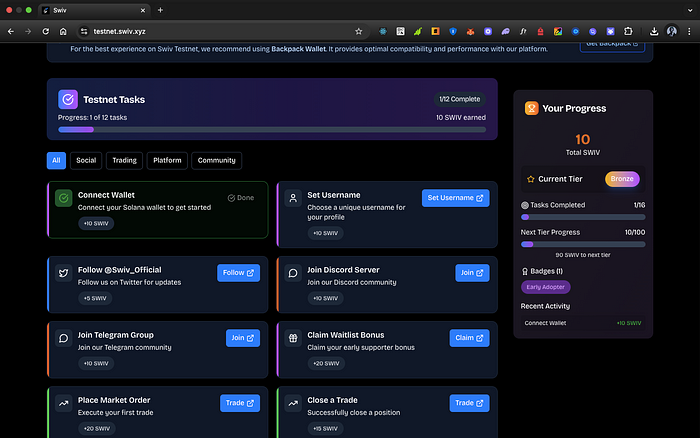
Before trading, we recommend completing the tasks on the homepage to start earning $SWIV points your gateway to rewards.
Tasks include:
Follow Swiv Twitter account
Referring friends
Sharing your PnL
Providing feedback
These points boost your rank on the leaderboard and qualify you for future $SWIV airdrop.
Step 6: Launch the Trading App
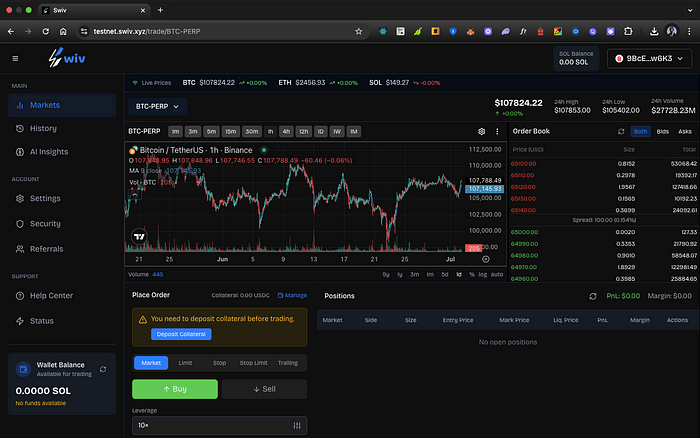
Click “Launch App” to enter the Swiv trading interface.
You’ll see a list of available perpetual markets:
BTC/USDC
ETH/USDC
SOL/USDC
Select any market to begin.
Step 7: Manage Collateral & Create Margin Account
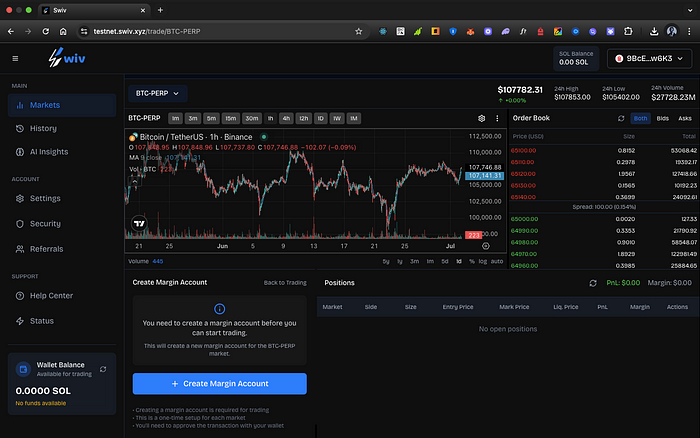
To trade, you must first set up a margin account for each market.
Click Manage Collateral
Select Create Margin Account
A 1,000 USDC airdrop will be automatically sent to your wallet
Choose how much USDC to deposit into your margin account
Click Deposit and approve the transaction
This margin account will fund your leverage trades on that market.
Step 8: Place a Perpetual Trade

Here’s how to place a trade on Swiv Testnet:
Choose Buy (Long) or Sell (Short)
Use the slider to select leverage (up to 50x)
Enter the amount of the token (BTC/ETH/SOL) you want to trade
Click Buy or Sell
Review the modal popup with order details
Confirm the trade
After confirmation, your position will appear in the Positions Table below.
Step 9: Track PnL, Share, and Close
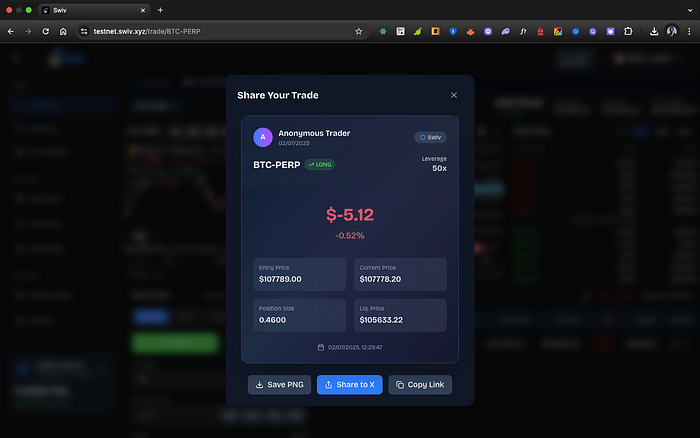
From the Positions Table, you can:
Monitor real-time PnL (Profit and Loss)
Share your PnL to Twitter for bonus points
Close the trade at any time
Swiv makes trading interactive, gamified, and transparent — perfect for degens and beginners alike.
Updates & Community
The Swiv testnet is evolving fast. More features and assets are coming soon.
Stay updated through:
Feedback is welcome, we’re building this for you.
✍️ Final Thoughts
If you’ve ever felt frustrated by clunky DeFi UX, constant wallet pop-ups, or slow execution… Swiv changes that.
With Sonic rollups powering instant trades, gamified incentives, and sleek design, Swiv is your new favorite DEX to try.
⚡ Try now: https://testnet.swiv.xyz
Subscribe to my newsletter
Read articles from Swiv directly inside your inbox. Subscribe to the newsletter, and don't miss out.
Written by