Launch Your Own Professional Publishing Platform: A Step-by-Step Guide to Self-Hosting Ghost with ServBay
 Lamri Abdellah Ramdane
In a world dominated by complex, do-everything content management systems, Ghost stands out for its beautiful simplicity. It’s a powerful, modern publishing platform built on Node.js, designed for one thing: creating gorgeous, fast, and engaging content. For writers and creators, it’s a breath of fresh air.
While Ghost offers a fantastic managed hosting service, the true power for any developer lies in self-hosting. When you self-host Ghost, you get complete control, zero limitations, and the satisfaction of running your own professional-grade platform.
But let’s be honest — setting up a Node.js application locally can be a real headache. Before you can get to the fun part, you often have to battle your own machine. But what if you could skip the frustration and get from zero to a fully running, SSL-secured Ghost site on a custom domain in just a few minutes?
It’s not just possible; it’s easy. Here’s how.

Why Self-Hosting Ghost Can Feel Like a Chore
If you’ve ever tried to set up a Node.js application from scratch, some of this might sound painfully familiar. The official Ghost documentation is excellent, but it assumes your local environment is already perfectly configured. That’s rarely the case.
The traditional setup process is often a minefield of small, frustrating problems:
The Node.js Version Dance: Ghost requires a specific version of Node.js. But what if your other projects need a different one? You end up wrestling with Node Version Manager (
nvm), constantly switching back and forth and hoping you don’t break another project's dependencies.The Database Dilemma: Ghost needs a MySQL database. That means it’s up to you to install it, make sure it’s running, and then dive into the command line to manually create a database, user, and permissions. One typo, and you’re stuck troubleshooting obscure connection errors.
The
ghost-cliGauntlet: Even the officialghost-clitool can fail if your environment isn't just right. Permission errors and dependency conflicts are common hurdles that can stop you in your tracks.
This initial friction is enough to make many developers give up. It shouldn’t be this hard.
The ServBay Way: From Zero to Published in Minutes
Here’s where we skip all of that frustration. ServBay is a complete, native development environment for macOS that gives you all the tools you need in one clean interface. Instead of wrestling with your environment, you just tell it what you need, and it works.
Step 1: Enable Your Core Services
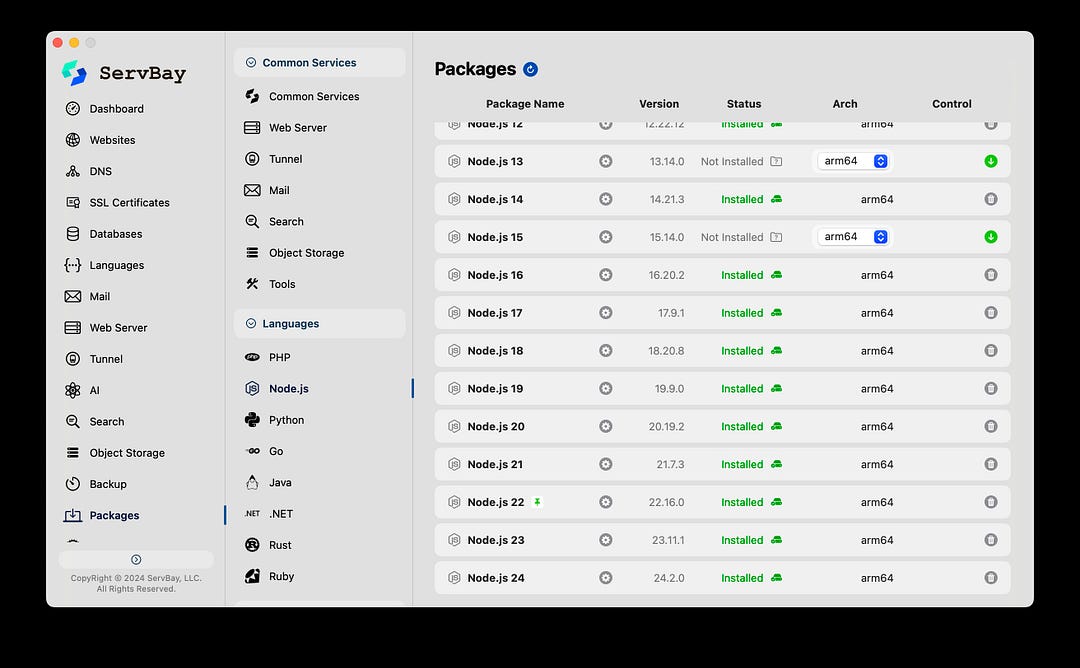
First, we need to prepare the perfect environment for Ghost. This means enabling the correct versions of Node.js and a database.
Open ServBay on your Mac.
In the services list, find Node.js and click the toggle to enable a supported version (e.g., v18.x or v20.x).
- Next, find MariaDB (a fully compatible replacement for MySQL) and click the toggle to enable it.
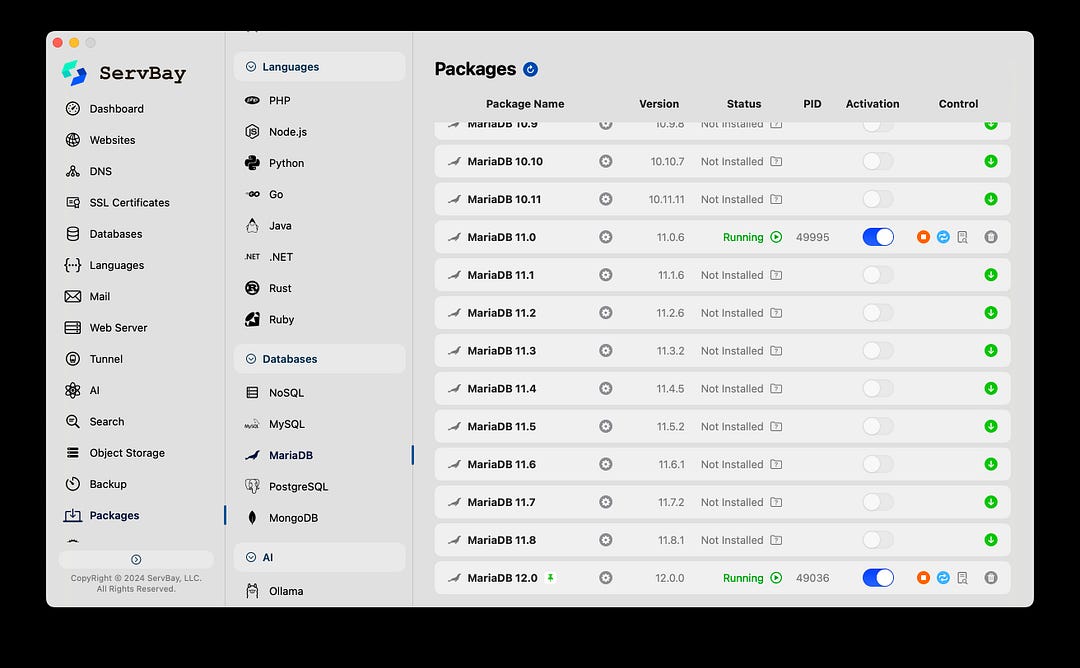
Your environment is now ready. You have a perfectly configured Node.js runtime and a running database server, all without a single command.
Step 2: Install the Ghost Command-Line Tool
With our environment ready, we just need to install Ghost’s official command-line tool, ghost-cli. Open your standard macOS Terminal app and run this one simple command:
Bash
npm install ghost-cli@latest -g
This uses the Node Package Manager (npm), which ServBay has already configured, to install the tool globally on your system.
Step 3: Install Your Local Ghost Site
Now for the magic. This is where Ghost’s installer will do all the heavy lifting.
- In your terminal, create a new folder for your project and navigate into it. For example:
mkdir my-ghost-blog
 cd my-ghost-blog
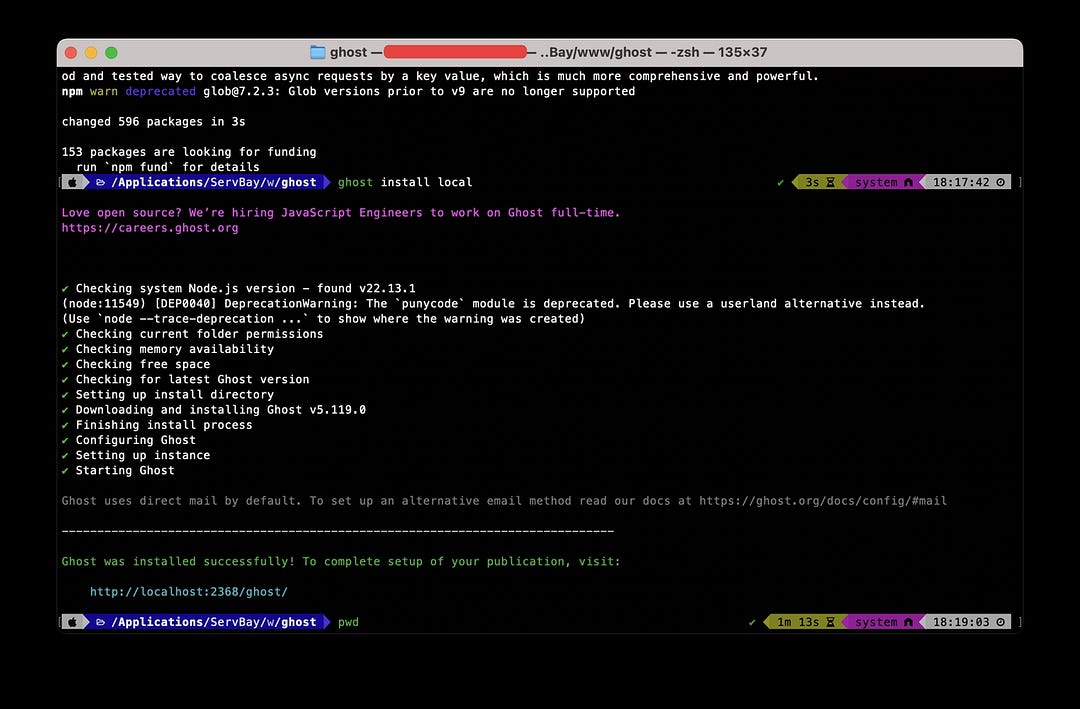
- Now, run the Ghost local install command:
ghost install local
The ghost-cli will download the latest version of Ghost and set everything up. In seconds, you'll see a success message confirming that your site is up and running on a local port.
Step 4: Go Pro with a Custom Domain (Reverse Proxy)
Your site is running on http://localhost:2368, which is great, but not very elegant. Let's use ServBay's powerful reverse proxy feature to map it to a clean, SSL-secured domain like https://my-blog.dev.
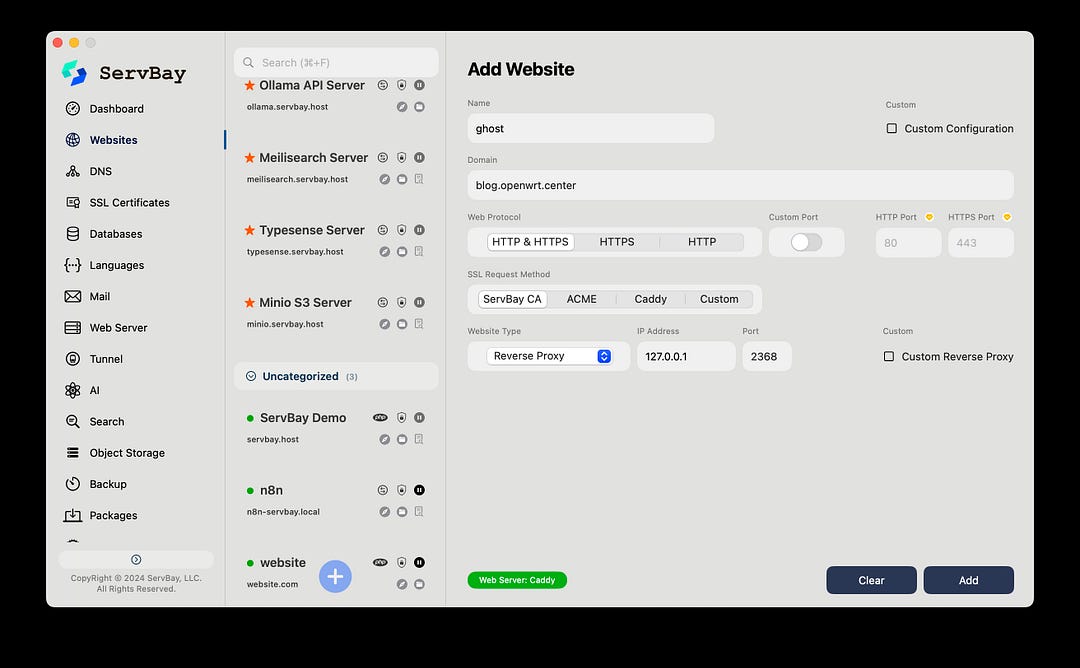
In ServBay, navigate to the “Hosts” tab and click the “+” button to add a new site.
Fill out the configuration panel:
Host Name: Give it a friendly name, like
Ghost Blog.Domain: Enter the custom local domain you want, such as
ghost-site.dev.Host Type: This is the key step. Change the type from “Static” to “Reverse Proxy”.
Target IP Address: Enter
127.0.0.1(since Ghost is running on your local machine).Target Port: Enter Ghost’s listening port, which is
2368.Enable SSL to automatically secure your new domain.
Click “Add”.
In about 10 seconds, ServBay will provision your new domain, handle all the complex server configuration, and issue an SSL certificate.
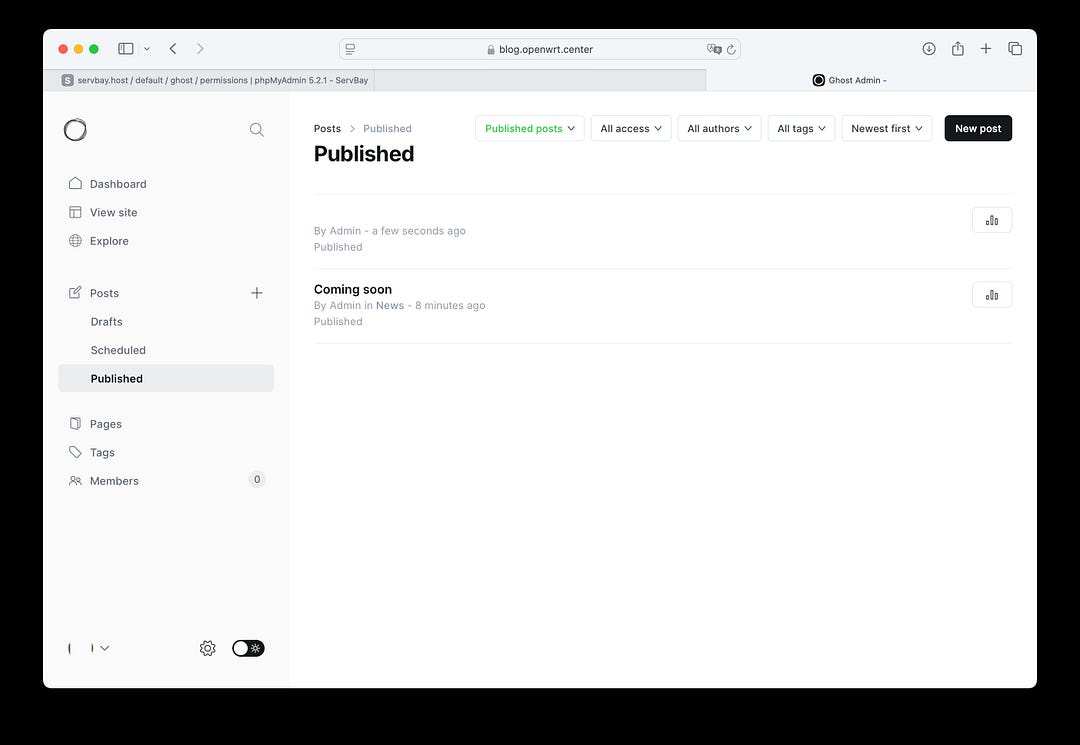
Step 5: The Final Result
That’s it. Open your web browser and navigate to the custom domain you just created (e.g., https://ghost-site.dev). You will see your beautiful new Ghost blog, served securely with a valid SSL certificate. To set up your admin account, simply go to https://ghost-site.dev/ghost.
Welcome to Effortless Publishing
Congratulations! You now have a powerful, professional-grade publishing platform running on a custom, SSL-secured domain on your Mac.
Think back to the manual setup. ServBay completely eliminated every single one of those pain points — the Node version conflicts, the database creation, the server configuration, the SSL certificates. What was once a frustrating, multi-hour process became a simple, repeatable, 5-minute task.
This is the power of a modern development environment. It gets out of your way so you can focus on what actually matters: building, writing, and creating.
Ready to stop fighting your tools and start publishing? Download ServBay for macOS today and experience the difference.
Subscribe to my newsletter
Read articles from Lamri Abdellah Ramdane directly inside your inbox. Subscribe to the newsletter, and don't miss out.
Written by