Basic Prompt Engineering — It’s Time to Talk to Transformers
 Rajesh Kumar
You’ve peeked under the hood. You now understand Transformers, embeddings, tokens, and attention mechanisms. You’ve seen how the GenAI engine works with trained data models. Now it’s time to talk about the next crucial step: Prompting.

📚 If you haven’t read my previous article on GENAI Transformers yet, I highly recommend checking it out first. It lays the foundation for how these powerful GenAI engines work under the hood.
So… You’ve Seen the Engine. Now What?
You might be thinking: “Okay, I get how the GenAI engine works. But as a builder, how do I actually use it to create something meaningful?”
🎯 Excellent. That’s exactly the right question.
Think of a GenAI model — like GPT-4, Claude, or Gemini — as a super-intelligent engine. It has read the internet, books, codebases, manuals, and memes. It knows a lot.
But here’s the catch: 📌 It doesn’t do anything until you give it instructions.
And that instruction is called a prompt.
💬 What Is a Prompt?
At its simplest, a prompt is any input you give to a GenAI model to get a response. This input gets converted into tokens and then processed by the model.
It could be:
A question → “What is machine learning?”
A sentence or paragraph → “Explain quantum computing in simple terms”
A block of code → “Debug this Python function”
A table of data → “Analyze this sales data and find trends”
…or even all of the above → Complex multi-part requests
🤔 The “Aha!” Moment
You might be thinking: “Wait… so it’s just the text I type into ChatGPT, Claude, or Perplexity? That’s it?”
Yes — that’s a prompt. But here’s the thing: Typing something isn’t enough.
Typing the RIGHT thing — in the RIGHT way — unlocks powerful results.
This is the art (and science) of Prompt Engineering.
Why Prompt Engineering Matters
Let’s step back for a moment.
Every major GenAI tool you’ve heard of — ChatGPT, Claude, Gemini, Perplexity, GitHub Copilot — they all work using Large Language Models (LLMs). And almost all of these LLMs are built upon the Transformer architecture.
This means that, at their core, these tools are powered by similar types of “engines.”
But consider this: just like different web developers use the same building blocks (like HTML, CSS, or React) to create wildly different websites and user interfaces, different prompts can make the same GenAI model behave in completely different ways. Your prompt is like the control panel for the AI.
🧩 The Intern Analogy
Think about talking to a GenAI model as if you’re talking to a super-smart but very literal intern.
Scenario 1: You give a vague instruction
You say: “Plan a trip..”
Intern thinks (AI): “Where to? For how long? Solo or group? Relaxing or adventurous? What’s your budget? What do you like to do?”
You get: Something very general and likely not very helpful because the intern (AI) didn’t have enough specific information to give you a tailored answer. It might suggest “a trip to Europe” which isn’t what you need.
Scenario 2: You give a specific instruction (This is Prompt Engineering!)
You say: “Plan a 3-day, budget-friendly trip to Goa, India for a couple who enjoys beaches and local food. Please include accommodation suggestions, activities, and local restaurants.”
Intern thinks (AI): “Aha! Specific location (Goa), duration (3 days), budget (friendly), travelers (couple), interests (beaches, local food). I need to suggest hotels, activities, and specific eateries.”
You get: A detailed, tailored trip itinerary that perfectly matches your preferences, including specific beach recommendations, local shacks, and budget accommodation options.
That’s the difference between just typing something and truly doing prompt engineering.
You’re not just using the model — you’re effectively directing it to do exactly what you want.
The Prompt Engineering Mindset 🧠💡
So far, we’ve talked about what prompts are and why they matter. But to truly unlock the potential of GenAI, you need to change the way you think about interacting with it.
❌ Old Thinking:
“What should I type into the box?”
“The AI should just know what I mean, it’s supposed to be smart.”
“If it doesn’t give me what I want, the AI is broken.”
✅ New Thinking (The Prompt Engineering Mindset):
- “How do I design an instruction that guides the model to do exactly what I want, with the right level of detail, the correct tone, and all necessary background information?”
That’s the core of Prompt Engineering: It’s not just about typing words. It’s about adopting a builder’s mindset — designing your prompts, experimenting with them, figuring out why they didn’t work (debugging), and improving them over time (iterating), just like you would with any piece of software code or a user interface.
Just like web developers don’t randomly throw code together and hope a button looks good and works, Prompt Engineers don’t just “wing it” and hope the AI behaves the way they want. They carefully craft their instructions.
🎯 Key Mindset Shifts:
Be Specific: Instead of a vague “help me,” say something precise like “help me write a professional email to politely decline a job offer, making sure to thank them for the opportunity.”
Provide Context: Don’t assume the AI knows anything about your situation. Give it all the relevant background information it needs to understand your request.
Iterate and Improve: Your very first prompt is almost never your best prompt. Keep refining it, adding details, or changing the wording until you get the desired output.
Test Different Approaches: If one way of asking doesn’t work, try a completely different style or structure for your prompt.
Let’s dive into this mindset — and how it completely changes the way you interact with LLMs.
🧪 Let’s Write Your First Prompt in Code (Step-by-Step)
Now that you understand what a prompt is in theory, let’s see how to actually send one to a GenAI model — not by typing into a chat interface like ChatGPT, but by writing real computer code.
We’ll start with examples using Python and TypeScript with OpenAI’s GPT models. This is your first step from being just a “user” of AI to becoming a “builder” with AI.
👁️ A Quick Look at Prompt Format: Understanding ChatML
Before we start writing code, it’s super helpful to understand how GenAI models like those from OpenAI (e.g., GPT-4, GPT-3.5) actually “listen” to your instructions. They expect your input in a specific structured format called ChatML (Chat Markup Language).
Think of it like writing a script for a play or a movie. In a script, each line of dialogue is clearly attributed to a specific character (e.g., “John: Hello there.” “Person2: Hi John!”). ChatML works in a very similar way. Instead of just sending a big block of text, you send a list of “messages,” and each message has two main parts: a role (who is “speaking” or providing the information) and content (what they’re saying or the actual instruction).
Here’s how a basic message looks:
{
  "role": "user",     // This specifies who is sending the message
  "content": "What is prompt engineering?" // This is the actual instruction or question
}
The Three Key Roles in ChatML
There are three main “roles” you’ll use to guide the AI, each serving a distinct purpose:
system (🧭): This role is like setting the stage directions for a play or giving the AI its overall personality and rules. You use it to define the AI’s general behavior, its "mood," or high-level instructions for the entire conversation.
When to use: To make the AI act consistently throughout a conversation, to define its expertise (e.g., “You are a legal expert”), or to establish strict output formats (e.g., “Always respond in JSON format”).
Best practices: Keep it concise but specific. It’s usually set once at the very beginning of a conversation and doesn’t change.
# Examples:
“You are a kind and patient teacher who explains complex topics simply.”
“You are a helpful coding assistant who only responds with Python code examples, and never explains your code.”
“You are a strict grammar checker. Identify all grammatical errors and suggest corrections, but do not explain the rules.”
user (👤): This is you! The user role represents your input – your questions, commands, information you’re providing, or new turns in the conversation.
When to use: Every time you’re asking a question, giving a new instruction, or providing more context.
Best practices: Be specific, provide enough context for your request, and clearly ask for what you actually need.
# Examples:
“Can you explain what an API is, assuming I know nothing about programming?”
“Debug this JavaScript function and tell me why it’s not working.”
“Write a short poem about a friendly robot cat.”
assistant (🤖): This role represents the AI’s previous responses in a conversation. While you usually don’t write this part yourself in a single, isolated prompt, it's absolutely crucial for providing context in multi-turn conversations. Including previous assistant messages helps the AI "remember" what it previously said and how it responded, allowing it to maintain a coherent conversation flow.
When to use: When you are building conversational applications where the AI needs to recall its past outputs to respond appropriately to follow-up questions.
Best practices: Always include previous
assistantresponses when you are continuing a conversation. This helps the AI understand the dialogue history.
# Example (Imagine this is from a previous turn):
(AI’s actual reply was)
{"role": "assistant", "content": "Sure! Imagine an API like a waiter at a restaurant. You (the customer) tell the waiter (the API) what you want from the kitchen (the server), and the waiter brings it back to you. You don't need to know how the kitchen works!"}(If you then ask a follow-up, you’d send both the previous user prompt and this assistant response to maintain context.)
📌 Important Note: While ChatML is the standard format for OpenAI models, other models sometimes use slightly different prompting styles (like Alpaca’s instruction format, or specific formats for open-source models). We’ll definitely dive into those in future articles. For now, mastering ChatML gives you a solid foundation for building with many popular GenAI tools!
🐍 Option 1: Python + OpenAI (Step-by-Step)
Let’s write your first prompt using Python and OpenAI’s official software development kit (SDK).
✅ Step 1: Set Up Your Project
Create a new folder, e.g.,
genai-demoInside it, create a file named
basic_prompt.py
✅ Step 2: Install Required Packages
# Open your terminal and run:
pip install openai python-dotenv
# openai – This package allows your Python code to communicate directly with the GPT models.
# python-dotenv – This package helps you safely load your sensitive API key from a special file, keeping it out of your main code.
✅ Step 3: Create a .env File for Your API Key
In the same folder as your
basic_prompt.pyfile, create a new file named.env(make sure it starts with a dot!).Inside the
.envfile, paste the following line, replacingrk-xxxxxxxxxxxxxxxxxwith your actual OpenAI API key:
OPENAI_API_KEY=rk-xxxxxxxxxxxxxxxxx
Get your API key from:
https://platform.openai.com/account/api-keys⚠️ Important: Never share your API key publicly or commit it to version control (like Git)! The
.envfile is a standard way to keep sensitive information safe and separate from your main code.
✅ Step 4: Write the Prompt Code Paste this into your basic_prompt.py
from openai import OpenAI
from dotenv import load_dotenv
import os

# Load API key from the .env file
load_dotenv()
client = OpenAI(api_key=os.getenv("OPENAI_API_KEY"))

# Define a function to send prompts, with added features
def send_prompt(prompt_text, model_name="gpt-4o-mini", creativity_level=0.7):
    """
    Sends a text prompt to the OpenAI chat model and prints the response.

    Args:
        prompt_text (str): The specific instruction or question for the AI.
        model_name (str): The name of the OpenAI model to use (e.g., "gpt-4o-mini", "gpt-3.5-turbo").
        creativity_level (float): A number between 0.0 and 1.0 (or sometimes slightly higher)
                                   that controls the randomness of the output.
                                   0.0 makes the output very predictable/factual.
                                   1.0 makes the output very creative/diverse.
    """
    try:
        # This is where we make the actual call to the OpenAI API
        response = client.chat.completions.create(
            model=model_name,  # The AI model we are using
            messages=[
                {"role": "user", "content": prompt_text} # Our prompt, formatted in ChatML
            ],
            temperature=creativity_level, # Controls randomness/creativity
            max_tokens=1000 # Limits the length of the AI's response to control cost and verbosity
        )

        # Display usage information, which helps track costs
        # The 'usage' object contains details like how many tokens were used.
        print(f"Tokens used: {response.usage.total_tokens}")
        # Access the actual text content of the AI's response
        print(f"Response: {response.choices[0].message.content}")

        return response.choices[0].message.content

    except Exception as e:
        print(f"An error occurred: {e}")
        # In case of an error, return None
        return None

# --- Test the function with a specific prompt ---
print("\n--- Running Prompt 1 ---")
response_1 = send_prompt("What is the capital of India?")

print("\n--- Running Prompt 2 with different settings ---")
# Example of using system role (though not directly in send_prompt here for simplicity)
# and a more creative prompt.
response_2 = send_prompt(
    "Write a very short, humorous story about a cat who discovers the internet.",
    model_name="gpt-3.5-turbo", # Using a different model
    creativity_level=0.9        # Higher temperature for more creativity
)
✅ Step 5: Run Your Prompt!
Open your terminal or command prompt again.
Make sure you are in your
genai-demofolder.Run the Python script:
python basic_prompt.py
# or for Python 3 (which is common):
python3 basic_prompt.py
You should see the model’s response printed on the console — boom, your first working prompt via code! 🚀
👨💻 Option 2: TypeScript + Node.js (for JS/TS Devs)
Prefer JavaScript or TypeScript? Here’s how to do the same thing using the OpenAI Node.js SDK.
✅ Step 1: Set Up Your Project
Open your terminal.
Create a new folder and navigate into it:
mkdir genai-ts-demo
cd genai-ts-demo
npm init -y
npm install openai dotenv
touch basicPrompt.ts
npm i --save-dev @types/node //for typescript
✅ Step 2: Create a .env File for Your API Key In the same folder, create a .env file:
OPENAI_API_KEY=rk-xxxxxxxxxxxxxxxxx
✅ Step 3: Write the TypeScript Code Paste this into basicPrompt.ts:
import { OpenAI } from "openai";
import * as dotenv from "dotenv";

// Load environment variables from .env file
dotenv.config();

// Initialize the OpenAI client with your API key
const openai = new OpenAI({ apiKey: process.env.OPENAI_API_KEY });

// Define an interface for optional prompt settings
interface PromptOptions {
  model?: string;
  temperature?: number; // Added '?' for optional property
  maxTokens?: number;
}

/**
 * Sends a text prompt to the OpenAI chat model and prints the response.
 * @param promptText The specific instruction or question for the AI.
 * @param options Optional settings like model name, creativity level (temperature), and max tokens.
 * @returns The AI's response content as a string, or null if an error occurs.
 */
async function sendPrompt(
  promptText: string,
  options: PromptOptions = {} // Default to an empty object if no options are provided
): Promise<string | null> {
  // Destructure options with default values
  const {
    model = "gpt-4o-mini",
    temperature = 0.7, // Default creativity level
    maxTokens = 1000
  } = options;

  try {
    // Make the API call to create chat completions
    const response = await openai.chat.completions.create({
      model, // The AI model to use
      messages: [
        { role: "user", content: promptText } // Our prompt, formatted in ChatML
      ],
      temperature, // Controls randomness/creativity
      max_tokens: maxTokens // Limits the response length
    });

    // Display usage information
    console.log(`Tokens used: ${response.usage?.total_tokens}`);
    // Access and print the actual text content of the AI's response
    console.log(`Response: ${response.choices[0].message.content}`);

    return response.choices[0].message.content;
  } catch (error) {
    console.error('An error occurred:', error);
    return null;
  }
}

// --- Test the function with a specific prompt ---
async function runPrompts() {
  console.log("\n--- Running Prompt 1 ---");
  await sendPrompt("What is the capital of India?");

  console.log("\n--- Running Prompt 2 with different settings ---");
  await sendPrompt(
    "Write a very short, humorous story about a cat who discovers the internet.",
    {
      model: "gpt-3.5-turbo", // Using a different model
      temperature: 0.9      // Higher temperature for more creativity
    }
  );
}

// Call the async function to run the prompts
runPrompts();
✅ Step 4: Run the Prompt
# You can run it using:
npx tsx basicPrompt.ts
NOTE: tsx is a tool that allows you to directly run TypeScript files without needing a separate compilation step. If you're using plain JavaScript, just create basicPrompt.js instead and run it directly with node basicPrompt.js.
🔧 Understanding the API Response
When you run the code above, you might notice lines like res.choices[0].message.content (in Python) or response.choices[0].message.content (in TypeScript). Let’s break down why we access the response this way:
The AI’s API (Application Programming Interface) returns a structured data object, usually in JSON format, which looks something like this:
{
  "id": "chatcmpl-...",
  "object": "chat.completion",
  "created": 1677652288,
  "model": "gpt-4o-mini",
  "choices": [
    {
      "index": 0,
      "message": {
        "role": "assistant",
        "content": "New Delhi is the capital of India."
      },
      "logprobs": null,
      "finish_reason": "stop"
    }
  ],
  "usage": {
    "prompt_tokens": 12,
    "completion_tokens": 7,
    "total_tokens": 19
  },
  // ... other metadata
}
Explanation:
The most important part for us is the
"choices"array. An AI might sometimes generate multiple possible responses (though usually just one in basic scenarios).choices[0]refers to the first (and typically the only) AI-generated response in that array.Inside
choices[0], there's a"message"object. This is where the actual AI output is stored.Inside the
"message"object,"role": "assistant"indicates that this message came from the AI.Finally,
"content"holds the actual text that the AI generated – for example, "New Delhi is the capital of India."
That’s why we access response.choices[0].message.content to get the core text response.
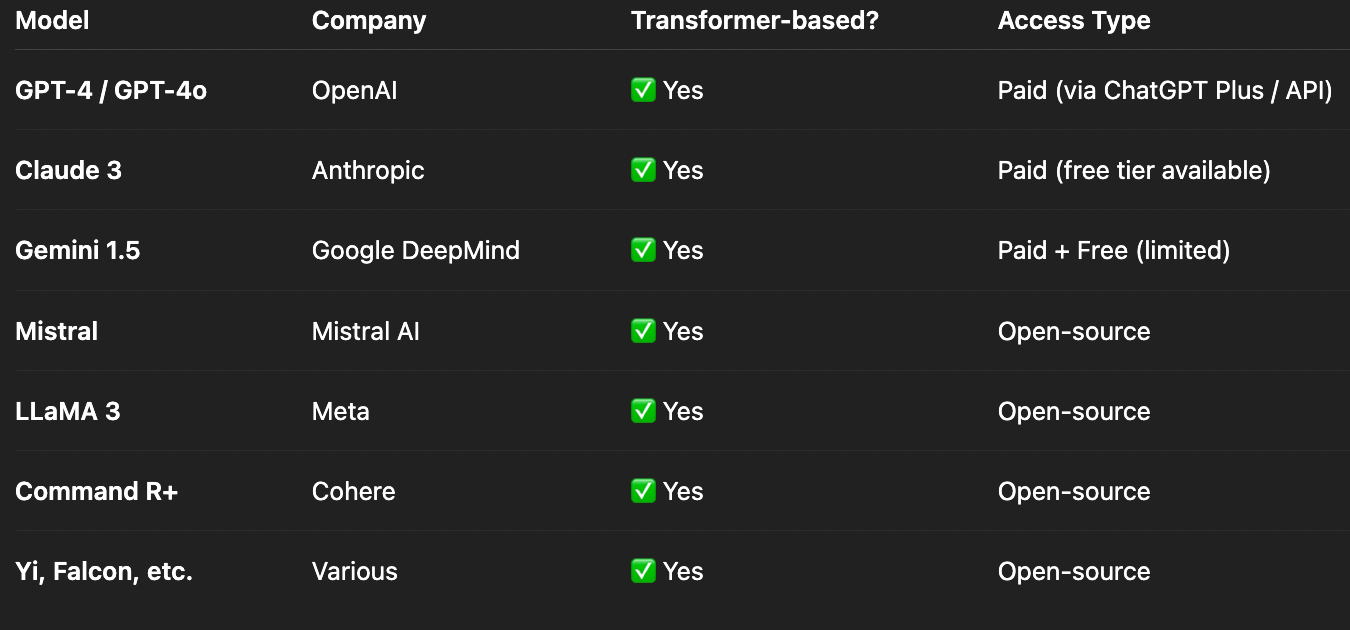
🌐 Want to Try Other Models?
You can build the same prompt flow using other GenAI platforms too. Each AI model or platform has its own SDK (Software Development Kit) or API format, but the central idea remains the same: You send a prompt (your instruction), and you get back a response (the AI’s output).
Popular Models/Platforms to Explore:
OpenAI (GPT-4, GPT-4o, GPT-3.5): This is what we used. Find their documentation at
platform.openai.com/docs.Claude (Anthropic): Another very capable family of models. Check their documentation at
docs.anthropic.com/claude.Gemini (Google): Google’s powerful LLMs. Their documentation is at
ai.google.dev.
And there are many more open-source and commercial models you can explore by searching online (e.g., Mistral, Llama, Falcon).
⚠️ If You Hit a “Rate Limit Exceeded” Error: This error usually means you’ve sent too many requests in a short period or you’ve used up your free usage quota for that API. You can either:
Switch to a different, less resource-intensive model version (like
gpt-3.5-turboinstead ofgpt-4o-miniif you're experimenting).Add a small amount of credit to your OpenAI account for extended usage (this is often necessary for serious development).
Or, explore other free-tier or open-source GenAI models and platforms that might have more generous free usage policies.
🎛️ Understanding Temperature and Randomness
Before we dive into different prompt types, let’s deeply understand one crucial parameter: temperature.
Temperature is one of the most important settings you'll use when interacting with LLMs. It controls how creative, diverse, or predictable the AI’s responses are. Think of it as controlling the "randomness" or "surprisiness" of the AI's output.
How Temperature Works (and its Range):
The temperature parameter typically takes a floating-point number (a number with decimals). While the exact range can vary slightly between different models and APIs, it's most commonly set between 0.0 and 1.0, though some APIs might allow slightly higher values (e.g., up to 2.0).
A temperature of 0.0 (or very close to it, like 0.1):
Makes the AI’s response very deterministic and predictable. Given the same prompt, it will almost always generate the exact same (or very similar) output.
The AI will choose the most probable next word based on its training data.
Best for: Tasks where you need precise, factual, or consistent answers.
# Use cases: Mathematical calculations, code debugging, factual Q&A (e.g., “What is the capital of France?”), data extraction (e.g., “Extract all names from this text.”), generating very strict formats (e.g., JSON).
# Ultra-precise tasks (temperature 0.0-0.2)
response = client.chat.completions.create(
    model="gpt-4o-mini",
    messages=[{"role": "user", "content": "What is 2+2? Give only the number."}],
    temperature=0.0   # Deterministic - aims for the same output every time
)
# Expected: "4" (always the same)
A temperature between 0.3 and 0.7 (Balanced Creativity):
Provides a balance between consistency and creativity. The AI will still generate coherent and relevant responses, but with a bit more variation.
It allows the AI to explore slightly less probable but still reasonable options for the next word.
Best for: Most general-purpose tasks where you want good quality and some natural variation.
#Use cases: Professional writing (emails, reports), generating explanations, solving general problems, summarizing text.
# Balanced creativity (temperature 0.3-0.7)
response = client.chat.completions.create(
    model="gpt-4o-mini",
    messages=[{"role": "user", "content": "Write a professional email declining a job offer."}],
    temperature=0.5   # Balanced - consistent but with some variation if run multiple times
)
# Expected: A polite and professional email, might have slightly different wording each time
A temperature between 0.8 and 1.0 (or higher, depending on model - High Creativity):
Makes the AI’s response very creative, diverse, and sometimes unpredictable. The output will vary significantly each time you run the same prompt.
The AI is more willing to pick less common or surprising words and phrases.
Best for: Brainstorming, generating multiple ideas, creative writing, or situations where you want truly unique and varied outputs.
# Use cases: Writing stories, poems, song lyrics, generating marketing taglines, brainstorming new product ideas, creating different versions of a piece of content.
# High creativity (temperature 0.8-1.0)
response = client.chat.completions.create(
    model="gpt-4o-mini",
    messages=[{"role": "user", "content": "Write a creative story opening about a lonely astronaut."}],
    temperature=0.9   # Very creative - results will be quite different on each run
)
# Expected: A unique and imaginative story opening, potentially very different on subsequent runs
To explicitly address your question “Does temperature all have this range??”:🧐
No, not all LLMs strictly adhere to the 0.0 to 1.0 range, although it's very common and the most widely used convention, especially for OpenAI models. Some models might:
Allow values slightly above
1.0(e.g., up to1.5or2.0), though outputs at these extremes can become very random, incoherent, or nonsensical.Use a different default or suggested range in their documentation.
Implement similar concepts under different parameter names (e.g.,
top_por nucleus sampling, which is another way to control diversity, often used in conjunction with or as an alternative to temperature).
The key takeaway is that temperature controls randomness. Lower values mean less randomness (more predictable), and higher values mean more randomness (more creative/diverse). Always consult the specific model's API documentation for its recommended temperature range and best practices.
🧠 You Sent Your First Prompt — Now Let’s Craft Better Ones
Whether you typed into ChatGPT or sent your prompt via code, that was your “Hello World” moment with GenAI. Congratulations!
But just like coding has different patterns (like using loops, functions, or conditional statements), prompting also has different styles and structures — each one is best suited for different kinds of tasks.
Now the real fun begins. Because prompting isn’t just about sending any text. It’s about choosing the right structure and approach for the task at hand.
Just like in web development, where you might use:
A form for users to input data.
A card component for displaying a specific piece of content.
A modal dialog for asking users to confirm an action.
In prompt engineering, there are different types of prompts, each designed for a particular use case. We’ll explore several common and powerful types of prompts, from basic questions to advanced reasoning techniques.
But that’s where we’ll pause for now. You’ve successfully built your foundation — you understand what prompts are, how to send them via code, and why being specific and iterative (trying and improving) is so important. You’ve successfully moved from being just a user to becoming a builder.
What’s Next?
You’ve just completed your first significant step into the world of prompt engineering. You now know:
What prompts are and why they are essential.
How to send prompts using code (both Python and TypeScript examples).
The ChatML format and the distinct roles (
system,user,assistant) used to structure conversations with AI.How the
temperatureparameter affects AI responses, controlling their creativity and predictability, and understanding its common range and variations.The critical importance of being specific, providing context, and iterating on your prompts.
In upcoming articles, we’ll go beyond the basics and equip you with powerful strategies to unlock even more sophisticated AI capabilities. Get ready to explore:
7 Powerful Prompt Types: From basic instructions to advanced reasoning methods that push the boundaries of what AI can do.
Professional Prompt Frameworks: Master structured approaches like CARE, 5W1H, and STAR to consistently get precise and effective outputs.
Avoiding Common Pitfalls: Learn from typical mistakes and discover how to debug your prompts for optimal performance.
Real-World Considerations: Dive into essential topics like cost optimization and crucial safety considerations for building responsible AI applications.
Ensuring Quality: Implement robust testing and validation strategies to guarantee reliable and consistent AI responses.
…and many more in-depth explorations to truly elevate your prompting game!
Ready to level up your prompting game? Let’s continue the journey!
🙏 Found this helpful? Tap the 👏 below to show some love! 💬 Got questions, thoughts, or fun AI ideas? Share them in the comments — I’d love to hear from you.
Subscribe to my newsletter
Read articles from Rajesh Kumar directly inside your inbox. Subscribe to the newsletter, and don't miss out.
Written by