DIY Product Photography Lighting Guide
 ProdShot Creator
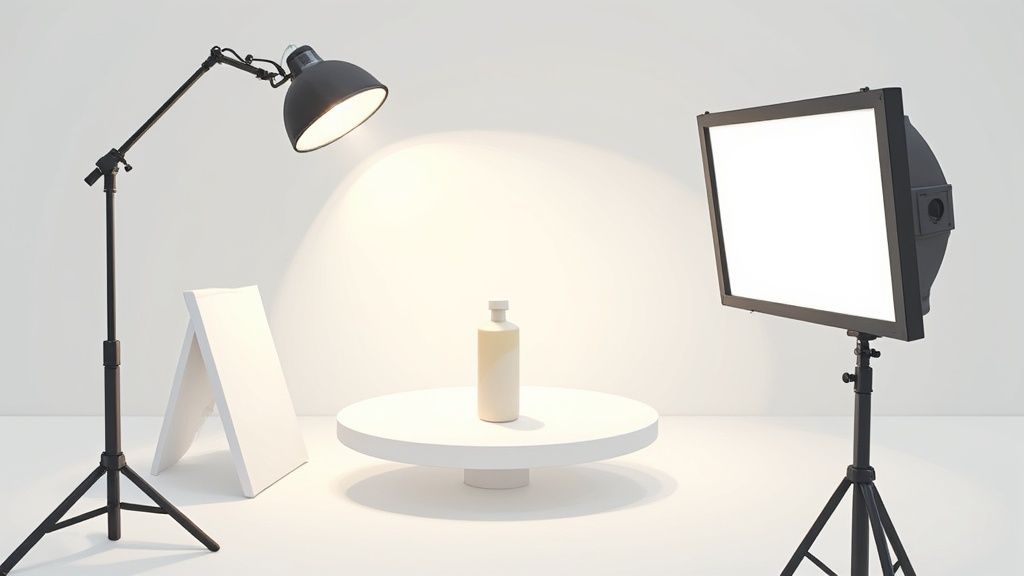
You've got an amazing product, and you know it deserves photos that do it justice. Here's a little secret from someone who's spent years in the trenches of product photography: the magic isn't in buying a ridiculously expensive camera—it's all about mastering light. Getting your DIY product photography lighting right is hands-down the most powerful thing you can do to build customer trust, define your brand, and boost your bottom line.
Why Great Lighting Is a Game-Changer for Your Products
Let's get real for a second. In the world of e-commerce, your product photos are your storefront. They’re the very first handshake, the initial pitch, and the final "wow" moment for your customers. Bad lighting—think dark, dingy photos, weird yellow tints, or harsh, distracting shadows—screams unprofessional. It might be subtle, but it plants a seed of doubt.
On the flip side, when your photos are bathed in clean, bright, and flattering light, your products look absolutely irresistible. Good lighting reveals true-to-life colors, shows off the quality of the materials, and gives everything a premium feel. This goes way beyond just looking pretty; it’s about earning a shopper's trust from the very first glance.
The Tangible Impact of Better Lighting
This isn't just a hunch; the link between lighting and sales is solid. High-quality images that showcase a product clearly and beautifully are a massive deal for shoppers. In fact, a staggering 74% of online shoppers say they rely heavily on product images to make a buying decision.
I've seen it time and time again: well-executed studio lighting can boost conversion rates by around 67%. Not only that, but clear visuals can also slash product returns by about 10% because what customers see online is exactly what they get.
This shows that putting a little time into your DIY lighting setup isn't just a fun creative project—it’s a core business strategy with a real, measurable payoff. You can find more info on how imagery impacts sales and dig into the research behind these lighting stats to see for yourself.
From Technical Hurdle to Your Best Tool
The idea of "lighting" can sound super technical and a bit intimidating, but I promise it's more straightforward than you think. At the end of the day, you're simply controlling how light hits your product to tell its best story.
- Shape Your Brand: Consistent, professional lighting across all your photos creates a strong, cohesive brand that people remember.
- Boost Shopper Confidence: When a customer can see every detail clearly, they feel much more secure clicking that "add to cart" button.
- Eliminate Guesswork: Great lighting answers questions before they're even asked. Is it matte or glossy? What's the exact shade of blue? Good photos make the buying decision easy.
Once you’ve got your visuals locked down, you're ready to create some powerful ecommerce social media marketing that sells and turn those beautiful photos into actual growth. Even on a cutthroat marketplace like Amazon, understanding light is what separates the top sellers from the rest. To see how these principles apply there, our guide on https://prodshot.net/professional-amazon-product-photography breaks down why lighting is the foundational skill for any successful product business.
Building Your DIY Lighting Toolkit on a Budget
You really don't need a Hollywood budget or a truckload of expensive gear to pull off professional-looking product photos. Honestly, some of the best tools for shaping beautiful DIY product photography lighting are probably sitting in your house right now, or you can grab them for less than the cost of a pizza.
Let's get this out of the way first: great lighting is about control, not cost. Our goal here is to round up a few key items that let you tame and direct the light hitting your product. Let's break down what you actually need to get started.
Finding Your Light Sources
Every photo starts with light. Natural light from a window is a fantastic—and free—place to begin, but you'll quickly find you need a consistent, artificial light for shooting on cloudy days or after the sun goes down. Don't worry, you don't need to splurge on professional strobes.
- Clamp Lights: These are the true unsung heroes of DIY lighting. You can find them at any hardware store for about $10-$15 a pop. I recommend grabbing two and pairing them with bright, "daylight balanced" LED bulbs. Look for a color temperature around 5000K-5600K on the packaging to get that clean, natural sunlight look.
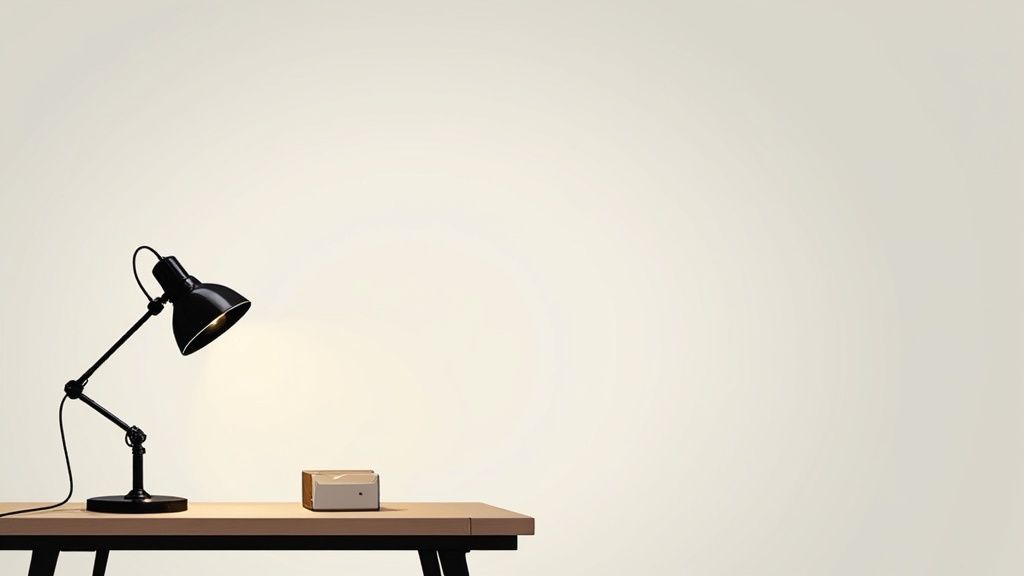
- Household Lamps: In a pinch, a simple desk lamp or even a floor lamp will do the trick. The key is to swap in a strong, daylight-balanced bulb and take off the lampshade. The shade will only muddy the color and block precious light.
What's great about these options is how ridiculously flexible they are. You can clamp them to chairs, tables, or bookshelves, giving you total freedom to adjust the height and angle of your light. That kind of control is what lets you create different moods and really make specific product features pop.
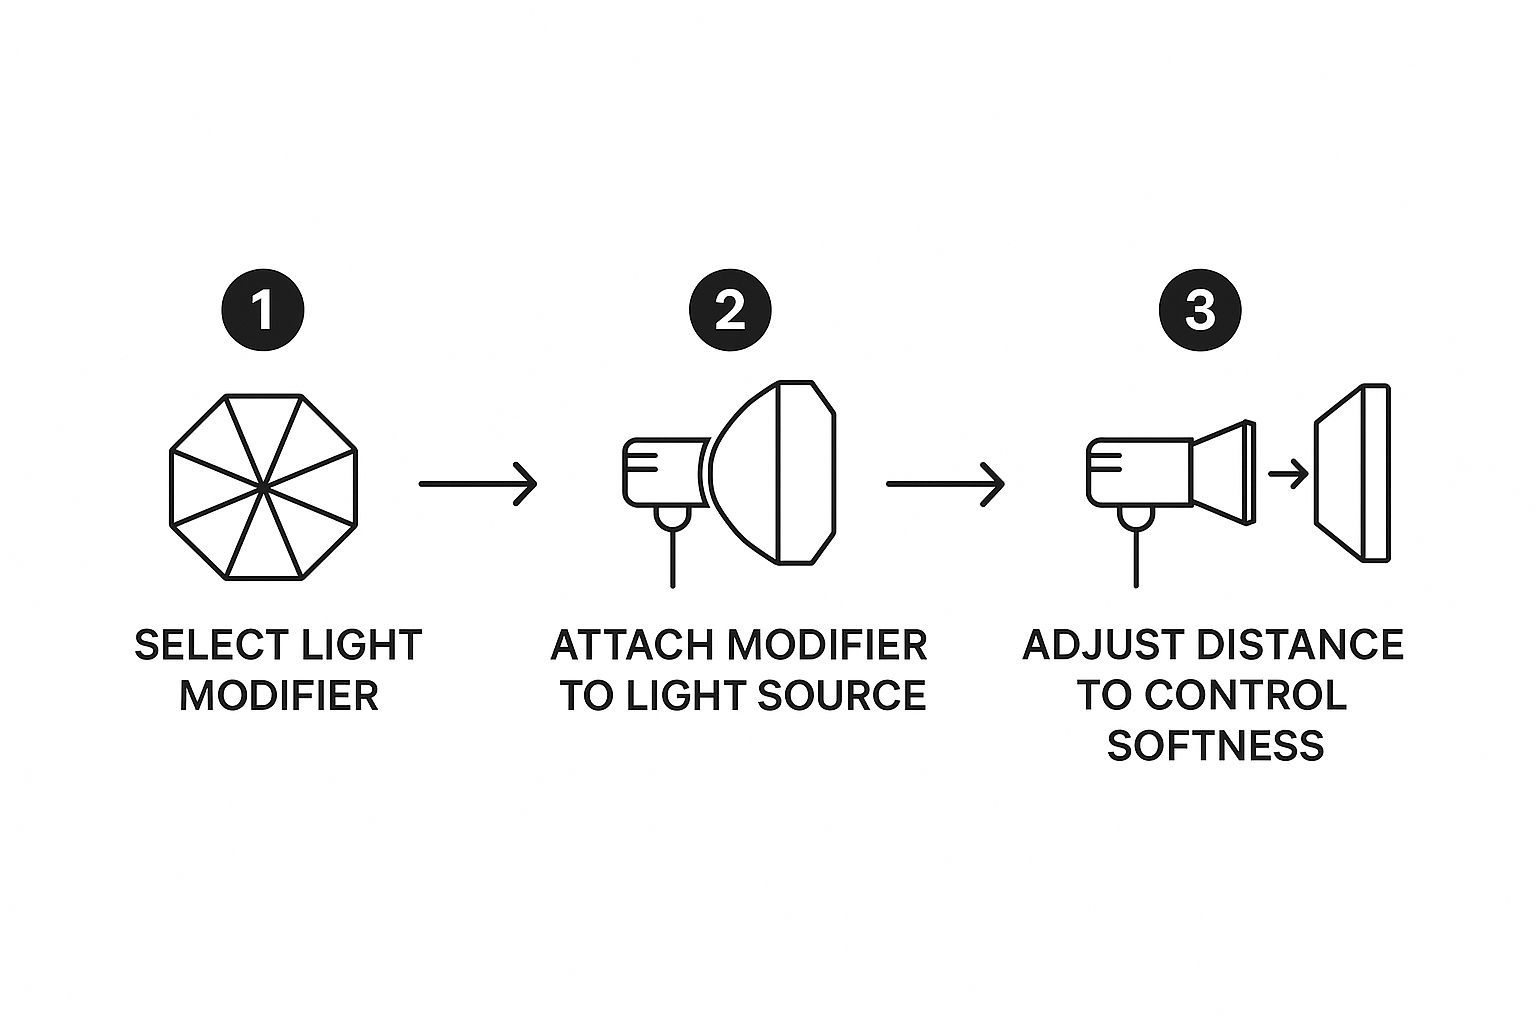
Crafting Your Light Modifiers
Once you've got a light source, your next job is to soften and direct it. A raw, bare bulb creates harsh, ugly shadows that can make even the nicest products look cheap. Light modifiers are what transform that harsh glare into soft, appealing illumination.
The real secret to pro-level lighting isn't about how powerful your bulb is. It's about how well you diffuse the light. A simple sheet of parchment paper can be more valuable than an expensive studio light if it gets you that soft, even look you're after.
Here are a few incredibly effective—and cheap—DIY modifiers:
- Foam Core Boards: A simple white foam board is your number one tool. You can pick one up at any dollar store or craft shop. It acts as a reflector, bouncing light back into the dark spots on your product to fill in and soften shadows. Grab a black one, too. Black foam board does the opposite; it absorbs light and makes shadows deeper, which is perfect for creating dramatic, high-contrast shots.
- Parchment Paper or a White Sheet: For diffusion, you can't beat these household staples. Just tape a piece of parchment paper or a thin, white bedsheet over your light source to instantly soften it. Just be careful not to let it touch a hot bulb! This simple trick gives you the same effect as a professional softbox, which could easily set you back $100 or more.
Assembling Your Complete DIY Kit
With your lights and modifiers ready, a few other items will make your life a whole lot easier and your shots more consistent.
| Tool | Purpose | Budget-Friendly Alternative |
| Tripod | Keeps the camera perfectly still, preventing blur and ensuring your angles are consistent from shot to shot. | A stack of books or a sturdy box. |
| Table | Gives you a stable surface for your product and background. | Any standard folding table or desk will do. |
| White Sweep | Creates that seamless, clean background without any distracting corners or lines. | A large piece of white poster board taped to a table and curved up against a wall. |
| Tape/Clamps | Holds your background and diffusers securely in place so they don't move mid-shoot. | Painter's tape is great because it won't damage your walls or furniture. |
When you put it all together, a fantastic starter DIY product photography lighting kit could cost you less than $50. That small investment buys you a powerful set of tools to control light, kill harsh shadows, and create the bright, clean images that build trust and drive sales. You're now equipped to move beyond just taking pictures and start crafting them with purpose.
The Secret to Pro-Level Shots? Your Window.
Some of the best light you'll ever find for your products is completely free—you just have to know how to work with it. Getting the hang of natural window light is a game-changer for DIY product photography lighting. It’s not just about plopping your product down next to any old window; the real magic is in how you shape and control that light.
Your main goal is to find soft, diffused light. This kind of light wraps beautifully around your product, softening shadows and bringing out textures without being harsh. Direct, blasting sunlight is what you want to avoid at all costs. It creates dark, distracting shadows that can cheapen the look of your product and hide important details.
This isn't some new-fangled trick. When e-commerce really took off after 2010, small business owners and Etsy sellers figured this out fast. They learned that placing products near a large window with indirect sun, maybe softened with a thin sheet, gave them sharp, professional-looking images without spending a dime on gear. It’s a powerful technique that's still just as relevant today. You can dive deeper into the history of DIY photography over at Visualwatermark.com.
Become a Light Detective in Your Own Home
Before you start shooting, you need to scout your location. Take a walk around your house or apartment at different times of the day, bringing a sample product with you. See how the light changes from room to room. Not all windows are created equal.
You’ll probably find that north or east-facing windows offer the most consistent, gentle light all day long. A south or west-facing window can definitely work, but you'll have to be more strategic to dodge the intense, direct sun, especially in the afternoon.
Here's the most important rule when using window light: turn off every other light in the room. Seriously. The cool, blue-ish tint of daylight mixed with the warm, yellow glow of your indoor bulbs creates a color balancing mess that is a total nightmare to fix in editing.
To make it easier to pick the right time and place, I've put together a quick cheat sheet. This table breaks down what you can expect from natural light throughout the day.
Natural Lighting Cheat Sheet
| Time of Day | Light Quality | Best For | Pro Tip |
| Early Morning | Soft, warm, diffused | Lifestyle shots, food, cosmetics | The "golden hour" light is very flattering but moves fast. Be ready to shoot quickly! |
| Mid-Morning | Bright, clean, neutral | E-commerce, white backgrounds, most products | This is often the most versatile and reliable light of the day. Consistent and easy to work with. |
| Midday | Harsh, high-contrast, overhead | Avoid for most indoor shots | If you must shoot, use a heavy diffuser (like a white sheet) over the window to soften it. |
| Late Afternoon | Soft, warm, dramatic | Textiles, wood, moody lifestyle shots | Creates long, interesting shadows. Great for adding depth and drama to your photos. |
This little guide should help you plan your shoots to capture your products in their best possible light, literally.
How to Position Your Product
Once you've found your best window, it's time to think about angles. Where you place your product in relation to the light source dramatically changes the look and feel of your photo.
- Side Lighting: Set up your product so the window is at a 90-degree angle to it. This is a fantastic starting point. It creates soft shadows that define the product's shape and add a sense of three-dimensionality. It’s my go-to for anything with texture, like clothing or handmade goods.
- 45-Degree Angle: This is another classic for a reason. Placing the light source at a 45-degree angle gives you a perfect balance of flattering highlights and gentle shadows. It’s a very safe, clean, and professional look.
- Backlighting: Feeling a bit more creative? Try putting the window behind your product. This can create a beautiful halo effect, especially for things like glassware, drinks, or anything translucent. Just know you will absolutely need a reflector to bounce light back onto the front, otherwise, you'll just get a silhouette.
Bending the Light to Your Will
Even the best natural light needs a little help. This is where your simple, inexpensive tools come in to refine what nature gives you.
Your most valuable tool will be a simple white foam core board. Place it on the side of your product opposite the window, and watch what happens. It will bounce light back into the shadows, brightening them and bringing out lost detail. It's a simple move that makes a world of difference.
If the sun is still a little too punchy, you can easily soften it. Try taping a thin white bedsheet or even a large piece of parchment paper over the window pane. This acts as a giant diffuser, creating the same kind of soft light you’d get from a professional softbox, but for a fraction of the cost.
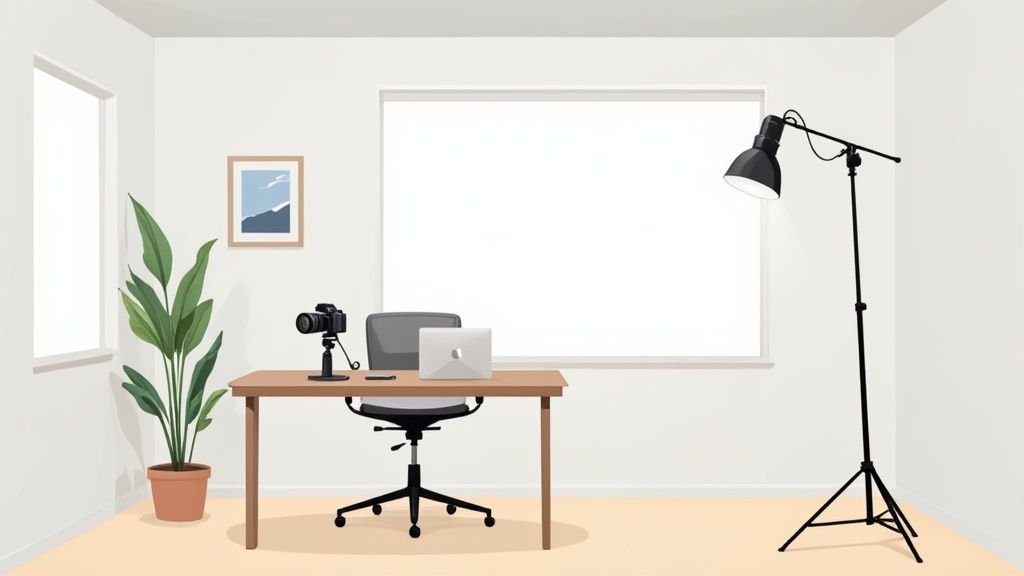
Building Your Own Artificial Lighting Setup
When the sun goes down or you're stuck in a room without a decent window, relying on natural light just isn't an option. This is where creating your own artificial DIY product photography lighting setup becomes essential for consistent, professional results. You get total control, which means you can shoot whenever inspiration strikes—not just when the weather cooperates.
The goal isn't to perfectly mimic daylight. Instead, it's about deliberately controlling light and shadow. By understanding a few core principles, you can sculpt the light to make your products look their absolute best, no matter the time of day. No more weird color casts from your overhead kitchen light or fighting with inconsistent brightness from a cloudy sky.
The Foundation: Three-Point Lighting
The classic setup used by photographers for decades is called three-point lighting. It might sound a bit technical, but it’s a beautifully simple concept that solves the most common lighting problems. It just means using three distinct lights to shape your subject, kill harsh shadows, and create a real sense of depth.
And the best part? You can easily build this professional-grade system using the budget-friendly clamp lights and LED bulbs we talked about earlier.
- The Key Light: This is your main event, the most powerful light source. It casts the primary light on your product and sets the whole mood of the image by creating the main shadows.
- The Fill Light: Think of this as the supporting actor. It's a softer, less intense light whose only job is to "fill in" and soften the shadows created by the key light. This reveals details that would otherwise be lost in the dark.
- The Backlight: Placed behind your product, this light creates a subtle glow or "rim light" around its edges. This simple trick is what separates the product from the background, adding that pop of depth and a polished, professional look.
This setup has been a cornerstone of photography since the 2010s, and its principles are just as relevant for DIY creators today. To really nail it, you'll want to understand how the key, fill, and backlight play off each other. You can learn even more about this professional approach on alanranger.com.
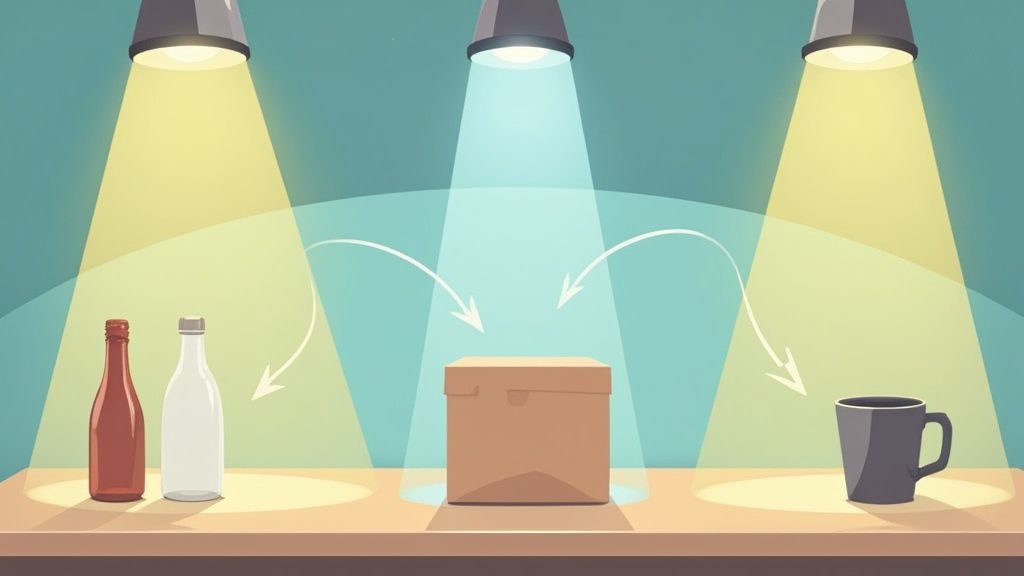
Your DIY Three-Point Setup in Action
Let's translate that theory into a practical setup you can build right now on your dining room table.
First, picture your product sitting at the center of a clock, facing you at the 6 o'clock position.
- Set Your Key Light: Place your brightest light at about the 4 o'clock or 8 o'clock position, creating a 45-degree angle to your product. Aim it down from above. This is what creates those defining shadows that give your product its shape and dimension. If you only have one light, this is where it goes.
- Add Your Fill Light: Now, bring in your second, less intense light and place it on the opposite side (if the key is at 4, the fill goes at 8). If you don't have a second lamp, a simple white foam board works perfectly as a reflector. Its job is to gently bounce some of the key light back into the shadows, making them softer. The goal is balance, not to get rid of shadows completely.
- Position Your Backlight: The third light goes behind the product, somewhere around the 1 or 2 o'clock spot. You'll want to aim it toward the back of the product, maybe slightly toward your camera, but be careful it doesn't shine directly into your lens and cause flare. This is what creates that crisp, defining edge.
As you can see, controlling your light is a simple process that can completely change the quality of your photos.
Why Color Temperature Is So Important
There's one final, critical piece to this puzzle: color temperature. Measured in Kelvin (K), this determines whether light appears warm and yellowish or cool and bluish.
Mixing different color temperatures is a surefire way to get funky, unprofessional-looking photos that are a nightmare to fix later.
Ever taken a picture inside that came out weirdly orange? That’s because your camera was trying to balance the cool daylight from a window with the warm light from an indoor bulb. It’s a classic mistake that instantly makes a photo look amateurish.
For clean, true-to-life product shots, you need all your light sources to be daylight balanced, which is typically between 5000K and 5600K. When you're buying LED bulbs, look for this number right on the box.
Using bulbs with the same Kelvin rating ensures your product’s colors look accurate in the final photo. This is non-negotiable for building customer trust—nobody wants to order a red sweater that shows up looking orange.
Sooner or later, every product photographer hits a wall. You've got the basics down, but then you're handed a project that seems impossible. Maybe it's a highly reflective wine bottle, a glossy piece of jewelry, or a pure black sweater that just melts into a shapeless blob in every shot. These tricky products demand a bit more finesse with your DIY product photography lighting.
The answer isn't just throwing more light at the problem—it's about using smarter light. Tackling these common headaches is all about learning to manipulate the direction, diffusion, and reflections to work for you, not against you. Once you get the hang of these principles, you can conquer even the most challenging items with your simple DIY setup.
https://www.youtube.com/embed/11fVshB1hkg
Taming Reflections on Shiny Surfaces
Photographing anything shiny—glass, metal, jewelry—can be maddening. The biggest fight is usually against unwanted reflections. Seeing your camera, your room, or even yourself staring back from the product's surface is a classic sign you need to adjust your approach. The secret is to take control of what the product is reflecting.
Instead of aiming a light directly at the item, which just creates a harsh, glaring hot spot, you need to surround it with large, soft light sources.
- Build a Light Tent: Your best friend for this is a simple DIY light tent. You can get great results just by draping a white sheet over a frame or even just by propping up large white foam boards on three sides of your product.
- Backlight Your Glassware: For items like bottles or glasses, try placing your main light behind the product, so it shines through the glass toward your camera. This gives the glass a beautiful glow and really defines its shape. From there, you can use a white reflector card in the front to gently bounce some light back onto the label.
- Go Big with Diffusion: Position your lights to bounce off those large foam boards or shoot them through a big diffusion panel (even a sheer white curtain will do). The product will then reflect a clean, soft white surface instead of the chaos of your room.
The core idea is a mental shift. You're not just lighting the product; you are lighting the environment that the product reflects. A clean, white reflection looks like an intentional, professional highlight, not a mistake.
Bringing Out Detail in Dark and Black Products
Black products, like dark clothing or electronics, are notorious for absorbing light. This can make them look flat and completely swallow up all the texture and detail you want to show off. A common mistake is to just blast them with more power, but that often just overexposes the background while the product itself still looks like a dark void.
The real solution here is edge lighting.
You need to create defined highlights along the product's edges to separate it from the background. You can do this by using your clamp lights or other sources to skim light across the product from the sides and slightly behind. This technique is often called "rim lighting," and it works by essentially tracing the outline of your product with light.
This approach carves the product out from the shadows, revealing its form and texture without making it look gray or washed out.
Preserving Shape in White Products
Just as black products can get lost in the shadows, pure white products can disappear into the highlights. When you photograph a white item on a white background, it's incredibly easy to overexpose it. When that happens, all the subtle details, textures, and edges get "blown out" and merge into a single white blob.
To fix this, you actually need to create subtle shadows.
| Problem | DIY Lighting Solution | Pro Tip |
| White-on-white disappearing | Place black foam boards on the sides of your product, just out of the frame. | The black cards do the opposite of a reflector—they absorb light and create faint, defining gray shadows along the product's edges. |
| Losing texture | Light the product from the side, at roughly a 90-degree angle to the camera. | This is called "raking" the light, and it casts tiny shadows across the surface that make textures and dimensions pop. |
Don't be afraid of shadows! They are precisely what give your white products shape and definition. It's a delicate balance, for sure, but using black cards to "add" shadows is a pro-level trick that works wonders.
While these lighting techniques are incredibly powerful, some issues like stubborn dust specs or complex reflections are just easier to fix in post-production. If you've tried everything and still aren't happy, professional product photo editing services can be a fantastic way to add that final layer of polish.
Your DIY Lighting Action Plan
Alright, you've got the theory down. Now it's time to put all this knowledge into practice and turn your product photos from just okay to genuinely impressive. The secret to great DIY product photography lighting isn't about how much money you spend—it’s about getting comfortable with controlling the light you have. This is where we pull it all together.
Your first step is to simply start experimenting. Seriously. Grab one of your products and a single light source, whether that's a window with some nice indirect light or a basic clamp lamp you already own. Just move the light around and watch what happens. See how the shadows fall, how the highlights pop, and how the texture changes.
Don't get caught up trying to nail the perfect shot right away. The real goal is to make one small, intentional improvement with each photo you take.
The aim here is progress, not instant perfection. Every photographer you admire started by learning to see and shape light. Your journey starts the second you stop just snapping pictures and begin consciously building them with light.
So, what should you do right now?
- Pick your light source. Are you going with natural window light or putting together a simple artificial setup? Make a decision and stick with it for your first test run.
- Grab a reflector. A simple piece of white foam board is perfect. Your only job is to use it to bounce light back into the shadows and see how it softens the overall look.
- Start shooting. Take a bunch of shots. Move the light, adjust your reflector, change the camera angle, and then look at what you've got. What worked? What didn't?
Once you've gotten the hang of your lighting and have some product shots you're proud of, you can think about getting them out into the world. You might even want to explore an AI social media content generator for photography to help craft some posts that will get your new images noticed.
Common DIY Lighting Questions Answered
Even after you've built your perfect little DIY studio, questions always crop up. That’s completely normal. Getting good at DIY product photography lighting is all about practice, trying things out, and figuring out what works. This section is your go-to guide for those "what now?" moments.
We're going to break down some of the most common hurdles that trip people up, giving you straightforward answers so you can get back to creating beautiful shots.
What if I Only Have One Light Source?
This is a classic problem, but don't worry—you can still pull off incredible photos. When you're working with a single lamp or just one sunny window, that light becomes your key light. The trick is to master the art of bouncing that light around.
Your main job here is to stop the side of your product opposite the light from falling into a deep, dark shadow.
- Working with Window Light: Set your product up so the window light hits it from the side. Grab a simple white foam board and place it on the shadow side. This will catch the window light and bounce it right back, gently filling in those dark areas.
- Working with Artificial Light: If you're using a single clamp light, position it at about a 45-degree angle to your product. Just like with the window, use a white reflector on the opposite side to serve as a makeshift "fill" light. I've even had success placing a second, smaller piece of foam behind the product to create a subtle highlight and separate it from the background.
How Do I Fix Unwanted Color Casts?
Have you ever taken a photo and noticed it has a strange yellow or blue tint? That’s a color cast. It almost always happens when you mix different kinds of light. For example, the cool, bluish light from a window clashing with the warm, yellowish light from a standard household lamp will throw your camera’s white balance completely off.
The number one rule for getting clean, accurate color is this: use only one type of light source at a time. If you’re using natural light from a window, turn off every other lamp in the room. If you’re using your new daylight-balanced LED bulbs, pull the shades or shoot in a windowless room.
Seriously, this one simple habit will do more for your color accuracy than almost anything else. Trying to fix a bad color cast in editing is a nightmare, but preventing it is surprisingly easy.
Should My Photos Look Perfect Straight Out of the Camera?
Nope. Not at all. This is a huge misconception that paralyzes a lot of people just starting out. I can promise you that even professional photographers with thousands of dollars in gear don't get the "perfect" shot right in the camera. Post-production is a non-negotiable part of the workflow.
Your goal on set is to capture a clean, well-exposed image with soft, flattering light and no harsh shadows. The photo you take might look a little flat or slightly gray—and that is perfectly fine. It's the basic edits in post-production, like adjusting brightness, contrast, and cropping, that really make the image pop. You haven't failed if your shot needs a little tweaking. Understanding that the cost of professional product photography always includes editing can help you appreciate that it’s a vital skill to develop for your own work, too.
Ready to skip the DIY setup and go straight to stunning, studio-quality images? ProdShot uses AI to transform your simple smartphone photos into conversion-ready product shots in seconds. Get your free trial at https://prodshot.net and see how easy it can be.
Subscribe to my newsletter
Read articles from ProdShot Creator directly inside your inbox. Subscribe to the newsletter, and don't miss out.
Written by