Emergency Roof Leak Repairs: A Step-by-Step Guide
 Nathalie Scott
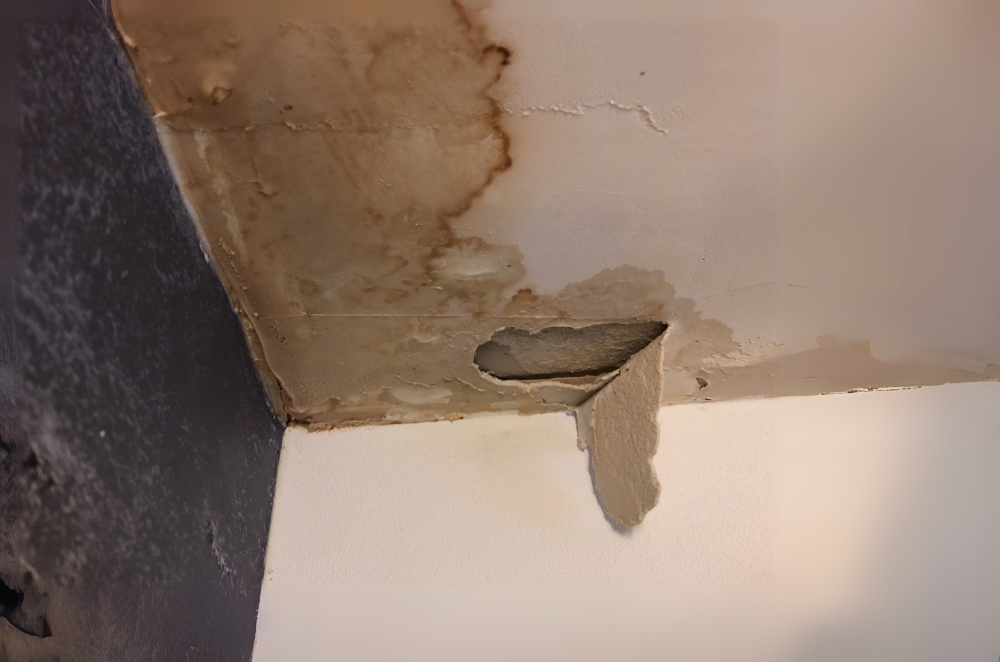
It always starts the same way. A weird tapping sound. A watermark that wasn’t there yesterday. A faint drip in the middle of the night when it’s bucketing down outside. That’s when you know — your roof’s turned on you.
I learned the hard way that when a roof starts leaking, things go from annoying to serious real fast. And unless you’ve got towels, tarps, and a roofer on speed dial, you’ll be flying blind. That’s why I always say, even if you’re not a DIY type, you need a plan.
So here it is — the step-by-step guide I wish I’d had the first time water started pouring through my ceiling. It won’t replace a pro, but it might save your walls, your wiring, and your sanity.
Oh, and if you ever need it in a pinch, keep a number handy for emergency roof repair. It’s not a matter of if, it’s when.
Step 1: Catch the water — now
Rule number one: don’t just watch it drip. Catch it.
Get a bucket under there. Or a pot. Or a plastic bin. Then throw down every towel you own. If your ceiling’s bulging, don’t wait for it to burst. Grab a screwdriver and gently poke a hole in the lowest point to release the water into a container.
Yeah, it feels risky, poking your ceiling. But I promise — it’s better than having the whole thing collapse and soak everything you own.
Step 2: Power off the wet zones
Next up: electricity.
If the leak’s anywhere near lights or power points, shut off the power in that part of the house. Go to your fuse box and flip the switch. Do not touch anything wet near a socket or switchboard.
I’ve seen people try to “dry around” a leak while the lights are still on. Please don’t. Water and wiring don’t play nice.
Step 3: Get eyes on the problem (from a distance)
You’ll want to know what’s going on up there. But here’s the thing — don’t climb your roof in the rain. Just don’t.
Instead, do a ground check:
Shine a torch up from the garden
Look for gutter overflow
Spot any cracked tiles or loose flashing
Check inside the roof space if you’ve got safe access
Whatever you do, follow the basic rules laid out in the roof safety checklist. If you’re unsure, wait for a pro.
Step 4: Patch it temporarily (but don’t overdo it)
Let’s be clear — you’re not fixing the leak. You’re buying time.
If the rain’s eased and it’s safe to get close, here are a few things you can do:
Throw a tarp over the damaged section (weigh it down — don’t rely on tape)
Use waterproof tape on visible cracks or seams
Place buckets or containers in your roof cavity if it’s dripping inside
I’ve seen people use cling wrap, duct tape, even zip-lock bags as makeshift diverters. It doesn’t have to look good — it just has to hold until help arrives.
Step 5: Call someone who knows what they’re doing
Once the water’s under control, it’s time to get a roofer. Not your mate. Not the handyman with three stars on Gumtree. A licensed, experienced roof leak specialist.
Why? Because leaks are sneaky. The spot where it’s dripping is often not where the water’s getting in.
A good roofer will:
Inspect the full roof structure (not just the surface)
Identify water paths through insulation and framing
Replace tiles, flashing, or sarking where needed
Check if moisture has damaged the ceiling or electricals
Don’t wait days to make the call. Many companies (like the one I used) offer 24/7 emergency roof repair, and trust me — the sooner they’re there, the smaller your final bill.
Step 6: Document it all for insurance
If you plan to make a claim (and you should), you’ll need proof.
Take photos of everything:
The leak itself
Water stains, drips, and ceiling bulges
Any damage to furniture, floors, or walls
The outside, especially the roof, gutters, and visible entry points
Also save:
Any invoices for emergency work
Emails or messages with your roofer
A short timeline of what happened and when
Insurers love clear documentation. It helps speed up approvals and protects you if there’s any pushback.
Step 7: Find out what caused it (and fix that)
A patch job isn’t enough. Once the rain stops and the roofer’s done the urgent repairs, get a full inspection.
Could be any of the usual suspects:
Cracked ridge tiles
Blocked valleys
Rusted or lifted flashing
Damaged sarking
Overflowing gutters
Or the classic: ponding on flat roofs (see flat roof leak causes)
Whatever it is, get it sorted. Roof leaks rarely happen in isolation. If one spot’s gone, others probably aren’t far behind.
Bonus: How to prevent this next time
After my roof fiasco, I’ve made this routine non-negotiable:
Gutters cleaned quarterly
A roof check after every serious storm
Annual inspection before summer
Overhanging trees cut back
Saved contact for my go-to emergency roofer
It’s not just about protecting your ceiling. It’s about protecting your time, your money, and your peace of mind.
Final thoughts
Leaks are unpredictable — but your response doesn’t have to be.
With a few smart moves, a bit of prep, and the right expert on your side, a middle-of-the-night roof leak can go from a total disaster to a manageable drama.
And hey, if you’re reading this while a bucket is catching water in your hallway, don’t panic. Start at step one, stay calm, and make sure emergency roof repair is next on your list.
Subscribe to my newsletter
Read articles from Nathalie Scott directly inside your inbox. Subscribe to the newsletter, and don't miss out.
Written by