Ergonomic Code with Elysia #1: A very quick start
 Au Quoc Hoa
What (or who) is Elysia?
Elysiajs is named after Elysia, a very famous character in the game Honkai Impact 3. The creator of this library is probably a big fan of Elysia, and so am I 😄
Besides, ElysiaJS is a production ready framework built on Bun. With many advantages:
Easy to learn and use, even for beginners
Small bundle, super high performance
E2E type safety
An important note is that in this series I will arrange the knowledge about Elysia in an easy-to-understand order with examples and explanations. However, I also encourage you to go through the official documentation on the home page to understand the theory clearly. In some places I will refer to the official documentation, if necessary.
Getting Started
Install Bun on Mac/Linux:
curl -fsSL https://bun.sh/install | bash
or Windows
powershell -c "irm bun.sh/install.ps1 | iex"
Then run script below to install a new Elysia app
bun create elysia app
Once done, go to your new app directory
cd app
and start the app
bun dev
Navigate to localhost:3000 should greet you with "Hello Elysia".
Controller / Route
To make the Elysia application receive a request from the internet, we need to create a controller (or route).
For example, we will create the following controllers, simulating an application that manages posts.
import { Elysia } from "elysia";

export const PostController = new Elysia({
  name: "post-controller",
  prefix: "/post",
})
  .get("/", () => {
    return "Get all posts";
  })
  .get("/:id", ({ params }) => {
    return `Get post by id ${params.id}`;
  })
  .post("/", () => {
    return "Create a new post";
  })
  .put("/:id", ({ params }) => {
    return `Update post by id ${params.id}`;
  })
  .delete("/:id", ({ params }) => {
    return `Delete post by id ${params.id}`;
  });
index.ts and place it in the src/post folder. Standardizing file names and project structure from the beginning will make your project easier to manage and test.After that, add the routes you just created to the main Elysia instance at src/index.ts, and save. Bun will automatically reload your app with the new codes.
import { Elysia } from "elysia";
import { PostController } from "./post";

const app = new Elysia()
  .use(PostController)
  .get("/", () => "Hello Elysia")
  .listen(3000);

console.log(
  `🦊 Elysia is running at ${app.server?.hostname}:${app.server?.port}`
);
Now you can access the controllers you just created using browser, Postman,... or a simple curl command like this
curl localhost:3000/post
but currently the controllers only log simple text. In a real application we need to use complex logic to handle necessary business, let's add services.
Service / Handler
We call the code that handles business operations as services (or handlers). Services have many different purposes, it can be a simple calculation function, a call to a database or a call to another third-party application,...
In Elysia, service is also an Elysia instance similar to controller (or even other components, this is a special and very cool point of Elysia, we will discuss this issue later)
Now we will assume to create a service to manage posts
export abstract class PostService {
  static posts: { id: number; title: string; content: string }[] = [];

  static async getPosts() {
    return this.posts;
  }

  static async getPostById(id: number) {
    return this.posts.find((post) => post.id === id);
  }

  static async createPost({
    title,
    content,
  }: {
    title: string;
    content: string;
  }) {
    this.posts.push({
      id: this.posts.length + 1,
      title,
      content,
    });
    return this.posts;
  }

  static async updatePost(
    id: number,
    {
      title,
      content,
    }: {
      title: string;
      content: string;
    }
  ) {
    const post = this.posts.find((post) => post.id === id);
    if (!post) {
      throw new Error("Post not found");
    }
    post.title = title;
    post.content = content;
    return post;
  }

  static async deletePost(id: number) {
    const post = this.posts.find((post) => post.id === id);
    if (!post) {
      throw new Error("Post not found");
    }
    this.posts = this.posts.filter((post) => post.id !== id);
    return this.posts;
  }
}
service.ts and be placed in the src/post folderChange the controller to implement services
import { Elysia } from "elysia";
import { PostService } from "./service";

export const PostController = new Elysia({
  name: "post-controller",
  prefix: "/post",
})
  .get("/", () => {
    return PostService.getPosts();
  })
  .get("/:id", ({ params }) => {
    return PostService.getPostById(Number(params.id));
  })
  .post("/", ({ body }) => {
    return PostService.createPost(body as { title: string; content: string });
  })
  .put("/:id", ({ params, body }) => {
    return PostService.updatePost(
      Number(params.id),
      body as { title: string; content: string }
    );
  })
  .delete("/:id", ({ params }) => {
    return PostService.deletePost(Number(params.id));
  });
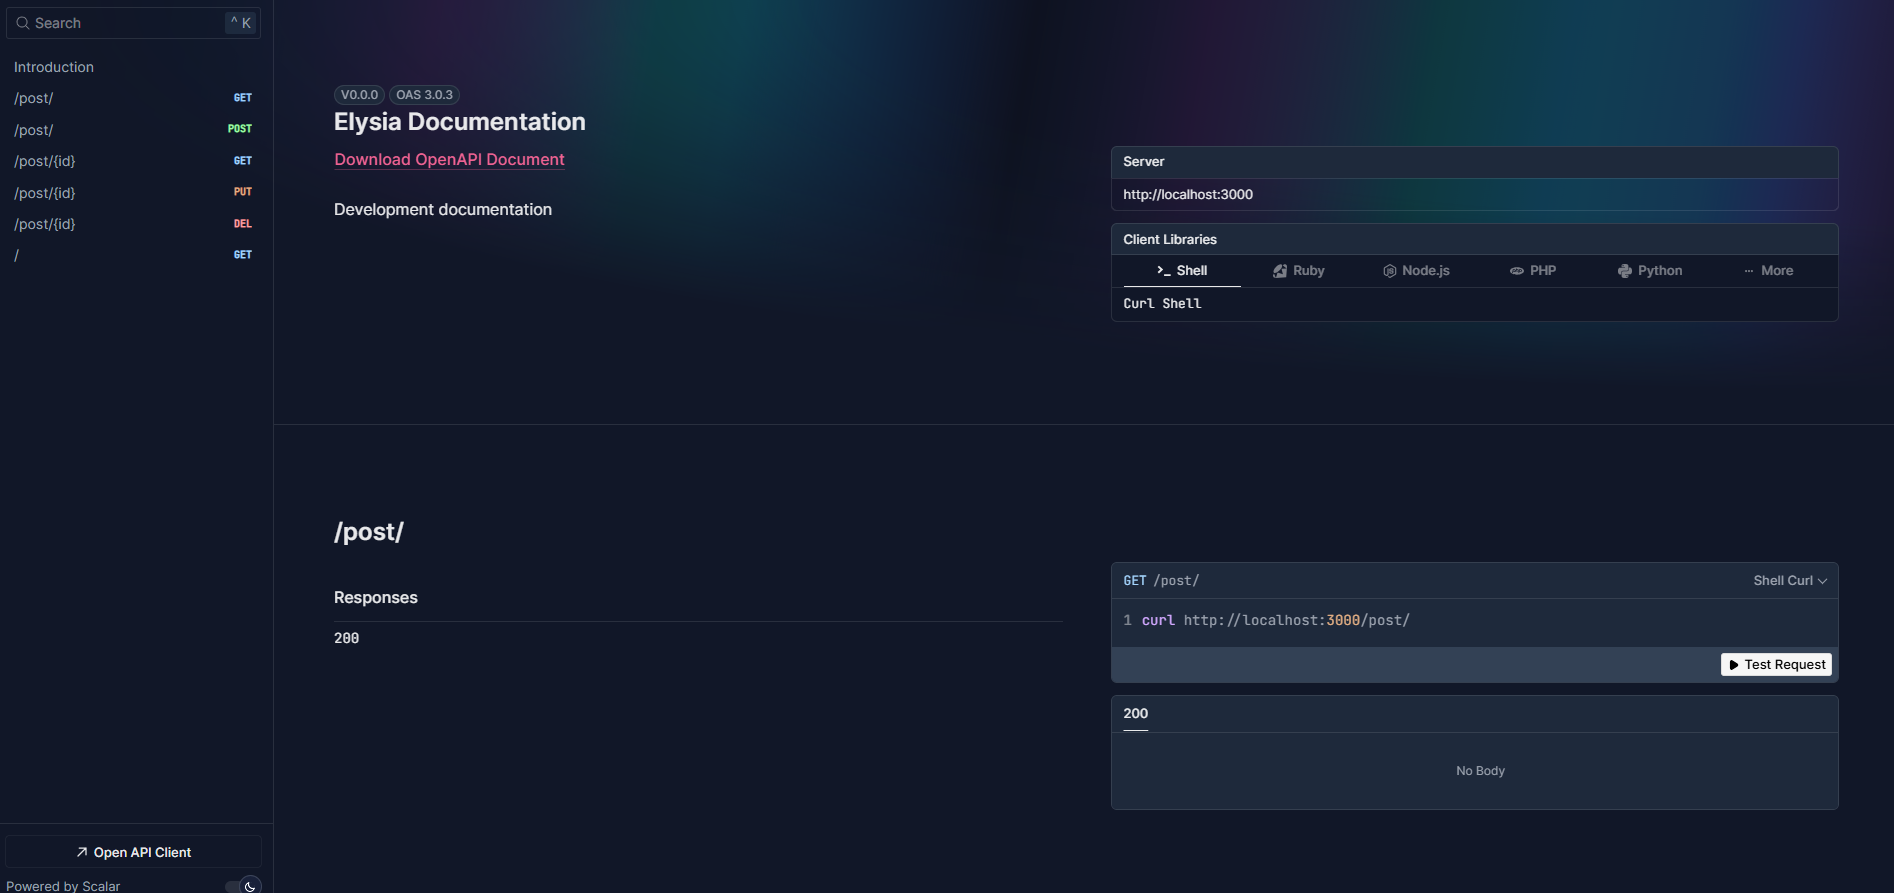
Test with Swagger
You can type curl command to test. But, to make life easier, just add Swagger library, Elysia already has config, we don't need to do much, just install this library
bun add @elysiajs/swagger
Then add this plugin to your application
import { Elysia } from "elysia";
import { PostController } from "./post";
import { swagger } from "@elysiajs/swagger";

const app = new Elysia()
  .use(swagger())
  .use(PostController)
  .get("/", () => "Hello Elysia")
  .listen(3000);

console.log(
  `🦊 Elysia is running at ${app.server?.hostname}:${app.server?.port}`
);
Then go to http://localhost:3000/swagger, you will see a beautiful swagger page with all your routes. You can test your new routes on that page
Type Integrity
You may have noticed that in routes with param ':id' Elysia has automatically interpolated the id type as string. However, in routes with body there is still no type.
And if you pass in numeric data in the title or content attribute (which should be text), the application still accepts it and does not report an error, which is not true in reality.
Therefore Elysia provides Elysia.t, which allows you to build schemas to validate types and data at both runtime and compile-time. This schema is similar to Zod schema.
For example, bind the create post route to title and content only being string.
//Another codes...
.post(
    "/",
    ({ body }) => {
      return PostService.createPost(body);
    },
    {
      body: t.Object({
        title: t.String(),
        content: t.String(),
      }),
    }
  )
//Another codes...
As you may have noticed, Elysia has now interpolated the body type and we don’t need to cast it anymore. Also, if you try to pass in a title or content with numeric data, you’ll get a validation error.
Model and split code
It is not good to keep rewriting the same schema in every case. For example, you can see that the body of create and update service is the same, so we will create a model and reuse that schema.
Actually, you can totally make an application without a Model. But trust me, creating a model will help you a lot, especially after connecting to the database which I will guide you in the next articles.
import { t } from "elysia";

export const postModel = {
  body: t.Object({
    title: t.String(),
    content: t.String(),
  }),
};
model.tsand place in src/postNow you can change service create to like this
//...
static async createPost({ data }: { data: typeof postModel.body.static }) {
    this.posts.push({
      id: this.posts.length + 1,
      ...data,
    });
    return this.posts;
  }
//...
and controller like this
//...
.post(
    "/",
    ({ body }) => {
      return PostService.createPost({ data: body });
    },
    {
      body: postModel.body,
    }
  )
//...
You can change the same for the update part and we have got a simple application.
But wait, if we stop here, organizing the code in the controller with many chaining methods will look quite messy.
I have a suggestion, which is also the way I usually organize, split the child routes inside the controller into separate Elysia instances with easy-to-understand names and add them inside the main controller, like this
import { Elysia } from "elysia";
import { PostService } from "./service";
import { postModel } from "./model";

const getPosts = new Elysia({ name: "get-posts" }).get("/", () => {
  return PostService.getPosts();
});

const getPostById = new Elysia({ name: "get-post-by-id" }).get(
  "/:id",
  ({ params }) => {
    return PostService.getPostById(Number(params.id));
  }
);

const createPost = new Elysia({ name: "create-post" }).post(
  "/",
  ({ body }) => {
    return PostService.createPost({ data: body });
  },
  {
    body: postModel.body,
  }
);

const updatePost = new Elysia({ name: "update-post" }).put(
  "/:id",
  ({ params, body }) => {
    return PostService.updatePost(Number(params.id), { data: body });
  },
  {
    body: postModel.body,
  }
);

const deletePost = new Elysia({ name: "delete-post" }).delete(
  "/:id",
  ({ params }) => {
    return PostService.deletePost(Number(params.id));
  }
);

export const PostController = new Elysia({
  name: "post-controller",
  prefix: "/post",
})
  .use(getPosts)
  .use(getPostById)
  .use(createPost)
  .use(updatePost)
  .use(deletePost);
It now looks nice and clean, let's say if you need to modify code in a certain route you can easily locate where to modify
Summary
If you follow all the instructions above you will have a directory tree that looks like this
├── README.md
├── bun.lockb*
├── package.json
├── src/
│   ├── index.ts
│   └── post/
│       ├── index.ts
│       ├── model.ts
│       └── service.ts
└── tsconfig.json
In this part, we have only learned the very basic parts of Elysia to know how to start a web server and call it.
In fact, to be able to handle business logic, applications always need at least 1 accompanying database. In the next part, we will build and connect this application to the database, so stay tuned.
The entire code of this series will be stored in this repo.
Subscribe to my newsletter
Read articles from Au Quoc Hoa directly inside your inbox. Subscribe to the newsletter, and don't miss out.
Written by
Au Quoc Hoa
Au Quoc Hoa
Hello readers! My name is Au Quoc Hoa, a programmer living in Vietnam with a passion for code and technology. HoaAQ is actually my initials and has no special meaning. Up to now, I have more than 7 years of experience working on many different large and small projects in many different roles. You can find in me all kinds of knowledge from front-end to back-end, from systems to data processing, AI integration,... In the process of accumulating that experience, I also realized that, in order to consolidate my knowledge and develop further, I need to share and spread it to everyone, that is also the reason I created this blog.