Set up a raspberry pi http tunnel instantly with Tunnelmole
 Robbie Cahill
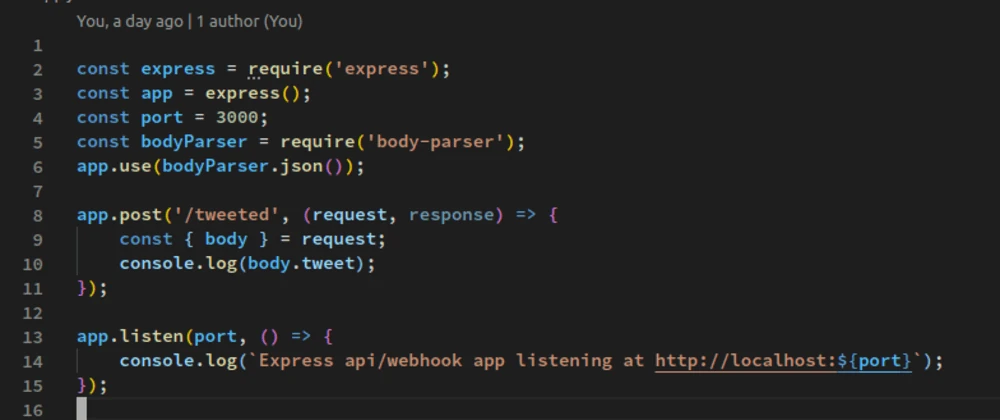
Set up a Raspberry Pi HTTP Tunnel Instantly with Tunnelmole
The Raspberry Pi is a fantastic, low-cost computer perfect for hosting personal projects, from home automation dashboards and media servers to web APIs and personal websites. However, once you've built your amazing project, a common challenge arises: how do you access it from outside your home network? Creating a Raspberry Pi HTTP tunnel is the solution, and it's easier than you think.
Traditionally, exposing a local server to the internet involved complex and often insecure methods like port forwarding. This guide will walk you through a modern, secure, and incredibly simple alternative using Tunnelmole, an open-source tunneling tool. You'll learn how to get a public URL for your Raspberry Pi project in seconds, without any complicated router configuration.
What is a Raspberry Pi HTTP Tunnel?
A Raspberry Pi HTTP tunnel is a way to make a web server running on your Raspberry Pi, which is normally only accessible on your local network, available to anyone on the internet.
It works by creating a secure, encrypted connection (a "tunnel") from your Raspberry Pi to a public server. This public server then forwards any incoming web traffic through the tunnel directly to your local application. To the outside world, it looks like your project is hosted on a public server, but it's actually running right on your Pi.
This is invaluable for a variety of tasks:
- Developing and testing webhooks: Services like Stripe, GitHub, or Shopify can send notifications directly to your local development environment.
- Sharing your work: Show a project to a client, classmate, or friend without needing to deploy it to a cloud provider.
- Remote access: Access your home automation system or personal server from anywhere in the world.
- Mobile testing: Test the mobile view of your website on a real smartphone using a public URL.
The Old Way: Port Forwarding and its Headaches
Before tools like Tunnelmole, the standard method for exposing a local server was Port Forwarding. This involves configuring your home router to forward incoming traffic on a specific port (e.g., port 80 for HTTP) to the local IP address of your Raspberry Pi.
While it works, this method is fraught with problems that make it a poor choice for most users.
Security Nightmares
When you open a port on your router, you are punching a hole in your network's primary defense mechanism: the firewall. This directly exposes your Raspberry Pi, and potentially your entire home network, to the public internet. Any security vulnerability in your application, your Pi's operating system, or any other service running on it becomes a potential entry point for malicious actors. It's like leaving a window open in your house; you might be fine, but you're inviting trouble.
Configuration Complexity
Setting up port forwarding is not a user-friendly process.
- You need to log into your router's admin interface, which can be difficult to find and navigate.
- You must assign a static IP address to your Raspberry Pi within your local network, otherwise, it might change, breaking the forwarding rule.
- Your home's public IP address, assigned by your ISP, can change periodically (this is called a dynamic IP). When it does, your public URL will break until you update your DNS records, requiring a dynamic DNS service to manage.
This entire process is tedious, error-prone, and varies significantly between router models.
The Carrier-Grade NAT (CGNAT) Roadblock
Many modern Internet Service Providers (ISPs) use a technique called Carrier-Grade NAT (CGNAT) to conserve IP addresses. With CGNAT, you don't even get your own unique public IP address; you share one with many other customers. If your ISP uses CGNAT, port forwarding is simply impossible, as you have no public IP address to forward from.
The Modern Solution: A Secure HTTP Tunnel with Tunnelmole
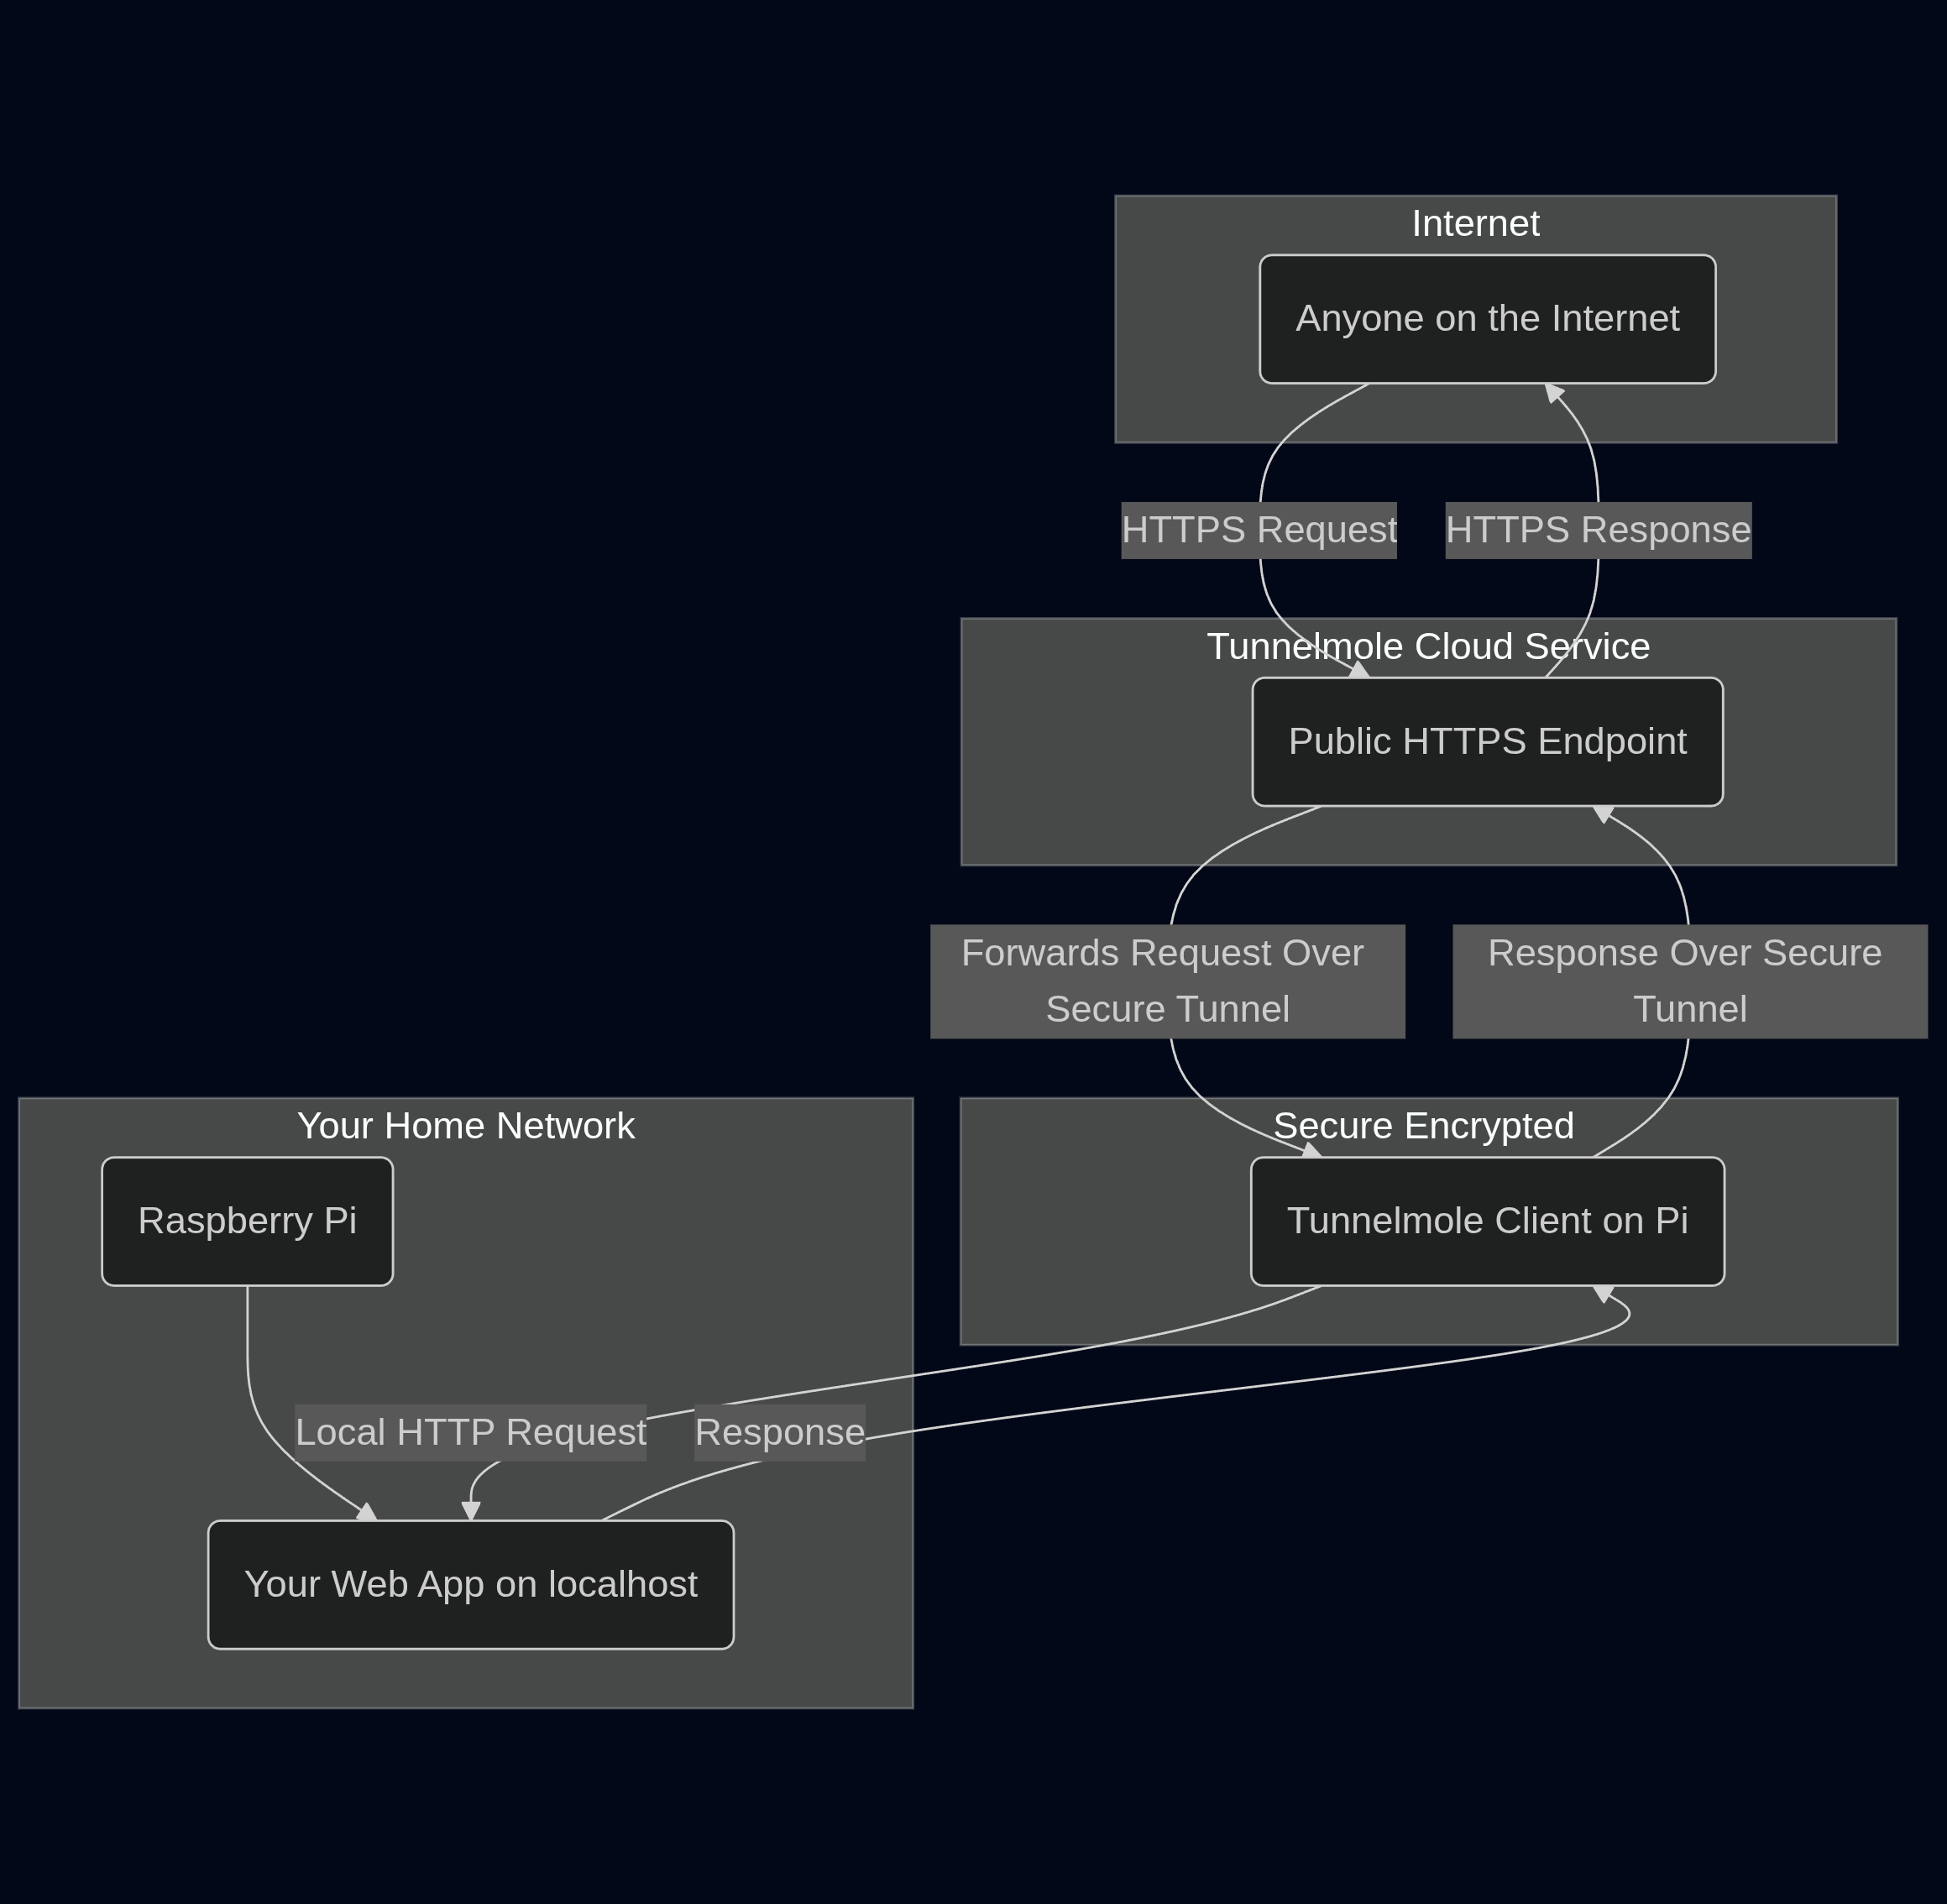
Tunnelmole bypasses all the problems of port forwarding by reversing the connection logic. Instead of waiting for incoming connections from the internet, the Tunnelmole client on your Raspberry Pi initiates a secure, outbound connection to the public Tunnelmole service.
This simple reversal has profound benefits:
- It's Secure by Default: Since the connection originates from inside your network, you don't need to open any ports in your firewall. Your home network remains completely sealed off from the public internet.
- It's Incredibly Simple: There is no router configuration, no static IPs to assign, and no dynamic DNS to worry about. You just run a single command.
- It Works Everywhere: Because it doesn't rely on a unique public IP, Tunnelmole works perfectly even if your ISP uses CGNAT.
The architecture is clean and secure, as shown in the diagram below.
Step-by-Step: Creating Your raspberry pi HTTP Tunnel
Let's get your raspberry pi HTTP tunnel up and running. This should take less than 5 minutes.
Step 1: Pre-requisites - A Running Web Server
First, you need a web application running on your Raspberry Pi. For this example, we'll use a very simple "Hello World" server using Node.js and Express.
Create a file named server.js on your Pi and add the following code:
const express = require('express');
const app = express();
const port = 8080;

app.get('/', (req, res) => {
    res.send('Hello from my Raspberry Pi!');
});

app.listen(port, () => {
    console.log(`Server running at http://localhost:${port}`);
});
This simple server listens on port 8080.
To run it, you'll first need to install Express:
npm install express
Then start the server:
node server.js
You should see the message Server running at http://localhost:8080.
Step 2: Install Node.js and NPM
Tunnelmole is a native NodeJS application. While many installation options exist, for the ARM architecture of the Raspberry Pi, the most reliable method is to install it via npm (Node Package Manager).
If you don't have Node.js and npm installed, you can get them easily. The recommended way is to use NodeSource. Raspberry Pi OS documentation has excellent, up-to-date instructions. Usually, it's a couple of commands like this:
# Fetch and run the NodeSource setup script for v22:
curl -fsSL https://deb.nodesource.com/setup_22.x | sudo -E bash –

# Install nodejs (this gives you node v22.x + npm)
sudo apt-get install -y nodejs
Verify the installation by checking their versions:
node -v
npm -v
Step 3: Install Tunnelmole
With npm ready, you can install Tunnelmole with a single command. The -g flag installs it globally, so you can run tmole from any directory.
sudo npm install -g tunnelmole
Step 4: Start Your Tunnel
This is the magic step. Make sure your local server (from Step 1) is running. Then, in a new terminal window on your Pi, run tmole and tell it which port your server is listening on.
In our example, the server is on port 8080.
tmole 8080
Tunnelmole will start, connect to the public service, and generate your public URLs. The output will look something like this:
$ tmole 8080
Your Tunnelmole Public URLs are below and are accessible internet wide. Always use HTTPs for the best security

https://k8s5tr-ip-192-168-1-10.tunnelmole.net ⟶ http://localhost:8080
http://k8s5tr-ip-192-168-1-10.tunnelmole.net ⟶ http://localhost:8080
That's it! Your Raspberry Pi HTTP tunnel is now live.
Step 5: Access Your Pi from Anywhere
You now have a public HTTPS URL. Copy the https URL from the terminal and paste it into any web browser on any device in the world. You will see the "Hello from my Raspberry Pi!" message being served directly from your device.
Conclusion
You've successfully set up a Raspberry Pi HTTP tunnel, giving your local project a public home on the internet. You've bypassed the insecure and complicated process of port forwarding and can now share your work, test integrations, and access your projects from anywhere.
With Tunnelmole, what used to be a significant networking hurdle is now a single command, making it easier than ever to unlock the full potential of your Raspberry Pi projects.
To learn more about what you can do with Tunnelmole, including using custom subdomains, visit tunnelmole.com.
Subscribe to my newsletter
Read articles from Robbie Cahill directly inside your inbox. Subscribe to the newsletter, and don't miss out.
Written by