How to do webhook testing quickly and easily with Tunnelmole
 Robbie Cahill
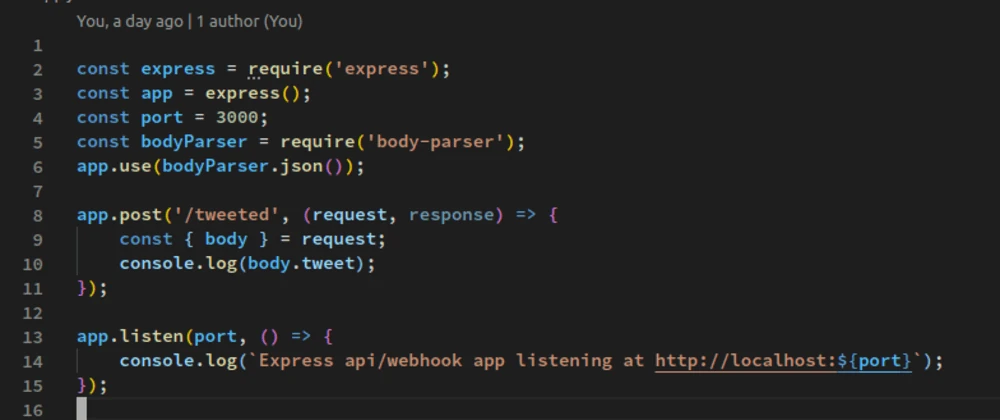
How to Do Webhook Testing Quickly and Easily
Developing and integrating webhooks can be a frustrating cycle of code, deploy, test, repeat. Every small change requires a deployment to a public server just to see if your webhook handler works correctly. This process is slow, inefficient, and clutters your development workflow. This is where webhook testing on your local machine becomes a game-changer.
This guide will walk you through the challenges of traditional webhook development and introduce a powerful, open-source solution to streamline your process. You'll learn how to perform webhook testing directly on your local development environment, get instant feedback, and accelerate your development cycle for popular platforms like Zapier, IFTTT, Slack, and Discord.
What is Webhook Testing and Why is it Difficult?
Webhooks are automated messages sent from one application to another when a specific event occurs. For instance, when a user pays for an item on your e-commerce store, Stripe can send a payment_succeeded webhook to your application. Your application then needs a "webhook handler"—a public-facing URL that can receive and process this incoming data.
The primary difficulty with webhook testing arises from this "public-facing" requirement. Your local development server, typically running on localhost:3000 or a similar address, is only accessible from your own machine. Webhook providers on the public internet, like Stripe, Shopify, or Slack, cannot send requests to your localhost.
Traditionally, developers get around this by:
- Deploying Every Change: Pushing code to a staging or development server after every minor tweak. This is incredibly time-consuming. A simple logic change can take several minutes to deploy, completely breaking your development flow.
- Using Mocking and Stubbing Tools: Simulating webhook requests manually with tools like Postman or
curl. While useful, this approach doesn't provide a true end-to-end test. You're not receiving a real webhook from the provider, so you can't be 100% sure your handler will work with the actual payload structure, headers, or authentication mechanisms.
Both methods are compromises that slow you down and introduce uncertainties. A much better approach is to receive real webhooks from the provider directly on your local machine.
The Solution: Local Webhook Testing with a Tunneling Tool
The most effective way to handle webhook testing is to expose your local web server to the internet. This is where a tunneling tool comes in. A tunneling tool creates a secure connection from a public URL to your local machine, effectively giving your localhost a temporary public address.
Tunnelmole is an open-source tool designed for exactly this purpose. It provides you with a free, public HTTPS URL that forwards all incoming requests to your local development server.
With Tunnelmole, your webhook testing workflow becomes:
- Start your local application (e.g., a Node.js Express server on port 3000).
- Run one simple command:
tmole 3000. - Tunnelmole gives you a public URL like
https://random-subdomain.tunnelmole.net. - Provide this URL to your webhook provider (e.g., in the Slack or Zapier dashboard).
- Trigger the event. The webhook is sent to the Tunnelmole URL, tunneled to your machine, and hits your local application.
You can now set breakpoints, use your debugger, and see log output in real-time, just as you would with any other local development task.
How Does Tunnelmole Work?
Tunnelmole establishes a secure connection between your computer and the Tunnelmole service running on the public internet. When a webhook provider sends a request to your public Tunnelmole URL, the service forwards that request through the secure tunnel to the Tunnelmole client running on your machine. The client then sends it to your local web server.
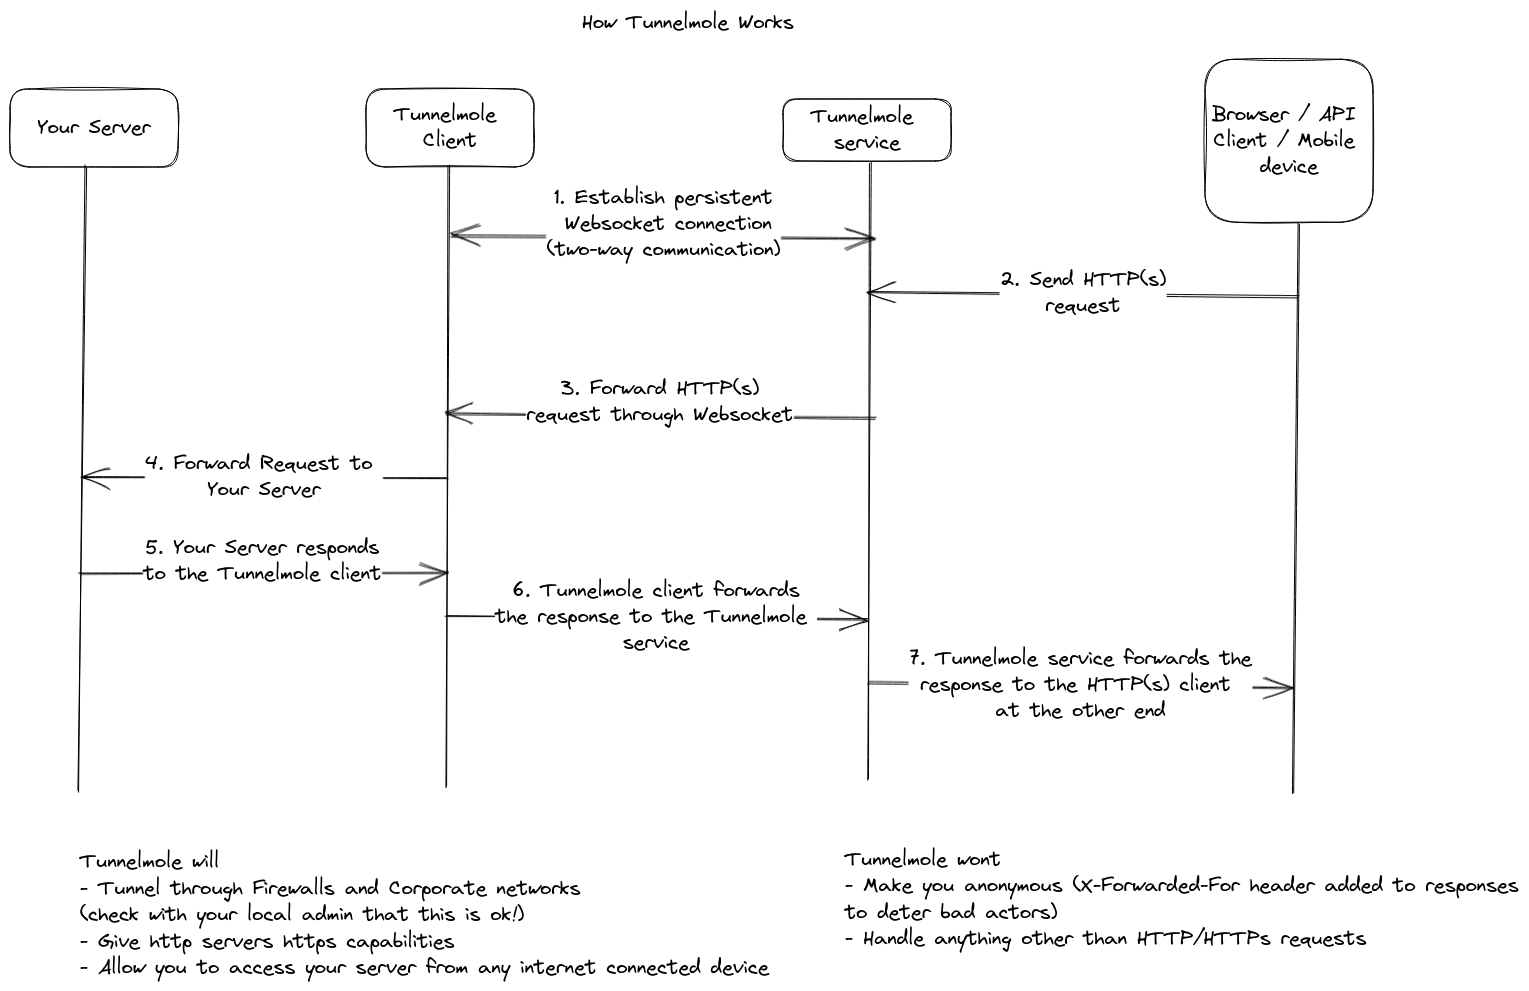
This entire process happens in milliseconds, allowing for a seamless and responsive testing experience.
Getting Started with Webhook Testing Using Tunnelmole
Let's set up a simple webhook testing environment. We'll create a basic Express.js server in Node.js to act as our webhook handler.
Step 1: Create a Simple Webhook Handler
First, you need an application that listens for incoming HTTP requests. If you don't have Node.js installed, download it from the official website.
Create a new project folder, and in your terminal, run:
npm init -y
npm install express
Now, create a file named server.js and add the following code:
const express = require('express');
const app = express();
const port = 3000;

// Middleware to parse JSON bodies. Most webhooks use JSON.
app.use(express.json());

app.post('/webhook-handler', (req, res) => {
    console.log('--- New Webhook Received ---');

    // Log headers
    console.log('Headers:', req.headers);

    // Log body
    console.log('Body:', req.body);

    console.log('--------------------------');

    // Respond to the webhook provider to acknowledge receipt
    res.status(200).send('Webhook received!');
});

app.listen(port, () => {
    console.log(`Webhook handler listening at http://localhost:${port}`);
});
This simple server listens on port 3000 at the /webhook-handler endpoint. When it receives a POST request, it logs the headers and body to the console and sends a 200 OK response.
Run your server:
node server.js
You should see the message: Webhook handler listening at http://localhost:3000.
Step 2: Install and Run Tunnelmole
Next, install Tunnelmole. If you have Node.js, the easiest way is with npm:
sudo npm install -g tunnelmole
Alternatively, for Linux, Mac, or WSL, you can use the install script:
curl -O https://install.tunnelmole.com/xD345/install && sudo bash install
With your local server running on port 3000, open a new terminal window and run:
tmole 3000
Tunnelmole will start and display your public URLs:
Your Tunnelmole Public URLs are below and are accessible internet wide. Always use HTTPs for the best security

https://k78de5-ip-12-34-56-78.tunnelmole.net ⟶ http://localhost:3000
http://k78de5-ip-12-34-56-78.tunnelmole.net ⟶ http://localhost:3000
Copy the HTTPS URL. Your full webhook endpoint is this URL plus your handler's path. In our example, it would be https://k78de5-ip-12-34-56-78.tunnelmole.net/webhook-handler.
You are now ready to receive webhooks from any service on the internet.
Webhook Testing Use Cases with Popular Platforms
Let's see how you can use this setup with some of the most popular webhook providers.
1. Zapier Webhook Testing
Zapier is a powerful automation tool that connects thousands of apps. Their "Webhooks by Zapier" trigger and action is perfect for creating custom integrations.
To test a Zapier webhook:
- Create a New Zap: Log in to Zapier and click "Make a Zap".
- Set up the Trigger: For the trigger, search for and select "Webhooks by Zapier".
- Choose the Event: Select the "Catch Hook" event and click "Continue".
- Copy Your Webhook URL: Zapier will provide you with a custom webhook URL. Ignore this URL. Instead, click "Continue" and in the "Test" step, you'll use your Tunnelmole URL. In a real scenario, you'd use Zapier's "Invoke a Webhook" action.
- Let's test with an Action: Create a simple trigger, like "Schedule by Zapier" to run every day. For the action, choose "Webhooks by Zapier" and the "POST" action.
- Configure the Action:
- URL: Paste your Tunnelmole URL:
https://<your-subdomain>.tunnelmole.net/webhook-handler. - Payload Type: Set to
json. - Data: Add some key-value pairs to send as the payload, e.g.,
sourcewith valueZapierandmessagewith valueHello from your Zap!.
- URL: Paste your Tunnelmole URL:
- Test the Action: Click "Test & Review". Zapier will send a request to your Tunnelmole URL.
Check the terminal where your server.js is running. You should see the logged output from Zapier, including the headers and the JSON body you configured.
--- New Webhook Received ---
Headers: {
  'user-agent': 'Zapier',
  ...
}
Body: {
  source: 'Zapier',
  message: 'Hello from your Zap!'
}
--------------------------
2. IFTTT Webhook Testing
IFTTT (If This Then That) is another popular automation service. Their Webhooks service allows your Applets to send requests to any public URL.
To test an IFTTT webhook:
- Create a New Applet: Log in to IFTTT and click "Create".
- Configure "If This": Choose a trigger. For a simple test, use the "Button Widget" service, which lets you trigger an action by tapping a button in the IFTTT app.
- Configure "Then That": Search for and select the "Webhooks" service.
- Choose "Make a web request":
- URL: Paste your Tunnelmole URL:
https://<your-subdomain>.tunnelmole.net/webhook-handler. - Method: Select
POST. - Content Type: Select
application/json. - Body: Enter a JSON payload. You can include "Ingredients" (data from the trigger). For example:
{"event_source": "IFTTT", "triggered_at": ""}.
- URL: Paste your Tunnelmole URL:
- Finish and Test: Save the Applet. Trigger it (e.g., press the button in the IFTTT mobile app).
Your local server will immediately receive the request and log the IFTTT payload, allowing you to debug it live.
3. Slack Webhook Testing
You can use Slack's "Slash Commands" or "Events API" to send webhooks to your application. Let's use a Slash Command as an example.
To test a Slack Slash Command:
- Create a Slack App: Go to api.slack.com/apps and create a new app in your workspace.
- Add a Slash Command: In the app's settings, go to "Slash Commands" and click "Create New Command".
- Configure the Command:
- Command: e.g.,
/test-local - Request URL: Paste your Tunnelmole URL:
https://<your-subdomain>.tunnelmole.net/webhook-handler. - Short Description: A brief description of your command.
- Command: e.g.,
- Install the App: Install the app to your workspace.
- Test in Slack: Go to any channel in your Slack workspace and type
/test-local some text.
Slack will send a POST request to your local server with details about the command, the user who triggered it, the channel, and the text they entered. You'll see all this data logged in your terminal, ready for inspection.
Why This is Better Than Deploying Code
Using a tunneling tool like Tunnelmole for webhook testing provides significant advantages over the traditional deploy-and-test cycle:
| Feature | Webhook Testing with Tunnelmole | Deploying to a Public Server |
| Feedback Loop | Instant. Code changes are reflected immediately. | Slow. Minutes to hours per deployment cycle. |
| Debugging | Full-featured. Use your IDE's debugger, set breakpoints. | Limited. Relies on remote logging and error tracking. |
| Cost | Free. Tunnelmole is open source and offers a free tier. | Can be costly. Requires cloud hosting, CI/CD resources. |
| Setup Complexity | Minimal. One command to install, one command to run. | High. Requires setting up deployment scripts, environments. |
| Development Flow | Uninterrupted. Stay within your local environment. | Constantly interrupted. Context switching between coding and deploying. |
The ability to maintain your development flow is crucial. By eliminating the need to leave your local environment, you can iterate faster, solve problems more efficiently, and build more reliable webhook integrations.
Conclusion
Webhook testing no longer needs to be a bottleneck in your development process. By using an open-source tunneling tool like Tunnelmole, you can expose your local server to the internet with a single command, enabling true end-to-end testing with real webhook providers.
This approach saves you time, reduces frustration, and allows you to leverage your favorite local debugging tools to build robust and reliable webhook handlers. Whether you're working with Zapier, IFTTT, Slack, or any other service that uses webhooks, integrating Tunnelmole into your workflow is a simple step that yields a massive productivity boost.
Subscribe to my newsletter
Read articles from Robbie Cahill directly inside your inbox. Subscribe to the newsletter, and don't miss out.
Written by