How to Remotely Access Your Raspberry Pi Server Outside Your Network with Tunnelmole
 Robbie Cahill
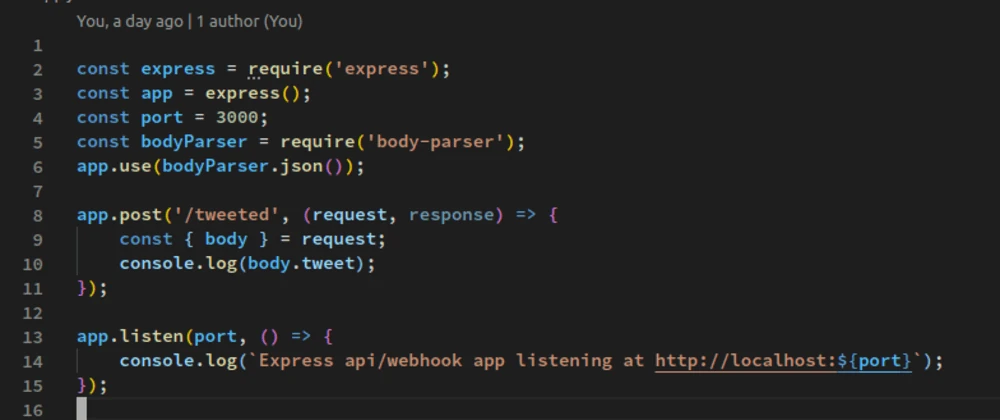
How to Access Your Raspberry Pi from Outside Your Network
The Raspberry Pi is an incredibly versatile and affordable single-board computer, perfect for a countless number of projects, from home automation hubs to personal web servers. A common challenge developers and hobbyists face is how to access their Raspberry Pi-hosted applications from outside their local home network. Whether you want to check on your home automation dashboard from work, share a project with a friend, or manage your device on the go, you need a way to bridge the gap between your local network and the public internet.
By default, your Raspberry Pi is only accessible to devices connected to the same Wi-Fi or LAN. To access it from the internet, you would typically need to configure complex network settings like port forwarding, deal with dynamic IP addresses, or navigate tricky firewall rules.
This guide will walk you through a much simpler solution. We'll show you how to securely expose a web server running on your Raspberry Pi to the internet with a public URL, using the open-source tool, Tunnelmole.
The Challenge: Why Your Raspberry Pi Isn't Publicly Accessible
When you run a web server on your Raspberry Pi, it listens on a specific port (e.g., port 80 or 8080) at a local IP address (like 192.168.1.10). This address is private to your network. Your internet router acts as a gatekeeper, using a single public IP address for all your devices while keeping their local addresses private.
This setup is great for security, but it prevents direct access from the outside world. Anyone trying to reach your Raspberry Pi from the internet would only see your router's public IP address, with no information on how to get to the specific server running on your Pi.
Factors that complicate remote access include:
- Firewalls: Both your router and your Raspberry Pi's operating system have firewalls that block unsolicited incoming traffic for security.
- Dynamic IP Addresses: Most Internet Service Providers (ISPs) assign dynamic public IP addresses to home networks, meaning your public IP can change without notice. This makes it difficult to have a stable address for your services.
- Carrier-Grade NAT (CGNAT): Some ISPs use CGNAT, which means multiple customers share the same public IP address. This makes traditional port forwarding impossible, as the ISP controls the network configuration.
The Solution: A Secure Tunnel with Tunnelmole
Tunnelmole is an open source tool simplifies this entire process by creating a secure tunnel from your Raspberry Pi to a public server. It gives you a unique, publicly accessible HTTPS URL that forwards all traffic directly to the local web service on your Pi.
Here’s a high-level overview of how it works:
- You run the open source Tunnelmole client on your Raspberry Pi, telling it which local port your web service is running on.
- Tunnelmole establishes a secure, persistent connection to the Tunnelmole cloud service.
- The service generates a public URL (e.g.,
https://random-name.tunnelmole.net) and assigns it to your tunnel. - When someone accesses your public URL, the request travels through the Tunnelmole service, down the secure tunnel, and arrives at your local application on the Raspberry Pi.
- Your Raspberry Pi processes the request and sends the response back up the same tunnel to the user.
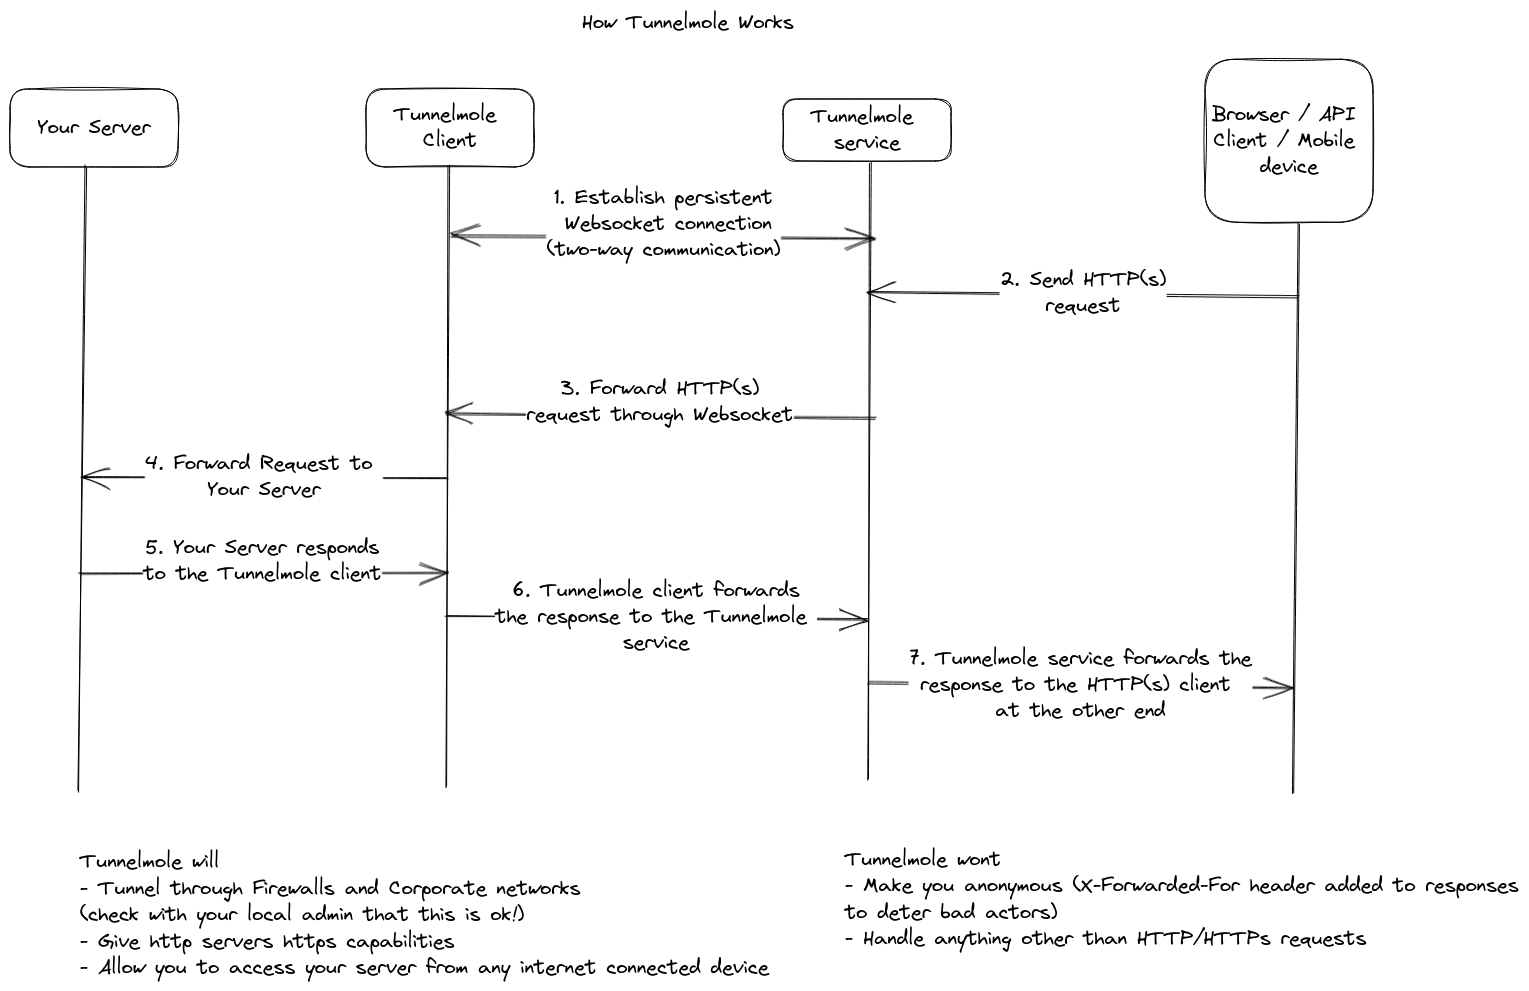
This method requires no router configuration, no static IP, and it works even if you are behind a restrictive firewall or CGNAT.
Step-by-Step Guide to Remotely Accessing Your Raspberry Pi
Let's get this set up. This guide assumes you have a Raspberry Pi set up with an operating system like Raspberry Pi OS and it's connected to the internet.
Step 1: Set Up a Web Server on Your Raspberry Pi
First, you need a web application or service running on your Pi. For this example, we'll create a very simple web server using Python, which comes pre-installed on Raspberry Pi OS.
Open a terminal on your Raspberry Pi and create a new file named server.py:
nano server.py
Paste the following code into the editor:
import http.server
import socketserver

# Define the port you want the server to run on
PORT = 8080

# The handler will serve files from the current directory
Handler = http.server.SimpleHTTPRequestHandler

with socketserver.TCPServer(("", PORT), Handler) as httpd:
    print(f"Serving at http://localhost:{PORT}")
    # Start the server
    httpd.serve_forever()
This script starts a basic web server that serves the files in the same directory it's run from. Save the file by pressing Ctrl+X, then Y, and Enter.
To test it, create a simple index.html file in the same directory:
nano index.html
Add this HTML content:
<!DOCTYPE html>
<html>
<head>
    <title>Hello from my Raspberry Pi!</title>
</head>
<body>
    <h1>Success! You've reached my Raspberry Pi server.</h1>
    <p>This page is being served from a Raspberry Pi located on my local network.</p>
</body>
</html>
Save and exit. Now, run the server:
python3 server.py
You should see the output Serving at http://localhost:8080. Your server is now running, but only accessible on your local network.
Step 2: Install Tunnelmole on Your Raspberry Pi
Next, open a new terminal window (leaving your server running) and install Tunnelmole. The easiest way is to use the install script, which works on any Linux-based OS, including Raspberry Pi OS.
curl -O https://install.tunnelmole.com/xD345/install && sudo bash install
This command downloads the installer, detects your system architecture (ARM for Raspberry Pi), and installs the correct tmole binary.
If you have NodeJS and npm already installed, you can also install Tunnelmole globally via npm:
sudo npm install -g tunnelmole
Step 3: Get a Public URL with Tunnelmole
With your web server running on port 8080, you can now start Tunnelmole to get a public URL for it. Run the following command:
tmole 8080
Tunnelmole will start up and display output similar to this:
Your Tunnelmole Public URLs are below and are accessible internet wide. Always use HTTPs for the best security

https://kdrb8u-ip-XX-XX-XX-XX.tunnelmole.net ⟶ http://localhost:8080
http://kdrb8u-ip-XX-XX-XX-XX.tunnelmole.net ⟶ http://localhost:8080
And that's it! Tunnelmole has generated a secure, public HTTPS URL that is now forwarding traffic to your local server on port 8080.
Step 4: Access Your Raspberry Pi From Anywhere
You can now take the https:// URL provided by Tunnelmole and access it from any device in the world—your phone, your laptop at a coffee shop, or a computer on a different continent. When you navigate to that URL in a web browser, you will see the index.html page we created earlier.
Your local Raspberry Pi is now serving content to the public internet, securely and without any network configuration headaches.
Common Use Cases
With Tunnelmole, you can unlock the full potential of your Raspberry Pi for a variety of remote access scenarios:
- Home Automation: Access your Home Assistant or custom IoT dashboard from anywhere.
- Personal Website Hosting: Host a low-traffic personal blog, portfolio, or CV on your own hardware.
- Web Development: Develop and test web applications directly on the Pi and share progress with clients or collaborators in real-time.
- File Server: Set up a simple file-sharing service to access your personal files on the go.
- API Development: Build and test APIs for your mobile or web applications.
- Demos and Prototyping: Quickly share a working prototype of a project without deploying it to a cloud service.
Conclusion
The Raspberry Pi is a powerful tool for developers and makers, but its usefulness can be limited if it's confined to your local network. By using Tunnelmole, you can overcome the common hurdles of remote access and get a stable, secure public URL for your projects in seconds.
Whether for development, home automation, or sharing your work, this simple method opens up a world of possibilities for what you can achieve with your tiny, mighty computer.
Subscribe to my newsletter
Read articles from Robbie Cahill directly inside your inbox. Subscribe to the newsletter, and don't miss out.
Written by