Run a Raspberry Pi server at home in minutes with Tunnelmole - No complex network setup required
 Robbie Cahill
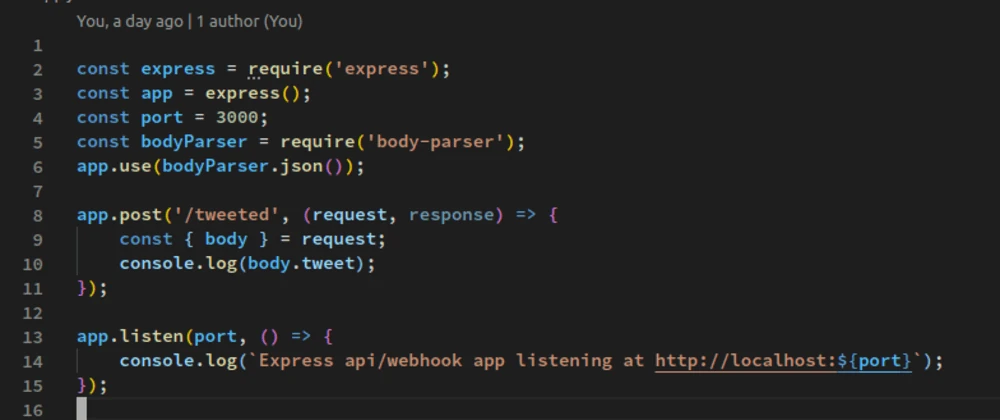
Run a server at home using Raspberry Pi and Tunnelmole - No complex network setup required
The Raspberry Pi is a marvel of accessible computing. This credit-card-sized device packs enough power to run a variety of applications, making it an incredibly popular choice for hobbyists, developers, and students looking to host their own home server. Whether you want to host a personal website, set up a home automation system, or create a private file cloud, a Raspberry Pi server is a cost-effective and energy-efficient solution.
However, a common hurdle stands in the way of many aspiring server administrators: making your Raspberry Pi accessible from the internet. Home internet setups are notoriously tricky to work with. They often involve complex router settings, dynamic IP addresses that change without warning, and restrictive firewalls. Many Internet Service Providers (ISPs) even place customers behind a Carrier-Grade NAT (CGNAT), which makes traditional methods like port forwarding completely impossible.
This is where Tunnelmole comes in. Tunnelmole is an open-source tool designed to solve this exact problem. It allows you to expose your local Raspberry Pi server to the public internet by creating a secure tunnel, giving you a public URL without needing to touch any complex network configurations. In this guide, we'll walk you through the entire process of setting up a Raspberry Pi server and making it public with Tunnelmole.
Why Use a Raspberry Pi as a Server?
Before we dive into the technical details, let's explore why the Raspberry Pi has become the go-to device for home servers. If you're considering setting one up, you're on the right track. The benefits are numerous and compelling.
| Feature | Benefit |
| Low Cost | Raspberry Pi boards are exceptionally affordable, with models available for well under $100. This low entry cost makes it possible for anyone to start experimenting with servers without a significant financial investment. |
| Low Power Consumption | A Raspberry Pi consumes a tiny fraction of the electricity used by a traditional desktop or server. It can run 24/7 without making a noticeable impact on your energy bill, making it an eco-friendly and budget-friendly choice. |
| Small Form Factor | Its tiny size means you can place it anywhere. It doesn't require a dedicated server rack or even much desk space. You can tuck it away on a shelf, and it will run silently in the background. |
| Silent Operation | Most Raspberry Pi models are passively cooled, meaning they have no fans. This results in completely silent operation, a stark contrast to the noisy fans of a full-sized server. |
| Active Community | The Raspberry Pi has a massive and active global community. This means that tutorials, project guides, and troubleshooting help are widely available. If you run into an issue, chances are someone else has already solved it. |
| GPIO Pins | The General-Purpose Input/Output (GPIO) pins are a unique feature that allows the Raspberry Pi to interact with the physical world. You can connect sensors, motors, lights, and other electronic components, making it the perfect brain for IoT and home automation projects. |
These advantages make the Raspberry Pi an ideal platform for a wide range of server applications, from hosting a simple blog to managing a complex smart home setup.
The Challenge: Exposing Your Raspberry Pi Server to the Internet
So you have your Raspberry Pi and a service running on it. How do you share it with the world? This is where many projects stall. The path from localhost to a public URL is fraught with technical obstacles.
- Dynamic IP Addresses: Most residential ISPs assign you a dynamic IP address, which means your public IP can change at any time. If you configure services to point to your IP, they will break as soon as it changes.
- Port Forwarding: The traditional solution is to configure port forwarding on your home router. This involves creating a rule that directs incoming traffic on a specific port (e.g., port 80 for HTTP) to your Raspberry Pi's local IP address. However, this can be a security risk if not done correctly, and the process varies wildly between router models.
- Firewalls: Your router and your Raspberry Pi's operating system both have firewalls that, by default, block unsolicited incoming connections from the internet. You would need to configure rules to allow traffic through, which adds another layer of complexity.
- Carrier-Grade NAT (CGNAT): This is the biggest showstopper for many. To conserve IPv4 addresses, many ISPs group multiple customers together under a single public IP address. From your router's perspective, its "public" IP is actually a private one on the ISP's network. This makes it impossible for you to accept direct incoming connections, rendering port forwarding useless.
Navigating these challenges requires a deep understanding of networking, and even then, a solution isn't always possible due to ISP restrictions.
The Solution: Tunnelmole
Tunnelmole bypasses all these networking challenges. Instead of waiting for incoming connections, Tunnelmole establishes an outbound connection from your Raspberry Pi to a public server. This connection is then used to create a secure tunnel. Any web requests sent to your public Tunnelmole URL are routed through this tunnel directly to the service running on your Raspberry Pi.
Here’s how it works:
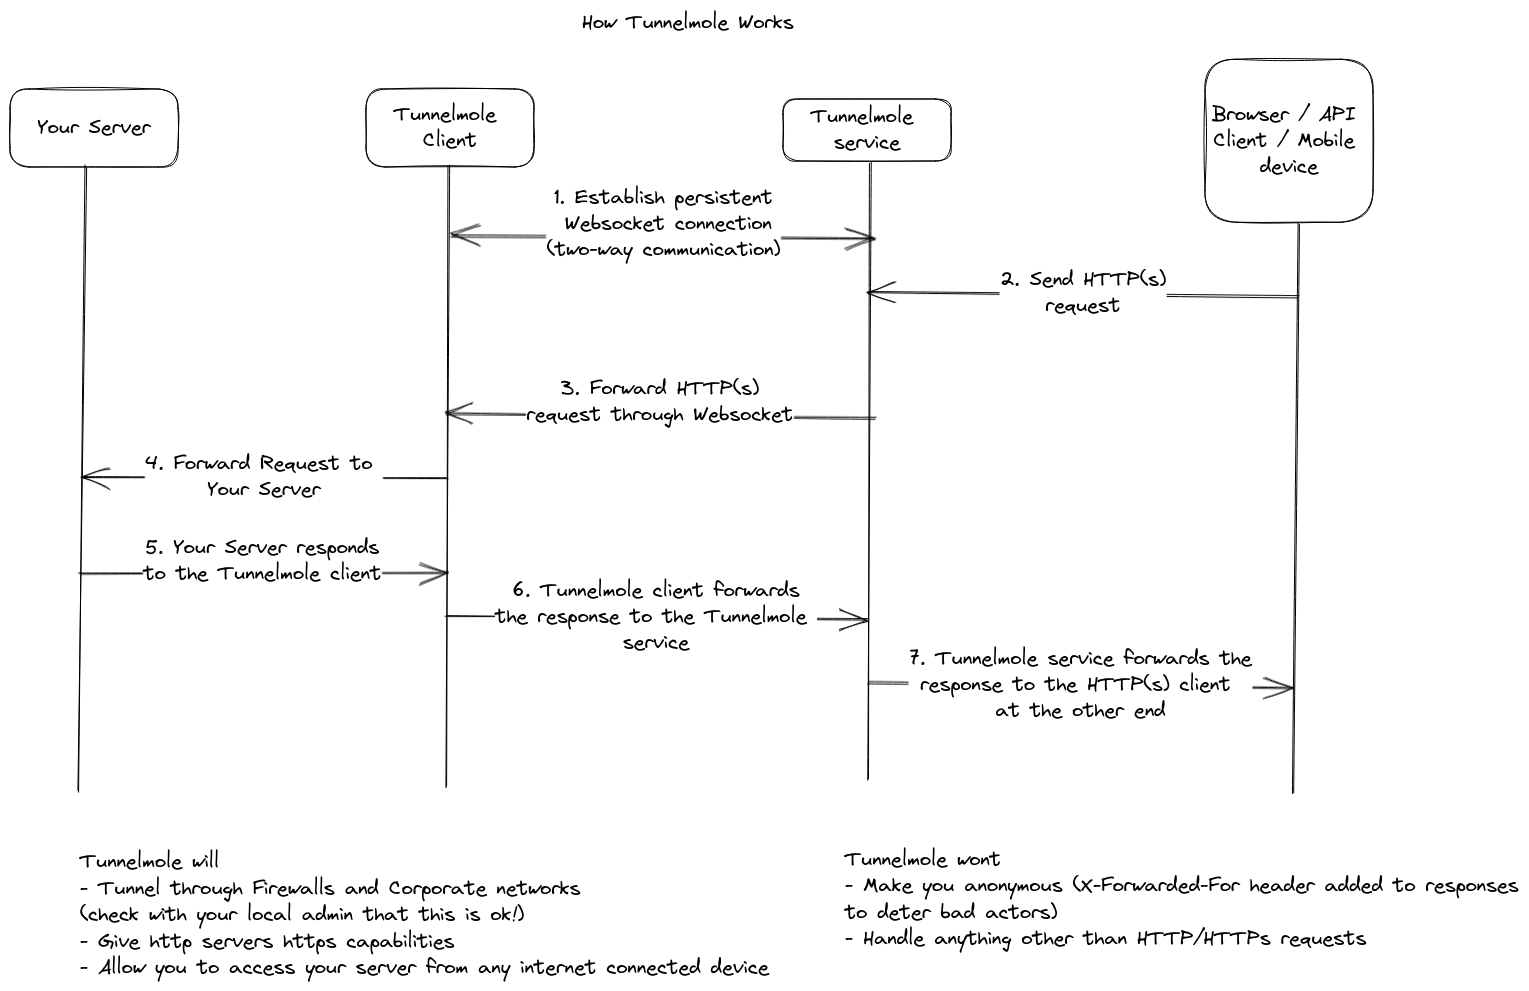
- Client Starts: You run the Tunnelmole client on your Raspberry Pi, telling it which local port your server is running on (e.g., port 8000).
- Outbound Connection: The Tunnelmole client makes a secure outbound connection to the public Tunnelmole service. This works even behind firewalls and CGNAT because outbound connections are almost always permitted.
- Public URL Assigned: The Tunnelmole service assigns you a unique public URL (e.g.,
https://random-name.tunnelmole.net) and links it to your secure connection. - Requests are Tunneled: When someone visits your public URL, the request hits the Tunnelmole service. The service then sends that request down the tunnel to the client on your Raspberry Pi.
- Local Forwarding: The client receives the request and forwards it to your local server running on the specified port.
- Response is Returned: The response from your local server travels back through the same tunnel to the user.
A key advantage of Tunnelmole is that it is fully open source. Both the client and the server-side code are available on GitHub. This means you have complete transparency, and if you prefer, you can self-host the server component on your own Virtual Private Server (VPS) for maximum control and privacy.
Step-by-Step Guide: Setting Up Your Raspberry Pi Server with Tunnelmole
Let's get your Raspberry Pi server online. This guide assumes you have a Raspberry Pi with an internet connection and Raspberry Pi OS (or a similar Debian-based Linux distribution) installed.
Step 1: Set Up a Simple Web Server (Example)
First, you need a service to expose. If you don't have one running already, you can start a simple web server using Python, which is pre-installed on Raspberry Pi OS.
Create a directory for your server and create a sample index.html file.
mkdir my-server
cd my-server
echo "Hello from my Raspberry Pi Server!" > index.html
Now, serve this directory using Python's built-in HTTP server.
python3 -m http.server 8000
This command starts a web server on port 8000. If you open a browser on your Raspberry Pi and go to http://localhost:8000, you will see your "Hello world" message. Our goal is to see this message from any device, anywhere.
Keep this terminal running. You'll need to open a new terminal window for the next steps.
Step 2: Install Node.js on Raspberry Pi
Tunnelmole is a Node.js application. While some installation methods use a pre-compiled binary, the most reliable method for ARM-based devices like the Raspberry Pi is to install it via npm (Node Package Manager). To do that, you first need to install Node.js itself.
We'll use the official distributions from NodeSource, which are optimized and kept up-to-date. The following commands will add the NodeSource repository and install Node.js version 22.
Update your package lists and install dependencies for adding new repositories.
sudo apt-get update
sudo apt-get install -y ca-certificates curl gnupg
Add the NodeSource GPG key to ensure the packages are authentic.
sudo mkdir -p /etc/apt/keyrings
curl -fsSL https://deb.nodesource.com/gpgkey/nodesource-repo.gpg.key | sudo gpg --dearmor -o /etc/apt/keyrings/nodesource.gpg
Add the Node.js 22.x repository to your system's sources.
NODE_MAJOR=22
echo "deb [signed-by=/etc/apt/keyrings/nodesource.gpg] https://deb.nodesource.com/node_$NODE_MAJOR.x nodistro main" | sudo tee /etc/apt/sources.list.d/nodesource.list
Update your package lists again and install Node.js.
sudo apt-get update
sudo apt-get install nodejs -y
Verify the installation by checking the versions of
nodeandnpm.node -v npm -vYou should see the version numbers for Node.js (e.g.,
v22.x.x) and npm.
Step 3: Install Tunnelmole
With Node.js and npm installed, you can now install Tunnelmole with a single command. The -g flag installs it globally, so you can run the tmole command from any directory.
sudo npm install -g tunnelmole
Step 4: Get a Public URL for Your Server
This is the final and most exciting step. Go to your second terminal window (the one not running the Python server). Run the tmole command and tell it which port your server is listening on. In our example, it's port 8000.
tmole 8000
Tunnelmole will start and display output similar to this:
Your Tunnelmole Public URLs are below and are accessible internet wide. Always use HTTPs for the best security

https://krcywd-ip-192-168-1-10.tunnelmole.net ⟶ http://localhost:8000
http://krcywd-ip-192-168-1-10.tunnelmole.net ⟶ http://localhost:8000
That's it! Your Raspberry Pi server is now live on the internet. You can copy the https URL and open it in a browser on your phone, your laptop, or share it with a friend. It will connect directly to the simple Python server running on your Pi.
Self-Hosting
For ultimate control, privacy, and customization, you can host the Tunnelmole service on your own cloud server (VPS). This allows you to use your own domain names and manage your own tunnels. You can find the source code and instructions on the Tunnelmole Service GitHub repository.
What Can You Do With Your Public Raspberry Pi Server?
Now that your Raspberry Pi is accessible from anywhere, a world of possibilities opens up.
- Host a Personal Website: Run a lightweight blog, portfolio, or wiki using platforms like WordPress, Ghost, or a static site generator.
- Home Automation: Create a central dashboard for your smart home devices using software like Home Assistant, and securely access it from outside your home network.
- Personal Cloud Storage: Set up a file server with tools like Nextcloud or Samba to create your own private Dropbox alternative.
- Develop and Test Webhooks: If you're developing IoT applications, you can test webhooks from services like IFTTT, Twilio, or Stripe directly on your device.
- Share Projects: Show a demo of a web project to a client or collaborate with a friend without having to deploy it to a hosting service first.
Conclusion
The Raspberry Pi is a powerful and affordable platform for running your own home server. While traditional networking hurdles have made it difficult to expose these servers to the internet, tools like Tunnelmole have completely changed the game.
By providing a simple, secure, and open-source way to create public URLs for local services, Tunnelmole empowers you to get your Raspberry Pi server online in minutes, without any need for complex router configuration or a static IP address. Whether you are a hobbyist, a developer, or a student, you now have the tools to bring your Raspberry Pi projects to the world.
Subscribe to my newsletter
Read articles from Robbie Cahill directly inside your inbox. Subscribe to the newsletter, and don't miss out.
Written by