Check film/tv ratings with Power Pages and Power Automate
 Calum Harrison
Table of contents

In a previous post on LinkedIn, I covered what makes Power Automate and Power Pages the dream team.
Today, I want to build on that and show a real example of how they can work together to:
⚡ Search for a film or TV show by title directly in Power Pages
⚡ Automatically pull in the poster and IMDB rating using Power Automate
⚡ Deliver a cool user experience with little to no code
It’s a great example of how you can enhance your portals with external APIs and automation.
I’ll walk through the setup and share tips to help you build something similar.
How does it work?
If you’re familiar with the Power Pages and Power Automate integration feel free to skip this section.
Basically you can call a Power Automate flow from Power Pages similar to how you would do it with a canvas app. You send an input or nothing at all to trigger a flow and then perform some action to return a value back to Power Pages.

There are a couple of benefits to this.
⚡Better security, perform logic server-side instead of client-side
⚡Extend Power Pages with lots of cool connectors from Power Automate
⚡Simpler solution that results in better adoption and post go-live support
Now we know what it is let’s look at how we build something with it.
Build time
You want to start by deciding what you want to build. I like watching films that have a decent rating so I went with that but feel free to pick something else.
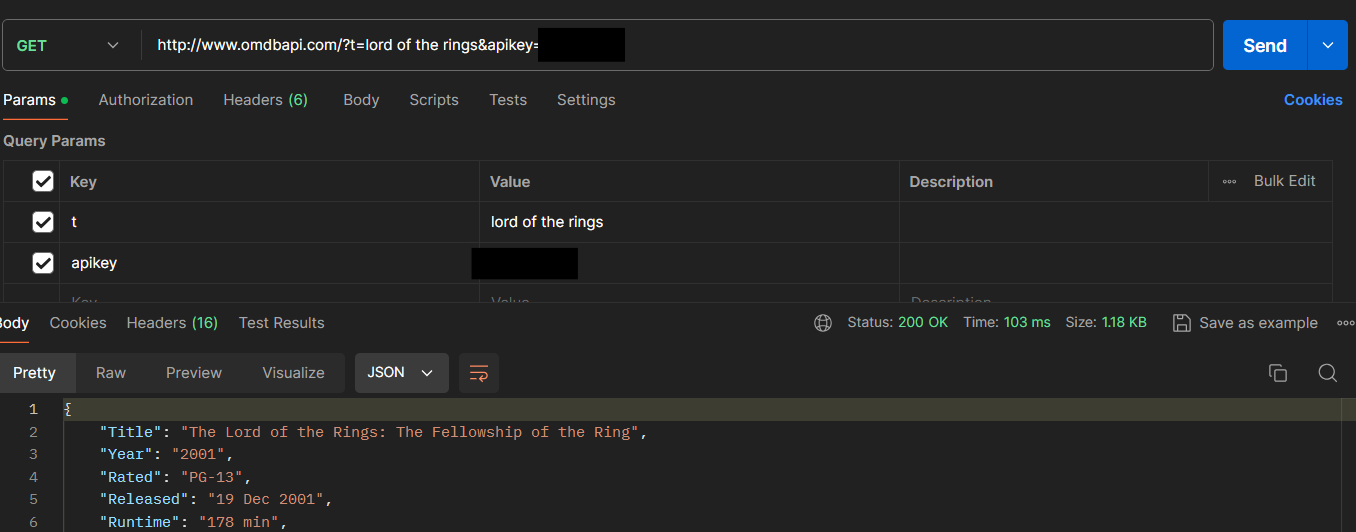
I used the OMDB API and checked that I got results from the endpoint by using Postman.
Then I created Power Automate flow that should be automation type.
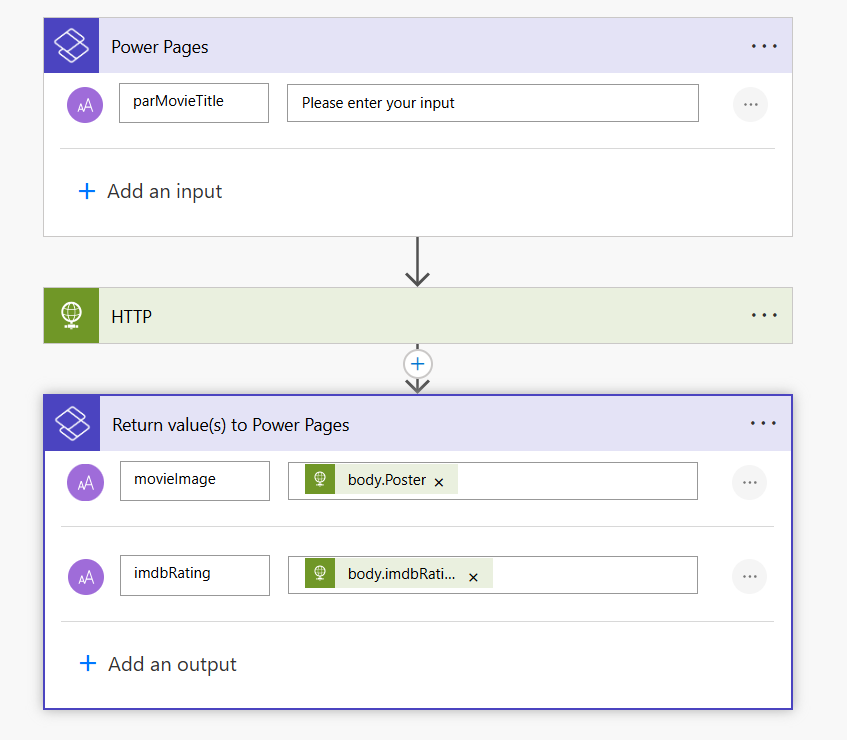
Within the flow, you have to add an input and output action.
Example input: Sends the search movie title from Power Pages
Example output: Returns the movie poster and IMDB rating to Power Pages using the OMDB API.
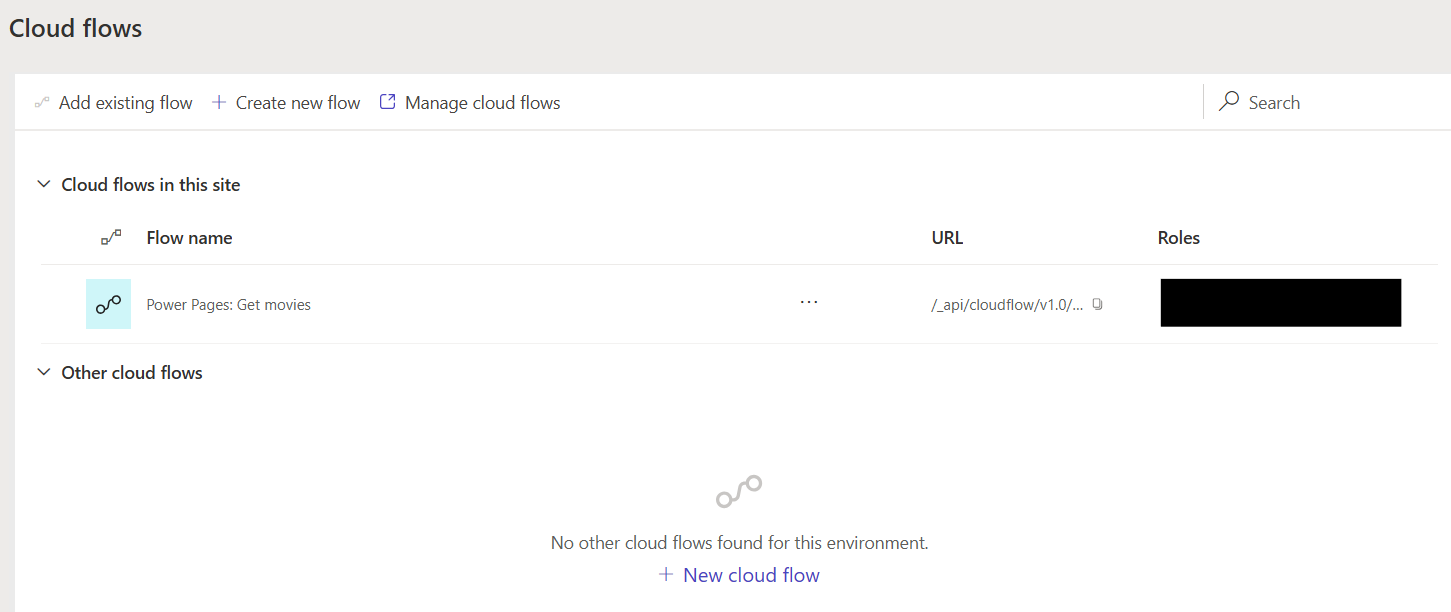
With the flow created we need to associate that with Power Pages, to do this go make.powerpages and open the cloud flows integration section.
You should now see the flow you have created, add this to the site and give it some web roles. To get going, you can give the anonymous web role but consider for customer projects a web role that’s more secure (authenticated etc).
Copy the flow URL and paste this into your flow URL variable, in the example below its _url
Now the fun part, I created a web template that includes the below.
<div class="row sectionBlockLayout text-start bg-dark" style="min-height: auto; padding: 8px;">
  <div class="container" style="display: flex; flex-wrap: wrap;" id="movieImagesContainer">
    <div class="col-lg-12 columnBlockLayout" style="padding: 16px; margin: 60px 0px; min-height: 200px;">
      <div class="d-flex justify-content-center mt-5">
        <div style="width: 100%; max-width: 300px;">
          <div class="input-group mb-3" id="searchGroup">
            <input type="text" class="form-control" placeholder="Search" aria-label="Recipient's username"
              aria-describedby="searchButton" id="searchInput">
            <button class="btn btn-outline-secondary" type="button" id="searchButton">
              <i class="fas fa-search"></i>
            </button>
          </div>
        </div>
      </div>
    </div>
  </div>
</div>

<script>
  $(document).ready(function () {

    const $searchButton = $("#searchButton");

     // start of the code that used to trigger PA flow
    $searchButton.click(function (event) {

      // Added to prevent forms being triggered
      event.preventDefault();
      event.stopPropagation();
      document.querySelector("form").inert = false;

      $searchInputValue = $("#searchInput").val();

      const _url = "<flow_id>";

      const data = { parMovieTitle: $searchInputValue || "notfound" };

      const payload = {
        eventData: JSON.stringify(data)
      };

      shell.ajaxSafePost({
        type: "POST",
        url: _url,
        data: payload
      })
        .done(function (response) {

          const result = JSON.parse(response);
          $("#searchImage").remove();
          $("#imdbRating").remove();

          // Create the image element (hidden at first)
          const $image = $(`<img id="searchImage" src="${result.movieimage}" alt="Search Image" class="img-fluid rounded mt-3" style="display: none;" />`);

          // Insert it below the input group
          $("#searchGroup").after($image);

          // Fade it in smoothly over 500ms
          $image.fadeIn(500);

          // Similarly, fade in the rating
          const $rating = $(`<p id="imdbRating" alt="imdb rating" class="mt-3 text-white" style="display: none;">IMDB ⭐: ${result.imdbrating}/10</p>`);
          $image.after($rating);
          $rating.fadeIn(500);

        })
        .fail(function () {
          alert("Failed to fetch movie images");
        });
    });
  });
</script>
⚡This code creates a styled search input within a Bootstrap layout that lets users search for a film.
⚡When the search button is clicked, it sends the input text to a backend endpoint using an AJAX POST request.
⚡If successful, it displays the movie image and IMDB rating with a smooth fade-in effect; if it fails, an alert is shown.
Conclusion
That’s a wrap 🎬 now that you have seen the process of how this example was made, go try out something yourself and drop a comment to let me know how you used the dream team.
As always, thanks for reading and take it easy!
👋 Enjoyed this post?
Sign up for my newsletter to get notified whenever a new blog is out.
Don't forget to check your spam folder so you don't miss out!
Subscribe to my newsletter
Read articles from Calum Harrison directly inside your inbox. Subscribe to the newsletter, and don't miss out.
Written by