Python Insert, Replace, Extract and Delete Images in Excel
 Casie Liu
While Excel is best known for handling data and spreadsheets, it also supports image insertion and editing—adding visual impact to reports and worksheets. This article focuses on how to use Python to work with images, including how to insert, replace, extract, and delete images in Excel files with ease through four practical examples.
Before We Start: Installing Spire.XLS
To complete this task, we’ll need a professional Python library for working with Excel. In this guide, I’ll use Spire.XLS as an example to demonstrate how to manage images in Excel. You can either download Spire.XLS and install it from a local file path, or simply run the following command to install it via pip:
pip install spire.xls
Spire.XLS also offers a free version, which is ideal for small projects and testing purposes.
Insert Images into Excel Workbooks Using Python
With the Spire.XLS for Python library, we can insert an image into a specific cell in Excel and customize its size and positioning. Here's how it works:
Create a Workbook object and access the target worksheet.
Use the method Worksheet.Pictures.Add(int topRow, int leftColumn, Image image) to insert an image into a specified cell.
Adjust the image’s width, height, and distance from cell borders using the properties provided by the ExcelPicture class.
Call the Workbook.SaveToFile() method to save the Excel file.
This complete code example demonstrates how to insert a picture into the second worksheet of a new Excel workbook:
from spire.xls import *
from spire.xls.common import *

# Create a Workbook object
workbook = Workbook()

# Get the second worksheet.
sheet = workbook.Worksheets[1]

# Add a picture to a specific cell
imgPath = "/image.png"
picture = sheet.Pictures.Add(1, 3, imgPath)

# Set the picture width and height
picture.Width = 150
picture.Height = 150

# Adjust the column width and row height so that the cell can accommodate the picture
sheet.Columns[2].ColumnWidth = 25
sheet.Rows[0].RowHeight = 135

# Set the distance between cell border and image
picture.LeftColumnOffset = 90
picture.TopRowOffset = 20

# Save to file
workbook.SaveToFile("/output/InsertImage.xlsx", ExcelVersion.Version2013)

# Release instance
workbook.Dispose()
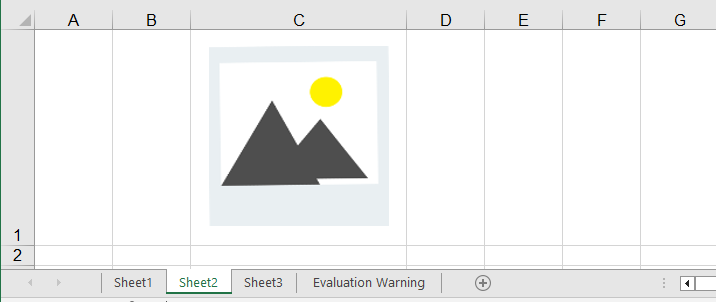
Result Preview:
Replace Images in Excel with Python
To replace an existing image in an Excel file with a new one, you can follow these steps:
Load the Excel file and access the target worksheet.
Use the Worksheet.Pictures[] property to retrieve the image you want to replace.
Replace it with a new image through the ExcelPicture.Picture property.
Save the updated Excel file using the SaveToFile() method.
from spire.xls import *
from spire.xls.common import *

# Create a Workbook instance
workbook = Workbook()

# Load an Excel file
workbook.LoadFromFile ("/output/InsertImage.xlsx")

# Get the second worksheet
sheet = workbook.Worksheets[1]

# Get the first picture from the worksheet
excelPicture = sheet.Pictures[0]

# Replace the picture with another one
excelPicture.Picture = Image.FromFile("/excel-small.png")

# Save the result file
workbook.SaveToFile("/output/ReplaceImage.xlsx", ExcelVersion.Version2016)
Result Preview:

Extract Images from Excel in Python
If you want to extract images from an Excel file for reporting or just for archiving, Spire.XLS can help you get the job done. By using the ExcelPicture.Picture.Save() method, you can easily read images from an Excel worksheet and save them to a specified file path. Here's how it works:
Load the Excel file and access the desired worksheet.
Loop through all the images in the worksheet.
Call the ExcelPicture.Picture.Save() method to extract and save each image.
from spire.xls import *
from spire.xls.common import *

# Create a Workbook instance
workbook = Workbook()

# Load an Excel file
workbook.LoadFromFile("/output/InsertImage.xlsx")

# Get the second worksheet
sheet = workbook.Worksheets[1]

# Get all images in the worksheet
for i in range(sheet.Pictures.Count - 1, -1, -1):
    pic = sheet.Pictures[i]

    # Save each image as a PNG file
    pic.Picture.Save("/output/ExtractImages/Image-{0:d}.png".format(i), ImageFormat.get_Png())

workbook.Dispose()
Delete Images from Excel Using Python
Of course, there are times when you may need to remove images from an Excel file. For example, if you need to update a large number of pictures, it’s often more efficient to delete them all and reinsert new ones, rather than replacing each image individually. Or perhaps you want to simplify the document and keep only the data. In either case, you can use the Worksheet.Pictures[].Remove() method to delete unwanted images from your Excel worksheet.
The following code demonstrates how to delete all images from the second worksheet in an Excel file. Additionally, it includes a reference snippet for removing a specific image if needed:
from spire.xls import *
from spire.xls.common import *

# Create a Workbook object
workbook = Workbook()

# Load an Excel file
workbook.LoadFromFile("/output/InsertImage.xlsx")

# Get the second worksheet
sheet = workbook.Worksheets[1]

# Delete all pictures from the worksheet
for i in range(sheet.Pictures.Count - 1, -1, -1):
    sheet.Pictures[i].Remove()

# Delete a specific picture (commented out as an example)
# sheet.Pictures[imgIndex].Remove()

# Save to file
workbook.SaveToFile("/output/DeleteImage.xlsx", ExcelVersion.Version2013)

# Release the resource
workbook.Dispose()
The Conclusion
This article has shown how to manage images in Excel using Python, covering four key tasks: inserting, replacing, extracting, and deleting images. With the help of Spire.XLS, working with images in Excel becomes much simpler and more efficient.
If you have any questions, feel free to leave a comment below — or check out my homepage for more tutorials.
Subscribe to my newsletter
Read articles from Casie Liu directly inside your inbox. Subscribe to the newsletter, and don't miss out.
Written by