Master Cheap Product Photography: Tips for Stunning Results
 ProdShot Creator
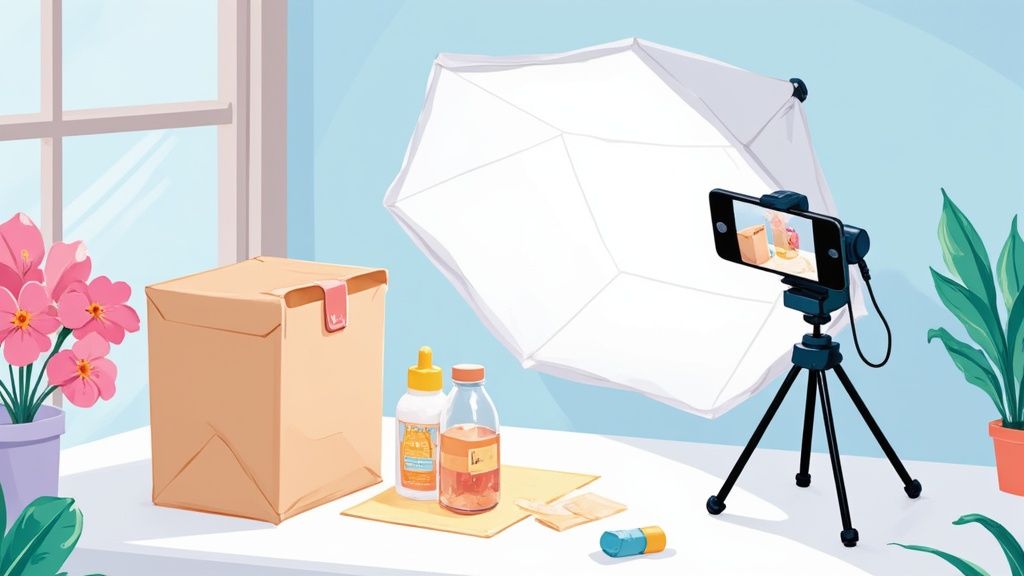
Let's be honest, stunning visuals are what drive online sales. But the idea that you need a massive studio budget to get them is completely outdated. The real secret to creating effective, cheap product photography is all about blending the tech you already have—like your smartphone—with some clever techniques and a little help from AI editing tools. It’s a classic case of working smarter, not spending more.
Why Great Photos Don't Demand a Huge Budget Anymore
The eCommerce world isn't just growing; it's exploded. And with that explosion comes a relentless demand for eye-catching product images. A decade ago, this was a huge hurdle for small businesses, Etsy sellers, and anyone building a brand on social media. If you couldn't shell out for a professional photoshoot, you were at a serious disadvantage. Thankfully, that's no longer the case.
The market for these visuals is massive and only getting bigger. We're talking about a global eCommerce product photography market valued at roughly USD 1 billion, and it's on track to double by 2033. This isn't just a random statistic; it shows how much online shoppers depend on clear, appealing photos to click "buy."
So, what changed? A few things have tipped the scales in favor of the little guy:
- Smartphone Cameras Got Seriously Good: The camera you carry around every day can capture sharp, high-resolution images that are more than ready for any online store.
- AI Editing Became Accessible: Tools like ProdShot handle the heavy lifting of editing—tasks that used to demand hours of tedious work in pricey software like Photoshop.
- DIY Knowledge is Everywhere: You can find a wealth of free tutorials and guides online, empowering anyone to get a handle on the fundamentals of lighting, styling, and composition.
Finding Your New Competitive Edge
This shift has leveled the playing field in a big way. Your advantage isn't about outspending the competition anymore; it's about being more creative and resourceful. A solopreneur with a smartphone, a sunny window, and the right app can now create images that hold their own against those from big, established brands.
The real magic happens when you pair a simple, low-cost shooting setup with smart post-production. This isn't about tricking anyone; it's about showcasing your products beautifully and doing it in a way that's both efficient and affordable.
While this guide is all about mastering the DIY approach, sometimes outsourcing is the right call. For businesses that decide to go that route, you can explore comprehensive photography services that consistently deliver incredible results. But for everyone else, embracing cheap product photography isn't settling. It’s a smart business strategy that saves you money while producing professional assets that turn browsers into buyers.
Building Your DIY Photo Studio for Under $50
You don't need a fancy commercial studio or a mountain of expensive gear to take stunning product photos. Seriously. With a few smart, budget-friendly moves, you can pull together a highly effective setup for under $50 that will give you consistently great results. The whole game is about controlling your environment—specifically, the light and the background.
The most critical element you have is also completely free: soft, natural light. Find the biggest window in your space and set up a sturdy table next to it. A simple folding table works perfectly. You’ll want to shoot when the sun isn't blasting directly through the window, as that creates harsh, ugly shadows. An overcast day is your best friend.
Crafting Your Seamless Background
A clean, distraction-free background is what makes your product pop. The secret is creating a "sweep," and it's easier than it sounds.
- Grab Some Poster Board: Head to any art supply or even a drug store and pick up a few sheets of pure white poster board. Stick to pure white—anything off-white or cream is a headache to color-correct in post-production.
- Create the Curve: Push your table up against a wall. Now, tape one end of the poster board to the wall, a bit above the table's surface. Let it curve down naturally onto the table. This smooth, curved transition is your sweep, and it eliminates the hard line where the table and wall meet, creating a professional-looking "infinite" background.
- Secure It: Use a little painter's tape to hold the bottom of the board flat against the table. Make sure it's smooth and has no wrinkles.
Mastering Your Light Source
Even with a great window, you'll probably have some shadows. This is where a reflector comes in, and you absolutely do not need to buy one.
A simple piece of white foam board is the perfect tool. You can even just tape a sheet of plain white paper to a piece of cardboard. Just prop this "fill card" up opposite your window. It will bounce light back into the shadowed side of your product, evening everything out. If you need a little more pop, wrap a piece of cardboard in aluminum foil for a stronger reflection. This one simple trick can instantly make your shots look more polished.
Pro Tip from Experience: If the window light still feels too intense, just diffuse it. Tape a thin white bedsheet or even a sheet of parchment paper over the window. This softens the light just like a professional softbox would, but for pennies.
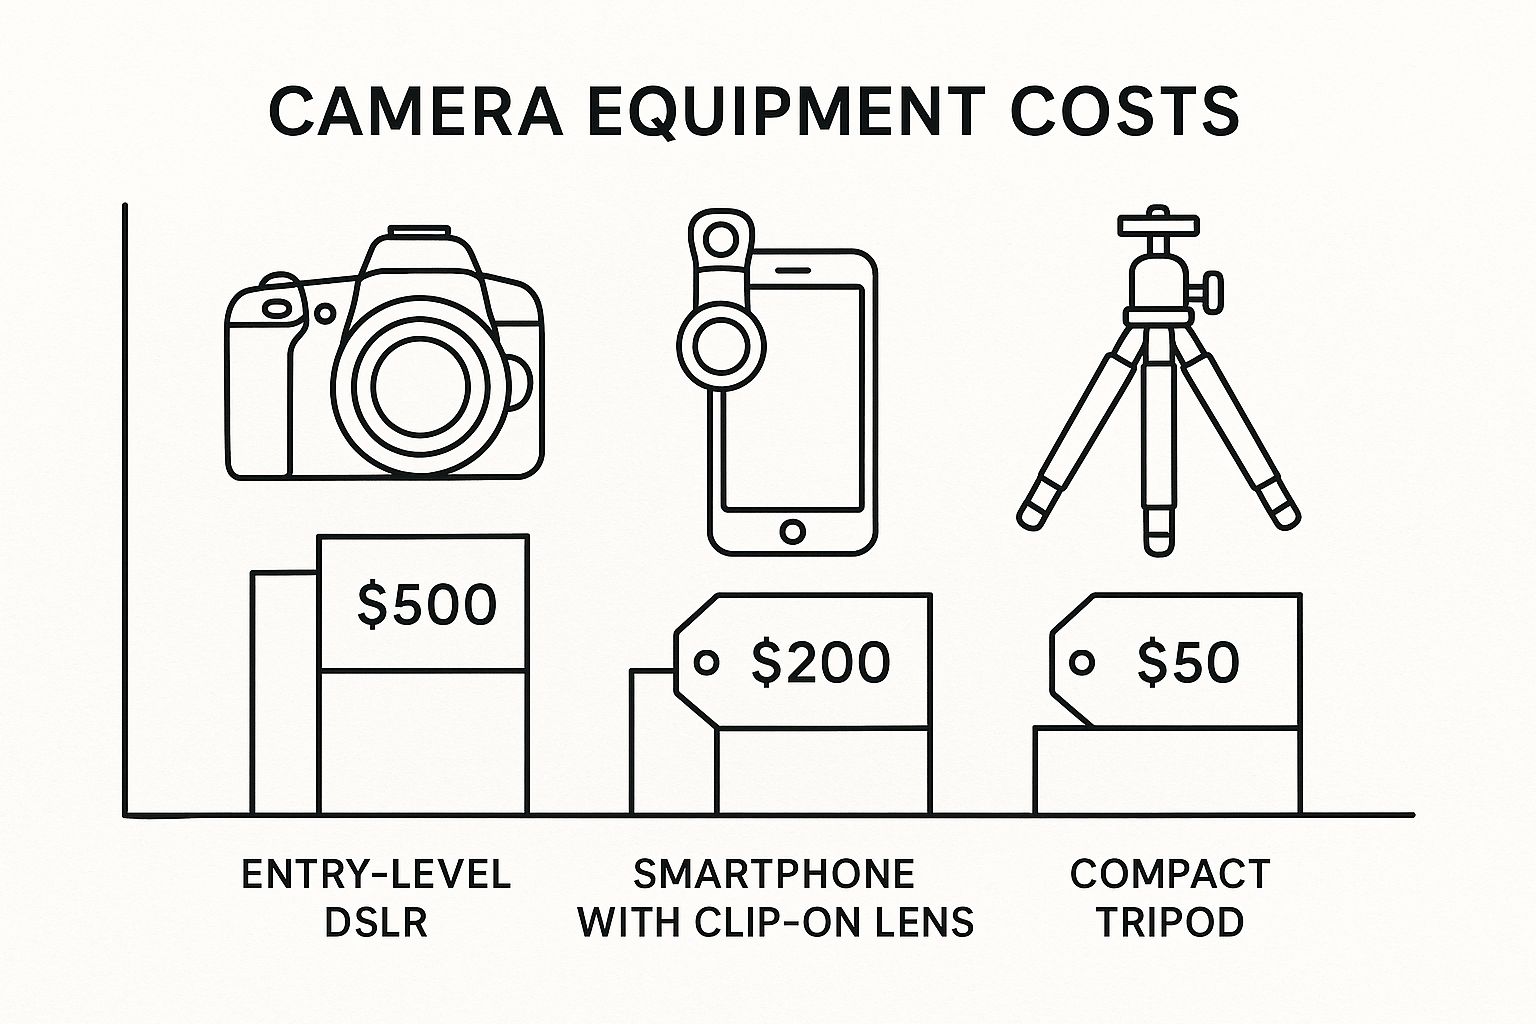
The cost of getting started is shockingly low, especially when you compare a DIY approach to what the pros spend. The savings are massive.
DIY Studio Equipment vs Professional Gear Costs
| Equipment Type | DIY Budget Option & Estimated Cost | Professional Option & Estimated Cost | ||
| Background | White Poster Board | $10 | Seamless Paper Roll & Stand | $150+ |
| Lighting | Natural Window Light | $0 | Studio Strobe Kit (2-3 lights) | $800+ |
| Light Modifier | Foam Board Reflector | $5 | Professional Softbox/Reflector Kit | $200+ |
| Camera | Your Smartphone | $0 (existing) | Entry-Level DSLR/Mirrorless | $700+ |
| Stabilizer | Stack of Books/Tripod App | $0 | Quality Tripod & Head | $150+ |
| Total Estimated Cost | Under $50 | $2,000+ |
As you can see, you can get incredible results without breaking the bank. The barrier to entry for great product photography is lower than it has ever been.
This really drives home the point that starting a product photography business is more accessible than most people think. In fact, some photographers report getting their start with as little as $60. This incredibly low barrier, combined with strong demand, has allowed established studios to become highly profitable, with some reporting average annual revenues around $327,000. You can learn more about the business side from this starter story breakdown.
The data is clear: with the right skills and a simple DIY setup like the one above, anyone has a real shot at entering this market.
Unlocking Pro Features on Your Smartphone Camera
Let's be honest, the most powerful tool you have for cheap product photography is probably sitting in your pocket right now. Modern smartphone cameras are phenomenal, but just pointing and shooting in auto mode isn't going to cut it. The real magic happens when you dig into the settings that are hiding just below the surface.
Think of your phone's camera app less like a simple snapshot tool and more like a pocket-sized DSLR. By taking manual control over a few key features, you can drastically improve your shots before they ever reach the editing stage.
Master Your Composition with Gridlines
Here's the first and easiest win: turn on your camera's gridlines. This simple overlay places a nine-square grid on your screen, which is your secret weapon for applying the Rule of Thirds.
Instead of plonking your product right in the middle every time, try positioning it along one of the lines or where two lines intersect. It’s a classic photography principle that instantly creates a more dynamic, balanced, and professional-looking photo. It just feels right to the human eye.
Control Light and Focus Manually
Relying on your phone’s auto-exposure is a gamble. It often gets things wrong, leaving you with photos that are too dark or have "blown out" highlights—those distracting white blobs where all detail is lost.
To take back control, just tap on your product on the screen. You'll see a focus box appear, usually with a little sun or lightbulb icon next to it. Slide your finger up or down to manually adjust the brightness until it looks perfect. While you're at it, long-press the screen to lock both the exposure and focus. This is a game-changer; it stops the camera from annoyingly "hunting" for focus right as you're about to take the shot, ensuring your product stays perfectly sharp.
One Rule to Never Break: Avoid Digital Zoom at All Costs. Digital zoom is a lie. It doesn't actually zoom; it just crops into your sensor and stretches the pixels, completely destroying your image quality. If you need a tighter shot, use your feet and move closer to the product.
Use Portrait Mode Wisely
Many newer phones feature a Portrait Mode that creates that beautiful, blurry background effect (known as bokeh). This can be a fantastic tool for lifestyle shots, as it makes your product pop by softening distracting background elements.
Be careful with it for standard product-on-white photos, though. The software can sometimes get confused and accidentally blur the edges of your product, which looks artificial and unprofessional. It's often better to capture a completely sharp image first and handle the background in post-production.
Even with these in-camera tricks, some things are just easier to fix later. If you're struggling with tricky backgrounds or small imperfections, looking into professional product photo editing services can be a smart, budget-friendly way to achieve that final, flawless polish.
Product Styling and Composition That Converts
You can nail the lighting and get a perfectly sharp image, but if the photo doesn't tell a story, it will still fall flat. That's where styling and composition come into play. This is the real art behind product photography—arranging your product in a way that truly connects with a customer and makes them want it. It's a non-negotiable step in any cheap product photography setup.
Good styling isn't just about adding more stuff to the frame. It's about giving your product context. You want to help your customer picture it in their own life. Your props are there to support the main product, not steal the show.
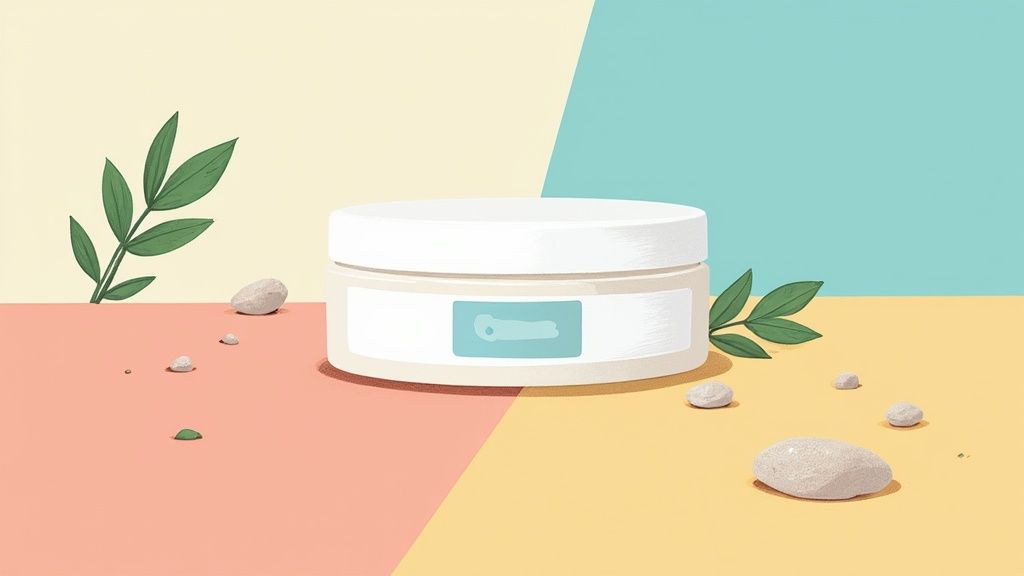
Think about it. If you're selling a bag of artisanal coffee, just scattering a few roasted beans nearby adds texture and instantly signals what your product is all about. Selling a natural skincare line? Style the bottle with some fresh botanicals or a smooth river stone to visually echo its organic and gentle properties.
Choosing Props That Add Value
The right props can take a basic product shot and turn it into a compelling lifestyle image. The trick is to pick items that feel authentic to your brand and help show your product's use, its size, or the feeling it evokes.
- To Show Scale: Let's say you're selling a delicate piece of jewelry. Placing it next to something familiar, like a single flower petal or a teacup, gives customers an instant sense of its size without them ever having to hunt for the dimensions.
- To Set a Mood: For a cozy, hand-knitted scarf, you can create a feeling of warmth and comfort by adding props like a steaming mug, an open book, or a rustic wooden surface.
- To Hint at Ingredients: A bar of honey-oatmeal soap suddenly becomes far more appealing when you style it with a small bowl of oats and a wooden honey dipper. It’s a simple visual cue that works wonders.
A great rule of thumb I always follow: if a prop doesn't have a clear job—whether that's showing scale, setting a mood, or hinting at an ingredient—it's just clutter. Keep your scenes clean and focused on your hero product.
Mastering Angles and Composition
How you angle your camera dramatically changes how a product is perceived. Don't fall into the trap of taking just one straight-on shot. You need to experiment to find the angle that best highlights your product's most important features. Different products demand different approaches.
I tend to cycle through a few key angles:
- The Eye-Level Shot: This is your classic, straightforward angle—shooting the product as if it were sitting on a shelf right in front of you. It’s the go-to for things like bottles, cans, and jars where the label is everything.
- The High Angle (45-Degree Shot): Coming from slightly above gives you a great view of both the top and front of the product, which adds a nice sense of depth. This works really well for items like shoes, electronics, and kitchen gadgets.
- The Flat Lay (Bird's-Eye View): This top-down shot is a huge favorite on social media for a reason. It's perfect for laying out apparel, cosmetics, and accessories on a flat surface, letting you create beautiful, artistic compositions and even show off multiple products at once.
Whichever angle you land on, turn on your camera's gridlines and use the rule of thirds. It’s a simple trick that makes for a much more balanced and professional-looking photo. By thinking more like a stylist and less like someone just taking a snapshot, you can turn your cheap product photography efforts into marketing assets that genuinely sell.
Using AI Photo Editors to Get Polished Results
https://www.youtube.com/embed/ZSLYsYckUkI
Okay, you’ve nailed your lighting and framed the perfect shot. What now? The last hurdle is editing, which used to be the most frustrating and costly part of the process. If you’ve ever spent hours trying to cut out a background in Photoshop, you know the pain.
Thankfully, AI photo editors have completely changed the game. They’ve made that professional-grade polish something anyone can achieve in minutes, not hours. We're not just talking about slapping on a simple filter. These tools automate the trickiest parts of editing. You can take a decent photo on your kitchen counter—clutter and all—and turn it into something that looks like it came from a professional studio.
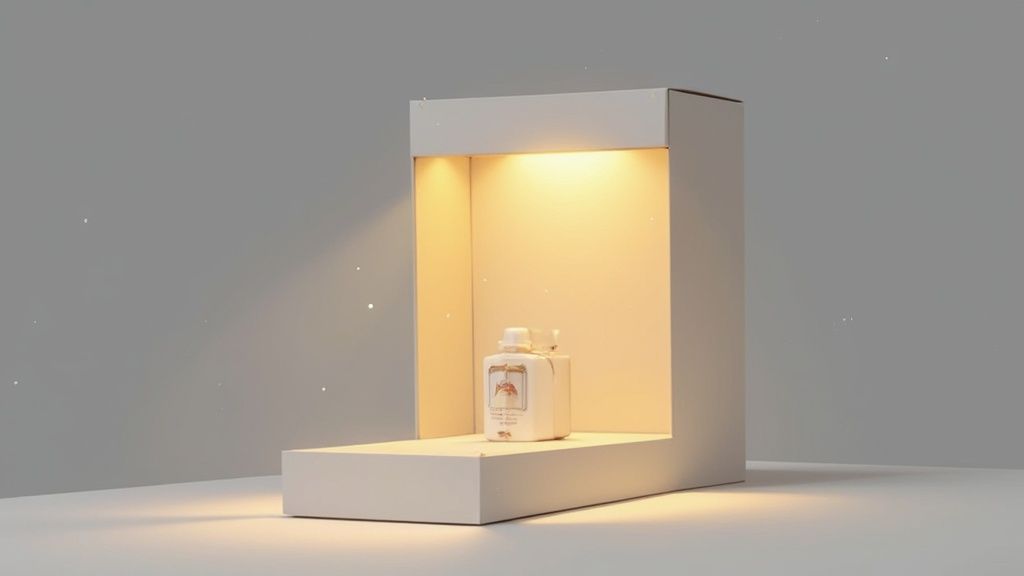
The Magic of One-Click Background Removal
One of the biggest time-savers is one-click background removal. For ecommerce sites like Amazon or Shopify, a clean, pure white background isn't just a suggestion; it’s often a requirement. Trying to shoot on a perfectly white surface is a nightmare, but AI makes it trivial.
With just a click, these tools can:
- Instantly erase any background, no matter how messy.
- Drop in a perfect RGB (255, 255, 255) white backdrop for that clean, professional look.
- Let you experiment with custom-colored backgrounds to perfectly match your brand’s vibe.
This feature alone is a huge leap forward for anyone doing their own product photography. It’s the difference between a photo that looks DIY and one that looks ready for prime time.
Bringing Your Photos to Life with Realistic Scenes and Shadows
But it doesn't stop with just removing the background. A product floating in a sea of white can feel a bit sterile and flat. This is where modern AI editors really shine. Tools like ProdShot can intelligently add soft, realistic shadows, which immediately gives your product weight and makes it pop off the page.
The most impressive part? You can generate entirely new lifestyle scenes from scratch. Take your basic product shot and ask the AI to place it on a sleek marble countertop, a weathered wooden plank, or even in a vibrant garden. It transforms a simple picture into a story.
You can explore how an AI product photo generator works and see firsthand how it can breathe new life into your images. These tools also handle the small stuff, like automatically correcting color imbalances or fixing minor lighting issues. For a deeper dive into the available options, checking out a list of top AI Image Generation Tools can help you find the right fit for your workflow.
Ultimately, integrating AI into your editing process is what closes the gap between a good DIY photo and a fantastic one that actually drives sales.
Your Top Questions About Budget Product Photography, Answered
Even with a solid game plan, diving into cheap product photography for the first time can feel a little uncertain. I get it. Let's walk through some of the questions I hear most often so you can start shooting with confidence.
Do I Really Need a DSLR for Good Product Photos?
Honestly? No, you absolutely don't. A big, fancy DSLR gives you a ton of manual control and lens options, which is great, but the cameras built into today's smartphones are shockingly good.
The real secret isn't the camera body—it's the light. With great lighting and a few simple techniques, your phone can produce crisp, high-quality images that look fantastic on your website or social media. Just focus on what truly makes a difference: controlling your light, setting up a strong composition, and making sure your focus and exposure are locked in. The best camera is the one you have in your pocket.
What Is the Biggest Mistake in DIY Product Photography?
By far, the most common and damaging mistake I see is bad lighting. It’s the classic pitfall.
Beginners often make one of two errors. They either use a single, harsh light source—like a bare lightbulb or direct midday sun—which creates ugly shadows and glaring hotspots. Or, they shoot in a room that's just too dark, resulting in grainy, blurry photos that scream "amateur."
The fix is always to find a source of large, soft, diffused light. Think of a big window on an overcast day—that's the gold standard. If you have to use artificial light, don't point it directly at your product. Bounce it off a white wall or a piece of foam board first. You can even hang a thin white sheet over a lamp to soften and spread the light.
Making this one change will elevate your photos more than anything else you can do.
How Can I Make My White Backgrounds Look Perfectly White?
This is a tricky one. Getting a pure, perfect white background (that's RGB 255, 255, 255 for the technically inclined) right in the camera is much harder than it sounds. Even if you use a bright white poster board, your camera's sensor will almost always see it as a light gray. You can try to intentionally overexpose the shot a bit, but that's a delicate balance and you risk losing important details on your actual product.
The most straightforward and consistent solution is to fix it in post-production. This is where an AI tool shines. An app like ProdShot can instantly detect and remove your real-world background, swapping it with a flawless, commercially-ready white one in a single click. It's a massive time-saver.
For certain platforms, getting the background right is non-negotiable. If you're selling on major marketplaces, it's worth digging into their specific requirements. You can learn more about crafting compliant images by checking out resources on professional Amazon product photography. It’s a shortcut that guarantees a polished, consistent look for all your products.
Ready to turn those simple phone snapshots into images that actually sell? With ProdShot, you can get professional, studio-quality results in seconds—no fancy gear or photo editing skills required. Give it a try for free and see just how easy it is to elevate your brand's look. Visit https://prodshot.net to get started.
Subscribe to my newsletter
Read articles from ProdShot Creator directly inside your inbox. Subscribe to the newsletter, and don't miss out.
Written by