How to Design Sci fi Bar Stool Using 3D CAD Software
 Juliana Misiko
How to Design Sci fi Bar Stool Using 3D CAD Software
In the ever-evolving world of digital design, 3D modeling software like SelfCAD empowers creators to bring imaginative concepts to life with precision and creativity. Among the many fascinating projects possible, designing a sci-fi bar stool stands out as a unique blend of artistic vision and functional design. Whether you’re a seasoned designer or a curious beginner, this tutorial will walk you through the step-by-step process of crafting a futuristic bar stool that looks like it belongs on a space station. Using SelfCAD’s intuitive tools and powerful modeling features, we’ll explore how to translate a science fiction aesthetic into a practical, visually striking 3D model. Let’s dive into the creative process and see how the future of furniture can be built one polygon at a time.
To access the interactive tutorial to this article, check out; https://www.selfcad.com/tutorials/572b1m2h6d44675v56306c6s6n4zy1221435
Once you’ve launched the editor;
From the 3D Shapes category on the toolbar choose cylinder; Set height to 25, position y to 100

Tick the checkmark to finalize cylinder
From the modify category on the toolbar choose fillet; Set intensity 5

Tick the checkmark to finalize fillet
Click to activate polygon selection; Click on highlighted region to select it

From the modify category on the toolbar choose extrusion; Set extrusion amount to 1

Tick the checkmark to finalize extrusion
Click on highlighted region to deselect it
From the 3D Shapes category on the toolbar choose cylinder; Set height to 4, position y to 96

Tick the checkmark to finalize cylinder
From the modify category on the toolbar choose fillet; Set intensity 1

Tick the checkmark to finalize fillet
Click copy button to copy selected objects
Click move on the toolbar; Set y to 0.
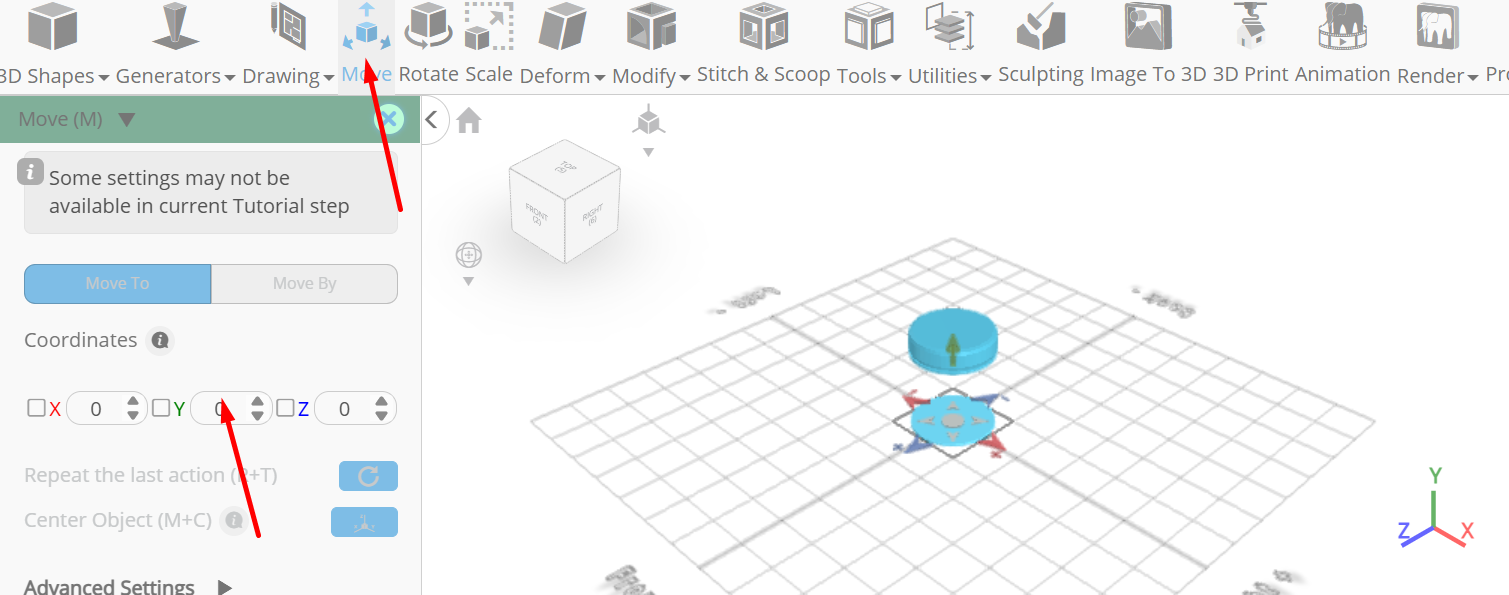
Click ‘x’ to close transformation panel
From the 3D Shapes category on the toolbar choose cylinder; Set top radius to 10, bottom radius to 10, height to 10, , position y to 79, position z to 22, rotation y to 90, rotation z to 90

Tick the checkmark to finalize cylinder
Click to activate edge selection
Click selection settings button to change selection settings; set loop selection to true, click on highlighted edge to select loop from the object.

Click ‘x’ to close selection settings panel
From the modify category on the toolbar choose chamfer; Set intensity to 1
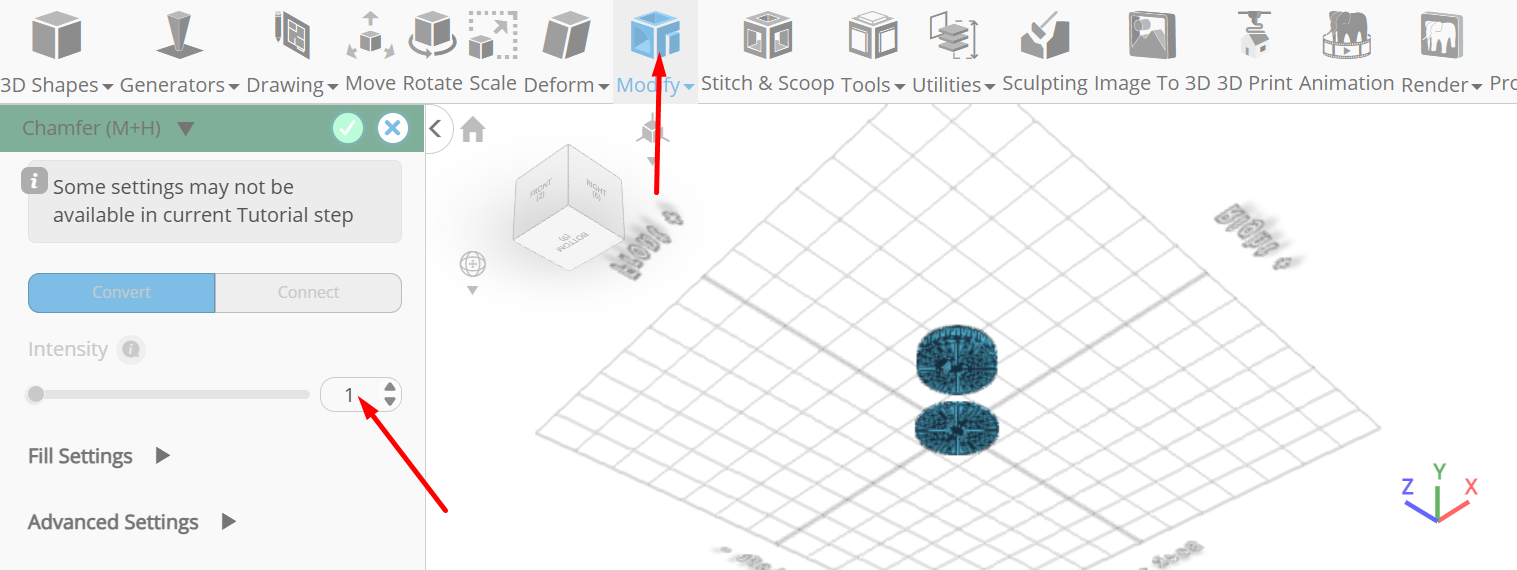
Tick the checkmark to finalize chamfer
Click to activate polygon selection; Click on highlighted region to select it

From the modify category on the toolbar choose inset; Set inset amount to 3, Click add option to add next macro step; Set operation to extrusion, amount to 1.

Tick the checkmark to finalize inset
Click on highlighted region to deselect it
Click scale on the toolbar; Set z to 16 using highlighted gizmo.

Click ‘x’ to close transformation panel
From the 3D Shapes category on the toolbar choose cylinder; Set top radius to 4, bottom radius to 4, height to 35, , position y to 85, rotation y to 90, rotation z to 90

Tick the checkmark to finalize cylinder
From the 3D Shapes category on the toolbar choose cylinder; Set top radius to 5, bottom radius to 5, height to 53, position x to -18 , position y to 57, position z to 24, rotation z to 120

Tick the checkmark to finalize cylinder
From the 3D Shapes category on the toolbar choose capsule; Set top radius to 8, bottom radius to 8, height to 26, position x to -44, position y to 51, position z to 24, rotation y to 90, rotation z to 90

Tick the checkmark to finalize cylinder
Click on mesh 12, 20 to select. Click on mesh 24 to deselect
Click copy button to copy selected objects; Click move on the toolbar; Set y to 3.

Click ‘x’ to close transformation panel
Click rotate on the toolbar; Set z to 80.

Click ‘x’ to close transformation panel
Click move on the toolbar; Set x to -42.36 using highlighted gizmo

Click ‘x’ to close transformation panel
Click on mesh 12(1), 24, 20, 12 to select
Click copy button to copy selected objects; Click move on the toolbar; Set z to -23 using highlighted gizmo.
Click ‘x’ to close transformation panel
Click on all the meshes to select them
Click stitch & scoop on the toolbar; From the tool panel choose union.

Tick the checkmark to finalize union
As you continue honing your design skills, remember that SelfCAD offers a wealth of resources to support your learning journey. To deepen your understanding and explore more advanced features, consider checking out the interactive tutorials (https://www.selfcad.com/tutorials) available on the SelfCAD website. The tutorials page provides a treasure trove of guides, tips, and tricks that cater to designers of all levels.
More structured learning experience can also be accessed at the SelfCAD Academy (https://www.selfcad.com/academy/curriculum/), https://www.youtube.com/@3dmodeling101, and 3D Modeling 101 series (https://www.youtube.com/playlist?list=PL74nFNT8yS9DcE1UlUUdiR1wFGv9DDfTB). This comprehensive resource offers in-depth courses taught by industry experts, allowing you to master the intricacies of SelfCAD at your own pace
Subscribe to my newsletter
Read articles from Juliana Misiko directly inside your inbox. Subscribe to the newsletter, and don't miss out.
Written by