How to Design a Typography Poster using 3D CAD Software
 Juliana Misiko
How to Design a Typography Poster using 3D CAD Software
Typography isn’t just about letters, it’s about turning words into visual art. In digital design, creating a typography poster involves balancing aesthetics, message, and structure to communicate effectively and creatively. While SelfCAD is often associated with 3D modeling, it also offers a powerful platform for bringing text-based designs into a new dimension. This article will guide you through the process of designing a bold and expressive typography poster using SelfCAD’s versatile toolset. Whether you're aiming for a sleek modern look or an experimental 3D text composition, you'll learn how to manipulate type, add depth, and infuse your poster with a dynamic visual impact that captures attention. Let's explore how to turn words into a statement; layer by layer, shape by shape.
To access the interactive tutorial to this article, check out; https://www.selfcad.com/tutorials/522s2i6a3q3z733k4x6r4o3hp3d39261xe1x
Once you’ve launched the editor;
From the Generators Category on the Toolbar choose Text Generator; Set Text to SelfCAD can change your life, Depth to 15, Smoothness to 3
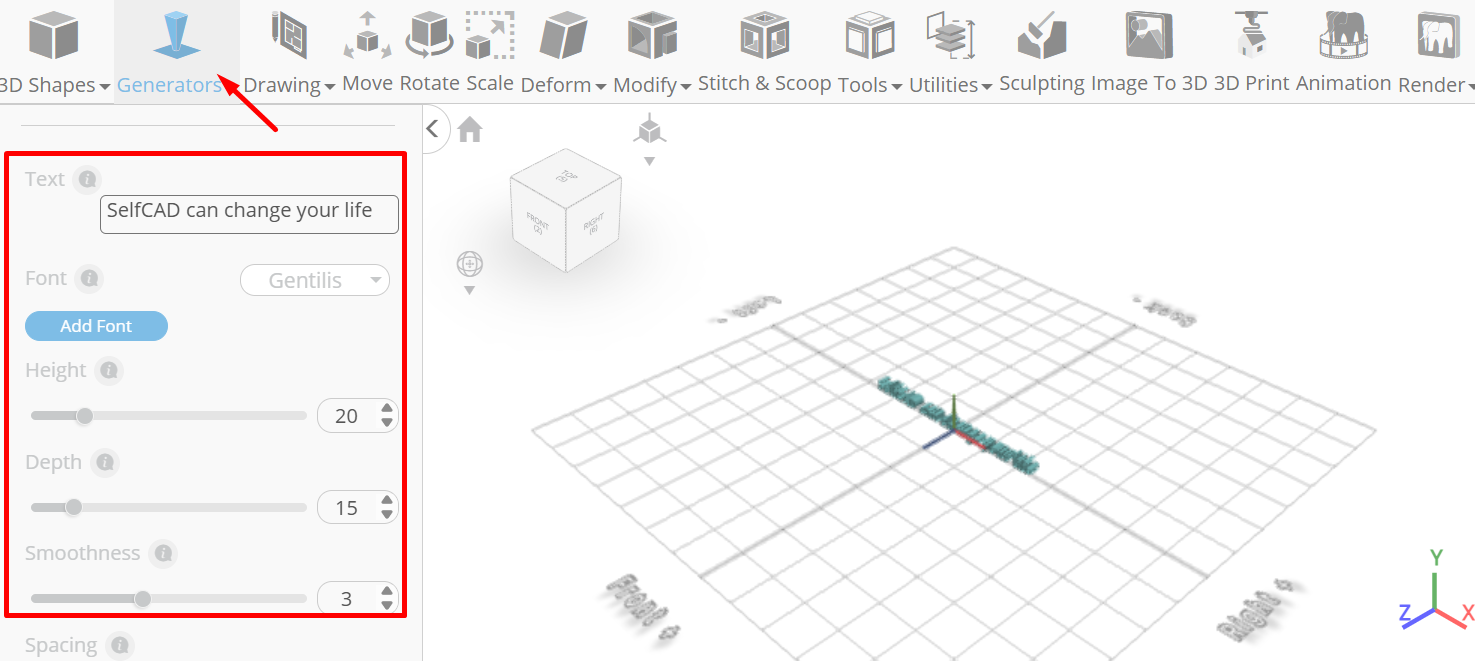
Click to finalize Text Generator
From the Drawing Category on the Toolbar choose 3D Sketch; From the plane list select Back/Front, choose Circle, Click on highlighted point to draw circle
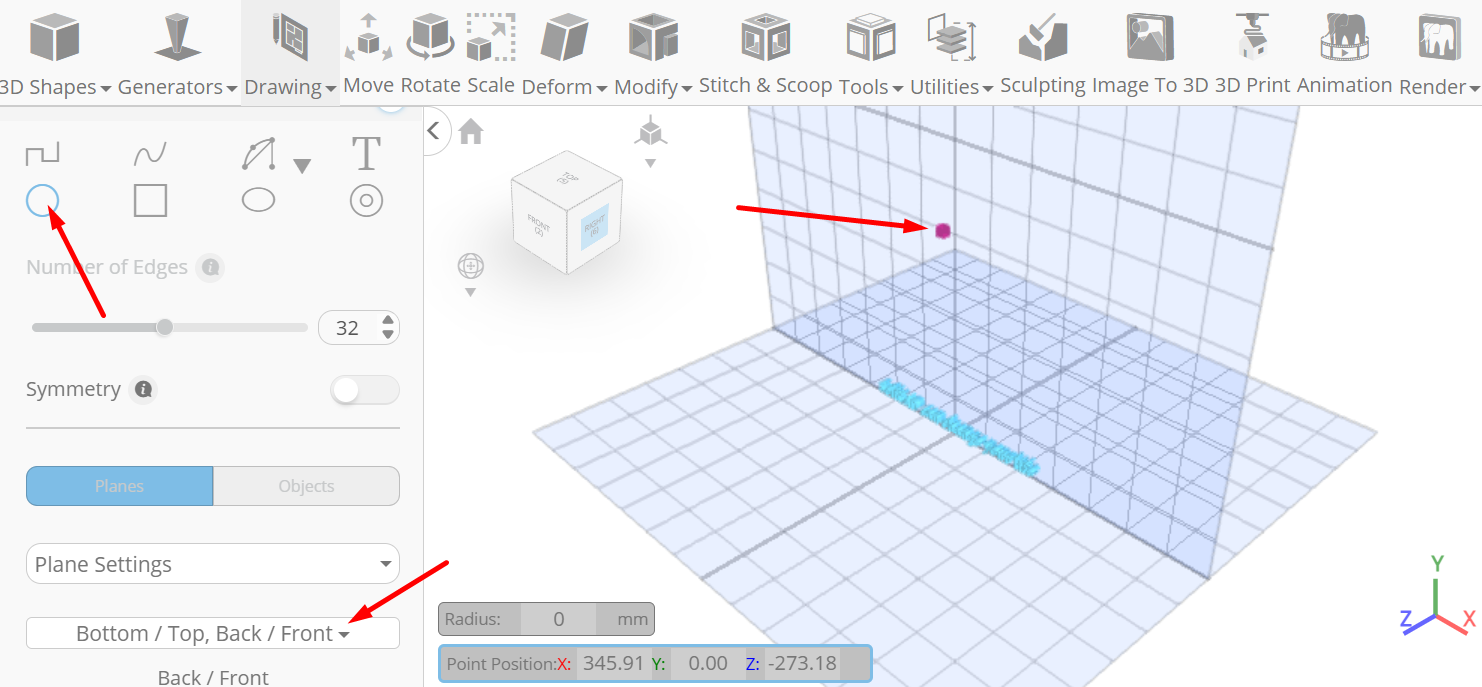
Click on highlighted point to draw circle
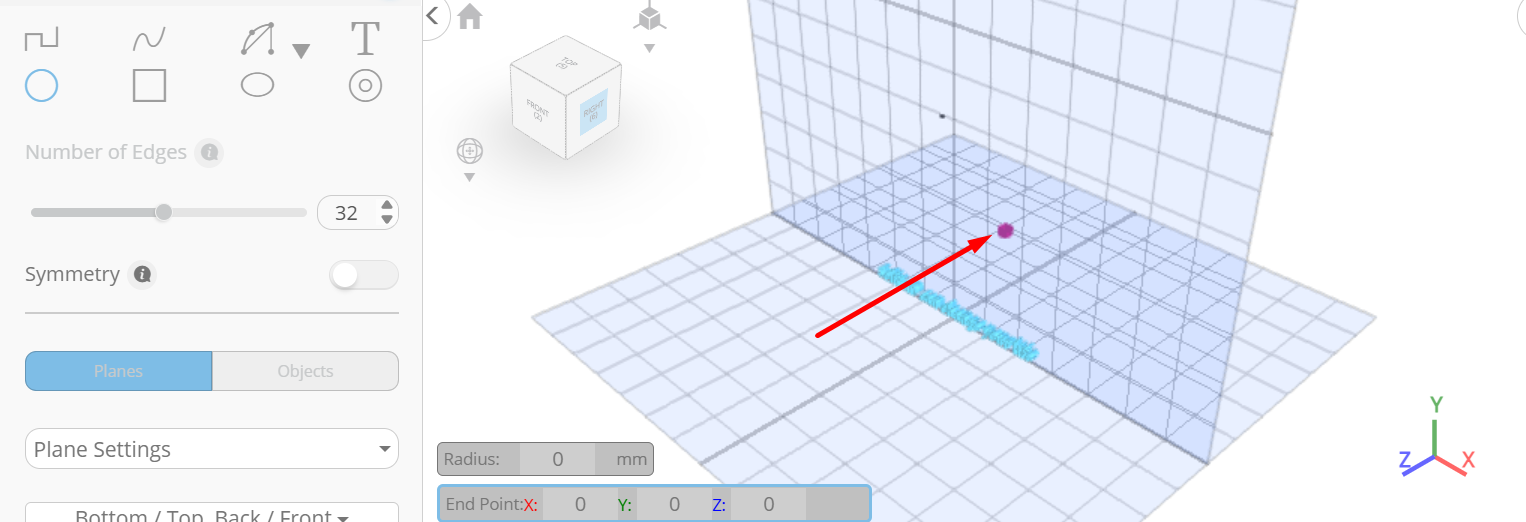
Click ‘x’ to close 3D Sketch panel

Click on text-1 to select it
From the Tools Category on the Toolbar choose Follow Path; Set Mode to wrap, Taper to 72, Weight to 51, Tangent to False
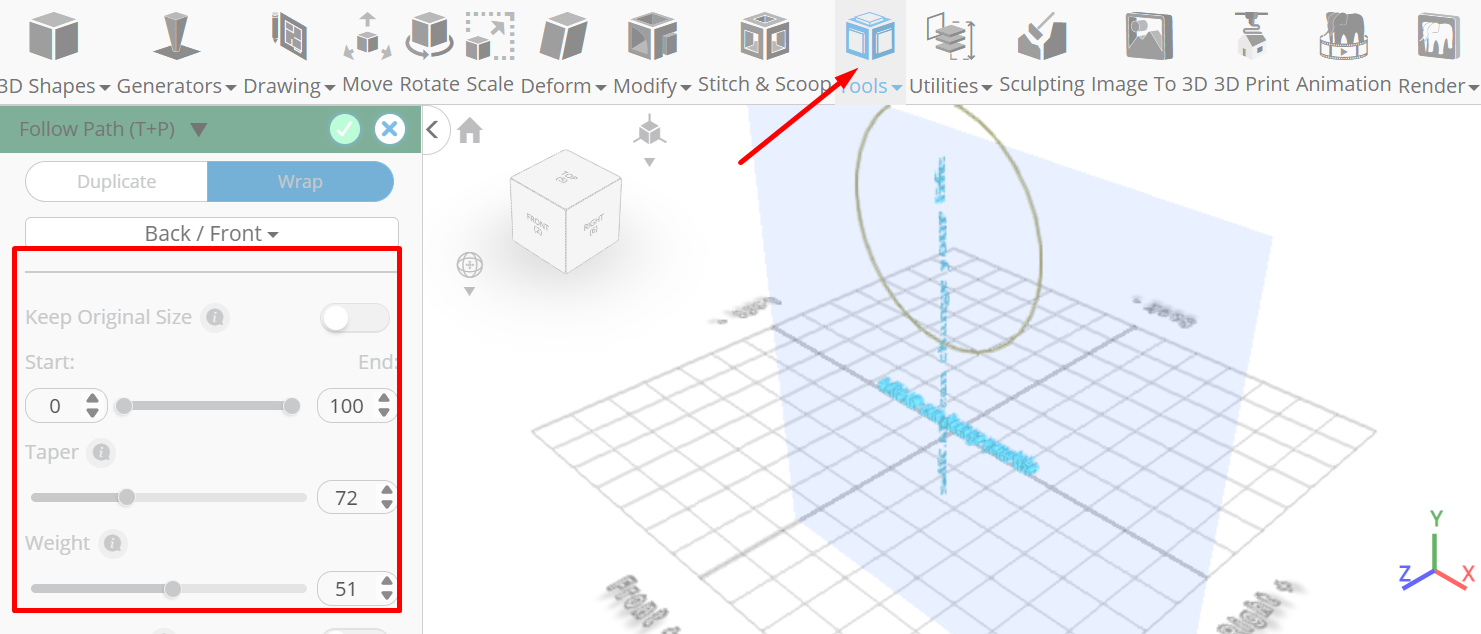
Click to finalize Follow path
Click Isolate button to isolate selected object
From the Deform Category on the Toolbar choose Twist; Set y to -30
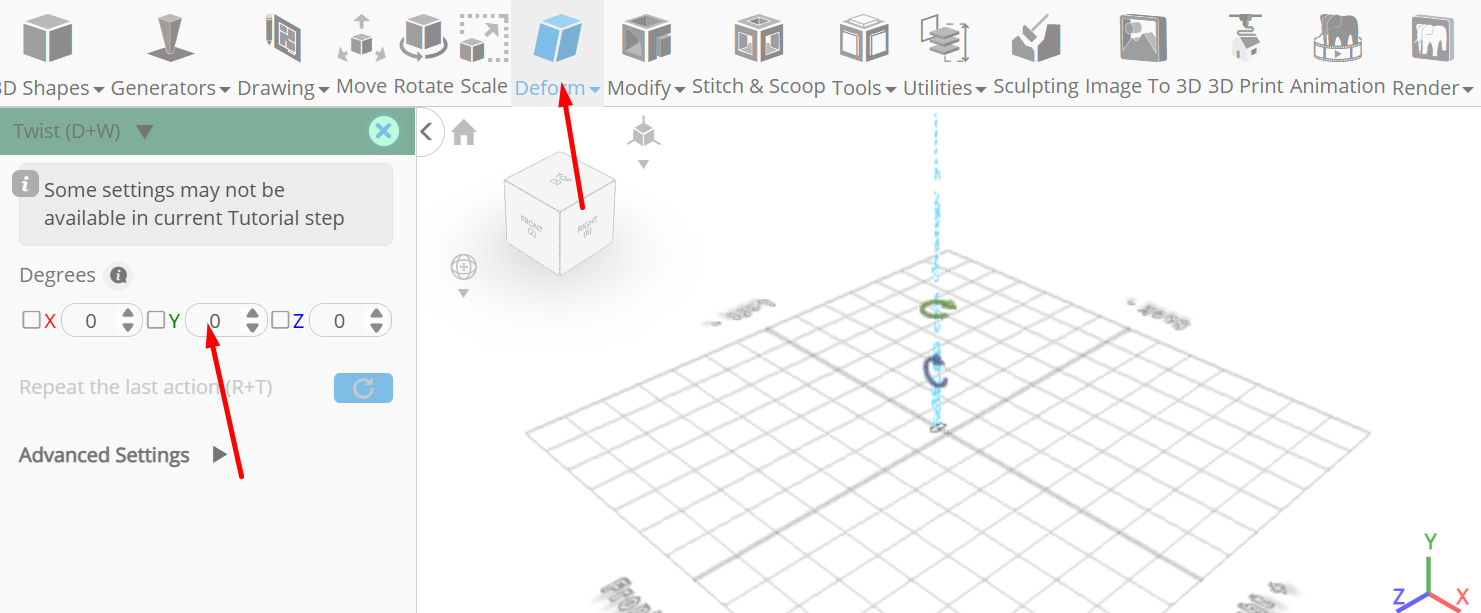
Click ‘x’ to close Transformation panel
From the 3D Shapes Category on the Toolbar choose Cube; Set Width to 400, Height to 5, Depth to 400, Position x to -22, Position y to 42, Position z to -70, Rotation x to -90
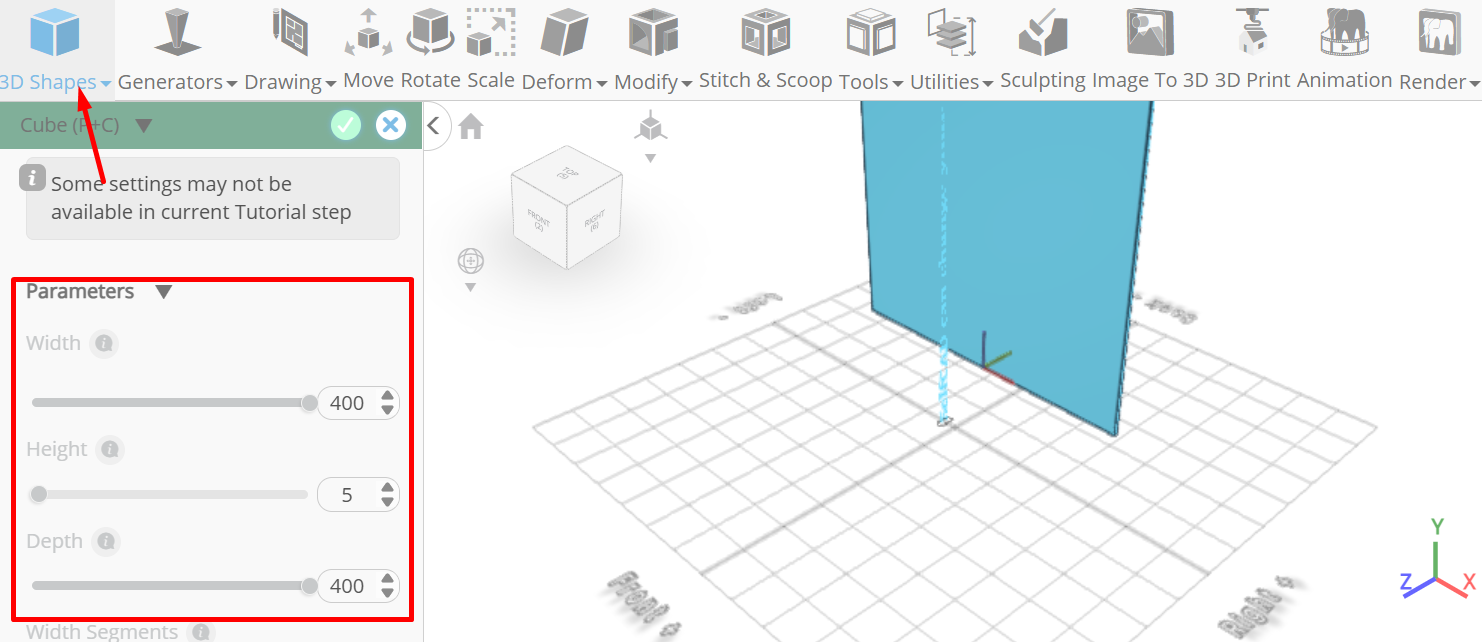
Click to finalize Cube
Click color picker button to change color of selected object; Click Grey button
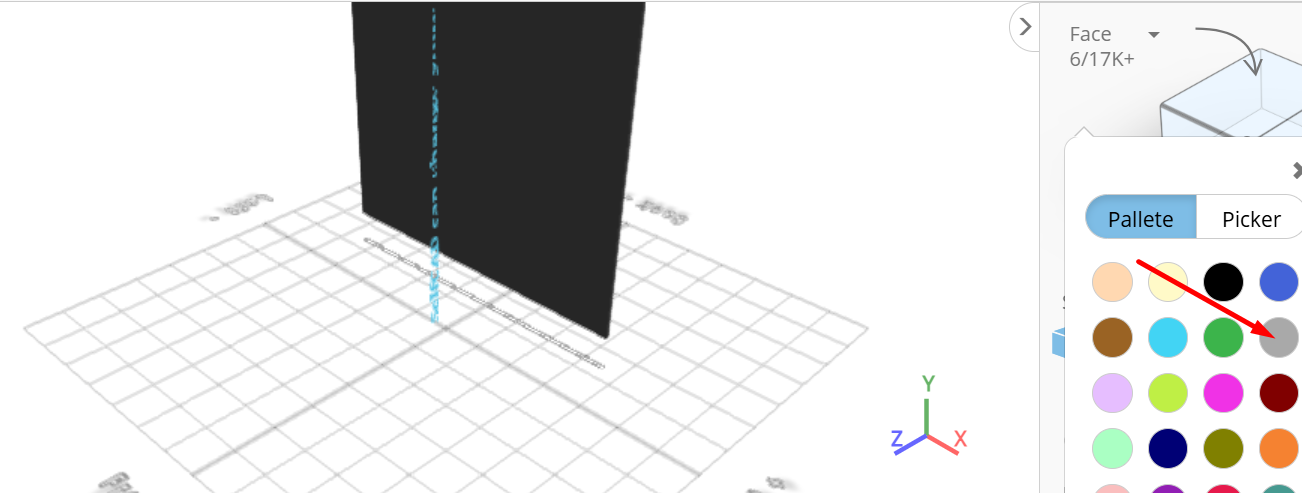
Click OK to confirm color change
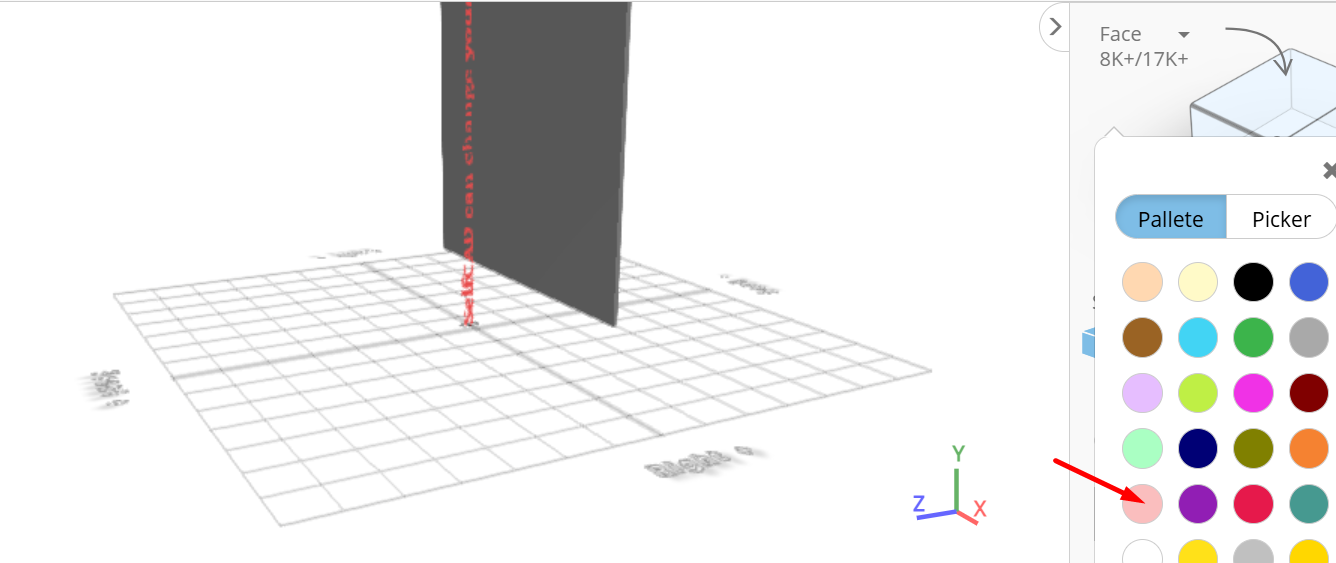
Click on mesh 1 to select it. Click on mesh 5 to deselect
Click color picker button to change color of selected object; Click pink button
As you continue honing your design skills, remember that SelfCAD offers a wealth of resources to support your learning journey. To deepen your understanding and explore more advanced features, consider checking out the interactive tutorials (https://www.selfcad.com/tutorials) available on the SelfCAD website. The tutorials page provides a treasure trove of guides, tips, and tricks that cater to designers of all levels.
More structured learning experience can also be accessed at the SelfCAD Academy (https://www.selfcad.com/academy/curriculum/), https://www.youtube.com/@3dmodeling101, and 3D Modeling 101 series (https://www.youtube.com/playlist?list=PL74nFNT8yS9DcE1UlUUdiR1wFGv9DDfTB). This comprehensive resource offers in-depth courses taught by industry experts, allowing you to master the intricacies of SelfCAD at your own pace
Subscribe to my newsletter
Read articles from Juliana Misiko directly inside your inbox. Subscribe to the newsletter, and don't miss out.
Written by