How to integrate eSignatures into Your PHP Laravel Application
 BoldSign
By integrating e-Signatures into your PHP Laravel application, you can seamlessly perform the entire electronic signature processes within your app. This provides enhanced flexibility for both you and your users, enabling to send, sign, track, download, and perform other e-Signature actions directly within your application. This streamlined approach eliminates the need for third-party platforms, offering greater convenience and instilling trust and confidence in your users regarding the documents they are signing.
In this blog post, we will guide you on how to integrate the BoldSign e-Signature solution into your PHP Laravel application using its APIs. BoldSign’s e-Signature solution offers numerous advantages, including quick and seamless integration, maintaining brand consistency, ensuring document security, and providing compliance with legal requirements, among other benefits.
To illustrate the benefits of integration, let’s consider a real-life situation where a company welcomes a new employee to its workforce. To safeguard sensitive company information and ensure confidentiality, it is crucial for the employee to sign a non-disclosure agreement (NDA). By integrating eSignatures into its PHP application, the company can facilitate the entire eSignature process directly within their own application. This streamlined approach guarantees a seamless and efficient experience for the employees
Getting started
Before you begin integrating eSignatures into your PHP Laravel application, there are a few prerequisites to consider. These include having a BoldSign account, obtaining an API key, and ensuring that PHP, Composer, and Laravel are installed on your machine.
Setting up the BoldSign account
To utilize the BoldSign APIs, you will need a BoldSign account. This can be either a paid account or a free sandbox account. If you don’t have an account yet, you can sign up for a free BoldSign account right now.Once you have your account, you will also need an API key to authenticate your access. This can be generated from the API Key – BoldSign page.
Setting up the PHP Laravel application
You can either use an existing PHP Laravel project or create a new one by following the steps we’ll mention. To create a Laravel project, you need to have PHP, Composer, and Laravel installed on your machine.
Step 1: Installing PHP, Composer, and Laravel
Visit the official PHP website and download the appropriate version. Once downloaded, follow the installation instructions to complete the setup.
Next, head to the official Composer website and download the version that is compatible with your operating system and install it.
Next, install Laravel globally on your system by executing the following command on your terminal or command prompt.
Composer global require laravel/installer
Step 2: Creating a new Laravel project
With Laravel installed, create a new Laravel project to integrate the eSignature solution:
- Navigate to the desired folder location where you want to create your project and run the following command by specifying a desired project name.
laravel new project-name
Step 3: Configure the environment
To configure the environment for your BoldSign integration, follow these steps:
Locate the .env.example file in the root directory of your Laravel project and rename it to .env.
Open the .env file and add the BoldSign API key, which we obtained earlier. Insert your API key in the following format and save the changes.
BOLDSIGN_API_KEY=<Your API Key>
Step 4: Serve the application
Now it’s time to start the local development server and see your Laravel application in action:
- Navigate to your project directory and run the following command:
php artisan serve
- The development server will start, and you can access your Laravel application in your web browser at http://localhost:8000.
By following these steps, you have successfully set up a new PHP Laravel application with BoldSign integration.
Integrating eSignature processes into the PHP Laravel application
BoldSign offers multiple methods to create and send signature requests. You can either create signature requests directly using the API, by utilizing templates, or embed the “create signature request” UI in your application.
In this case, let’s create a signature request using templates. A new template can be created using BoldSign APIs or through the BoldSign web application. The template should include all the necessary elements for the “new employee NDA” scenario.
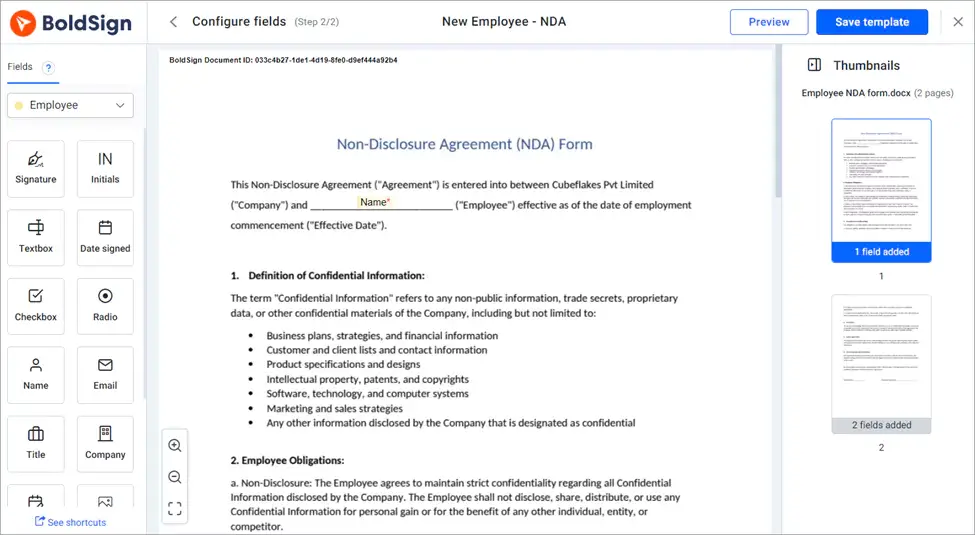
Once the template is created, make a note of the template ID, which will be used in your PHP code for sending the document for signing.
With all the necessary steps completed, you are now set to integrate the eSignature process within your PHP application. Let’s integrate the following eSignature functionalities:
Sending the document out for signature request.
Embedding the signing process into the app.
Downloading the signed document within the app.
Sending the document out for signature request
To initiate the signing process, you can make use of the BoldSign send API. In your Laravel controller, add the necessary code to send a signature request to the employee using the obtained template ID. Here is an example code snippet that demonstrates this functionality.
    public function createDocumentFromTemplate(Request $request)
        {
            $templateId = "***Your Template Id***";
            $employeeName = $request->input('name');
            $employeeEmail = $request->input('email');
            $templateDetails = [
                "roles" => [
                    [
                        "roleIndex" => 1,
                        "signerName" => $employeeName,
                        "signerEmail" => $employeeEmail,
                    ]
                ]
            ];

            $templateAPIUrl = "https://api.boldsign.com/v1/template/send/?templateId=" . $templateId;
            $headers = ['X-API-Key' => env('BOLDSIGN_API_KEY')];
            $client = new Client(['verify' => false]);
            $request = new GuzzleRequest('POST', $templateAPIUrl, $headers);
            $response = $client->send($request, ['json' => $templateDetails]);
            return json_decode($response->getBody()->getContents())->documentId;
        }
Upon successful creation of the signature request, the response will include the document ID for the created request. This document ID is further required for generating the embedded signing link.
Embedding the signing process into the app
To generate an embedded signing URL, you can make use of the BoldSign getEmbeddedSignLink API. Pass the document ID and the signer’s email address as parameters. This API will generate a URL that can be loaded into an iFrame, ensuring a seamless signing experience for your signers within your application. Refer to the example code snippet below.
    public function generateEmbedSignLink($documentId, $email)
        {
            $queryString = http_build_query([
                'DocumentId' => $documentId,
                'SignerEmail' => $email,
                'RedirectUrl' => "http://localhost:8000/"  // You can provide the redirect URL of your choice.
            ]);

            $embedSignAPIUrl = "https://api.boldsign.com/v1/document/getEmbeddedSignLink?" . $queryString;
            $headers = ['X-API-Key' => env('BOLDSIGN_API_KEY')];
            $client = new Client(['verify' => false]);
            $response = $client->request('GET', $embedSignAPIUrl, ['headers' => $headers]);
            $signLink = json_decode($response->getBody()->getContents())->signLink;

            return json_encode($signLink);
        }
The following screenshot shows the signing screen embedded within an application.
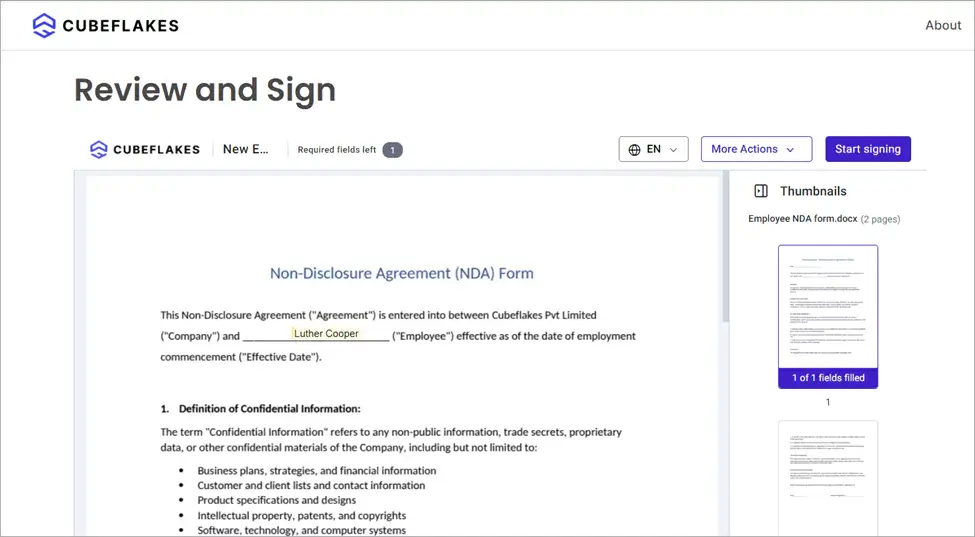
To handle the completion of the signing process and redirect the user back to your PHP application, you can utilize the RedirectUrl parameter. This allows you to specify the URL where the user should be redirected after completing the signing process.
Downloading the signed document within the app
After the signing process is successfully completed, using the BoldSign download API, you can download the signed document if you wish to save a copy for further use. The following code snippet illustrates this.
    public function downloadDocument($documentId)
        {
            $downloadDocumentAPIUrl = "https://api.boldsign.com/v1/document/download?documentId=" . $documentId;

            $headers = [
                'Accept' => 'application/json',
                'X-API-Key' => env('BOLDSIGN_API_KEY')
            ];

            $client = new Client(['verify' => false]);
            $response = $client->request('GET', $downloadDocumentAPIUrl, ['headers' => $headers]);

            if ($response->getStatusCode() == 200) {
                $fileContent = $response->getBody()->getContents();

                return Response::make($fileContent, 200, [
                    'Content-Type' => 'application/pdf',
                    'Content-Disposition' => 'attachment; filename="document.pdf"'
                ]);
            }
        }
Since the document signing is an asynchronous process, it is recommended to listen for the WebHook completed event to ensure that the document is ready to download. Refer to the Webhooks documentation for further details.
Conclusion
We hope this blog has provided you with valuable insights on integrating e-Signatures into your PHP Laravel application for the “new employee NDA” scenario. Likewise, you can integrate BoldSign into any other applications where eSigning is required. With a wide range of APIs available, BoldSign allows you to track signature request statuses and access various other functionalities to enhance your e-Signature workflows.
To learn more about BoldSign APIs, visit our API documentation. Live API demos are also available for several different scenarios. Sample code for popular programming languages is available in this GitHub repo.If you have questions, you can contact us through our support portal. We are always happy to assist you!
Related blogs
Note: This blog was originally published at boldsign.com
Subscribe to my newsletter
Read articles from BoldSign directly inside your inbox. Subscribe to the newsletter, and don't miss out.
Written by
BoldSign
BoldSign
BoldSign is a secure, legally compliant e-signature solution for businesses and individuals. It simplifies document signing with a user-friendly platform and powerful API & SDK for easy integration. Send, sign, and manage contracts effortlessly.