Ecommerce Photo Editing That Sells
 ProdShot Creator
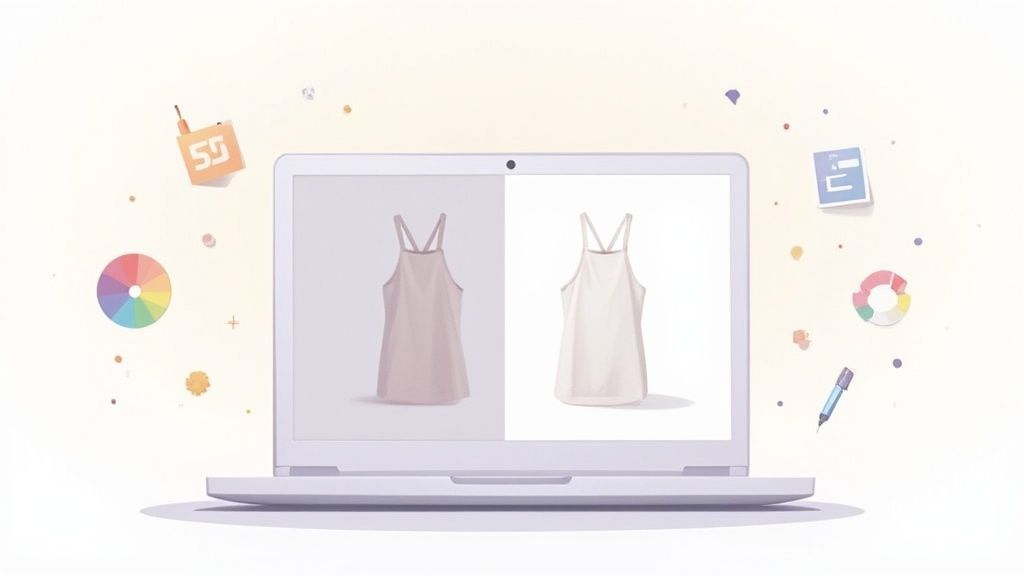
In the world of online shopping, your product images do almost all of the talking. This is where ecommerce photo editing comes in—it’s the craft of taking a good product picture and making it truly great. We’re talking about refining colors, getting rid of distracting backgrounds, and making sure every last detail is perfect. This isn't just about aesthetics; it's a core part of your business that directly shapes trust, conversions, and ultimately, sales.
Why Great Photo Editing Drives Ecommerce Sales
Think of a raw, unedited product photo as a diamond in the rough. It has potential, but its real sparkle is hidden. Photo editing is the process of cutting and polishing that stone to reveal its true color and brilliance, captivating anyone who sees it. It turns a simple snapshot into a powerful asset that builds trust and drives your business.
When people shop online, they can't touch or hold your product. Your images have to do all that work for them. They rely on those visuals to judge quality, understand features, and picture the item in their own lives. Professional editing makes sure this visual "conversation" is clear, compelling, and honest.
Building Trust Through Visual Quality
A polished image sends an immediate, powerful message: you're a professional brand that cares about quality. On the flip side, grainy, poorly lit, or inconsistent photos can make a store feel amateurish or untrustworthy, making shoppers think twice about the product and the business itself.
When your images are consistently crisp, clean, and beautifully edited, you create an instant sense of credibility. This visual consistency across your entire store builds your brand and gives customers the confidence they need to buy.
Answering Questions and Reducing Uncertainty
Excellent product photos do more than just show off an item; they answer customer questions before they're even asked, which helps reduce that nagging feeling of purchase anxiety.
- Color Accuracy: Editing ensures the color they see on screen is the color that arrives at their door. This one thing alone can dramatically cut down on returns.
- Detail Clarity: When customers can zoom in on a sharp, retouched image, they can inspect the texture, materials, and craftsmanship for themselves, wiping out any doubts about quality.
- Context and Scale: Lifestyle shots that place the product in a real-world setting help customers instantly understand its size and how it's used, often better than a long description ever could.
High-quality product images aren't just a "nice-to-have" for a good online store; they are the foundation. They bridge the gap between the digital and physical worlds, giving customers the visual proof they need to click 'add to cart' with confidence.
It's no surprise the demand for these visuals is exploding. The global photo editing software market is projected to grow by USD 606.1 million between 2024 and 2029, a surge driven almost entirely by ecommerce and digital advertising needs. This focus on imagery fits right into a larger picture of improving your store's performance through proven Shopify conversion rate optimization strategies.
The good news? Modern tools have made top-tier editing more accessible than ever before. Whether you're a solopreneur just starting out or a rapidly growing brand, achieving professional results is well within reach. You can learn more about the different paths you can take by exploring various photo editing services for ecommerce to find one that fits your workflow and budget.
The Core Techniques of Ecommerce Photo Editing
Now that we've covered why stellar images are non-negotiable, let's roll up our sleeves and get into the "how." These are the core techniques that transform a decent product shot into a high-performing asset for your store. Think of these as the fundamental skills in every professional ecommerce photo editor's toolbox.
Don't worry, you don't need an art degree to get this right. It's really about understanding a few key concepts and applying them consistently to create images that earn your customers' trust and, ultimately, their business.
Creating a Distraction-Free Background
The very first, and arguably most important, step is getting the background right. For most big ecommerce platforms—think giants like Amazon and Google Shopping—a pure white background isn't just a friendly suggestion; it's a hard rule for your main product images.
Why? A clean background acts as a blank canvas, making sure your product is the star of the show. It cuts out all the visual noise, gives your entire product catalog a cohesive, professional feel, and just looks clean. It’s like giving your product its own quiet, perfectly lit stage.
This process is usually called background removal. It involves meticulously separating the product from whatever was behind it during the photoshoot. What used to be a painstakingly manual job has become incredibly fast and simple with modern editing tools.
Perfecting Color Correction and Exposure
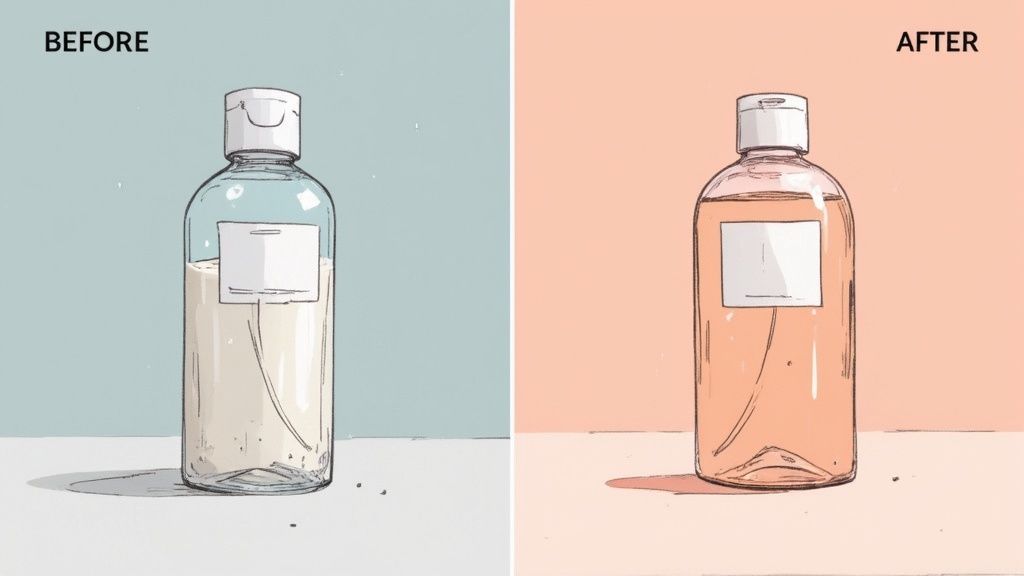
Have you ever bought a t-shirt online that looked fire-engine red, only to open the package and find a dull burgundy? That’s a classic case of bad color correction, and it’s a one-way ticket to frustrated customers and costly returns.
Color correction is simply the art of making the colors in your photo match the product in real life. Cameras aren't perfect; they can be fooled by weird lighting, reflections, or just the wrong settings. Your job is to fix it in post-production.
The goal of color correction isn't to make the product look better than it is, but to make it look exactly as it is. This honesty builds long-term customer loyalty and significantly reduces return rates, which can cripple an online store's profitability.
Beyond just the color, you also have to nail the exposure and contrast. A photo that’s too dark (underexposed) will hide important features, while one that’s too bright (overexposed) will wash out all the detail. A quick adjustment ensures your photos are bright and clear, letting shoppers zoom in and inspect every last stitch with confidence.
The Art of Flawless Retouching
The final layer of polish is retouching. This is where you zoom in and clean up all the tiny imperfections that sneak into your photos. It’s the digital equivalent of wiping down a display model to make it look pristine.
Retouching isn't about altering the product itself, but about presenting it in its best possible light. Common tasks include:
- Removing dust and scratches: Tiny specks or scuffs that you'd never notice in person can look like giant blemishes in a high-res photo.
- Fixing minor flaws: A loose thread on a sweater, a fingerprint on a shiny surface, or a small scuff from shipping can all be zapped away.
- Smoothing out wrinkles: This is an absolute must for clothing and fabrics to avoid looking unprofessional.
- Eliminating unwanted reflections: Glass, metal, and jewelry often catch distracting glares from lights or the camera. Retouching can carefully tone these down or remove them completely.
Good retouching is subtle but makes a massive impact. It shows customers you care about quality down to the smallest detail, which is often what separates an "add to cart" from a "back" button click.
To bring it all together, here’s a quick look at how these techniques directly impact your business goals.
Core Photo Editing Techniques and Their Business Impact
This table breaks down each essential editing task, its main purpose for ecommerce, and how it translates into better customer trust and higher conversion rates.
| Technique | Primary Goal | Impact on Sales & UX |
| Background Removal | To create a clean, consistent, and distraction-free visual environment for the product. | Increases professionalism, meets marketplace requirements, and keeps customer focus solely on the item. |
| Color Correction | To ensure the colors in the photo are a perfect match for the physical product. | Builds trust, reduces return rates due to "not as described" complaints, and improves customer satisfaction. |
| Retouching | To remove minor, distracting imperfections like dust, scratches, or unwanted reflections. | Enhances perceived product quality and value, creating a polished and flawless final image. |
Mastering these three pillars—clean backgrounds, true-to-life color, and meticulous retouching—forms the foundation of any successful ecommerce visual strategy. They work together to create a seamless and trustworthy shopping experience.
Your Step-By-Step Product Photo Editing Workflow
If there's one secret to a professional-looking online store, it's consistency. When your product photos all look different—some bright, some dark, some crooked—it creates a chaotic, untrustworthy vibe. You need a solid, repeatable ecommerce photo editing workflow that you can apply to every single image.
Having a structured process like this turns a potentially massive task into a series of simple, manageable steps. It’s the key to making sure every photo on your site meets the same high standard, building a brand experience that customers will trust. Let's walk through the exact steps I use, from picking the best shots to prepping them for your website.
Step 1: Culling and Organizing
Before you even think about opening an editing program, you have to pick your winners. This first stage is called culling. It's all about sorting through the mountain of images from your photoshoot and selecting only the absolute best ones.
You have to be ruthless here. Toss out anything that's blurry, poorly composed, or just plain unflattering. The goal is to whittle down your options to a handful of "hero" images for each product. This one step will save you countless hours down the line by making sure you only work on photos that have real potential.
Step 2: Basic Adjustments and Cropping
With your best shots selected, it's time to lay the groundwork. These are the foundational edits that create a clean, consistent look across your entire product catalog. Think of it as pouring the concrete foundation before you start building the house.
Your first move is to crop and straighten every image. Consistency is everything. All your main product photos should have the same aspect ratio (a 1:1 square is a popular choice) and alignment. This simple discipline is what creates that clean, grid-like appearance on your category pages that looks so professional.
Next, you’ll tackle the basic adjustments:
- Exposure: Fix any photos that are too dark or too bright. You need to reveal all the important product details that might be hiding in the shadows or blown out in the highlights.
- Contrast: Give the image a little "pop" by adjusting the contrast. This makes the whites bright and the blacks deep, but be careful not to crush the details in either.
- White Balance: This is crucial for accurate color. You need to correct the color temperature so that white objects in your photo actually look pure white, not tinged with yellow or blue.
It’s incredibly important to work non-destructively here. Use adjustment layers or tools that let you go back and change these settings later without permanently baking them into your original image.
Pro Tip: Batch process these basic adjustments. Most modern editing software, from Adobe Lightroom to dedicated tools, lets you apply the same settings (like white balance) to a whole group of photos at once. This is a massive time-saver when you're dealing with hundreds of similar shots.
This chart gives you a good idea of where your time typically goes during a standard editing workflow.
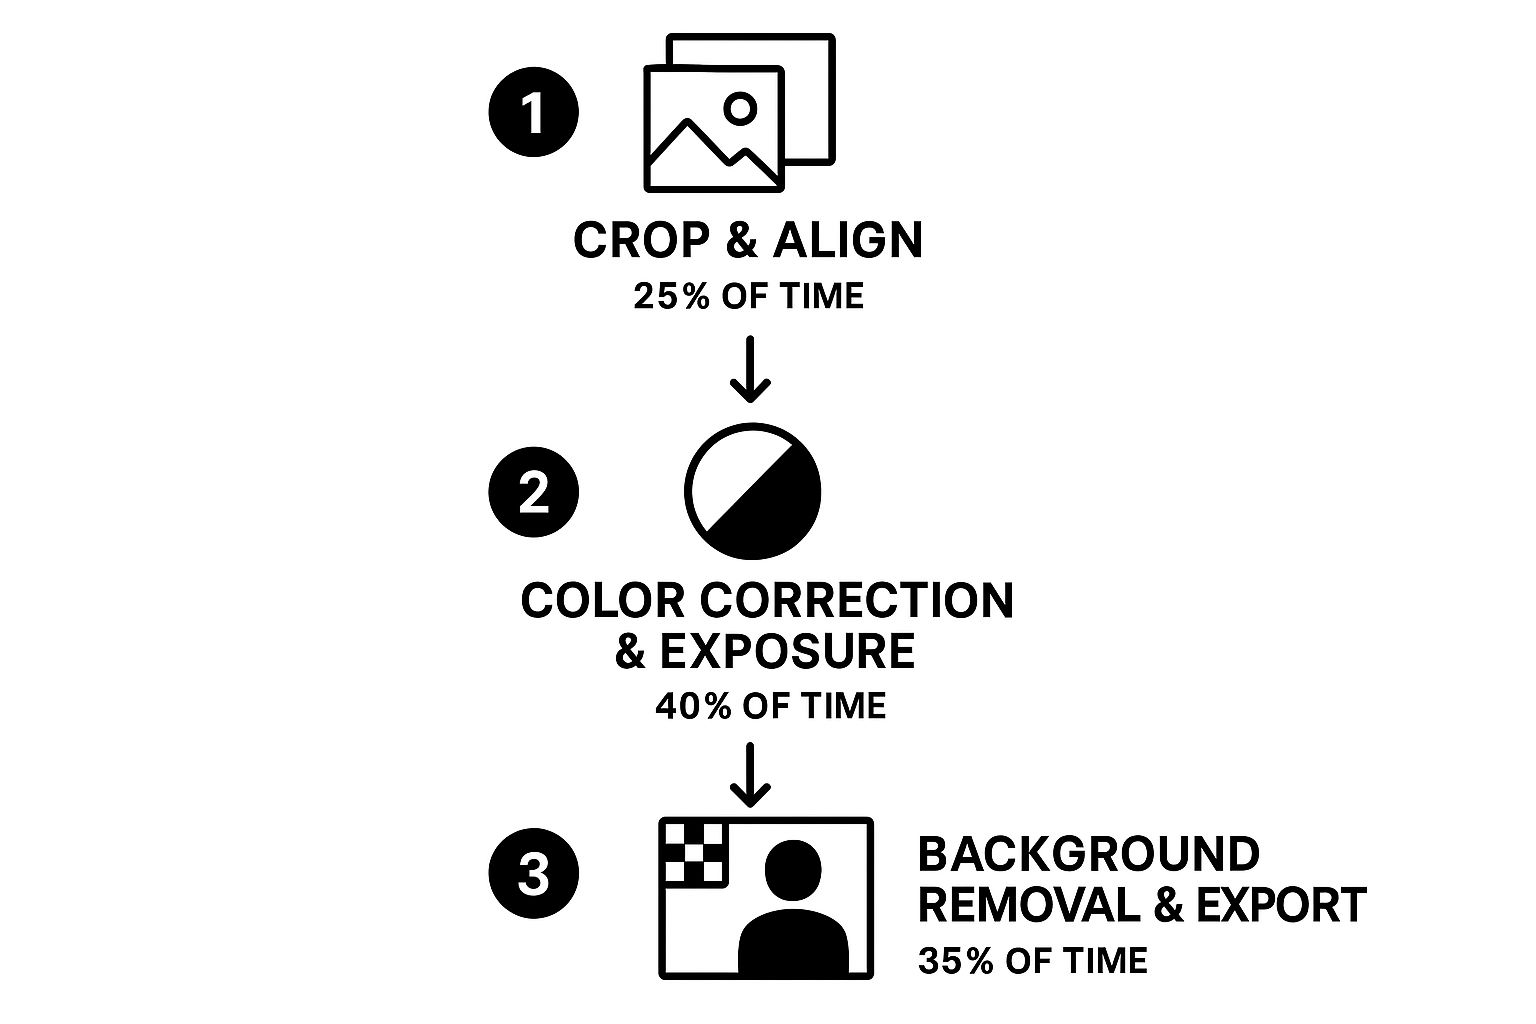
As you can see, color correction and exposure adjustments eat up the biggest slice of the pie, which really drives home how critical they are to the final result.
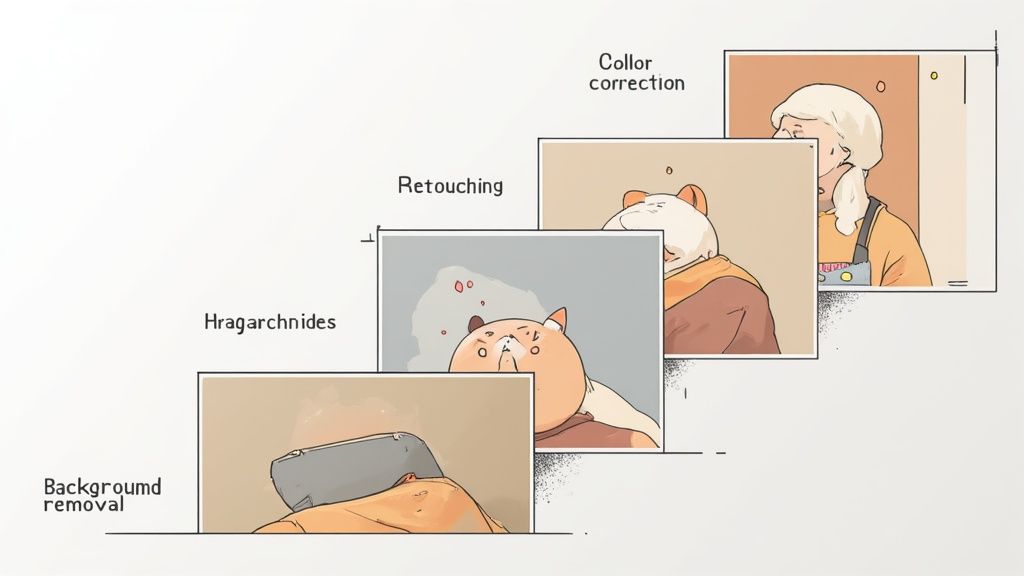
Step 3: Detailed Retouching and Cleanup
Okay, time to zoom in. With the big-picture adjustments handled, the next step is to get nitpicky with detailed retouching. This is where you hunt down and eliminate any tiny imperfections that might distract a customer. Your goal is a polished, flawless version of your product.
Common retouching jobs include zapping away dust specks, cleaning up minor scratches, removing fingerprints from shiny surfaces, or tidying up loose threads on clothing. These subtle fixes send a powerful message about quality and attention to detail.
This is also the stage where you’d handle background removal. You'll want to isolate your product on a clean, consistent backdrop—usually pure white for primary product shots—to eliminate any distractions.
Step 4: Color Consistency and Final Polish
Once each photo looks great on its own, you need to make sure they look great together. This step is all about lining up your edited photos for a single product and checking for color consistency.
The specific shade of blue on a t-shirt has to look identical in the main shot, the close-up detail shot, and the lifestyle photo. Even small differences can create doubt in a customer's mind and lead to more returns. Make those final, subtle tweaks to get every image in the set perfectly matched.
Step 5: Cropping and Exporting for the Web
You're in the home stretch! The last step is all about getting your polished images ready for their final destination. This involves two key things: creating final crops and exporting them correctly.
First, you’ll likely need different crops for different platforms. You might need a square version for the main product page, a tall vertical one for a Pinterest Pin, and a wide horizontal one for a website banner.
Then, you export. You have to use the right settings to balance quality and performance. This means choosing the right file format (JPEG is standard for photos), setting the color space to sRGB so they look right in all browsers, and compressing the file. A smaller file size means a faster-loading website, which is a huge deal for both your customers and your search engine rankings.
Advanced Editing That Makes Products Pop

Once you've nailed the basics, it's time to dig into the techniques that separate the good-enough product photos from the truly great ones. This is where advanced ecommerce photo editing comes in, adding a layer of polish and realism that can completely change how customers see your brand.
These aren't just flashy effects. Think of them as strategic choices that give your products a high-end, tangible feel. The goal is to make shoppers feel like they can almost reach through the screen and touch the item, building the trust they need to click "add to cart."
Creating Realistic Shadows and Reflections
One of the biggest giveaways of amateur photo editing is a product that looks like it was just pasted onto a white background, floating awkwardly in space. In the real world, objects cast shadows. Adding them back into your images is one of the most important things you can do to create depth and realism.
A well-made drop shadow or a more subtle natural shadow makes the product feel grounded. It tells the customer’s brain that this is a real, three-dimensional object sitting on a surface. The secret is subtlety—the shadow should be soft and believable, not a harsh, dark blob.
Reflections are another powerful tool, especially for specific kinds of products:
- Jewelry: A gentle reflection can emphasize the gleam of polished metal or the brilliant cut of a gemstone, instantly adding a sense of luxury.
- Electronics: For items with glossy screens or polished metal, a faint reflection communicates high-quality materials and a premium finish.
- Cosmetics: A reflection can make a simple bottle of perfume or a jar of cream look more elegant and substantial on the page.
These subtle effects transform a flat, boring picture into a dynamic one, telling a story of quality without you having to write a single word.
Mastering the Ghost Mannequin Effect
If you sell clothing, you know how crucial it is to show how a garment actually fits. Live models are fantastic for lifestyle shots, but your main product photos need to show the item's true shape without any distractions. This is where the ghost mannequin (or invisible mannequin) technique shines.
This effect makes it look like an invisible person is wearing the clothes. It’s the perfect way to display a garment's natural shape, fit, and drape—from both the front and back. You can even see the inside of the collar or cuffs.
The ghost mannequin effect is the gold standard for apparel ecommerce. It gives a 3D view that a simple flat-lay photo can't touch, answering a customer's questions about fit and form before they even have to ask.
Creating this look is a bit of a magic trick. It involves combining two photos: one of the garment on a mannequin, and another shot of the garment turned inside-out to capture the parts that were covered, like the brand tag area on the collar. The two images are blended together to create one seamless, professional photo that helps customers imagine themselves wearing it.
Choosing the Right Technique for Your Product
Not every product needs every advanced trick in the book. It’s all about making smart choices that serve the specific item you're selling. The goal is always the same: present your product as clearly and attractively as you possibly can.
| Product Category | Recommended Technique | Why It Works |
| Apparel & Clothing | Ghost Mannequin | Shows the true fit and shape of the garment without distracting from the item itself. |
| Furniture & Home Goods | Natural Shadow | Grounds the object in the space, giving it a sense of weight and physical presence. |
| Jewelry & Watches | Subtle Reflections | Enhances the shine of metals and facets of stones, conveying luxury and quality. |
| Handbags & Shoes | Drop Shadow & Retouching | Creates depth and removes any minor scuffs from handling, presenting a pristine product. |
Pulling off these advanced edits takes a good amount of skill and a keen eye for detail. For brands that want this level of quality without the steep learning curve, exploring professional product photo editing services is a fantastic option. These pros have the expertise to apply techniques like shadow creation and the ghost mannequin effect consistently across your entire catalog, ensuring every product looks polished and premium.
How AI Is Changing the Game in Photo Editing
Right now, we're seeing the single biggest shift in ecommerce photo editing, and it's all thanks to Artificial Intelligence. If you think of traditional editing as building furniture with hand tools, then AI is like walking into a fully automated, state-of-the-art workshop. It’s not just about working faster—it’s a completely different way of creating.
This technology is taking the mystery out of complex editing and putting serious creative power directly into the hands of store owners. Tasks that once took a skilled professional hours of meticulous work can now be accomplished in seconds with a few clicks.
The numbers behind this shift are stunning. The market for AI image editing tools, currently valued at USD 5.12 billion, is expected to explode to USD 39.7 billion by 2030. That kind of growth signals a massive demand for smarter, more efficient ways to create visual content. For a deeper dive, you can explore the full market research on AI image editing tools.
Automating the Tedious Work
The most immediate win with AI is its knack for automating the most mind-numbing parts of the editing process. Think about removing a background or tracing the outline of a fuzzy sweater. These jobs are slow, repetitive, and demand a ton of patience and a steady hand.
AI tools handle this instantly. They can pinpoint the subject of a photo with remarkable precision and slice away the background, giving you a clean cutout that’s ready for a simple white backdrop or a custom scene. This frees you from hours of grunt work, letting you focus on the bigger picture of your business.
Think of AI as an incredibly efficient assistant. It takes over the most monotonous tasks so you can focus on creative direction. It's not about replacing creativity; it's about amplifying it by removing technical roadblocks.
Generating Entire Worlds from Scratch
Beyond just speeding up old tasks, generative AI introduces something that feels like actual magic: creating brand-new visuals out of thin air. Instead of just tweaking a photo, you can now generate a complete, photorealistic scene around your product.
This is where platforms like ProdShot completely change the game. Let's say you have a basic photo of your product, shot on your phone against a plain wall. You can upload that single image and let AI place it into dozens of professional-looking lifestyle settings.
With a simple text prompt, you can conjure a beautiful, custom background tailored to your product, just like in the example below.
An interface like this turns anyone into a virtual photographer, capable of producing scenes that would otherwise cost a fortune and take weeks to shoot.
The implications for ecommerce brands are huge:
- Cost Savings: You can skip the expense of photographers, models, studio rentals, and props.
- Speed and Scale: Create hundreds of unique images for social media, ads, and email campaigns in minutes, not months.
- Endless Creativity: A/B test different backgrounds and concepts to see what your audience loves, all without spending another dime on production.
Using an AI product photo generator means you're no longer held back by your budget or physical limitations. You can build an infinite library of high-quality, on-brand images, giving you the visual firepower to compete with even the biggest names in your industry. This technology isn't just a tool; it's a creative partner, opening up a world of new possibilities for how you market and sell online.
Optimizing Images for Performance and SEO
So, you’ve put in the work and have a beautifully edited product photo. Fantastic! But here's a hard truth I've learned over the years: a stunning image is only half the battle. If that gorgeous photo is so massive that it slows your site to a crawl, you might as well not have bothered. The final—and absolutely critical—step in any professional ecommerce photo editing workflow is optimizing your images for both web performance and search engines.
Think of it like packing for a trip. You need to bring all your essentials, but you don’t want to be the person dragging a ridiculously oversized suitcase through the airport. Image optimization is the art of making your photo files as small as possible without anyone noticing a drop in visual quality.
Beyond just looking good, your photos need to load in a snap. This is non-negotiable for keeping customers on your site. For a really thorough breakdown, it's worth learning more about optimizing your images for page load speed to really get this right.
Choosing the Right File Format
Your first move is picking the right file type. Each format has its own job, and matching the format to the image is fundamental to balancing quality and file size.
- JPEG (or JPG): This is the go-to format for the vast majority of product photos. JPEGs offer fantastic compression, giving you those small file sizes that are perfect for the web. If your image is a standard photograph with a full range of colors and tones, this is your best bet.
- PNG: Reach for this format when you absolutely need a transparent background. Think logos, icons, or product shots where you want to layer the image over a colored background on your site. Just be aware, PNGs are usually larger than JPEGs, so only use them when transparency is a must-have.
- WebP: This is the new kid on the block, built by Google specifically for the web. It delivers even better compression than JPEG and PNG, which means smaller files and faster pages. Most modern browsers and e-commerce platforms now fully support it, making it an excellent choice.
Image Compression Lossy vs Lossless
After choosing a format, it’s time to compress the image. This is the process of actually shrinking the file size, and you have two ways to do it.
Lossless compression is like a perfect vacuum-seal bag. It squishes the file down by removing redundant data but discards absolutely nothing. When you "unzip" it, the image is identical to the original.
Lossy compression, however, is a bit more aggressive. It intelligently removes bits of data that the human eye isn't likely to perceive anyway. This results in a much, much smaller file, but at the cost of a tiny, often unnoticeable, bit of quality. For almost all photos on your website, a little lossy compression is the ideal path.
The goal is to find that sweet spot. You want to compress the image enough for a speedy load time, but not so much that your product starts to look fuzzy or pixelated. Always, always check the final image before you upload it.
Don't Forget Alt Text and File Names
Finally, there’s more to image SEO than just file size. The way you name your files and the text you pair with them are direct signals to search engines about what's in the picture. This is how you get found in image searches.
- Descriptive File Names: Please, don't upload
IMG_8432.jpg. Give your files meaningful, keyword-rich names. Something likeblue-suede-running-shoes-side-view.jpgtells everyone—and every search engine—exactly what they're looking at. - Alt Text: This is the text that shows up if an image can't load. More importantly, it's what screen readers use to describe the image to visually impaired users. It should be a clear and concise description, like "A pair of men's blue suede running shoes on a white background." This is a huge win for both accessibility and SEO.
Common Questions About Ecommerce Photo Editing
Jumping into ecommerce photo editing always brings up a few key questions. Figuring out the answers early on will save you a ton of headaches, whether you decide to edit photos yourself or look for help. Let's tackle the questions I hear most often from brands.
How Much Should I Budget For Ecommerce Photo Editing?
This is a classic "it depends" situation, but I can give you some solid numbers. The cost really hinges on the path you take. Doing it yourself with software like Photoshop is the cheapest option in terms of cash outlay, but be prepared—it will cost you a significant amount of time.
If you outsource the work, you'll find a huge range. Freelancers and agencies typically charge anywhere from $1 to $15+ per image. The price tag goes up with the complexity of the edits. For a more modern and scalable approach, AI tools like ProdShot use a subscription model. These services strike a great balance between cost, speed, and quality by generating entire scenes and automating the tedious edits, which often means you can skip expensive photoshoots altogether.
What Is The Best Photo Editing Software For Ecommerce?
If you want total creative control and the most powerful toolset on the market, the industry standard is still Adobe Photoshop. For beginners who just need to make simple tweaks without a steep learning curve, Canva is a fantastic starting point.
But honestly, for most ecommerce sellers, specialized AI platforms are quickly becoming the go-to solution. A tool like ProdShot is designed specifically for creating product photos. It's built to automate the most important tasks, like generating backgrounds and creating entire scenes. You get polished, consistent results without needing to be a photo editing wizard.
The secret weapon for most successful brands? It’s a mix. Use a super-clean, marketplace-compliant hero image, then surround it with captivating lifestyle shots on your product pages, in your emails, and across social media to tell a compelling story.
Do All My Product Photos Need A White Background?
Not at all. This is a common misconception. A clean, pure white background is a non-negotiable for your main image on platforms like Amazon and Google Shopping. They have strict rules. But that’s just one piece of the puzzle.
Lifestyle photos that show your product in a real-world setting are absolute gold. They’re what help a customer truly connect with your product and imagine using it themselves. The winning formula is simple: combine a crisp primary image with contextual lifestyle photos to grab shoppers' attention and boost your sales.
Ready to skip the manual editing and create stunning product photos in seconds? With ProdShot, you can take a simple smartphone picture and turn it into a professional, conversion-ready image—no editing skills required. Try ProdShot for free and see just how easy it is to level up your brand's visuals.
Subscribe to my newsletter
Read articles from ProdShot Creator directly inside your inbox. Subscribe to the newsletter, and don't miss out.
Written by