A Modern Product Photography Workflow That Sells
 ProdShot Creator
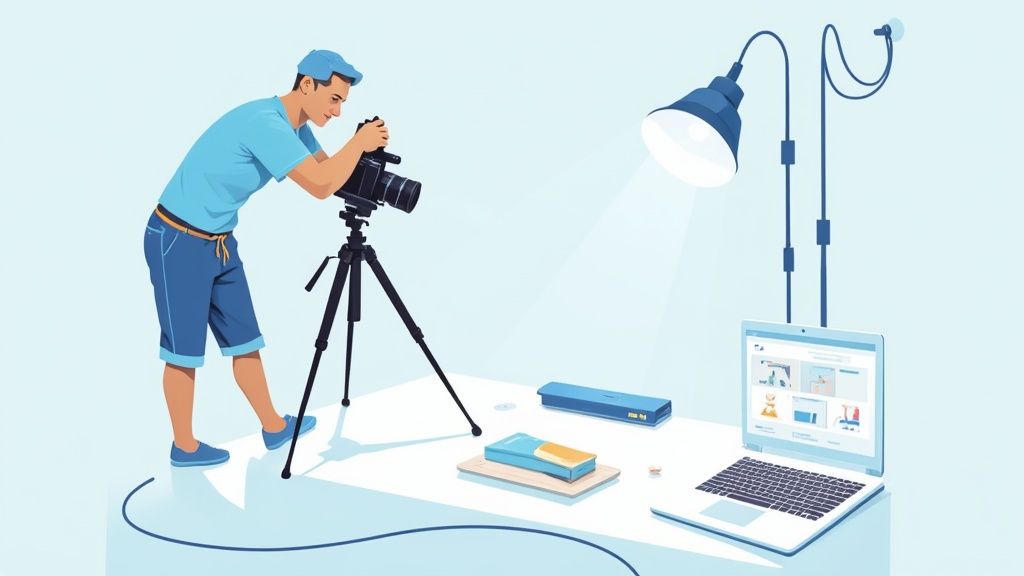
Any seasoned product photographer will tell you that the magic happens long before the shutter clicks. A rock-solid pre-production plan is what truly separates a chaotic, expensive photoshoot from a smooth, successful one. This isn't just about ticking boxes; it's about building a strategic blueprint that guides every creative and logistical decision you'll make.
Building Your Pre-Production Blueprint
Think of it this way: spending a few extra hours in planning can save you days of headaches in post-production. It’s an investment that always pays off.
The pressure to create stunning visuals has never been higher. In fact, the global eCommerce product photography market is on track to hit $1 billion in 2025 and is projected to double to a staggering $2 billion by 2033. This boom isn't just a trend; it confirms that high-quality images are the lifeblood of online sales. You can dig deeper into these market trends over at Business Research Insights.
Crafting a Purpose-Driven Shot List
Your shot list is your roadmap for the entire shoot. A vague list gets you vague, uninspired photos. A detailed, purposeful list ensures every single shot serves a specific goal for your marketing.
To really nail this down, think critically about where each photo will live and what job it needs to do. Your list should include a mix of:
- Hero Shots: These are your bread and butter. Crisp, clean images on a white or neutral background, perfect for marketplaces like Amazon or your main Shopify product page.
- Lifestyle Images: You need to help customers see the product in their world. A watch on a wrist, a speaker on a bookshelf, a backpack out on a hike—these contextual shots sell the experience, not just the item.
- Detail Shots: Get in close. Highlight the quality of the stitching on a wallet, the texture of a hand-thrown mug, or the precision of an electronic component. These shots build trust and show value.
- Scale Shots: How big is it, really? Including a person or a familiar object in a photo gives customers an immediate and clear sense of the product's actual size.
Key Takeaway: A great shot list forces you to think like your customer. What questions do they have? What details would convince them to buy? Your photos need to answer those questions visually.
Developing Your Visual Identity with a Mood Board
Before you even think about lighting, you need a clear visual direction. This is where a mood board comes in. It's simply a collage of images, colors, textures, and even fonts that define the look and feel of your shoot.
A solid mood board gets everyone on the same page—from you to your photographer to a stylist—and guarantees a cohesive set of images that perfectly reflect your brand. To get your creative juices flowing, checking out these essential product photography tips can be a great starting point for your planning.
To make sure you don't miss any critical steps, I've put together a quick checklist that I use before every shoot. It helps keep everything organized and ensures a much smoother workflow from start to finish.
Essential Pre-Production Checklist
| Phase | Key Action | Why It Matters |
| Strategy | Create a detailed shot list. | Ensures every photo has a purpose and meets marketing needs. |
| Creative | Build a comprehensive mood board. | Aligns the entire team on a cohesive visual style and brand feel. |
| Logistics | Source and prep all products and props. | Prevents delays and saves significant time in post-production editing. |
| Preparation | Clean products meticulously. | Removes dust, smudges, and wrinkles, leading to a more professional final image. |
Following these steps provides a strong foundation. This attention to detail is what elevates your images from simple snapshots to powerful sales tools.
Meticulous Product and Prop Preparation
Here’s a piece of advice I can't stress enough: prepare everything meticulously. Every single minute you spend cleaning and prepping your products before the shoot will save you ten times that in Photoshop later. I promise.
Wipe down every item to get rid of fingerprints, dust, and smudges. If you’re shooting apparel or fabrics, make sure they are steamed or ironed perfectly to remove every wrinkle. Check your props and backgrounds to ensure they are clean, undamaged, and fit the aesthetic you defined in your mood board. This is the unglamorous but vital work that separates amateur shots from professional, high-converting product photography.
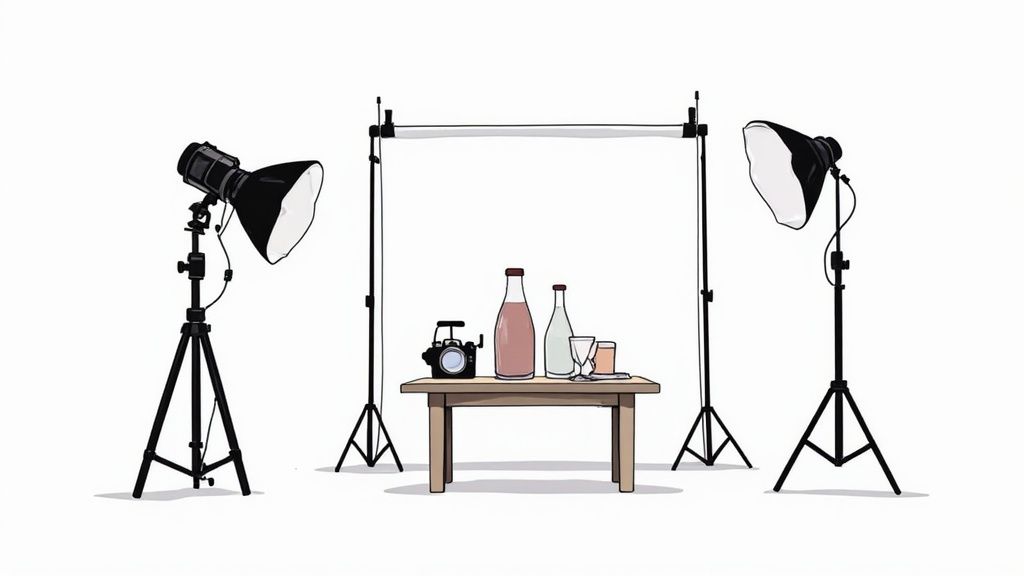
Setting the Scene and Capturing Your Shots
Okay, your pre-production blueprint is ready. Now for the fun part: bringing that vision to life. This is where all the planning pays off and you get hands-on with your camera and lighting. It's time to build your set, dial in your settings, and capture the shots that will make your product shine.
Forget the abstract theory for a moment. This stage is all about physically arranging your set, shaping the light, and making those crucial in-the-moment decisions that dictate the quality of your final images. The goal is simple: get it as perfect as possible in the camera. Nailing this step will make the rest of the process a whole lot easier.
Mastering Your Camera and Lens Choice
Your camera is your main tool, so getting comfortable with its core settings is non-negotiable if you want professional-looking results. The three most important settings are often called the exposure triangle, and they all work together.
- Aperture (f-stop): This setting controls your depth of field—how much of the image is in focus. For a classic hero shot of a single product, you'll want a higher f-stop, like f/8 or f/11, to keep the entire product tack-sharp. If you're going for a more creative lifestyle feel, a lower f-stop like f/2.8 will blur the background beautifully, making your product the undeniable star.
- Shutter Speed: This is all about how long your camera's sensor is exposed to light. Since you should be using a tripod for stability (seriously, use a tripod!), you can get away with a slower shutter speed like 1/60s or even lower. This lets in plenty of light without you having to worry about blurry images from camera shake.
- ISO: Think of ISO as your camera's sensitivity to light. Your rule of thumb here should be to always, always use the lowest native ISO your camera offers. This is usually 100 or 200, and it's the key to getting the cleanest, most detailed, noise-free images possible.
The lens you pick is just as important. A solid 50mm lens is a fantastic, versatile workhorse for a huge range of products. But if you're shooting smaller items with intricate details, like jewelry or cosmetics, you really need a dedicated macro lens (something around 100mm) to capture those fine details that customers zoom in on.
Shaping Light to Create Mood and Detail
I'll say it: lighting is everything in product photography. It's what sculpts your product, defines its texture, and sets the entire mood of the shot. You can definitely use natural light from a big window, but for consistency and total control, artificial light is the way to go.
Softboxes are an absolute game-changer. They diffuse the light from your flash or strobe, creating a soft, even illumination that wraps beautifully around your product and minimizes ugly, hard shadows. Here's a pro tip: the bigger your light source is relative to your product, the softer the light will be. For most e-commerce shots, especially for platforms with strict guidelines like Amazon, the goal is clean, bright, and evenly lit. For more tips on this, check out our guide on professional Amazon product photography.
A common mistake I see is people thinking they just need more light. What you actually need is more control over your light. Using black cards (we call them "flags") to block light and create strategic shadows can add depth and dimension just as effectively as adding another flash.
This diagram shows a simple but incredibly effective studio lighting setup using a softbox and a secondary LED panel.
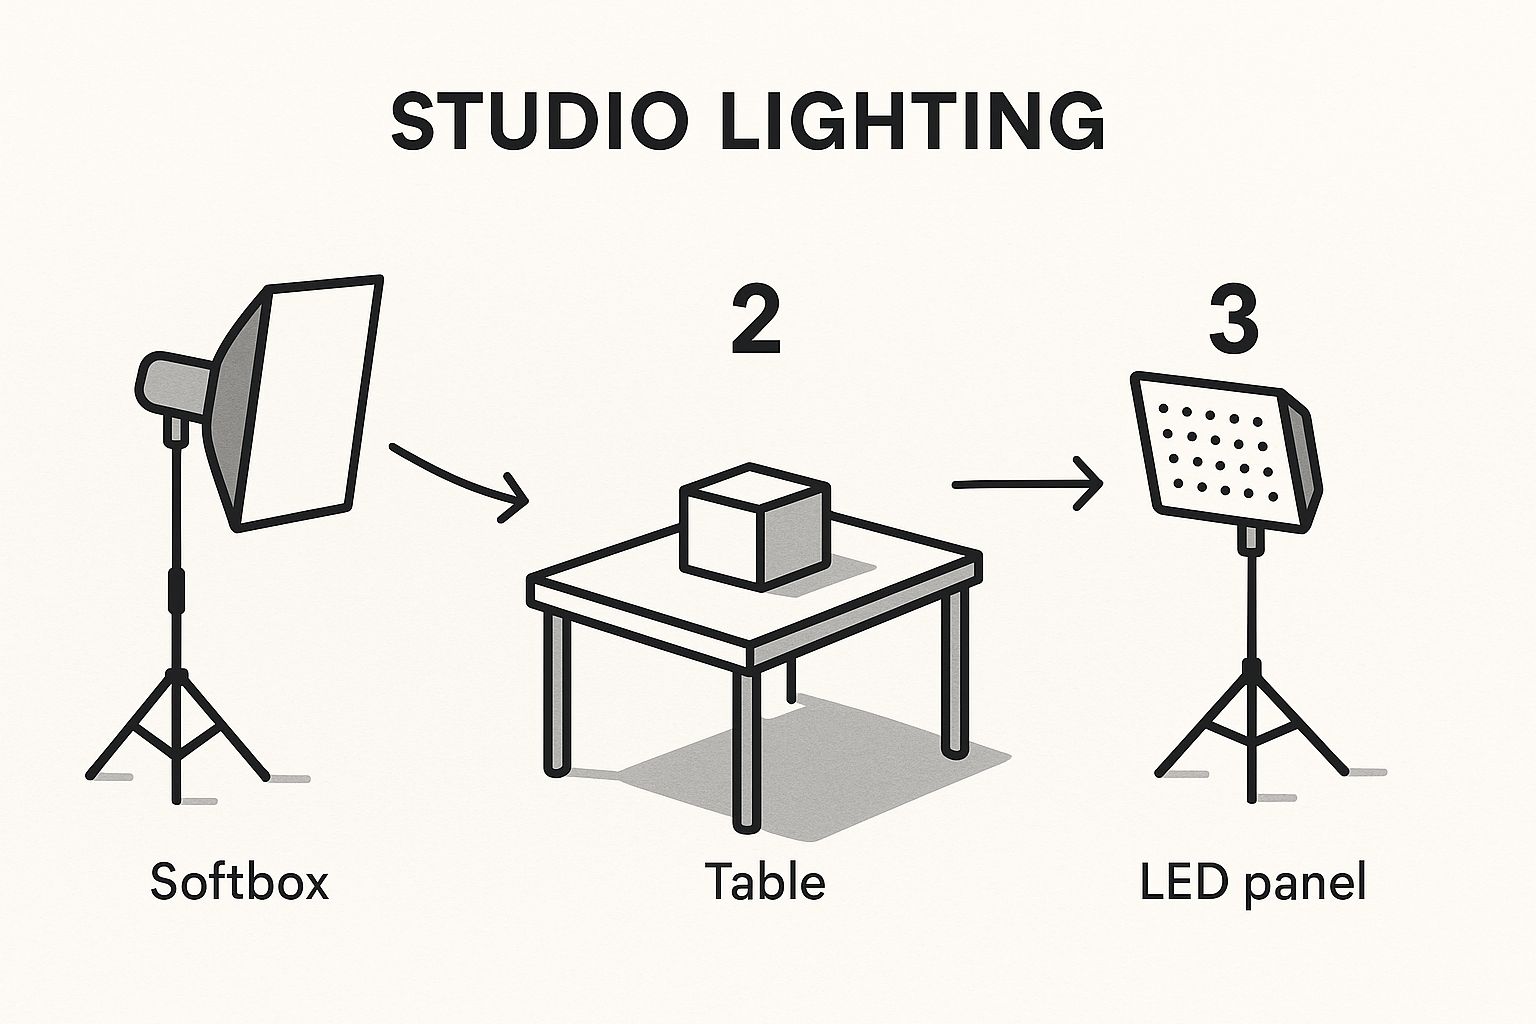
The key thing to notice here is how the lights are placed to create soft, flattering highlights while keeping distracting shadows in check. It's all about intentional placement.
The Efficiency Secret: Tethered Shooting
Now, let me share an insider tip that will completely change how you shoot: tethered shooting. This just means connecting your camera directly to a laptop or tablet so you can see your photos on a big screen the instant you take them.
Think about it. Trying to judge critical focus, lighting, and tiny details on a 3-inch camera screen is a nightmare. It’s practically impossible to get it perfect. Tethering solves this problem immediately.
So, why should you start shooting tethered?
- See Everything Clearly: You can instantly check focus, exposure, and composition on a large, high-resolution display. No more squinting and guessing.
- Collaborate in Real-Time: If you're working with a client or art director, they can see the shots as they happen and give you feedback on the spot.
- Fix Problems Instantly: Spotting an issue and fixing it right then and there is so much faster than discovering a mistake hours later when you're editing.
- Backup As You Go: As you shoot, the image files transfer directly to your computer, which means you have an immediate backup.
For this, I personally rely on software like Capture One, which has incredibly robust tethering tools. You just create a "session" for the shoot, plug in your camera, and every photo you snap pops up on the screen, ready for you to inspect. Making this one small change to your workflow gives you amazing quality control and will save you countless hours in reshoots and editing down the road.
Your Modern Post-Production Playbook
Clicking the shutter is a huge milestone, but it's really just the starting line. What happens next—in post-production—is what turns a good photo into a high-converting asset for your store. This is where you hammer out consistency, add that final polish, and make sure every single image sings your brand's tune.
A modern editing workflow isn't about just noodling with sliders until something looks right. It’s a system. It's a repeatable process built for speed and quality. Whether you're working in powerhouse tools like Adobe Lightroom and Photoshop or a dedicated platform like ProdShot, the core ideas of smart organization and refinement are universal.
The First Cut: Culling Your Images
After any shoot, you’re staring down a mountain of images—hundreds, maybe thousands. The very first thing you need to do is "cull" the collection. It’s a simple concept: pick the winners and ditch the rest. It's tempting to keep everything "just in case," but that's a fast track to digital chaos.
You have to be ruthless here. Your only goal is to eliminate anything that’s out of focus, poorly composed, or a near-duplicate of a much better shot. I always do a quick first pass, flagging or rejecting anything that’s obviously a dud. This initial filter makes the whole task feel much more manageable.
For a second, more careful pass, I'll often apply a basic preset to see the raw potential. This helps reveal which images have the legs to look great after a full edit. Anything that still doesn't make the cut gets deleted. Permanently.
Pro Tip: Don't get emotionally attached during the culling process. Ask yourself one simple question: "Does this image help sell the product?" If the answer isn't a firm "yes," it's time to let it go.
Building Consistency with Batch Editing
Once you have your final selections, it's all about creating a cohesive look. This is where batch editing becomes your secret weapon. Instead of painstakingly editing each photo from scratch, you apply foundational adjustments to the whole group at once.
This process typically involves:
- White Balance Correction: Grab a shot of a grey card from your shoot to set a custom white balance. This is your anchor for accurate colors across every photo.
- Exposure Adjustments: Nudge the brightness of all the photos so they sit at a similar level.
- Lens Corrections: Apply built-in profiles to fix any distortion or vignetting from your lens. It’s a small step that makes a big difference.
- Basic Tone & Contrast: Make some initial tweaks to highlights, shadows, and contrast to establish a baseline look.
Software like Lightroom is literally built for this. Once you nail the settings on a single "hero" image, you can sync those exact adjustments across every other photo in the set. It’s a simple action that brings a professional, uniform look to your entire product line.
New tech and market demands are completely reshaping product photography workflows. The rise of AI-powered editing is a huge part of this, automating tasks like color correction, background removal, and blemish cleanup that used to take hours of manual work. Studios can now push through higher volumes with incredible consistency. You can dig into these photography industry statistics to see just how much the field is changing.
Meticulous Retouching for the Final Polish
With your basic adjustments locked in, it's time to zoom in on the details. We move from batch processing to individual retouching, hunting down the tiny imperfections that can cheapen an otherwise professional shot.
For this stage, a tool with more precision like Adobe Photoshop or Affinity Photo is your best friend. The job list looks something like this:
- Spot and Blemish Removal: Using the clone stamp or healing brush, meticulously zap any dust specks, fingerprints, or minor product flaws you missed during prep.
- Background Cleanup: Even with a seamless paper backdrop, you’ll probably need to perfect it. This could mean extending the background, erasing weird shadows, or doing a full background removal for that pure white e-commerce look.
- Precise Color Correction: Go beyond the initial white balance to make sure the on-screen color is a dead-on match to the real-life product. This step is critical for reducing returns from customers who feel an item was misrepresented.
- Sharpening for Web: The final touch is applying a sharpening filter specifically for on-screen viewing. This makes the details pop and gives the image a crisp, high-end finish.
This meticulous final polish is what separates the amateurs from the pros. It builds trust with your customers and is the last, crucial play in your post-production book.
Getting Your Images Ready for the Spotlight
Taking beautiful pictures is a great start, but it's only half the job. Now comes the part where we turn those great shots into assets that actually drive sales. We need images that load in a flash, look sharp on any screen, and get picked up by Google.
After all, what good is a stunning photo if it slows your site to a crawl or nobody ever finds it? This final step is all about balancing that gorgeous quality with rock-solid technical performance. It’s not just a nice-to-have; for any serious e-commerce store, it’s a must.
Picking the Right File Format for the Job
The file format you save your image in directly affects its quality, file size, and ultimately, your site's speed. There isn't one "best" format for everything. The secret is knowing which one to use for which situation.
- JPEG (or JPG): Think of this as your go-to for most product photos. It's fantastic at compressing images with lots of colors and detail—like a lifestyle shot of a model wearing your product—into a small file without a noticeable drop in quality.
- PNG: This is your hero when you need a transparent background. Did you just spend time carefully cutting out your product from its original background? You'll want to save it as a PNG to keep that background transparent. The trade-off is that PNG files are usually quite a bit larger than JPEGs.
- WebP: This is the new kid on the block from Google, and it’s a game-changer. WebP offers the best of both worlds—it delivers incredible quality and supports transparency, but at a fraction of the file size of a JPEG or PNG. Most browsers support it now, so it’s an excellent choice for speeding up your site.
So, for a standard product shot on a plain white background, a well-optimized JPEG or a WebP is your best bet. For a logo or an image you plan to layer over other graphics, go with a PNG or WebP.
Compression and Sizing: The Balancing Act
Nothing kills a user's patience—or your search rankings—faster than a slow-loading page. And the number one culprit is almost always massive, unoptimized images. Uploading a photo straight from your camera is a performance killer.
The goal here is to find that perfect sweet spot: the absolute smallest file size you can get away with before you can see any dip in quality.
I always tell my clients to aim for under 200 KB for their product images, but if you can get them under 100 KB, you're in the goldilocks zone. It sounds aggressive, but it's totally doable.
Before you compress anything, resize the image first. Does your product page really need a photo that's 6000 pixels wide? Nope. For most product pages, 1500 to 2000 pixels wide is more than enough. Once it's resized, then you can run it through a compression tool to shrink the file size. If this all sounds like a lot of manual work, remember that our photo editing services for ecommerce can handle all of this automatically, saving you a ton of time.
Smart File Naming and SEO for Visibility
This is one of those simple habits that pays off big time. A filename like IMG_8472.jpg doesn't do you, or Google, any favors. A smart, consistent naming system keeps you organized and gives your SEO a nice little nudge.
Think of it like labeling a file folder. You want it to be descriptive.
Don't do this: DSC00123.jpg
Do this instead: blue-wool-sweater-crewneck-front.jpg
See the difference? Now you—and Google—know exactly what that image is about just by reading the filename. It makes finding assets a thousand times easier and helps you show up in image searches.
Finally, don't neglect your alt text. This is the text that shows up if an image breaks, and it's what screen readers use to describe the image to visually impaired users. It’s also a huge signal to search engines. Make your alt text a clear, simple description of the photo.
Once you have this technical workflow down, you can focus on the creative side of things and learn how to take perfect shots that sell, knowing your visuals are set up for success.
Using Advanced Tools to Level Up Your Workflow
Once you’ve got the basics down, it’s time to start thinking about how to work smarter, not just harder. This is where you move from taking one-off product photos to building a scalable, professional production line. It's about bringing in advanced tools and techniques to handle the repetitive stuff, so you can focus on quality and crank out more work.
The real trick is to stop treating every shoot like a brand new project. Instead, you need a repeatable, optimized system. Applying the principles of process standardization to your photography can be a game-changer. You're essentially building a machine that spits out consistent, high-quality images every single time.
Automate Your Look with Presets and Actions
Ever wanted to apply your signature brand style to a whole batch of photos in one click? That's exactly what presets in a program like Adobe Lightroom are for. A preset is just a saved recipe of your editing settings—things like exposure, contrast, and color grading.
When you develop a core set of presets that match your brand’s look, you guarantee every photo feels like part of the same family. It doesn't matter if it was shot yesterday or last year. This consistency is what builds a recognizable brand and a polished, professional storefront.
Photoshop Actions take this idea even further. An "action" is literally a recording of steps you can play back on any image. Think about all the boring, repetitive tasks you do for every single photo:
- Resizing for specific website dimensions.
- Popping a small watermark in the corner.
- Adding that final touch of sharpening for the web.
- Saving out a JPEG and maybe a WebP version.
Instead of clicking through that sequence dozens or hundreds of times, you record it once. After that, a single click does it all for you. This saves an incredible amount of time and, just as importantly, cuts down on simple mistakes.
Nailing Perfect Detail with Advanced Capture Techniques
A single photo can't always do a product justice. This is especially true for items with a lot of depth, like a stack of books, a long necklace, or a complex piece of tech. When you need every last detail to be tack-sharp, you need to use focus stacking.
Here’s how it works: you set your camera on a tripod and take multiple shots of the product without moving the camera. For each shot, you just change the focus point slightly—one on the front, one on the middle, one on the back.
Then, you bring those images into software like Photoshop or Affinity Photo and let it automatically blend them together. The software takes the sharpest parts of each photo and merges them into one final image that’s perfectly crisp from front to back.
For high-end products like jewelry, watches, or intricate electronics, focus stacking isn't just a nice-to-have; it's a necessity. It’s the best way to scream “premium quality” and show customers every single detail they’re paying for.
Cloud Collaboration and Getting Files Where They Need to Go
These days, the job isn’t finished until the client has the final images in hand. Cloud tools have made this part of the process a breeze. Instead of messy email threads, you can use a platform like Frame.io or even shared albums in Lightroom to send a gallery for review. Clients can leave comments right on the images, making feedback quick and clear.
Better yet, specialized software can automate the final handoff. Imagine a system where a client-approved image is automatically resized and formatted for Shopify, Amazon, and Instagram, then sent straight to the right cloud folders. Tools like ProdShot are built for this, turning a tedious manual process into an automated delivery system that helps get your products on the market that much faster.
Common Questions About Product Photography Workflows
Even the most well-oiled product photography machine hits a few snags. As you start putting your workflow into practice, questions will inevitably come up. Getting straight answers to these common hurdles can save you a ton of frustration and help you create better images, faster.
Let’s dig into some of the most frequent questions we hear from e-commerce sellers trying to master their product shots.
What Is the Most Important Part of the Workflow?
This might surprise you, but the single most impactful stage is pre-production and planning. It’s not the most glamorous part, I know. It feels like you're not making progress. But this is where true efficiency is born.
A thoughtful plan—complete with a detailed shot list and perfectly prepped products—is what separates a chaotic, expensive shoot from a smooth one. Skipping this step almost always means you'll pay for it later, trying to fix easily avoidable problems in post-production.
How Can I Ensure My Product Colors Are Accurate?
Getting true-to-life color is non-negotiable. It has a direct impact on customer trust and, ultimately, your return rates. There's no single magic button for this; it's a disciplined, three-part process.
- Use a Reference on Set: The first step is to shoot a grey card or a color checker in your exact lighting setup. This gives your editing software a perfectly neutral target to calibrate from.
- Calibrate in Post-Production: Once you're editing, use the "white balance selector" tool (the eyedropper) and click on the grey card in your reference photo. This one click corrects for any color cast from your lights, instantly neutralizing the colors for every photo you took in that setup.
- Calibrate Your Monitor: This is the step everyone skips, and it’s a huge mistake. If your monitor’s colors are off, you'll make incorrect edits without even realizing it. A hardware calibration tool ensures that what you see on your screen is what your customers will see.
An uncalibrated screen is like trying to mix paint colors in the dark. You're just guessing, and it undermines all the careful work you did during the shoot.
How Many Photos Should I Take for Each Product?
For most online stores, the sweet spot is 5-7 images per product. This variety gives customers the confidence they need to buy something they can't physically touch. A solid shot list usually covers these bases:
- A crisp "hero shot" on a clean white or neutral background.
- Several alternate angles showing the sides, back, and top.
- A lifestyle shot showing the product in a real-world context.
- A scale shot, maybe next to a common object, to help people visualize its size.
- Close-up detail shots that highlight texture, materials, or special features.
If you’re selling something more complex, like electronics or apparel with intricate details, you might need even more shots to really show off its value.
What Is the Best Way to Speed Up My Editing?
The secret to a faster editing workflow is to stop editing photos one-by-one and start thinking in terms of batch processing and smart automation.
Software like Adobe Lightroom is perfect for this. You can sync basic adjustments—like exposure and white balance—across an entire set of photos at the same time. Creating custom presets for your brand's look can apply a complex style with a single click. For really repetitive tasks like resizing or adding a watermark, recording "Actions" in Photoshop can turn a dozen tedious steps into an instant process.
The time you invest upfront to build these systems pays for itself over and over again. It slashes your editing hours, boosts consistency, and has a big impact on the overall cost of professional product photography, where time is quite literally money.
Ready to skip the learning curve and get stunning, sales-driving images in seconds? ProdShot uses advanced AI to transform your simple smartphone photos into professional-grade product shots automatically. Forget studios, complex software, and expensive photographers. Try it for free and see how easy it is to elevate your brand. Get started at https://prodshot.net.
Subscribe to my newsletter
Read articles from ProdShot Creator directly inside your inbox. Subscribe to the newsletter, and don't miss out.
Written by