How to Export a Complete Webflow Site Including CMS Content Easily
 The Lean Ecommerce
Unlock the Full Potential of Your Webflow Site by Exporting CMS Content Seamlessly
Webflow is a robust platform known for enabling designers and developers to craft visually stunning websites without extensive coding knowledge. However, even with its flexibility, Webflow’s limitations on exporting CMS content can be a significant hurdle for many users. Fortunately, ExFlow offers a revolutionary solution that can help you overcome these limitations and manage your site with greater control and flexibility.
Why Export Your Webflow Site?
Exporting your Webflow site provides several advantages:
- Cost Efficiency: Save on Webflow’s hosting fees by choosing your preferred hosting solution.
- Customization: Completely customize your site’s appearance and functionality beyond the Webflow interface.
- Autonomy: Host your site on any platform, granting you peace of mind and complete ownership of your content.
- Integration: Easily integrate with other tools and platforms due to increased flexibility.
Image: Exploring the real-world applications of Webflow for creating stunning websites.
How to Export Your Webflow Site with ExFlow
Step 1: Initiate the Export Process
Begin by visiting ExFlow. Input the URL of your Webflow site into the designated field. This will initiate the process of preparing your site for export.
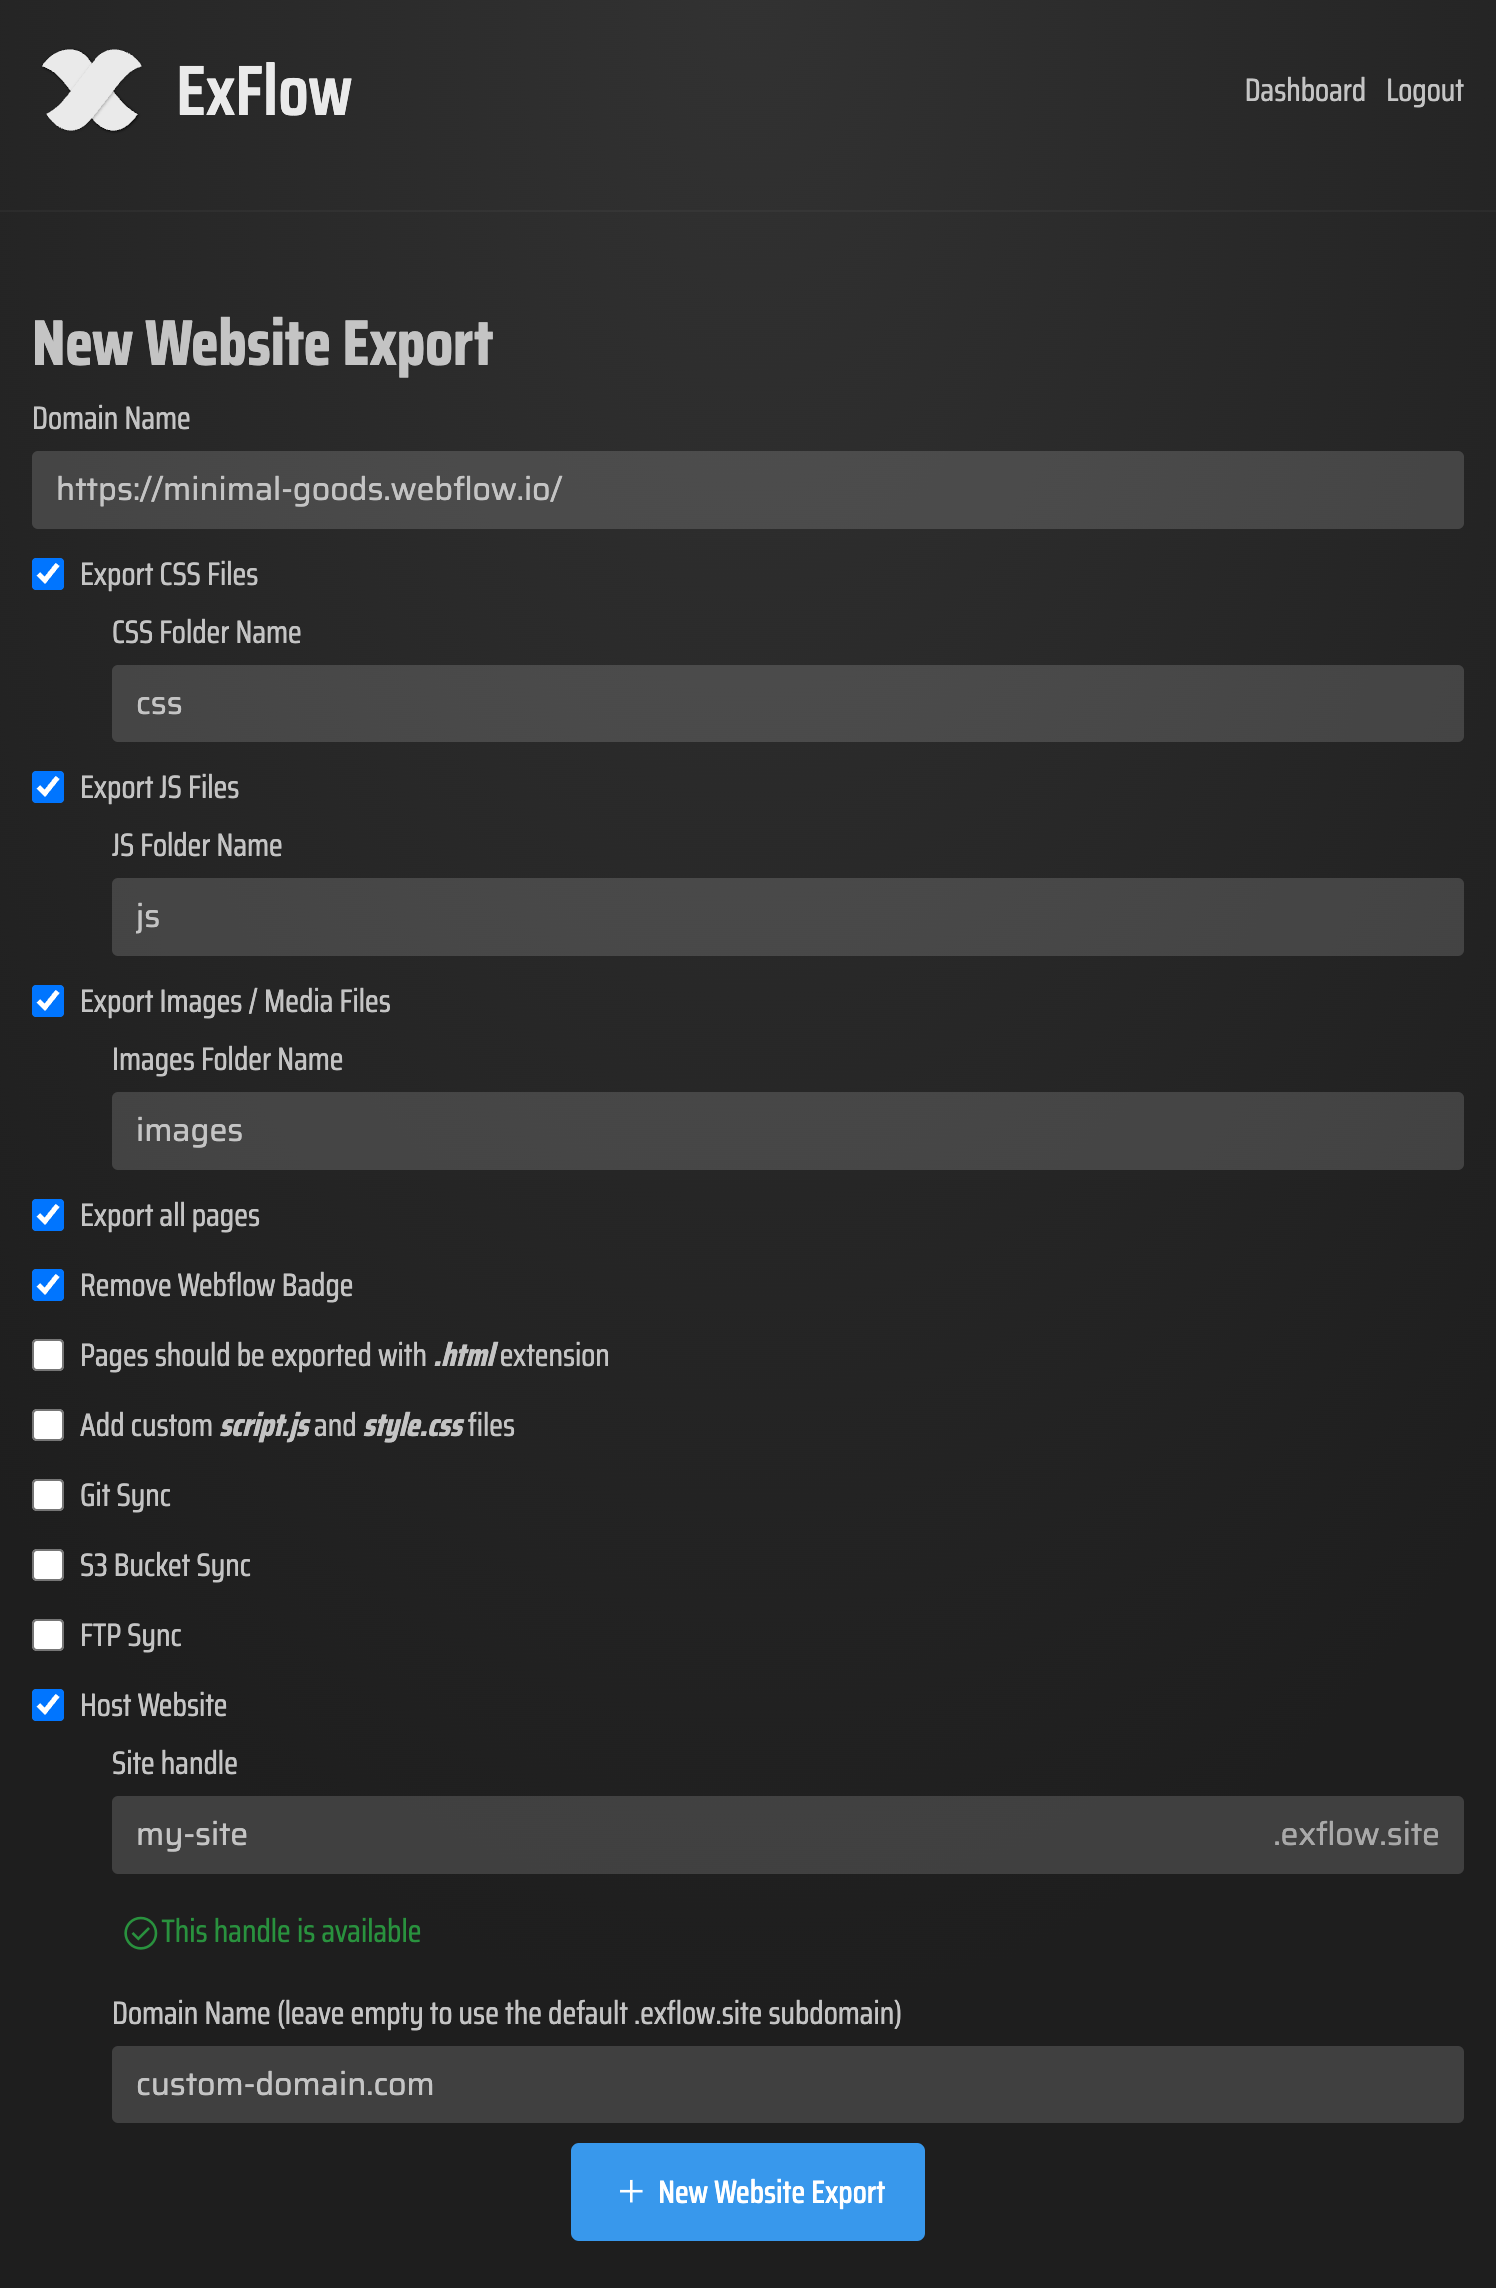
Step 2: Customize Your Export Settings
ExFlow enables you to choose the specific components you wish to export:
- CSS and JS files for complete styling and interactive functionality.
- Images and media, ensuring all your visual assets are included.
- CMS content, which is not possible with standard Webflow export.
- Removal of the Webflow badge for a cleaner, professional appearance.
Example Video: Export a Webflow Site for Free + Badge Removal
Step 3: Review and Download
Once you’ve customized your settings, proceed to review the settings and start the export process. ExFlow will package all your selected files into a downloadable zip, complete with all necessary assets and pages.

Step 4: Host Your Exported Site
Choosing Your Hosting Platform
ExFlow's Servers: For simplicity, you can opt to host directly on ExFlow’s powerful servers. This method ensures a streamlined process with support for linking external domains.
Amazon S3: Ideal for static sites. Create an S3 bucket in AWS, enable website hosting and upload the files using ExFlow’s sync feature.
Git Hub and Netlify: Perfect for those utilizing Git for version control and deployment. Use ExFlow’s Git sync for automatic repository updates.
FTP Servers: Utilize traditional web hosting by syncing your files to an FTP server, offering conventional web hosting options.
Example Video: How to Sync Webflow with GitHub
ExFlow's Advanced Features
- Syncing Options: Automate transfers to Git, S3, or FTP servers, making updates and deployments simpler.
- Custom Additions: Include custom scripts and stylesheets during export, enhancing functionality and appearance.
Conclusion
Exporting your Webflow site, including CMS content, opens avenues for greater customization, cost savings, and control. ExFlow serves as a vital tool in facilitating this process with ease. This user-friendly export tool provides the flexibility you need to elevate your website game without the constraints of traditional Webflow limitations.
Ready to take control of your Webflow site? Visit ExFlow today and discover how simple managing your site can be.
Some images in this article were generated via AI tools and the article itself was proof-read with AI.
Subscribe to my newsletter
Read articles from The Lean Ecommerce directly inside your inbox. Subscribe to the newsletter, and don't miss out.
Written by