Mastering Waterfall Photography: Expert Tips and Enhancing
 HitPaw FotorPea
Waterfall photography, whether capturing a plunge or horsetail waterfall, adds life to the picture and is seen as therapeutic, but it presents challenges like overexposed highlights or unwanted motion blur.
If you want to avoid these problems when taking waterfall photos, this article will show you all the techniques you need to know. We will also introduce you to an upscaling tool to improve your photos after taking them.
Part 1. Planning Your Waterfall Photography Session
To make your waterfall portraits clear and appealing, you need to plan before shooting with an expert’s techniques, which are as follows:
A. Researching Locations
To avoid wasted trips and capture the best possible pictures, you should explore the location before shooting. One can use tools like “Google Earth”, “Gaia GPS”, and “PeakVisor” to check if they are accessible or not. Also, check the seasonal waterfall activity to determine which waterfall flows on your shoot date.
B. Choosing the Right Time
Selecting the right timing makes a huge difference in your waterfall pictures, as one can opt for overcast days with soft lighting. Additionally, you can use golden hours, like “Before Sunset and After Sunrise,” for warmth and depth in pictures. Photographers can also shoot on rainy days since it increases water flow and makes the waterfall more photogenic.
C. Weather Considerations
Since most waterfalls are in remote areas, one should consider the weather updates before planning a shoot. Unlike sunny days, cloudy conditions will enhance the quality of your waterfall photoshoot by providing even lighting. However, wet weather means slippery rocks and muddy trails; one should wear proper shoes and weather-resistant gear to avoid any issues.
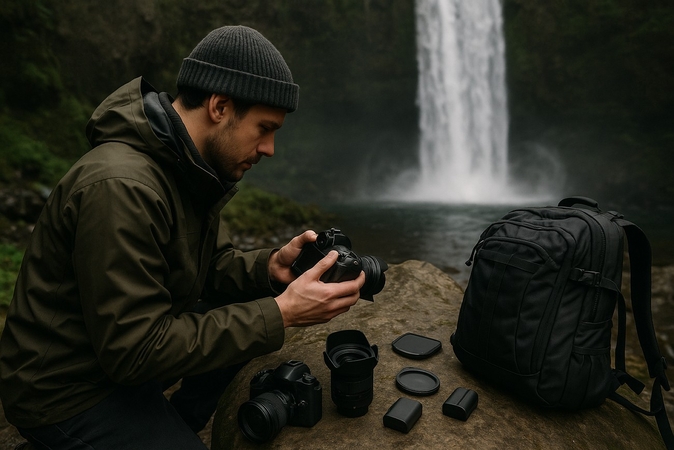
Part 2. Essential Gear for Waterfall Photoshoot
Once you have planned your shoot, it’s time to choose the right gadgets for photography. Hence, here is the equipment you should know for a fantastic waterfall photoshoot:
A. Camera Recommendations
Choose a mirrorless camera as they are lightweight, have exposure preview, and stabilization for long pictures. To help you pick the right one, here is a breakdown of ideal mirrorless cameras with detailed specifications:
| Camera Name | Feature | Price Range |
| Canon EOS R8 | Full frame, lightweight, complete auto focus | $1,300 - $1,600 |
| Nikon Z6 II | Full frame, excellent dynamic range | $1,600 - $2,000 |
| Sony A7 IV | Full frame, superb image quality | $2,500 - $2,800 |
| Fujifilm X-T5 | APS-C sensor, excellent color science, compact | $1,700 - $1,900 |
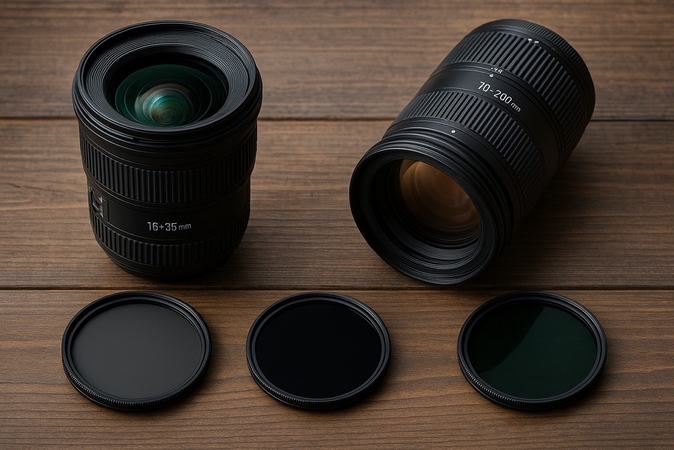
B. Lenses and Filters
Lenses are used to control the composition of your pictures, while filters control light and improve image clarity. Photographers can choose a wide-angle lens (16-35mm) to capture the waterfall along its surroundings, while a Telephoto lens (70-200mm) captures each detail in close-ups. Whereas, filters like ND (6 stops, 10 stops) lessen over-exposed pictures and Circular Polarizer finish reflection to enhance waterfall portrait quality.
C. Tripods and Other Accessories
For waterfall photography, a tripod is important as it helps in stability to get the smoothest waterfall shots, mainly for long exposure. Other than that, you can use other accessories like “Waterproof Camera kits”, “Remote Shutter”, or “Camera Timer” to protect your gear and capture shake-free shots.
Part 3. Mastering Camera Settings for Waterfall Photography
As we have discussed techniques to plan your shoot, let's dive into waterfall camera settings that will help you shoot with clarity and aesthetically:
A. Exposure Modes and Shutter Speed Guidelines
Among 2 exposure modes, consider Manual for full control over images, but for managing motion effects, use Shutter Priority mode. Other than these settings, utilize 1/4 to 2 seconds shutter speed for silky water flow, or go for 1/250 seconds and faster to freeze motion sharply.
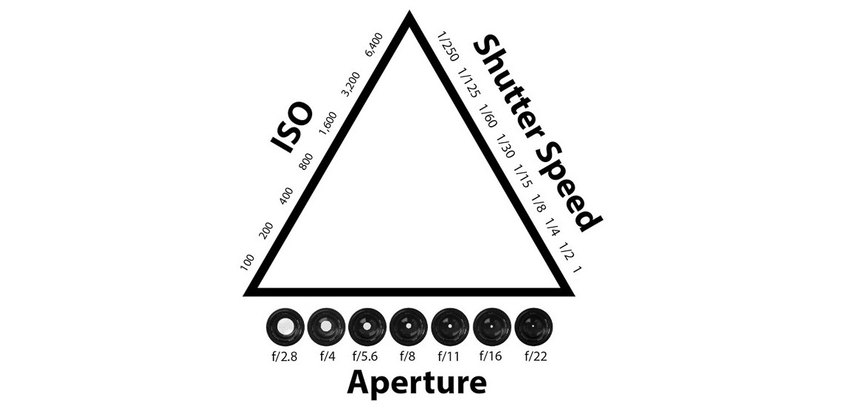
B. Aperture, ISO Settings, and White Balance
One can use f/8 to f/16 to get the depth while ensuring the waterfall and its surroundings remain in focus. Also, you can keep your ISO 100 or below to minimize noise while keeping the white balance too cloudy for warmer and richer tones.
Part 4. Enhance Natural Waterfall Pictures With HitPaw FotorPea
Imagine you planned your shoot with proper techniques, the right cameras, and necessary settings, but are not satisfied with the results. It's possible that your picture gets blurry or experiences dark lightning due to uncertain weather conditions. The only solution to address this situation is to use photo-enhancing tools like HitPaw FotorPea (formerly HitPaw Photo Enhancer), which uses AI technology to upscale images.
Key Features
1. Use its Denoise Model to remove grainy or unwanted noise from your waterfall photos.
2. Its Upscale Model enhances the waterfall photoshoot without losing its original quality.
3. Using the Blur Repair mode, you can easily make your waterfall photos less blurry.
4. Its Colorize Model adds colors to your black and white waterfall pictures.
5. It allows you to enhance all your waterfall photographs in a single take through batch processing.
Steps to Upscale and Enhance photos of waterfalls with FotorPea
After learning the techniques to shoot pictures of waterfalls and mountains, let’s see how you can upscale your waterfall images with this image enhancer.
Step 1. Launch the App and Select Photo Enhancer
After accessing the app’s newest version, begin editing by selecting the “Enhance Photo Now” button in the main interface.

Step 2. Fetch your Image from the Device to Start Enhancing
Now, from the following interface, hit the “+” icon to import the photo from File Explorer to your tool.

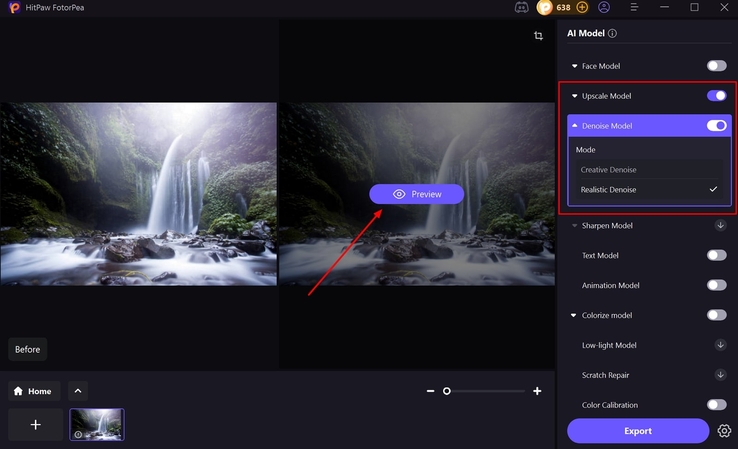
Step 3. Activate AI Models and Preview
As you have imported your file, toggle the “Denoise Model” and “Upscale Model” before you click the “Preview” button to enable the tool enhance your image.
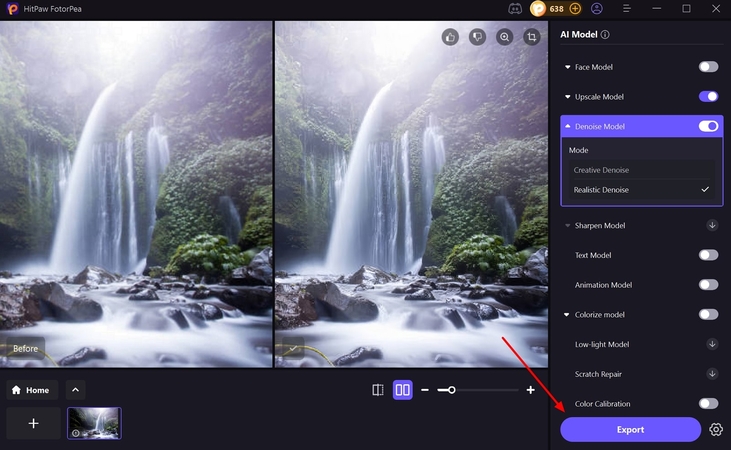
Step 4. Execute the Export Command
Once the desired outcome is ensured, press the “Export” button to save the photo in the file explorer.
Subscribe to my newsletter
Read articles from HitPaw FotorPea directly inside your inbox. Subscribe to the newsletter, and don't miss out.
Written by
HitPaw FotorPea
HitPaw FotorPea
HitPaw FotorPea Photo Enhancer helps you effortlessly improve photo clarity, remove noise, and upscale image details using advanced AI technology. Whether your pictures are blurry, old, or low-resolution, you can make them look sharp and vibrant in just one click.