Bridge the Gap: Seamless Telegram Automation with n8n and Pinggy
 Lightning Developer
In today's fast-paced digital landscape, automating workflows that connect messaging platforms like Telegram with other services has become indispensable for businesses and developers alike. n8n offers a robust platform for crafting these automations, while Telegram provides an intuitive interface for user interaction. However, a common hurdle arises when developing locally: connecting Telegram webhooks to a self-hosted n8n instance. Telegram mandates HTTPS endpoints, posing a challenge for local development environments. This is precisely where Pinggy steps in, offering immediate HTTPS tunnels to your local setup without the burden of intricate configurations.
A Quick Start Guide to Your Automated Telegram Bot
Setting up your Telegram automation with n8n and Pinggy can be done swiftly. Here's a concise overview:
Create your Telegram bot: Use the
/newbotcommand via BotFather.Expose n8n with Pinggy: Open your terminal and run
ssh -p 443 -R0:localhost:5678qr@free.pinggy.io. This provides an HTTPS URL for your local n8n instance.Install n8n and configure the webhook URL: Execute
npm i n8n -g && WEBHOOK_URL="https://your-pinggy-url.a.pinggy.link" n8n start. Remember to replace"https://your-pinggy-url.a.pinggy.link"with the actual URL Pinggy provides.Configure the Telegram Trigger node: Within n8n, add a Telegram Trigger node and input your bot token.
Set the webhook: Use the Telegram Bot API to set your webhook:
https://api.telegram.org/bot<token>/setWebhook?url=<webhook_url>.Add a response node: Include a Telegram node to send messages back to the user, using
={{$json["message"]["chat"]["id"]}}for the Chat ID.Execute and test: Run your workflow and send the
/startcommand to your Telegram bot to verify functionality.
For more inspiration, you can explore various n8n workflow templates to kickstart your automation journey.
Powering Up with Telegram and n8n
The synergy between Telegram's versatile Bot API and n8n's visual workflow automation unlocks a world of possibilities for businesses and developers. This integration allows for the creation of sophisticated automation systems capable of managing customer inquiries, processing data, dispatching notifications, and integrating with hundreds of other services.
Real-time communication: Telegram bots deliver instant messaging, making them ideal for urgent notifications, alerts, and immediate customer interactions.
Rich media support: Beyond basic text, you can transmit images, documents, location data, and interactive keyboards, enhancing the user experience.
Scalable automation: n8n's visual workflow builder empowers you to construct intricate automation logic without extensive coding. For specific needs, custom JavaScript can be seamlessly integrated.
Preparing Your Development Environment
Before diving into the specifics of Telegram integration, it's essential to prepare your local development environment.
Prerequisites
Ensure the following are installed and configured on your system:
Node.js (v16 or above): Verify your version with
node -v.npm (comes with Node.js): Check your version with
npm -v.Docker (optional): If you prefer containerized environments, confirm installation with
docker -v.SSH client: Most systems have this pre-installed.
Telegram Bot Token: This is obtained by creating a bot through @BotFather and is crucial for connecting your bot to n8n.
Creating Your Telegram Bot
Every Telegram integration begins with creating a bot using BotFather:
Open Telegram and search for "@BotFather."

Initiate a conversation and send the command
/newbot.
Follow the prompts to name your bot and create a unique username.

BotFather will then provide an API token, such as
123456789:ABCDefGhIJKlmNoPQRsTUVwxyZ. This token is vital for authenticating your bot with Telegram's servers and enabling n8n to exchange messages.
Exposing n8n with Pinggy for Seamless Webhook Integration
A significant challenge in local n8n development is that Telegram webhooks necessitate HTTPS endpoints, while your local instance typically runs on HTTP. Traditional solutions often involve complex SSL certificate setups or reliance on paid tunneling services.

Pinggy elegantly addresses this by providing instant HTTPS tunnels with a single command:
ssh -p 443 -R0:localhost:5678 qr@free.pinggy.io

After entering your token, this command establishes a secure tunnel from Pinggy's servers to your local n8n instance. This provides you with an HTTPS URL, for example, https://randomstring.a.pinggy.link, which Telegram can utilize for webhooks.
The advantages of using Pinggy include:
Instant setup: No configuration files or complicated setup procedures are required.
Automatic HTTPS: SSL certificates are managed automatically.
Reliable connection: It includes built-in reconnection and keepalive features.
No downloads required: It operates with a standard SSH client.
Installing n8n Locally
With your Pinggy tunnel established, the next step is to install and configure n8n to work with it. You can choose to run n8n using npm or Docker.
Option 1: Using npm
To install n8n globally:
npm install n8n -g

Then, start n8n with your Pinggy webhook URL:
WEBHOOK_URL="https://your-pinggy-url.a.pinggy.link" n8n start
Important: Ensure you replace "https://your-pinggy-url.a.pinggy.link" with the actual URL provided by Pinggy. Setting the WEBHOOK_URL environment variable is crucial for Telegram webhooks to function correctly.
Option 2: Using Docker
If you prefer Docker, use the following command:
docker run -it --rm --name n8n \
  -p 5678:5678 \
  -e WEBHOOK_URL="https://your-pinggy-url.a.pinggy.link" \
  n8nio/n8n
Once n8n is running, open your browser and navigate to http://localhost:5678 to access the n8n interface. You will be prompted to create an account before you can begin building your automation workflows.
Configuring the Telegram Integration in n8n
With your tunnel in place, you can now configure the Telegram integration within n8n.
Adding the Telegram Trigger Node
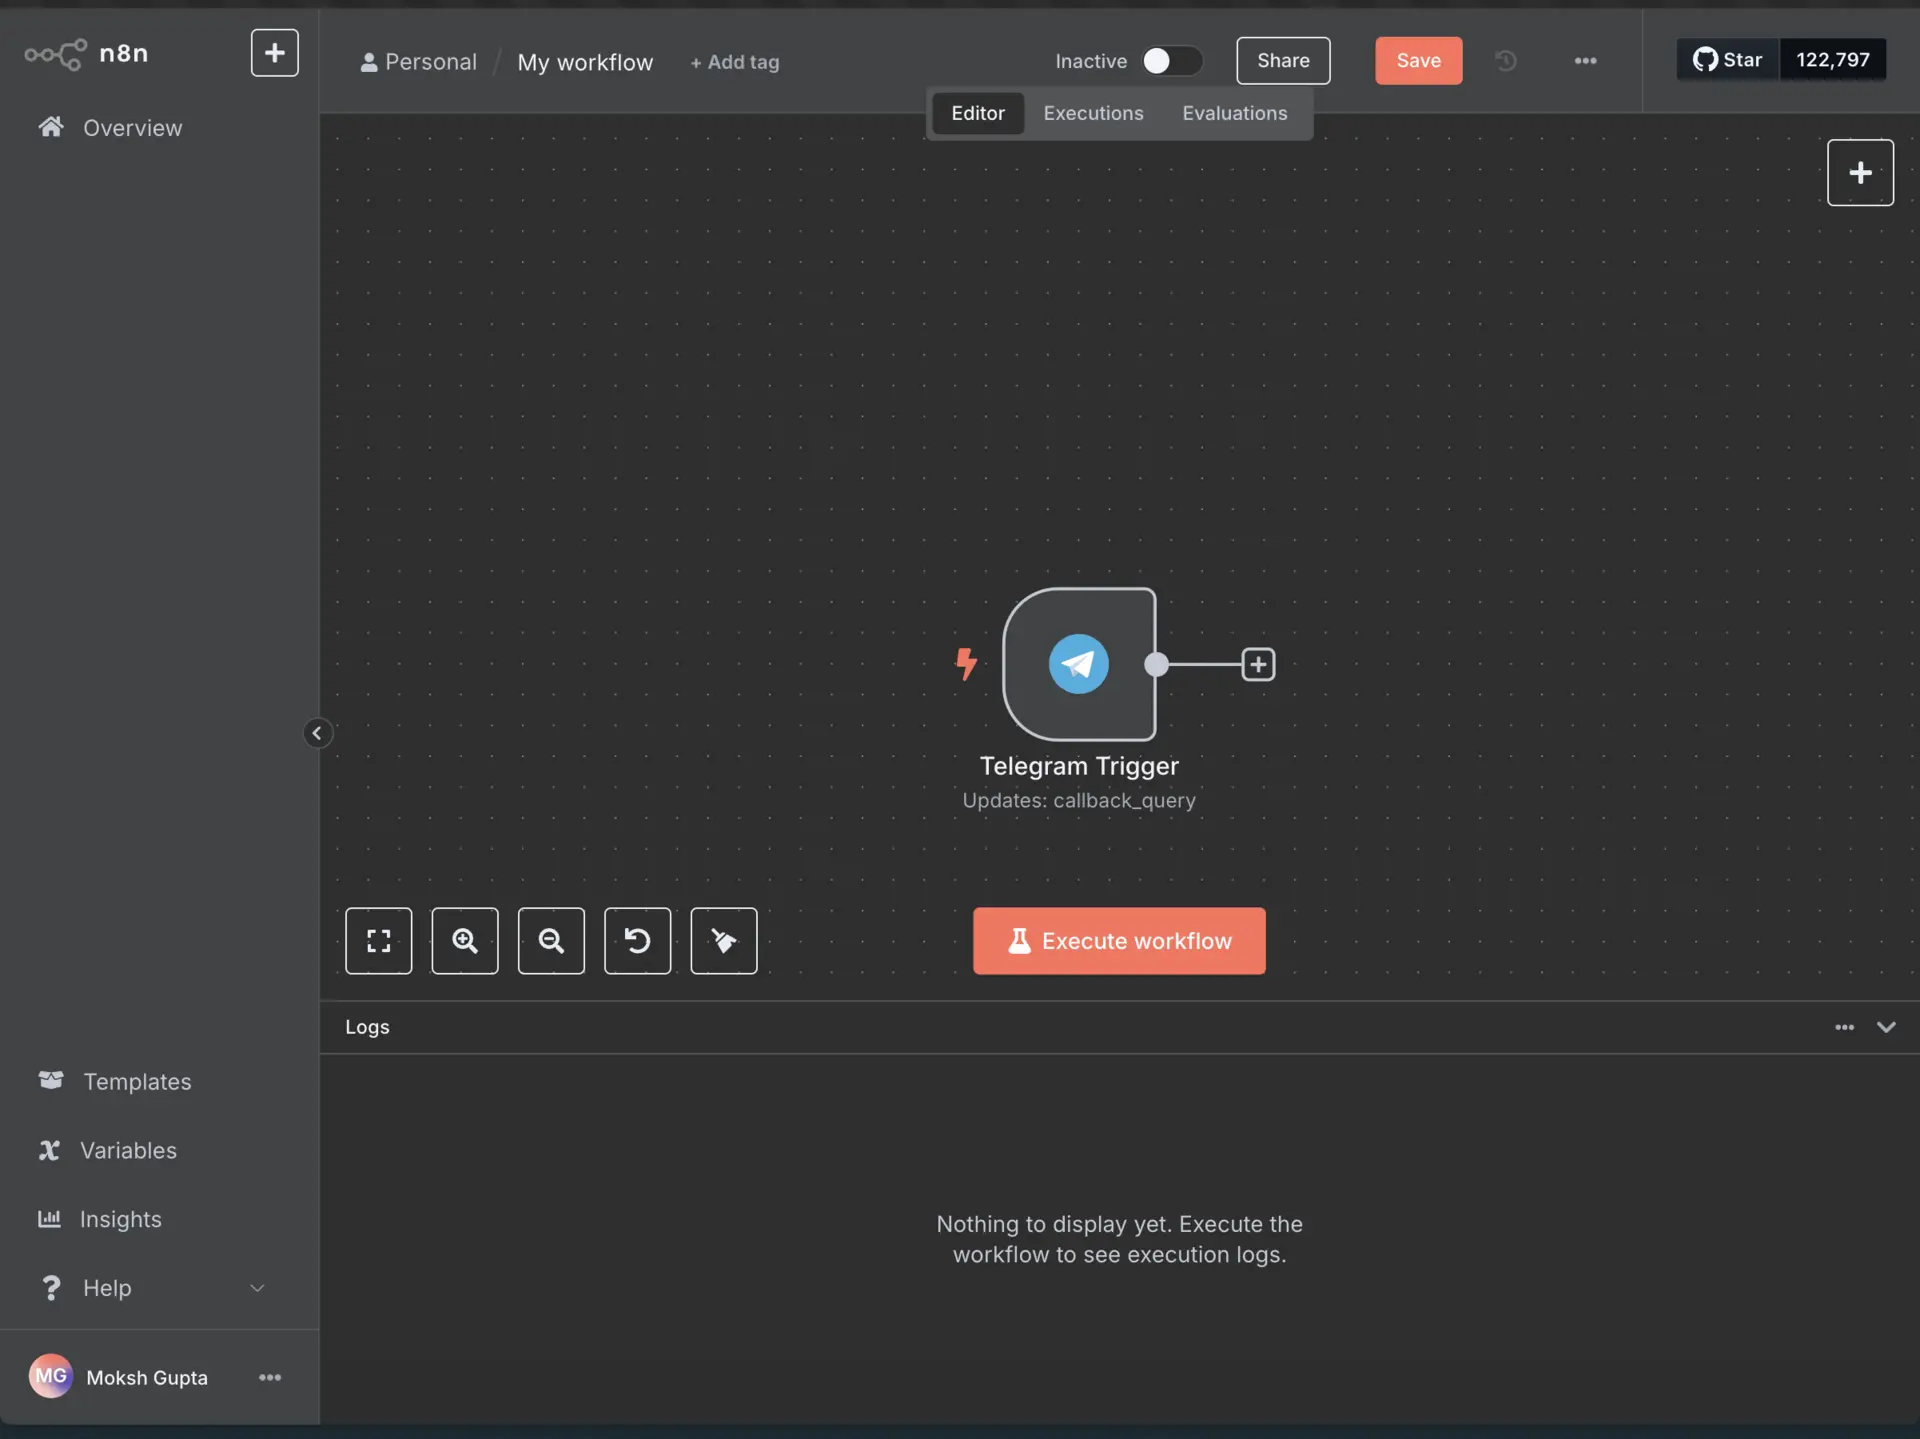
Create a new workflow in n8n.
Add a "Telegram Trigger" node from the node palette.

Click on "Create New Credential" next to the credentials dropdown.
Enter your bot token obtained from BotFather.
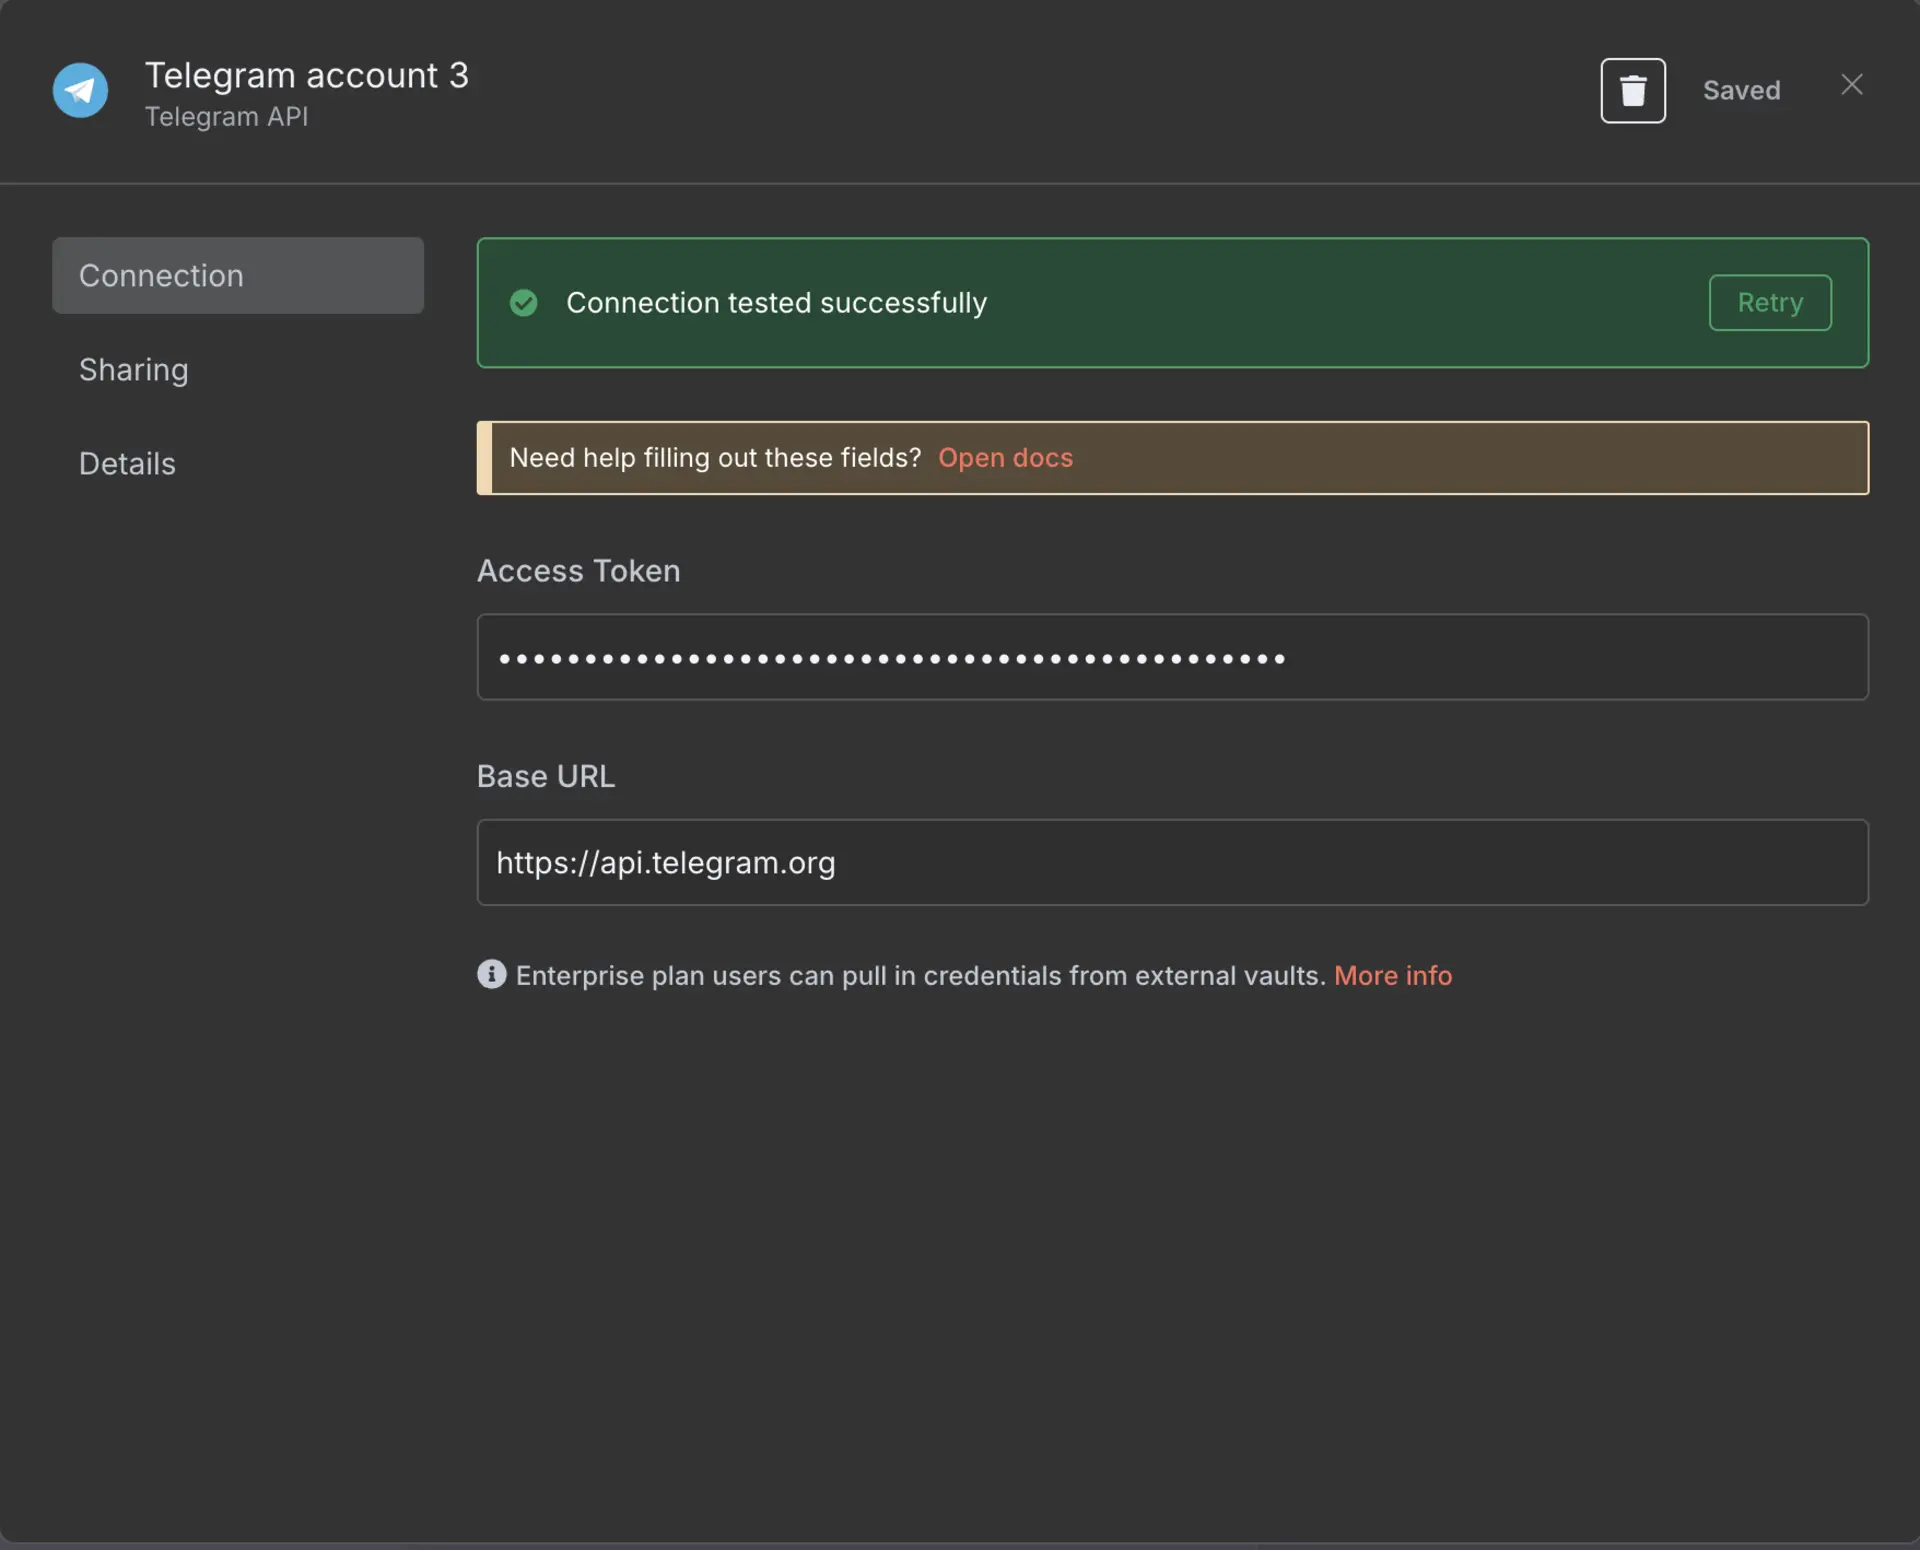
Save the first node.
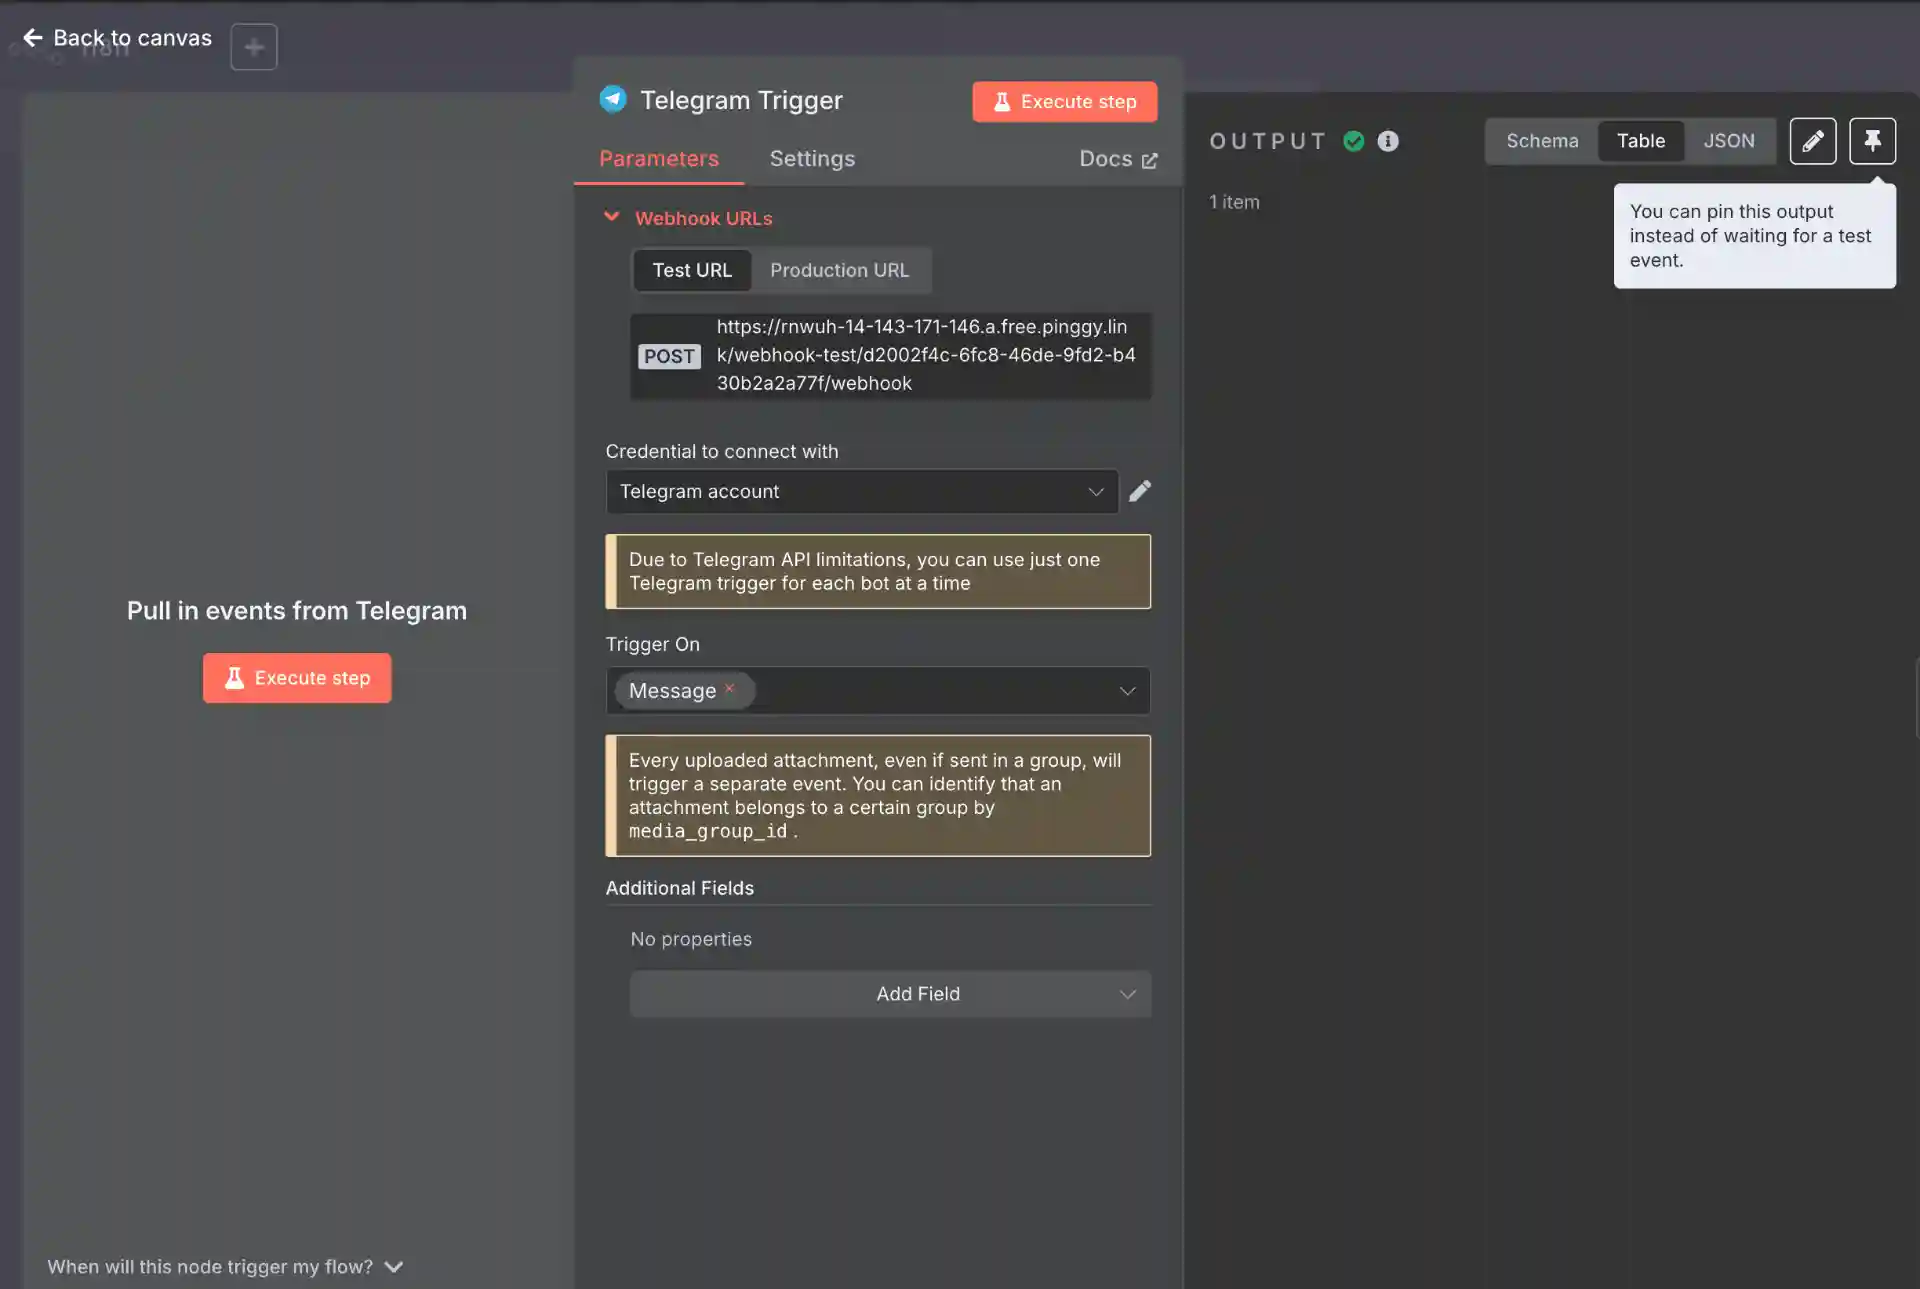
Connecting Your Telegram Bot to the Webhook
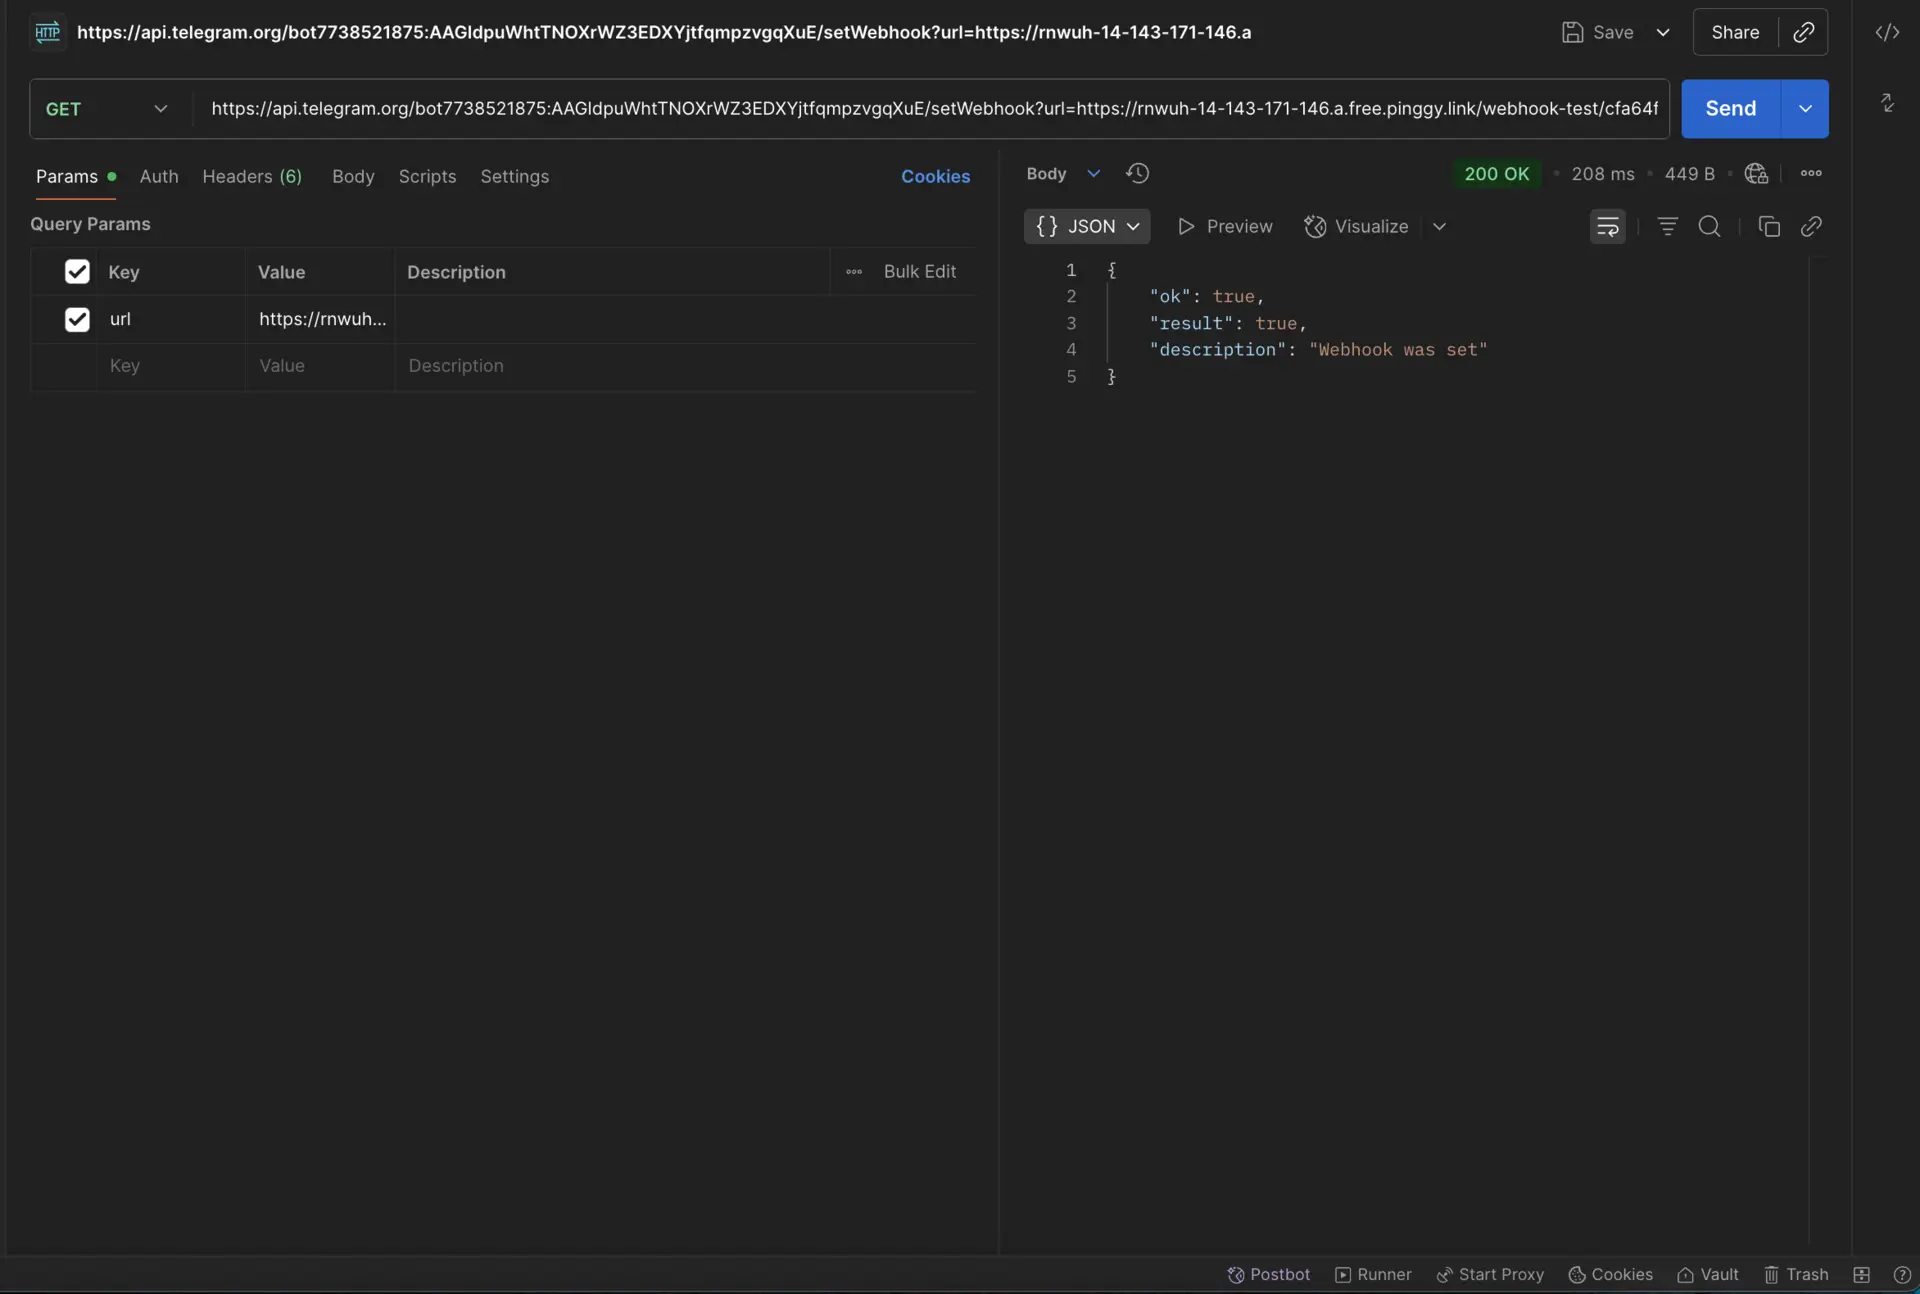
After saving your first node, you need to link your Telegram bot to the webhook URL. Copy the webhook URL from the first node. The format for setting the webhook is:
https://api.telegram.org/bot<your_bot_token>/setWebhook?url=<your_webhook_url>
For instance:
https://api.telegram.org/bot123456789:ABCdefGhIjKlmNoPQRstUvWXyZ1234567890/setWebhook?url=https://rnwuh-14-143-171-146.a.free.pinggy.link/webhook-test/d2002f4c-6fc8-46de-9fd2-b430b2a2a77f/webhook
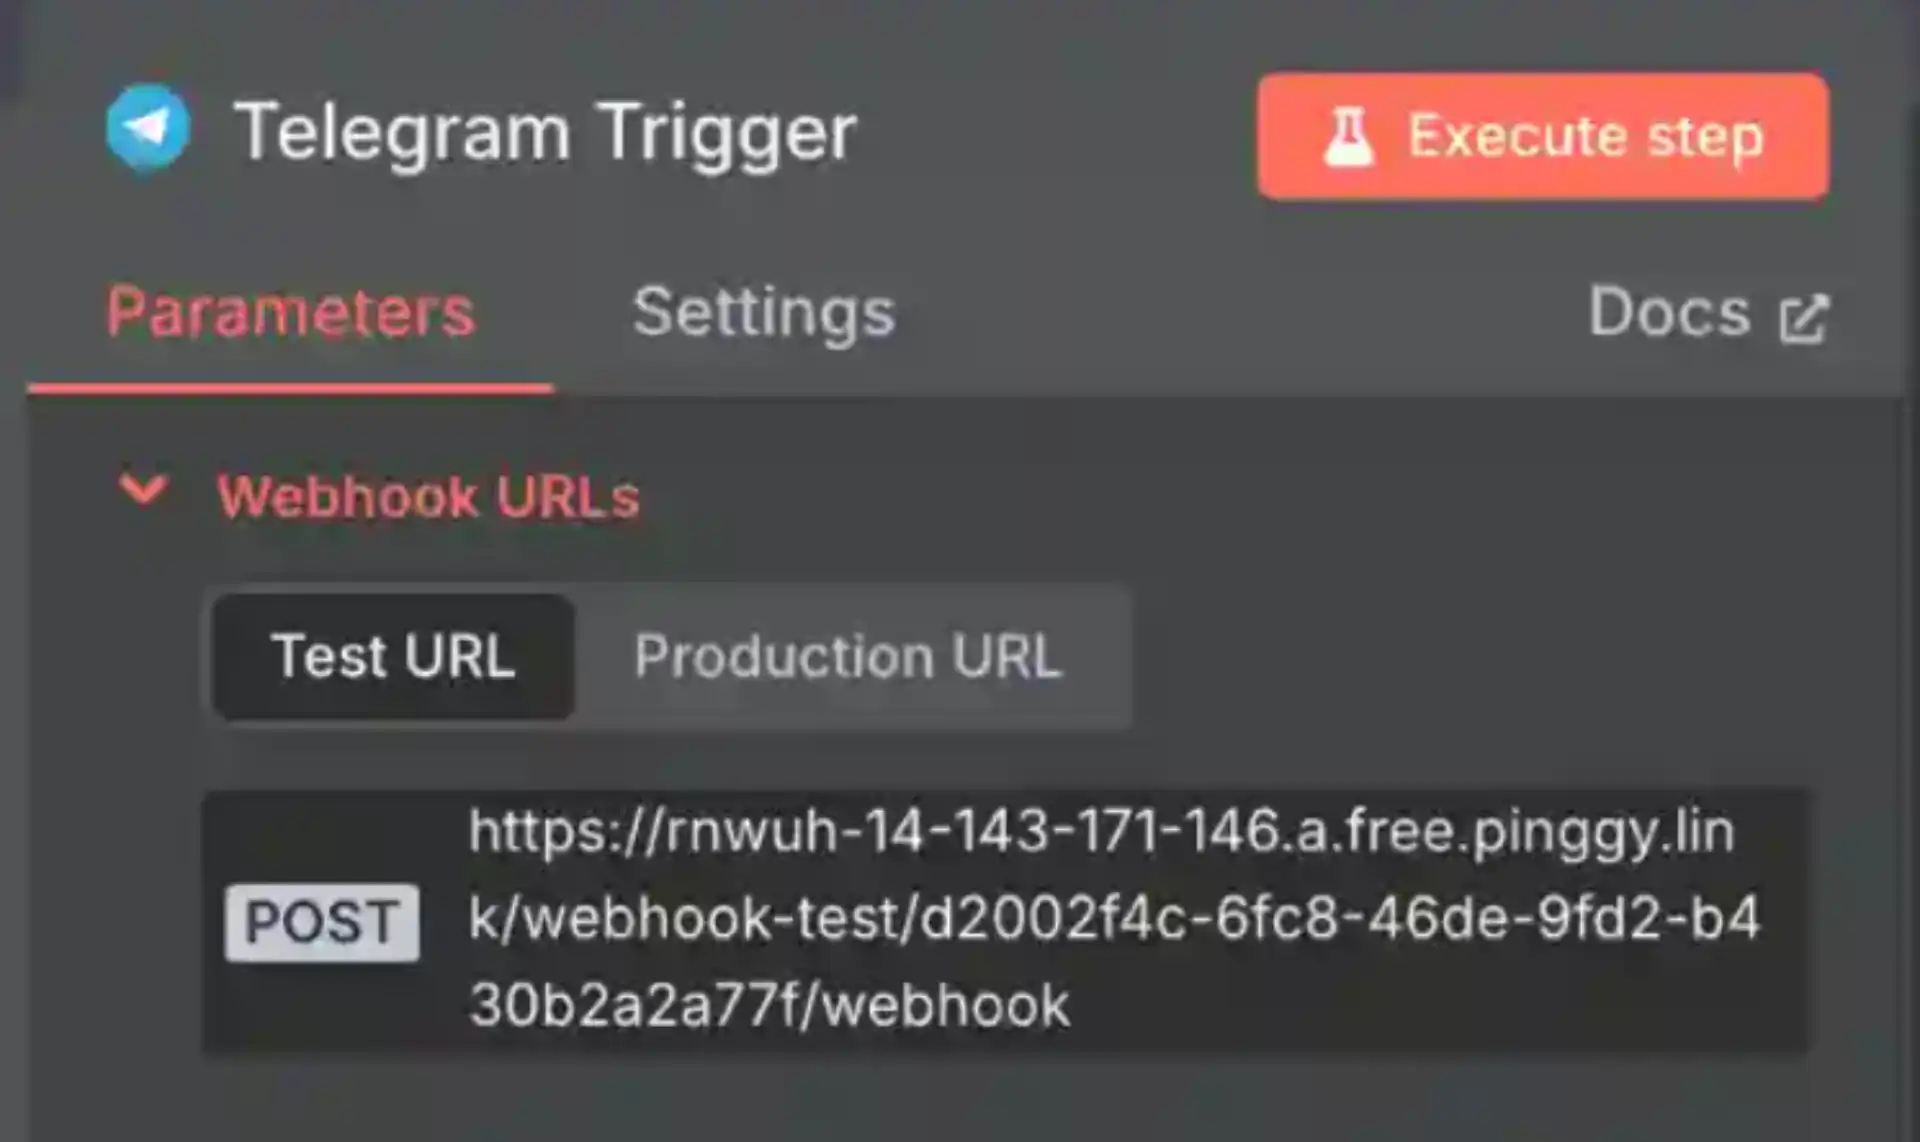
You should receive a response confirming the webhook was set, like:
{"ok":true,"result":true,"description":"Webhook was set"}
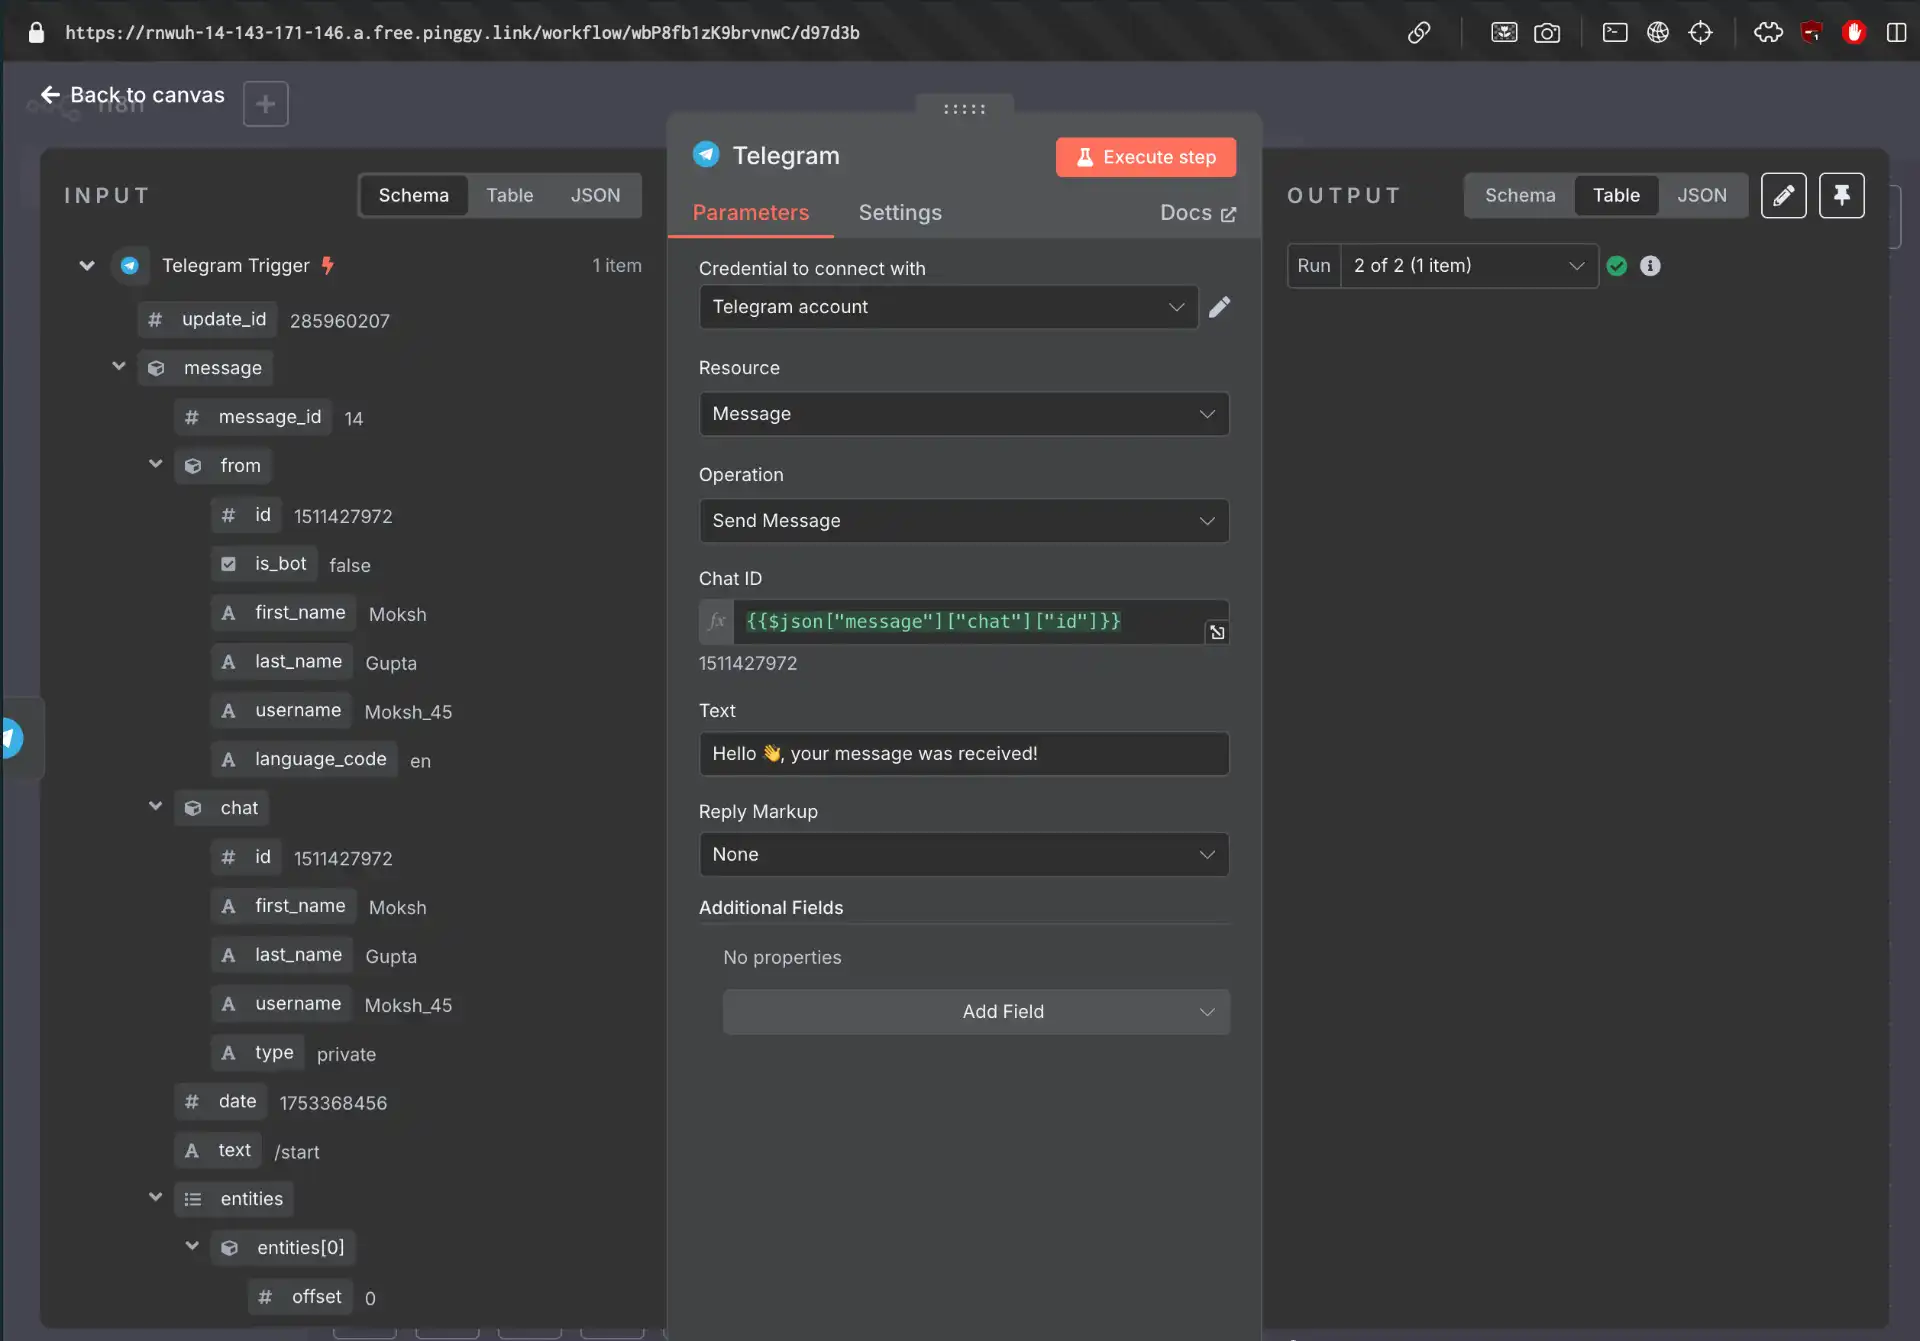
Adding a Response Node
Now, let's create a simple workflow to send a response. Add another Telegram node after the trigger with these settings:
Resource: Message
Operation: Send Message
Chat ID:
={{$json["message"]["chat"]["id"]}}Text: "Hello, your message was received!"
Testing Your Workflow
It's time to put your complete workflow to the test:
Execute the workflow: Click the "Execute Workflow" button in n8n to activate it.
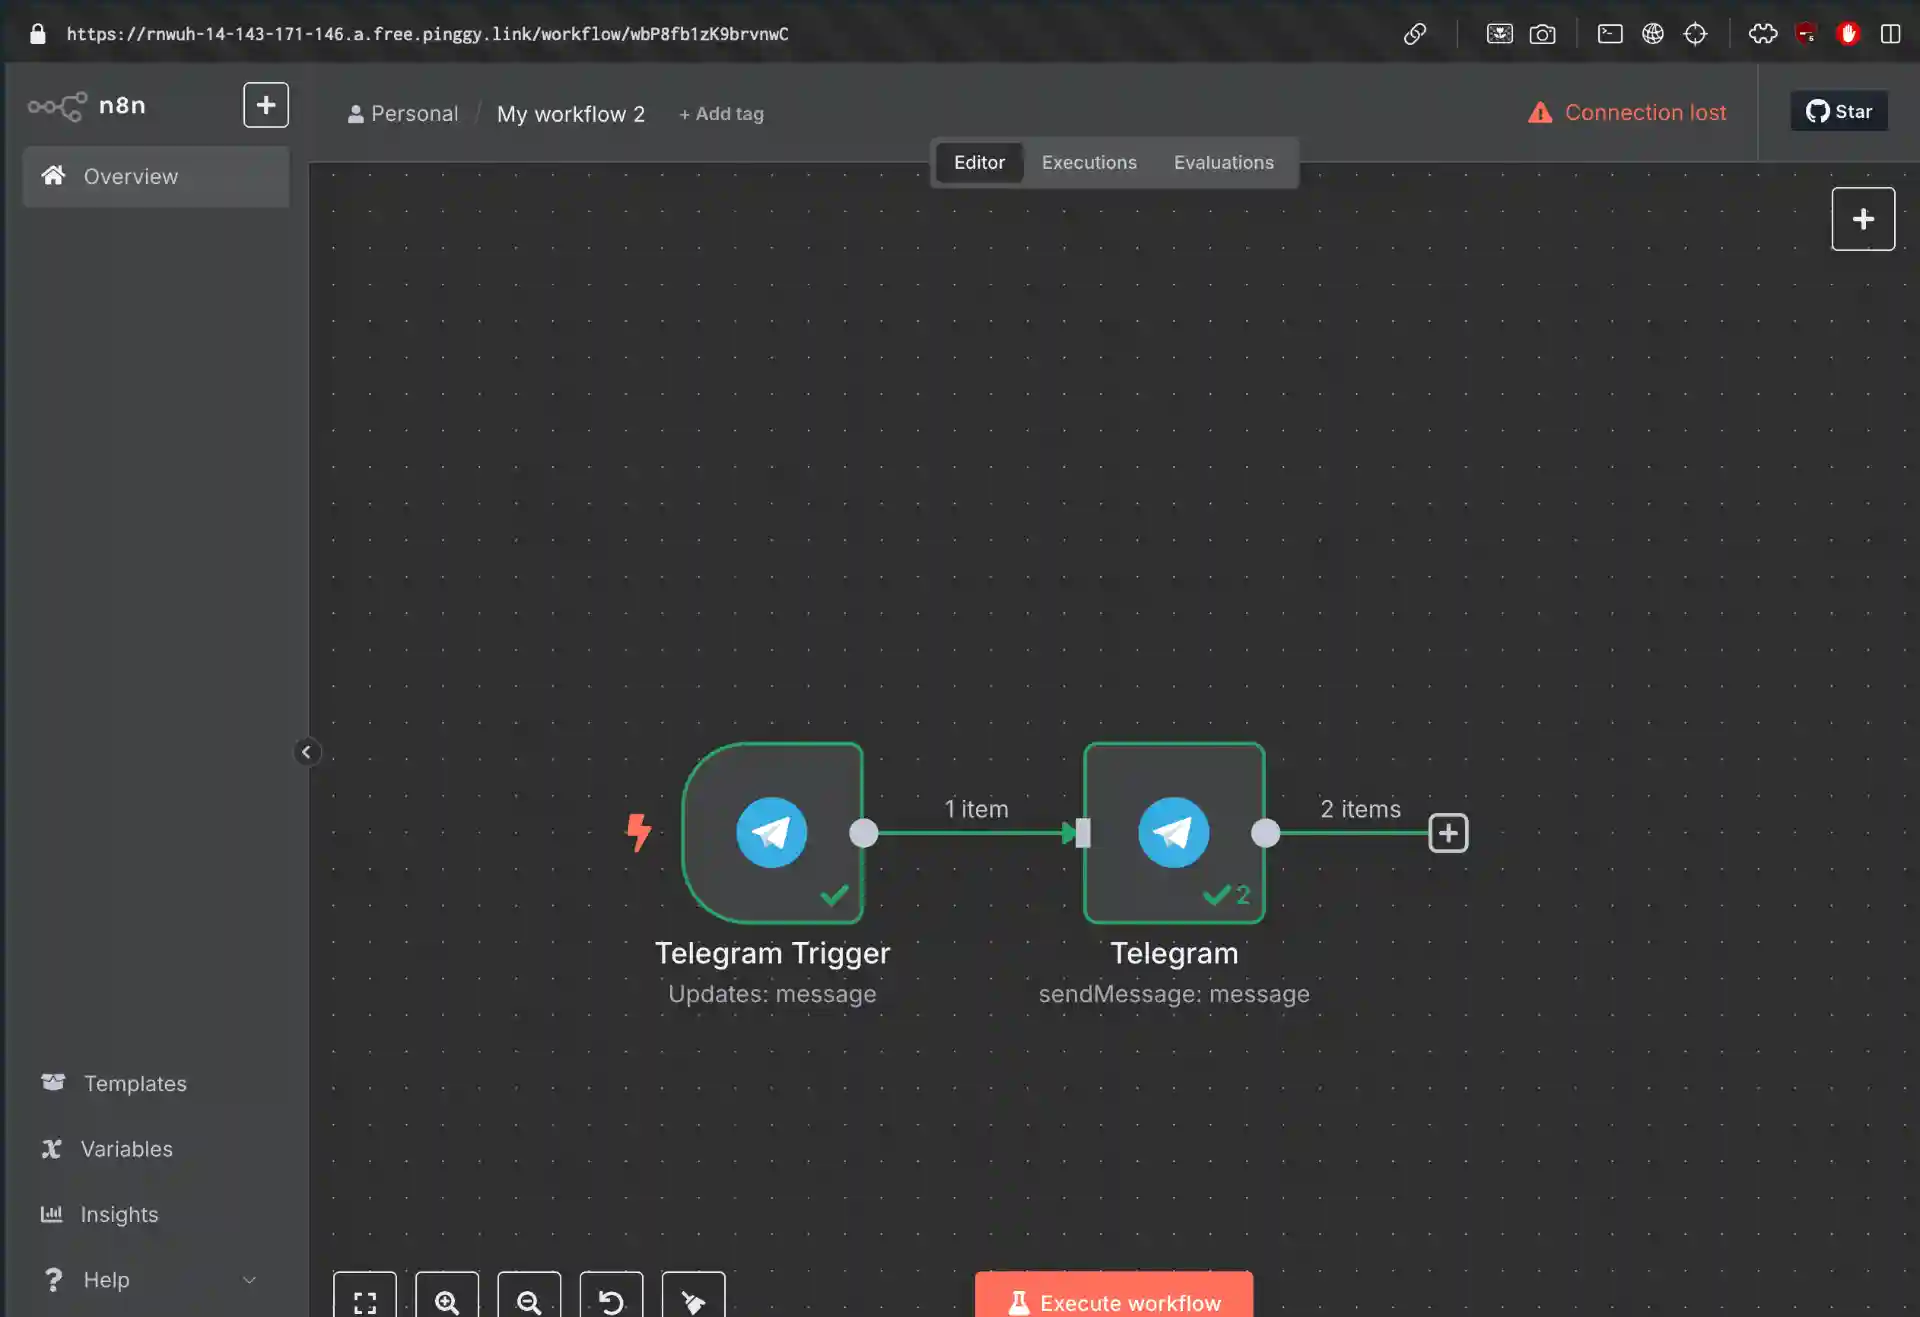
Test with your bot: Open Telegram and send
/startto your bot.
Verify the response: You should receive the message "Hello, your message was received!"
Check n8n execution: Return to n8n to review the workflow execution data and confirm everything functioned as expected.
If the test is successful, your bot is now ready to receive and respond to messages through the Pinggy tunnel!
Conclusion
Integrating Telegram with n8n using Pinggy establishes a powerful foundation for building automated communication workflows. The combination of Telegram’s rich messaging capabilities, n8n’s visual workflow builder, and Pinggy’s seamless tunneling solution empowers developers to quickly prototype and test sophisticated automation systems.
Whether you are developing customer support bots, notification systems, or intricate multi-service integrations, this stack provides the flexibility and reliability necessary for modern automation challenges. Begin with straightforward workflows and gradually expand your automation capabilities as your requirements evolve.
References
Subscribe to my newsletter
Read articles from Lightning Developer directly inside your inbox. Subscribe to the newsletter, and don't miss out.
Written by