3. Configure AWS IAM at Scale
 Arindam Baidya
Overview
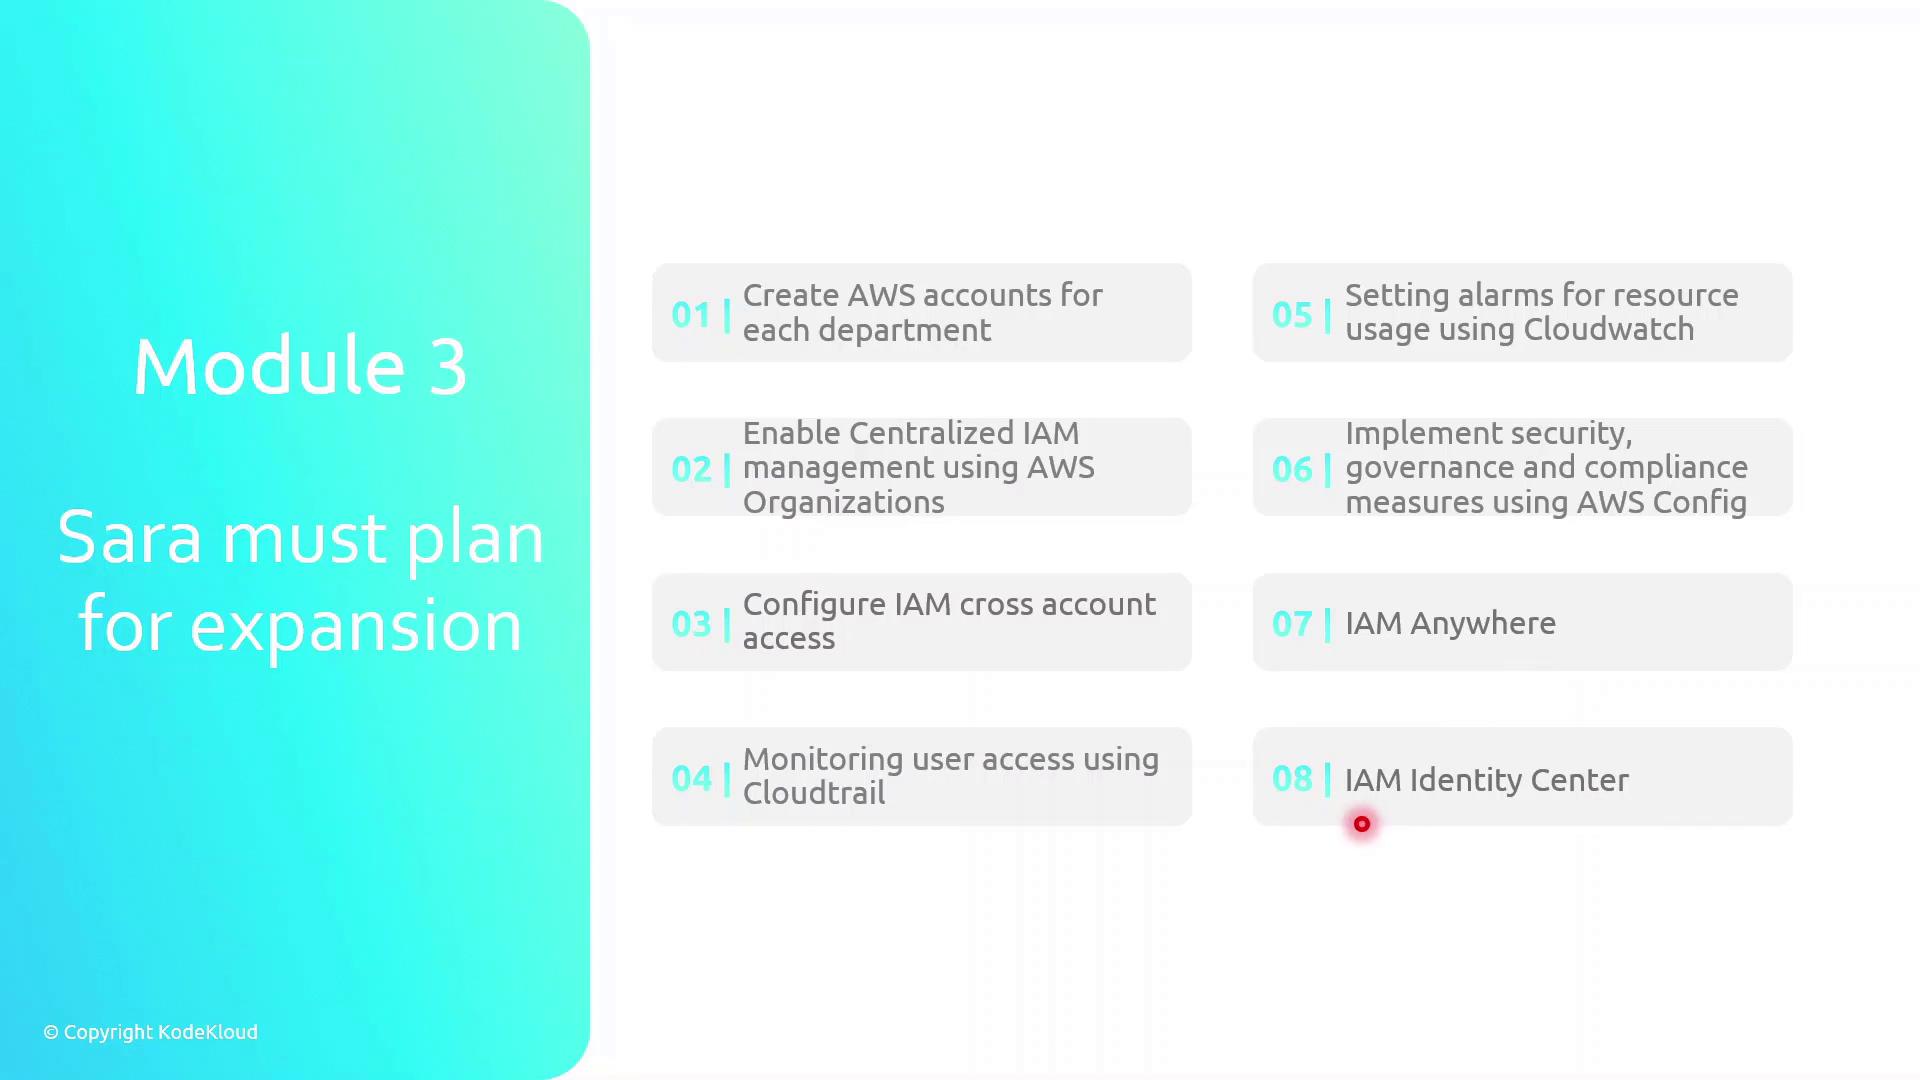
Scaling your AWS Identity and Access Management (IAM) strategy across multiple accounts requires careful planning. In this lesson, Sarah will:
Create separate AWS accounts for each department to enforce resource isolation
Enable centralized IAM management using AWS Organizations
Configure IAM cross-account access for seamless resource sharing
Monitor user activity and API calls with AWS CloudTrail
Set up usage and performance alarms in AWS CloudWatch
Implement security governance and compliance with AWS Config
Leverage IAM Anywhere to grant on-premises access to AWS resources
Use IAM Identity Center for unified single sign-on (SSO) into AWS
Note
Establishing individual AWS accounts per team is a best practice for isolating billing, permissions, and resource usage.
| Task | AWS Service | Purpose |
| Account creation | AWS Organizations | Isolate resources and consolidate billing |
| Centralized IAM management | AWS Organizations | Apply policies across accounts |
| Cross-account access | IAM Roles | Share resources without sharing credentials |
| Activity and API monitoring | CloudTrail | Audit user/API calls |
| Alarms for resource usage | CloudWatch | Alert on thresholds and anomalies |
| Security governance and compliance checks | AWS Config | Track resource configurations and drift |
| On-premises access | IAM Anywhere | Grant secure data center access |
| Single sign-on | IAM Identity Center | Centralize user authentication |
Warning
Be cautious when configuring cross-account roles: overly permissive trust policies can expose your resources to unintended access.
AWS Organizations
AWS Organizations is a service for centralized governance, billing, and access control across multiple AWS accounts. By structuring accounts into a hierarchy, you can enforce policies, streamline resource sharing, and maintain compliance at scale.
Management Account and Organizational Units
Creating Your Management Account
The management account (formerly the “master” account) acts as the root of your AWS Organization. It holds billing responsibility and delegates policy management to Organizational Units (OUs) or individual member accounts.
Organizing With OUs
Create one or more Organizational Units (OUs) under the management (root) account.
Move or add member accounts into these OUs.
Apply Service Control Policies (SCPs) at the OU level for inherited governance.
Warning
Avoid using the root user for everyday tasks. Instead, assign permissions through IAM roles in member accounts to reduce security risk.
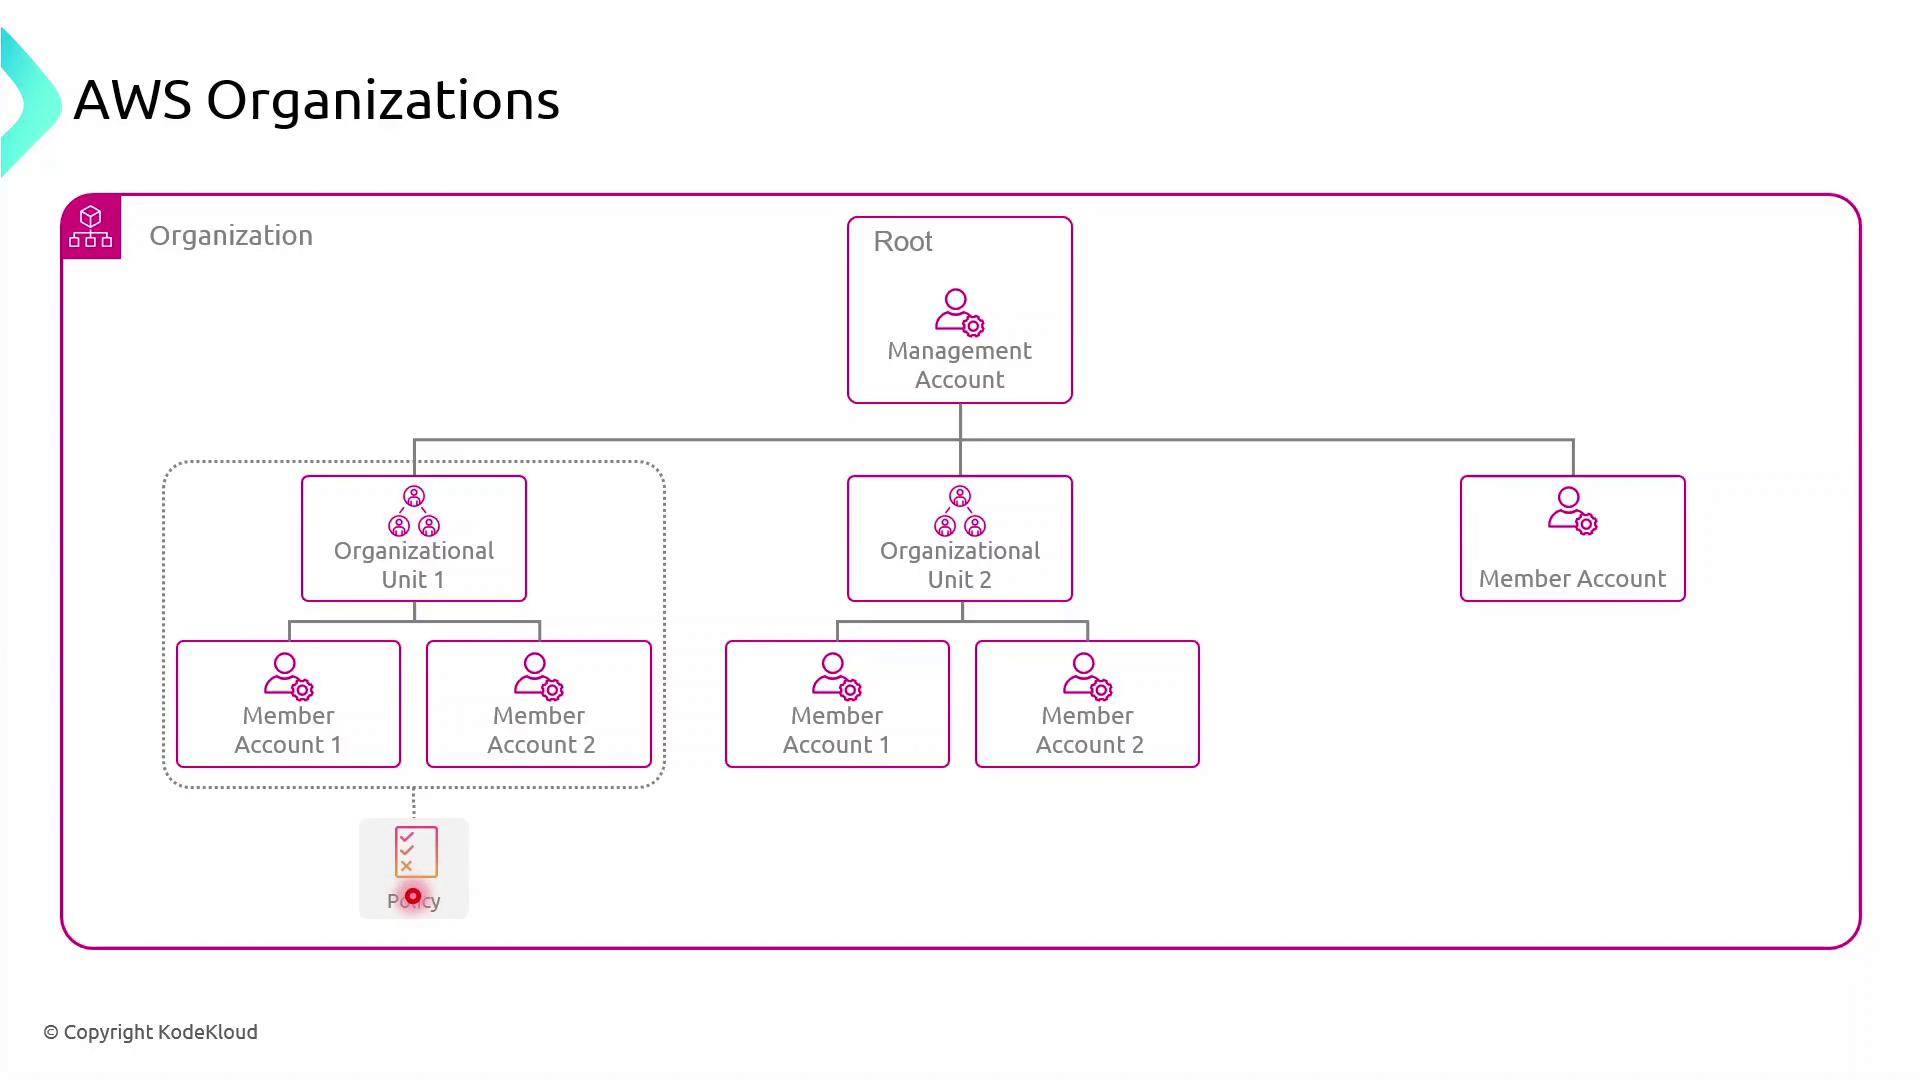
Any SCP attached to an OU automatically cascades to all nested OUs and member accounts. You can also target SCPs directly to individual accounts when a specialized policy is required.
Note
Service Control Policies (SCPs) define the maximum available permissions for IAM identities in accounts, but they don’t grant permissions by themselves.
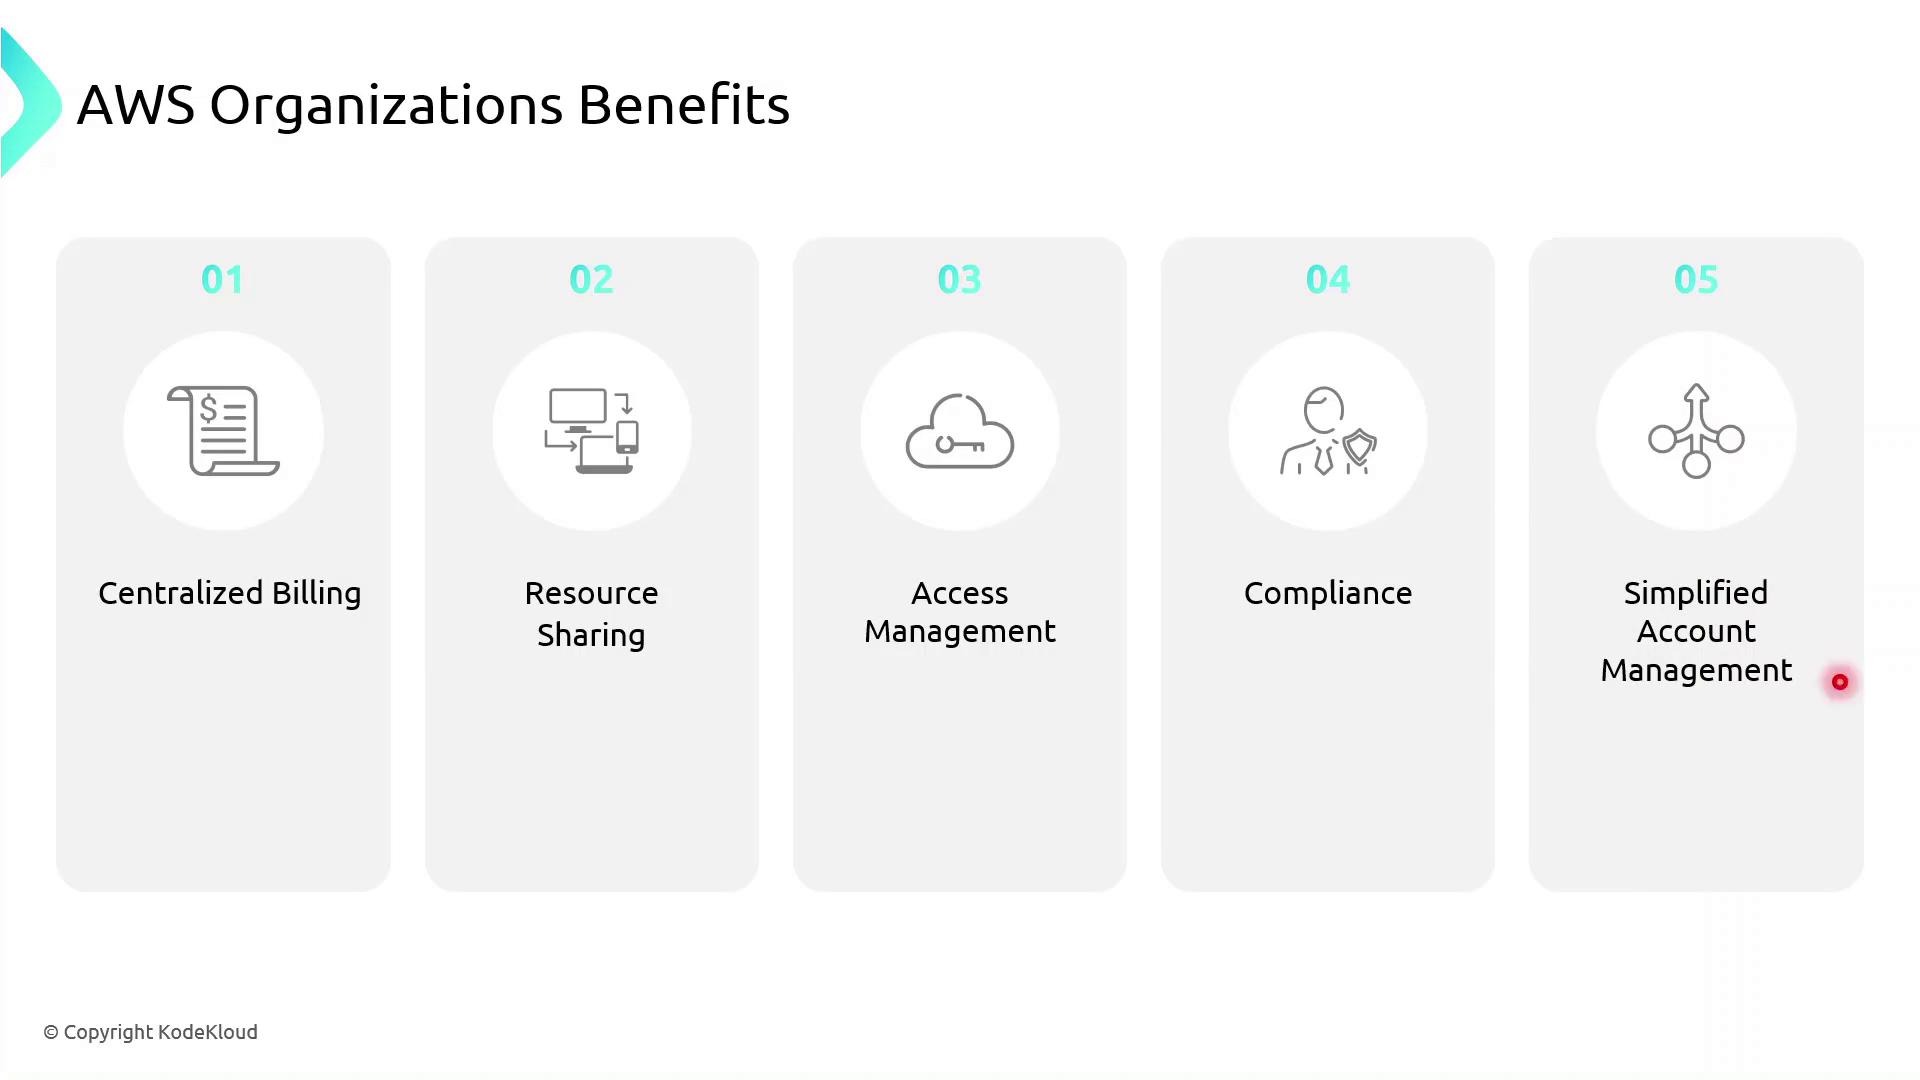
Key Benefits of AWS Organizations
AWS Organizations unlocks powerful features for enterprises:
| Benefit | Description |
| Centralized Billing | Aggregate charges from all member accounts into one monthly invoice. |
| Resource Sharing | Share VPCs, RDS, EC2, S3, and more across accounts with AWS Resource Access Manager. |
| Access Management | Enforce uniform IAM policies and manage credentials organization‐wide. |
| Compliance | Apply security baselines and audit controls centrally to meet regulatory needs. |
| Simplified Account Management | Monitor and administer all accounts from a single, unified dashboard. |
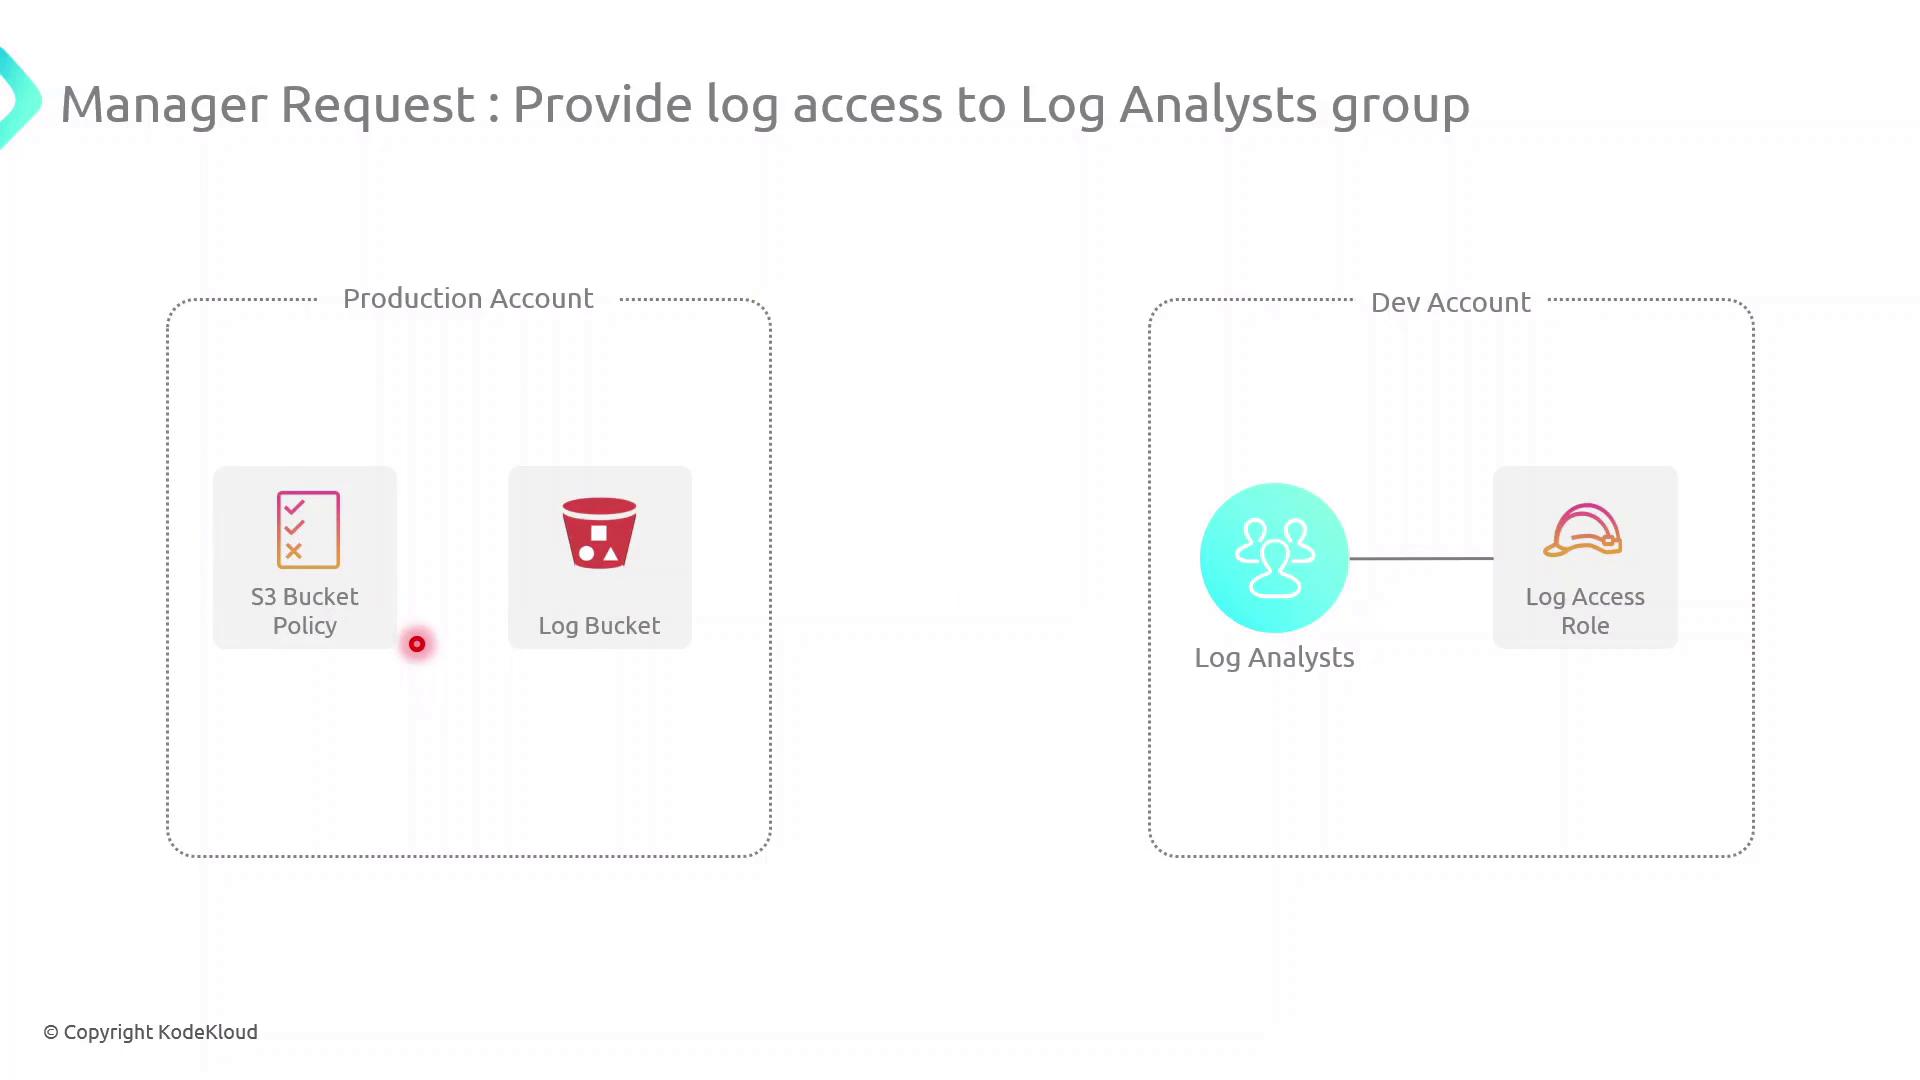
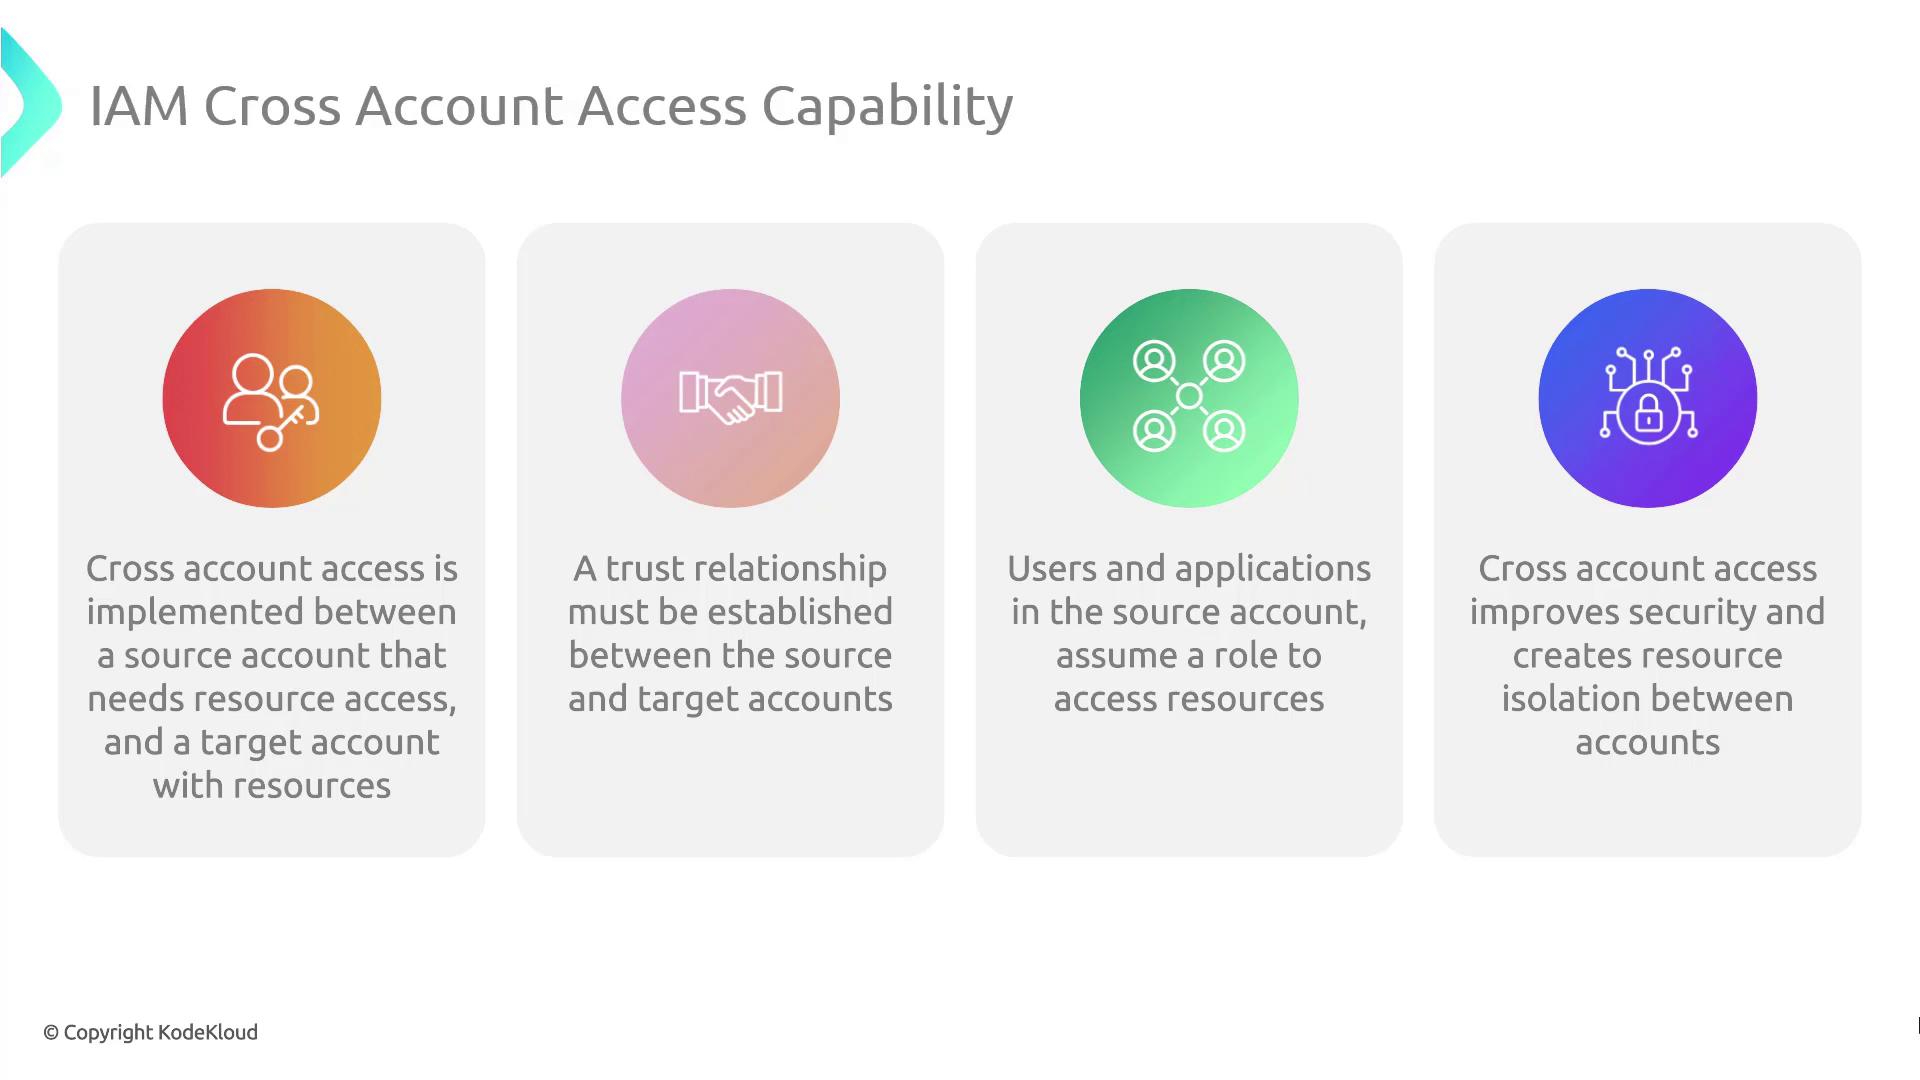
IAM Cross Account Access
In this guide, we'll configure cross-account access between a Production AWS account (owns an S3 log bucket) and a Development AWS account (hosts a Log Analysts group). This setup enables secure, temporary access to logs without sharing long-term credentials.
Scenario
| AWS Account | Resource | Purpose |
| Production Account | S3 bucket (log-bucket) | Stores application log files |
| Development Account | IAM Group (Log Analysts) | Needs permission to list and read log files |
Our objective is to let the Log Analysts group assume a role in the Production account to retrieve logs.
High-Level Architecture
Create an IAM Role in the Production Account
Attach an inline S3 policy to that role
Update the S3 Bucket Policy to trust the role
Assume the role from the Development Account and verify access
Cross-Account Access Components
| Component | Description |
| Trust Relationship | IAM Role trust policy in the Production account allowing Dev account to assume it |
| Role Assumption | sts:AssumeRole call from Dev account for temporary credentials |
| Permissions Boundary | Inline policy (or managed) on the role controls S3 access |
| Resource Policy | S3 Bucket policy grants the role s3:ListBucket and s3:GetObject |
Note
Be explicit in your trust policy to avoid granting unintended access. Restrict Principal to specific IAM roles or account IDs.
Demo Walkthrough
Follow these steps to implement and test cross-account S3 access.
1. Create the IAM Role in Production
Create a trust policy (trust-policy.json):
{
  "Version": "2012-10-17",
  "Statement": [
    {
      "Effect": "Allow",
      "Principal": {
        "AWS": "arn:aws:iam::DEV_ACCOUNT_ID:root"
      },
      "Action": "sts:AssumeRole"
    }
  ]
}
Use the AWS CLI to create the role:
aws iam create-role \
  --role-name DevLogAccessRole \
  --assume-role-policy-document file://trust-policy.json \
  --description "Allows Dev account to access logs" \
  --profile prod-account
2. Attach an Inline S3 Access Policy
Define s3-access-policy.json:
{
  "Version": "2012-10-17",
  "Statement": [
    {
      "Effect": "Allow",
      "Action": [
        "s3:ListBucket",
        "s3:GetObject"
      ],
      "Resource": [
        "arn:aws:s3:::log-bucket",
        "arn:aws:s3:::log-bucket/*"
      ]
    }
  ]
}
Attach it to the role:
aws iam put-role-policy \
  --role-name DevLogAccessRole \
  --policy-name S3LogAccess \
  --policy-document file://s3-access-policy.json \
  --profile prod-account
3. Update the S3 Bucket Policy
Create or edit your bucket policy (bucket-policy.json):
{
  "Version": "2012-10-17",
  "Statement": [
    {
      "Sid": "AllowDevRoleAccess",
      "Effect": "Allow",
      "Principal": {
        "AWS": "arn:aws:iam::PROD_ACCOUNT_ID:role/DevLogAccessRole"
      },
      "Action": [
        "s3:ListBucket",
        "s3:GetObject"
      ],
      "Resource": [
        "arn:aws:s3:::log-bucket",
        "arn:aws:s3:::log-bucket/*"
      ]
    }
  ]
}
Apply it:
aws s3api put-bucket-policy \
  --bucket log-bucket \
  --policy file://bucket-policy.json \
  --profile prod-account
Warning
Ensure the bucket policy’s Principal matches the exact ARN of the role. Using wildcards may expose your bucket to unintended access.
4. Assume the Role and Verify Access
From the Development account, assume the role:
aws sts assume-role \
  --role-arn arn:aws:iam::PROD_ACCOUNT_ID:role/DevLogAccessRole \
  --role-session-name LogAnalysisSession \
  --profile dev-account > assume-role-output.json
Export temporary credentials:
export AWS_ACCESS_KEY_ID=$(jq -r '.Credentials.AccessKeyId' assume-role-output.json)
export AWS_SECRET_ACCESS_KEY=$(jq -r '.Credentials.SecretAccessKey' assume-role-output.json)
export AWS_SESSION_TOKEN=$(jq -r '.Credentials.SessionToken' assume-role-output.json)
List and retrieve logs:
aws s3 ls s3://log-bucket
aws s3 cp s3://log-bucket/example.log .
Demo Cross Account Access
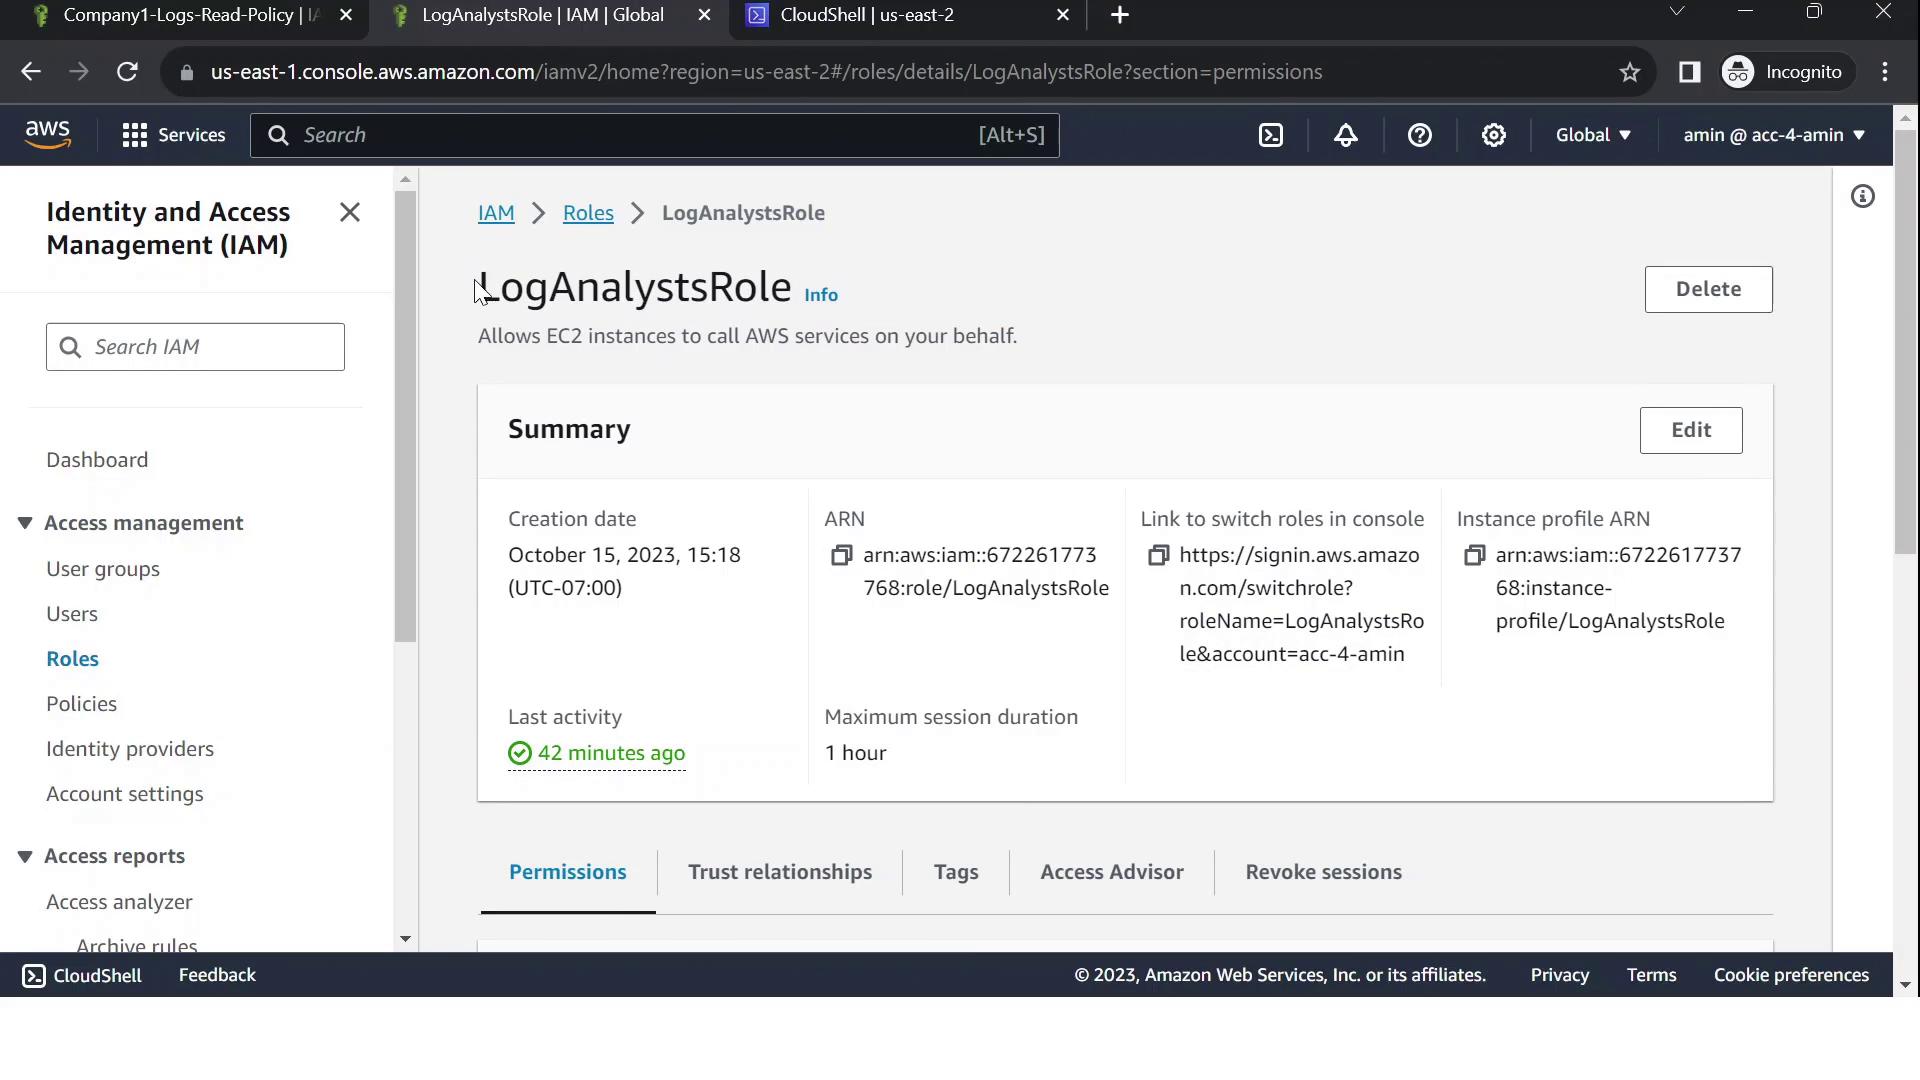
Enable a role in your source account (ID: 672261773768) to read objects from an S3 bucket in your target account (ID: …2021). This walkthrough covers:
Configuring the bucket policy
Creating and trusting an IAM role
Testing access via AWS CloudShell
| Step | Description |
| 1 | Add a bucket policy in the target account |
| 2 | Create IAM policy & role with trust policy |
| 3 | Assume role and verify access in CloudShell |
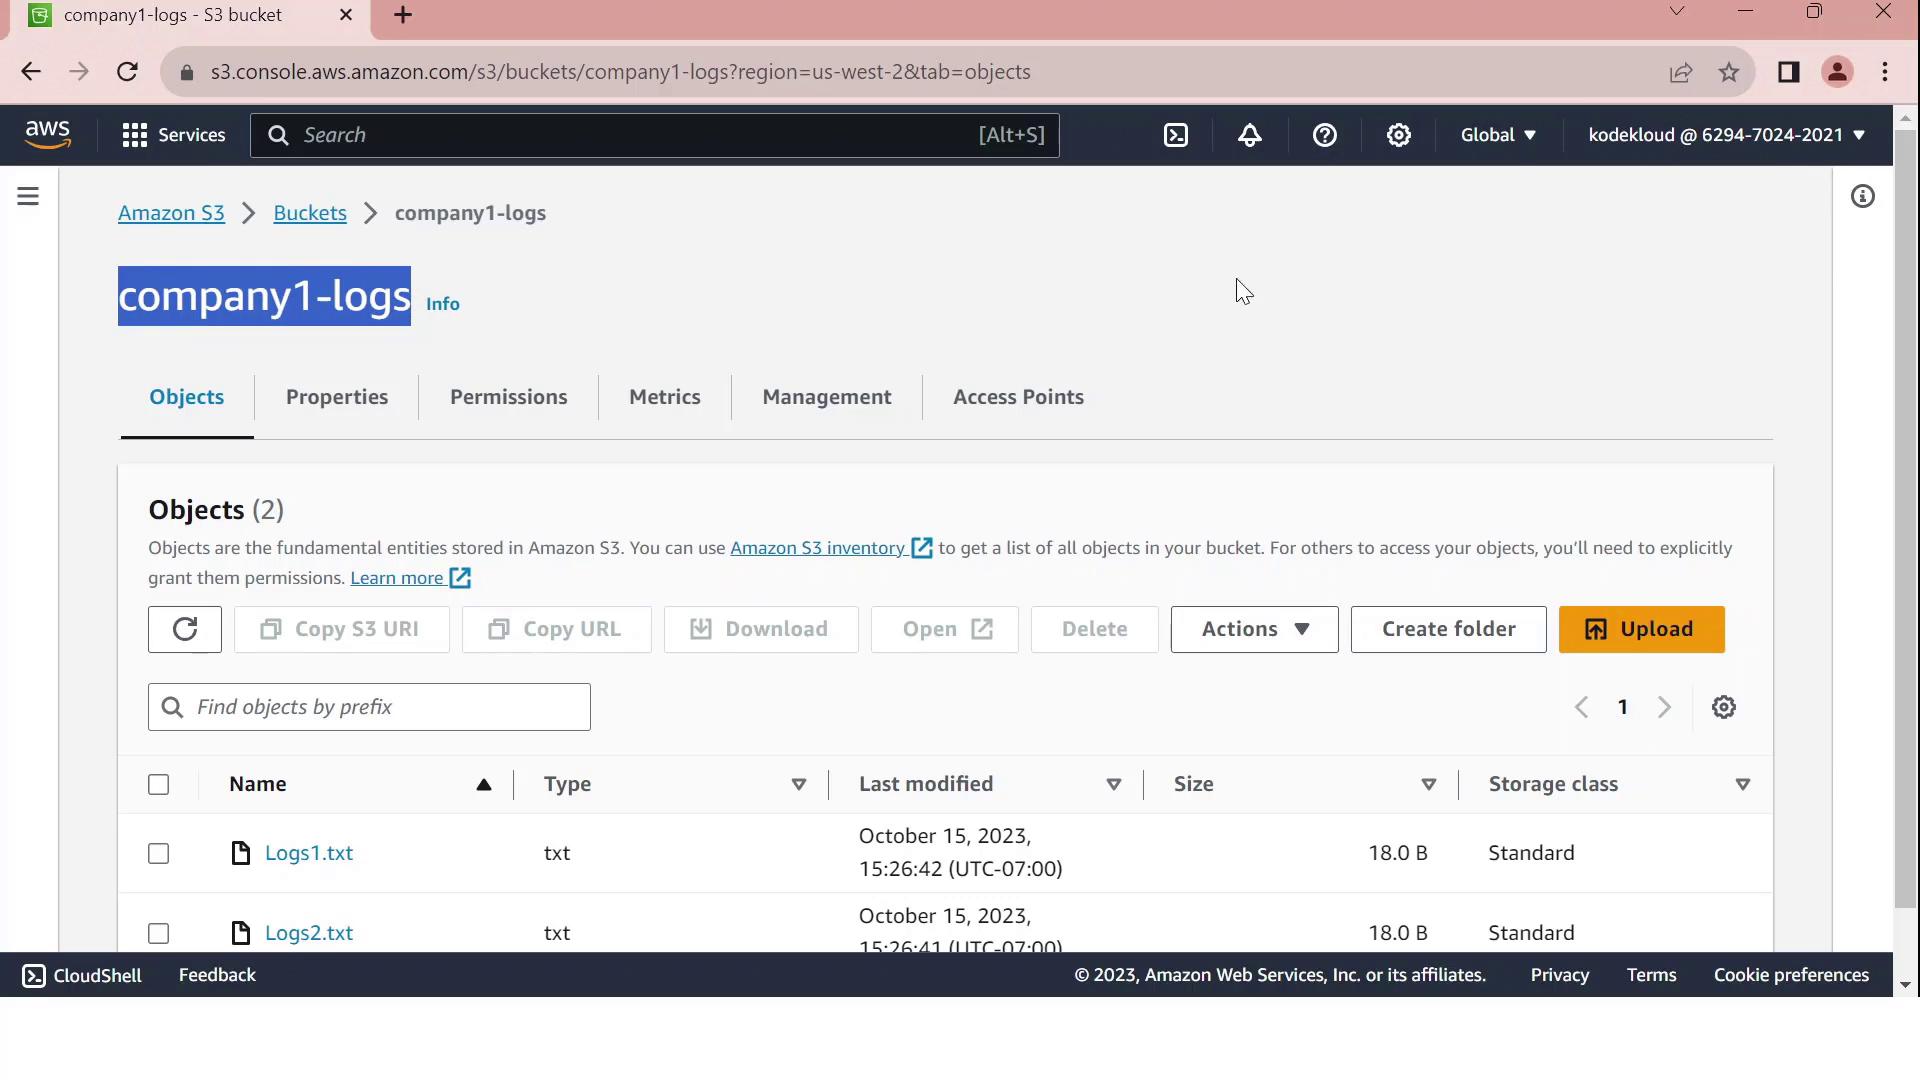
1. Configure the Bucket Policy in the Target Account
In the target account, go to S3 > company1-logs > Permissions > Bucket policy and paste:
{
  "Version": "2012-10-17",
  "Statement": [
    {
      "Effect": "Allow",
      "Principal": {
        "AWS": "arn:aws:iam::6294702402021:role/LogAnalystsRole"
      },
      "Action": [
        "s3:Get*",
        "s3:List*"
      ],
      "Resource": [
        "arn:aws:s3:::company1-logs",
        "arn:aws:s3:::company1-logs/*"
      ]
    }
  ]
}
Note
Ensure the bucket ARN and role ARN exactly match your resources. Typos in ARNs will prevent access.
2. Create the IAM Role in the Target Account
2.1 Define a Read-Only Policy
Create an IAM policy named company1-logs-read-policy:
{
  "Version": "2012-10-17",
  "Statement": [
    {
      "Effect": "Allow",
      "Action": [
        "s3:Get*",
        "s3:List*"
      ],
      "Resource": [
        "arn:aws:s3:::company1-logs",
        "arn:aws:s3:::company1-logs/*"
      ]
    }
  ]
}
2.2 Create the Role and Configure Trust
In IAM, create a role called LogAnalystsRole.
Attach company1-logs-read-policy.
Edit Trust relationships to allow the source account user (
amin) to assume this role:
{
  "Version": "2012-10-17",
  "Statement": [
    {
      "Effect": "Allow",
      "Principal": {
        "AWS": "arn:aws:iam::672261773768:user/amin"
      },
      "Action": "sts:AssumeRole"
    }
  ]
}
Warning
Grant only the minimum privileges needed. Review your trust policy to prevent unauthorized access.
3. Test Cross-Account Access via CloudShell
Confirm your caller identity in the source account:
aws sts get-caller-identityAssume the cross-account role:
 aws sts assume-role \
   --role-arn arn:aws:iam::6294702402021:role/LogAnalystsRole \
   --role-session-name CrossAccountSession
Export the temporary credentials:
 export AWS_DEFAULT_REGION=us-east-2
 export AWS_ACCESS_KEY_ID=<YOUR_ACCESS_KEY_ID>
 export AWS_SECRET_ACCESS_KEY=<YOUR_SECRET_ACCESS_KEY>
 export AWS_SESSION_TOKEN=<YOUR_SESSION_TOKEN>
Verify you’re now the assumed role:
aws sts get-caller-identityYou should see an ARN with
assumed-role/LogAnalystsRole.List bucket contents:
aws s3 ls s3://company1-logsExpected output:
 2023-01-01 12:00:00        18 Logs1.txt
 2023-01-01 12:00:00        18 Logs2.txt
If you see the log files listed, your cross-account S3 access is working!
Centralized Logging and Monitoring
Centralized logging and monitoring are critical for maintaining security, compliance, and operational visibility in your AWS environment. By aggregating audit trails, metrics, and resource configurations into a single pane of glass, you can troubleshoot faster, detect anomalies early, and meet regulatory requirements.
In this guide, we’ll show you how to implement centralized logging and monitoring using three AWS services:
| Service | Purpose | Key Features |
| AWS CloudTrail | Records API calls and user activity | Full audit trail, log file integrity validation, multi-region trails |
| Amazon CloudWatch | Collects and visualizes logs and metrics | Real-time dashboards, alarms, log aggregation, custom metrics |
| AWS Config | Assesses, audits, and evaluates resource configurations | Continuous compliance checks, resource change tracking, conformance packs |
AWS CloudTrail
AWS CloudTrail provides governance, compliance, and risk auditing by capturing all API calls and delivering log files to an Amazon S3 bucket.
# Create a new trail that delivers logs to S3
aws cloudtrail create-trail \
  --name MyCloudTrail \
  --s3-bucket-name my-cloudtrail-bucket \
  --is-multi-region-trail


# Start logging events for the trail
aws cloudtrail start-logging \
  --name MyCloudTrail
Note
Enable CloudTrail Insights to detect unusual API activities, such as spikes in resource provisioning or configurations changes.
Amazon CloudWatch
Amazon CloudWatch collects logs and metrics from AWS services and your applications, allowing you to build dashboards, set alarms, and route log data to various targets.
Create a CloudWatch Log Group:
aws logs create-log-group --log-group-name /my-application/logsInstall and configure the CloudWatch Agent on your EC2 instances:
 # On Amazon Linux 2
 sudo yum install -y amazon-cloudwatch-agent
 sudo /opt/aws/amazon-cloudwatch-agent/bin/amazon-cloudwatch-agent-config-wizard
 sudo systemctl start amazon-cloudwatch-agent
Define alarms based on metrics:
 aws cloudwatch put-metric-alarm \
   --alarm-name HighCPUUtilization \
   --metric-name CPUUtilization \
   --namespace AWS/EC2 \
   --statistic Average \
   --period 300 \
   --threshold 80 \
   --comparison-operator GreaterThanOrEqualToThreshold \
   --dimensions Name=InstanceId,Value=i-0123456789abcdef0 \
   --evaluation-periods 2 \
   --alarm-actions arn:aws:sns:us-east-1:123456789012:NotifyMe
AWS Config
AWS Config continuously evaluates resource configurations against desired settings. It records configuration changes and can trigger automated remediation.
# Create an S3 bucket and SNS topic for AWS Config delivery
aws s3 mb s3://my-config-bucket
aws sns create-topic --name config-topic


# Set up the configuration recorder
aws configservice put-configuration-recorder \
  --configuration-recorder name=default,roleARN=arn:aws:iam::123456789012:role/AWSConfigRole


# Specify where to deliver configuration snapshots
aws configservice put-delivery-channel \
  --delivery-channel name=default \
  --s3-bucket-name my-config-bucket \
  --sns-topic-arn arn:aws:sns:us-east-1:123456789012:config-topic


# Start recording
aws configservice start-configuration-recorder --configuration-recorder-name default
Warning
AWS Config is enabled per region. Be sure to deploy your recorder and delivery channel in each region where you have resources.
CloudTrail
CloudTrail provides a comprehensive audit trail of all API calls in your AWS account. In this guide, you’ll learn how to trace which IAM user issued the StopInstances command to shut down an EC2 instance.
Monitoring Demo CloudTrail
In this walkthrough, you’ll learn how to pinpoint the IAM user who terminated an EC2 instance (ID ends with 1D91) using AWS CloudTrail’s Event History. This helps you audit critical API calls and enhance security visibility.
1. Access CloudTrail Event History
Sign in to the AWS Management Console and search for CloudTrail.
In the left-hand menu, select Event history.
Adjust the time range and apply filters as needed to narrow down results.
By default, Event history shows all recorded API calls, such as:
CreateBucketPutBucketEncryptionConsoleLoginTerminateInstances
Note
Ensure your IAM user or role has the cloudtrail:LookupEvents permission to view event history.
2. Filter for TerminateInstances Events
In the Event name filter, type
TerminateInstances.(Optional) Under Resource name, enter the instance ID:
i-02287a6b78cc71d91
Now you should see the specific TerminateInstances event for the target instance. The summary row displays the IAM user, timestamp, and event name.
3. Inspect Event Details
Click the TerminateInstances entry to expand the details pane. You’ll find several sections:
3.1 User Identity & Metadata
{
  "eventVersion": "1.08",
  "userIdentity": {
    "type": "IAMUser",
    "principalId": "AIDAZZBPMTHEGGK6QLMU",
    "arn": "arn:aws:iam::672261773768:user/John",
    "accountId": "672261773768",
    "accessKeyId": "ASIAZZBPMTHEGOIBHXVW",
    "userName": "John",
    "sessionContext": {
      "attributes": {
        "creationDate": "2023-10-16T17:24:53Z",
        "mfaAuthenticated": "false"
      }
    }
  },
  "eventTime": "2023-10-16T17:25:20Z",
  "eventSource": "ec2.amazonaws.com"
}
This indicates:
IAM user John (
principalId:AIDAZZBPMTHEGGK6QLMU)Event timestamp:
2023-10-16T17:25:20ZAPI source:
ec2.amazonaws.com
3.2 Instance State Transition
Scroll down to Response elements to view the state change:
{
  "responseElements": {
    "requestId": "77104859-e0f6-4465-a836-830c1cb8583e",
    "instancesSet": {
      "items": [
        {
          "instanceId": "i-02287a6b78cc71d91",
          "previousState": {
            "code": 16,
            "name": "running"
          },
          "currentState": {
            "code": 32,
            "name": "shutting-down"
          }
        }
      ]
    }
  }
}
| State | Code | Meaning |
| previousState | 16 | Running |
| currentState | 32 | Shutting-down |
This confirms the TerminateInstances call initiated a shutdown.
4. Summary of Event Record
At the bottom of the details pane, you’ll find additional metadata:
{
  "eventID": "0ea6b2d5-51d5-4765-ad83-4db65d506d9c",
  "readOnly": false,
  "eventType": "AwsApiCall",
  "managementEvent": true,
  "recipientAccountId": "672261773768",
  "eventCategory": "Management"
}
| Field | Sample Value | Description |
| eventID | 0ea6b2d5-51d5-4765-ad83-4db65d506d9c | Unique ID for the CloudTrail event |
| eventType | AwsApiCall | Type of API call |
| managementEvent | true | Indicates a management-level operation |
| recipientAccountId | 672261773768 | AWS account where the event occurred |
From this audit trail, you’ve confirmed that John executed the TerminateInstances API call, changing the instance from running to shutting-down.
5. Automate Alerts with EventBridge
Integrate these CloudTrail logs with Amazon EventBridge (formerly CloudWatch Events) to trigger alerts or remediation workflows when critical actions occur:
aws events put-rule \
  --name EC2TerminationRule \
  --event-pattern '{
    "source": ["aws.ec2"],
    "detail-type": ["AWS API Call via CloudTrail"],
    "detail": {
      "eventName": ["TerminateInstances"]
    }
  }'
Attach a target (e.g., SNS topic, Lambda function) to notify your team or perform automated checks.
CloudWatch
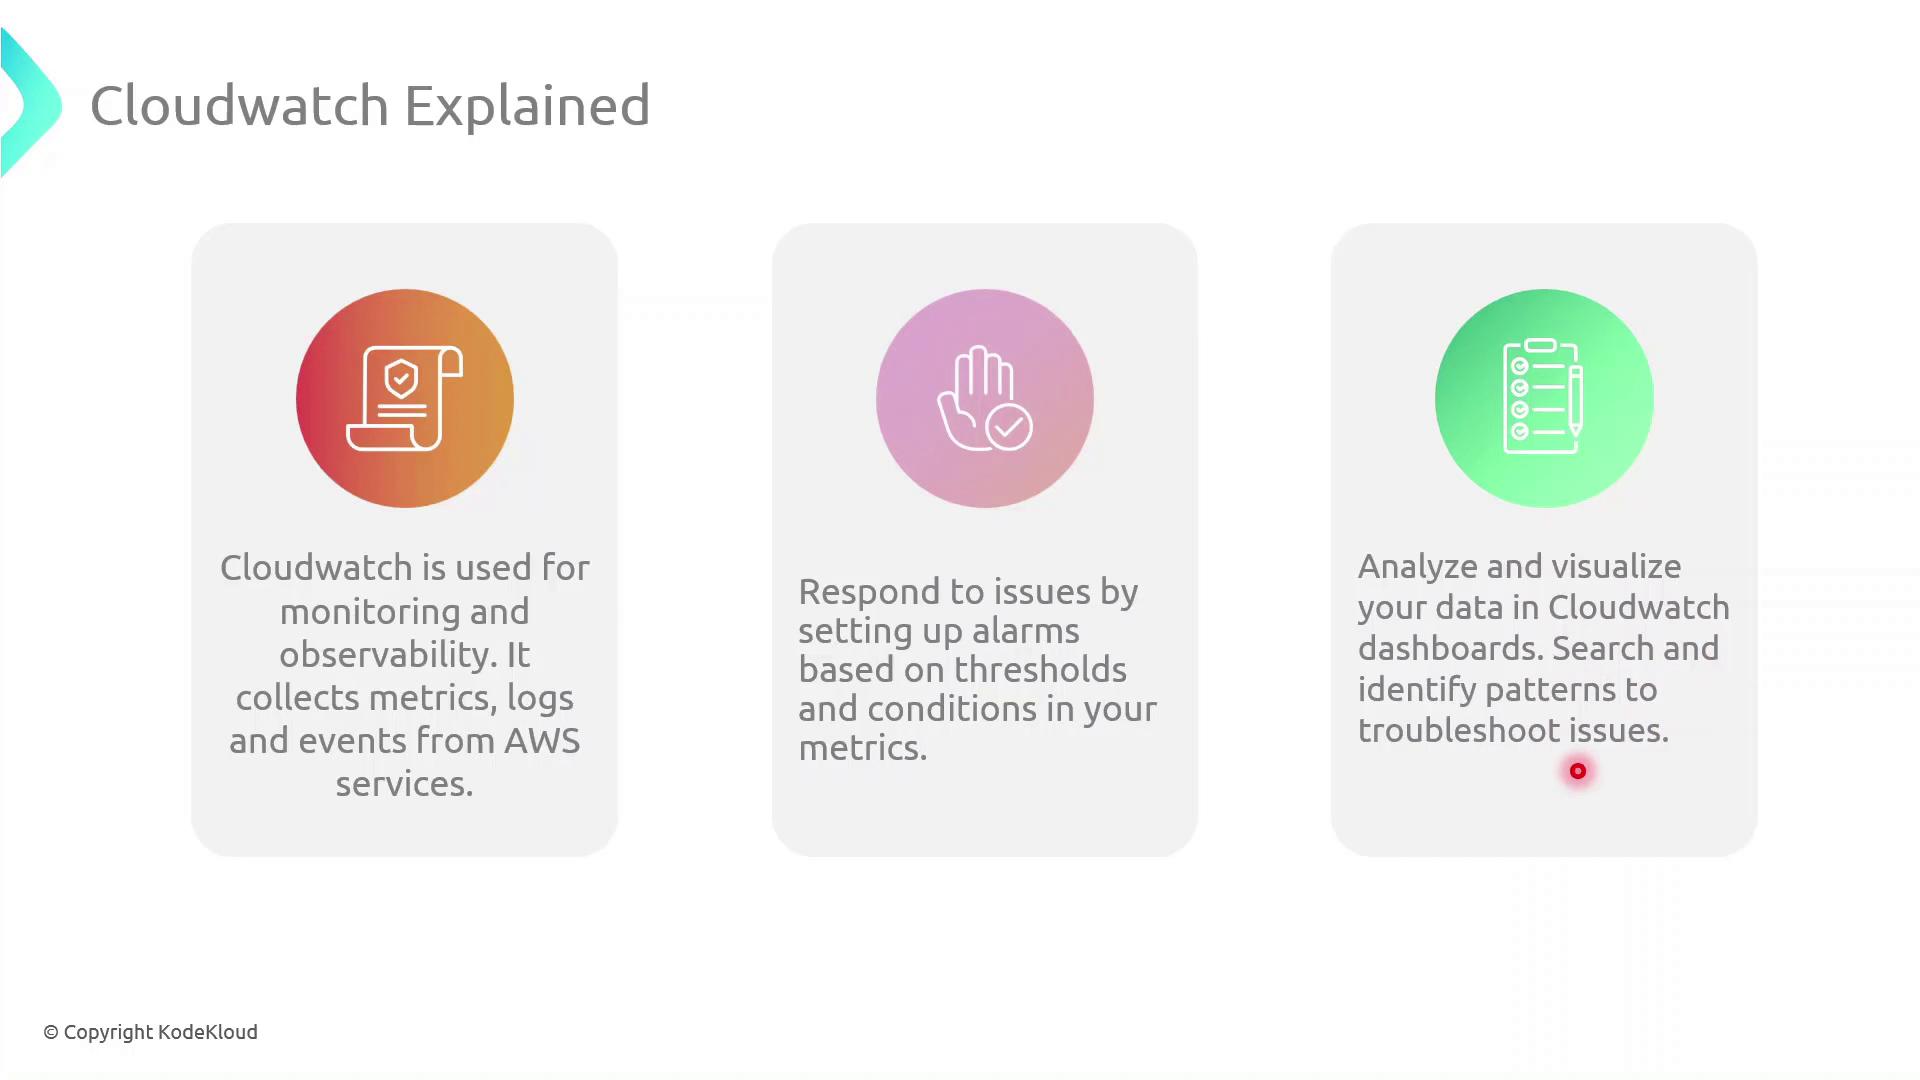
AWS CloudWatch is the central observability service for collecting metrics, logs, and events from your AWS resources and applications. In this guide, you’ll learn how to set up a CPU utilization alarm for an EC2 instance, ensuring you receive notifications whenever usage crosses a critical threshold.
Why Use CloudWatch?
With CloudWatch, you can:
Collect and visualize metrics (CPU, memory, disk I/O, network) from AWS services and custom applications
Aggregate, search, and analyze logs in real time
Trigger automated actions or notifications when specified events or thresholds are met
Build dashboards for a consolidated, at-a-glance view of your infrastructure health
Note
Be aware that custom metrics and detailed monitoring (1-minute resolution) may incur additional charges.
Key CloudWatch Components
| Component | Purpose |
| Metrics | Time-series data for resource performance (e.g., CPUUtilization). |
| Logs | Centralized aggregation and querying of application and system logs. |
| Alarms | Threshold-based triggers to send notifications or invoke actions. |
| Dashboards | Customizable visualizations combining metrics and logs in one view. |
| Events/Rules | Automated reactions to state changes or scheduled tasks across AWS. |
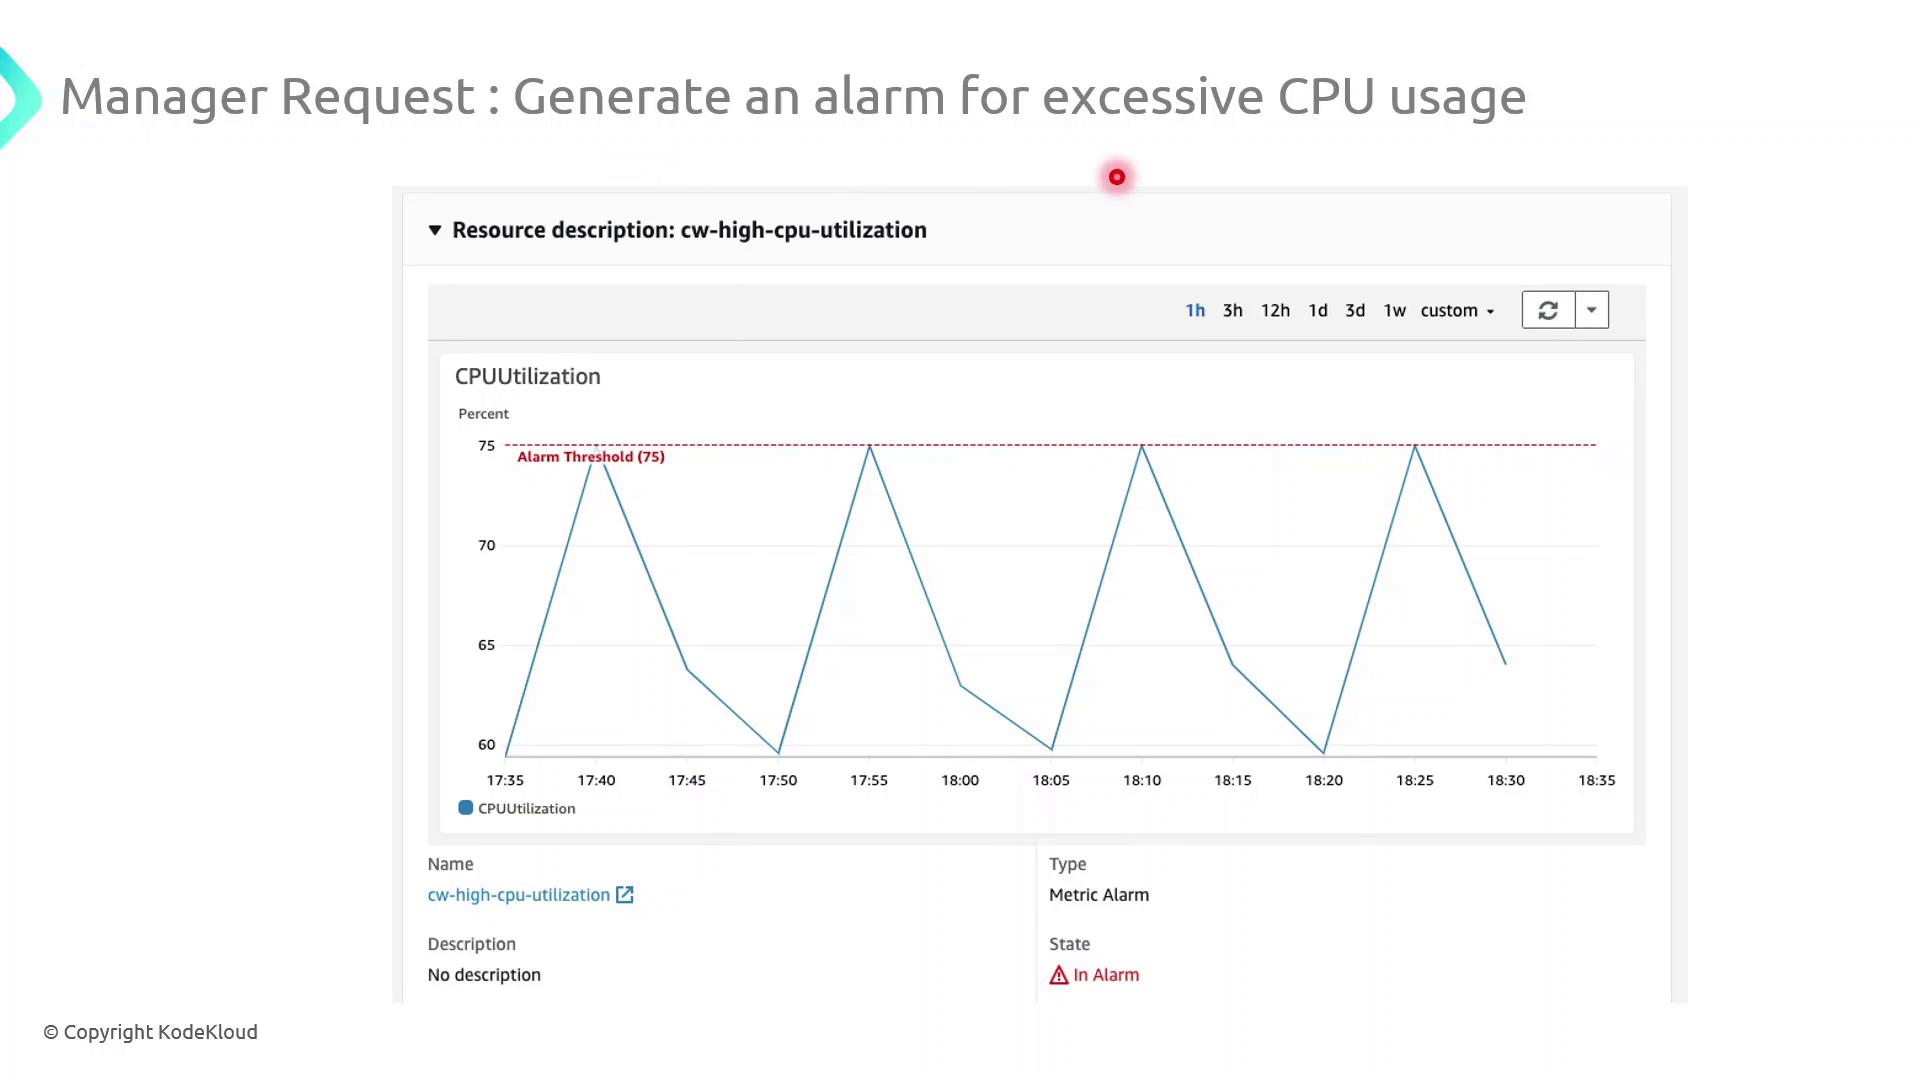
Demo: Configure a High-CPU Alarm
Follow these steps in the AWS Management Console to create an alarm that notifies you when CPU utilization exceeds 75% for 5 minutes:
Navigate to CloudWatch in the AWS Console.
In the sidebar, choose Alarms → All alarms → Create alarm.
Under Select metric, pick the EC2 namespace and then Per-Instance Metrics → CPUUtilization.
Click Select metric for your target instance.
On the Specify metric and conditions page:
Threshold type: Static
Whenever CPUUtilization is:
>75For: 5 consecutive periods of 1 minute each
Under Configure actions, choose an SNS topic or create a new one to send email notifications.
(Optional) Add tags to organize billing and access management.
Review settings and click Create alarm.
Once activated, CloudWatch will continuously evaluate the metric and send an email via SNS whenever CPU usage remains above 75% for 5 minutes.
Warning
Ensure your SNS subscription is confirmed; otherwise, you won’t receive alarm notifications.
Demo CloudWatch
In this guide, you’ll configure an Amazon CloudWatch alarm that notifies you via email whenever an EC2 instance’s average CPU usage exceeds 70% over a five-minute period. This is essential for maintaining optimal performance and responding swiftly to resource bottlenecks.
Prerequisites
| Requirement | Description |
| AWS account with CloudWatch access | Permissions to view metrics and create alarms |
| Running EC2 instance | The instance you intend to monitor |
| Verified email subscription for SNS | Confirmed subscription to receive alarm notifications |
Warning
Make sure your IAM user or role has the following managed policies:
CloudWatchFullAccessAmazonSNSFullAccess
Without these permissions, you won’t be able to create alarms or SNS topics.
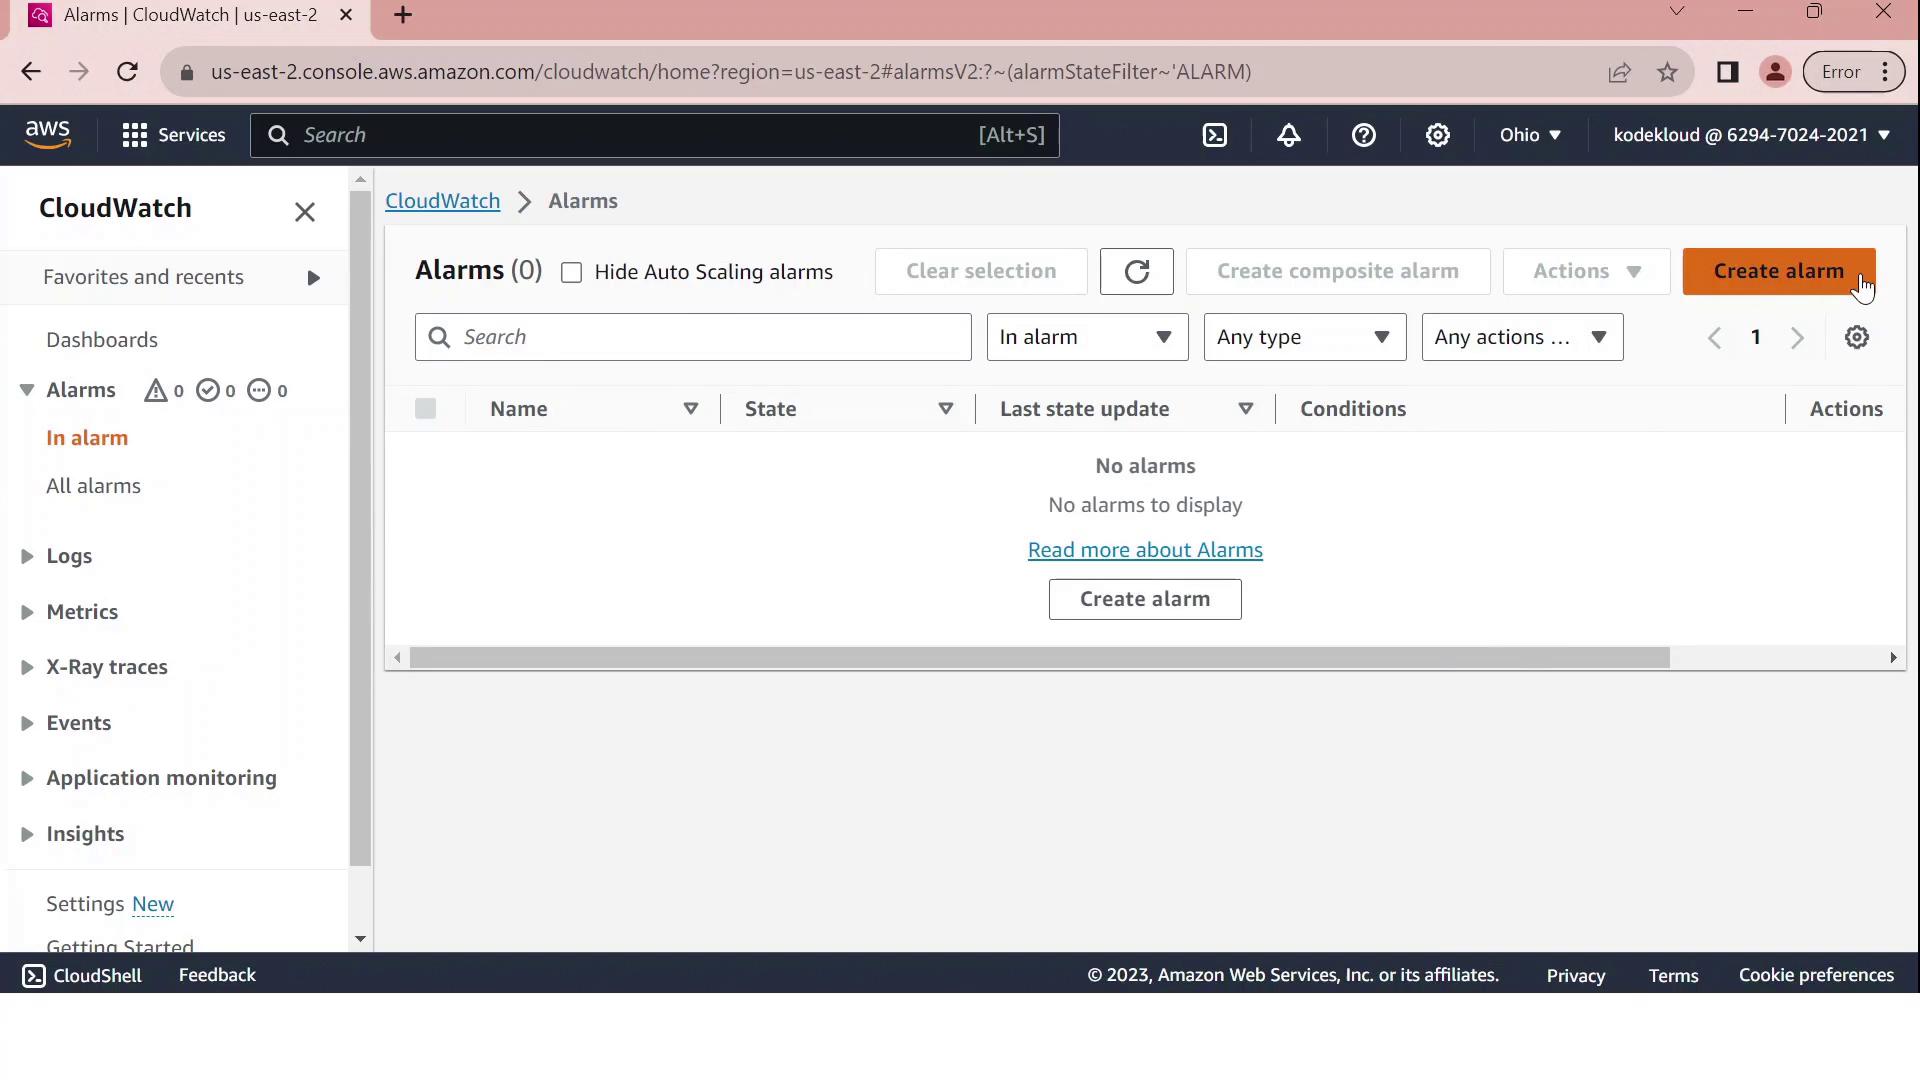
1. Open the Alarms Dashboard
Sign in to the AWS Management Console and open CloudWatch.
In the left navigation pane, choose Alarms, then click Create alarm.
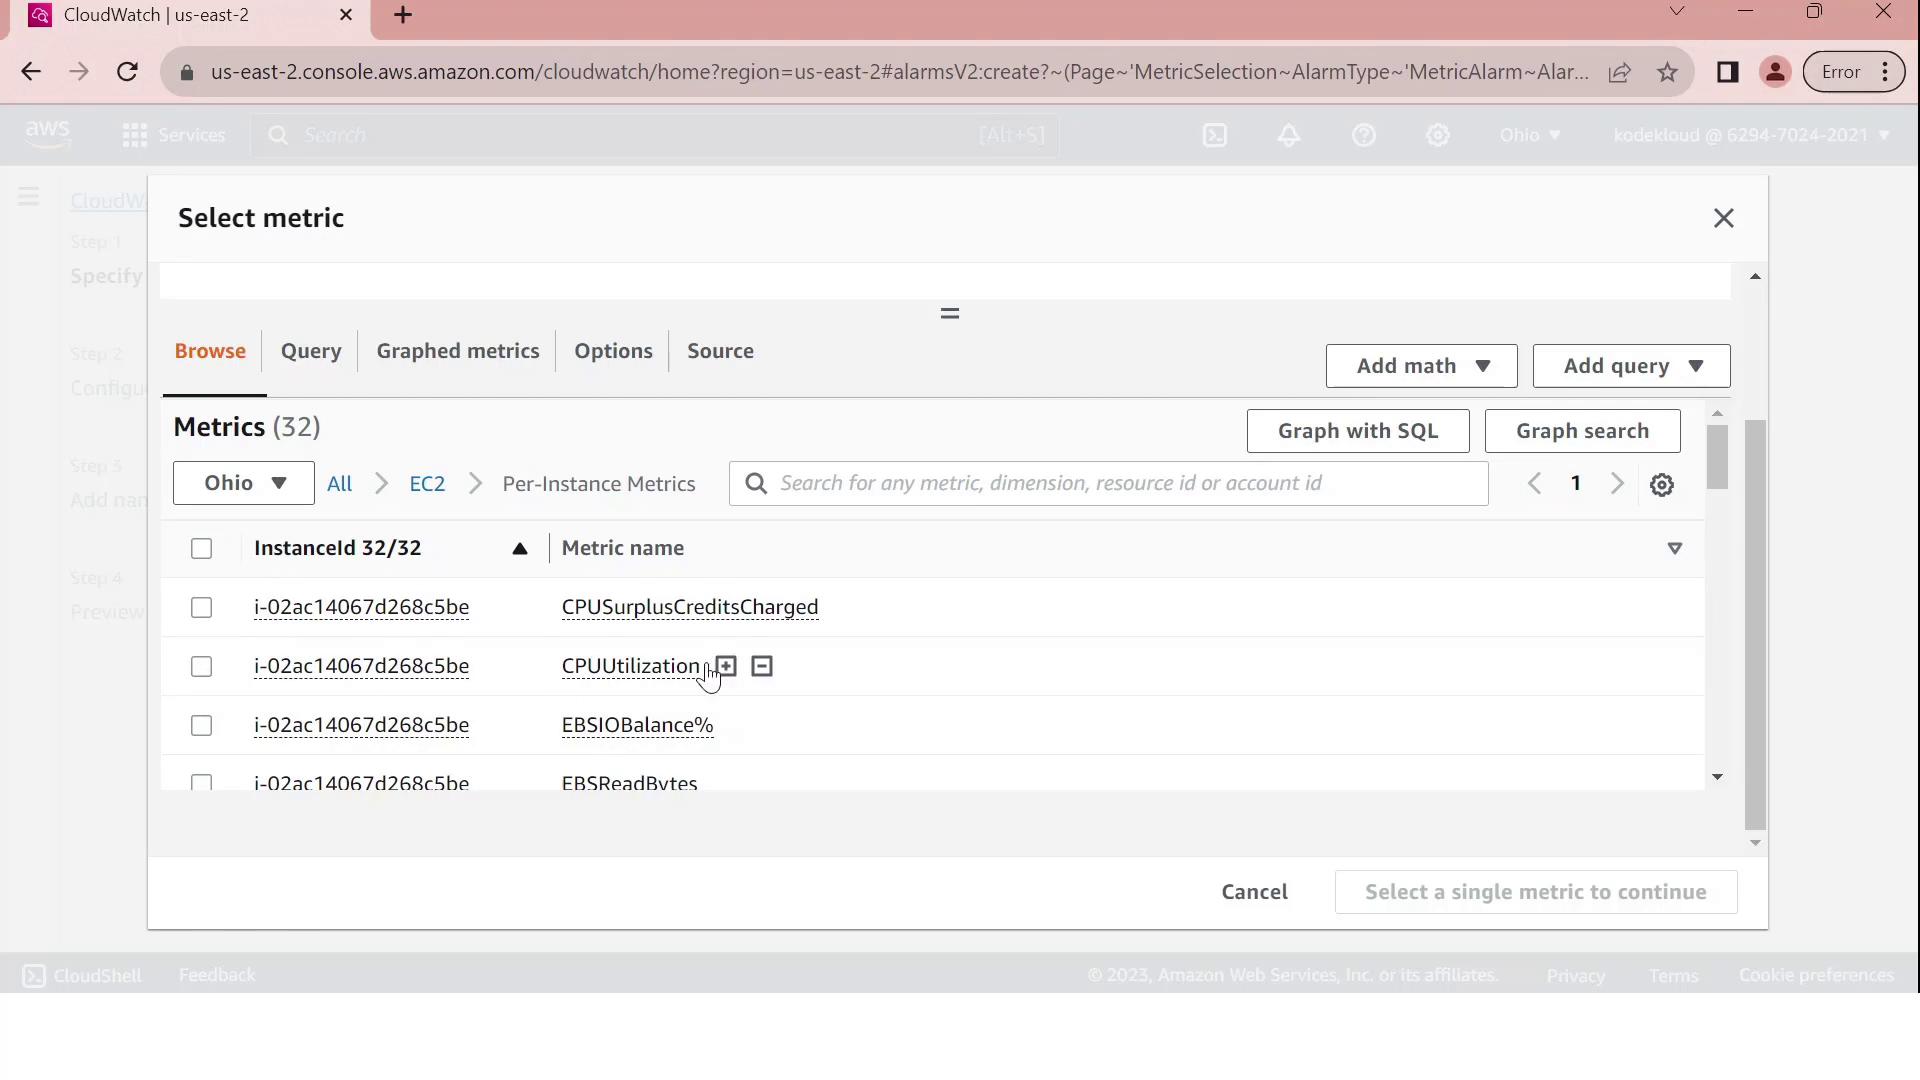
2. Select the EC2 CPUUtilization Metric
On Select metric, pick EC2.
Under Per-Instance Metrics, locate and select your instance’s CPUUtilization metric.
Click Select metric.
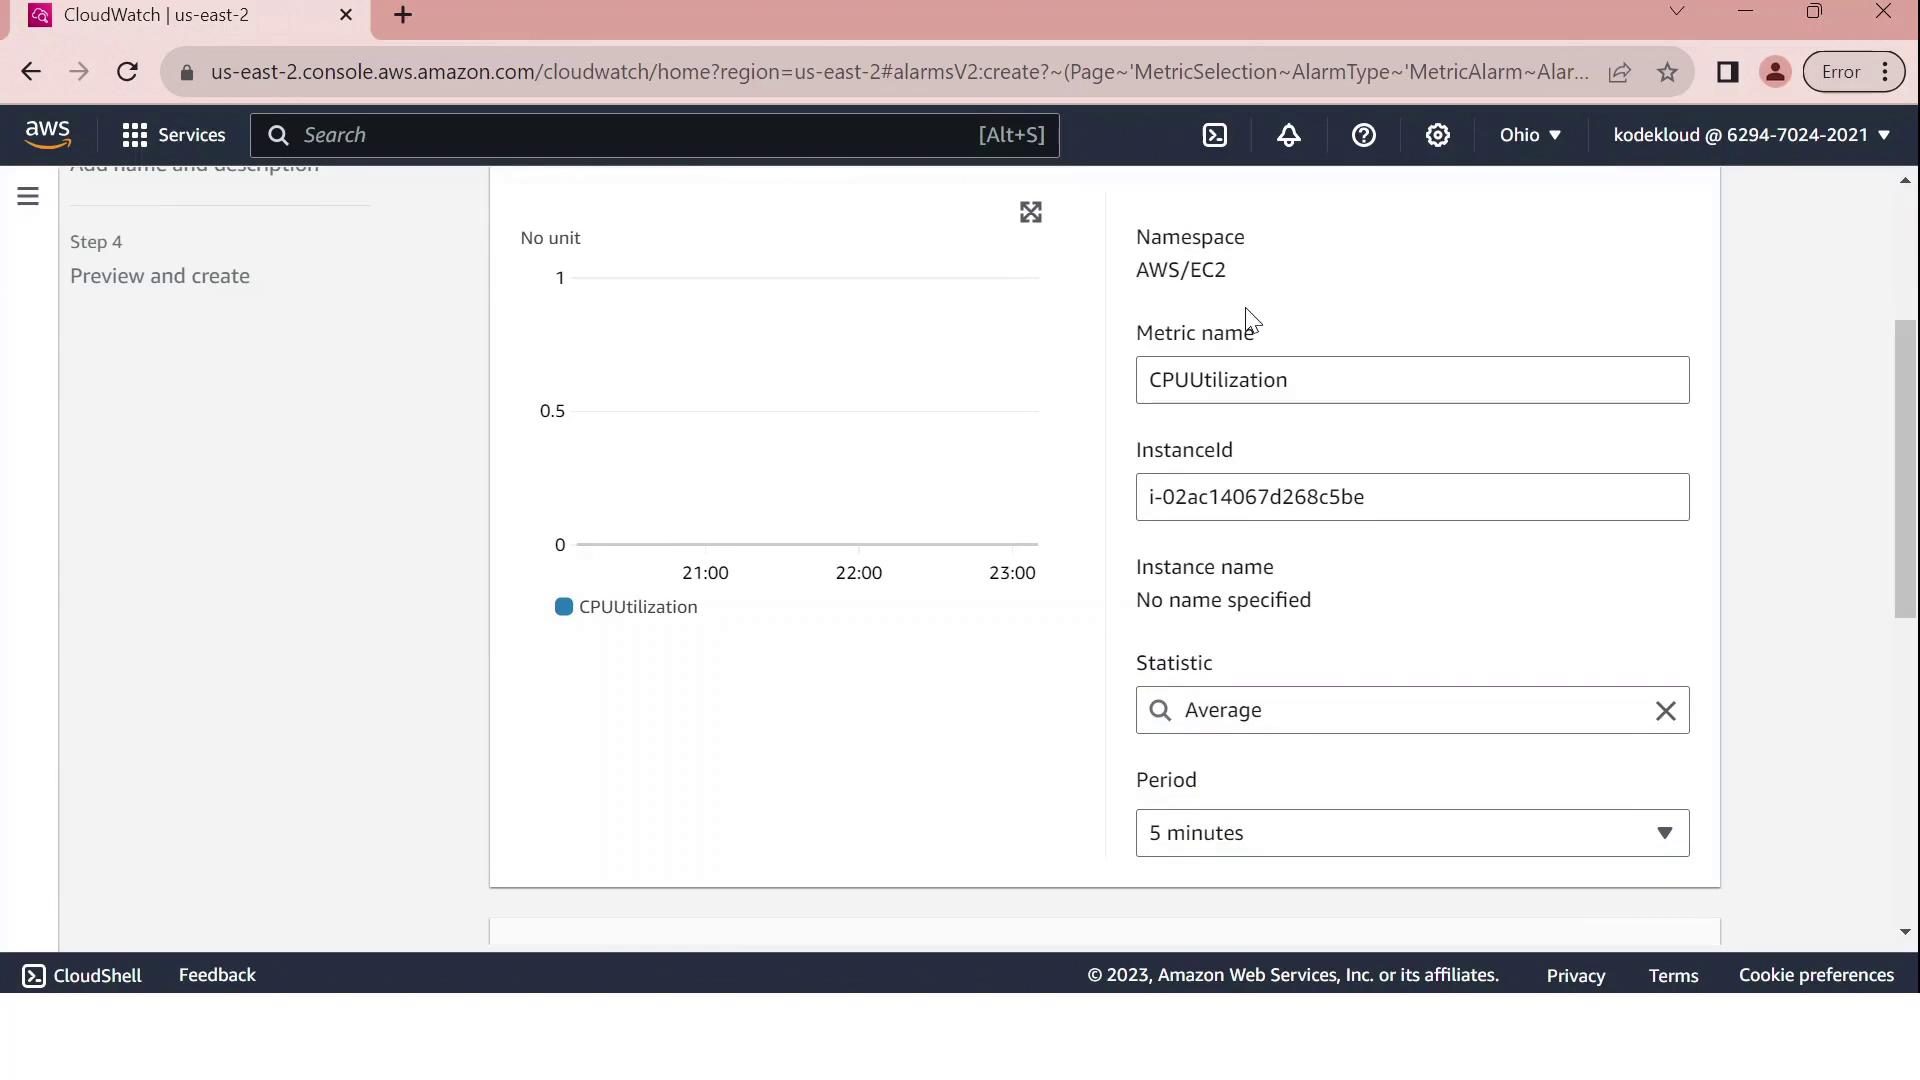
3. Define the Alarm Threshold
Configure the alarm conditions on the Configure metric page:
| Setting | Value |
| Statistic period | 5 minutes |
| Threshold type | Static |
| Condition | GreaterThanThreshold |
| Threshold value | 70 |
This setup tells CloudWatch to evaluate the average CPU utilization over each 5-minute interval and fire the alarm if it exceeds 70%.
Note
Custom metrics and long-term storage can incur additional charges. Review CloudWatch pricing before enabling high-frequency monitoring.
4. Configure Notifications via SNS
Under Notification, choose Create new topic and enter:
Topic name: Send_email_to_Admin
Endpoint: admin@test.com
Click Create topic to confirm. You can also attach automated actions for Auto Scaling, EC2, or Systems Manager.
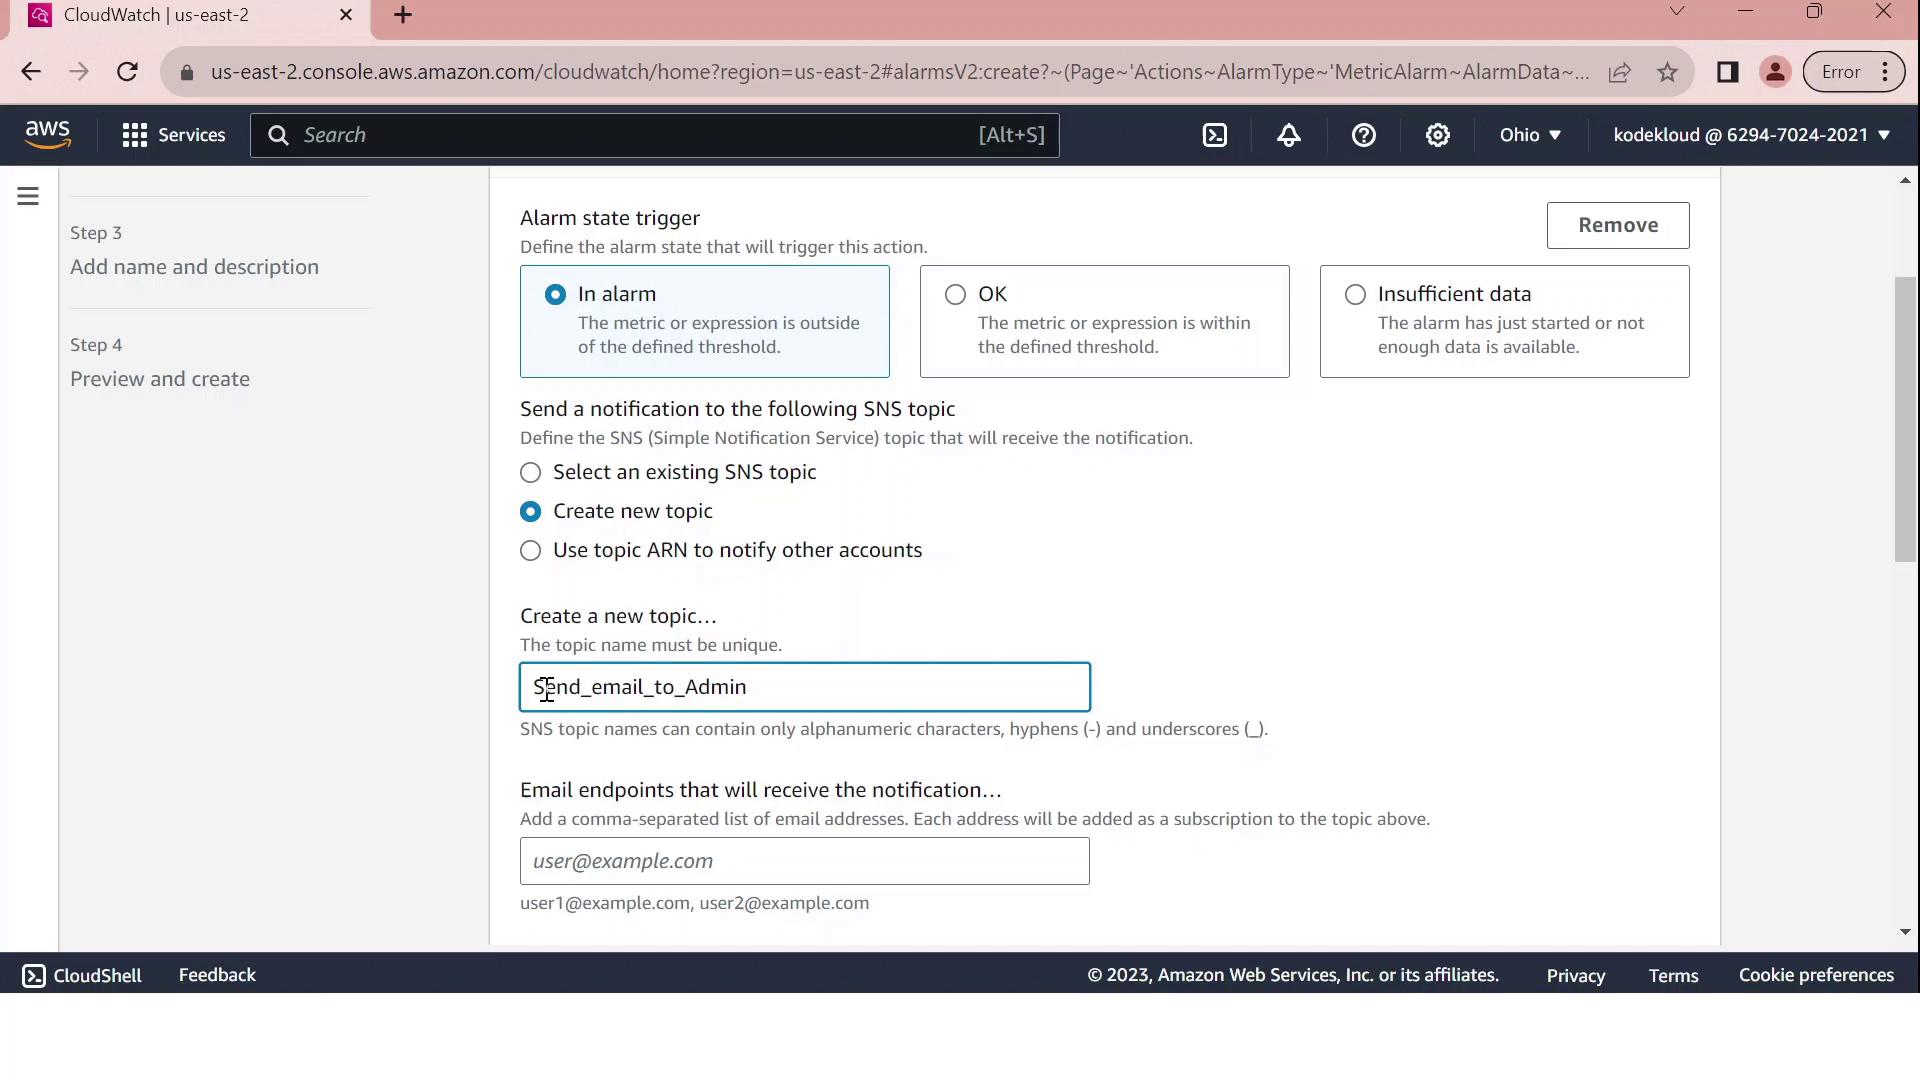
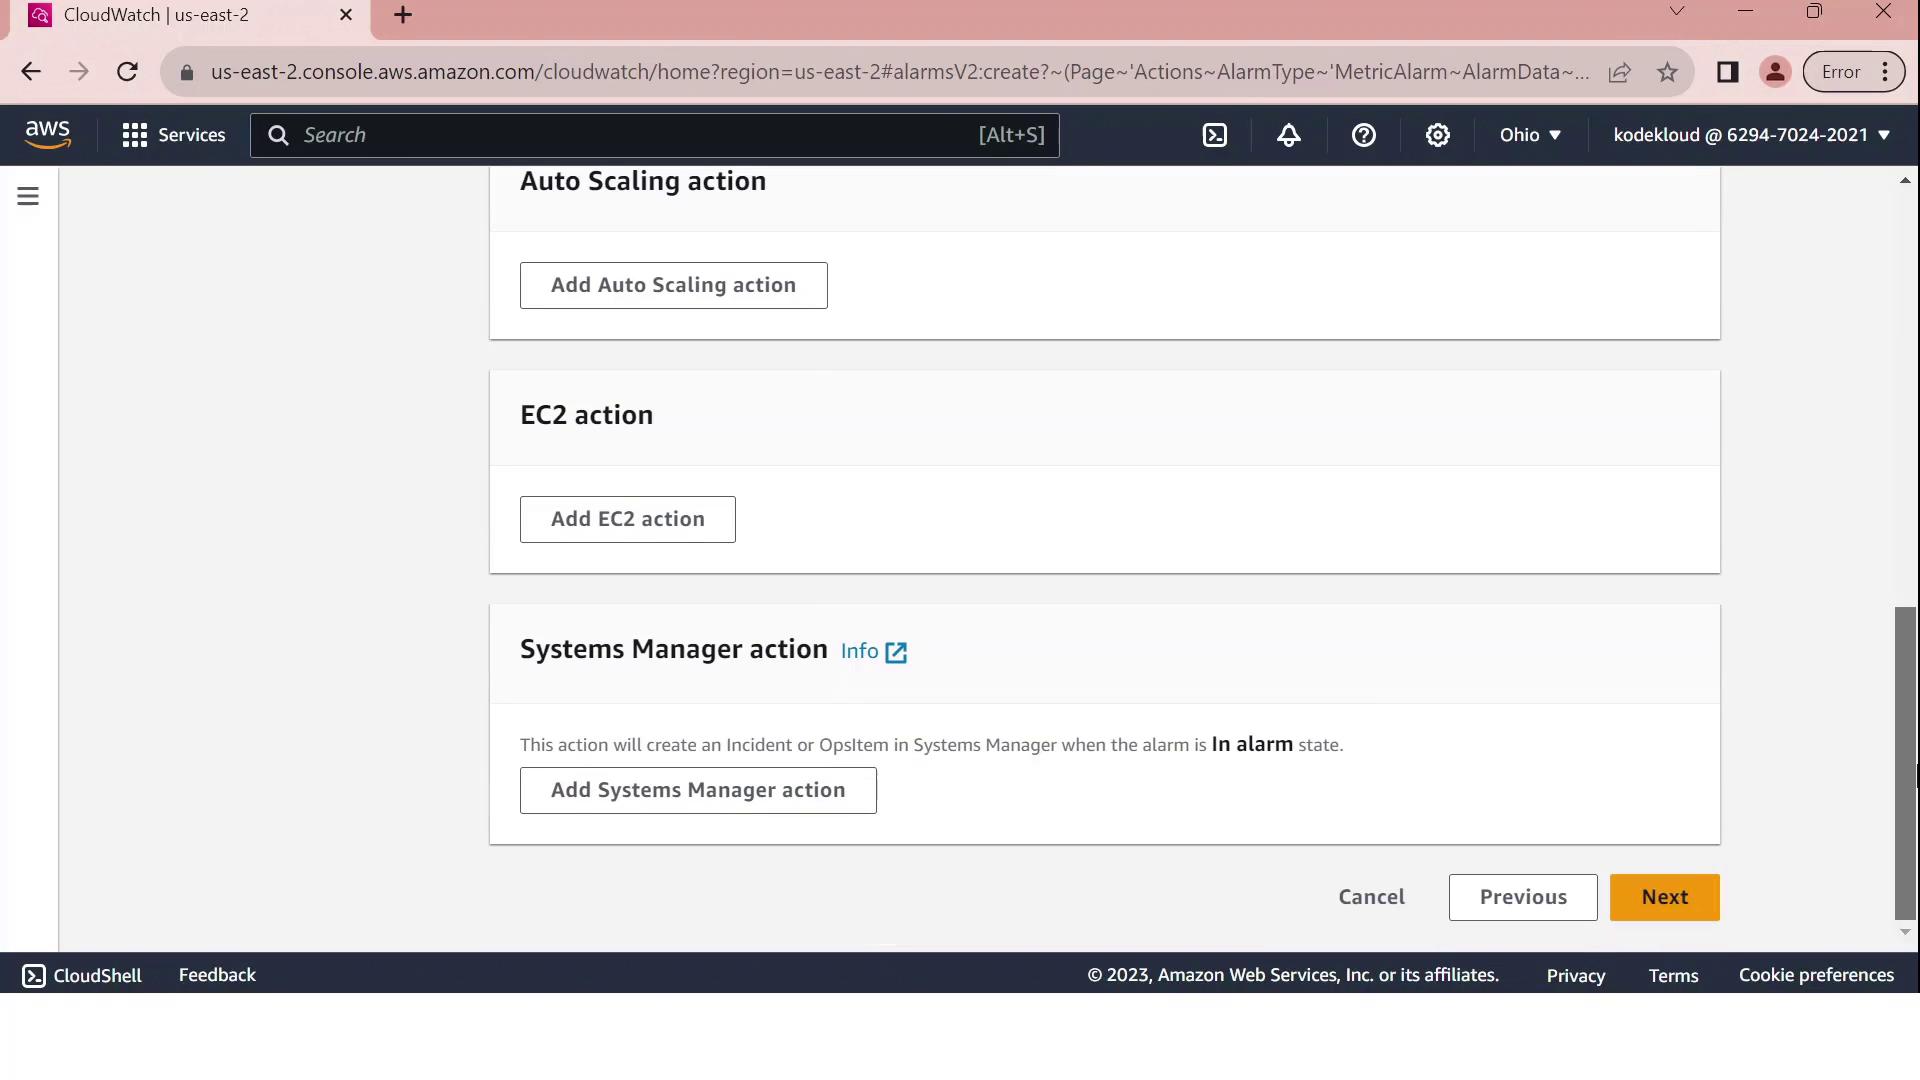
Click Next to proceed.
5. Name, Review, and Create
Provide a name such as
CPUUtilizationAbove70and an optional description.Review all settings:
Metric: CPUUtilization for your EC2 instance
Period and statistic
Threshold: GreaterThan 70
Notification: SNS email to admin@test.com
Click Create alarm.
Upon successful creation, you’ll see a confirmation message in the Alarms dashboard.

Your CloudWatch alarm is now active. When the average CPU utilization exceeds 70% over a five-minute span, an email is sent to the administrator. Monitor and adjust thresholds as needed to align with your application’s performance requirements.
AWS Config
In this guide, we’ll explore how to leverage AWS Config and a PCI Conformance Pack to ensure your AWS environment adheres to the Payment Card Industry Data Security Standard (PCI DSS). You’ll learn how to continuously monitor configuration changes, enforce encryption and logging rules, and quickly remediate non-compliant resources.
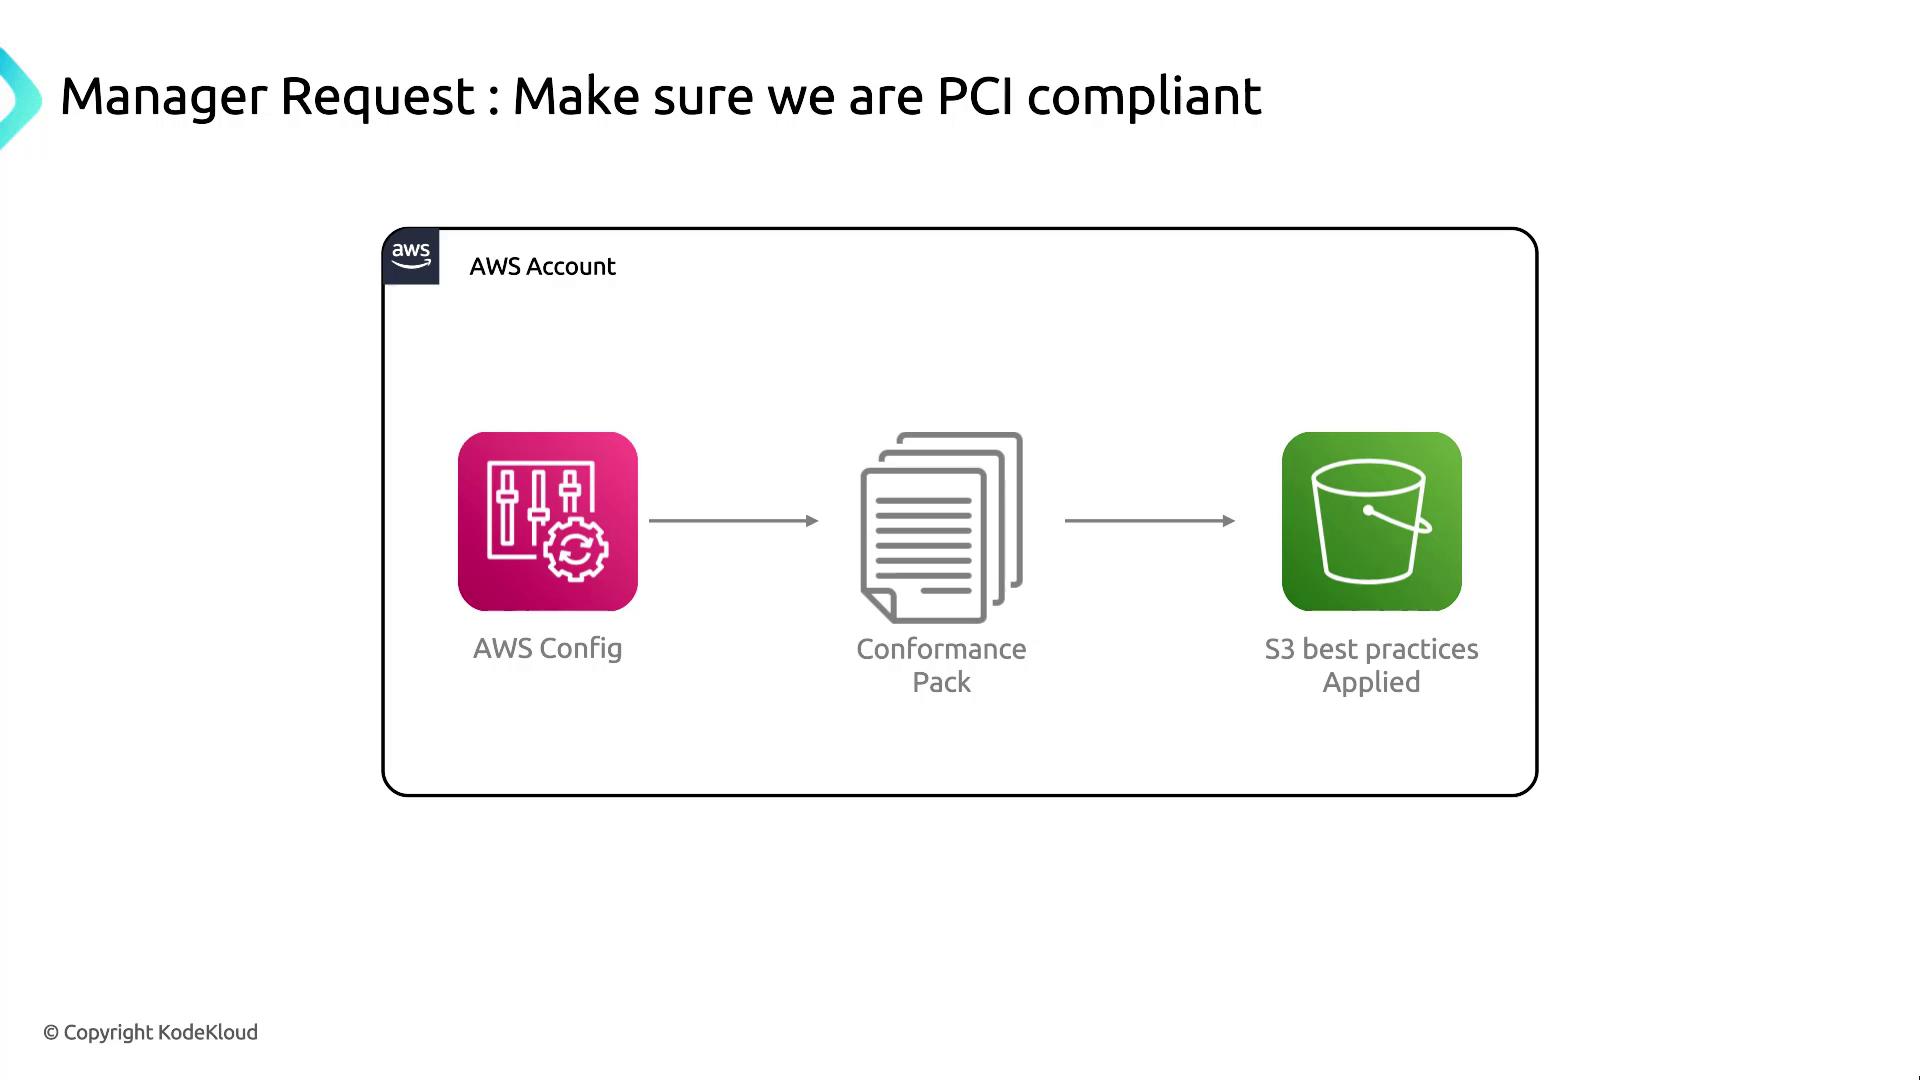
PCI Compliance Workflow
The diagram below illustrates how AWS Config, paired with a PCI conformance pack, enforces critical controls—such as S3 bucket encryption, access policies, and logging—across your AWS account.
Key AWS Config Functions
AWS Config provides the following core capabilities to help you maintain and audit compliance:
Configuration Tracking: Records detailed history of resource configurations.
Compliance Assessment: Evaluates resources against rules defined in conformance packs.
Change Management: Maintains a timeline of changes for troubleshooting and auditing.
![]()
For deeper details, see the AWS Config Developer Guide.
PCI Conformance Pack Overview
A PCI conformance pack is a curated collection of managed AWS Config rules and remediation actions mapped to PCI DSS requirements. Typical rules include:
| Rule Name | Description |
s3-bucket-server-side-encryption-enabled | Ensures all S3 buckets have default encryption enabled. |
cloudtrail-enabled | Verifies that AWS CloudTrail is enabled in every region. |
iam-password-policy | Checks that the IAM password policy meets complexity standards. |
Note
You can customize managed rules or add AWS Config Custom Rules using AWS Lambda to address organization-specific requirements.
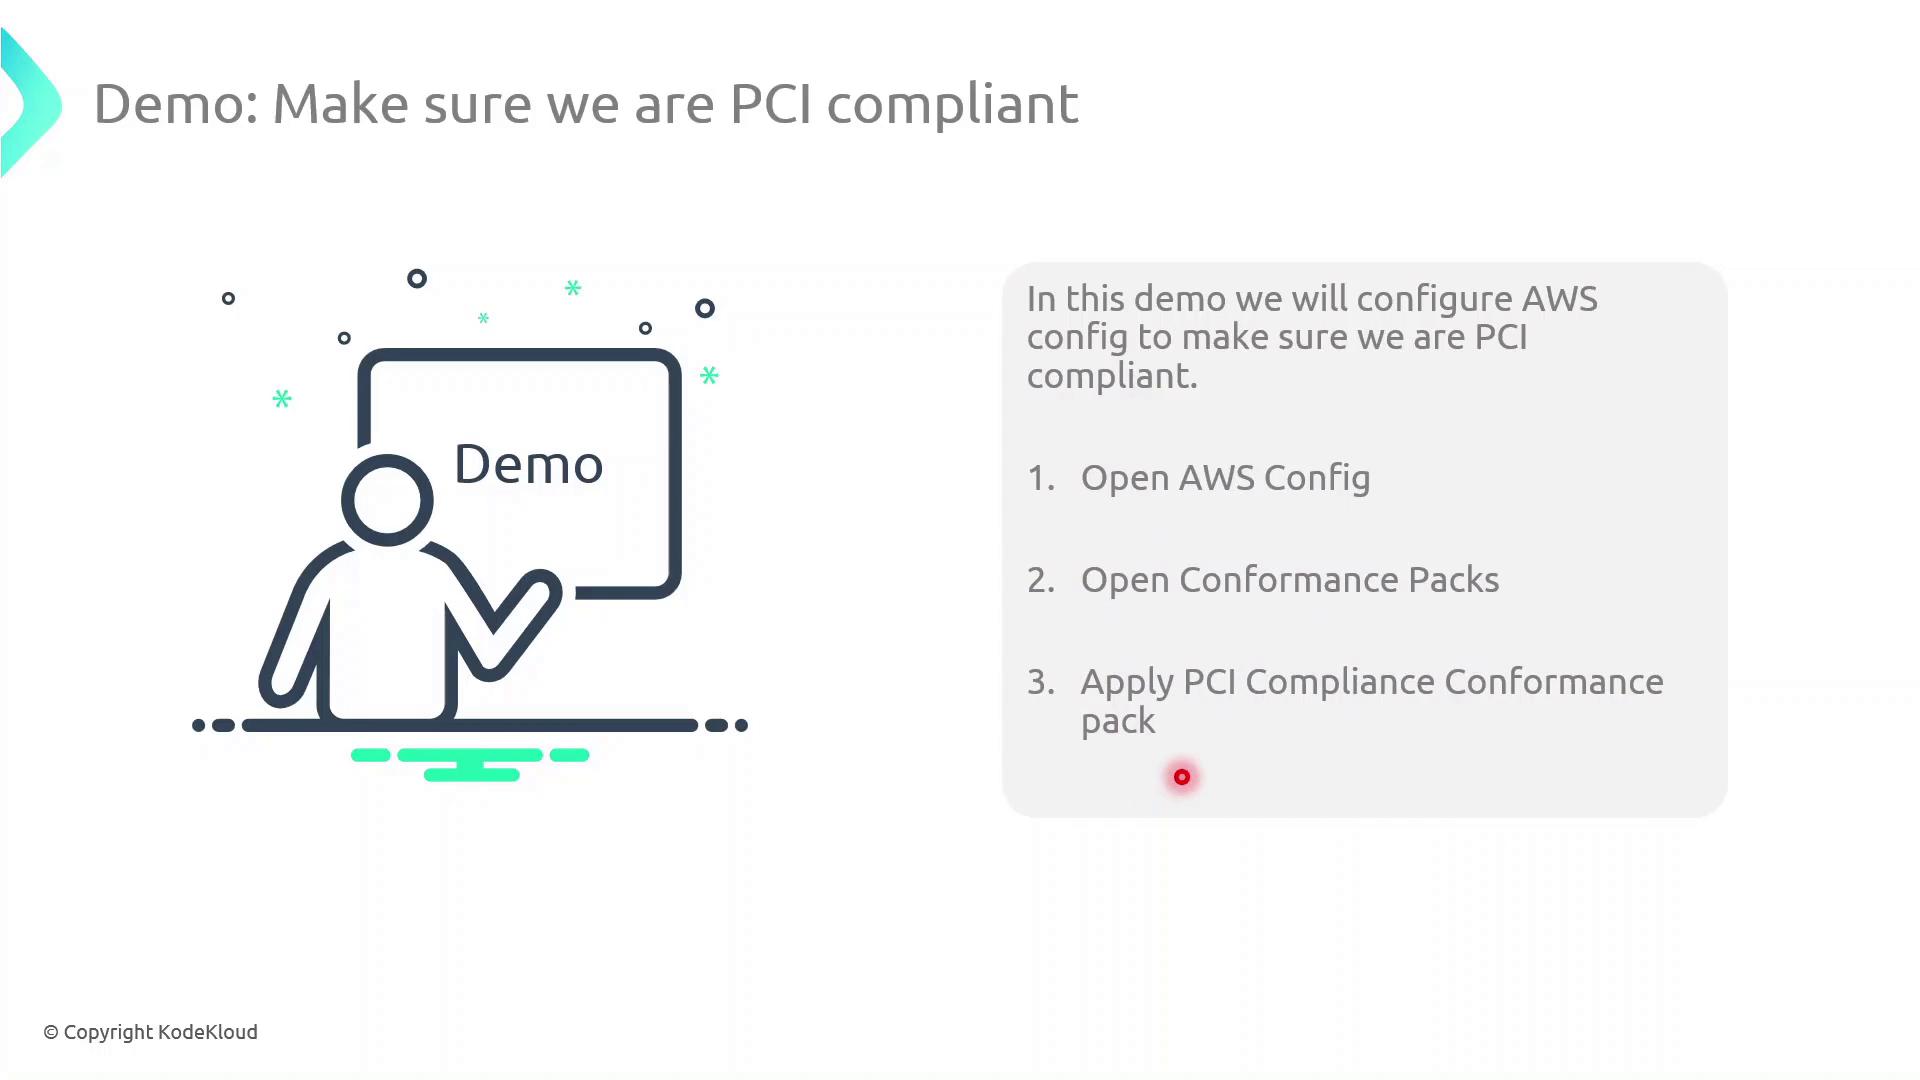
Demo: Deploying the PCI Conformance Pack
Follow these steps to deploy and evaluate the PCI conformance pack in your AWS account:
Sign in to the AWS Management Console.
Navigate to AWS Config in the Services menu.
In the left pane, select Conformance packs.
Click Deploy conformance pack, then choose PCI Compliance from the AWS-managed list.
Review parameters (if any), then click Deploy.
Once deployed, AWS Config immediately evaluates your resources against the PCI rules and highlights any compliance violations on the Conformance packs dashboard.
Demo AWS Config
In this guide, we'll walk through configuring AWS Config in the US East (Ohio) region, deploying a managed rule to restrict SSH access, and using a sample PCI DSS conformance pack to assess your environment’s compliance.
Prerequisites
An AWS account with administrative or Config-related IAM permissions
A designated S3 bucket for storing configuration snapshots
Region set to US East (Ohio) (us-east-2)
Warning
Enabling AWS Config may incur charges for configuration recordings, S3 storage, and conformance pack evaluations. Review the AWS Config Pricing page before proceeding.
1. Accessing AWS Config
Sign in to the AWS Management Console.
In the search bar, type Config and select AWS Config.
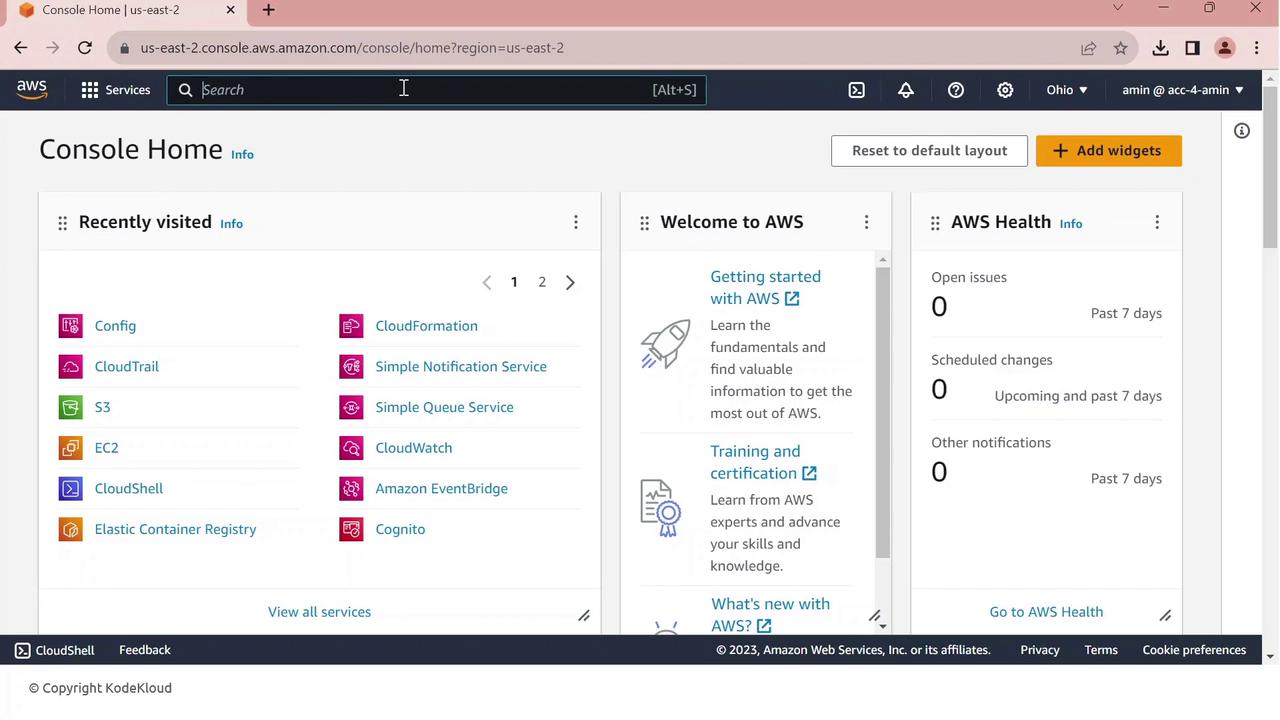
Confirm your region is US East (Ohio) (us-east-2).
Click Config. If AWS Config isn’t set up yet, you’ll see the setup dashboard.
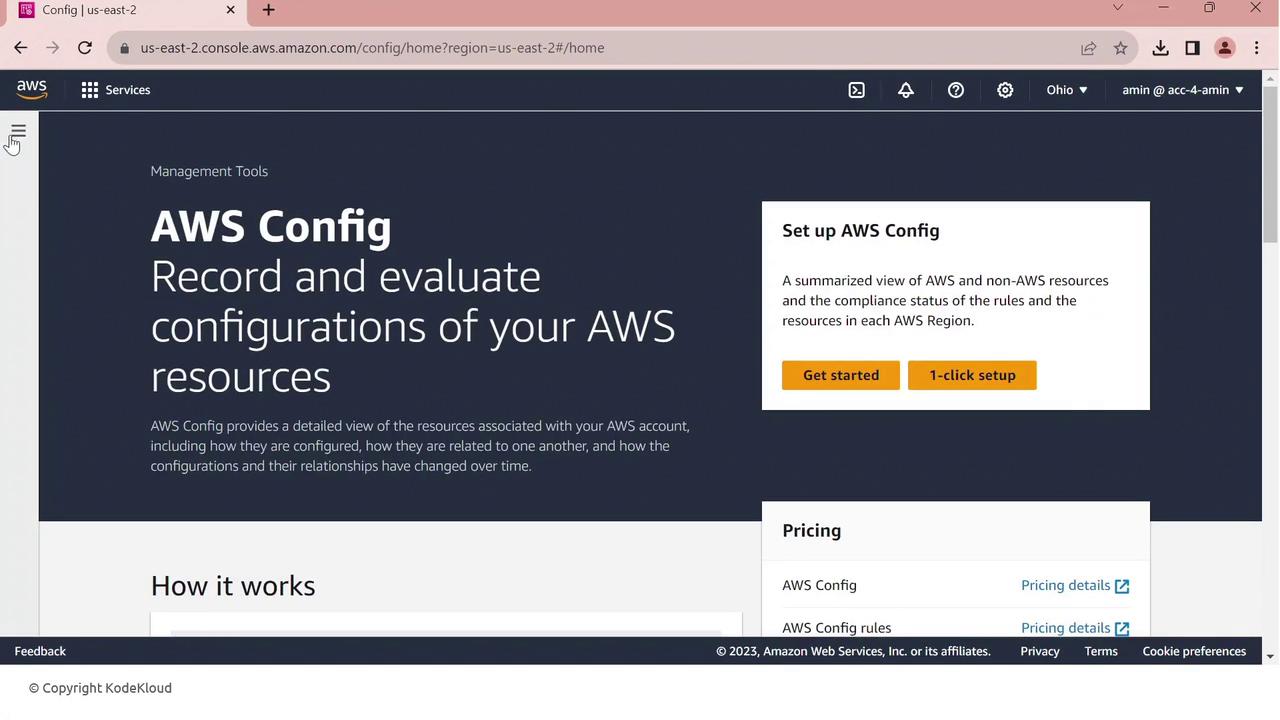
Click Get started to begin.
2. Configuring AWS Config
On General settings, choose All current and future resource types supported in this region. This enables comprehensive tracking.
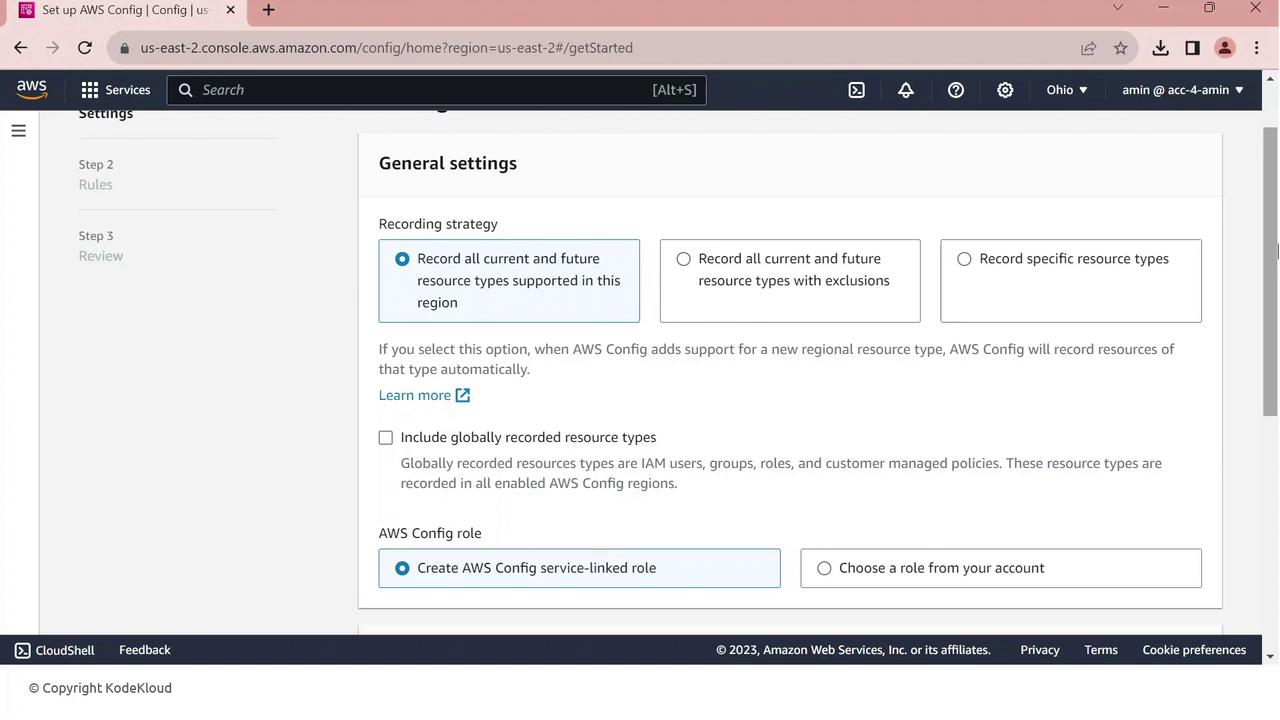
Scroll to Resource types to record—AWS Config will create a service-linked role automatically.
Next, specify your delivery channel:
S3 bucket: to store configuration snapshots and compliance histories
IAM role: AWS Config uses this to write data to your bucket
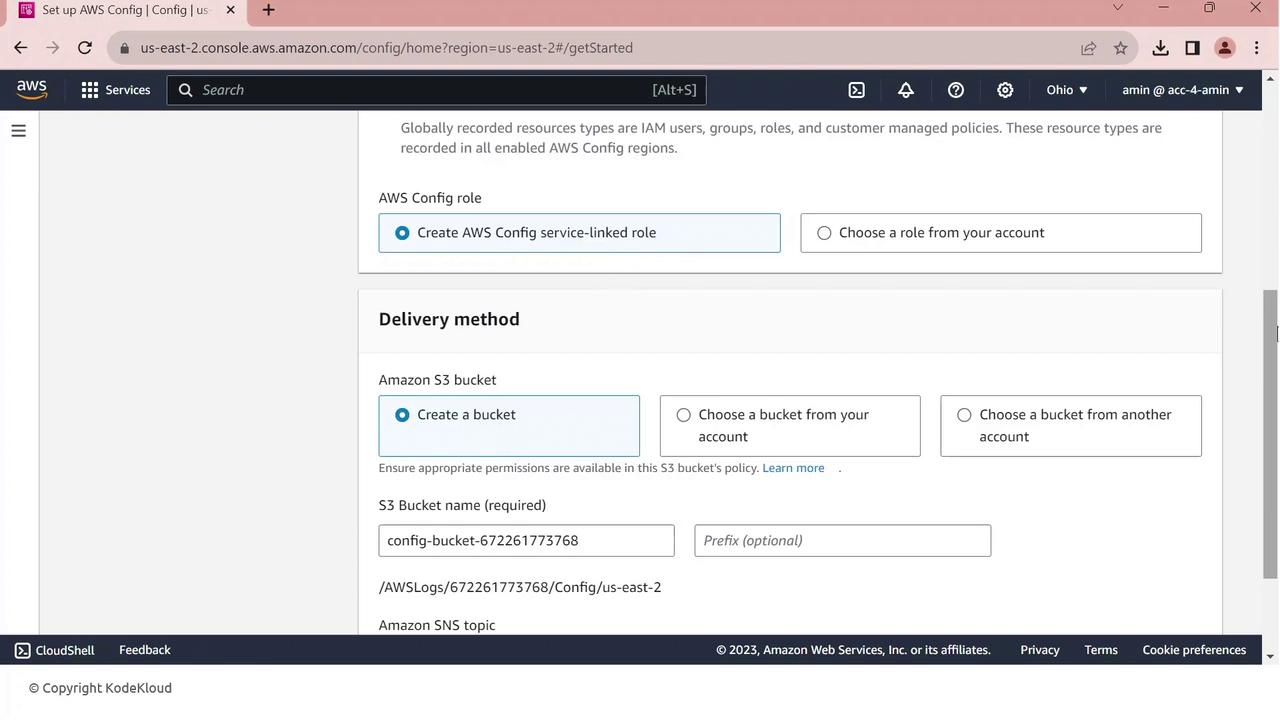
Click Next to review, then Confirm to complete setup.
3. Adding a Managed Rule
AWS Config includes a library of managed rules to enforce best practices. Let’s add the restricted-ssh rule:
In the console, go to Rules.
Search for restricted-ssh—this rule ensures no security group permits 0.0.0.0/0 on port 22.
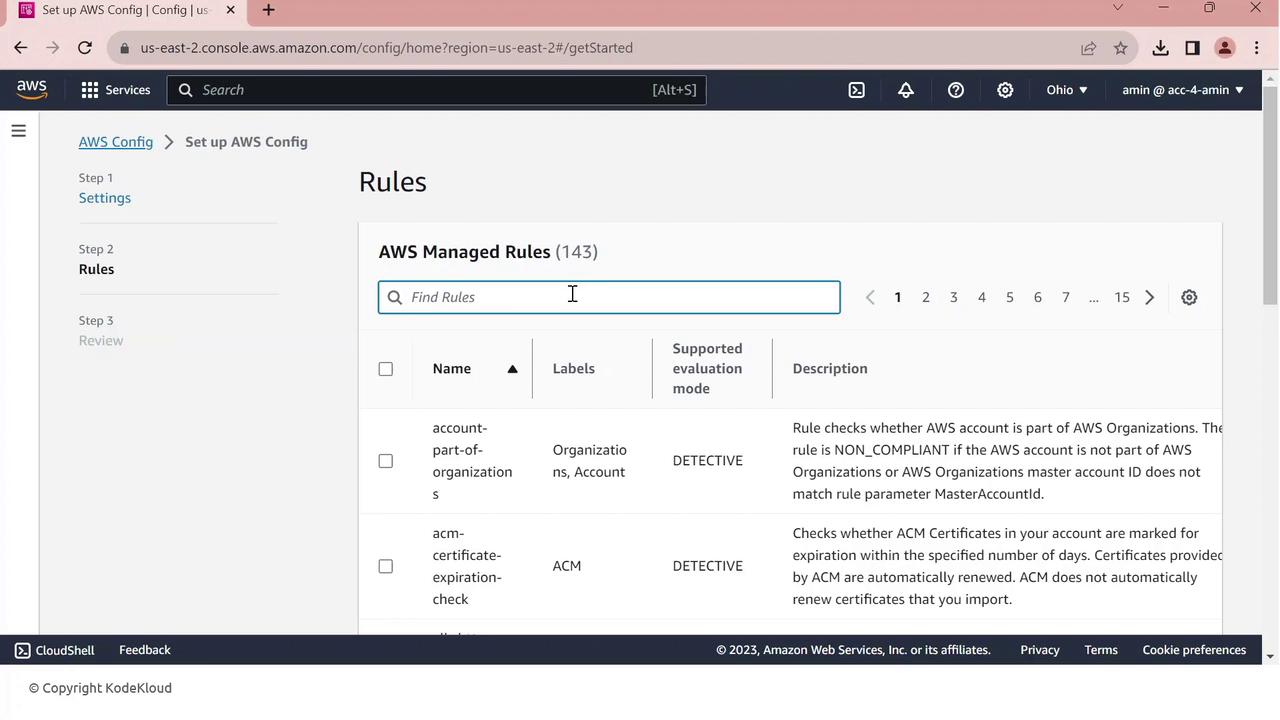
Select restricted-ssh and click Next.
Review the parameters and click Confirm.
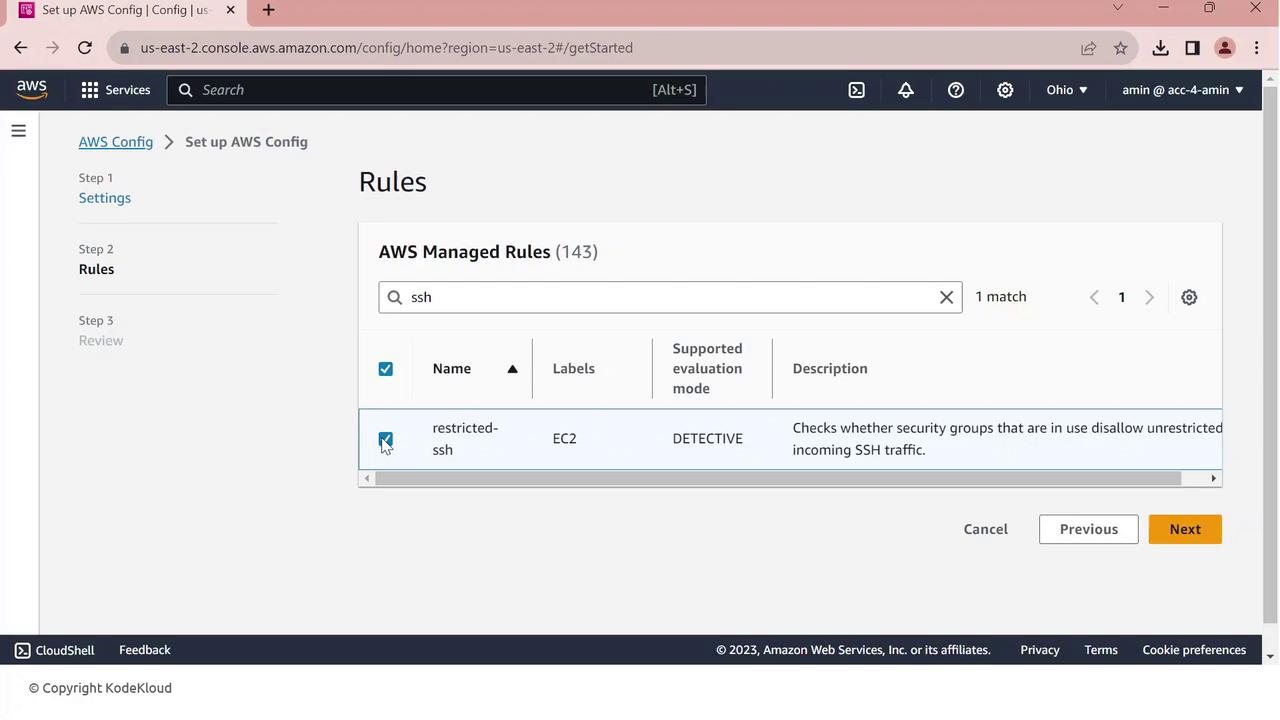
The rule is created and begins evaluating your security groups. Initially, compliance may show zero resources until the first evaluation completes.
4. Deploying a PCI DSS Conformance Pack
To scale compliance checks against PCI DSS requirements, deploy the AWS–provided conformance pack:
In AWS Config, navigate to Conformance packs.
Click Deploy conformance pack.
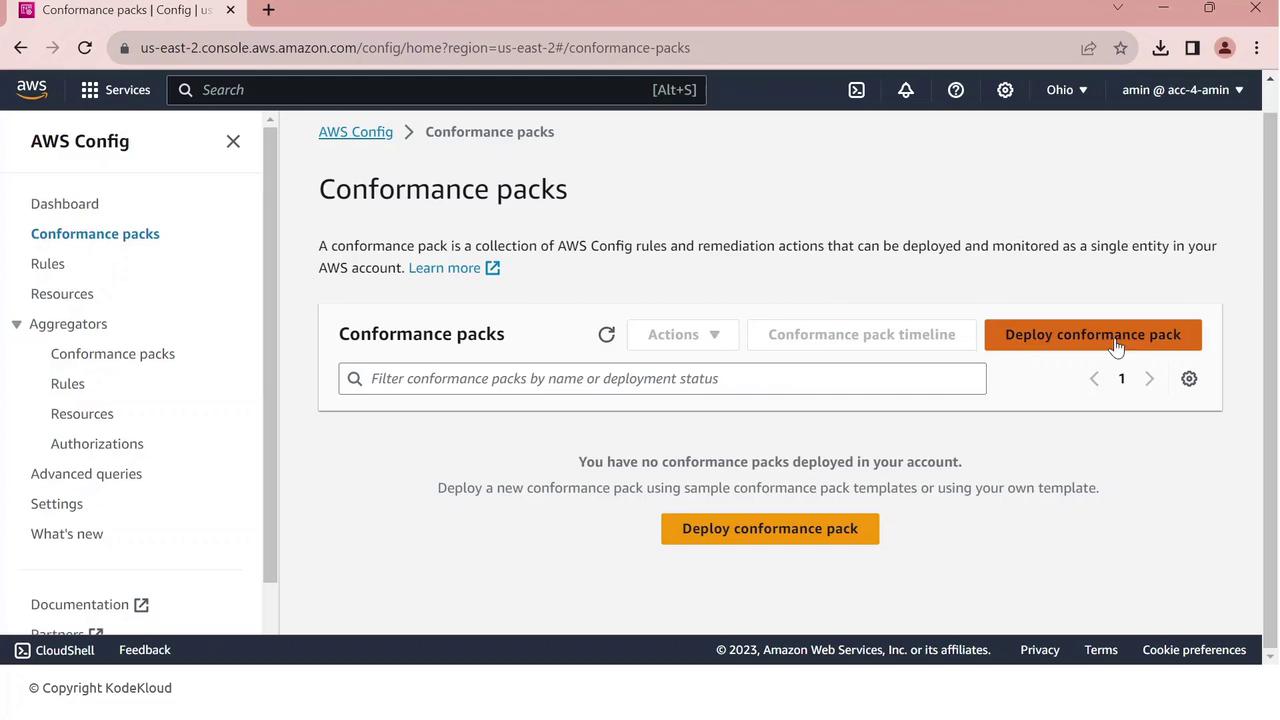
Choose Use a sample template.
From the dropdown, select Operational Best Practices for PCI DSS.
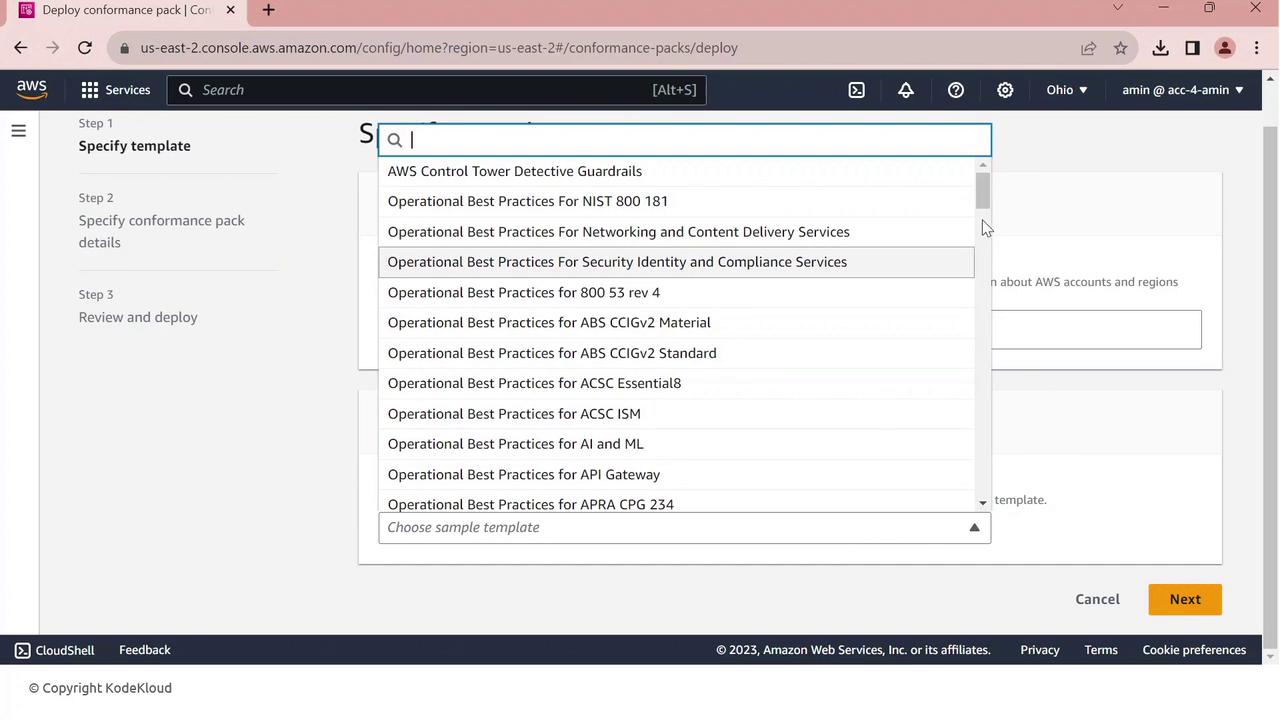
- Click Next, give your pack a name (e.g.,
PCI-Conformance-Pack), and proceed.
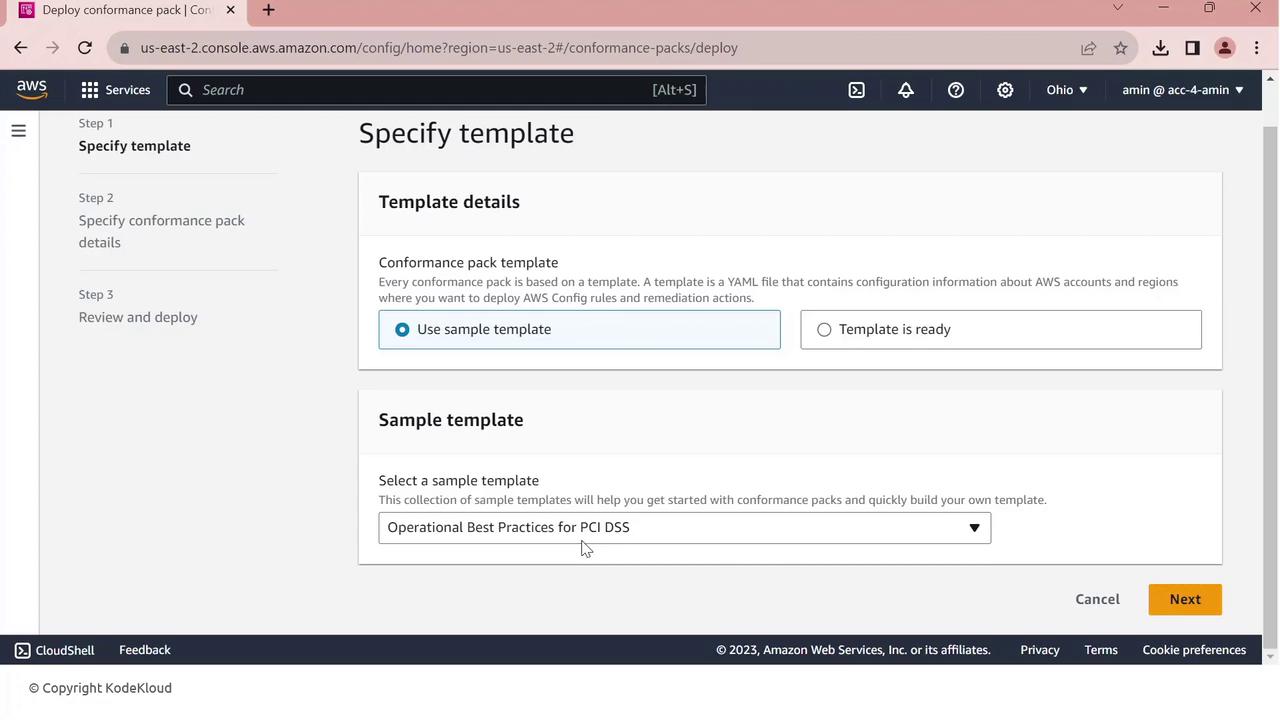
- Review the configuration and click Deploy.
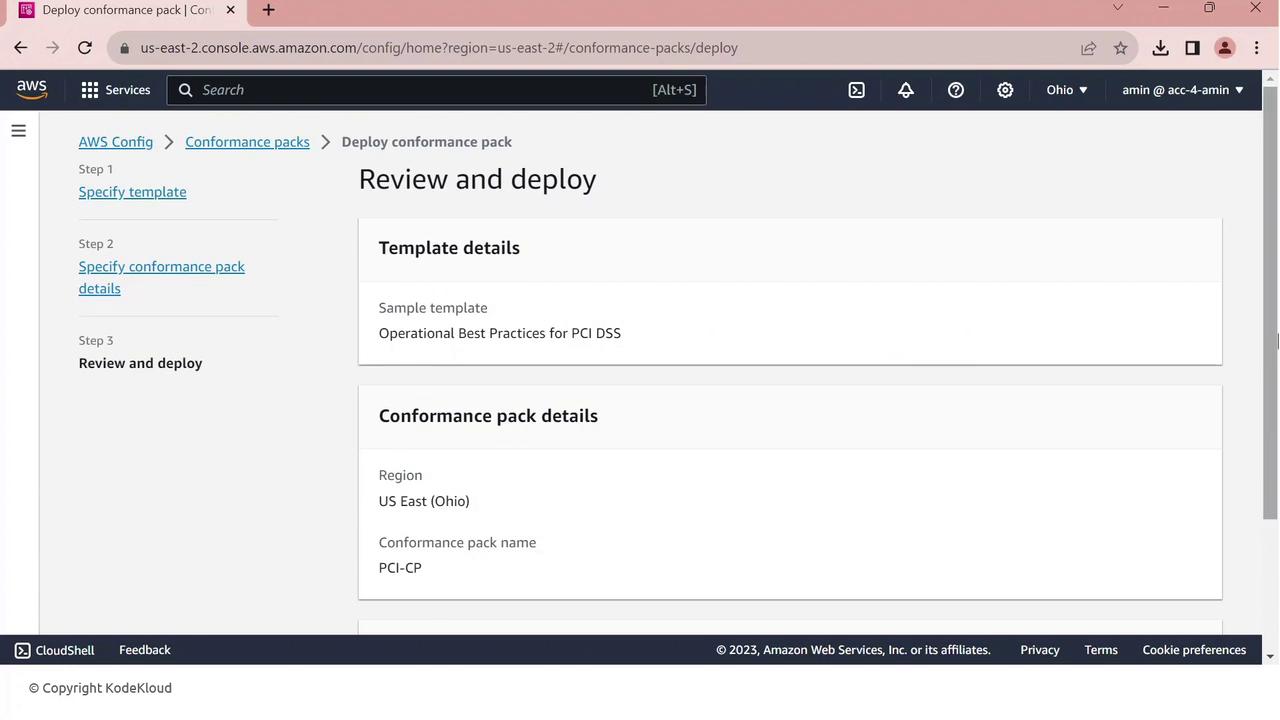
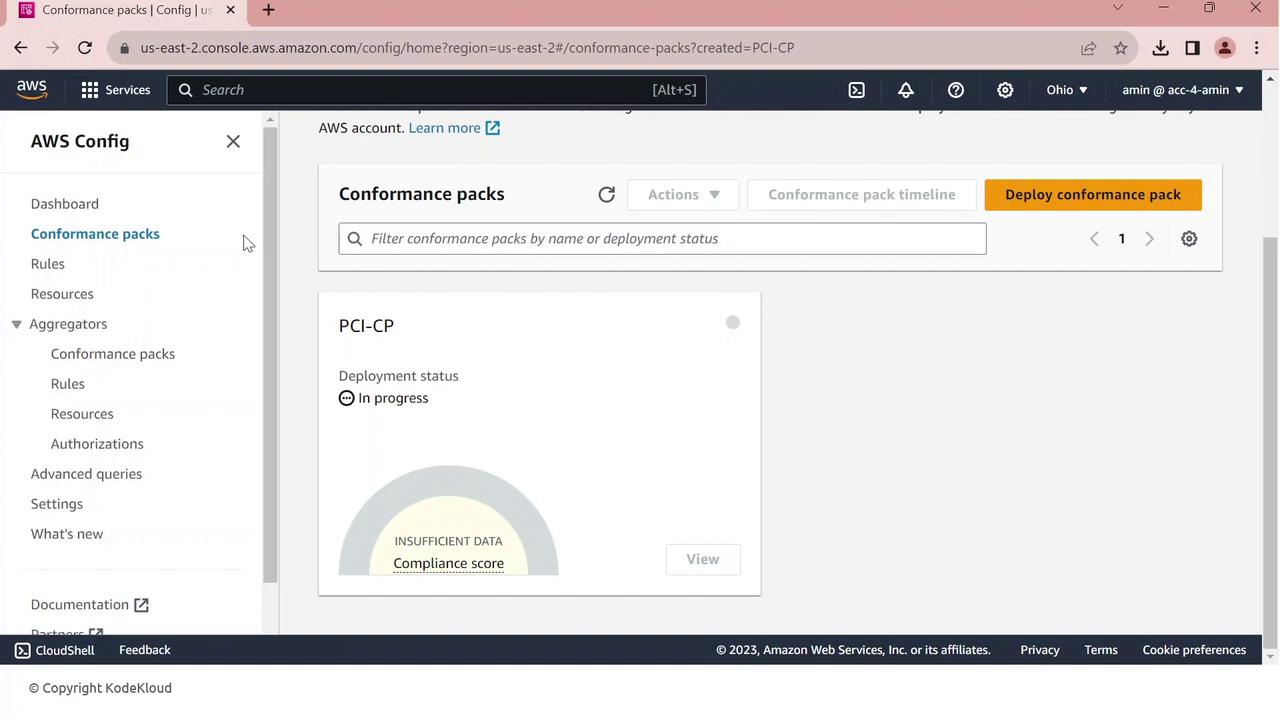
AWS Config will now create and evaluate all PCI DSS rules. Monitor status under Conformance packs.
5. Reviewing Compliance Results
Once your conformance pack is deployed, view all rules and their statuses:
Go to Rules in the AWS Config console.
You’ll see managed and conformance-pack rules listed with compliance indicators.
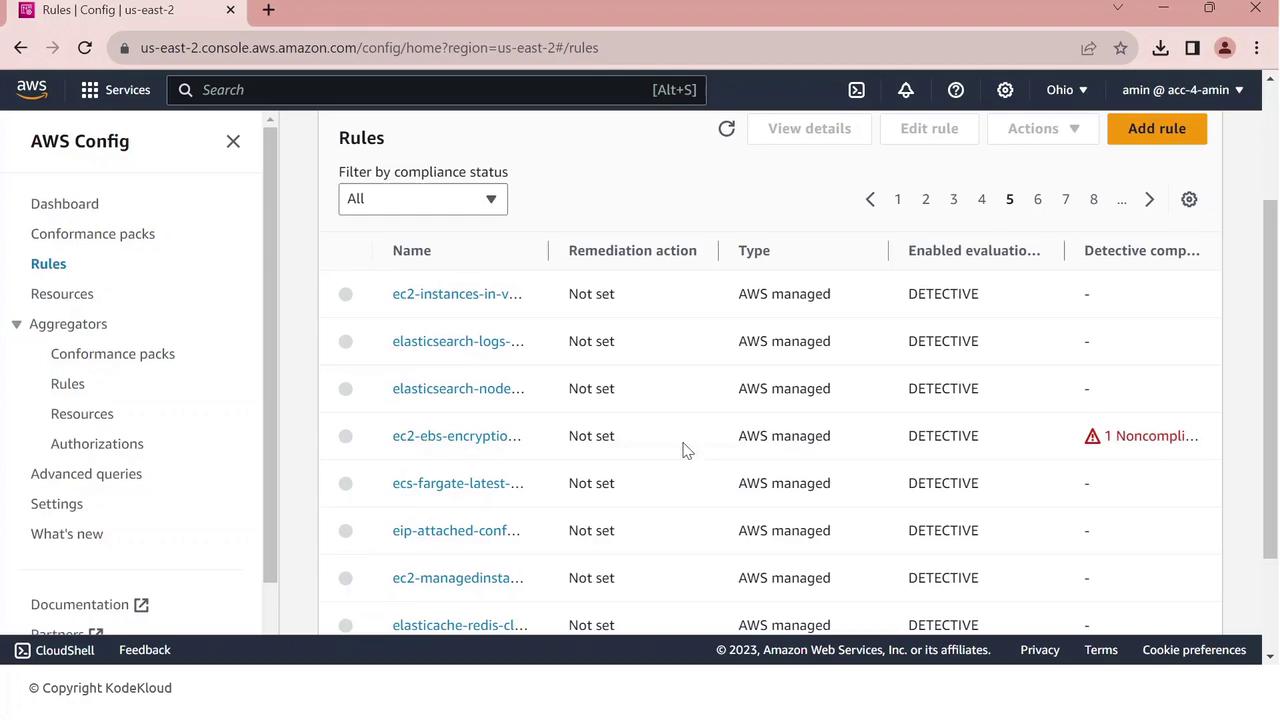
One common finding is EBS default encryption:
- Click the non-compliant rule to view details—resource IDs, configuration timeline, and remediation options.

From here, you can investigate resources, enable encryption, or configure automated remediation.
IAM Anywhere
IAM Roles Anywhere enables external applications and resources to securely access AWS services using X.509 certificates managed by a centralized Public Key Infrastructure (PKI).
Overview
External servers, hybrid clouds, and non-AWS environments often require access to AWS resources without relying on long-lived credentials. IAM Roles Anywhere issues temporary AWS credentials by validating X.509 certificates against your PKI.
Prerequisites
An ACM Private CA or an existing on-premises CA
X.509 certificates issued for your external systems
Appropriate IAM roles configured in AWS
How IAM Roles Anywhere Works
Establish your PKI
Generate X.509 certificates for external workloads
Register your Certificate Authority (CA) with IAM Roles Anywhere
Request temporary AWS credentials by presenting a certificate
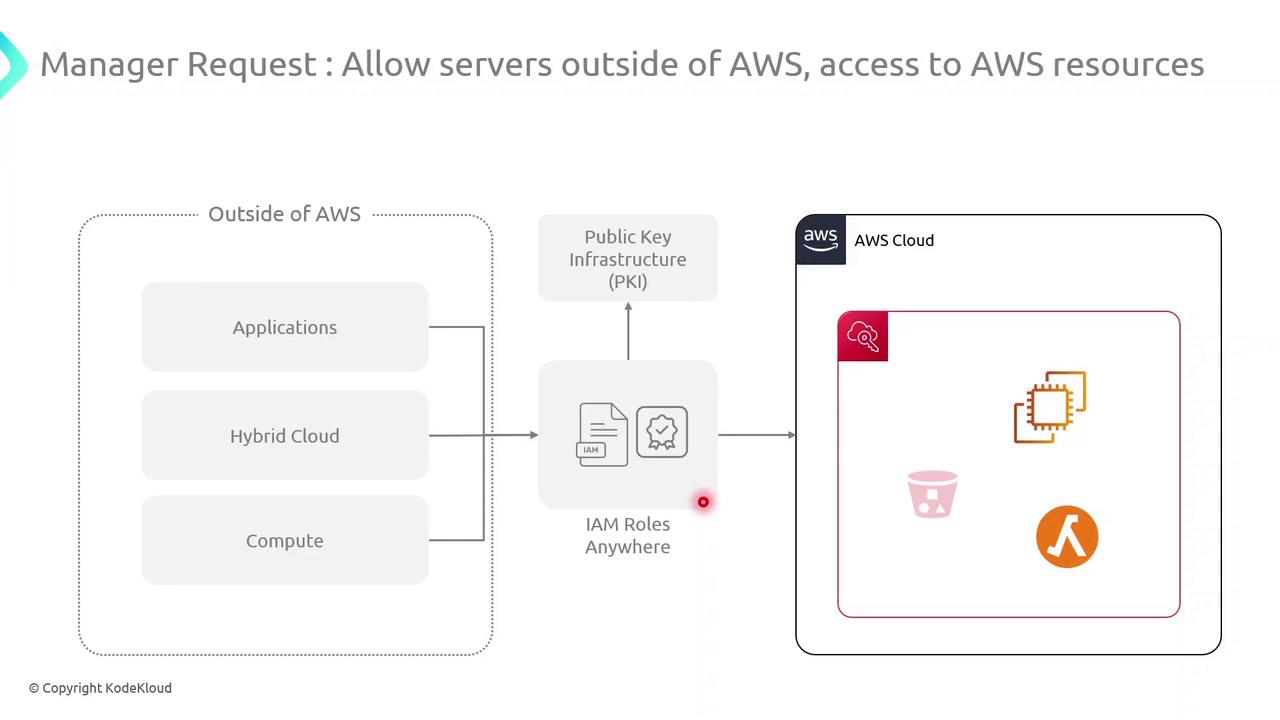
When an external workload presents a valid certificate, IAM Roles Anywhere verifies it against your registered CA. Upon successful validation, it issues temporary AWS credentials scoped to an IAM role, granting secure and auditable access to AWS services.
Key Steps
| Step | Action |
| 1 | Create or import a root/subordinate CA in ACM PCA or on-premises |
| 2 | Issue X.509 certificates to your servers and applications |
| 3 | Register your CA with IAM Roles Anywhere via AWS Console or CLI |
| 4 | Exchange a presented certificate for temporary AWS credentials |
Security Best Practice
Always store private keys in a secure hardware module or key management system. Do not embed certificates or keys directly in application code.
Benefits of IAM Roles Anywhere
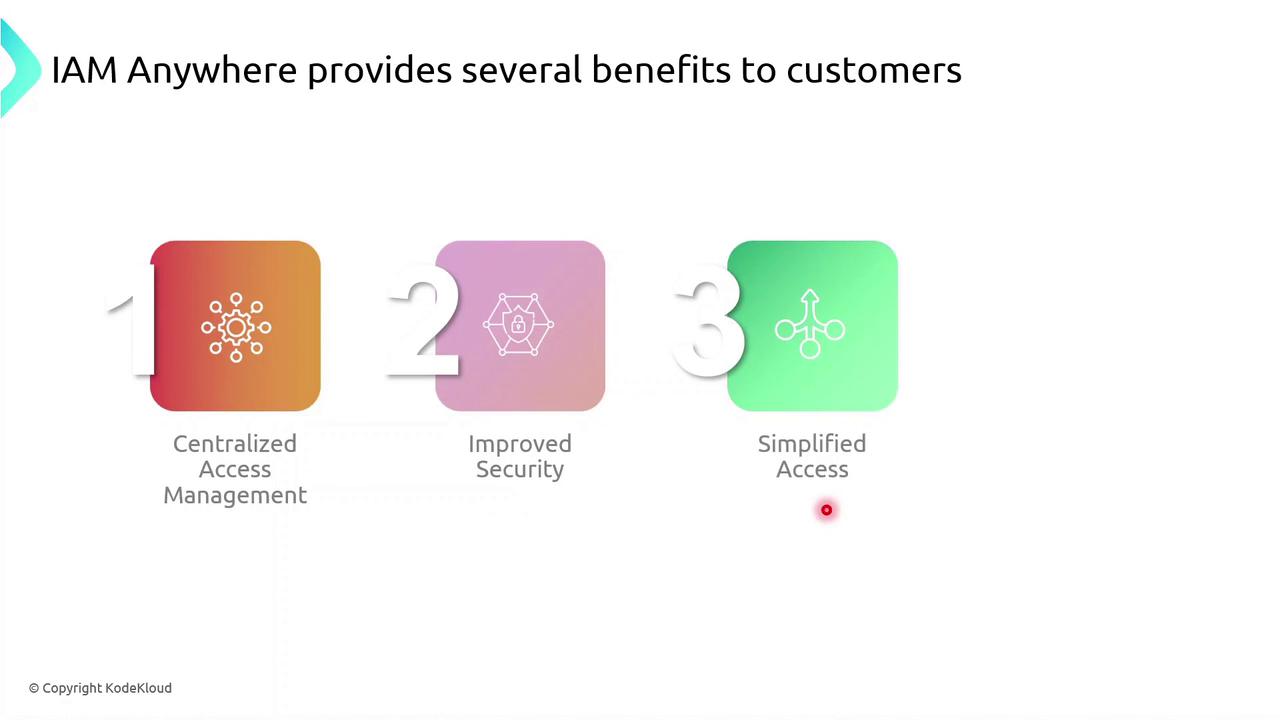
| Benefit | Description |
| Centralized Access Management | Control AWS and external permissions from a unified console |
| Enhanced Security | Utilize short-lived X.509 certificates and temporary AWS credentials |
| Simplified Provisioning | Eliminate hard-coded secrets and automate certificate rotation |
| Integration Flexibility | Leverage existing PKI systems and customize authentication workflows |
Get Started
Configure your PKI in AWS ACM PCA or on-premises.
Issue and distribute X.509 certificates.
Register the CA with IAM Roles Anywhere.
Implement AWS SDK or CLI calls to request credentials.
For complete setup instructions, see the AWS IAM Roles Anywhere User Guide.
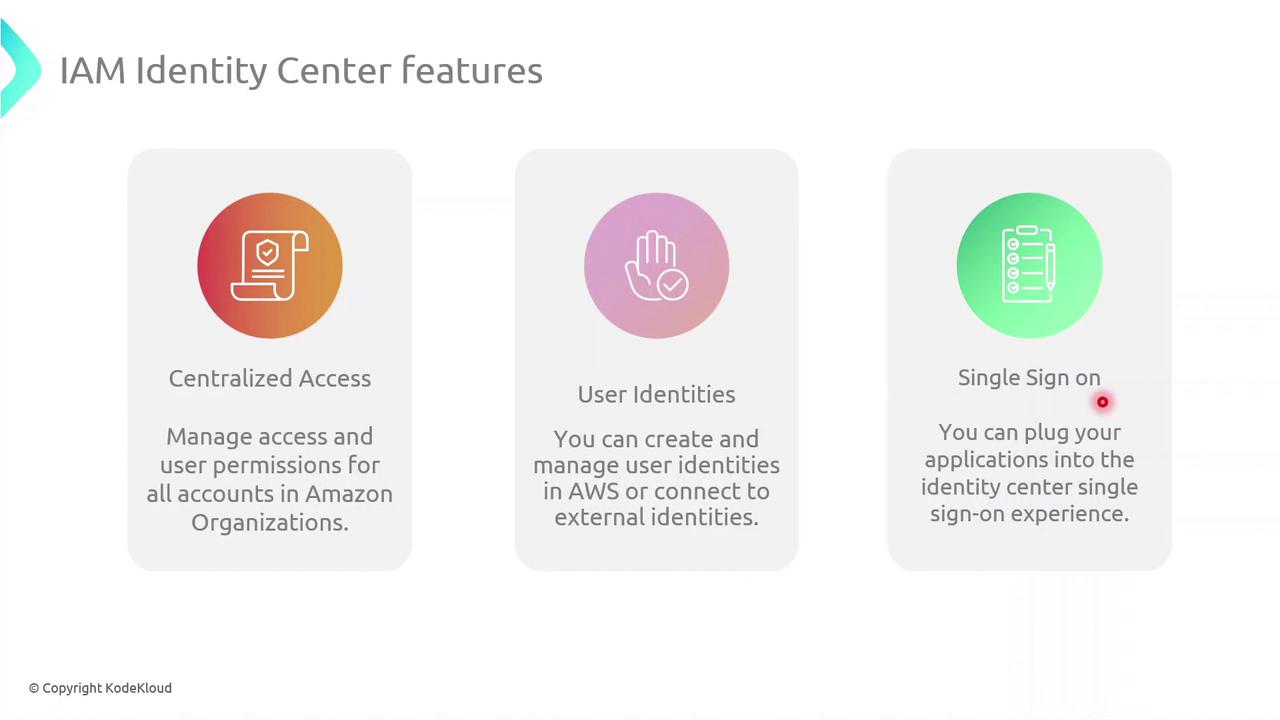
IAM Identity Center
AWS IAM Identity Center provides a unified, organizational-level identity management solution for your AWS Organization. While AWS IAM manages users and groups within a single account, IAM Identity Center lets you centralize access, identities, and single sign-on (SSO) across multiple member accounts from your management account.
Key Features
| Feature | Description | Benefit |
| Centralized Access | Assign and manage permissions across all member accounts in your Organization | Consistent, audit-ready permission model |
| User Identities | Create users in AWS or connect to external identity providers (Okta, AD) | Flexible identity source, no separate sync |
| Single Sign-On (SSO) | Integrate cloud apps and AWS accounts for seamless access | One-click access to all authorized resources |
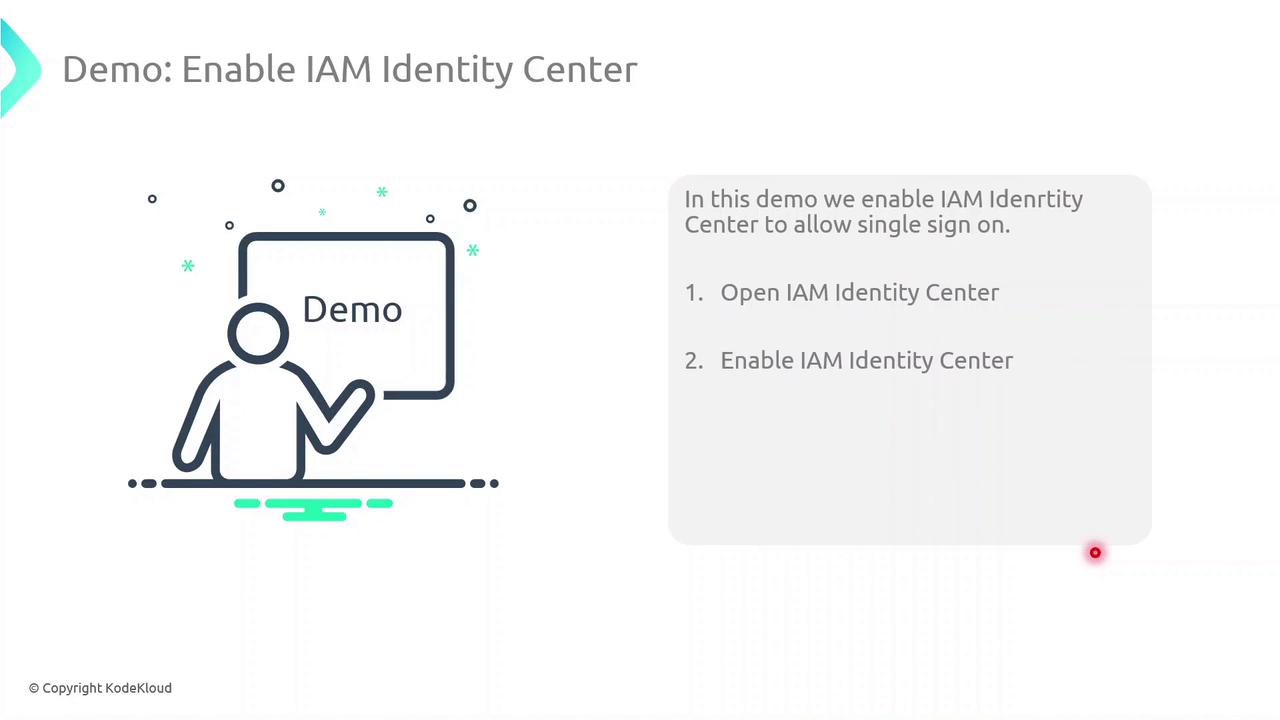
Demo: Enabling IAM Identity Center
Follow these steps to enable IAM Identity Center (formerly AWS SSO) in your Organization.
Note
Ensure your AWS Organization is active and you have Management Account privileges before proceeding.
1. Verify SSO Status in a Member Account
Sign in to a member account.
Go to IAM Identity Center in the AWS Console.
You’ll see a message indicating SSO isn’t enabled yet.
2. Enable in the Management Account
Switch to your Management Account.
Open the IAM Identity Center page.
Click Enable IAM Identity Center to activate SSO for all member accounts.
(Optional) CLI Alternative
You can also enable SSO programmatically using the AWS CLI:
aws sso-admin enable-sso \
  --region us-east-1 \
  --cli-input-json file://enable-sso-config.json
Demo IAM Identity Center
In this guide, you’ll learn how to enable and use AWS IAM Identity Center to centrally manage user and group access across multiple AWS accounts and cloud applications.
Prerequisites
An AWS Organizations management account
Permissions to manage IAM Identity Center and AWS Organizations
Note
IAM Identity Center can only be enabled from your organization’s management account. Member accounts cannot enable or configure it.
Enabling IAM Identity Center
Sign in to the AWS Management Console with your management account.
In the top search bar, type IAM Identity Center and select it:
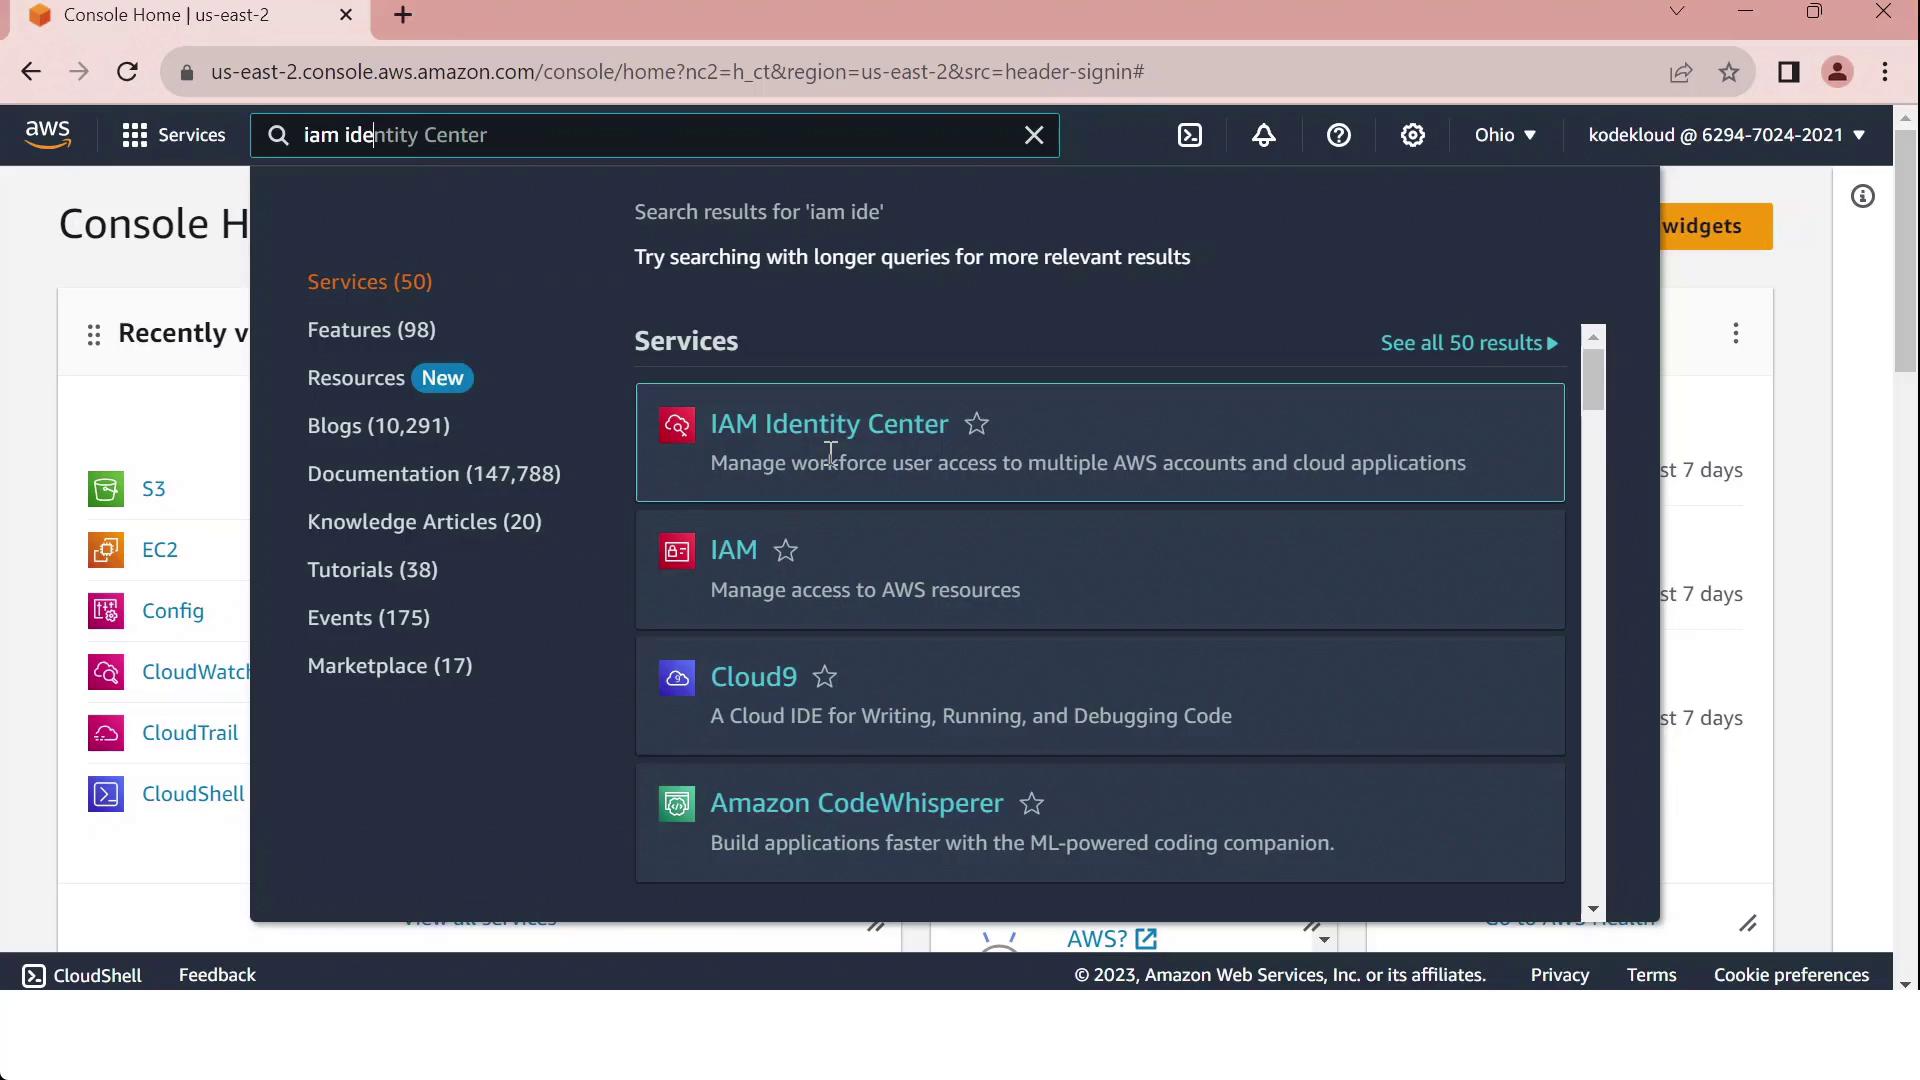
Click Enable.
Choose your identity source:
Connect an existing directory (AWS Managed Microsoft AD, AD Connector, or external IdP)
Use the built-in Identity Center directory
After activation, create users and groups (if using the built-in directory), then assign permission sets to your AWS accounts or cloud applications.
IAM vs. IAM Identity Center
When you go to the IAM console and click Create user, selecting Provide console access will direct you to specify an Identity Center user:
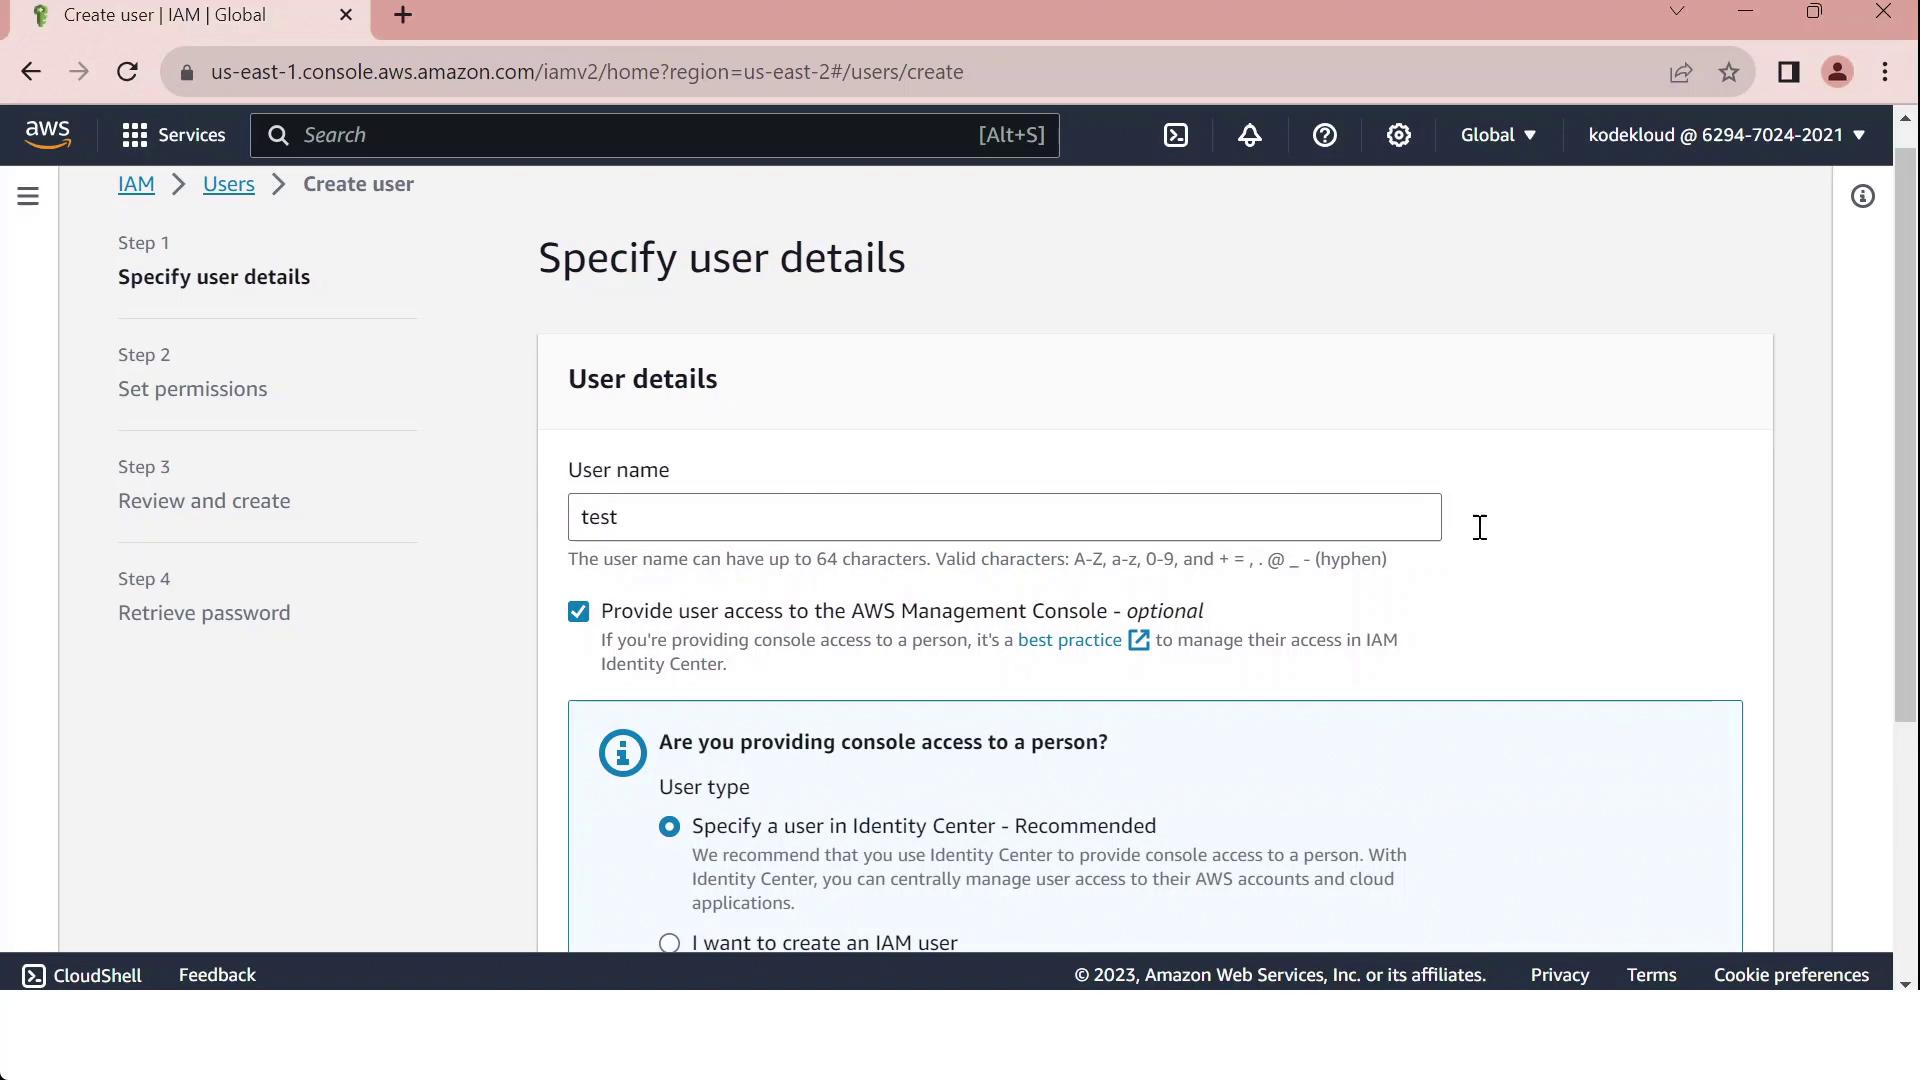
Use the following table to decide between IAM users and IAM Identity Center:
| Capability | IAM User | IAM Identity Center |
| Console access across accounts | Manual per account | Centralized via permission sets |
| Programmatic access (access keys) | Yes | No (create separate IAM users) |
| Service-specific credentials | Yes | No |
| External identity federation | Limited | Built-in SAML and OIDC support |
| Multi-account role assignments | Manual | Automated through a single portal |
Warning
Reserve IAM users for programmatic or service-specific credentials. For scalable, centralized console access across multiple accounts, adopt IAM Identity Center.
Subscribe to my newsletter
Read articles from Arindam Baidya directly inside your inbox. Subscribe to the newsletter, and don't miss out.
Written by
Arindam Baidya
Arindam Baidya
🚀 Aspiring DevOps & Cloud Engineer | Passionate about Automation, CI/CD, Containers, and Cloud Infrastructure ☁️ I work with Docker, Kubernetes, Jenkins, Terraform, AWS (IAM & S3), Linux, Shell Scripting, and Git to build efficient, scalable, and secure systems. Currently contributing to DevOps-driven projects at Assurex e-Consultant while continuously expanding my skills through hands-on cloud and automation projects. Sharing my learning journey, projects, and tutorials on DevOps, AWS, and cloud technologies to help others grow in their tech careers. 💡 Let’s learn, build, and innovate together!