2. AWS S3 Basic Features
 Arindam Baidya
Versioning
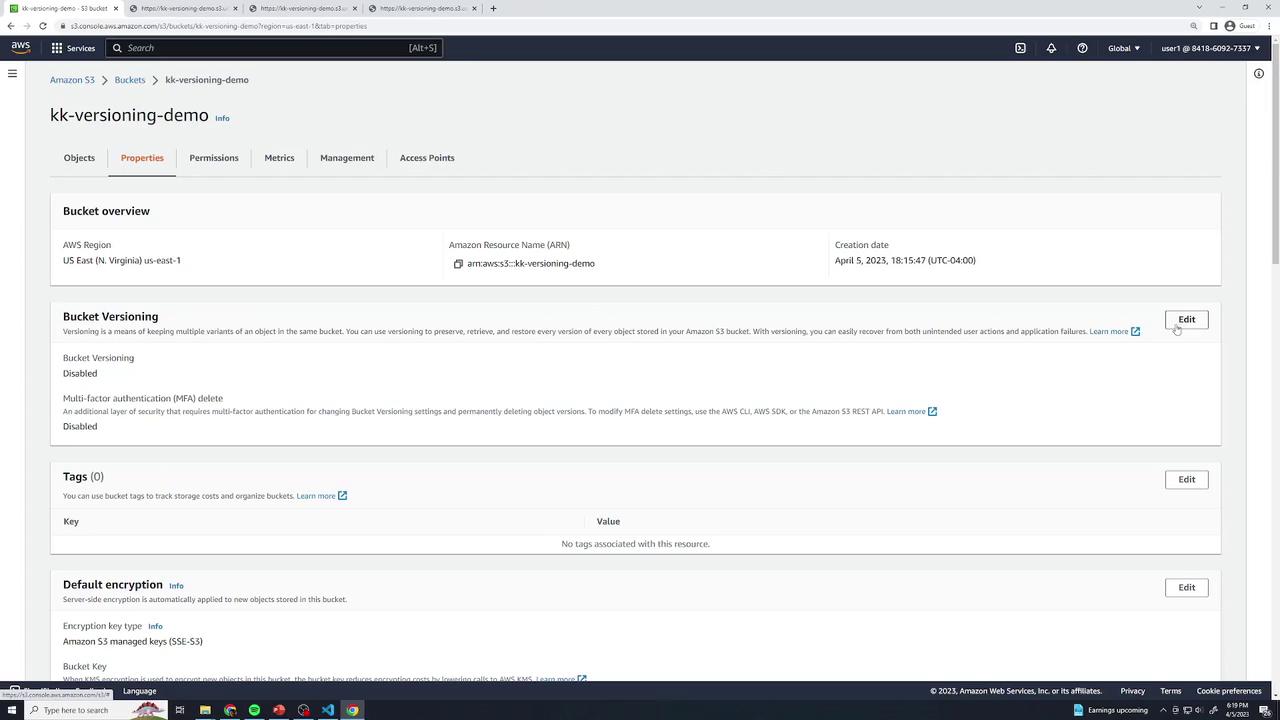
In this lesson, we dive into Amazon S3 versioning—a powerful feature that helps you recover from accidental deletes or overwrites. By default, new S3 buckets have versioning disabled, which means:
Deleting an object (e.g.,
file1.txt) removes it permanently.Uploading a new object with the same key (e.g.,
file5.txt) overwrites the existing object, making any previous data unrecoverable.
Enabling versioning lets you retain, retrieve, and restore every version of an object stored in your bucket.
![]()
Bucket Versioning States
You can configure versioning at the bucket level. An S3 bucket exists in one of three states:
| State | Description |
| Unversioned | Versioning is disabled (default). New uploads overwrite existing objects without version IDs. |
| Enabled | All new and updated objects receive unique version IDs. |
| Suspended | Existing versions stay intact; new uploads behave like an unversioned bucket (null version ID). |
Once you enable versioning, you can never fully turn it off—only suspend it. Suspending does not delete prior versions; it simply stops assigning new version IDs.
Enabling Versioning and Managing Object Version IDs
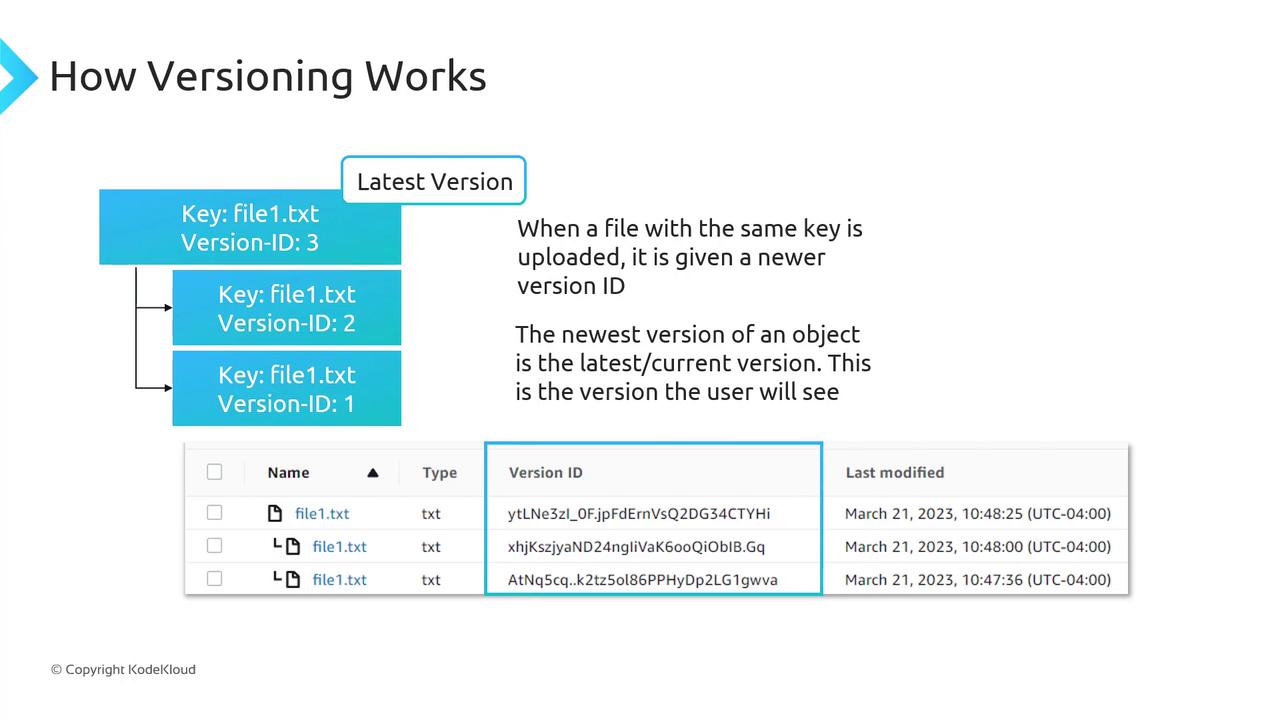
When versioning is Enabled:
The first upload of
file1.txtmight get version ID1.Re-uploading the same key creates version ID
2, preserving version1.A third upload assigns version ID
3, and so on.
The most recent upload is the current or latest version. A GET request without versionId returns this version.
Enabling Versioning via Console and CLI
Console:
Open the S3 console.
Select your bucket → Properties → Bucket Versioning → Enable → Save.
CLI:
aws s3api put-bucket-versioning \
  --bucket my-bucket \
  --versioning-configuration Status=Enabled
Note
A GET or LIST operation on an unversioned bucket always shows VersionId: null.
Delete Markers
With versioning enabled, deleting an object without specifying a version ID does not remove its data. Instead, S3 inserts a delete marker, which becomes the current version and hides previous versions.
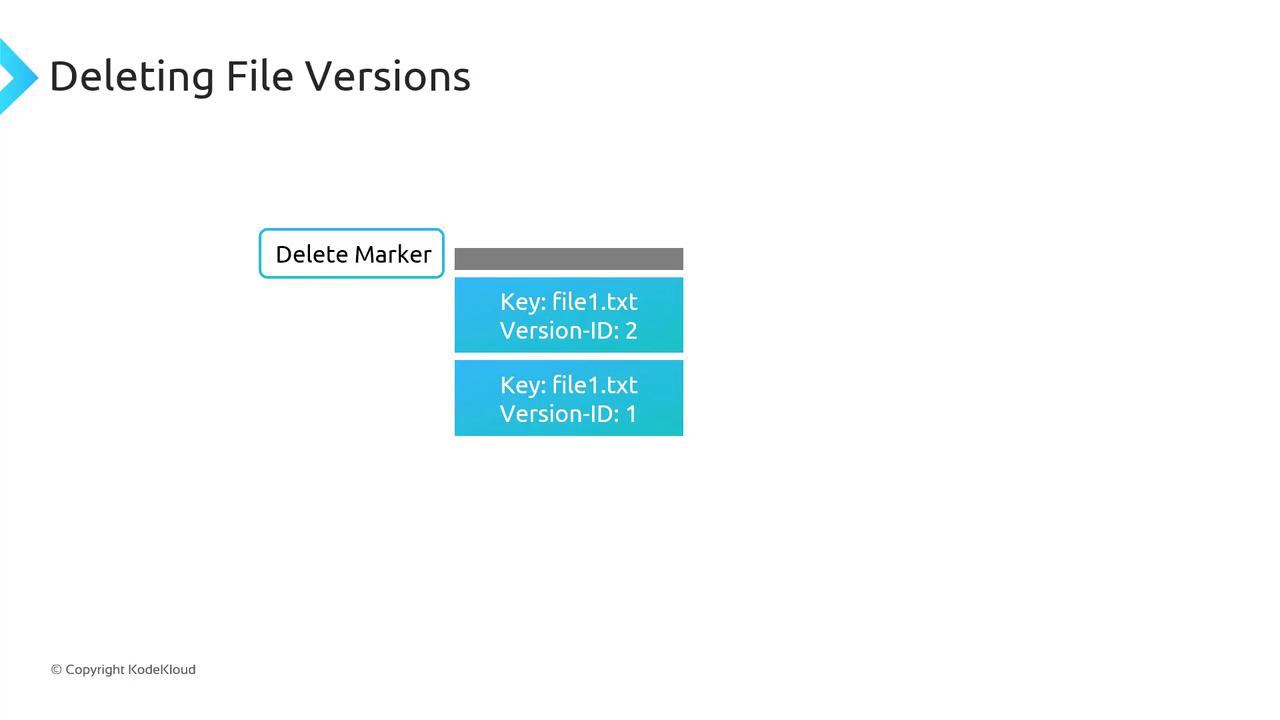
To undelete, remove the delete marker; the next latest version immediately becomes current.
To remove a specific version (e.g., version
2offile1.txt), delete that version ID directly—other versions remain intact.
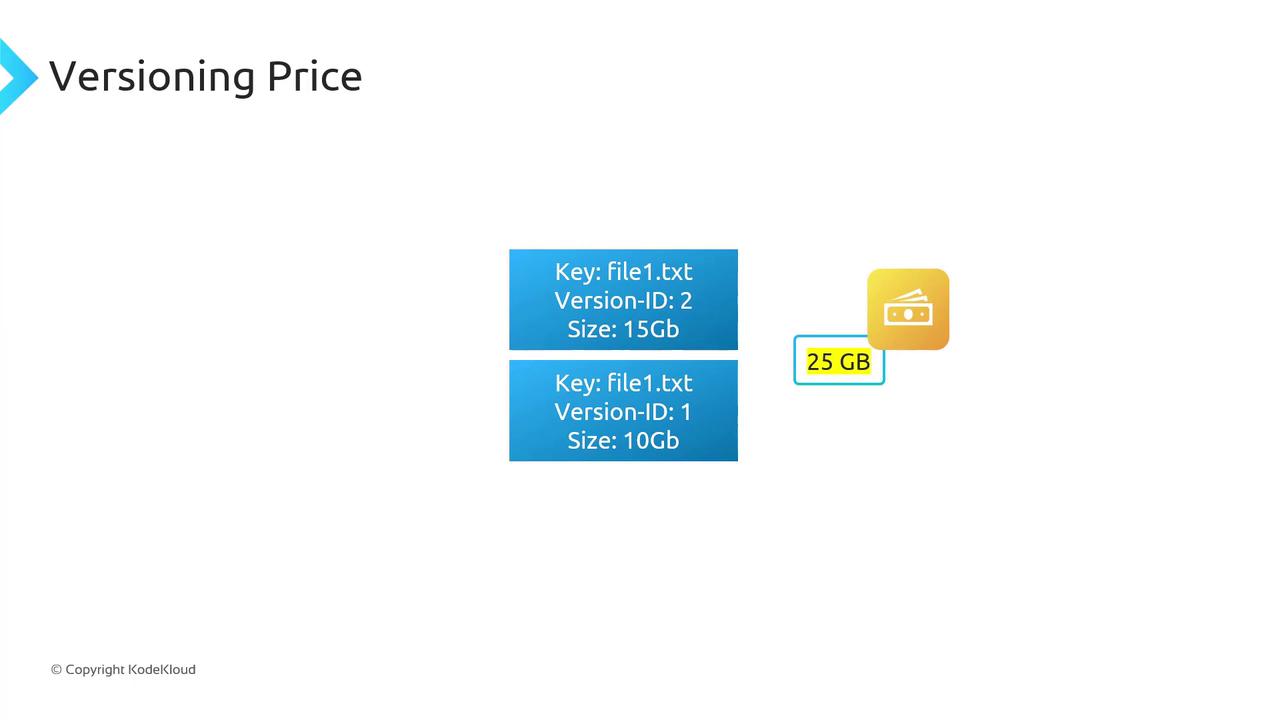
Pricing Considerations
Every version of an object counts towards your storage usage. You pay for the sum of all versions:
| Version | Size |
| Version 1 of file1.txt | 10 GB |
| Version 2 of file1.txt | 15 GB |
| Total billable | 25 GB |
Warning
Enabling versioning can significantly increase your storage costs. Implement Lifecycle rules to expire or transition older versions to cheaper storage classes.
Suspending Versioning
When you suspend versioning on a bucket:
Existing object versions remain stored.
New uploads receive a
nullversion ID and overwrite objects as in an unversioned bucket.
S3 never purges prior versions automatically. To remove old versions, you must delete them manually or configure a Lifecycle policy.
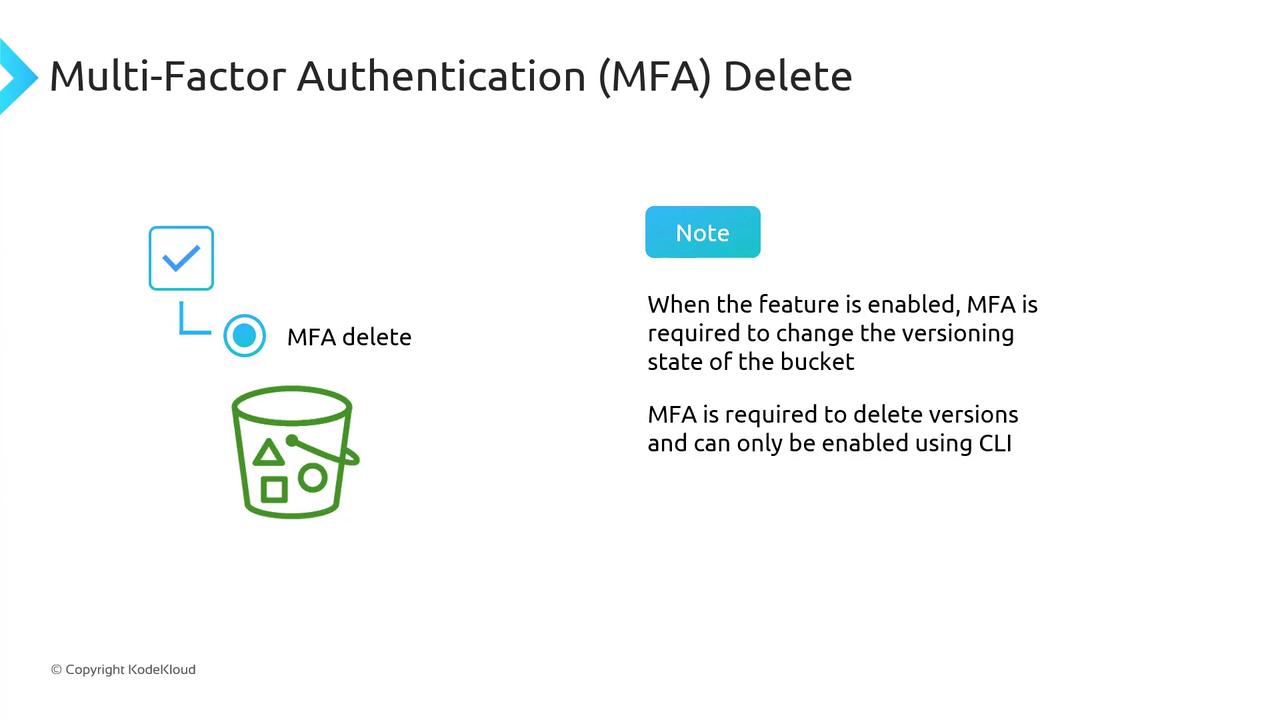
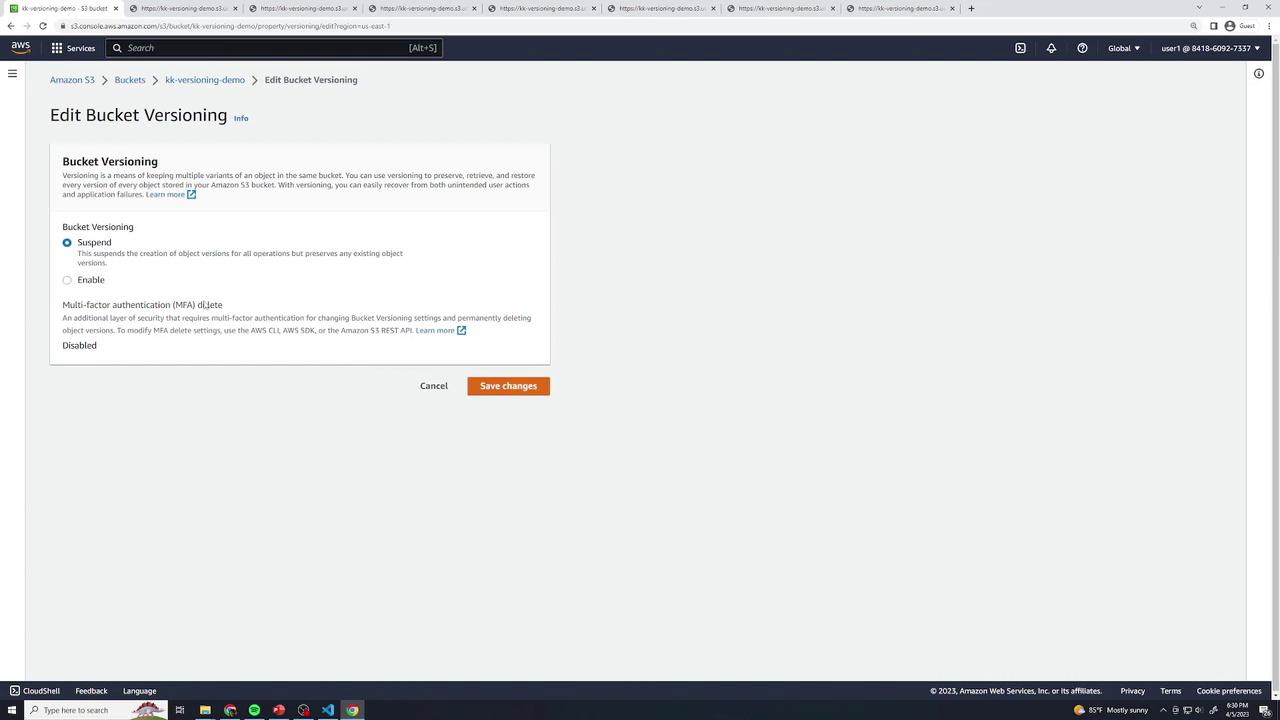
MFA Delete
Multi-Factor Authentication (MFA) Delete adds a security layer for versioning-related operations:
Changing the bucket’s versioning state (Enabled/Suspended) requires MFA.
Permanently deleting object versions also requires MFA.
MFA Delete is only configurable via the AWS CLI.
Demo Versioning
In this tutorial, you’ll explore how Amazon S3’s versioning feature affects object uploads, overwrites, and deletions. We’ll walk through three key states—versioning disabled, enabled, and suspended—and demonstrate how you can recover or permanently remove object versions.
Versioning Disabled
With versioning disabled, any object you delete is permanently removed and cannot be recovered. Overwrites simply replace the existing object.
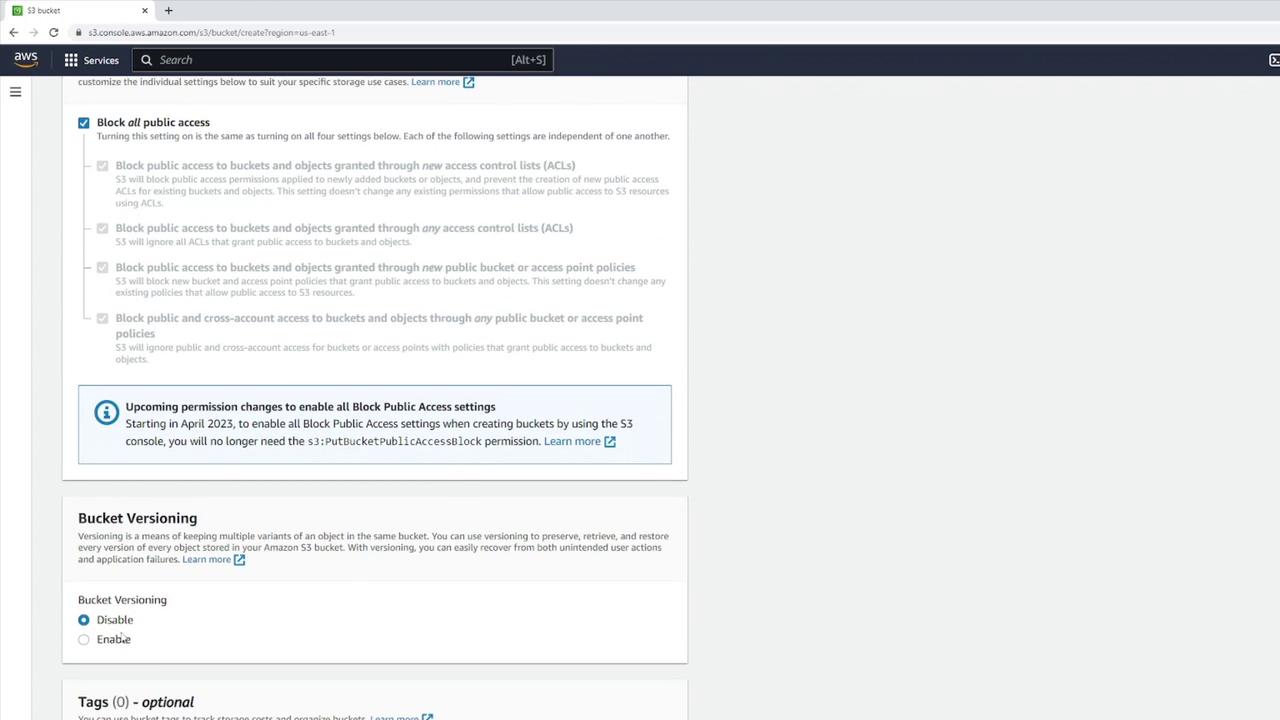
- Create a new S3 bucket named Versioning Demo, leaving Bucket Versioning turned off and all other settings at their defaults.
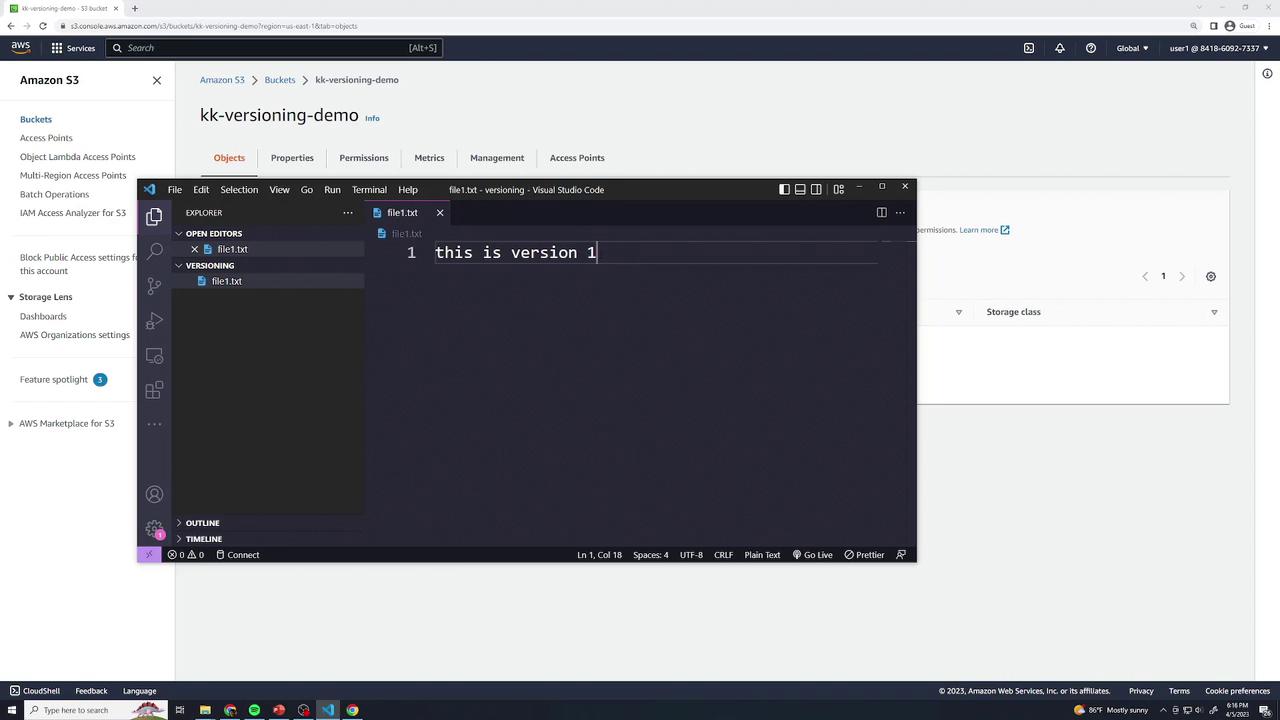
Locally create a file
file1.txtwith:this is version 1
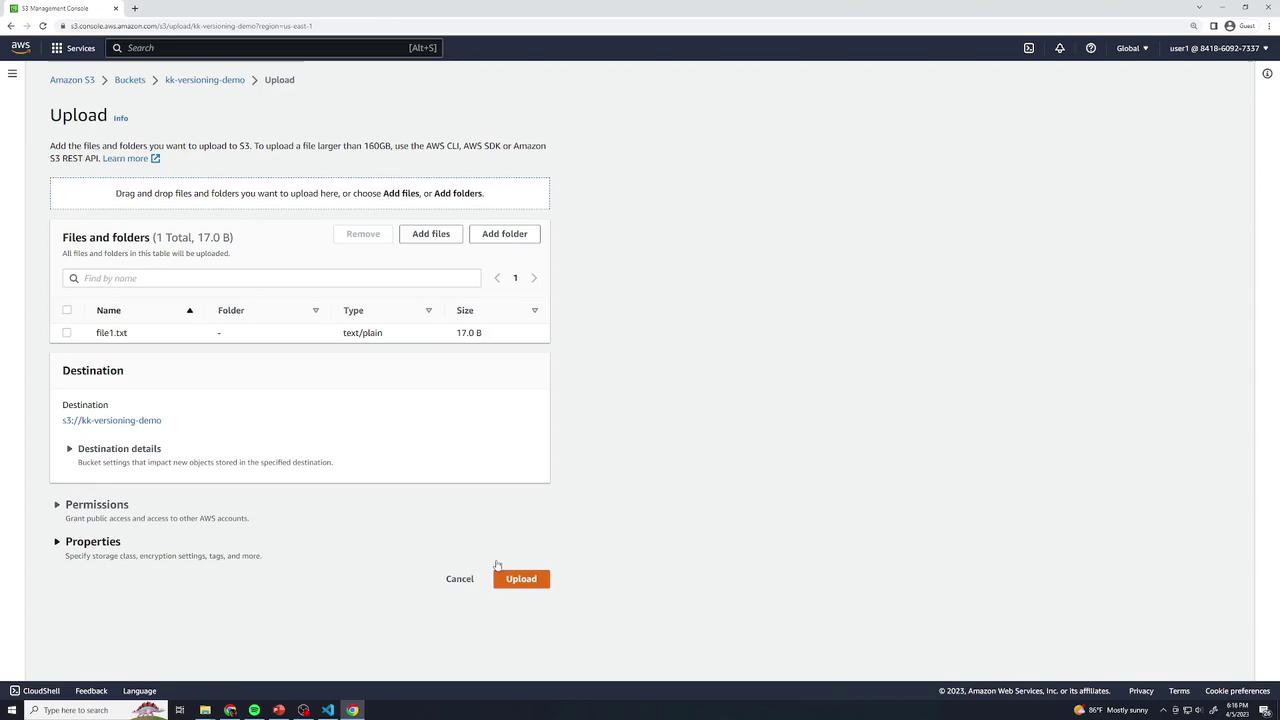
- Upload
file1.txtto your bucket (all defaults).
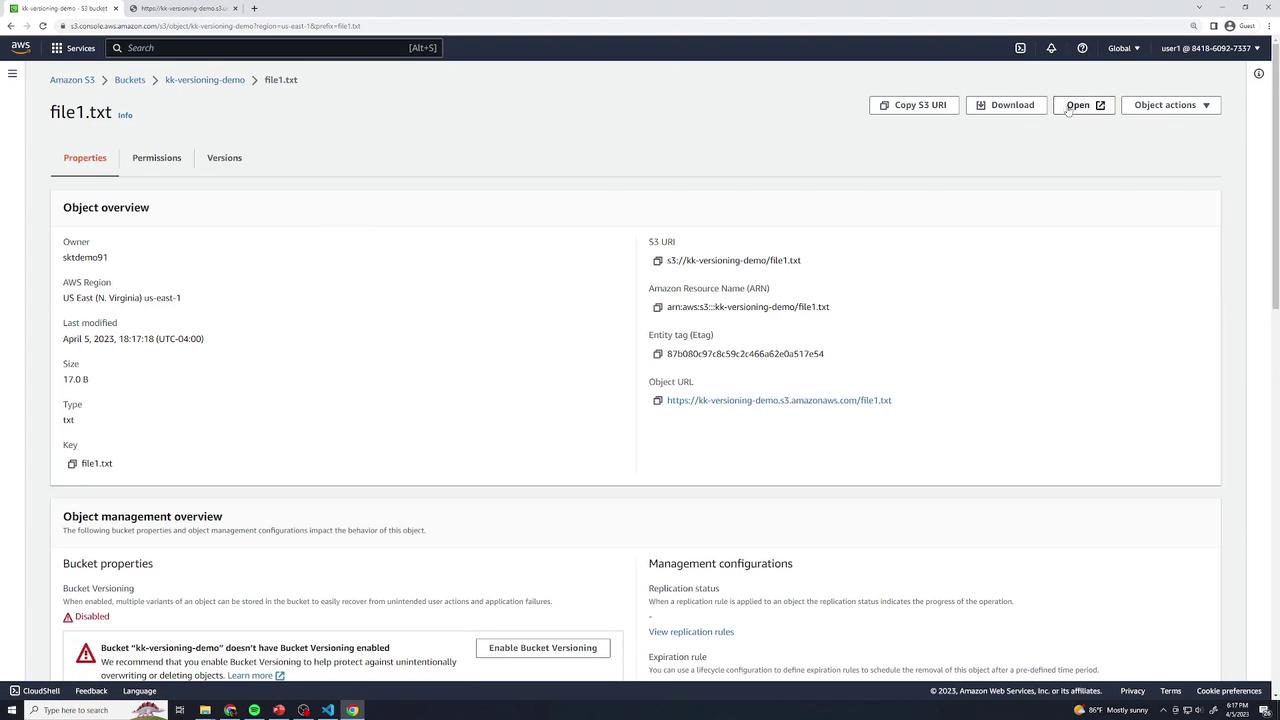
Open file1.txt in the console to confirm it shows:
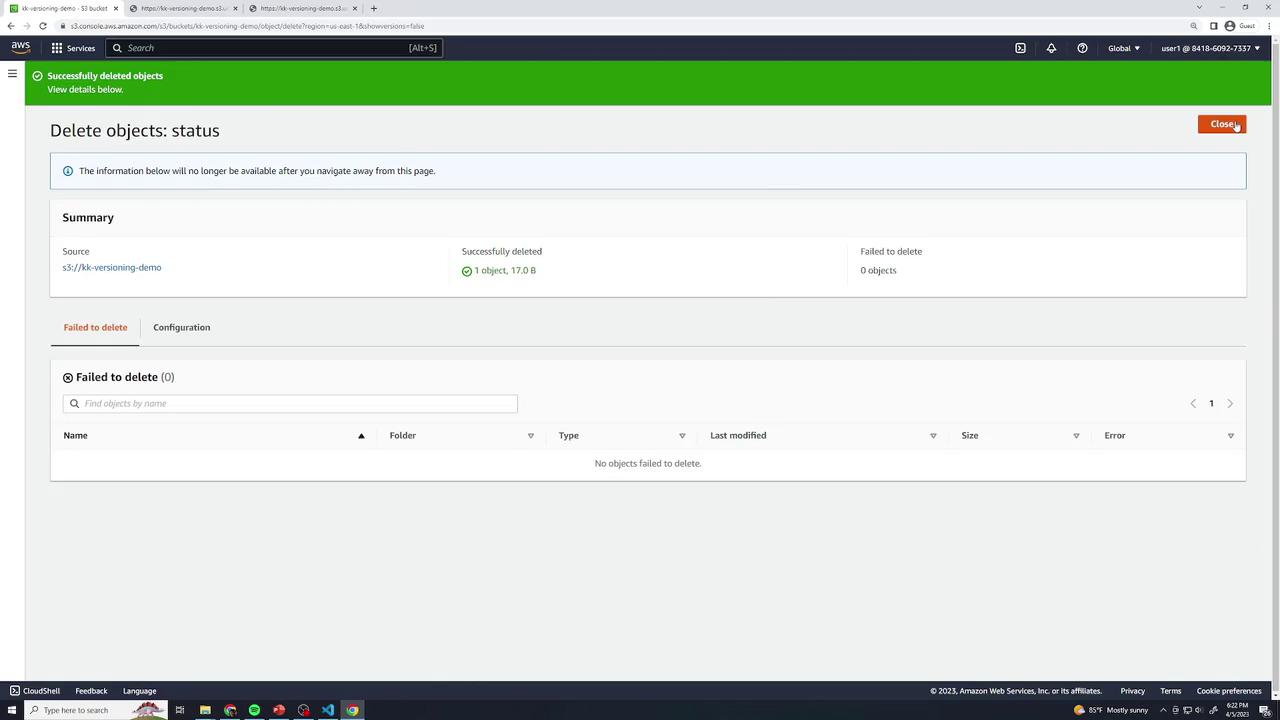
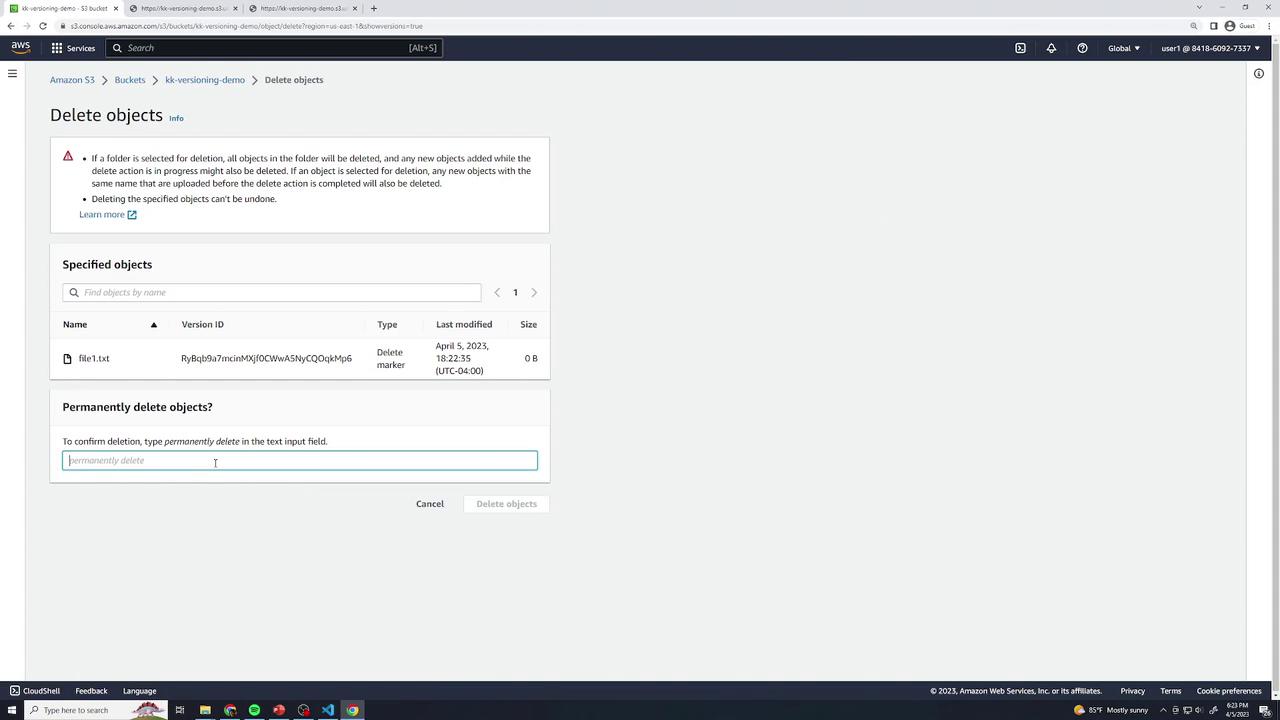
this is version 1Permanent Delete when Disabled
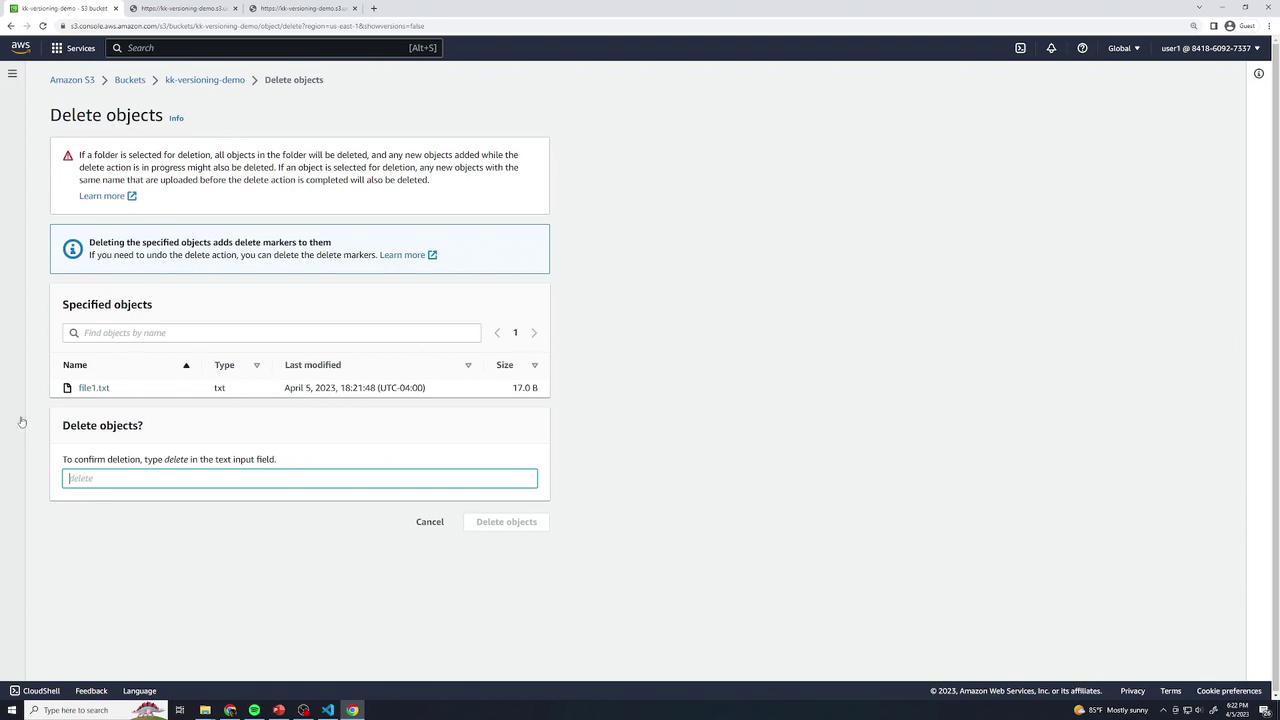
Select file1.txt → Delete → type permanently delete to confirm.
Warning
Deleting objects in a bucket with versioning disabled removes them forever—there is no undelete or version history.

- Re-upload the same
file1.txt(version 1) to restore it.
Overwrite when Disabled
Editfile1.txtto:this is version 2Upload using the same key. Version 1 is lost permanently because versioning is disabled.
Enabling Versioning
Enable versioning to retain every object change with a unique Version ID. You can recover or permanently delete specific versions.
- In the bucket Properties, click Edit under Bucket Versioning, select Enable, and Save.
Upload
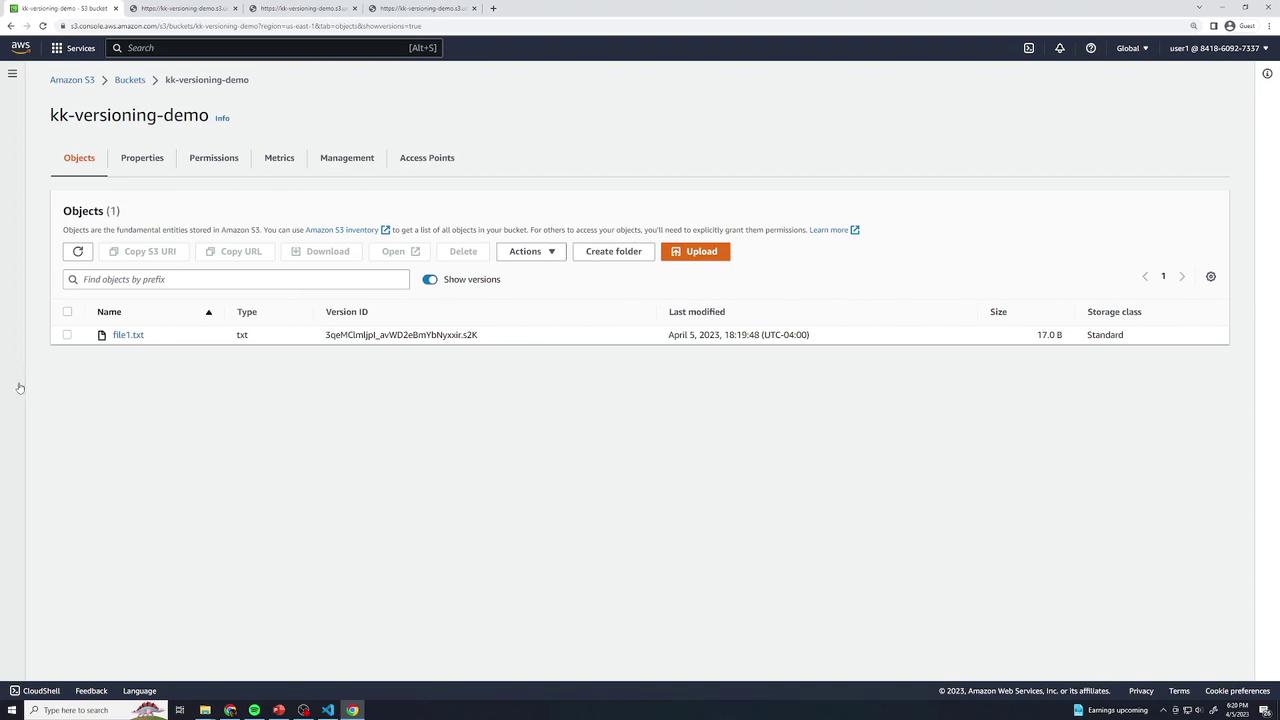
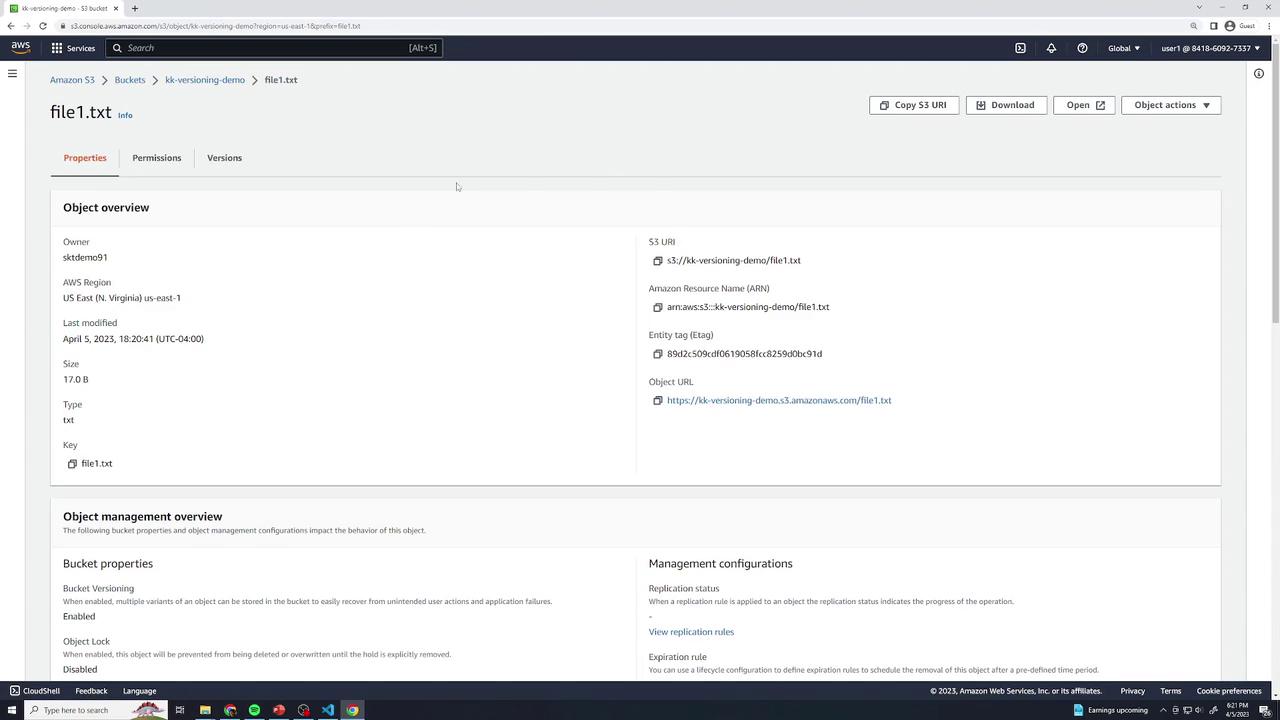
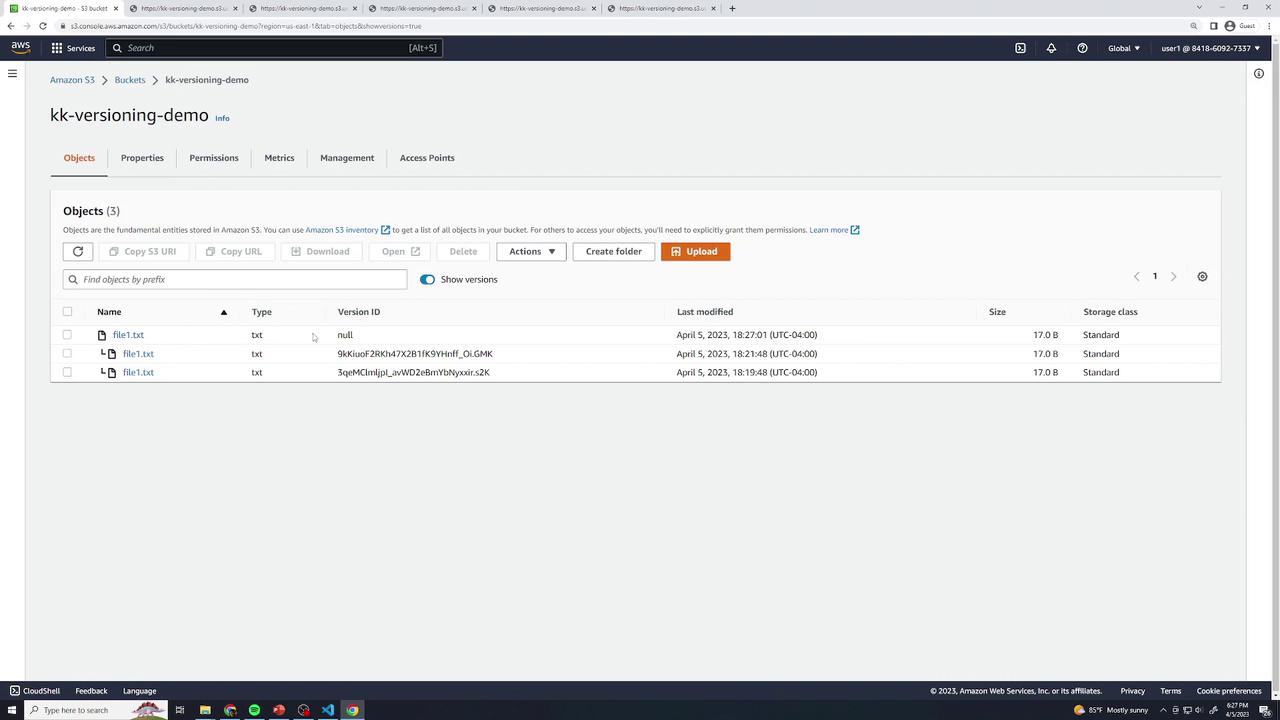
file1.txtwith the original content:this is version 1In the Objects view, check Show versions to reveal version history. Each version entry displays a unique Version ID.
Confirm version 1 content:
this is version 1
Adding More Versions
Version 2: Update locally to
this is version 2and upload again.Version 3: Change to
this is version 3and upload once more.
Each upload creates a new version entry. You can open each one to verify content and timestamps.
Delete with Versioning Enabled
Deleting an object now places a delete marker rather than removing prior versions.
- Select file1.txt → Delete → type delete (no “permanently delete” prompt).
The object disappears, but Show versions reveals:
A new Delete marker
All three prior versions
- Restoring: Remove the delete marker by selecting it and choosing Delete → type permanently delete.
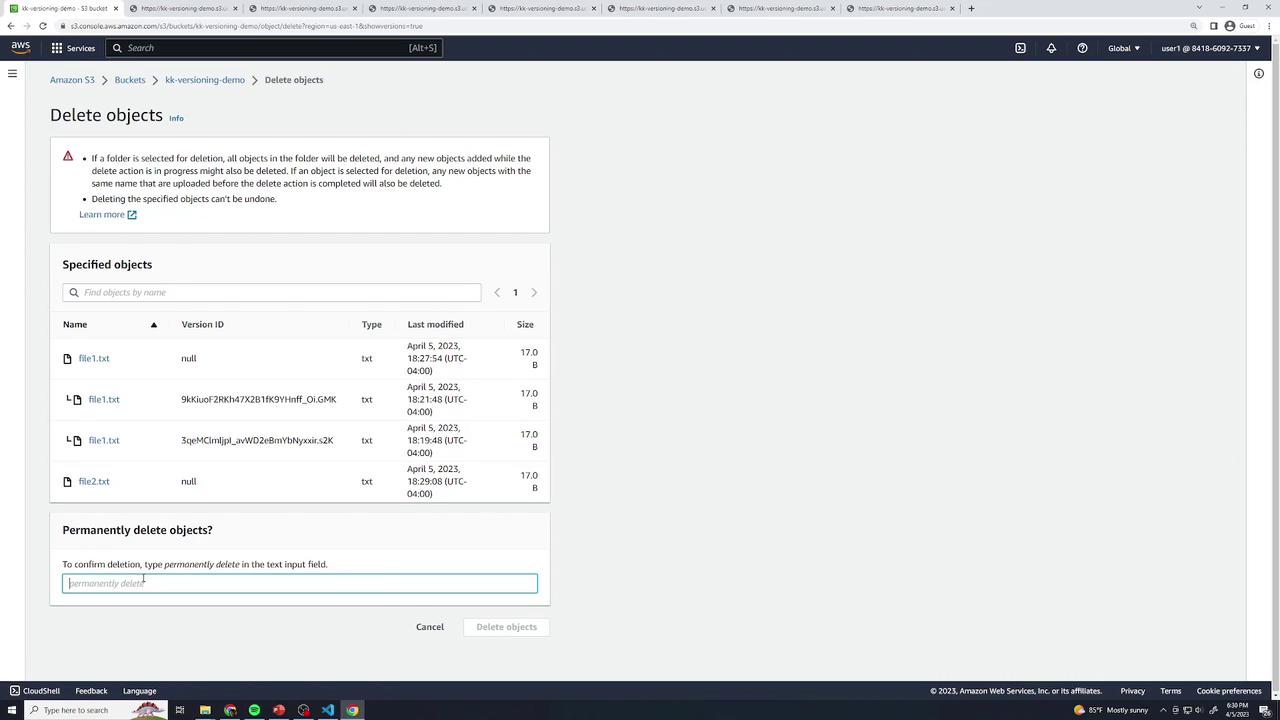
Permanently Deleting Specific Versions
You can delete individual versions without affecting others. Select a version (e.g., version 2) → Delete → type permanently delete. Only that version is removed.
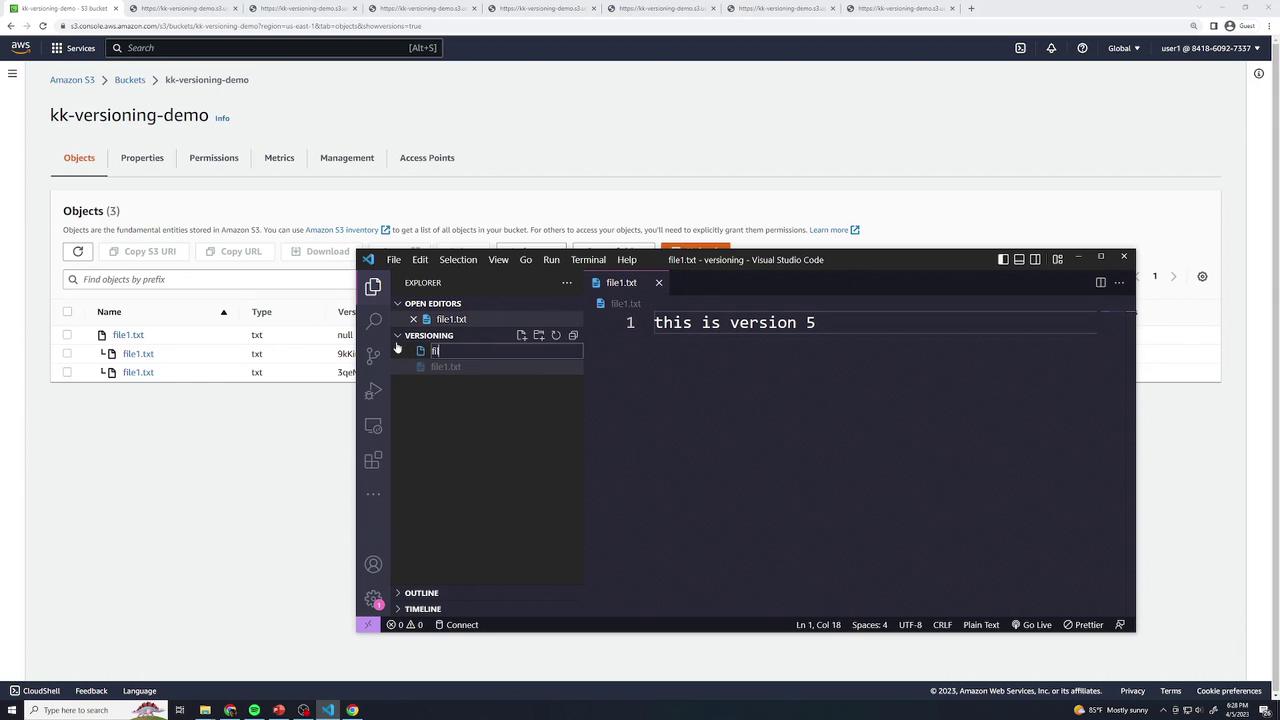
Suspending Versioning
Once turned on, you can only suspend versioning, not disable it. Suspended state retains old versions but assigns null as the Version ID for new uploads.
- In Properties → Bucket Versioning, click Suspend and Save.
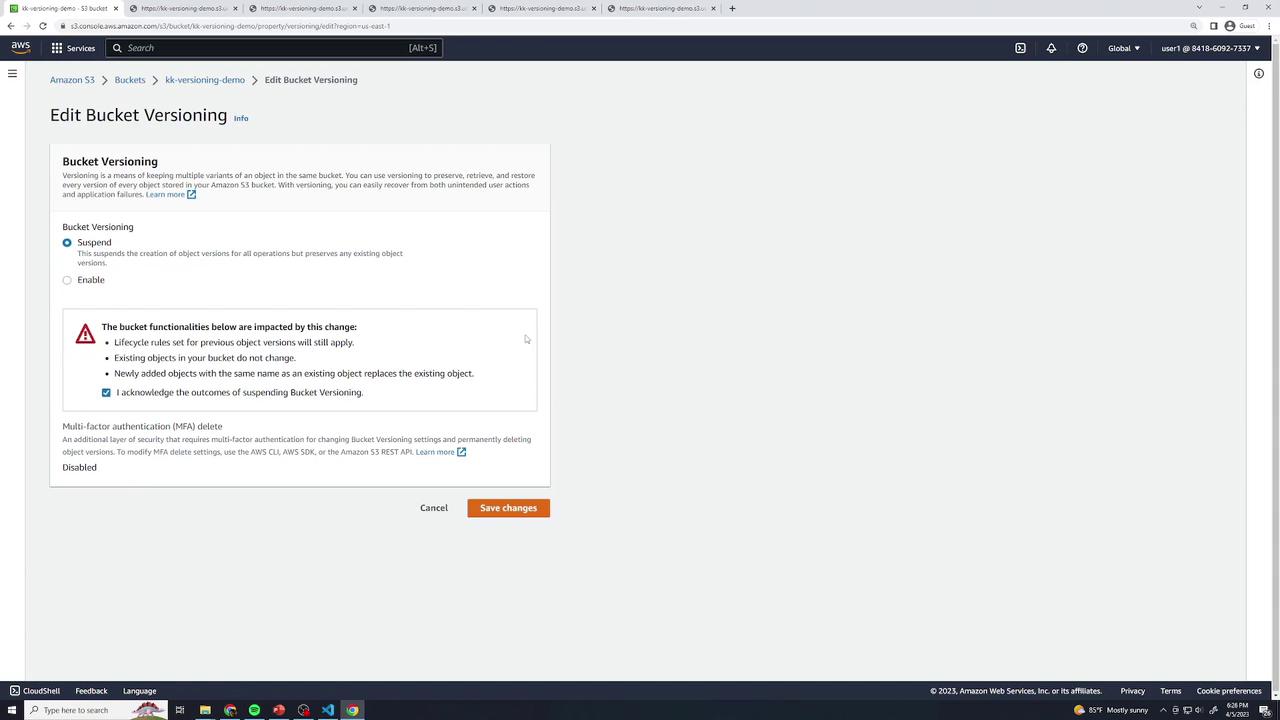
- Existing versions remain accessible. New uploads use a
nullVersion ID.
- Upload version 4 (
this is version 4) and version 5 (this is version 5). Both appear withnullVersion IDs.
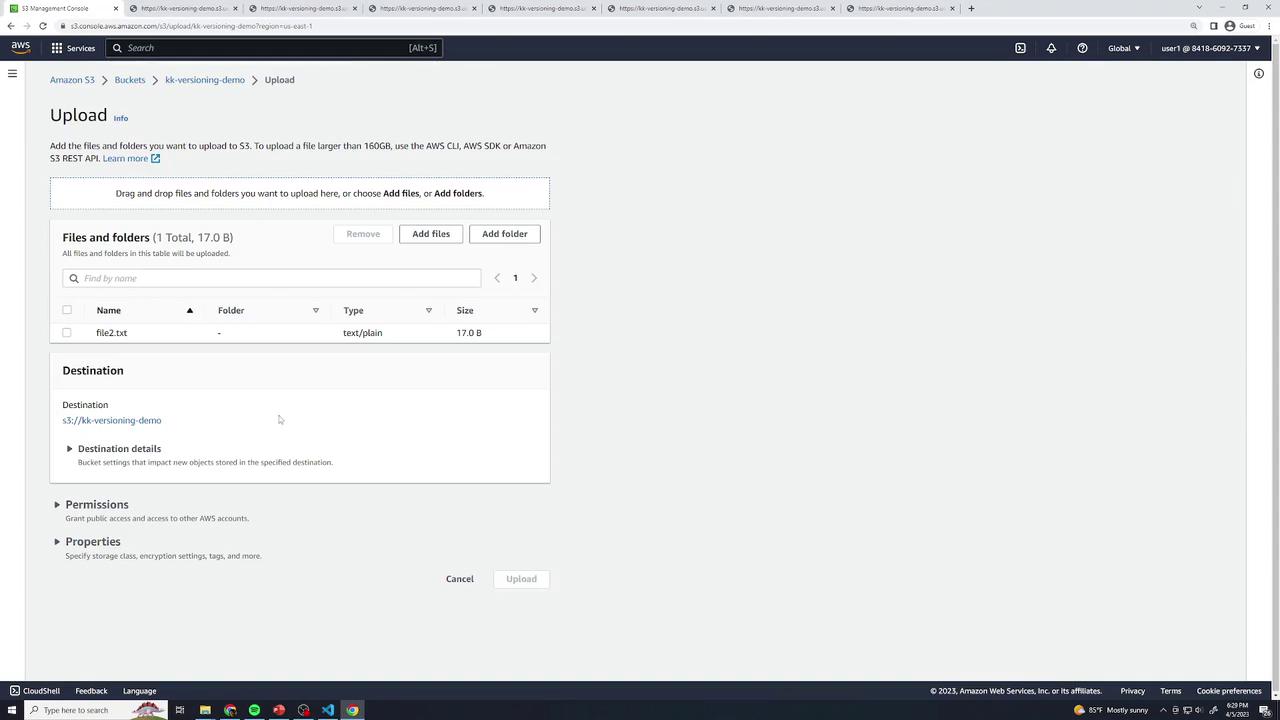
New Objects under Suspension
Create
file2.txtwiththis is version 1and upload—it getsnullID.Update to
this is version 2—the previousnullversion is replaced.
MFA Delete
In the Bucket Versioning settings, you’ll see MFA Delete. Enabling this feature (via CLI or SDK) requires multi-factor authentication to change or delete versions. It cannot be turned on in the console.
Versioning States Overview
| Versioning State | New Upload Behavior | Recoverability |
| Disabled | Overwrites existing objects | No history, permanent deletes |
| Enabled | New versions with unique IDs | All versions retained; delete markers available |
| Suspended | null Version ID on uploads | Existing versions kept; new uploads overwrite |
Cleanup
To tear down:
In Objects, enable Show versions.
Select all versions and markers → Delete → type permanently delete.
Delete the bucket.
Lifecycle Policies
Amazon S3 lifecycle policies help you optimize storage costs by automatically transitioning objects between storage classes or expiring them after a specified time. Define your rules once, and S3 handles the rest—no manual cleanup required.
How Lifecycle Policies Work
When you upload an object (for example, file1.txt) using S3 Standard, its access pattern may change over time. You can configure a lifecycle policy such as:
After 30 days: transition to S3 Standard-IA (Infrequent Access).
After 90 days: archive to S3 Glacier Deep Archive.
After 365 days: delete the object.
Lifecycle policies can target:
An entire bucket.
A subset of objects defined by prefix or tag.
Specific versions (if you have versioning enabled).
Note
Lifecycle rules only move objects “downhill,” from a higher-cost class to a lower-cost class.
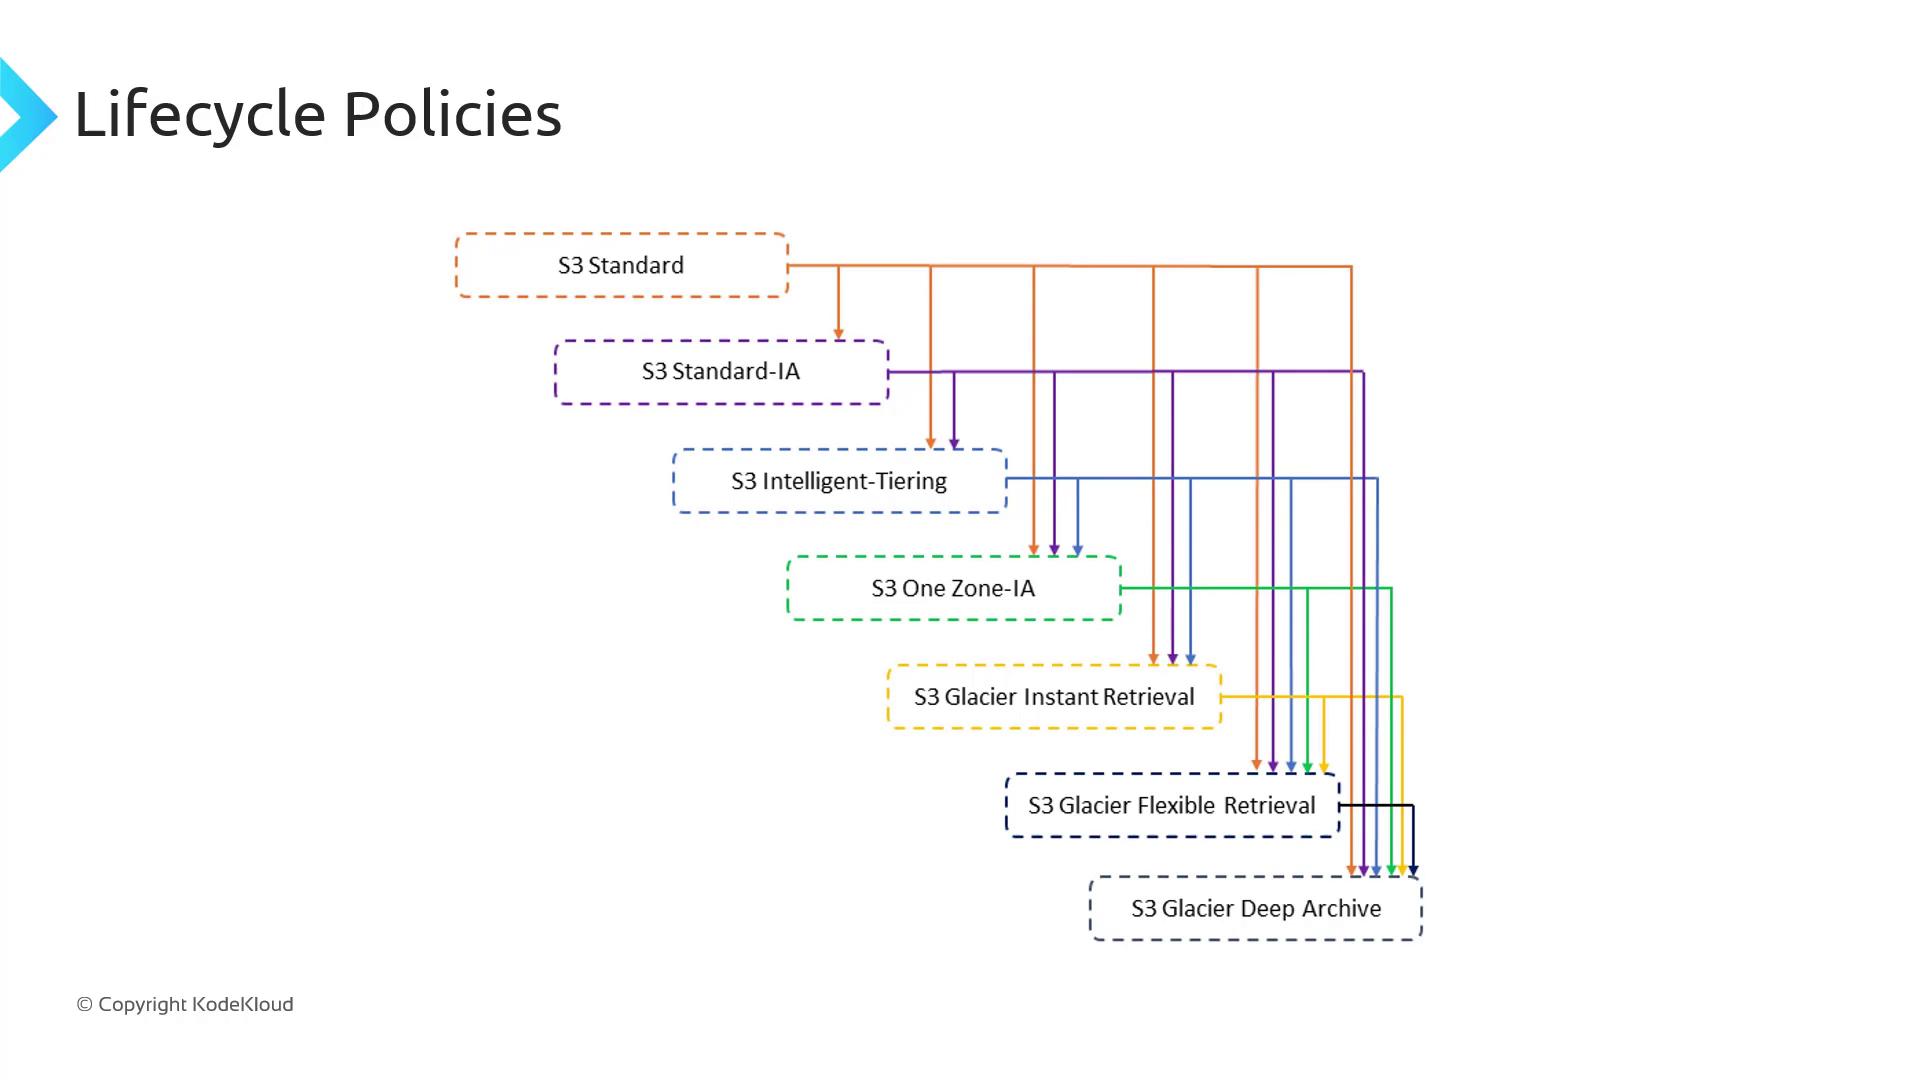
Storage Class Transition Rules
Not every storage class can transition directly to every other. The following table summarizes permitted transitions:
| Source Class | Allowed Transitions |
| S3 Standard | Standard-IA, Intelligent-Tiering, One Zone-IA, Glacier Instant Retrieval, Glacier Flexible Retrieval, Glacier Deep Archive |
| S3 Intelligent-Tiering | Glacier Instant Retrieval, Glacier Flexible Retrieval, Glacier Deep Archive |
| S3 One Zone-IA | Glacier Flexible Retrieval, Glacier Deep Archive |
Additional Constraints
When defining lifecycle rules, observe these key constraints:
Minimum object size
Objects must be ≥ 128 KB to transition from Standard or Standard-IA to Intelligent-Tiering or Glacier Instant Retrieval.Minimum storage duration
Standard → Standard-IA or One Zone-IA: 30 days in the source class.
After moving to Standard-IA or One Zone-IA, wait another 30 days before transitioning to any Glacier class.
Warning
Violating minimum size or duration requirements will cause your lifecycle rule to skip transitions. Always verify object metadata before applying a rule.
For a full list of constraints and examples, see the official AWS documentation.

Lifecycle Policies
Amazon S3 lifecycle policies help you optimize storage costs by automatically transitioning objects between storage classes or expiring them after a specified time. Define your rules once, and S3 handles the rest—no manual cleanup required.
How Lifecycle Policies Work
When you upload an object (for example, file1.txt) using S3 Standard, its access pattern may change over time. You can configure a lifecycle policy such as:
After 30 days: transition to S3 Standard-IA (Infrequent Access).
After 90 days: archive to S3 Glacier Deep Archive.
After 365 days: delete the object.
Lifecycle policies can target:
An entire bucket.
A subset of objects defined by prefix or tag.
Specific versions (if you have versioning enabled).
Note
Lifecycle rules only move objects “downhill,” from a higher-cost class to a lower-cost class.
Storage Class Transition Rules
Not every storage class can transition directly to every other. The following table summarizes permitted transitions:
| Source Class | Allowed Transitions |
| S3 Standard | Standard-IA, Intelligent-Tiering, One Zone-IA, Glacier Instant Retrieval, Glacier Flexible Retrieval, Glacier Deep Archive |
| S3 Intelligent-Tiering | Glacier Instant Retrieval, Glacier Flexible Retrieval, Glacier Deep Archive |
| S3 One Zone-IA | Glacier Flexible Retrieval, Glacier Deep Archive |
Additional Constraints
When defining lifecycle rules, observe these key constraints:
Minimum object size
Objects must be ≥ 128 KB to transition from Standard or Standard-IA to Intelligent-Tiering or Glacier Instant Retrieval.Minimum storage duration
Standard → Standard-IA or One Zone-IA: 30 days in the source class.
After moving to Standard-IA or One Zone-IA, wait another 30 days before transitioning to any Glacier class.
Warning
Violating minimum size or duration requirements will cause your lifecycle rule to skip transitions. Always verify object metadata before applying a rule.
For a full list of constraints and examples, see the official AWS documentation.
Demo Lifecycle Policies
In this walkthrough, you’ll learn how to automate object transitions and expirations in an Amazon S3 bucket using lifecycle policies. We’ll cover:
Creating a demo bucket
Uploading sample objects
Defining lifecycle rules to transition and expire objects across storage classes
Why Use Lifecycle Policies
Lifecycle policies help optimize storage costs by automatically moving objects to lower-cost classes (e.g., Standard-IA, Glacier) or deleting them when they’re no longer needed.
Lifecycle Storage Classes Overview
| Storage Class | Description | Typical Use Case |
| S3 Standard | Frequent access, low latency | Active datasets |
| S3 Standard-IA | Infrequent access, lower cost | Backups and long-term storage |
| S3 Glacier Instant Retrieval | Millisecond access retrieval from Glacier | Archives with occasional retrieval |
| S3 Glacier Deep Archive | Lowest cost, hours-long retrieval time | Compliance archives, long-term retention |
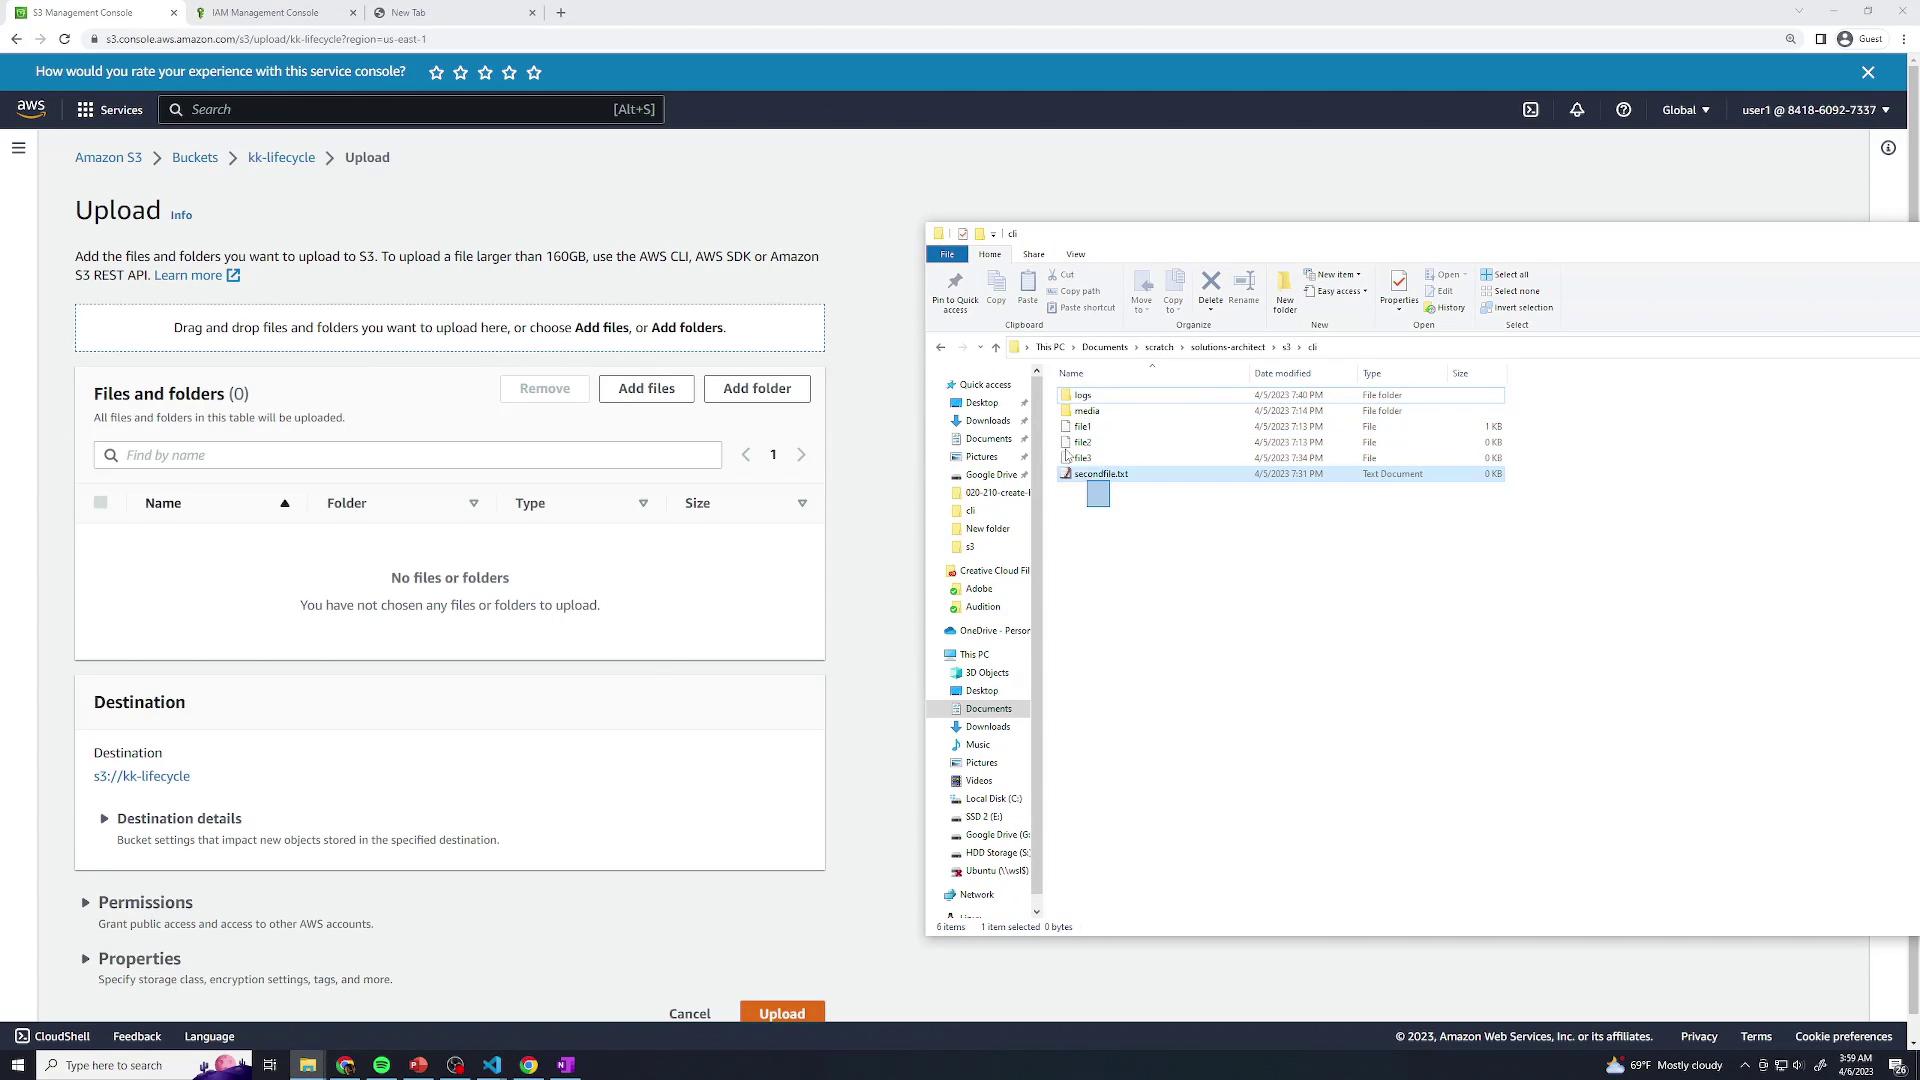
1. Create a Demo Bucket and Upload Objects
Open the AWS Management Console and navigate to S3.
Click Create bucket, accept all defaults, and finish the wizard.
In your new bucket, click Upload, then drag and drop a few test files and folders. Any sample data will do.
- Open Properties for the bucket and confirm that the Storage class of your objects is Standard.
2. Configure Lifecycle Rules
Navigate to the Management tab of your bucket and click Create lifecycle rule.

You can define multiple rules to target different prefixes (logs/, media/) or object sizes.
2.1 Rule 1: lifecycle-logs
Rule name:
lifecycle-logsUnder Scope, select Limit the scope to specific prefixes or tags and enter:
- Prefix:
logs/
- Prefix:
(Optional) Specify Minimum size or Maximum size filters.
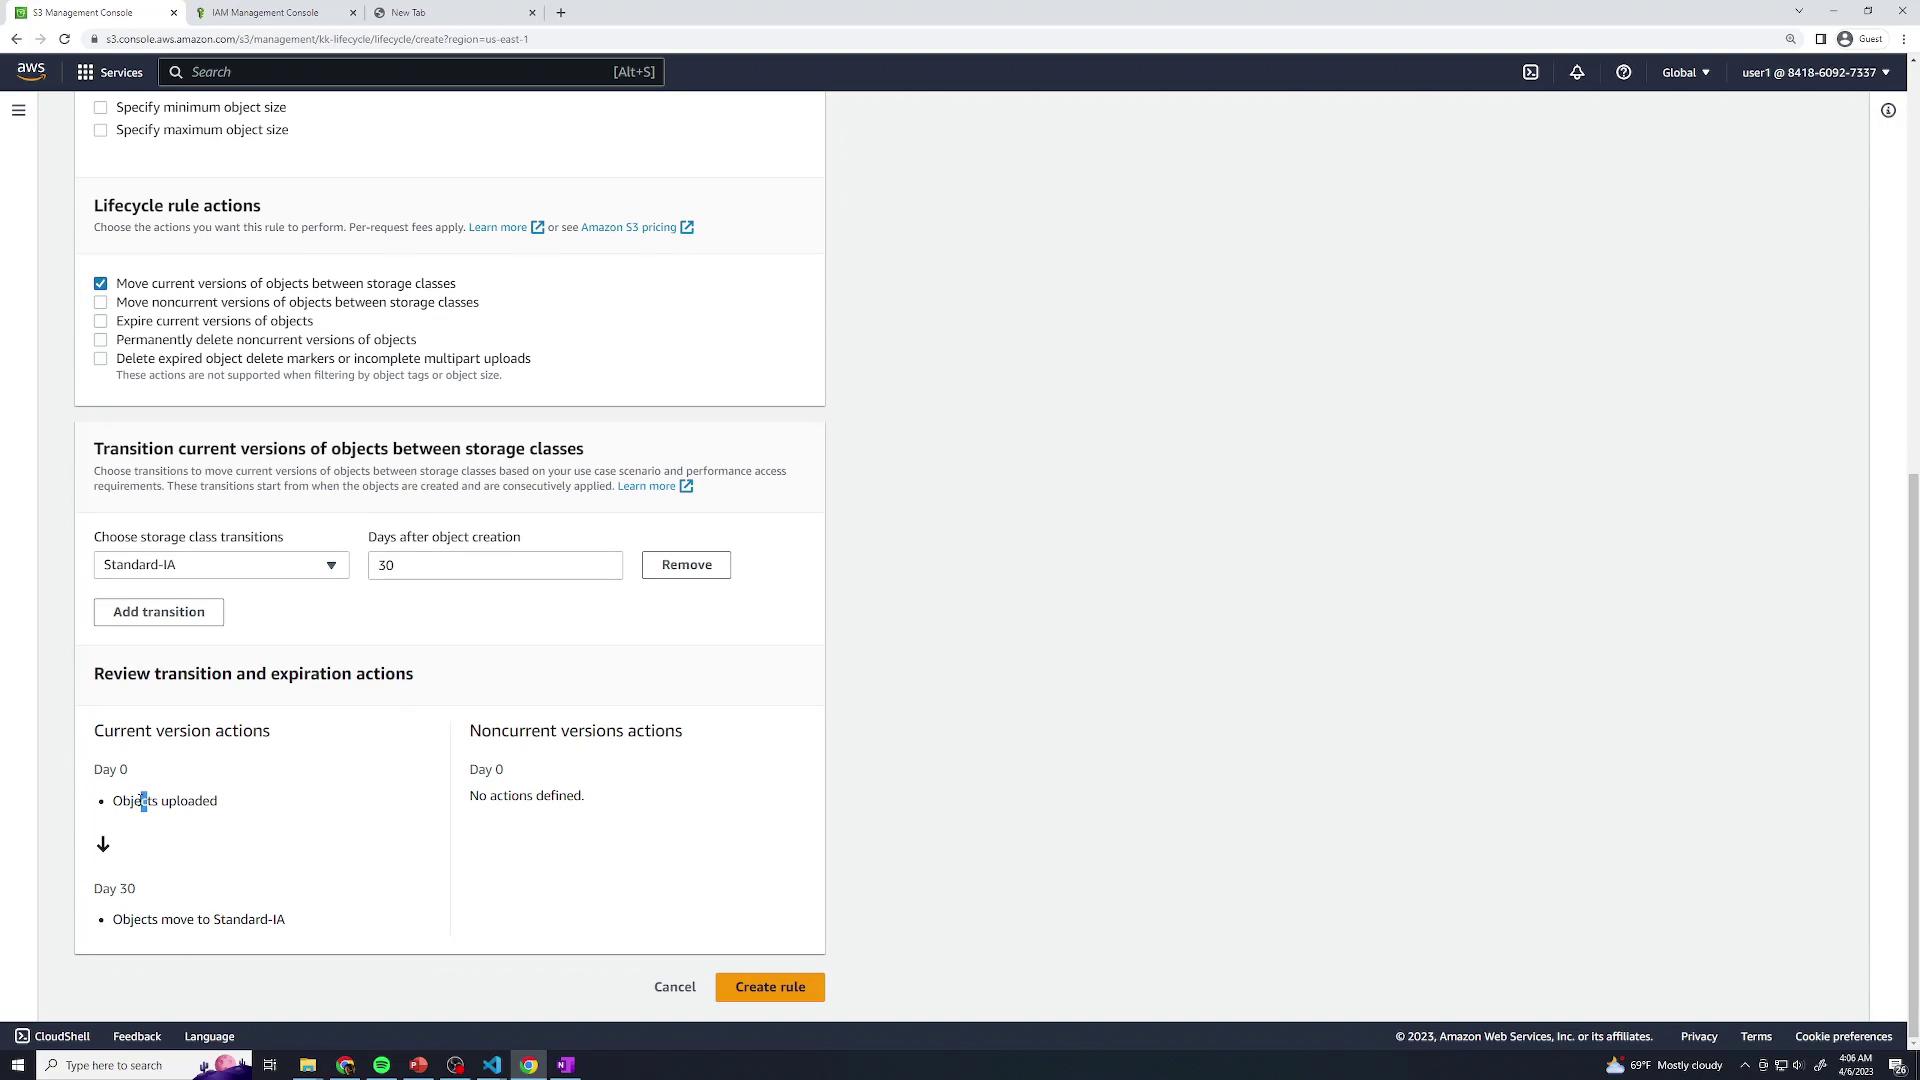
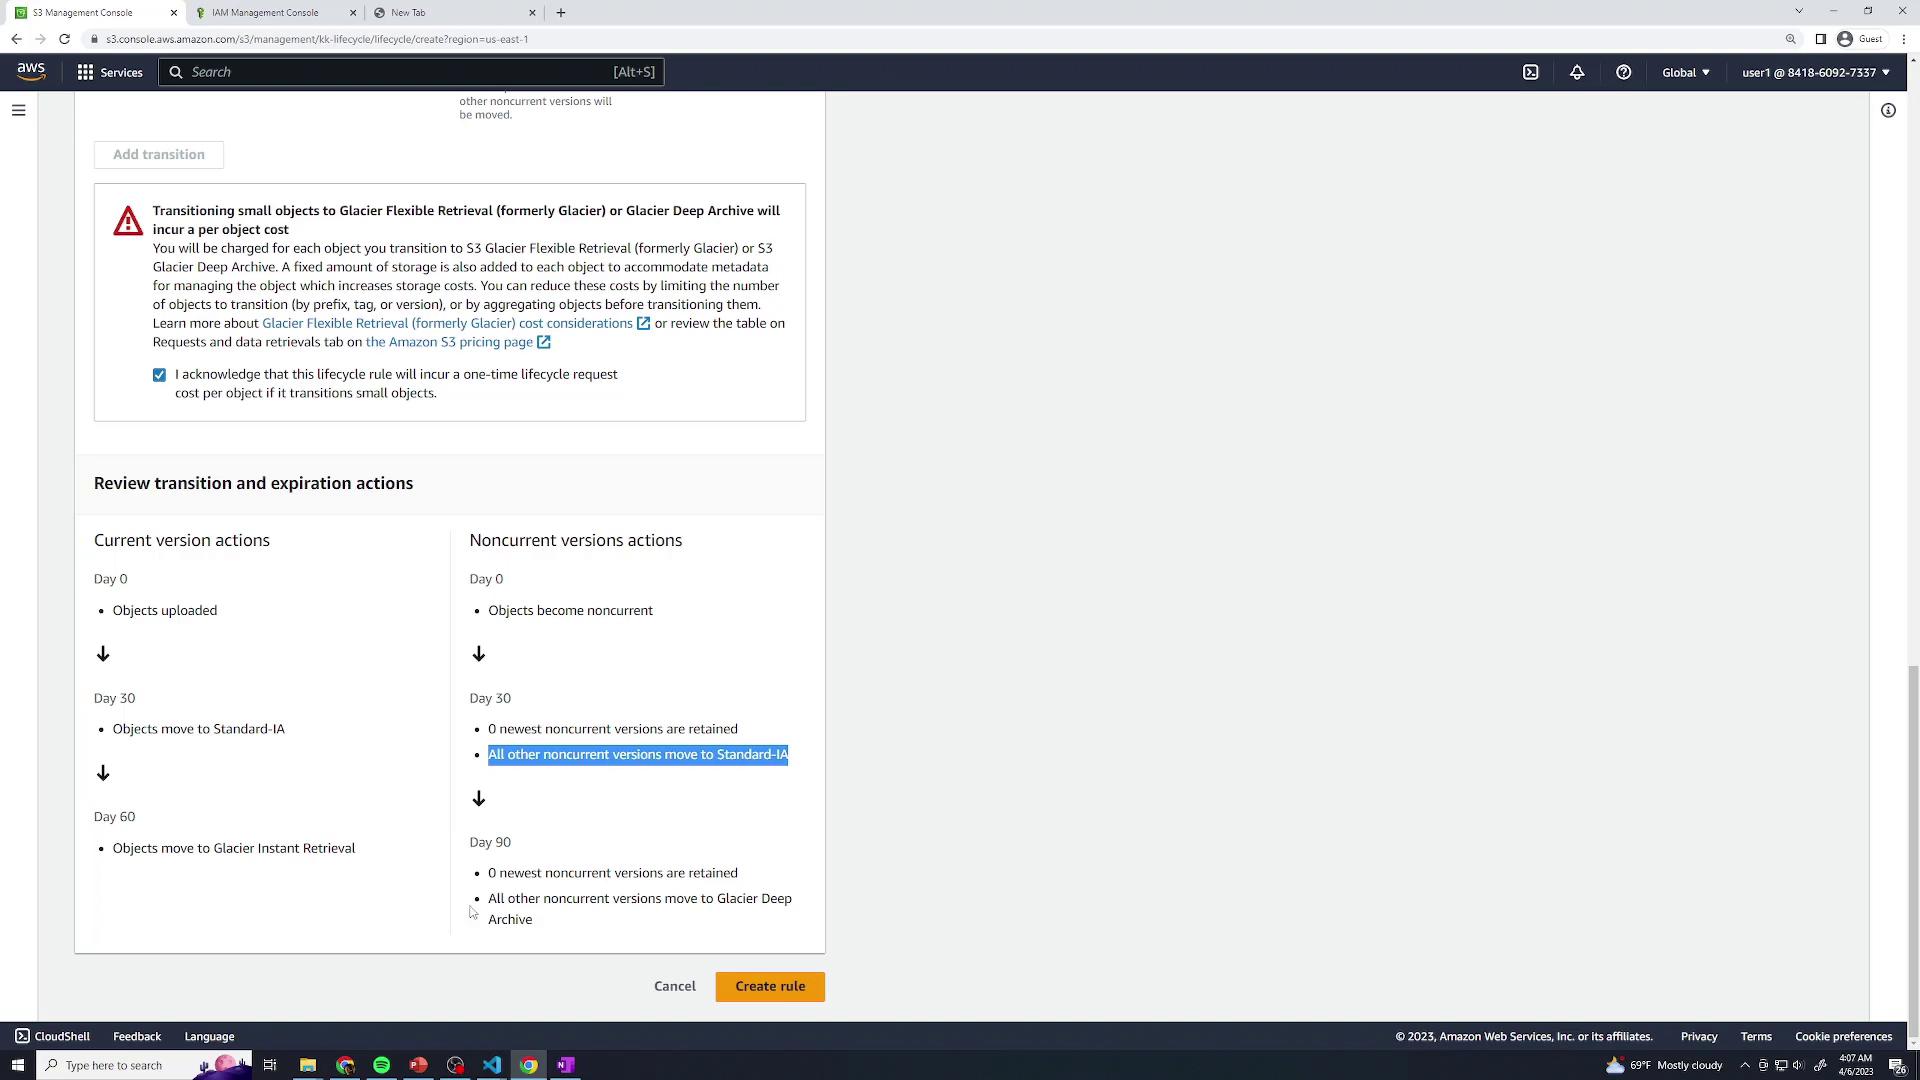
Current Version Transitions
After 30 days: transition to S3 Standard-IA
After 60 days: transition to S3 Glacier Instant Retrieval
Non-Current Version Transitions
After 30 days: transition to S3 Standard-IA
After 90 days: transition to S3 Glacier Deep Archive
Click Create to save lifecycle-logs.
2.2 Rule 2: lifecycle-media
Rule name:
lifecycle-mediaScope → Prefix:
media/Current version transitions:
- After 60 days: transition to S3 Standard-IA
Non-current version actions:
After 30 days: transition to S3 Standard-IA
After 365 days: Expire non-current versions
Click Create to save lifecycle-media.
3. Review Your Lifecycle Configuration
Once both rules are enabled, the Lifecycle configuration page displays all active rules:
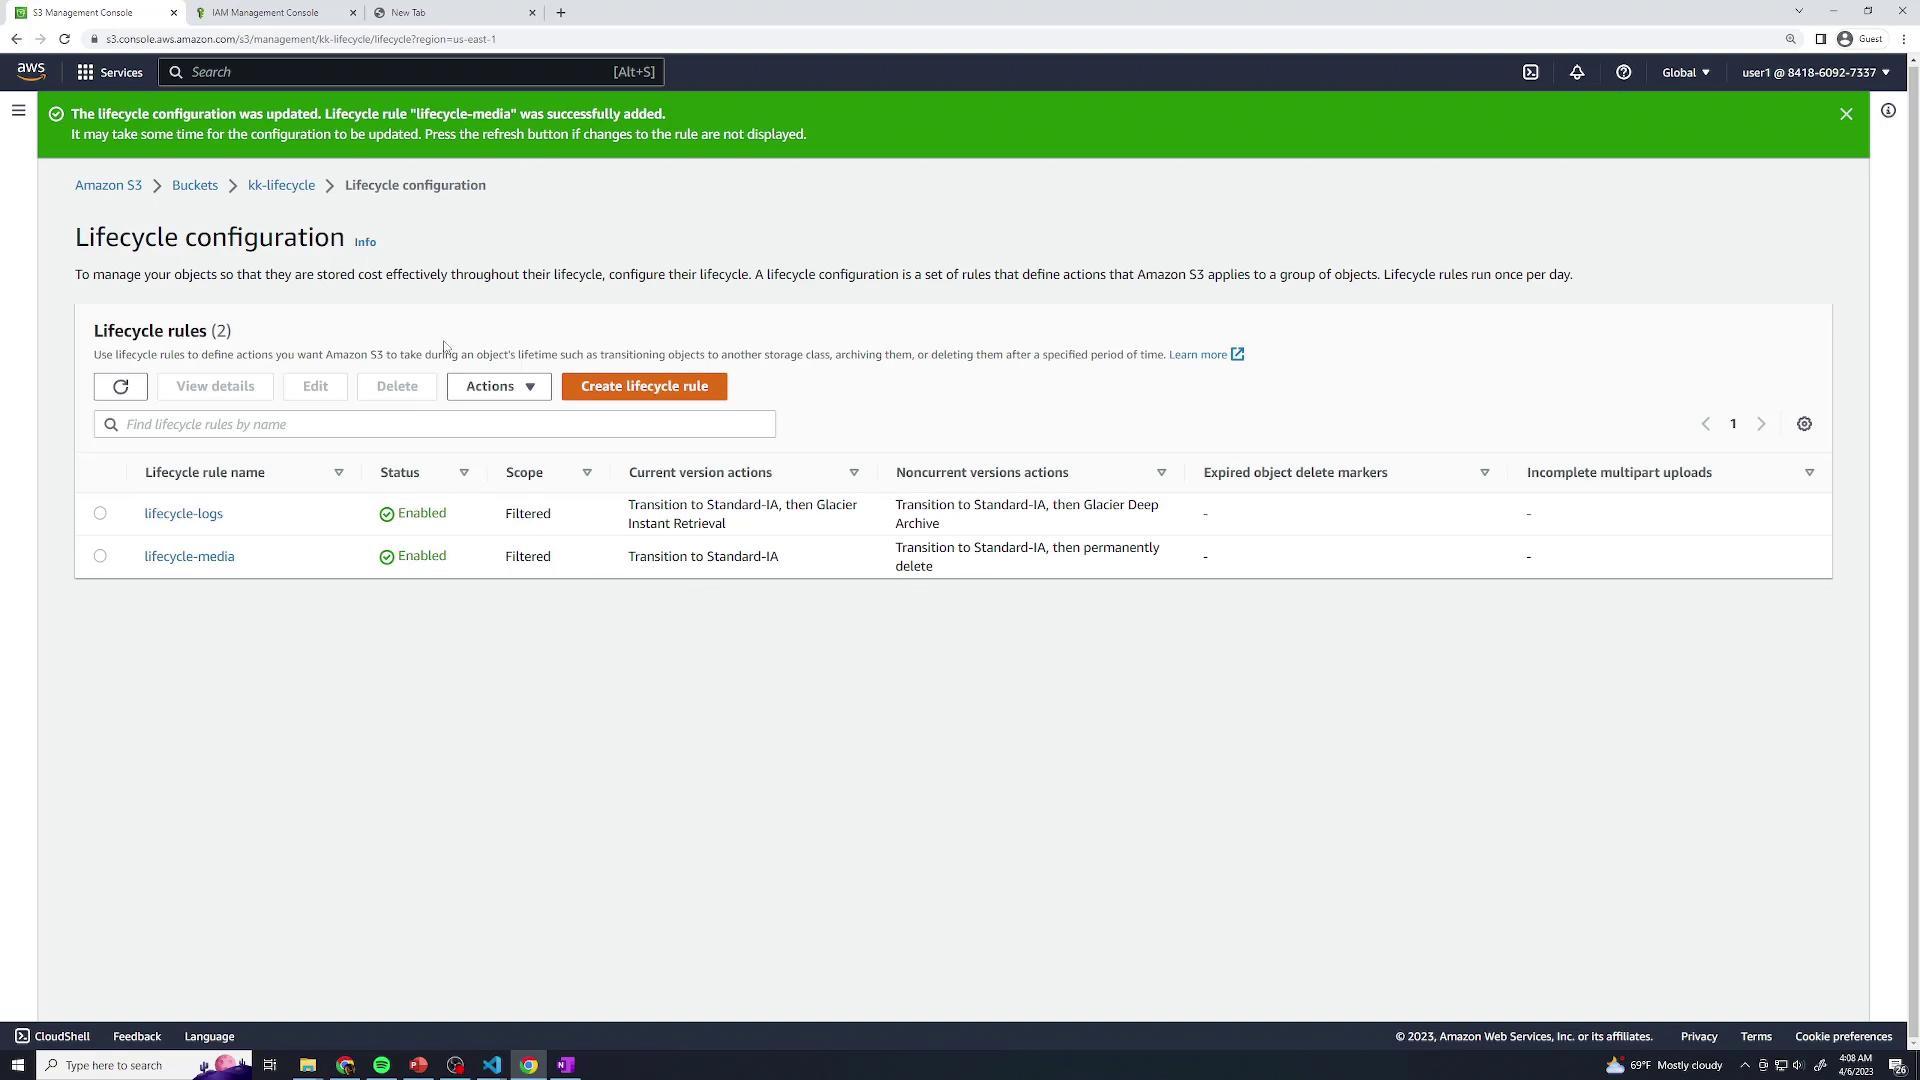
Propagation Delay
It can take up to 24 hours for lifecycle policies to appear in the billing report and start transitions.
Static Website
In this guide, you'll learn how to serve a fully static website—HTML, CSS, JavaScript, and media—directly from an Amazon S3 bucket. We’ll cover how static hosting works, pricing considerations, and steps to configure a custom domain.
Note
Static website hosting on Amazon S3 supports only static files. If your site requires server-side processing, consider integrating Amazon EC2, Amazon ECS, or AWS Lambda.
Understanding Static Websites
When a user enters a URL, their browser sends an HTTP GET request to a web server, which responds with files that the browser renders. Common file types include:
| File Type | Purpose |
| HTML | Defines the page structure and content. |
| CSS | Styles layout, fonts, colors, and spacing. |
| JavaScript | Adds interactivity and dynamic behavior on the client side. |
| Images & Media | Provides visual and audio assets for the page. |
By uploading these files as objects in an S3 bucket and enabling static website hosting, you can serve them directly over HTTP.
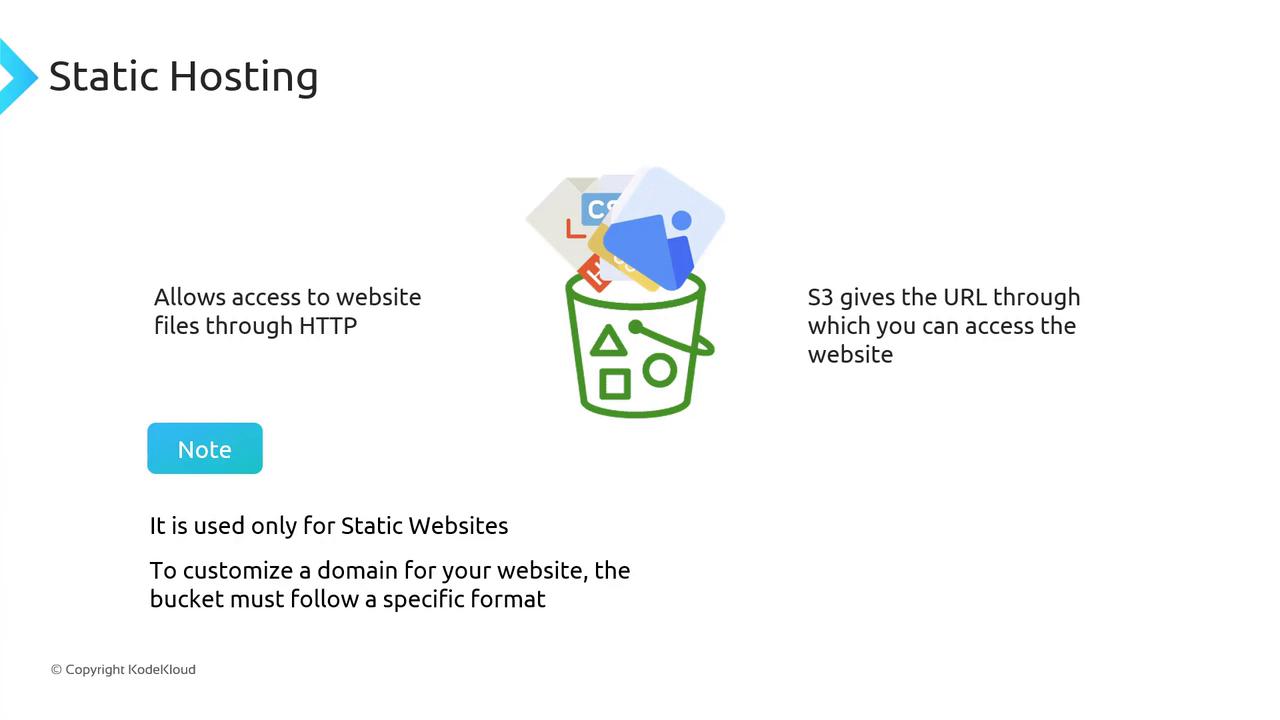
How Static Hosting Works
Upload your site assets (HTML, CSS, JS, images) to an S3 bucket.
In the bucket Properties, enable Static website hosting.
Specify your
index.html(and optionalerror.html) documents.Use the assigned S3 website endpoint to deliver your content.
Pricing Overview
Static hosting on S3 involves standard storage and data transfer fees, plus a small request charge. For example, on S3 Standard, GET requests cost $0.0004 per 1,000 requests.
| Cost Component | Pricing (S3 Standard) |
| Storage | Pay per GB stored per month |
| Data Transfer (Out) | Pay per GB transferred out |
| HTTP GET Requests | $0.0004 per 1,000 requests |
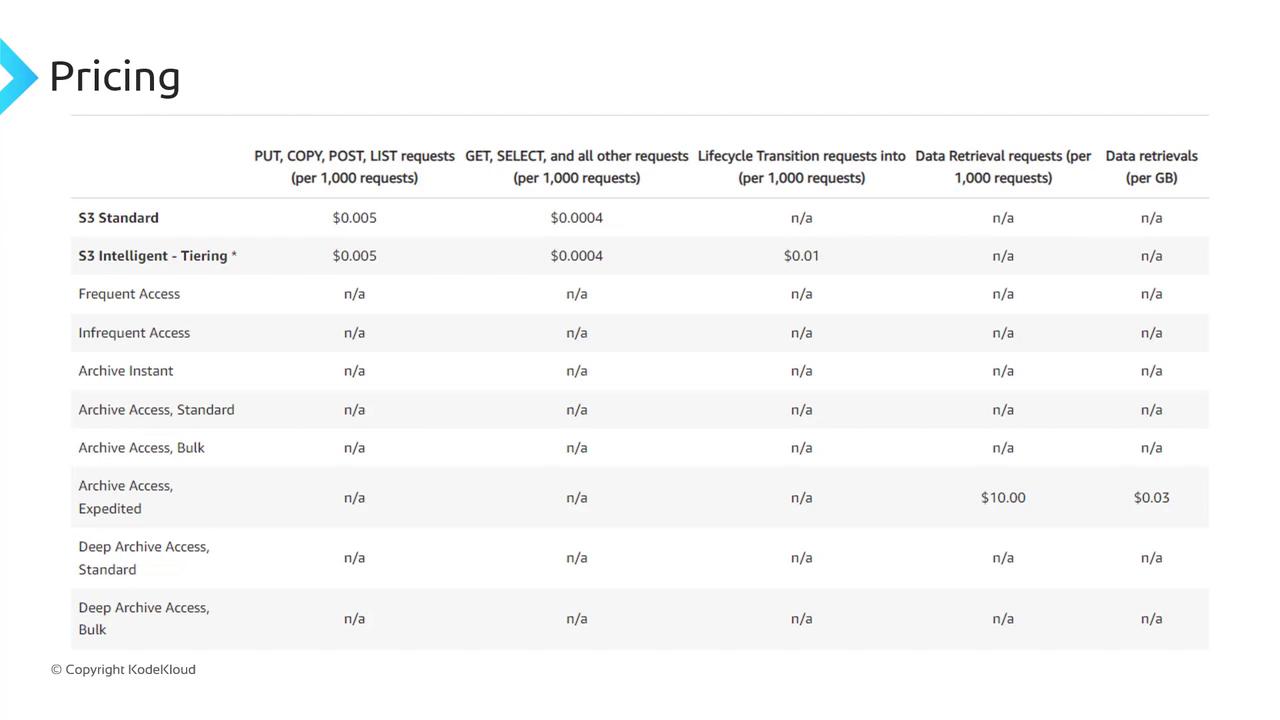
Factor in both storage and request fees when estimating your total hosting cost.
Accessing Your Static Site
After enabling static website hosting, S3 assigns an endpoint in this format:
http://bucketname.s3-website-<region-name>.amazonaws.com
Point your users to this URL to serve your static site directly from S3.
Using a Custom Domain
To replace the default S3 URL with your own domain, configure DNS using Amazon Route 53 or another provider. Your bucket name must exactly match the domain you wish to use. For example:
Bucket name:
bestcars.comCustom domain:
http://bestcars.com
In Route 53, create an Alias record (or CNAME) that maps bestcars.com to your S3 website endpoint.
Warning
Your S3 bucket name must match your custom domain (example.com). If they differ, DNS routing will fail and your site will be inaccessible.

Demo Static Website
In this tutorial, you’ll learn how to deploy a simple static website using Amazon S3. We’ll cover:
Project file structure
Configuring S3 for static hosting
Setting public access and custom error pages
Testing your site endpoint
This guide is ideal for developers and DevOps engineers looking to serve HTML, CSS, and images directly from S3.
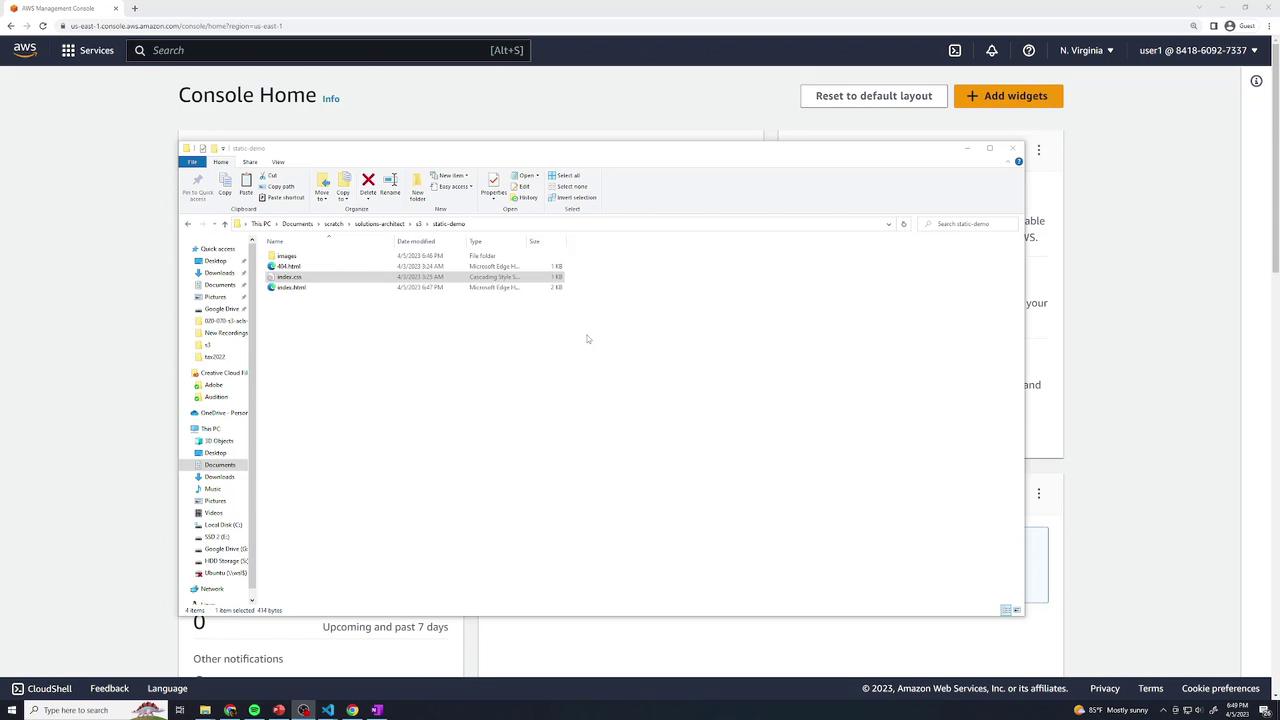
Project Structure
Your local directory (static-demo/) contains:
index.html– Main gallery pageindex.css– Layout and styling rules404.html– Custom error pageimages/– JPEG photos used in the gallery
index.html
This HTML file defines the page structure and references your CSS and images:
<!DOCTYPE html>
<html lang="en">
<head>
  <meta charset="UTF-8" />
  <meta http-equiv="X-UA-Compatible" content="IE=edge" />
  <meta name="viewport" content="width=device-width, initial-scale=1.0" />
  <link rel="stylesheet" href="index.css" />
  <title>Food Gallery</title>
</head>
<body>
  <div class="container">
    <div class="images">
      <!-- Nine food images displayed in a grid -->
      <div class="image"><img src="images/food1.jpg" alt="Food 1" /></div>
      <div class="image"><img src="images/food2.jpg" alt="Food 2" /></div>
      <div class="image"><img src="images/food3.jpg" alt="Food 3" /></div>
      <div class="image"><img src="images/food4.jpg" alt="Food 4" /></div>
      <div class="image"><img src="images/food5.jpg" alt="Food 5" /></div>
      <div class="image"><img src="images/food6.jpg" alt="Food 6" /></div>
      <div class="image"><img src="images/food7.jpg" alt="Food 7" /></div>
      <div class="image"><img src="images/food8.jpg" alt="Food 8" /></div>
      <div class="image"><img src="images/food9.jpg" alt="Food 9" /></div>
      <div class="image"><img src="images/food10.jpg" alt="Food 10" /></div>
    </div>
  </div>
</body>
</html>
Your accompanying index.css defines a responsive grid layout, background colors, and typography. Place all JPEGs in the images/ folder.
404.html
When users request a missing resource, S3 serves this custom error page:
<!DOCTYPE html>
<html lang="en">
<head>
  <meta charset="UTF-8" />
  <meta http-equiv="X-UA-Compatible" content="IE=edge" />
  <meta name="viewport" content="width=device-width, initial-scale=1.0" />
  <link rel="stylesheet" href="index.css" />
  <title>Page Not Found</title>
</head>
<body>
  <div class="container">
    <h1 class="head-404">404</h1>
    <h2 class="text-404">Page not found</h2>
  </div>
</body>
</html>
Note
You can preview both pages locally by opening index.html in your browser. The CSS grid will display your food gallery.
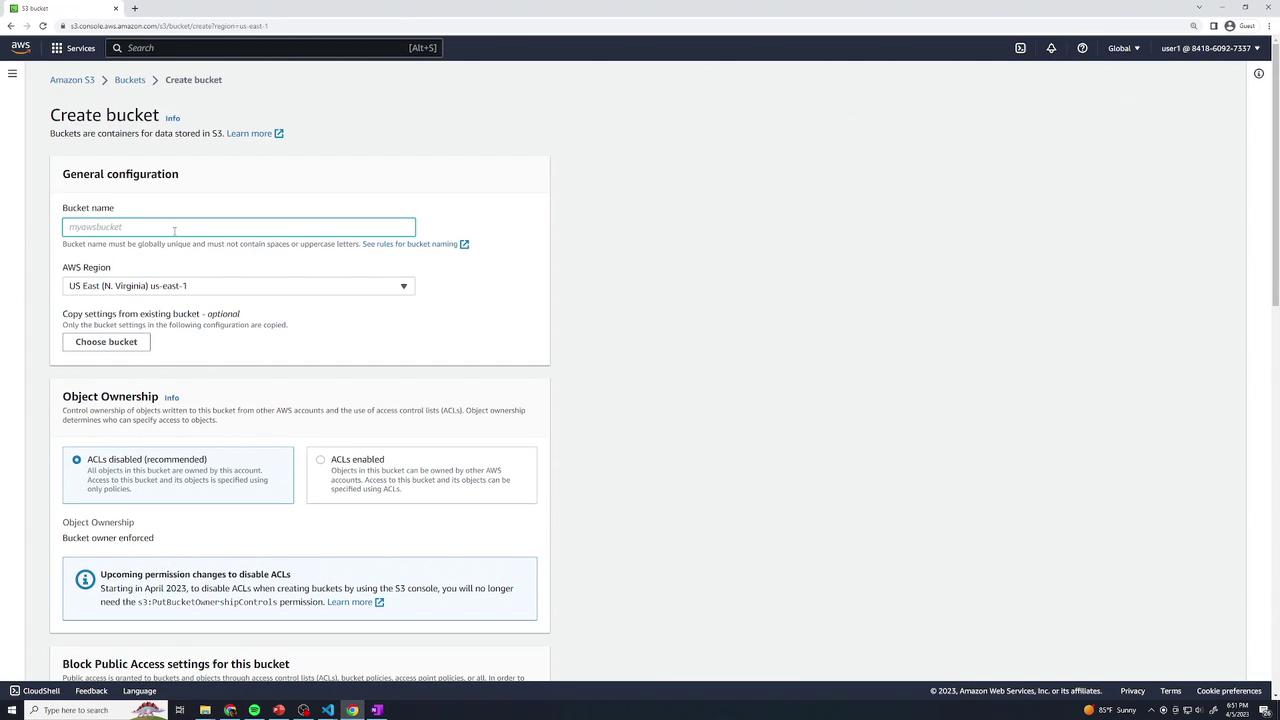
1. Create an S3 Bucket
Open the Amazon S3 console and click Create bucket.
Enter a unique bucket name (e.g.,
kk-static-demo) and select your region.Keep default settings and click Create bucket.
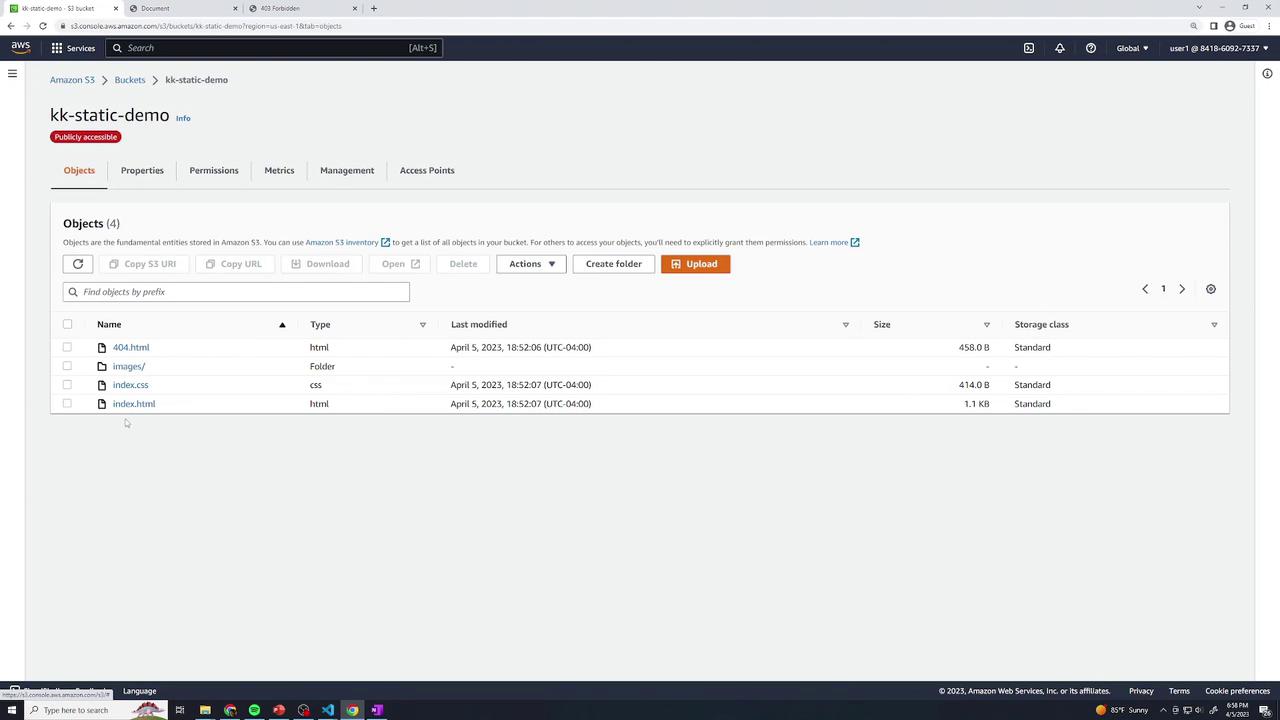
Once created, locate your bucket in the list:

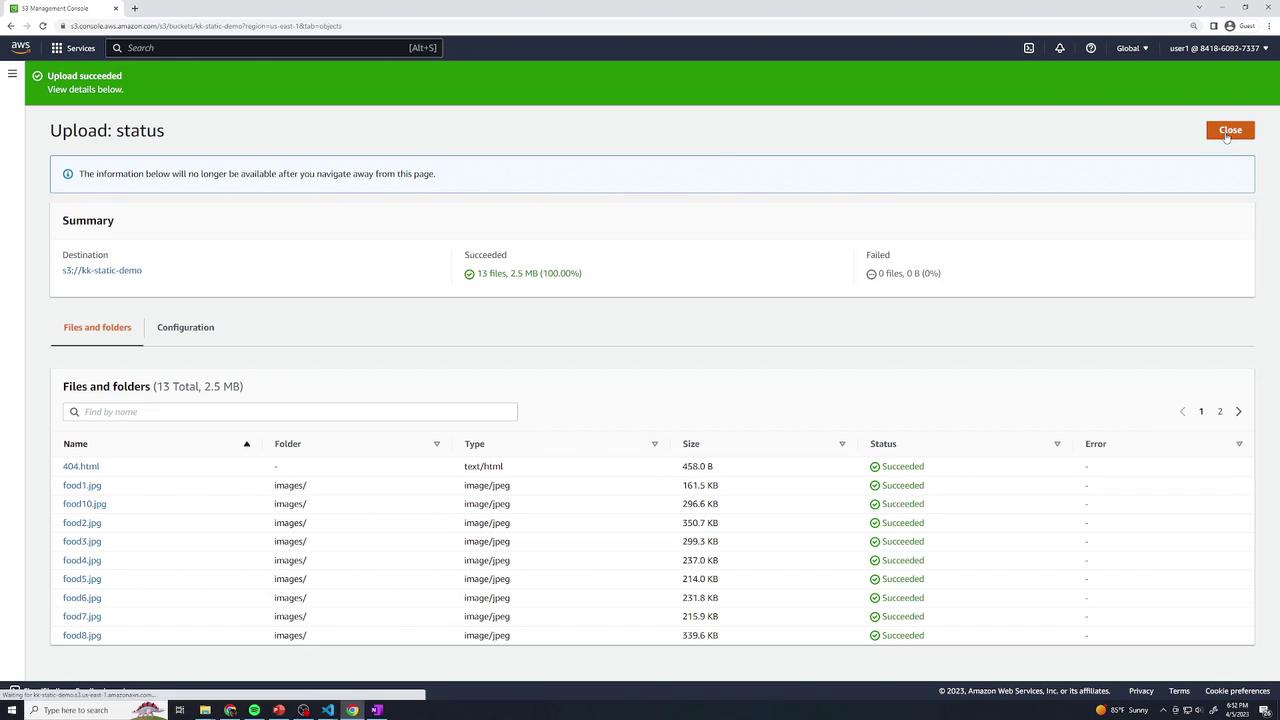
2. Upload Website Files
Click your bucket name to open it.
Drag & drop
index.html,index.css,404.html, and theimages/folder into the console.Choose Upload and confirm.
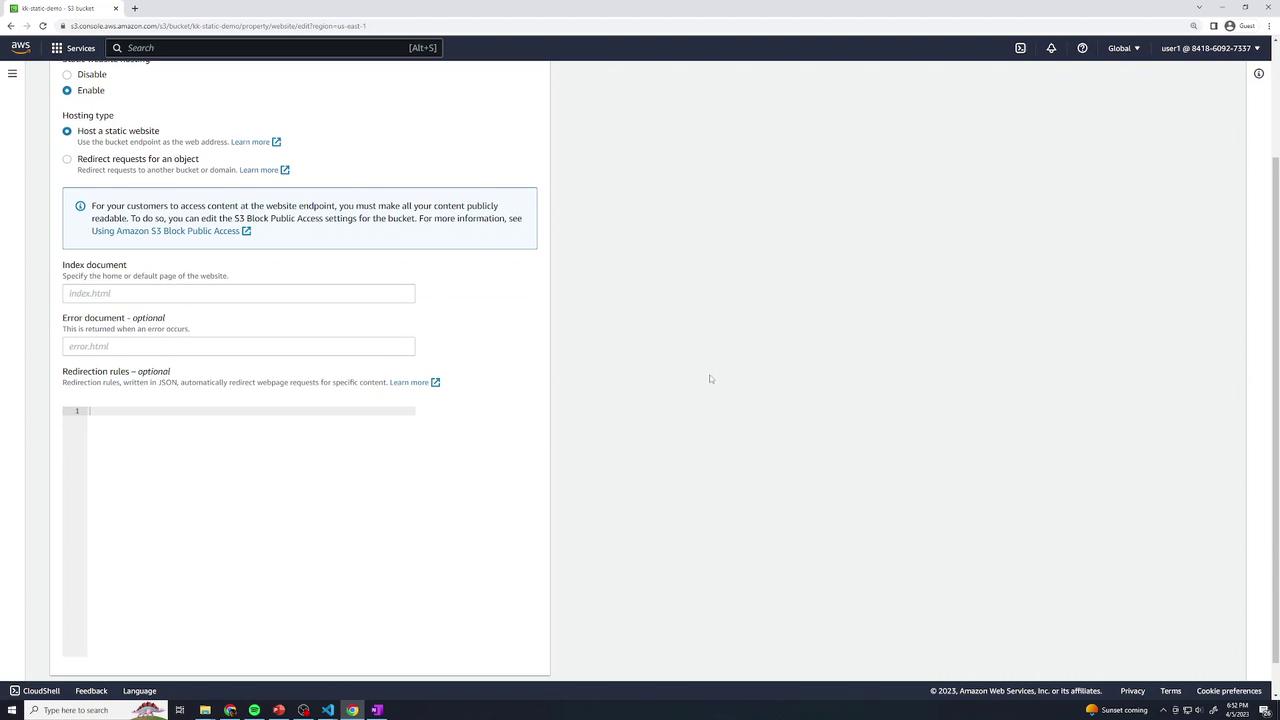
3. Enable Static Website Hosting
In your bucket, navigate to Properties → Static website hosting → Edit.
Select Enable.
For Index document, enter
index.html.For Error document, enter
404.html.Save changes.
Review the bucket’s static hosting properties:
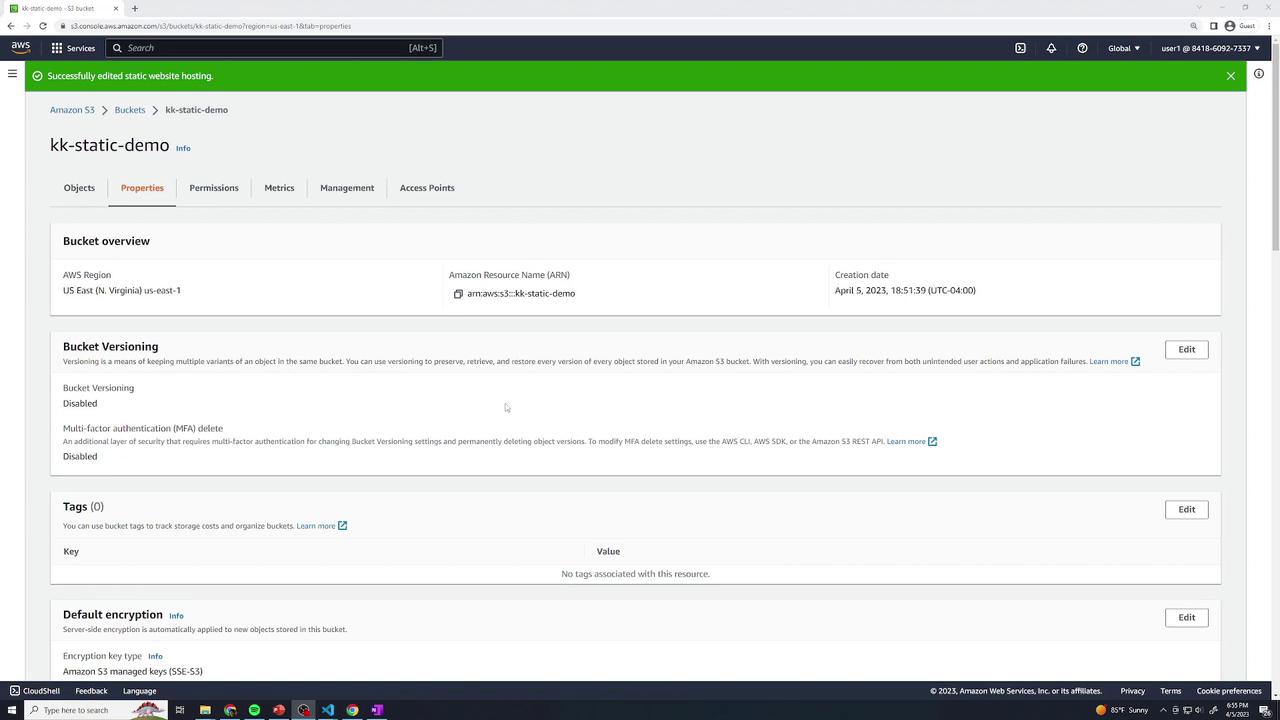
You should see a Bucket website endpoint listed:
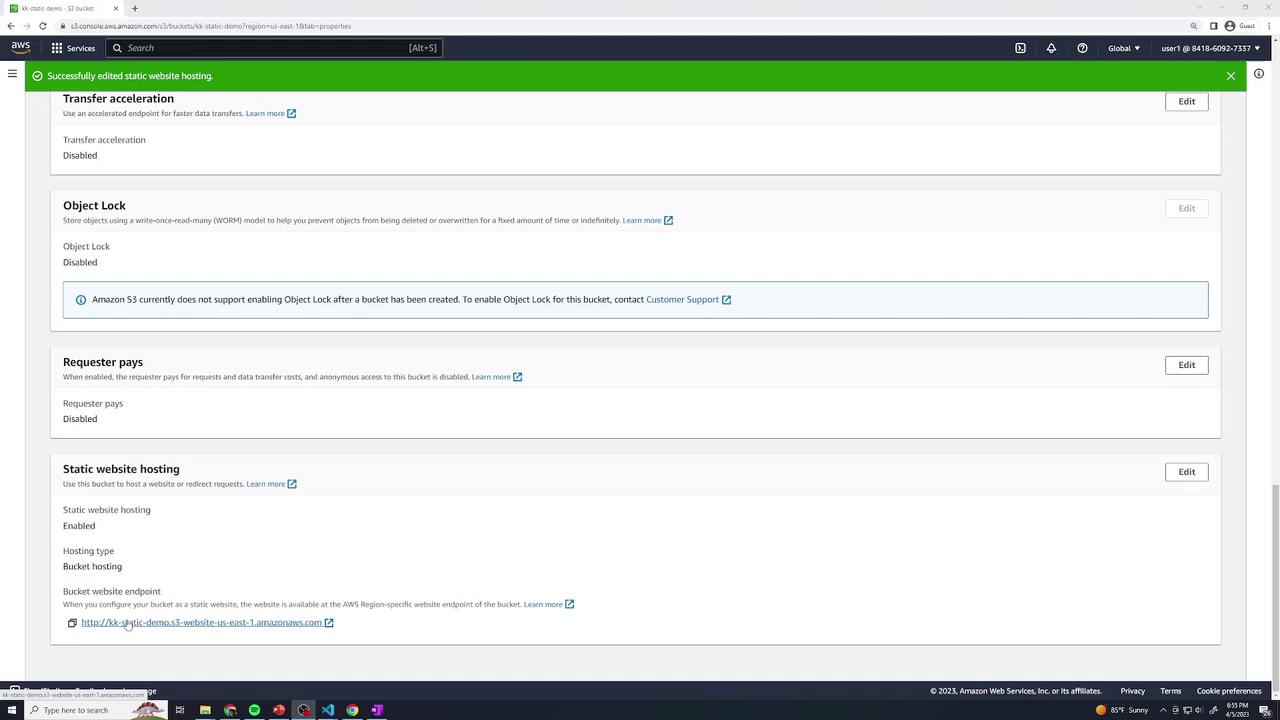
At this point, clicking the endpoint yields Access Denied since the bucket is private.
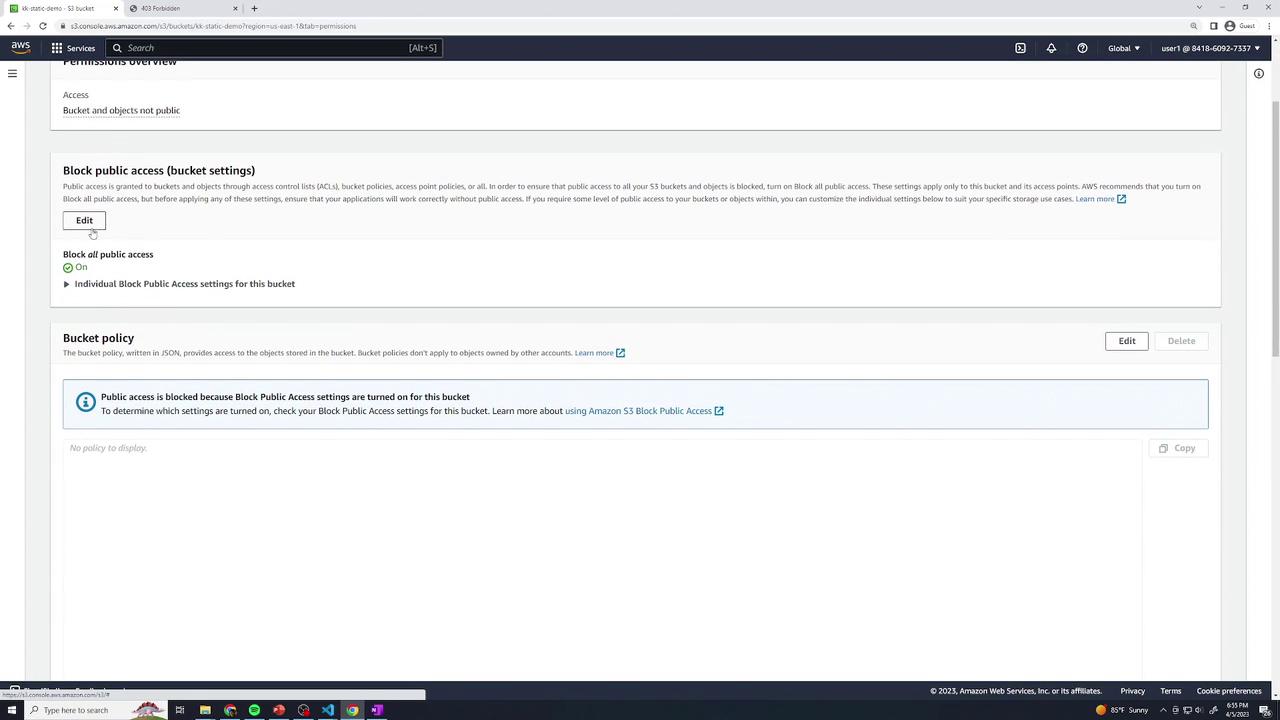
4. Configure Public Access
4.1 Disable Block Public Access
Go to Permissions → Block public access (bucket settings) → Edit.
Uncheck Block all public access and confirm.
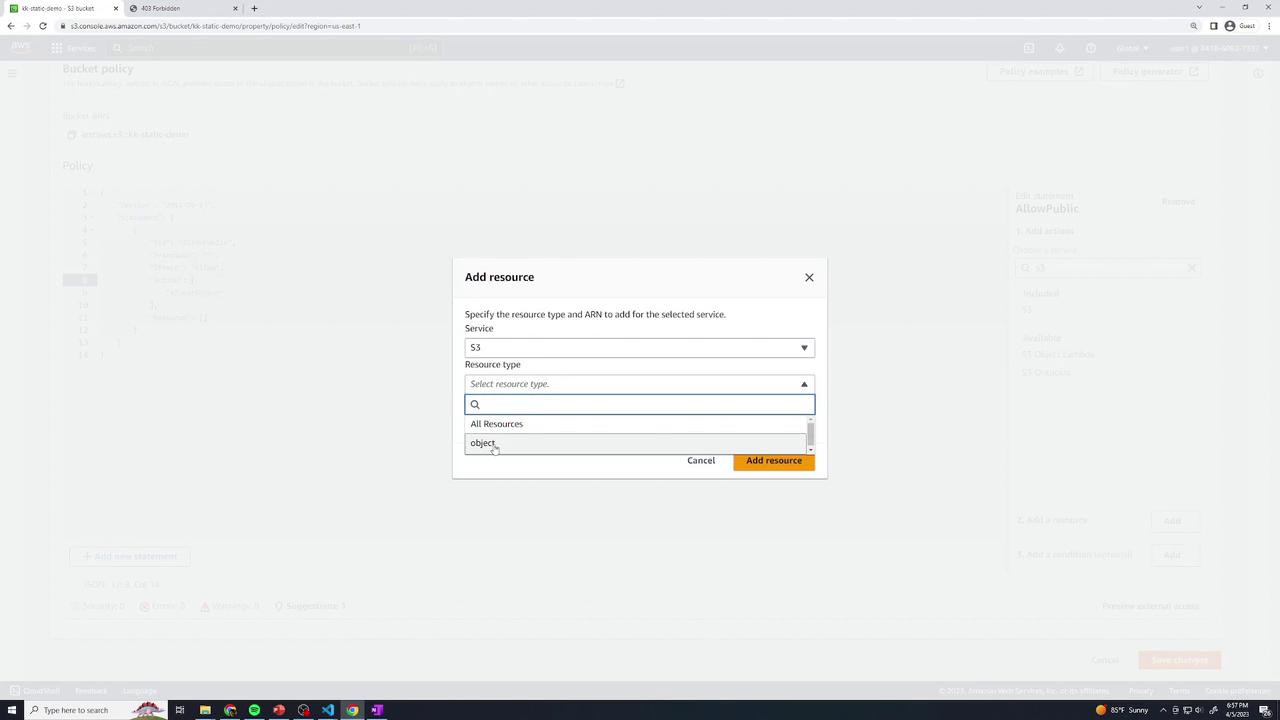
4.2 Add a Bucket Policy
Still under Permissions, select Bucket policy and paste the following JSON (replace the ARN with your bucket name):
{
  "Version": "2012-10-17",
  "Statement": [
    {
      "Sid": "AllowPublic",
      "Principal": "*",
      "Effect": "Allow",
      "Action": ["s3:GetObject"],
      "Resource": ["arn:aws:s3:::kk-static-demo/*"]
    }
  ]
}
Save the policy. Alternatively, use the Add a resource UI:
Your bucket will now appear publicly accessible:
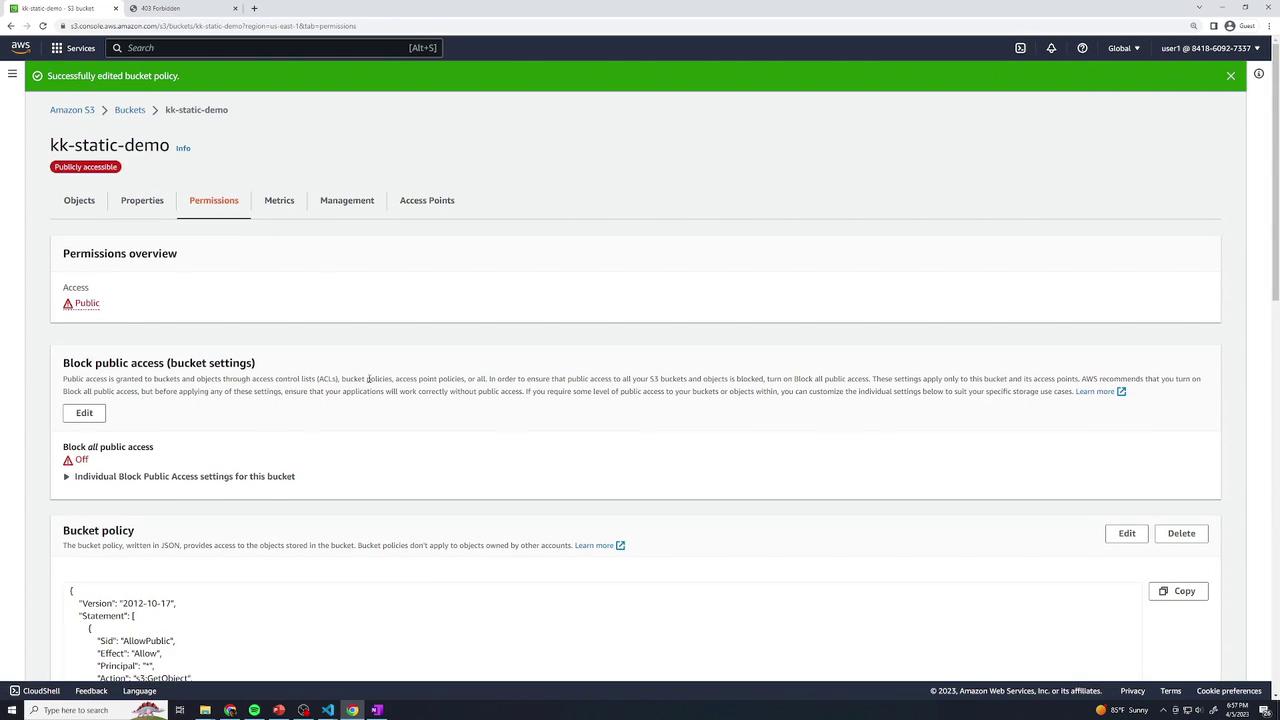
Warning
Making your bucket public exposes all objects. Ensure only intended files are uploaded.
5. Test Your Static Website
Return to Properties → Static website hosting and click the endpoint link. You should see the food gallery home page.
You do not need to append /index.html—the index document is served automatically.
| Resource | URL Pattern |
| Home page | http://kk-static-demo.s3-website-<region>.amazonaws.com/ |
| Explicit index | http://kk-static-demo.s3-website-<region>.amazonaws.com/index.html |
| Specific image | http://kk-static-demo.s3-website-<region>.amazonaws.com/images/food1.jpg |
| Missing resource (404 page) | http://kk-static-demo.s3-website-<region>.amazonaws.com/does-not-exist |
Subscribe to my newsletter
Read articles from Arindam Baidya directly inside your inbox. Subscribe to the newsletter, and don't miss out.
Written by
Arindam Baidya
Arindam Baidya
🚀 Aspiring DevOps & Cloud Engineer | Passionate about Automation, CI/CD, Containers, and Cloud Infrastructure ☁️ I work with Docker, Kubernetes, Jenkins, Terraform, AWS (IAM & S3), Linux, Shell Scripting, and Git to build efficient, scalable, and secure systems. Currently contributing to DevOps-driven projects at Assurex e-Consultant while continuously expanding my skills through hands-on cloud and automation projects. Sharing my learning journey, projects, and tutorials on DevOps, AWS, and cloud technologies to help others grow in their tech careers. 💡 Let’s learn, build, and innovate together!