🔥 Building a Simple PDF AI Chat app with Next.js, React PDF and OpenAI 💬
 watcharakorn
AI is showing up everywhere these days, and one great use is real-time answers from PDFs. From contracts and manuals to compliance reports, PDFs remain a crucial component in business workflows. But searching for answers or details inside long documents can be tedious and time consuming.
With a PDF AI Chat app, you can:
Ask questions about a document and get accurate responses fast.
Highlight text and get context-aware answers from AI.
Copy key details or insights with one click.
For companies, this can mean faster onboarding, quicker report reviews, and less back-and-forth over document details.
In this walkthrough, we'll cover how to build a PDF chat app that let users talk to an AI about the contents of any PDF, right inside a web browser. If you’re a React.js developer wanting to explore document chat workflows, you’ll find this tutorial practical.
Here's a list of tools you’ll need:
Next.js for the app framework
React PDF to show PDFs directly in the browser
OpenAI for the chat backend
Tailwind CSS for easy styling

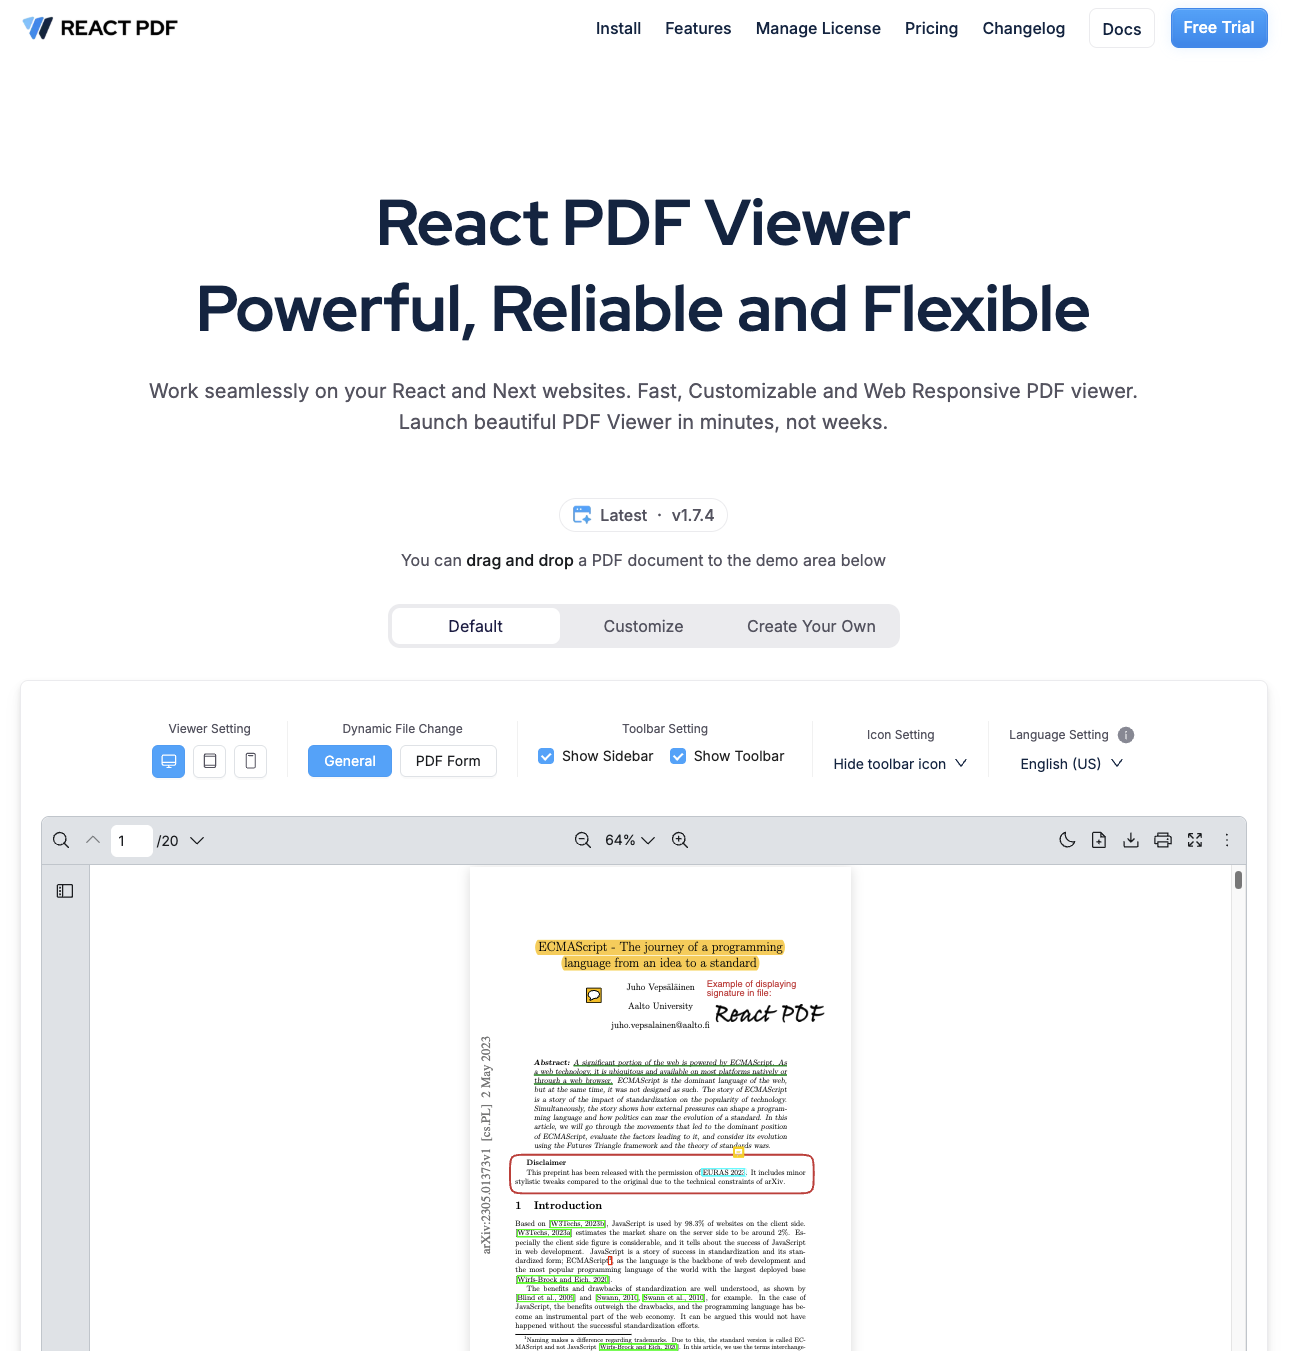
A quick introduction about us. React PDF lets you display PDF files directly inside your React.js or Next.js projects. With more than 20 built-in features like a default toolbar, easy customization and responsive layouts, your users can view and work with PDFs without leaving your app.
You can add a React PDF Viewer component to all kinds of projects. Use it in document systems, workflow tools, AI apps or as a simple PDF reader. It's flexible and fits right in wherever you need to show or manage PDF files.
Part 1 - Set up Your App
Step 1: Initialize a new Next.js project with Tailwind CSS:
npx create-next-app@latest
Step 2: Install required libraries:
npm install @pdf-viewer/react eventsource-parser openai react-markdown
Here's what each does:
@pdf-viewer/react: Display PDFs in your app.
eventsource-parser: Handle event streams for live AI responses.
openai: Connect to the OpenAI API.
react-markdown: Render markdown content from AI replies.
Part 2 - Set Up a PDF Viewer Infrastructure
Start by creating a provider and React PDF Viewer component using @pdf-viewer/react. The library lets users open and read PDFs inside your app, with features like built-in toolbars and a responsive design. It works with both simple readers and advanced workflows.
Step 1: Create a PDF Provider Component
// AppProviders.tsx
"use client";
import { RPConfig, RPConfigProps } from "@pdf-viewer/react";
import { type PropsWithChildren } from "react";

function AppProviders({
  children,
  ...props
}: PropsWithChildren<RPConfigProps>) {
  return <RPConfig {...props}>{children}</RPConfig>;
}
export default AppProviders;
Step 2: Create a React PDF Viewer Component
// AppPdfViewer.tsx
"use client";
import { RPProvider, RPDefaultLayout, RPPages } from "@pdf-viewer/react";
import { Ref } from "react";
const AppPdfViewer = ({ ref }: { ref?: Ref<HTMLDivElement> }) => {
return (
<div ref={ref}>
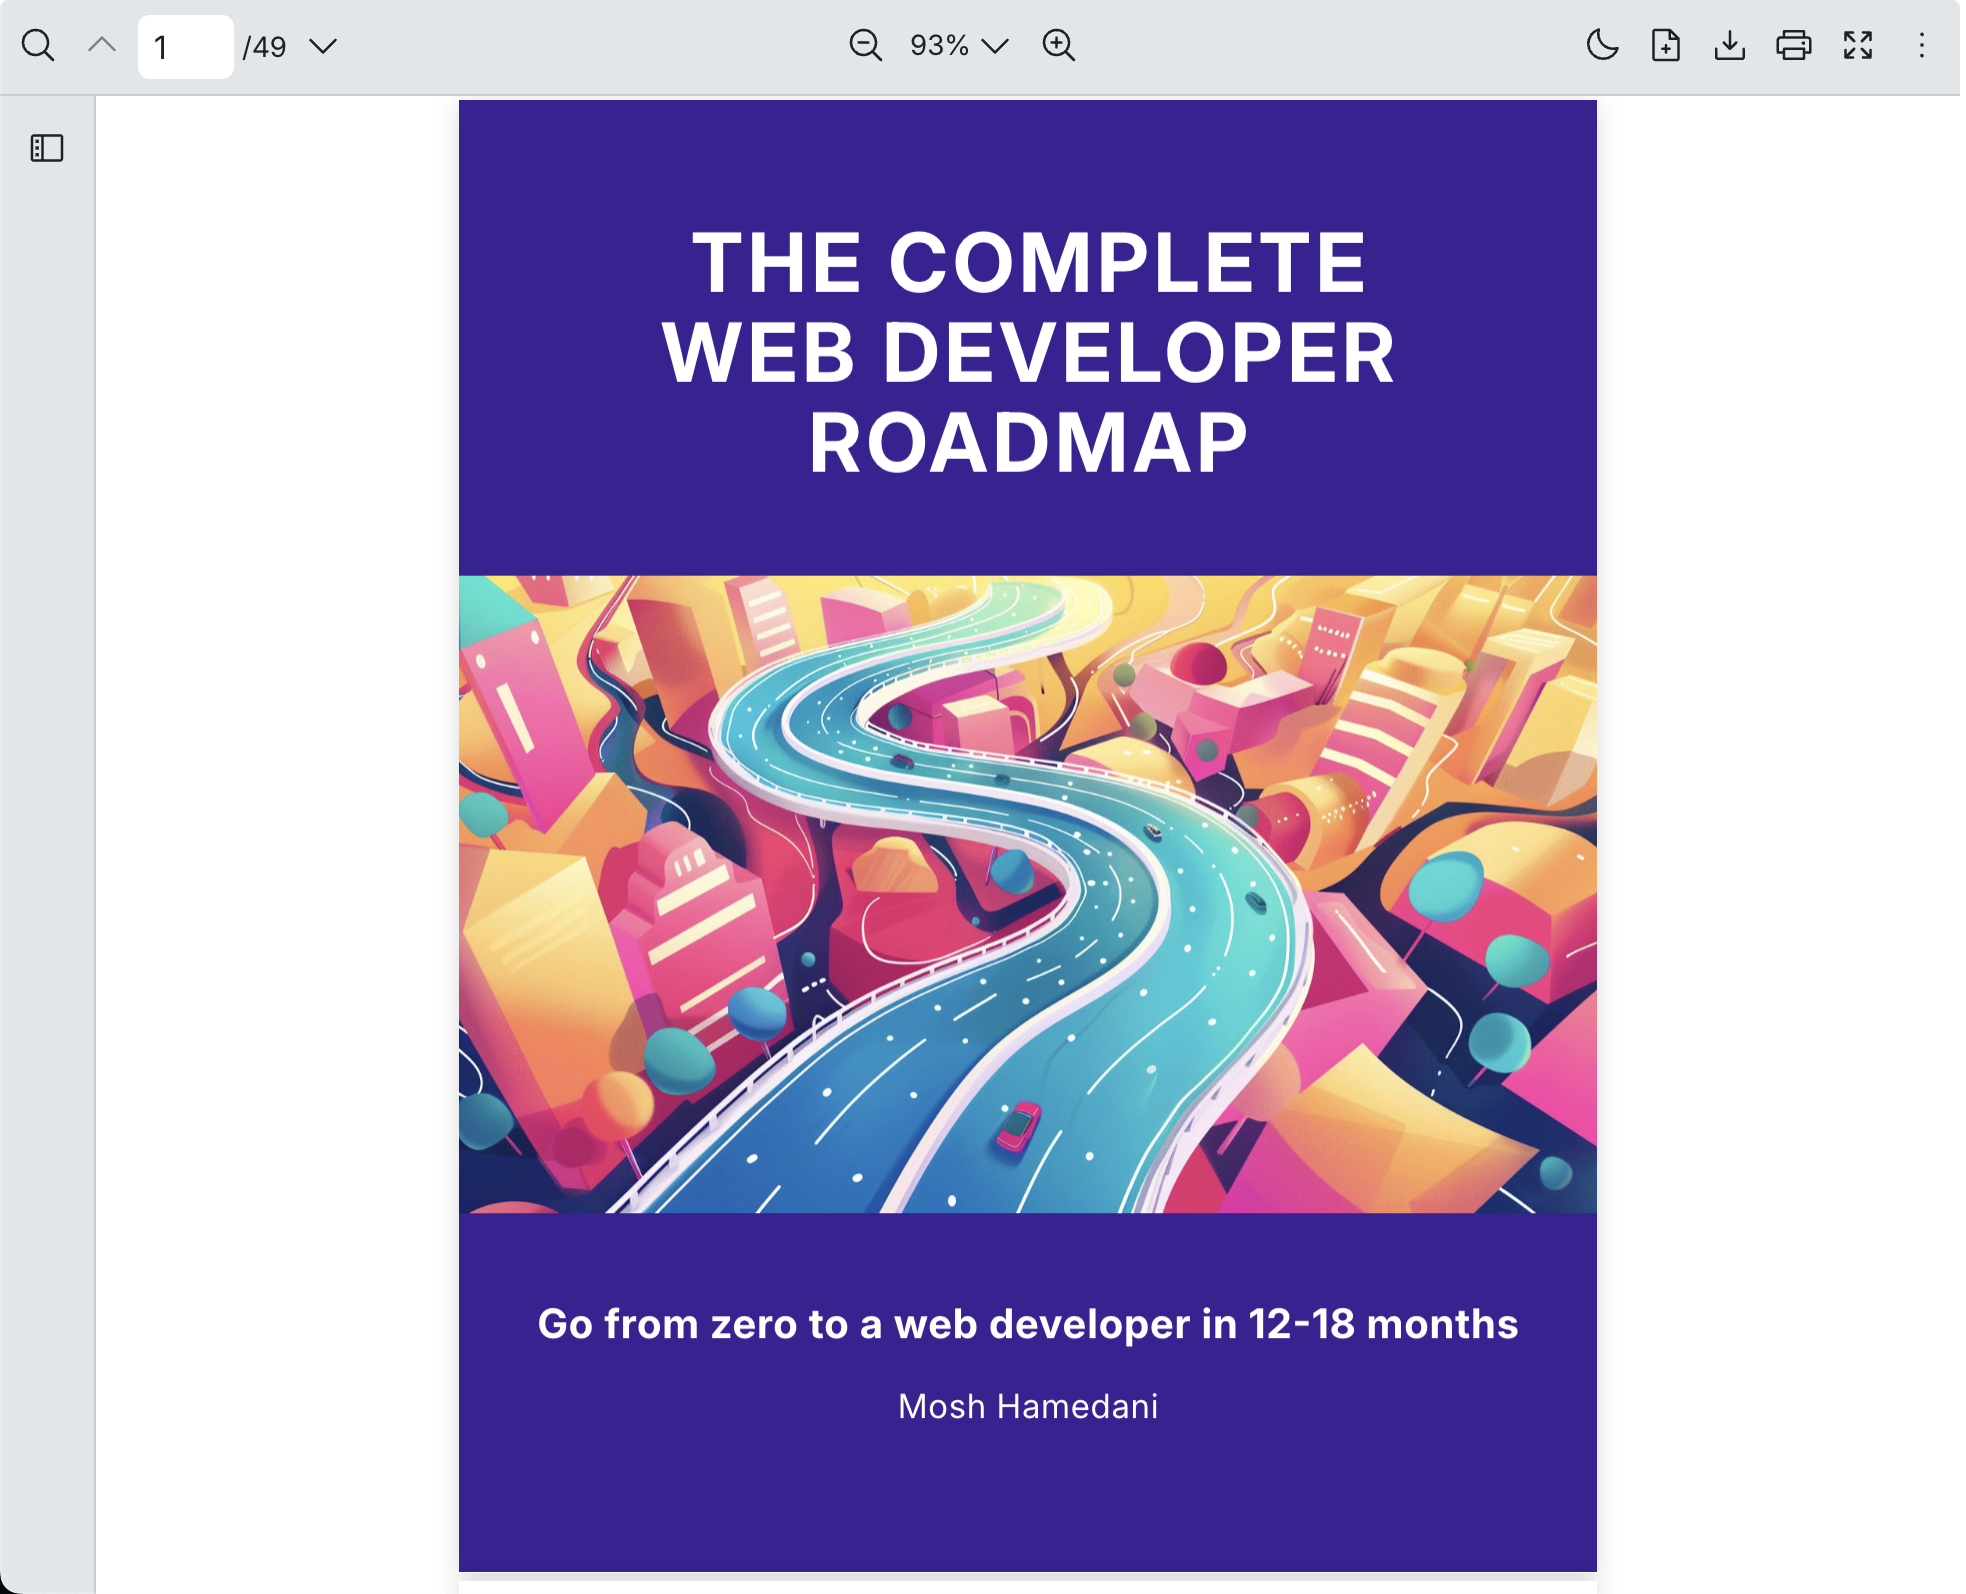
<RPProvider src="https://cdn.codewithmosh.com/image/upload/v1721763853/guides/web-roadmap.pdf">
<RPDefaultLayout style={{ height: "100vh" }}>
<RPPages />
</RPDefaultLayout>
</RPProvider>
</div>
);
};
export default AppPdfViewer;
Step 3: Dynamically Import Viewer Components for Client-Side Rendering
Since PDF.js workers must be run on client-side only, you can use next/dynamic to import your PDF components to prevent SSR errors.
// LazyAppPdfViewer.tsx

"use client";
import dynamic from "next/dynamic";

const LazyAppPdfViewer = dynamic(() => import("./AppPdfViewer"), {
  ssr: false,
});
export default LazyAppPdfViewer;
// LazyAppProviders.tsx
"use client";
import dynamic from "next/dynamic";

const LazyAppProviders = dynamic(() => import("./AppProviders"), {
  ssr: false,
});
export default LazyAppProviders;
Step 4: Configure Layout with Providers
Apply the PDF provider globally via your layout.tsx file.
// layout.tsx
export default function RootLayout({
  children,
}: Readonly<{
  children: React.ReactNode;
}>) {
  return (
    <html lang="en">
      <body className="antialiased">
        <LazyAppProviders licenseKey="your-license-key">
          {children}
        </LazyAppProviders>
      </body>
    </html>
  );
}
For more information on how to use React PDF, check out the Basic usage guide.
Part 3: Create a Main Application Layout
To make the chat experience smooth, you’ll want these 4 components:
Dropdown for text selection
Loading indicator
Chat input
Chat interface
Create Four Supporting Components
Step 1: Dropdown for Text Selection Component
Pop up when users highlight text in the PDF. Options include “Ask” (send a question about the selected text to AI) and “Copy” (save the text to clipboard)
// SelectDropDown.tsx

import { useCallback } from "react";

interface SelectDropDownProps {
  position: {
    x: number;
    y: number;
  };
  show: boolean;
  onAsk: () => void;
  onCopy: () => void;
}

export const SelectDropDown = ({
  position,
  show,
  onAsk,
  onCopy,
}: SelectDropDownProps) => {
  const handleAsk = useCallback(() => {
    onAsk();
  }, [onAsk]);
  const handleCopy = useCallback(() => {
    onCopy();
  }, [onCopy]);

  if (!show) return null;

  return (
    <div
      className="absolute"
      style={{ top: `${position.y}px`, left: `${position.x}px` }}
    >
      <ul className="bg-white border border-gray-200 rounded-md p-2">
        <li className="cursor-pointer hover:bg-gray-100" onClick={handleAsk}>
          Ask
        </li>
        <li className="cursor-pointer hover:bg-gray-100" onClick={handleCopy}>
          Copy
        </li>
      </ul>
    </div>
  );
};
Step 2: Loading Indicator Component
This appears when the AI is working on a response
// LoadingIcon.tsx

export const LoadingIcon = () => {
  return (
    <svg
      width="1em"
      height="1em"
      viewBox="0 0 100 100"
      xmlns="http://www.w3.org/2000/svg"
    >
      <circle
        cx="50"
        cy="50"
        r="40"
        stroke="#555555"
        strokeWidth="10"
        fill="none"
        strokeLinecap="round"
        strokeDasharray="209.44"
        strokeDashoffset="0"
      >
        <animateTransform
          attributeName="transform"
          type="rotate"
          from="0 50 50"
          to="360 50 50"
          dur="1s"
          repeatCount="indefinite"
        />
      </circle>
    </svg>
  );
};
Step 3: Chat Input Component
Let's users send questions, either based on selected text or general queries about the document.
// Input.tsx

"use client";
import { useCallback, Ref, useRef } from "react";

interface InputProps {
  onSubmit?: (value: string) => void;
  onClearContext?: () => void;
  ref?: Ref<HTMLDivElement>;
  context?: string;
}

export const Input = ({
  ref,
  onSubmit,
  context,
  onClearContext,
}: InputProps) => {
  const inputRef = useRef<HTMLDivElement>(null);

  const handleSubmit = useCallback(() => {
    const textValue = inputRef.current?.innerText;
    if (onSubmit && textValue) {
      onSubmit(textValue);
      inputRef.current!.innerText = "";
    }
  }, [onSubmit]);

  const handleKeyDown = useCallback(
    (e: React.KeyboardEvent<HTMLInputElement>) => {
      // if press Enter only it will send question to server
      // allow new line by shift + enter
      if (e.key === "Enter" && !e.shiftKey) {
        e.preventDefault();
        handleSubmit();
      }
    },
    [handleSubmit]
  );

  return (
    <div ref={ref} className="p-1">
      {context && (
        <div className="text-sm border-t border-gray-300 px-2">
          <div className="flex justify-between">
            Ask about:{" "}
            <span onClick={onClearContext} className="cursor-pointer">
              X
            </span>
          </div>
          <div className="text-gray-500">{context}</div>
        </div>
      )}
      <div className="flex border-t border-gray-300">
        <p
          ref={inputRef}
          className="w-3/4"
          contentEditable
          suppressContentEditableWarning
          onKeyDown={handleKeyDown}
        ></p>
        <button
          onClick={handleSubmit}
          className="w-1/4 border-l border-gray-300"
        >
          Submit
        </button>
      </div>
    </div>
  );
};
Step 4: Chat Interface Component
This component manages the entire conversation:
Shows Q&A messages
Streams answers in real time
Updates dynamically with markdown formatting
Adjusts height responsively based on the input area
// Chat.tsx

"use client";
import { useCallback, useEffect, useRef, useState } from "react";
import { Input } from "./Input";
import Markdown from "react-markdown";
import { LoadingIcon } from "./LoadingIcon";
import { EventSourceParserStream } from "eventsource-parser/stream";

// message item for question and answer
const Item = ({
  type,
  content,
}: {
  type: "question" | "answer";
  content: string;
}) => {
  return (
    <div
      className={`flex ${
        type === "question" ? "justify-end" : "justify-start"
      } w-full`}
    >
      <div
        className={`px-2 max-w-2/3 my-2 py-1 rounded ${
          type === "question" ? "bg-neutral-200" : "bg-neutral-400"
        }`}
      >
        {/* render markdown content that will be received from ai */}
        <Markdown>{content}</Markdown>
      </div>
    </div>
  );
};

interface ChatProps {
  context?: string;
  onClearContext?: () => void;
}

export const Chat = ({ context, onClearContext }: ChatProps) => {
  const [inputRef, setInputRef] = useState<HTMLDivElement | null>(null);
  const [messages, setMessages] = useState<
    { id: string; type: "question" | "answer"; content: string }[]
  >([]);
  const [loading, setLoading] = useState(false);
  const messageRef = useRef<string>("");
  const currentMessageIndexRef = useRef<number>(0);
  const [conversationHeight, setConversationHeight] = useState<string>("100vh");

  useEffect(() => {
    if (!inputRef) return;
    const observer = new ResizeObserver((entries) => {
      setConversationHeight(`calc(100vh - ${entries[0].contentRect.height}px)`);
    });
    observer.observe(inputRef);
    return () => {
      observer.disconnect();
    };
  }, [inputRef]);

  const handleSubmit = useCallback(
    async (value: string) => {
      setLoading(true);
      messageRef.current = "";
      setMessages((prev) => {
        // set message index to be appended when answer is received
        currentMessageIndexRef.current = prev.length + 1;
        return [
          ...prev,
          { id: Date.now().toString(), type: "question", content: value },
        ];
      });
      if (onClearContext) {
        onClearContext();
      }
      // get message from openai
      const response = await fetch("/api/ai", {
        method: "POST",
        body: JSON.stringify({ question: value, context }),
        headers: {
          "Content-Type": "application/json",
        },
      });
      // read event stream
      const reader = response.body
        ?.pipeThrough(new TextDecoderStream())
        .pipeThrough(new EventSourceParserStream())
        .getReader();
      try {
        while (true) {
          if (!reader) {
            throw new Error("Reader is not defined");
          }
          const { done, value } = await reader.read();
          if (done || value.data === "[DONE]") {
            reader.cancel();
            break;
          }
          const newMessage = value.data;
          // append new message to the current message
          messageRef.current = messageRef.current + newMessage;
          setMessages((prev) => {
            if (prev[currentMessageIndexRef.current]) {
              return prev.map((message, index) => {
                if (index === currentMessageIndexRef.current) {
                  return {
                    ...message,
                    content: messageRef.current,
                  };
                }
                return message;
              });
            }
            return [
              ...prev,
              {
                id: Date.now().toString(),
                content: messageRef.current,
                type: "answer",
              },
            ];
          });
        }
      } catch (error) {
        console.error(error);
      }
      setLoading(false);
    },
    [context, onClearContext]
  );

  return (
    <div className="h-full relative">
      {loading && (
        <div className="w-full h-full bg-neutral-400/30 absolute inset-0 flex items-center justify-center">
          <div className="spin text-5xl">
            <LoadingIcon />
          </div>
        </div>
      )}
      <div
        className="overflow-y-auto"
        style={{
          height: conversationHeight,
        }}
      >
        <div className="p-1">
          {messages.map((ele) => (
            <Item key={ele.id} type={ele.type} content={ele.content} />
          ))}
        </div>
      </div>
      {/* avoid rerender when input height change due to new line */}
      <div className="absolute bottom-0 w-full">
        <Input
          context={context}
          onSubmit={handleSubmit}
          onClearContext={onClearContext}
          ref={setInputRef}
        />
      </div>
    </div>
  );
};
Step 5: Combine PDF Viewer and Chat Interface
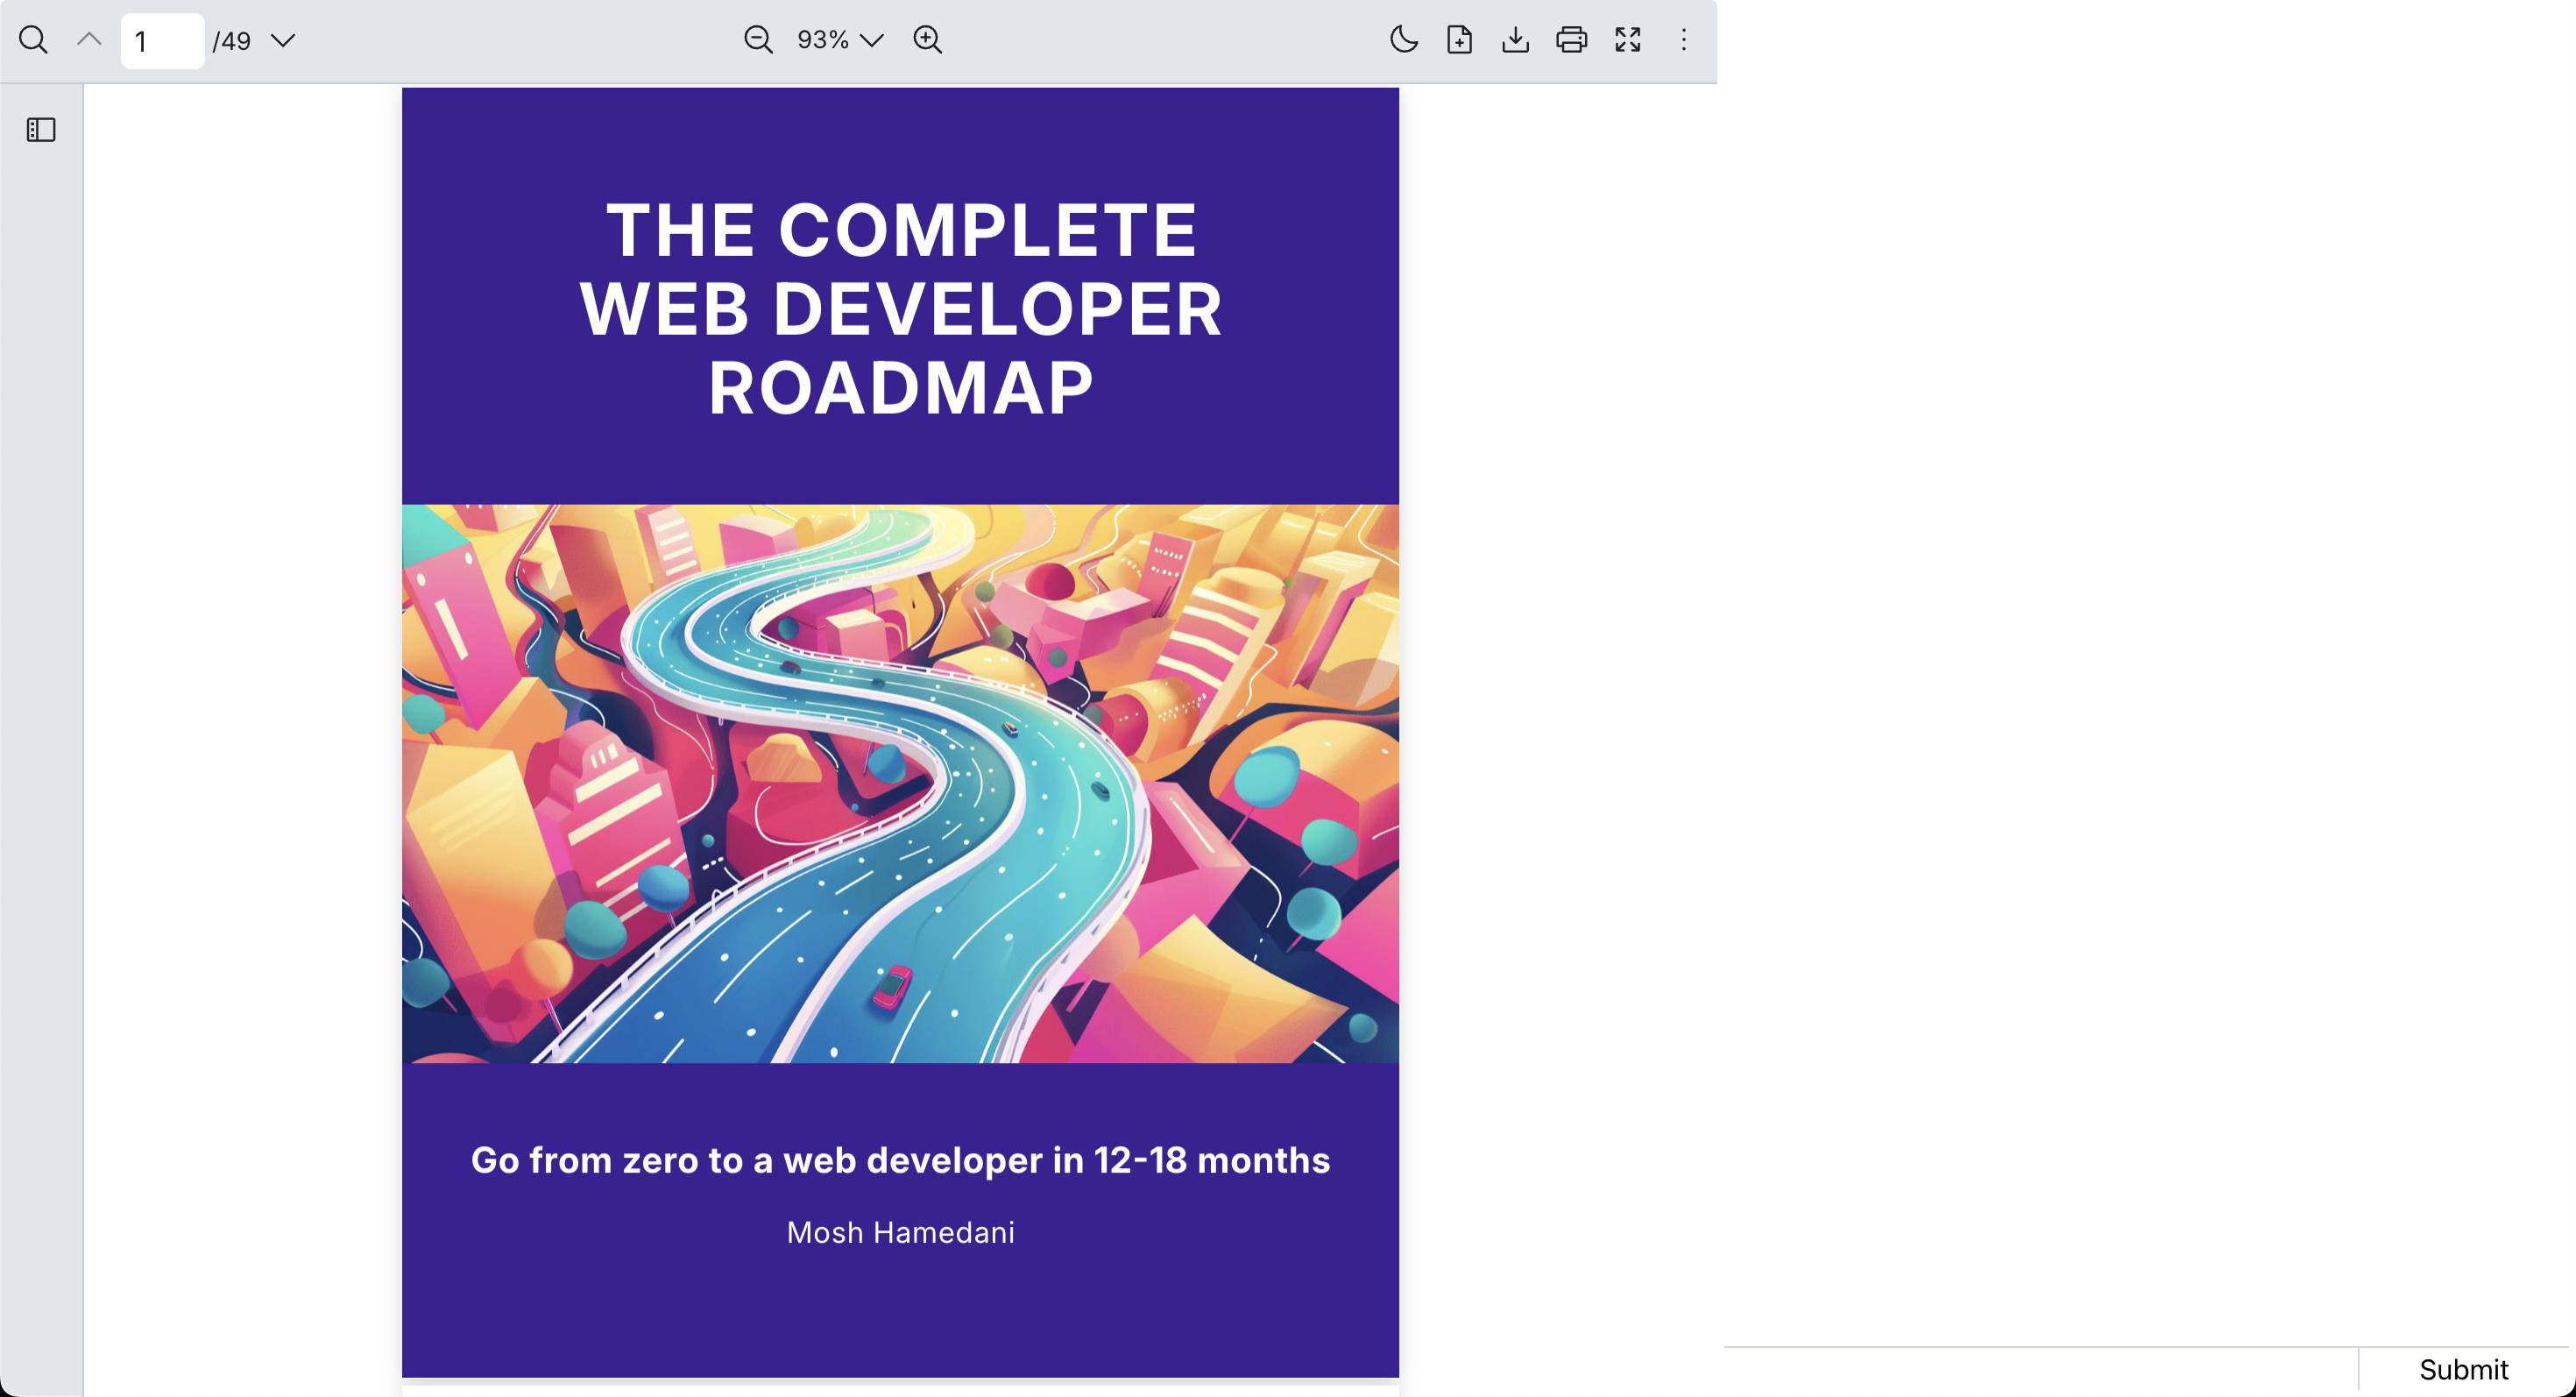
At this stage, you’ll combine everything into a unified experience:
The PDF viewer will appear on the left.
The chat interface on the right.
When users highlight text, they’ll see a dropdown menu near their selection with contextual actions like Ask or Copy.
Hooks will be used to handle events like text selection and menu placement. Make sure the chat input and dropdown feel responsive by tracking which text is active and when to show menus.
// PdfChat.tsx

"use client";
import LazyAppPdfViewer from "./LazyAppPdfViewer";
import { Chat } from "./Chat";
import { useCallback, useEffect, useState } from "react";
import { SelectDropDown } from "./SelectDropDown";

export const PdfChat = () => {
  const [pdfViewer, setPdfViewer] = useState<HTMLDivElement | null>();
  const [selectedText, setSelectedText] = useState<string>();
  const [menuPosition, setMenuPosition] = useState<{ x: number; y: number }>({
    x: 0,
    y: 0,
  });
  const [showDropdown, setShowDropdown] = useState<boolean>(false);
  const [context, setContext] = useState<string>();

  const handleMouseUp = useCallback(() => {
    const selection = window.getSelection(); // Get current selection
    const selectedString = selection?.toString(); // Convert to string
    const selectedRange = selection?.getRangeAt(0); // Get the range object

    // Set selected text so we can use it later
    setSelectedText(selectedString);

    // If there's valid selection, show dropdown
    if (selectedString && selectedString.trim().length > 0 && selectedRange) {
      const rangeBounds = selectedRange.getBoundingClientRect();
      // Position the dropdown near the selection
      setMenuPosition({
        x: rangeBounds.left + window.scrollX,
        y: rangeBounds.bottom + window.scrollY,
      });
      setShowDropdown(true);
    } else {
      setShowDropdown(false);
    }
  }, []);

  const handleAsk = useCallback(() => {
    setContext(selectedText);
    setShowDropdown(false);
  }, [selectedText]);

  const handleCopy = useCallback(() => {
    if (selectedText) {
      window.navigator.clipboard.writeText(selectedText);
    }
    setShowDropdown(false);
  }, [selectedText]);

  useEffect(() => {
    pdfViewer?.addEventListener("mouseup", handleMouseUp);

    return () => {
      pdfViewer?.removeEventListener("mouseup", handleMouseUp);
    };
  }, [handleMouseUp, pdfViewer]);

  return (
    <>
      <div className="col-span-2 relative">
        <LazyAppPdfViewer ref={setPdfViewer} />
        <SelectDropDown
          position={menuPosition}
          show={showDropdown}
          onAsk={handleAsk}
          onCopy={handleCopy}
        />
      </div>
      <div className="col-span-1">
        <Chat context={context} onClearContext={() => setContext(undefined)} />
      </div>
    </>
  );
};
Part 4 - Create an API to Connect with OpenAI
Now that the UI is complete, we’ll build an API route that connects your app to OpenAI. This backend route will:
Accept questions and optional context (like highlighted text).
Send those to the OpenAI API with an appropriate prompt
Stream the AI’s response back to the frontend in real-time
This gives users a fast, interactive experience where answers appear as they’re generated.
import OpenAI from "openai";

const openai = new OpenAI({
  apiKey: process.env.OPENAI_KEY,
});

export async function POST(request: Request) {
  const { question, context } = await request.json();
  if (!question) {
    return new Response("No question", { status: 400 });
  }
  try {
    const prompt = context
      ? `
    From this content:
    ${context}
    Question: ${question}
    `
      : question;

    const encoder = new TextEncoder();
    const customReadable = new ReadableStream({
      start(controller) {
        openai.responses
          .stream({
            model: "gpt-4.1-nano",
            input: prompt,
          })
          // send delta to client
          .on("response.output_text.delta", (event) => {
            controller.enqueue(encoder.encode(`data: ${event.delta}\n\n`));
          })
          // send done to client
          .on("response.output_text.done", () => {
            controller.enqueue(encoder.encode("data: [DONE]\n\n"));
            controller.close();
          });

        // Clean up on connection close
        request.signal.addEventListener("abort", () => {
          // clearInterval(intervalId);
          controller.close();
        });
      },
    });

    return new Response(customReadable, {
      headers: {
        "Content-Type": "text/event-stream",
        "Cache-Control": "no-cache",
        Connection: "keep-alive",
      },
    });
  } catch (error) {
    console.error(error);
    return new Response("Error", { status: 500 });
  }
}
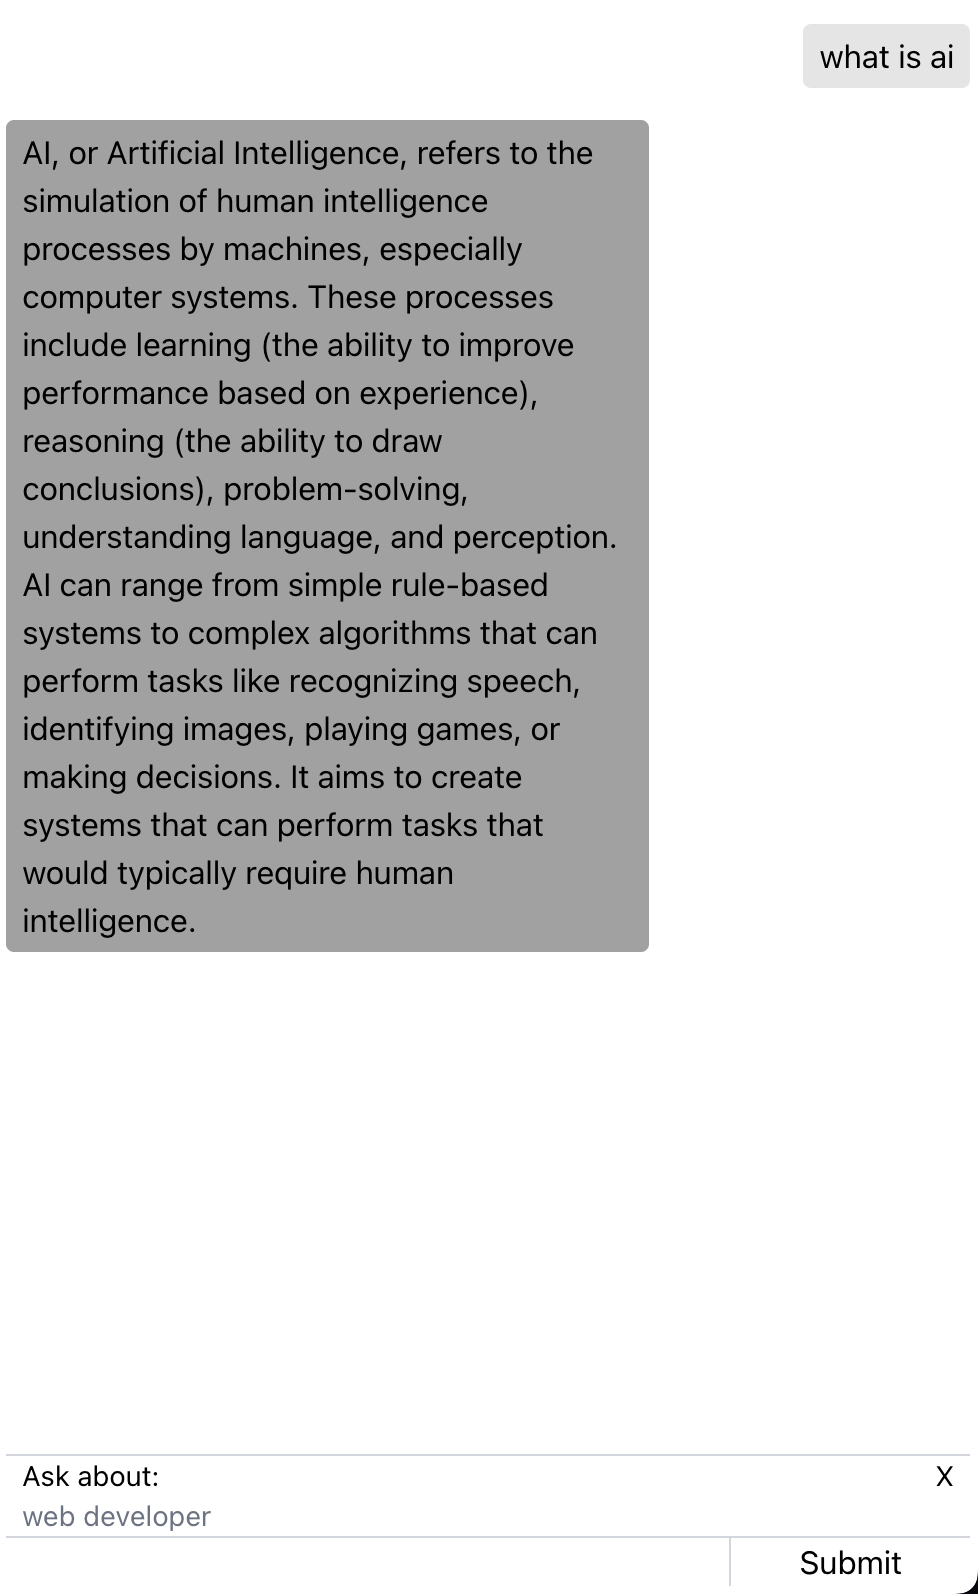
Demo
Here’s what the final app looks like in action:
For the complete example with full codes, check out Stackblitz.
Conclusion
In this tutorial, we've built a simple PDF viewer application with AI chat by using Next.js, OpenAI, and React PDF. By combining modern web technologies, we created a practical tool that enhances document interaction and understanding:
Quickly get summaries, explanations, or answers about any PDF.
Avoid endless scrolling or skimming to find info.
Evaluate answers or insights as needed for reports or messages.
This makes it particularly valuable for professionals who frequently work with PDF documents and need quick insights or clarifications about their content.
With the right React tools and AI, you can unlock new ways to interact with information. If you build something cool or have ideas for new features, share your results with the community!
If you liked this article, take a look at React PDF. It's a React PDF viewer made for React and Next.js projects. No matter if you're new to building apps or handling a larger setup, React PDF is ready to help.
React PDF is built with developers in mind and offers:
Out-of-the-box features - See the Getting Started guide to get moving fast
Plenty of ways to customize - Check out options to style and tweak its components to fit your needs
Simple, clear APIs - Dive into the API documentation to see all the details
Your support helps me keep building new tools and writing for React devs. Thanks for giving React PDF a look! 🙏

Subscribe to my newsletter
Read articles from watcharakorn directly inside your inbox. Subscribe to the newsletter, and don't miss out.
Written by