Tailscale VPN Server in Proxmox LXC Container
 Aniket Sharma
- Prerequisite
Make sure the linux LXC Container template is present in the Storage of your Proxmox Server.
Go to Storage-Directory > Click on CT Templates > Click on “Templates”

We can choose any linux template - For this demonstration, we will be using “ubuntu-22.04-standard”, click on Download.
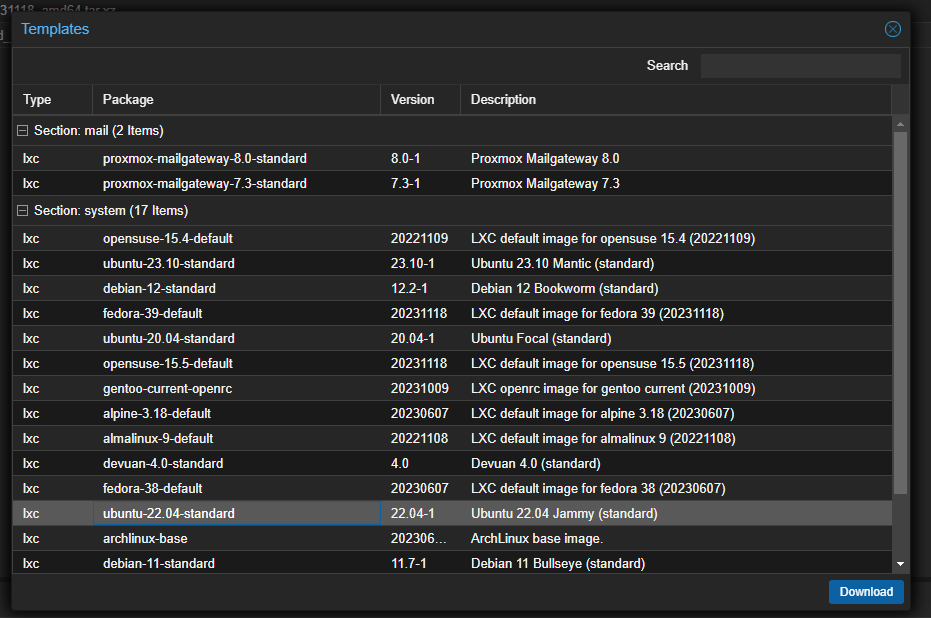
Now we have a LXC Container Template ready for use to go ahead with the tailscale exit node server installation.
NOTE: Make sure to have a Tailscale Account ready in order to remote back into the home network devices through the Tailscale Application (or Client) without the need for forwarding any port in the home network.
- Setting up the LXC Container on the Proxmox Server
On the Proxmox VE Dashboard, Click on “Create CT”
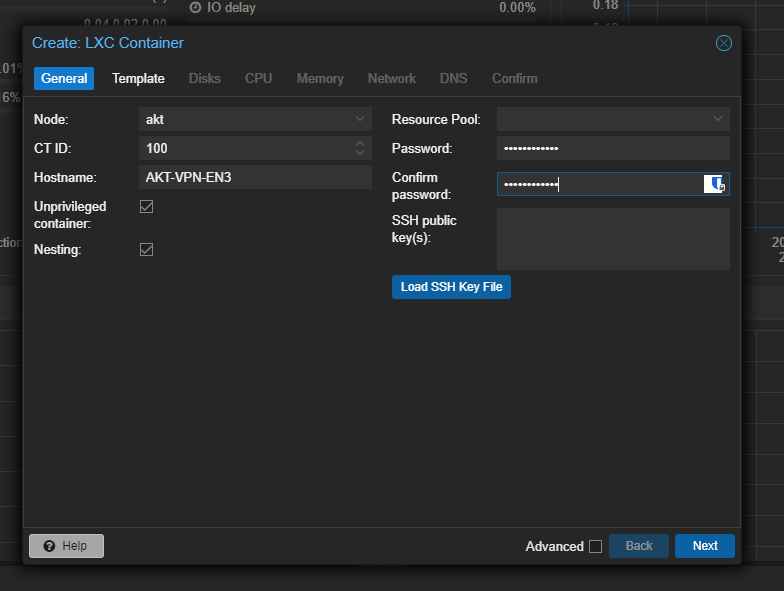
Enter the details such as “Node: <Server_name>”, “CT ID”, “Hostname”, along with the password. Make sure the Uniprivileged container box is checked before clicking “Next” (To ensure a safer approach while making it).
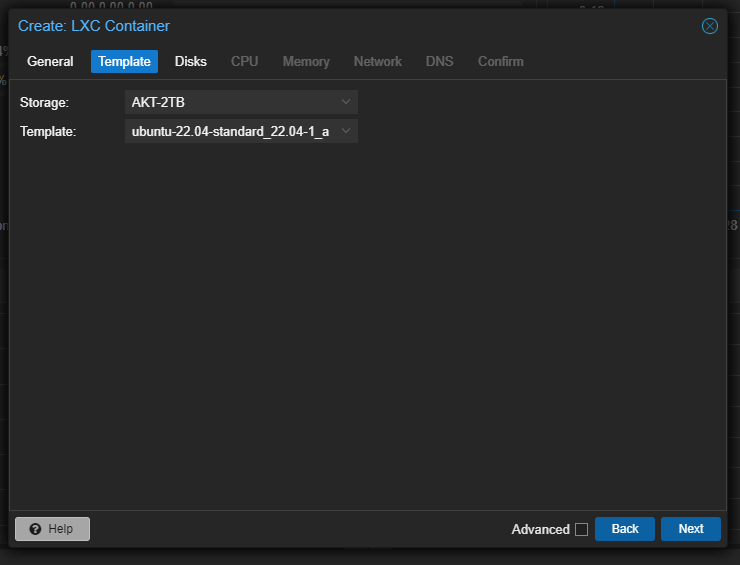
On clicking next, Specify the name of the Drive along with the name of the Template.
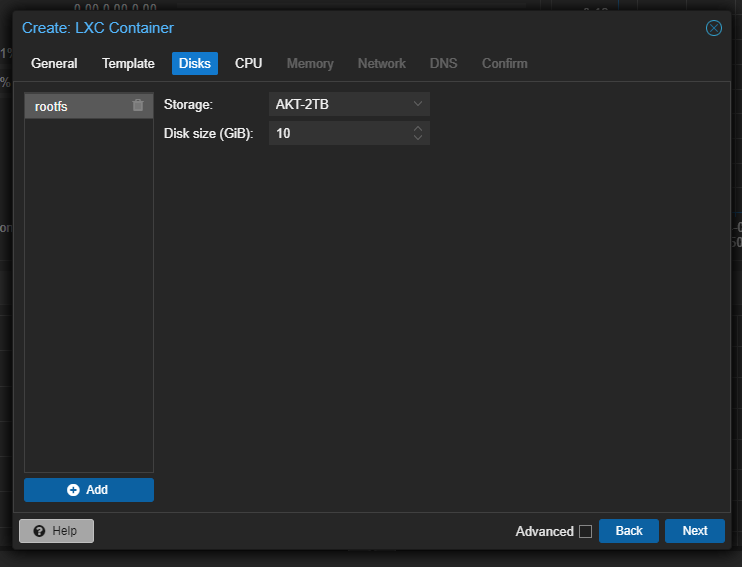
On clicking “Next”, we have to allocate the size of the Container Disk inside the Drive - Since this installation will not consume alot of Disk Space we can keep the Storage as 8-10 GB in the root file system of the container.
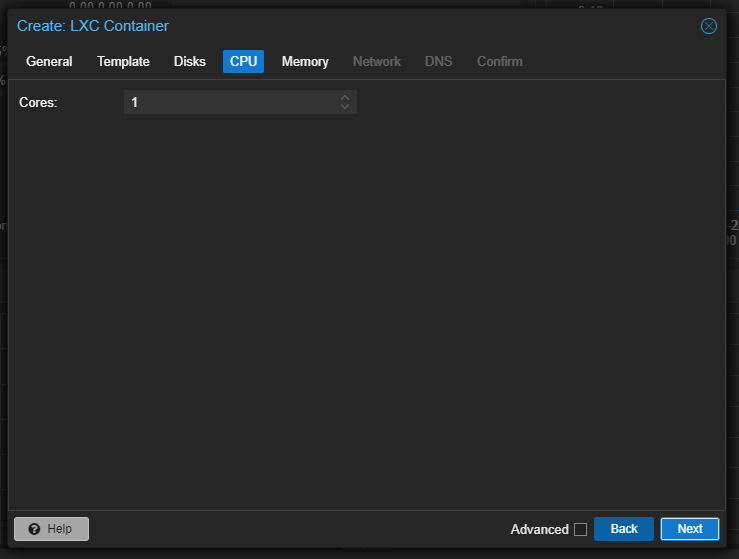
On clicking “Next”, we now have to allocate the Number of Cores in the CPU to be allocated in the Container - 1 Core will be good, if required it can be increased manually after the installation is complete.
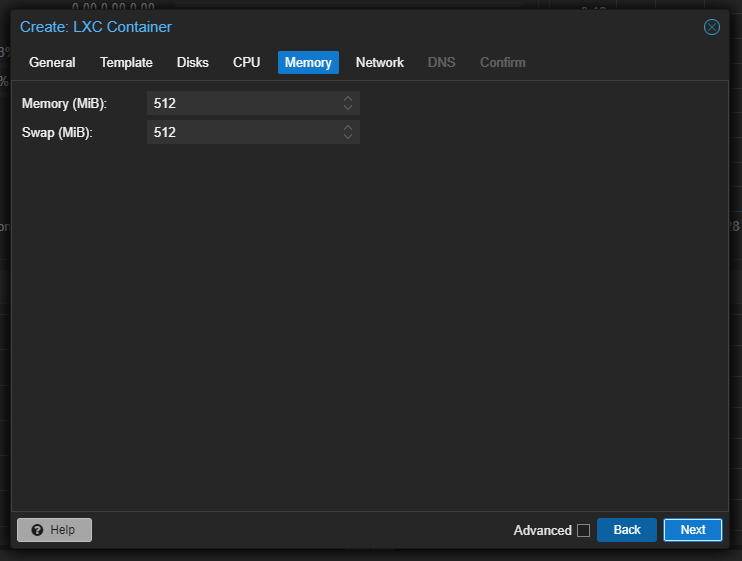
Now we have to click “Next” and allocate the Memory required by the Container.
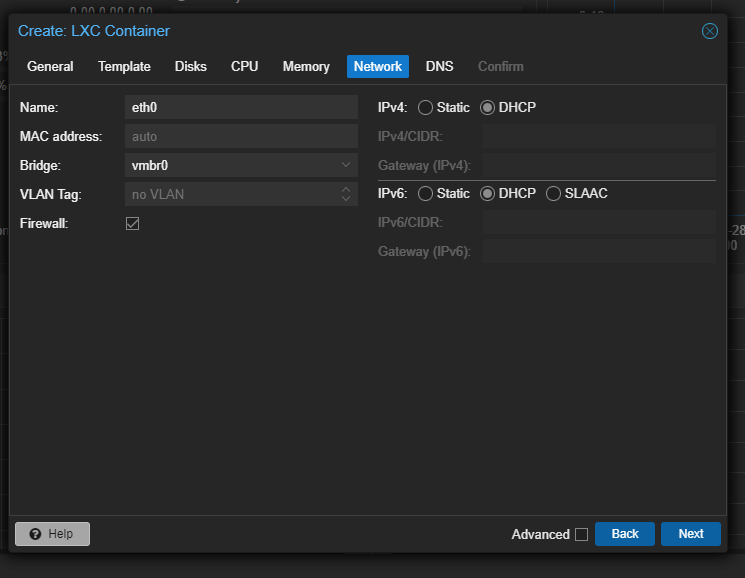
In the “Network”, First give it DHCP — After an IP Address is allocated to it, we will use it and Convert it into Static in the proxmox settings.
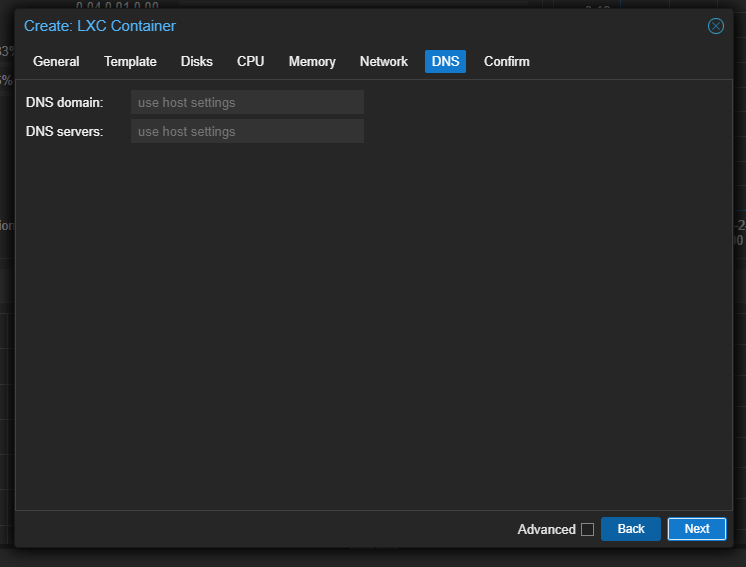
In DNS, leave the settings as default and proceed to the next step.
Check the “Start after created” box after checking all the resources allocated to the LXC Container then click on “Finish”.
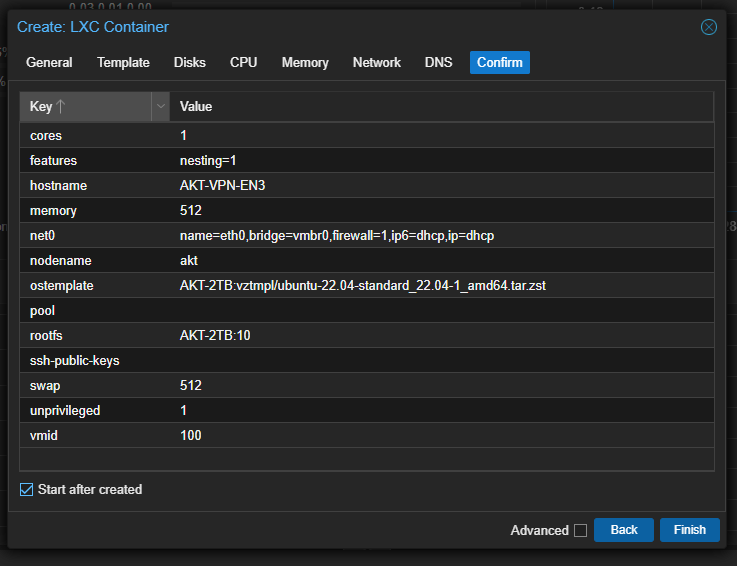
- Open the Console of the Container and Enable the SSH Service to remote into the VPN Container.
nano /etc/ssh/sshd_config

# Uncomment the line by removing the hash before it
PermitRootLogin prohibit-password
# Change prohibit-password to yes

PermitRootLogin yes #Final line to be changed in the config file
sudo systemctl restart sshd # After making the above change
- Assign a static IP Address to the VPN Container by the following method
ip a

Copy the IP Address as given by executing the command.
Go to the Proxmox VE GUI > Click on the VPN Container > Go to Network and Double click on the Interface.
Now change the Mode from DHCP to Static in IPv4 and Copy the above IP Address along with the subnet into the field. Make sure to add the Router’s Address in the Default Gateway field.
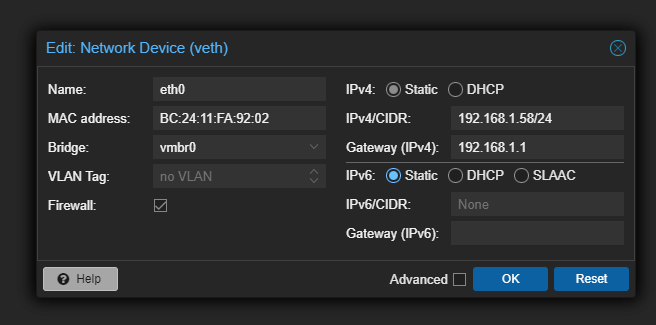
Click on “OK”, The LXC container will automatically adapt the changes.

- Update and Upgrade Process on the VPN LXC Container
apt-get update && apt-get upgrade -y
- Tailscale Installation on the VPN Container
sudo apt-get install curl # 'curl' does not come by default in LXC Containers
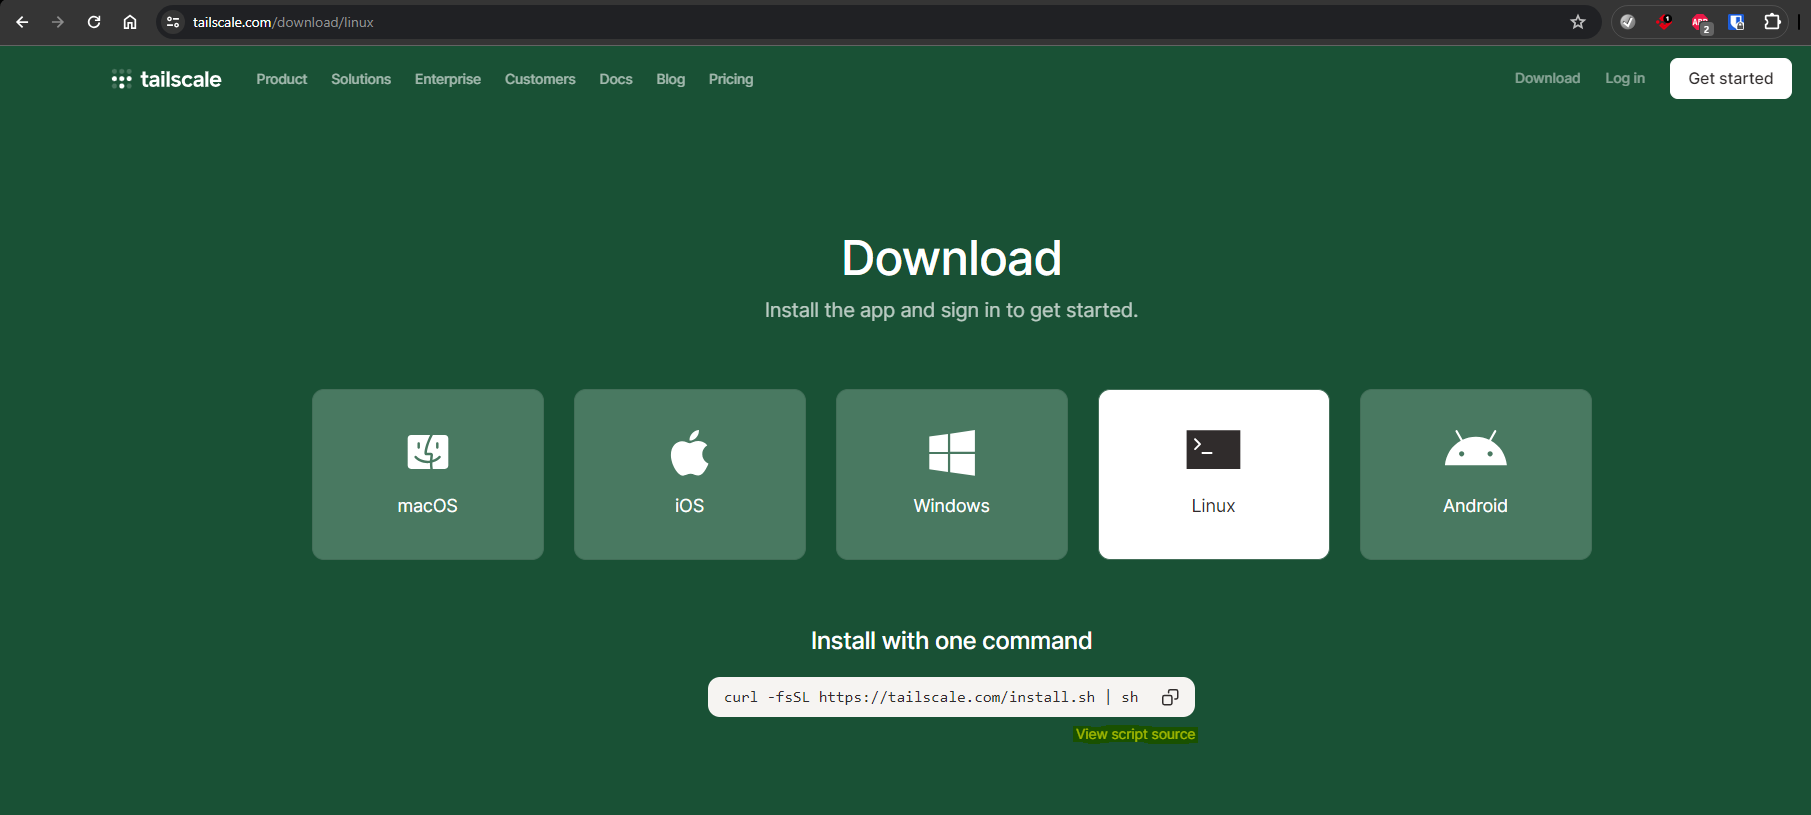
Go to the tailscale website and download the Installer Script for Linux to execute.
NOTE: It is important to go through the contents of the bash script before executing it directly from the Internet.
After viewing the source of the script and if everything feels okay, run the command as show in the prompt of the Tailscale website.
After the installation is done, before running the “tailscale up” command we have to make a few more changes since the LXC Container we are about to use is an “Unprivileged Container”.
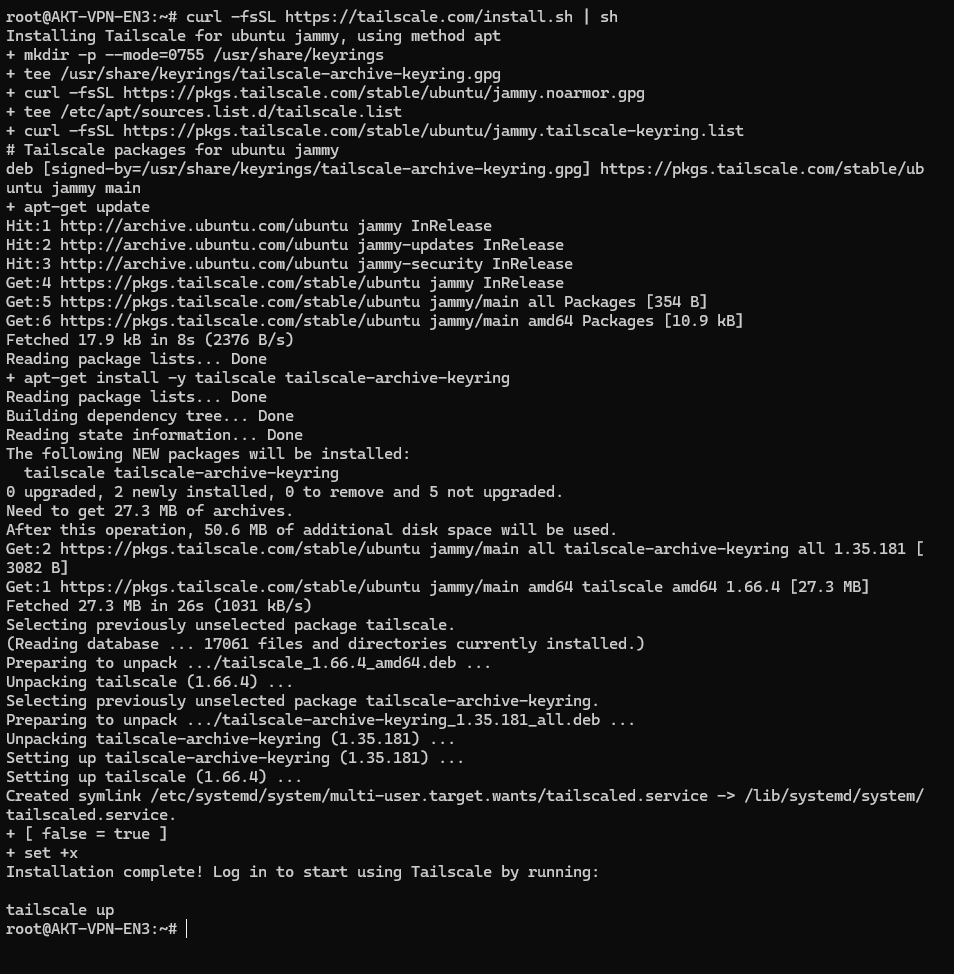
To make sure we can use this container to advertise network traffic on our network we have to enable IPv4 & IPv6 forwarding for it to work.
nano /etc/sysctl.conf

#Remove the hash before: IPv4
net.ipv4.ip_forward=1

#Remove the hash before: IPv6
net.ipv6.conf.all.forwarding=1

Shutdown the LXC Container since we have to make some changes in the Configuration of the proxmox server to make it work.
Attached the link of the article for more information: https://tailscale.com/kb/1130/lxc-unprivileged
- Make the follwing configuration changes in the root shell of the main Proxmox Server where the LXC Container is being hosted.
nano /etc/pve/lxc/100.conf

#Add these lines after the Unprivileged Line present in the config
lxc.cgroup2.devices.allow: c 10:200 rwm
lxc.mount.entry: /dev/net/tun dev/net/tun none bind,create=file
It will allow the Unprivileged container to have the access to the host network settings using which it can work correctly. (It is a crucial step while setting up the VPN Server, without this Tailscale will now work correctly)
Start the container back when the above configurations are made in the Host (Proxmox Server)
- Setting up Tailscale to Advertise Traffic and set it up as an Exit Node
- Run the tailscale server with the following parameters
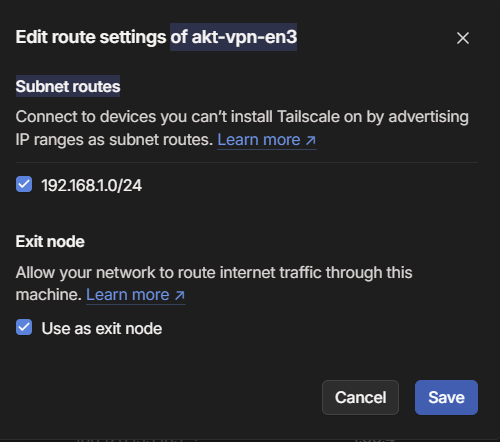
tailscale up --advertise-routes=192.168.1.0/24 --advertise-exit-node
- After running this command, We will get a unique link using with we have to authenticate to our tailscale account to perform the next step.

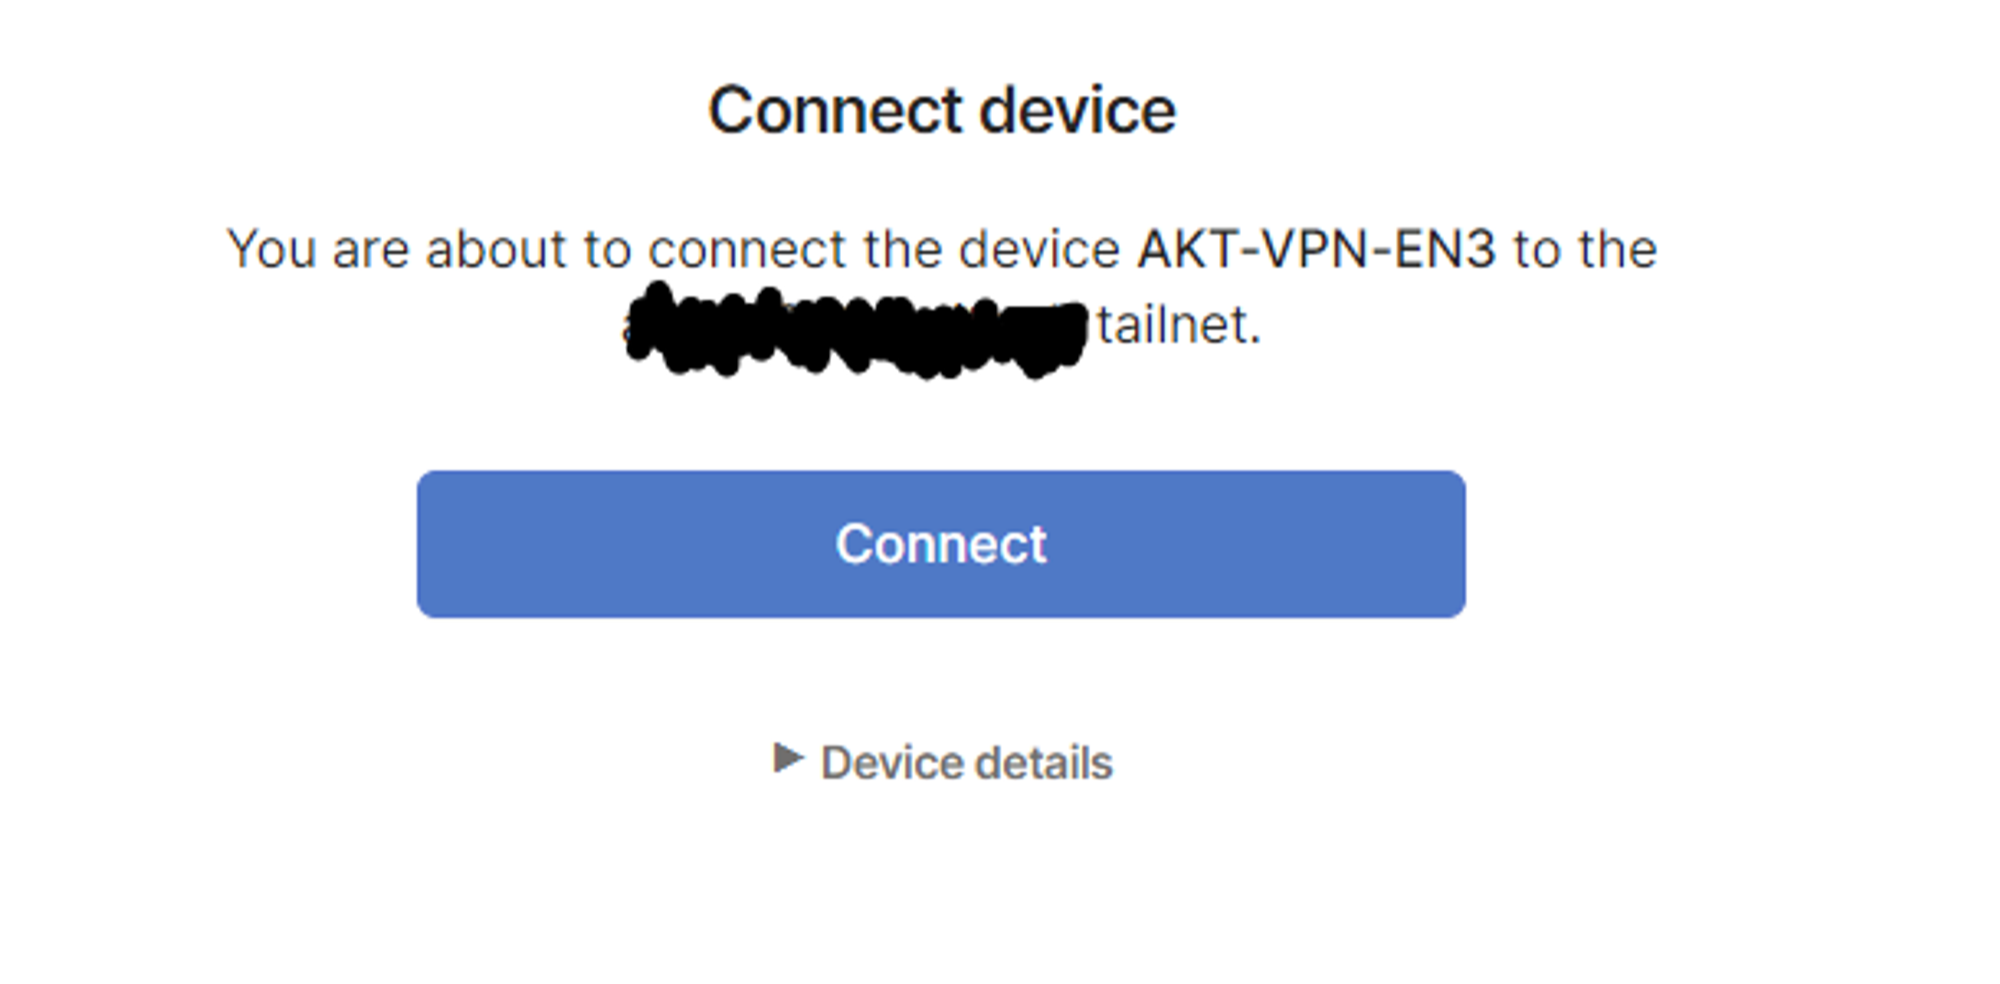
It will ask use to Connect the VPN Server (LXC Container to the Tailnet)
After connecting it to the Tailnet, Go the Machines > VPN LXC Container > Click on the Three dots on it > Edit Route Setting and Approve the subnet routes and exit node present in it.
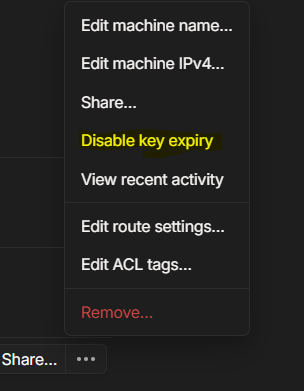
NOTE: Key Expiry should be disabled for the VPN LXC Container or else the Machine will lose access to the Tailnet after a few days.
Now we have our Private VPN Tailscale Server Ready for personal use. Make sure to have the Tailscale app downloaded on your laptops and Mobile Phones and Login into the Tailscale Service to use it.
Subscribe to my newsletter
Read articles from Aniket Sharma directly inside your inbox. Subscribe to the newsletter, and don't miss out.
Written by

Aniket Sharma
Aniket Sharma
I am an Engineering Student, Sharing my various tech experiments through this blog! :)