Enhance Customer Service with Dynamics 365's Integrated Voice Channel
 Holger Imbery
Series:
This is the first article in a two-part series. The next piece will discuss integrating a Copilot Studio Voice Bot into the Voice Channel.
Dynamics 365 Contact Center or Dynamics 365 Customer Service Premium enhances the capabilities of customer service representatives by enabling them to communicate with customers via phone calls effectively. Despite the growing popularity of chat, SMS, and social media for customer engagement and support, the telephone remains a vital channel for communication. Dynamics 365's voice channel empowers agents to handle public switched telephone network (PSTN) calls directly within the platform, offering a seamless calling experience. Integrating real-time AI features, including live call transcription, sentiment analysis, and intelligent suggestions, significantly elevates agent productivity. Additionally, the application delivers comprehensive analytics and insights, featuring AI-powered topic clustering and detailed call analytics to optimize customer service operations.
Why choose the voice channel
Many organizations still manually combine separate telephony and customer relationship management (CRM) systems, leading to disjointed experiences for both agents and customers across various channels. These multi-provider solutions are complex to deploy and manage and lead to isolated data pools, obscuring a unified view of customer interactions and agent performance across different channels.
Prerequisites:
Proper licensing for Dynamics 365 Contact Center or Dynamics 365 Customer Service Premium is required.
Connect to Azure Communication Services
The voice channel feature in Dynamics 365 operates on Azure Communication Services, which allows you to allocate phone numbers for your enterprise through a connection with Azure Communication Services.
Create Azure Communication Resource
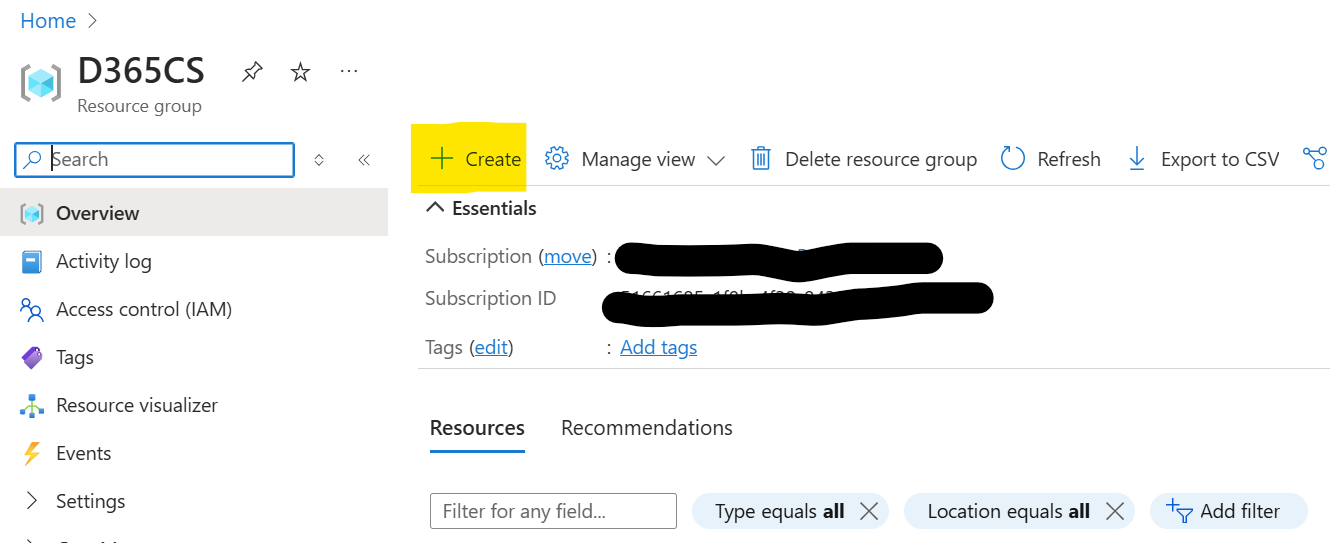
- Navigate to portal.azure.com, create a new Resource Group, and click the "+Create" button.
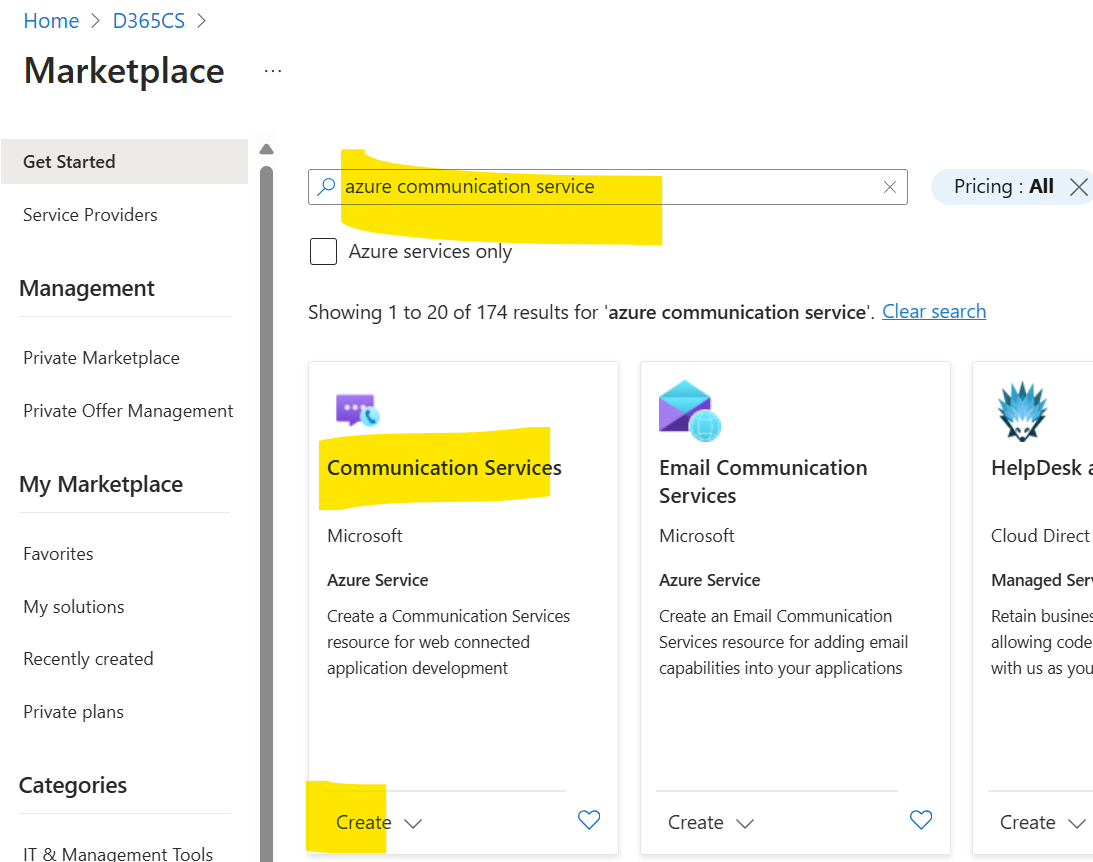
- Then, enter 'Communication' into the search bar or the 'Search the Marketplace' input field. Choose 'Communication Services' from the search results and click 'Create'.
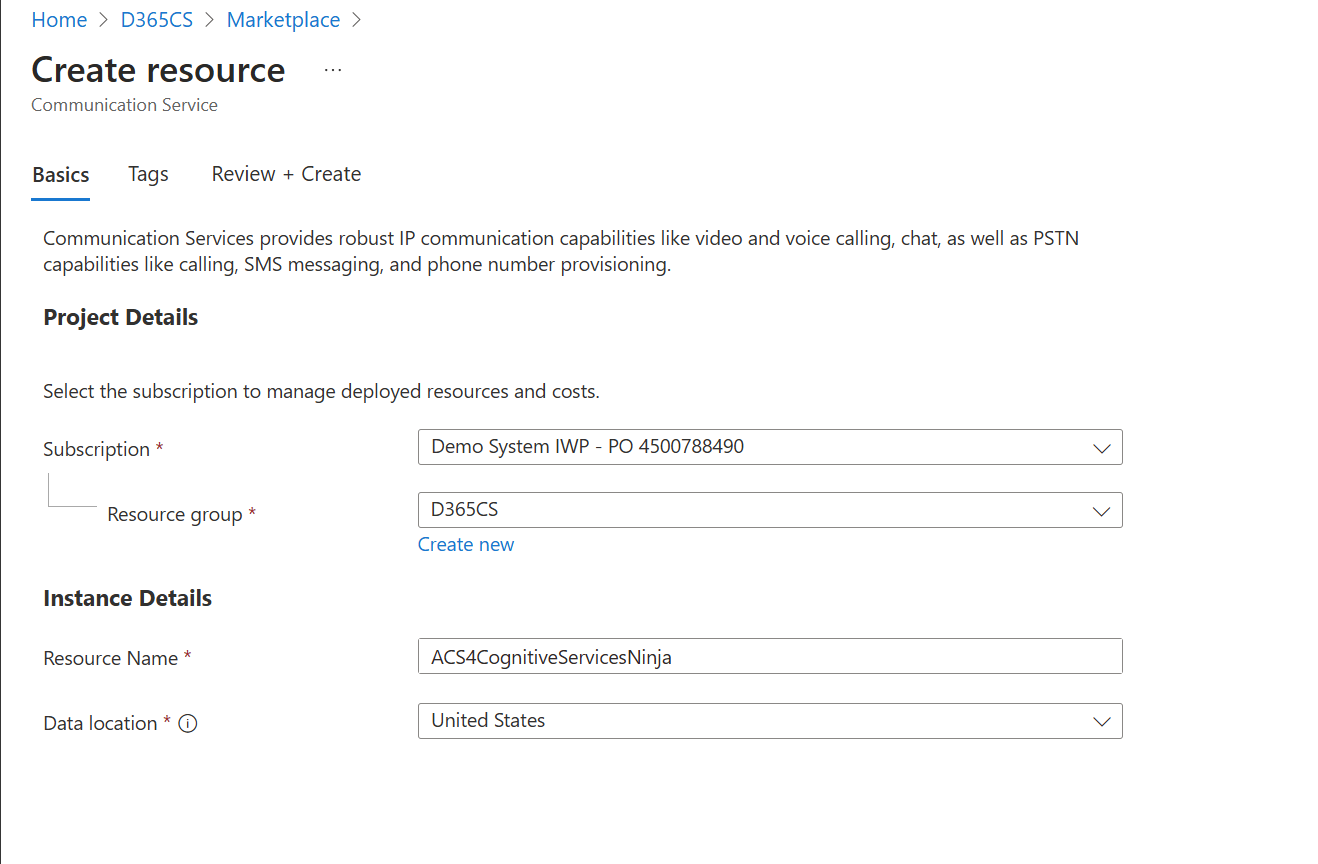
- Proceed to configure your new resource.
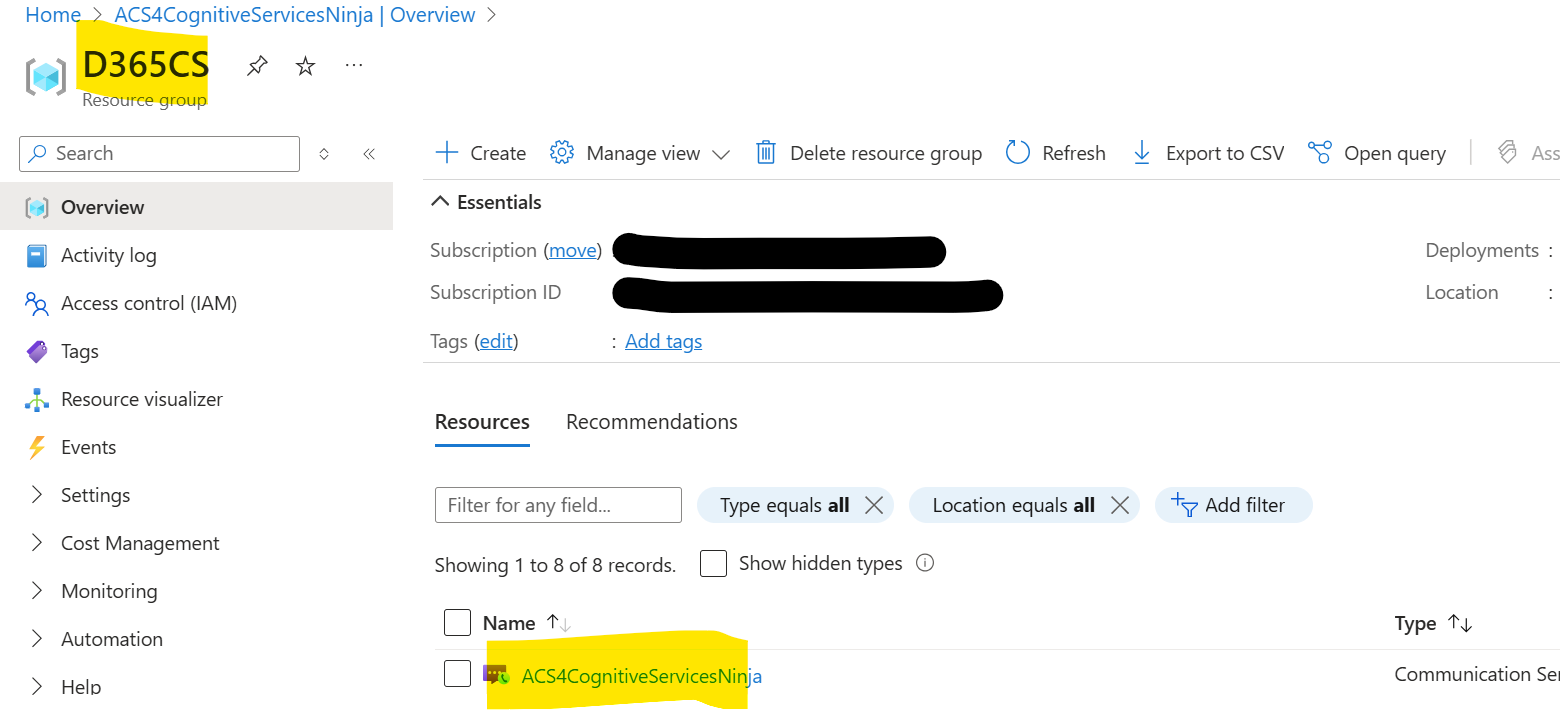
Verify your new Resource
Create an App Registration
- Navigate to Microsoft Entra ID within portal.azure.com and select 'App Registration'.
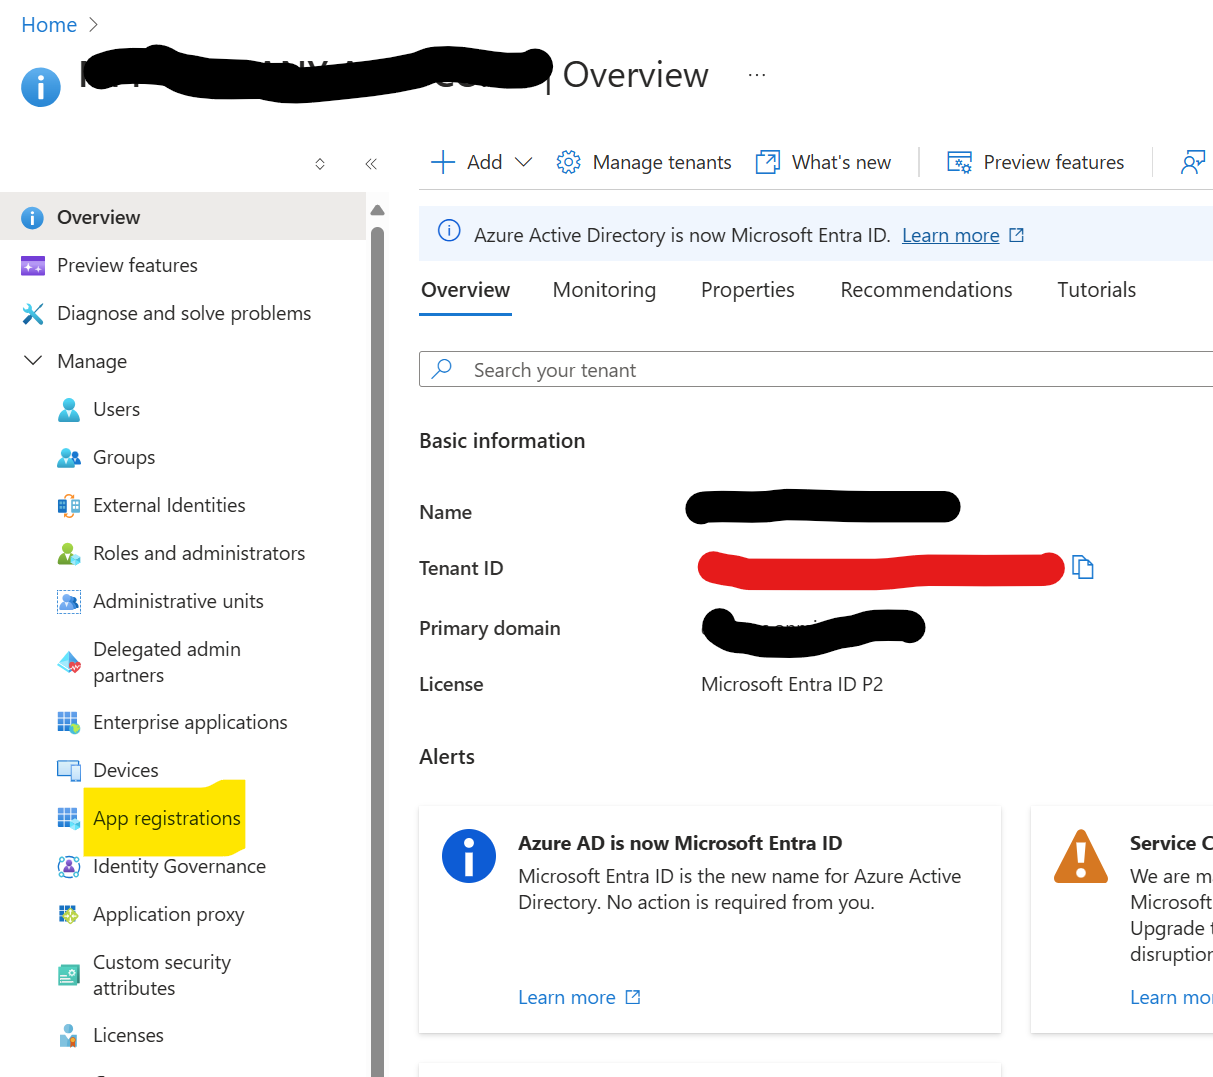
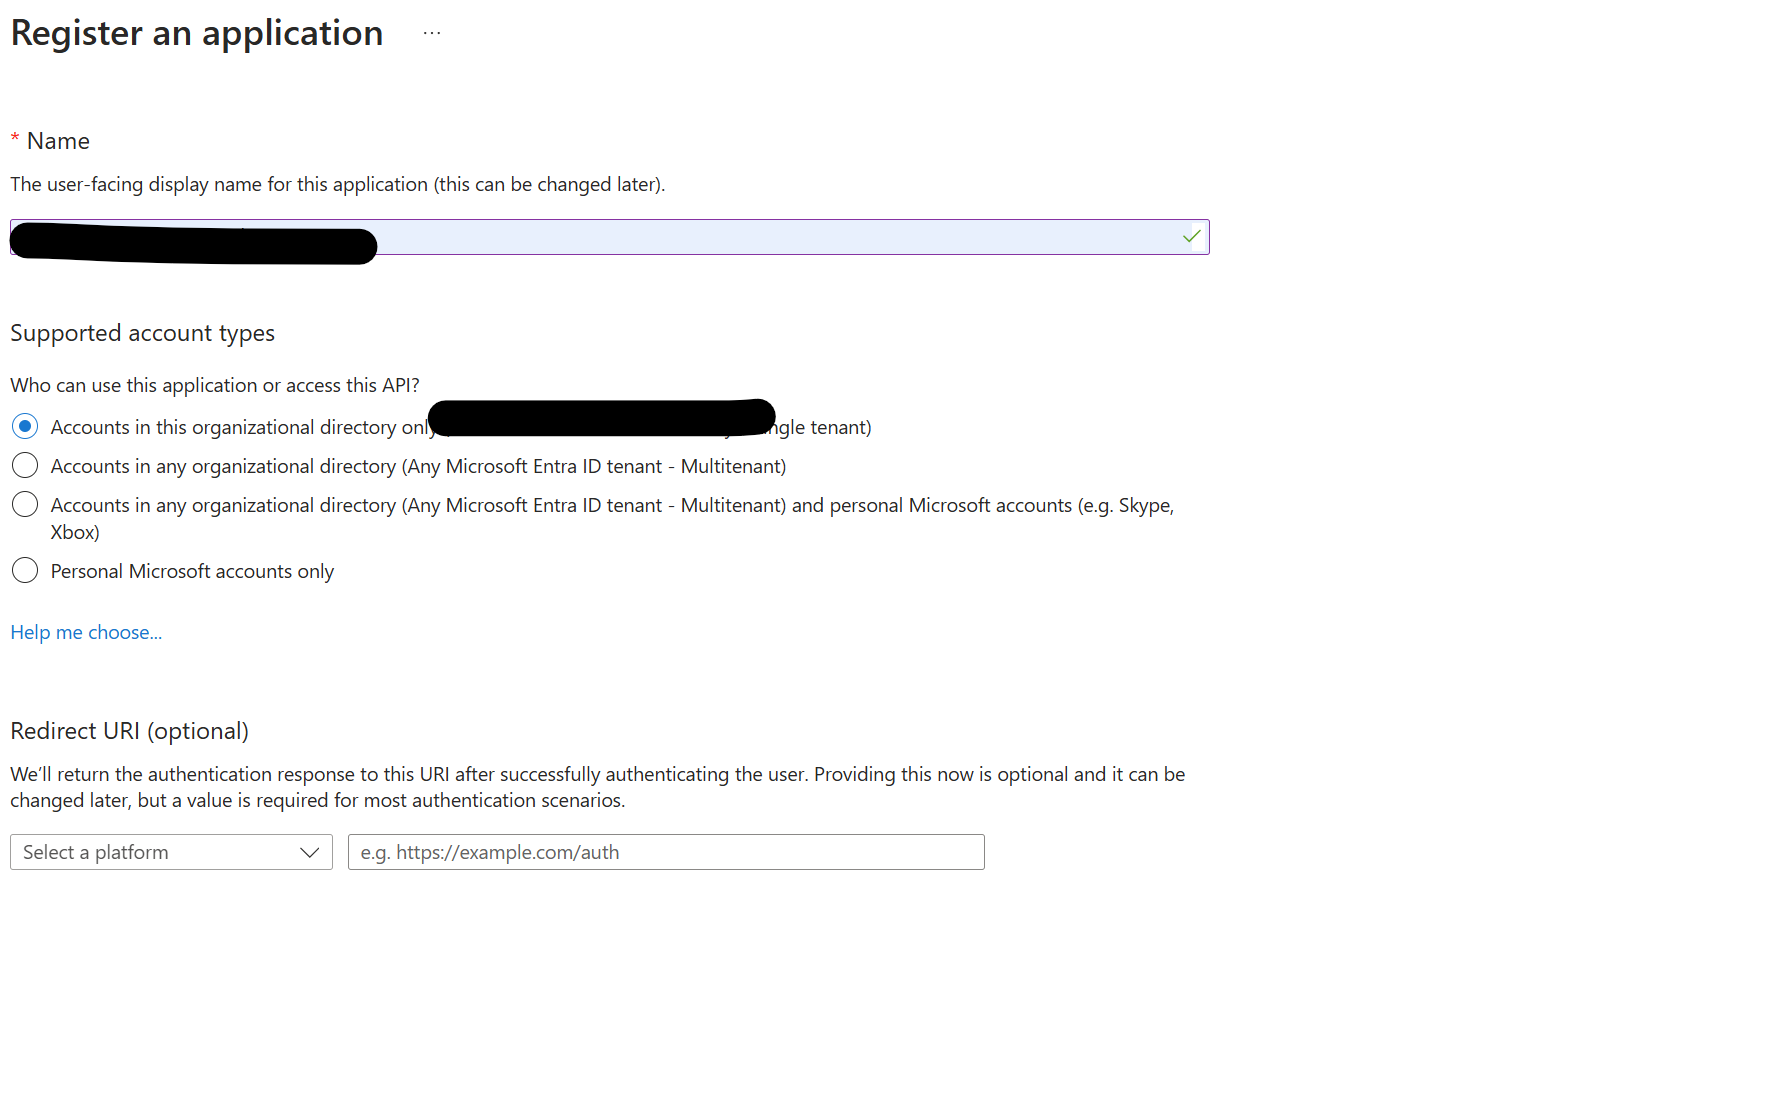
- Click "+Add" and set up your new App Registration, as shown in the image below.
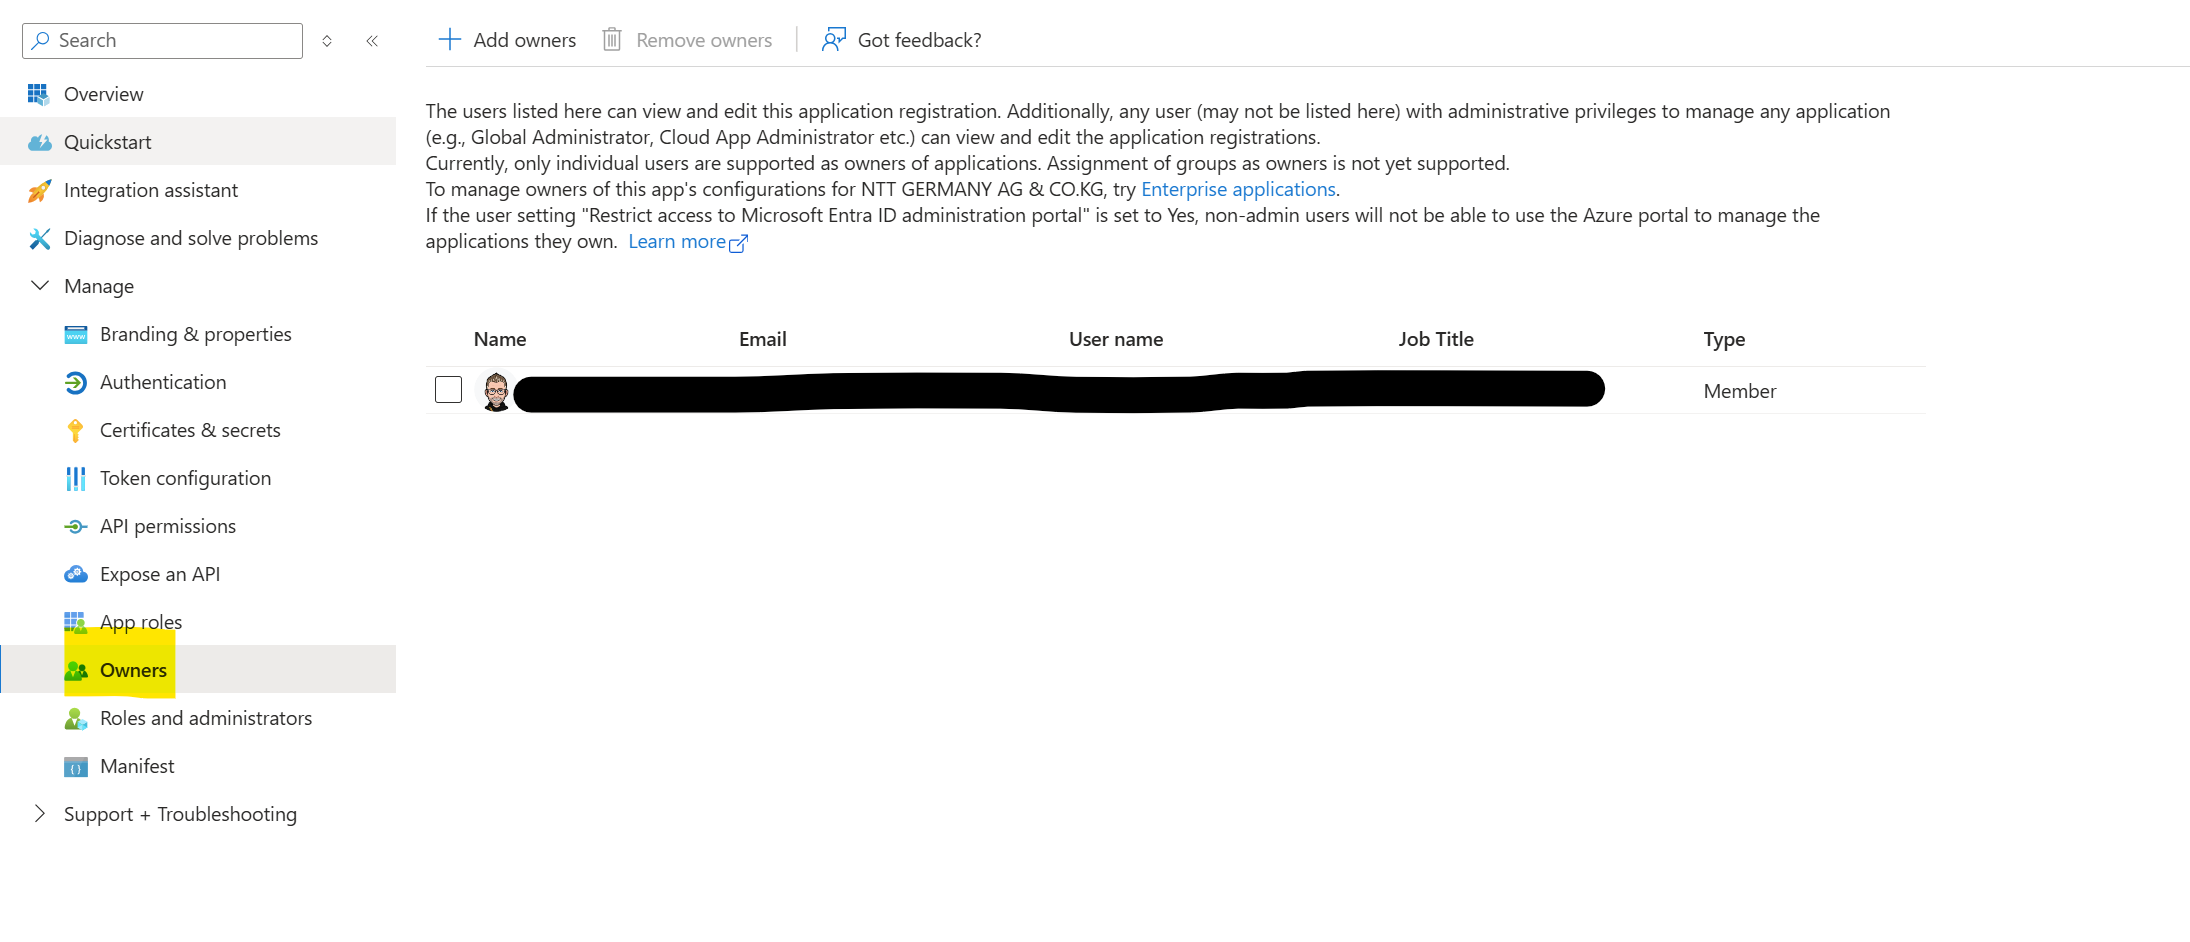
Navigate to the created App Registration and add yourself as an owner.
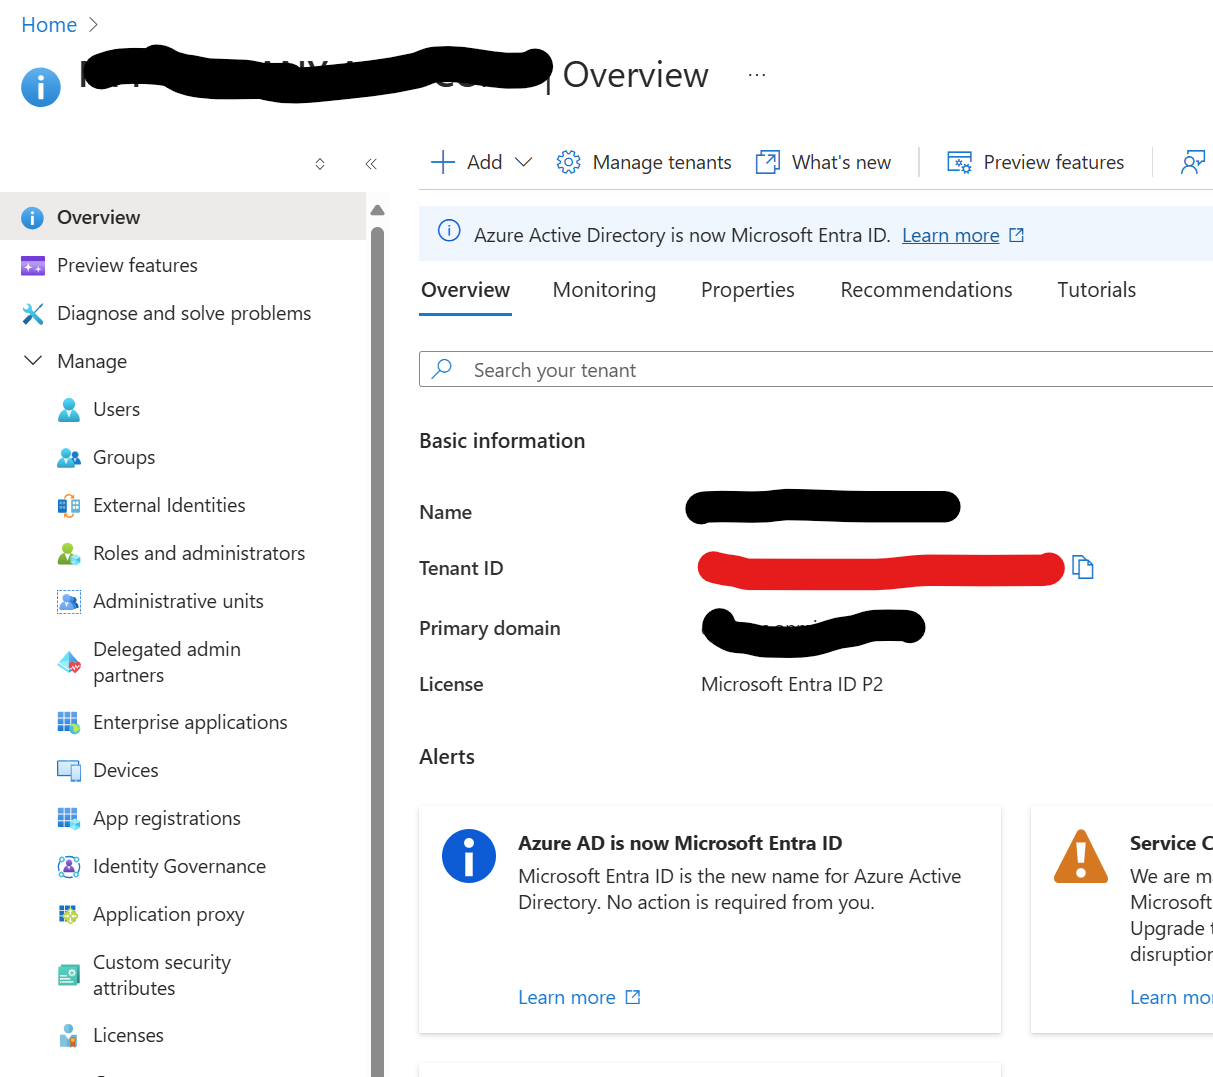
Remember your Tenant ID
- After registering your app, remember to note down your tenant ID for future reference; it will be highlighted in red in the image below.
Configure Direct Routing
Navigate to your Azure Communication Resource, select "Telephony and SMS," and click "Direct Routing."
Select "Add domain"
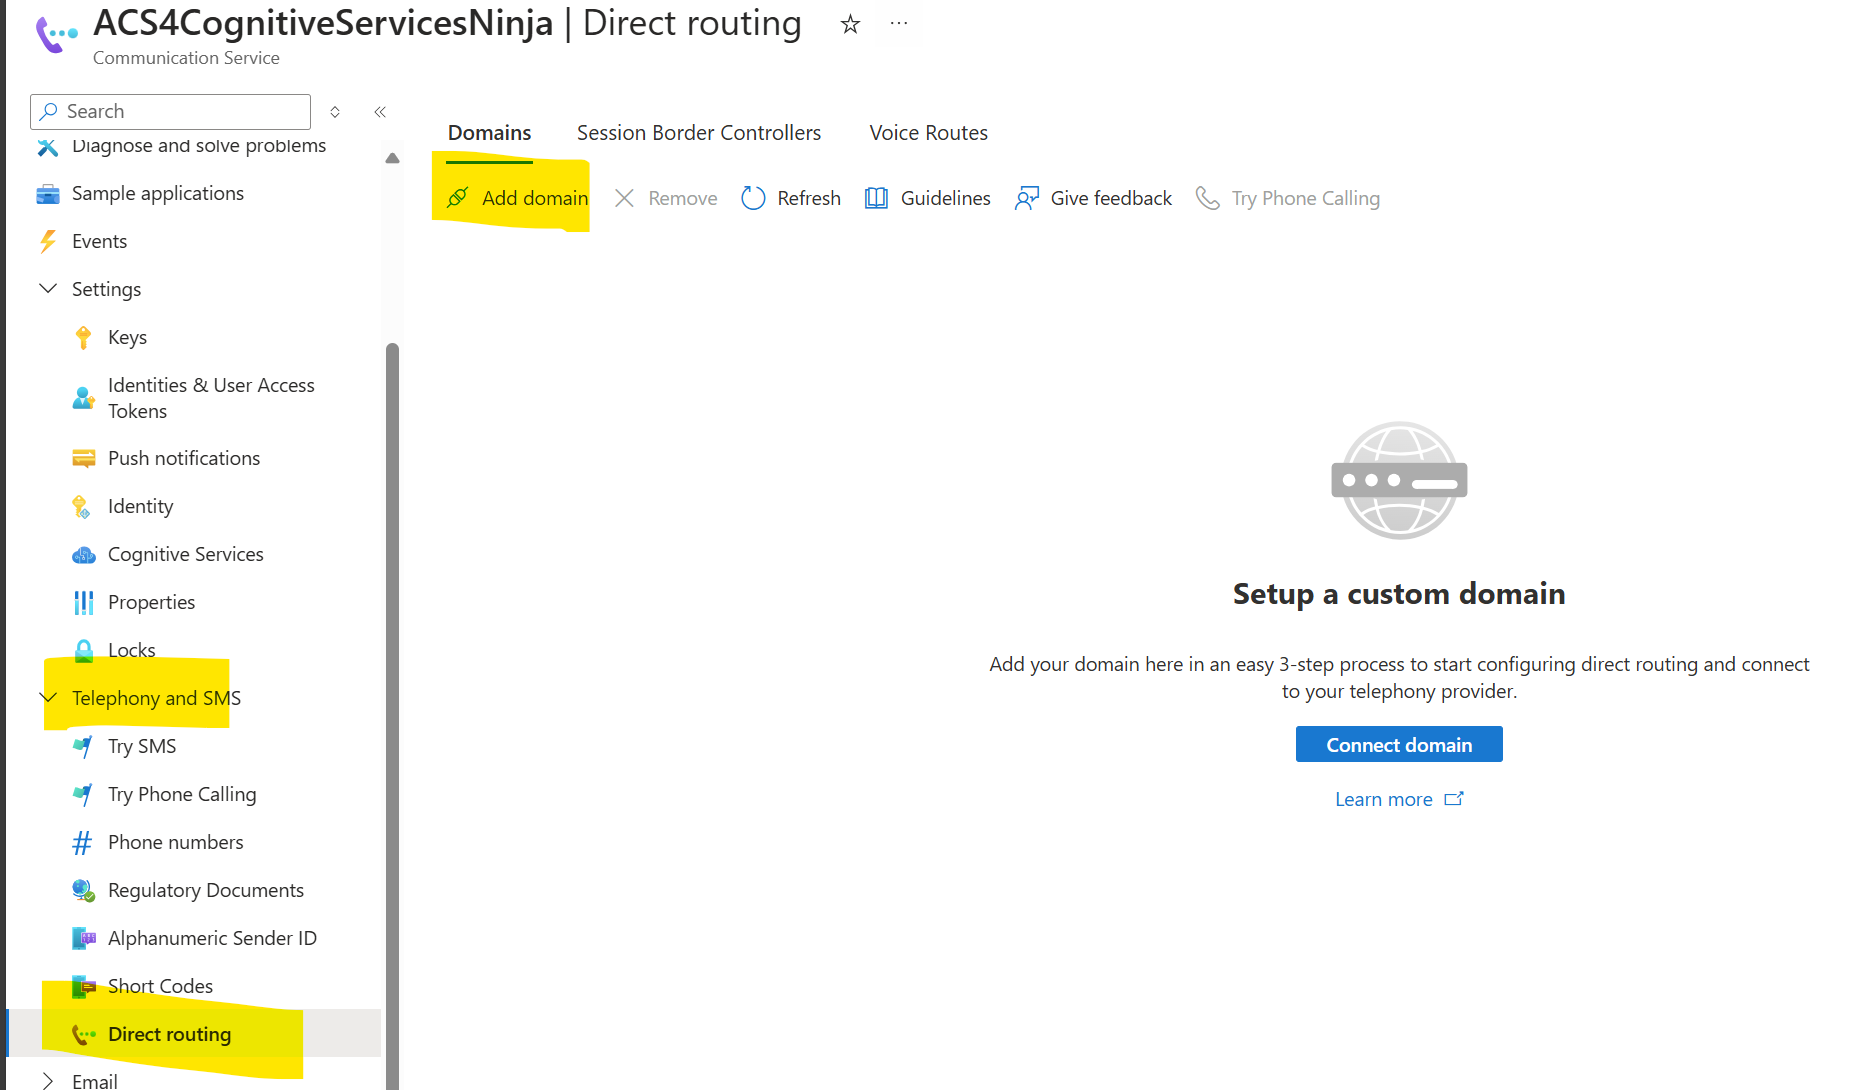
You ought to have obtained some domain names from your direct routing provider. The subsequent step involves creating TXT records for domain verification. These records and additional details must be forwarded to your provider.
After verifying these domains, it should look as shown in the picture below.
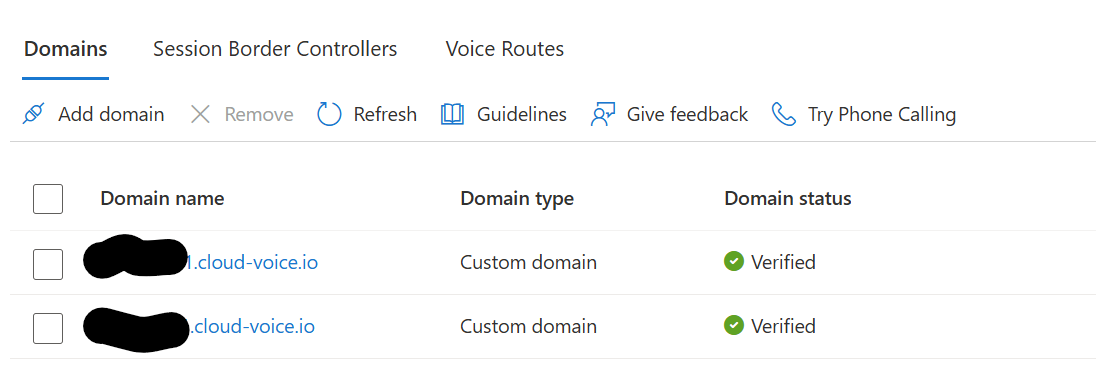
Click on "Session Border Controllers" to add your provider's SBC. Therefore, you should have received a URI for at least one SBC and a port number.
The setup should resemble the image provided after integrating the Session Border Controllers (SBCs).
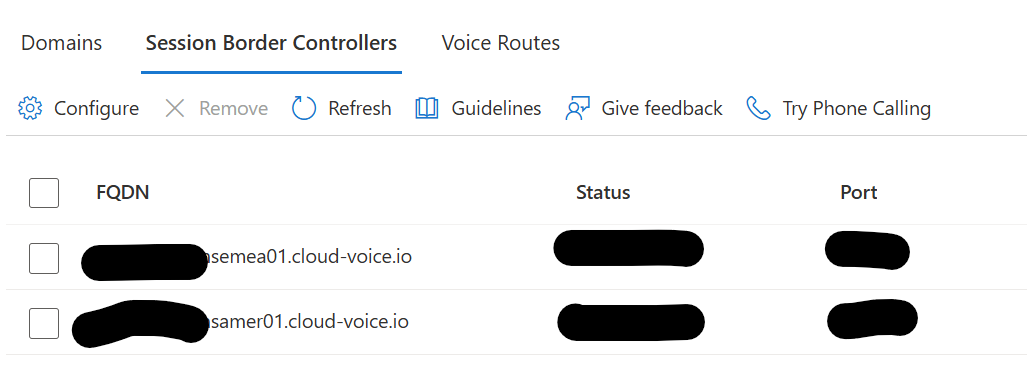
Next, configure your Voice Routes as outlined in Microsoft's documentation.
If you have just one SBC, you can establish a default route.

Start a test call
To ensure the Azure Communication Resource functions correctly, initiate a test call.
Click on "Try Phone Calling," and enter your Caller ID and the number you want to call.
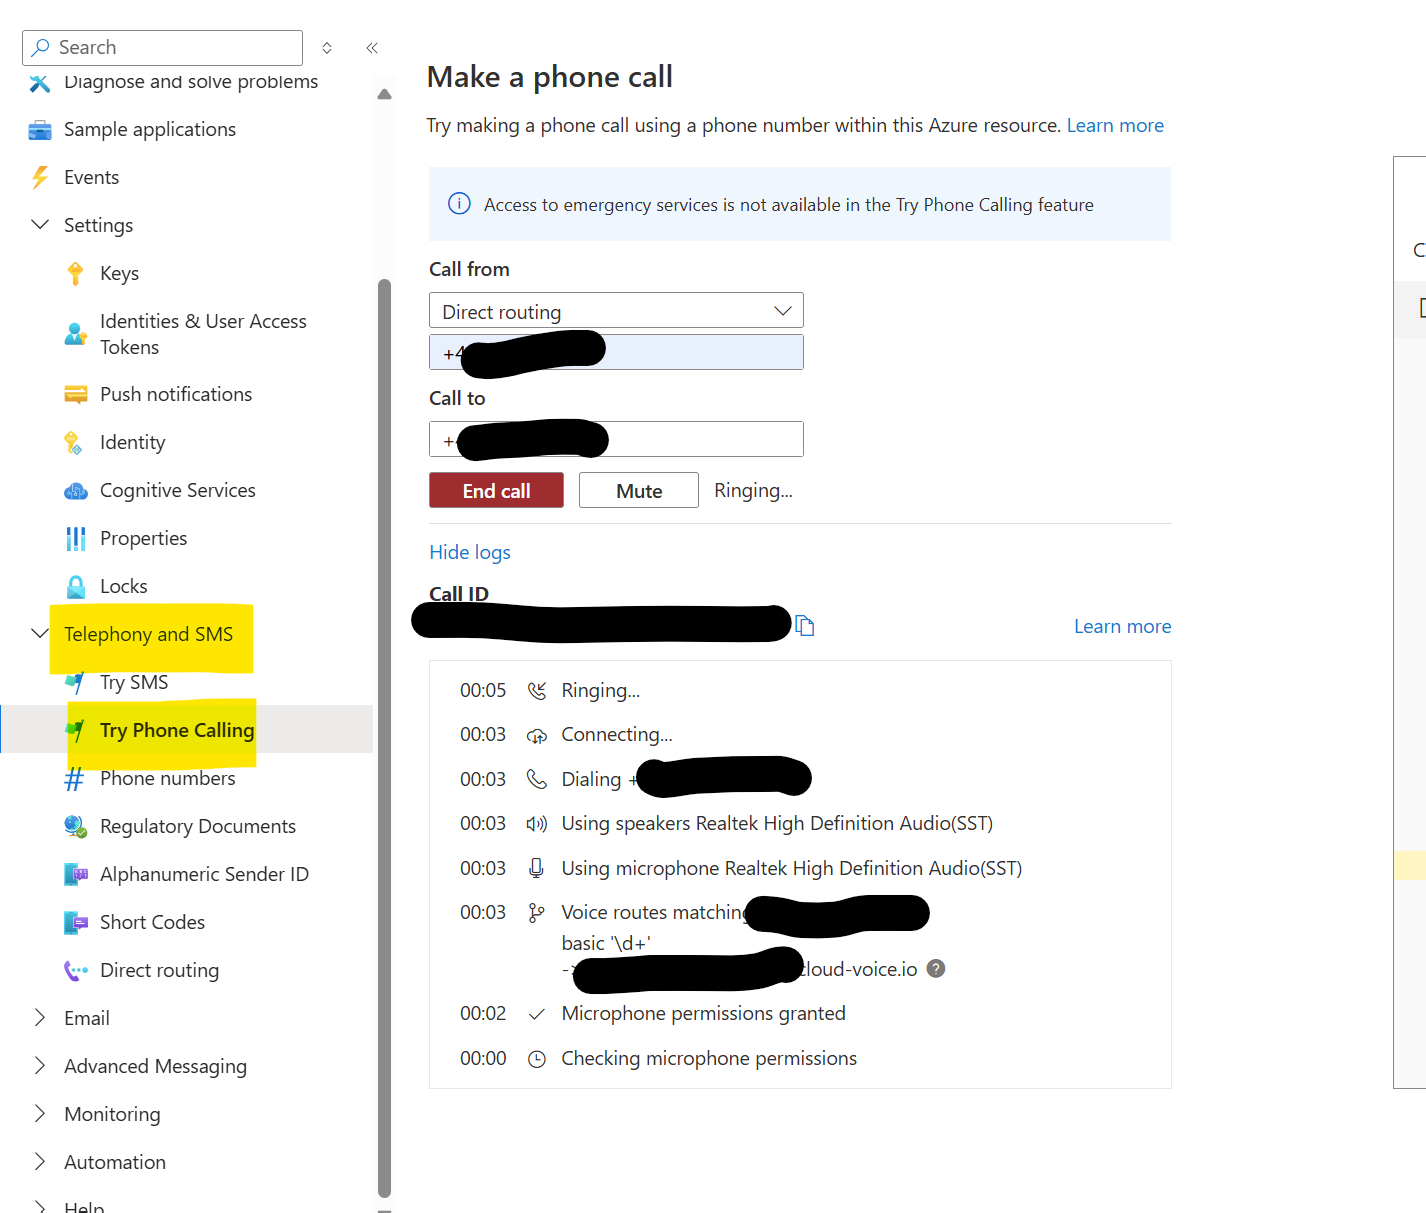
- If everything is configured correctly, you will receive a call via Azure Communication Services.
Prepare the Dynamics Side
Link Dynamics 365 to your Azure Communication Services
Go to your Dynamics 365 Customer Service (Contact Center) Admin Center
Click on "Channels", "Phone numbers" and "Manage"
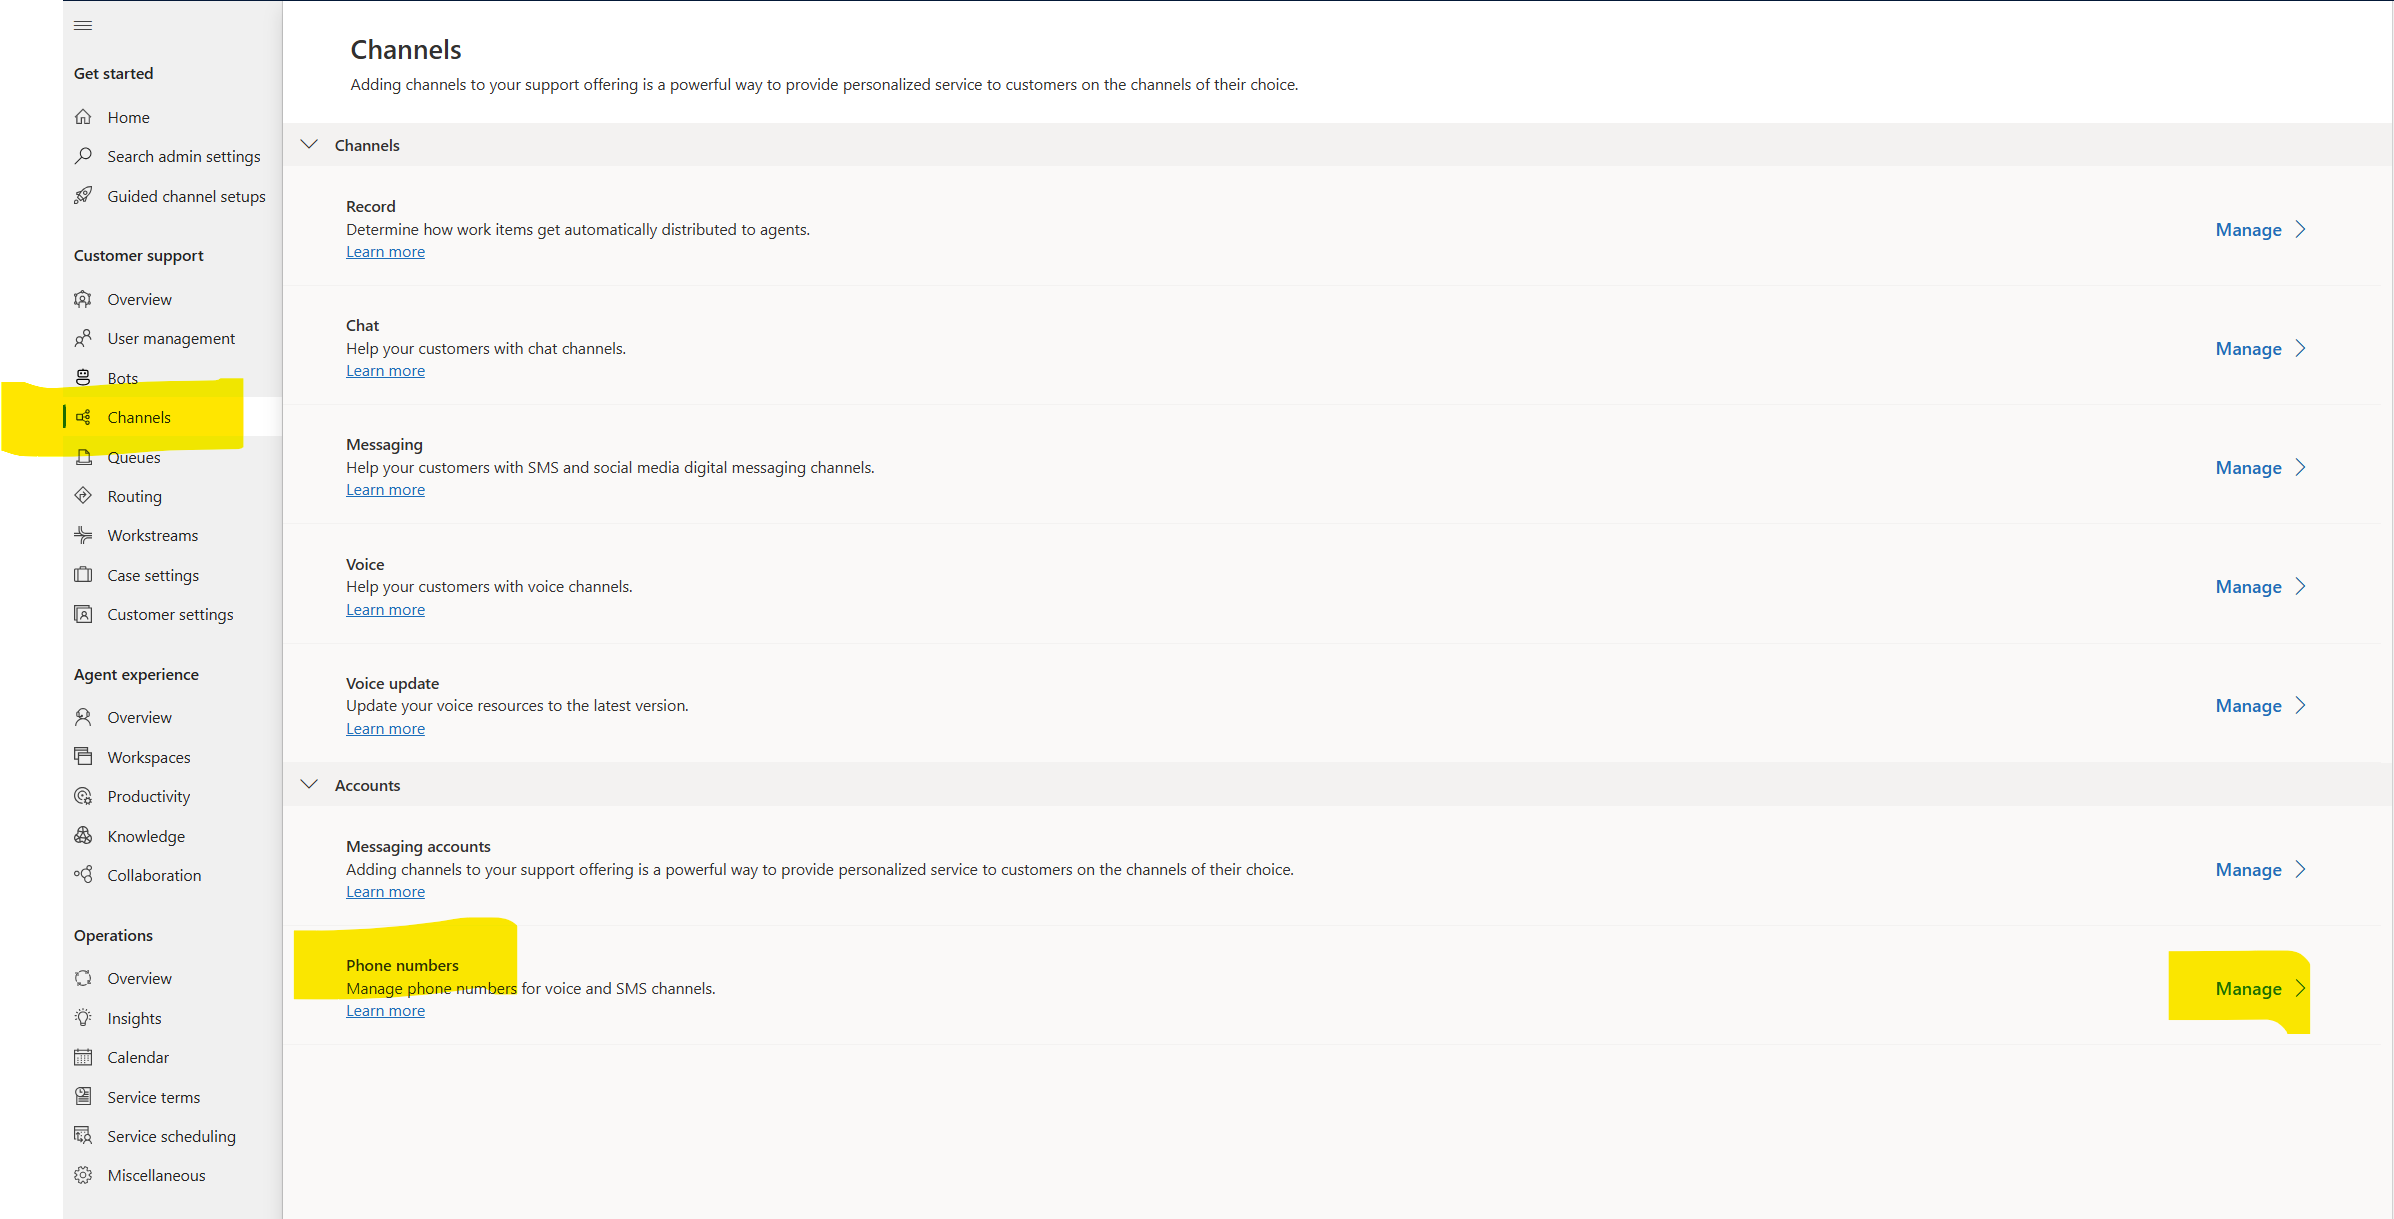
Complete your channel setup by installing the Omnichannel for Customer Service app.
Select "Use existing resource" and specify the following:
Paste the values to the following fields:
"ACS Resource name" and "ACS Resource ID": The Name and Resource ID field values.
"Connection String": The Connection string field value.
Select Connect to connect the resource to Azure Communication Services.
Once you have configured the Azure Communication Services resource, input your App Registration App ID (highlighted in red, paragraph "remember your App ID") and your Tenant ID into the 'Event Grid App ID' and 'Event Grid App Tenant ID' fields, respectively.

The system will present three webhooks that need to be configured as "Event Grid Topics." (Marked in red)
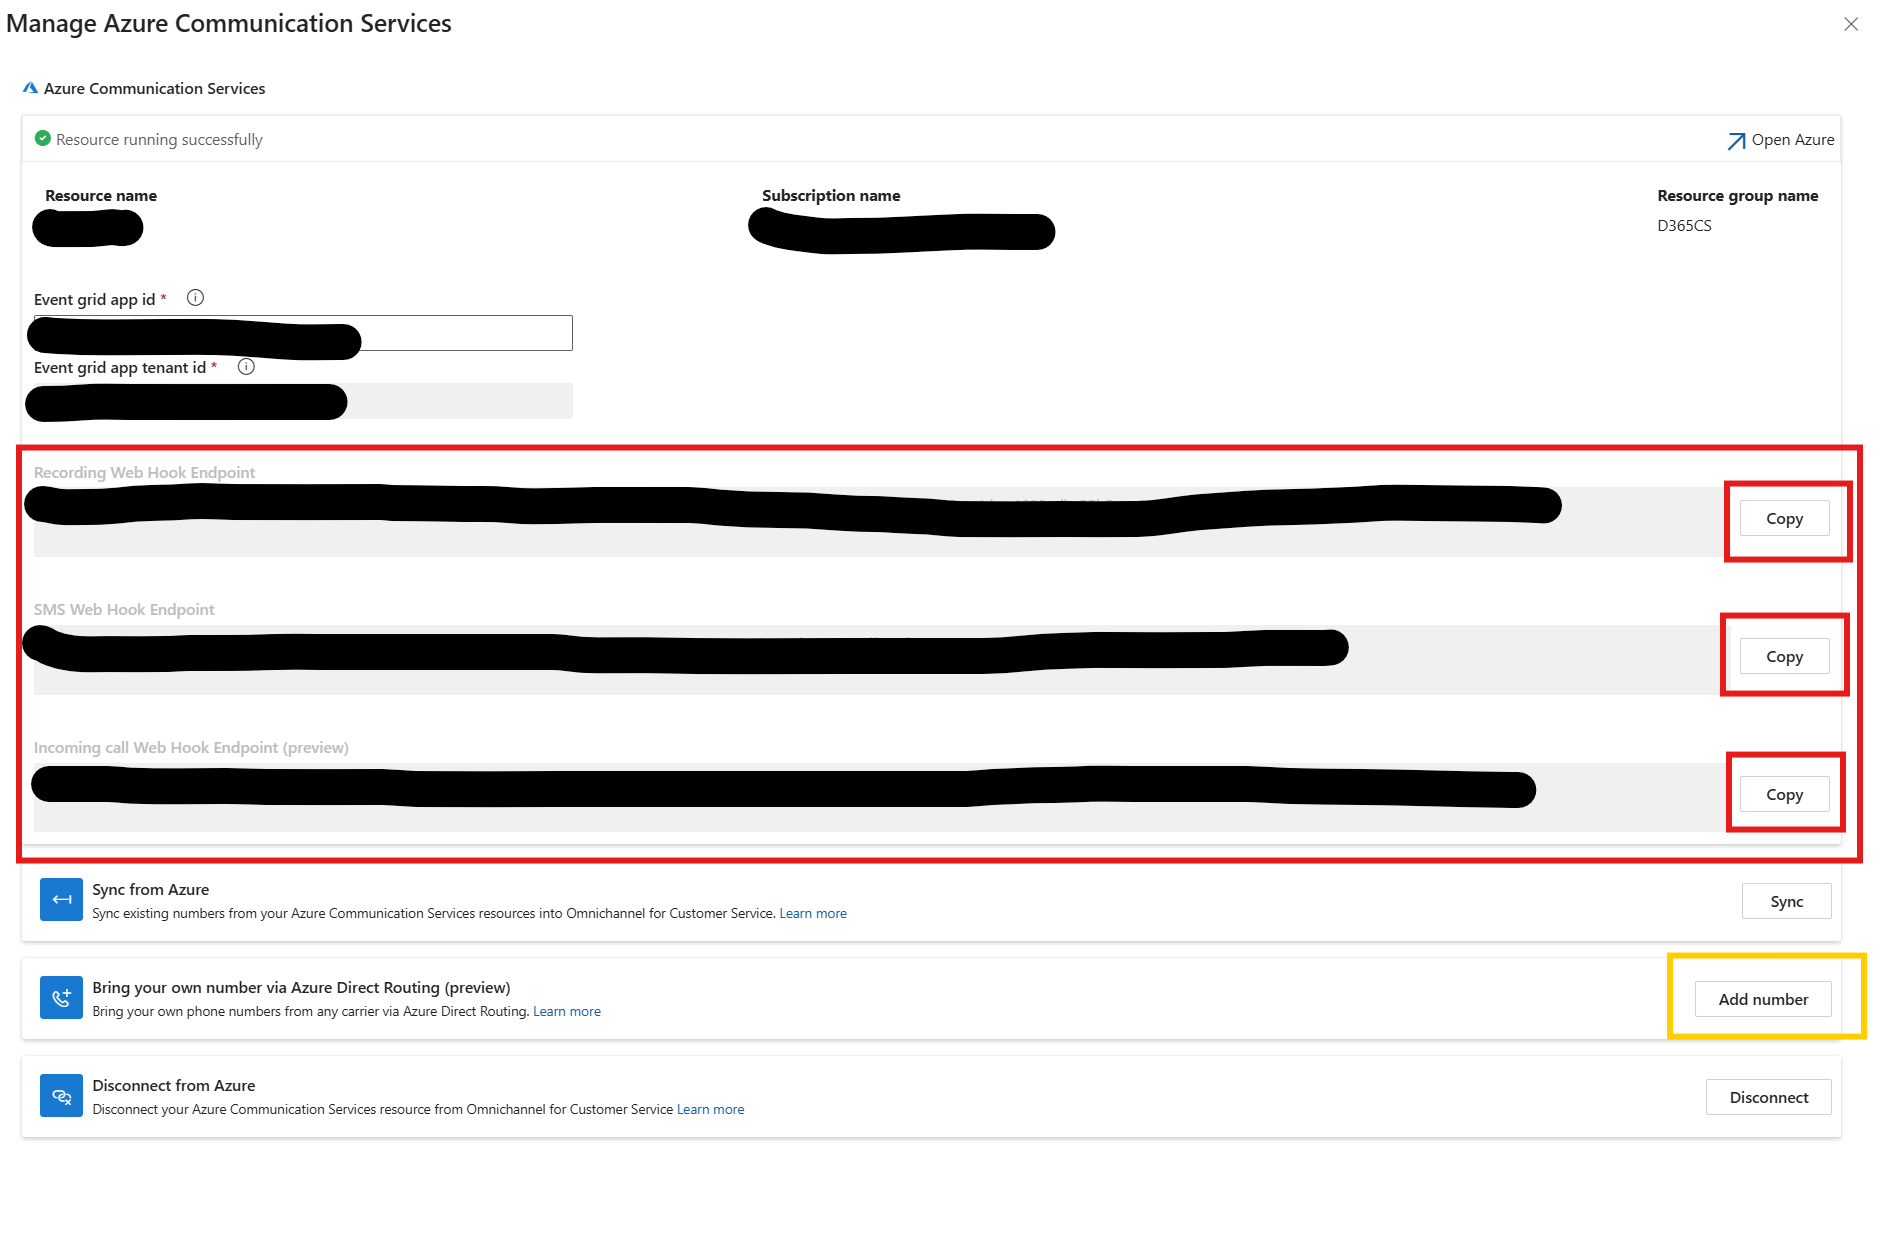
Add your Phone Numbers
Click on "Add number" as indicated in the image above.
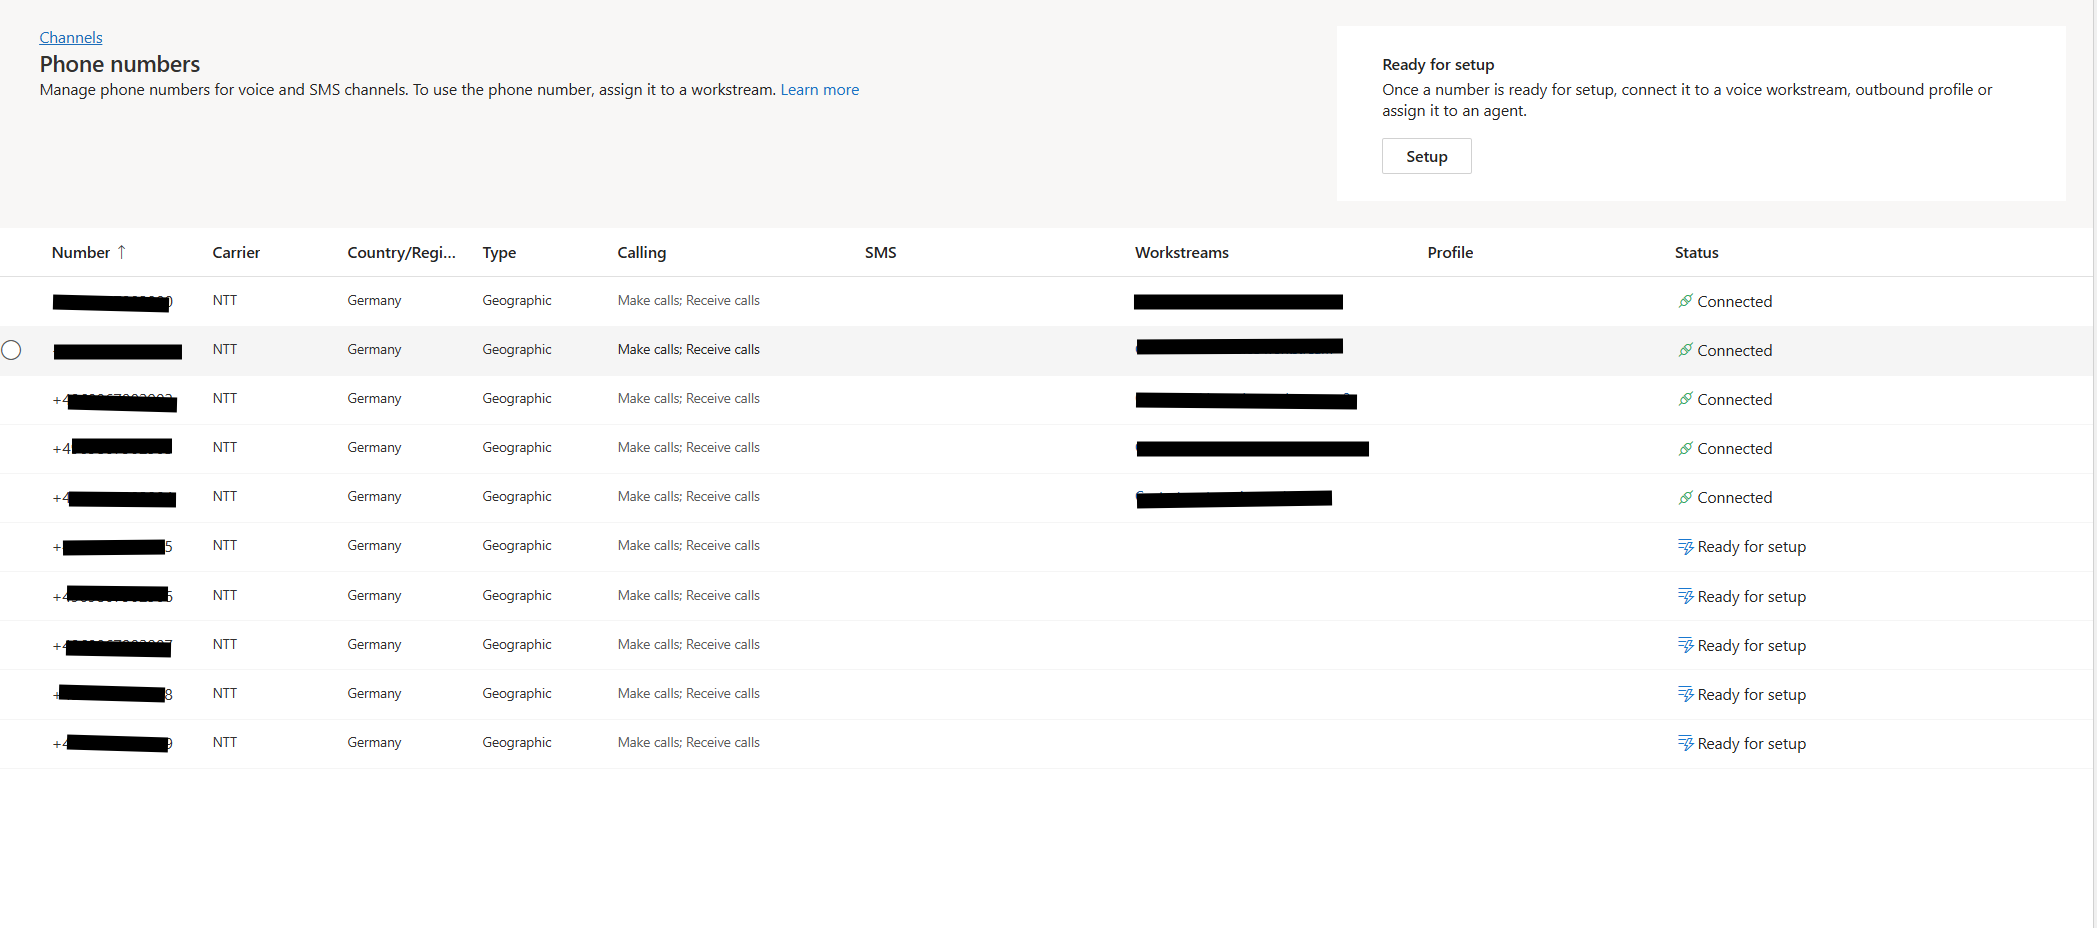
Enter your phone numbers in the provided format, marking them as incoming and/or outgoing numbers.
The result should look similar to the configuration below.
Create your Event Grid System Topics
Azure Communication Services integrates with Azure Event Grid to provide real-time notifications for chat, telephony, SMS, video, and voice calling events. Azure Event Grid utilizes event subscriptions to direct these messages to subscribers.
To activate call recording and SMS services, configure your applications to receive Azure Communication Services events by registering with Event Grid system topics. Following this, create Event Grid subscriptions in the Azure portal to subscribe to specific events related to incoming calls, call recording, or SMS.
Important
You need to be an owner of the App registration to create Event Grid subscriptions.
- Create an Event Grid System topic
You must carry out the following three types of incoming/recording actions for SMS.
On the "Event Grid System Topic" page, click on the "Subscription" link.
On the resource subscription page, go to Settings > Resource providers, and verify if the Microsoft.EventGrid provider is marked as Registered. If not, select the record and click Re-register to register it.
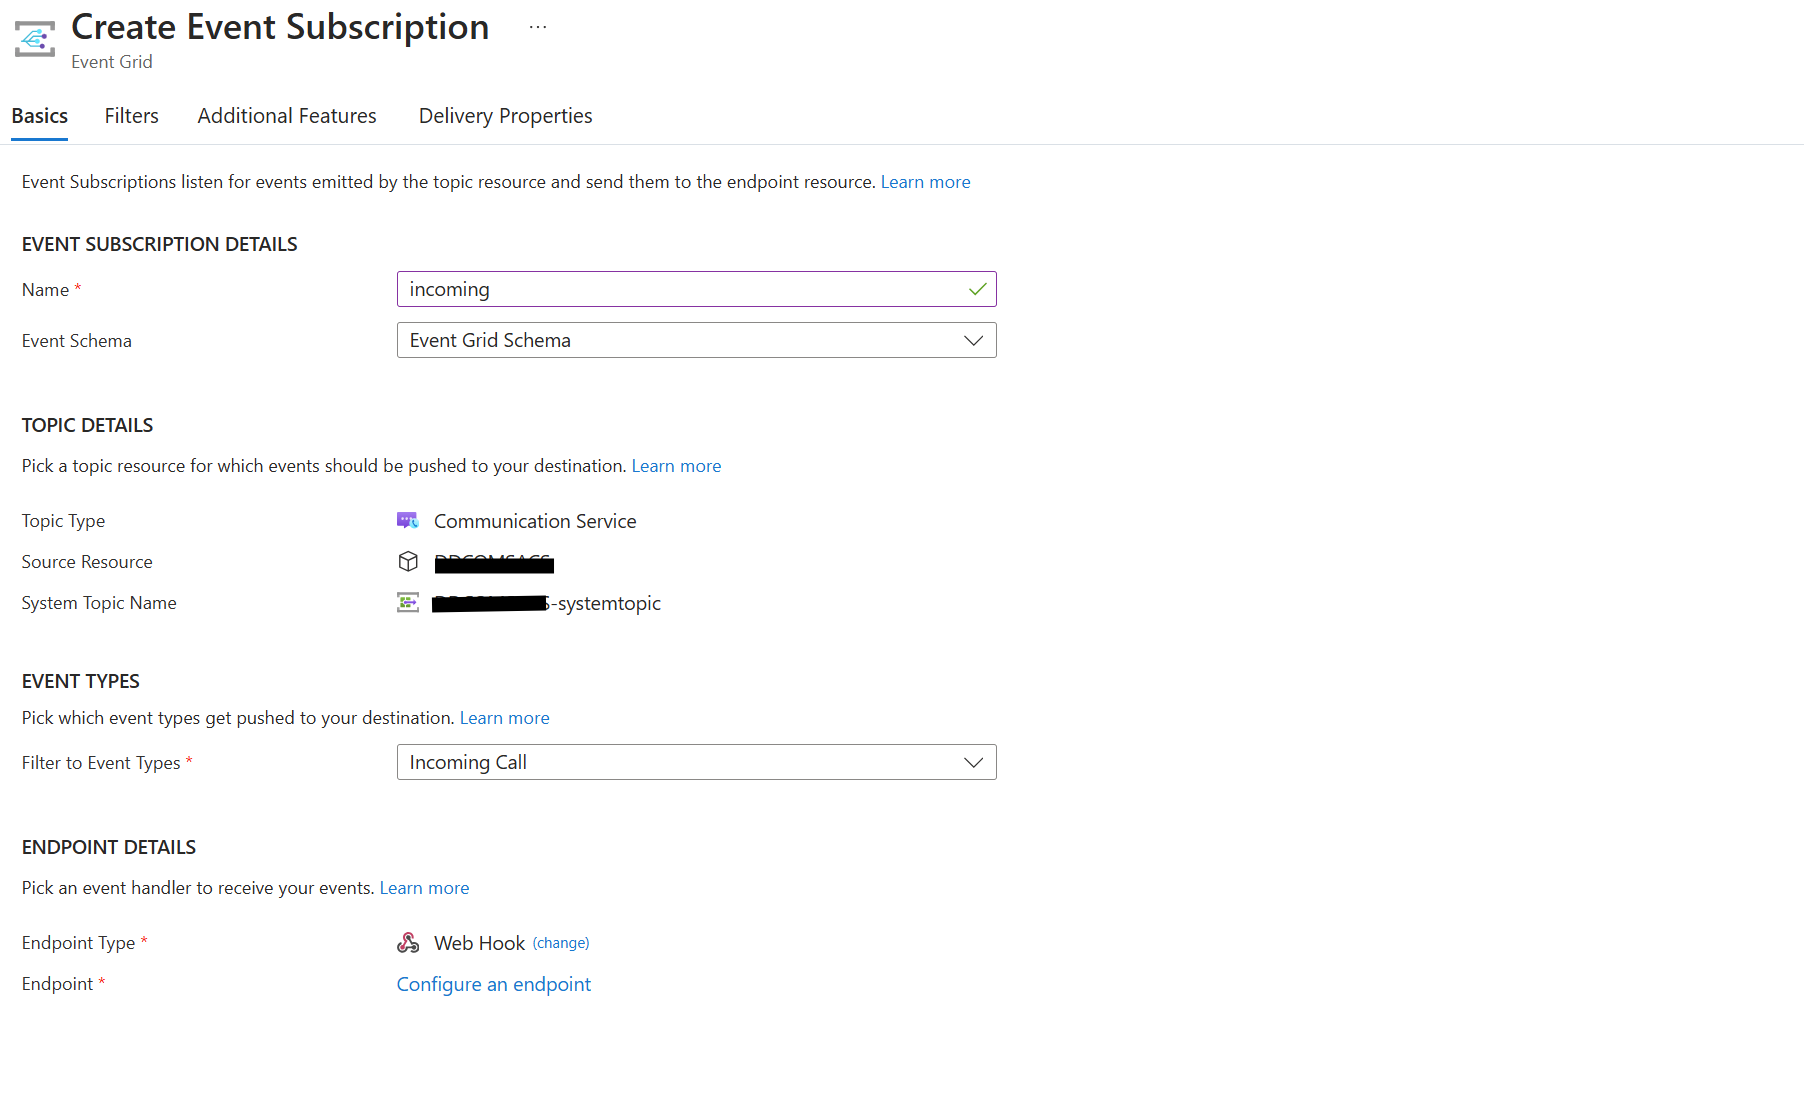
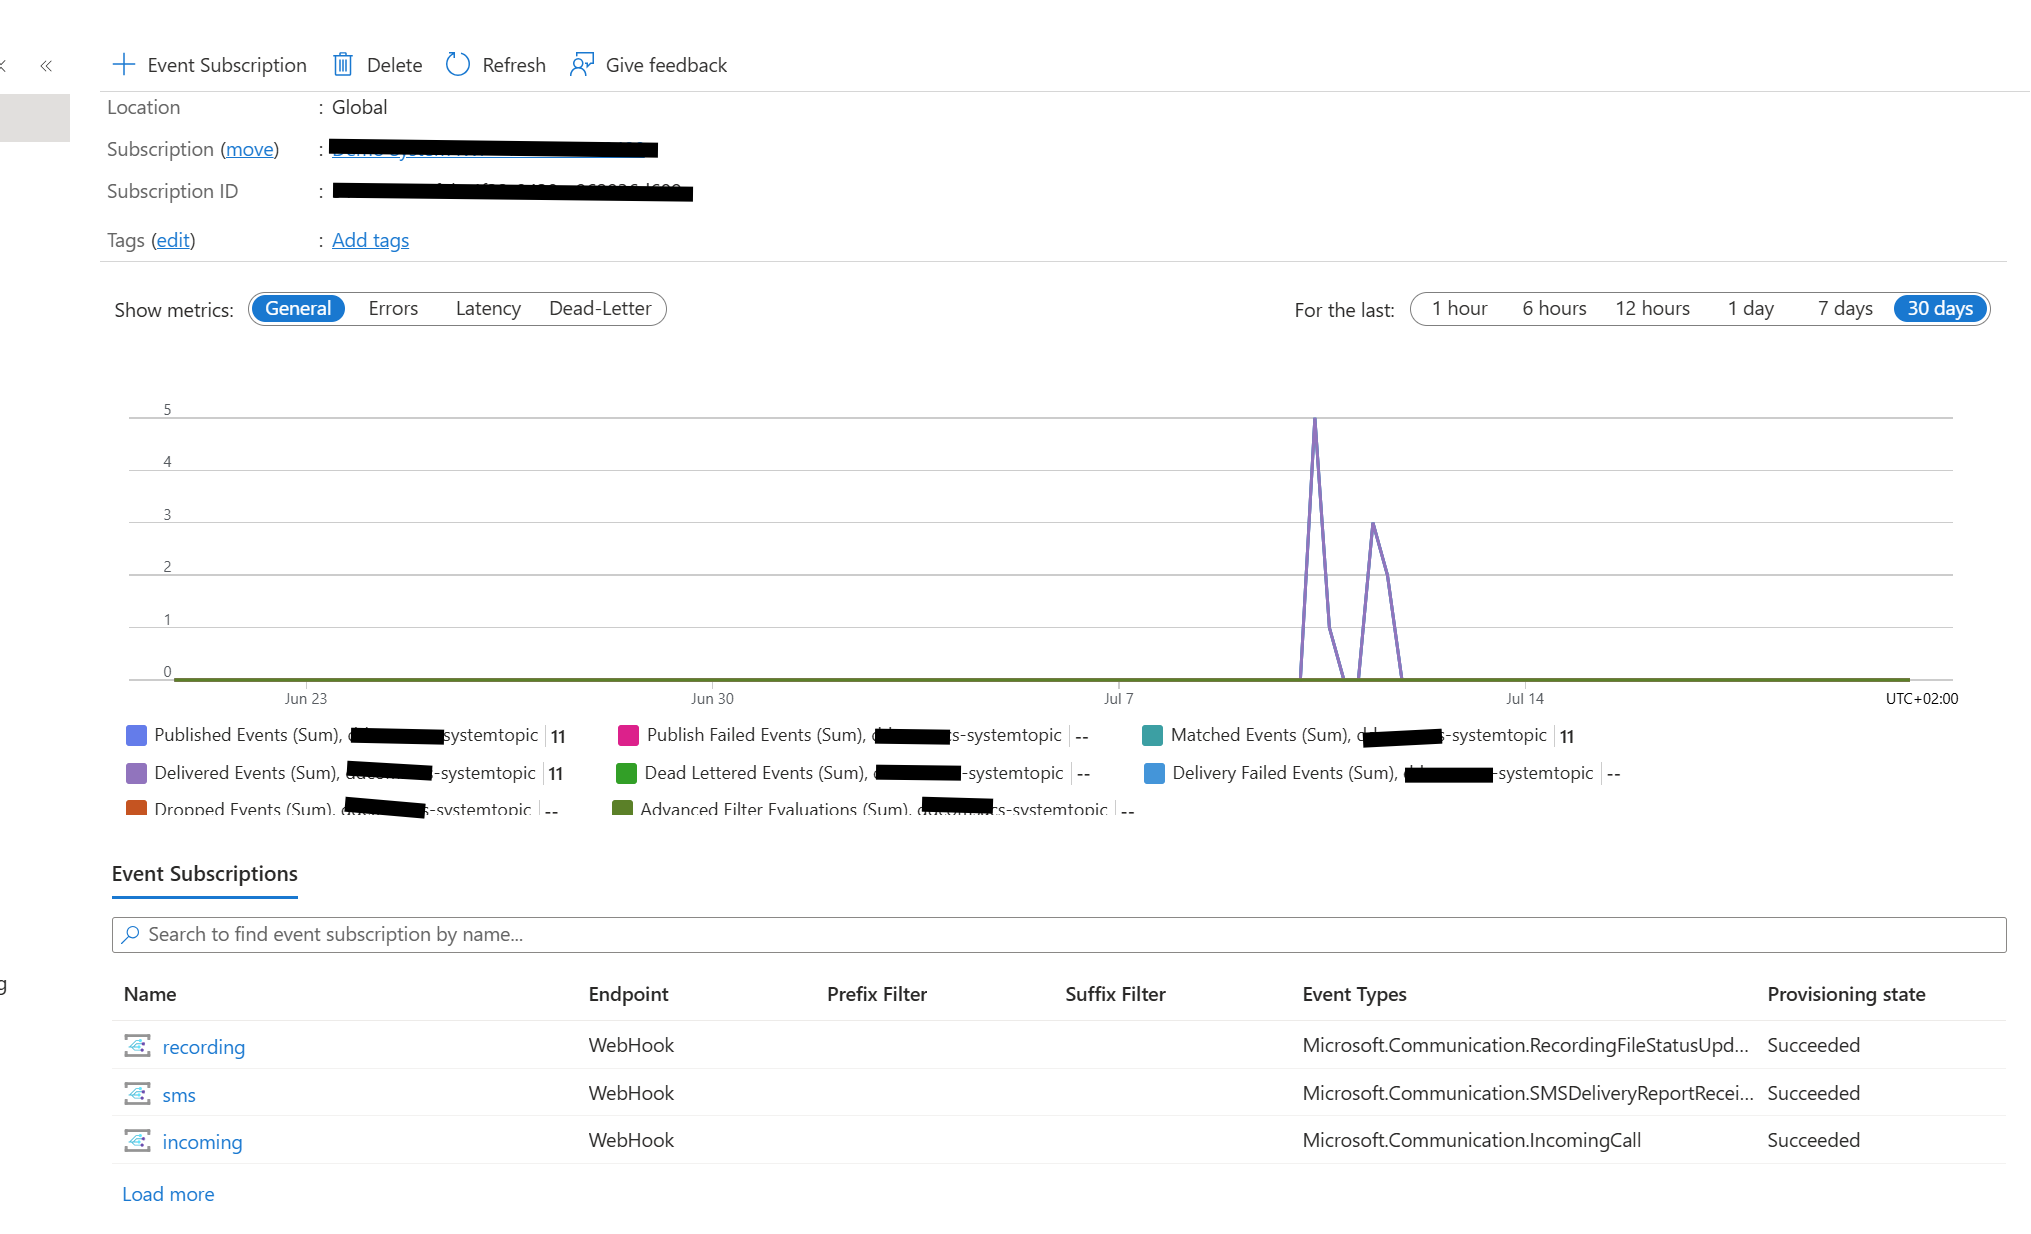
To set up an event subscription in the Azure portal, open the resource, navigate to Events, and select Event Subscription. In the Basic tab, fill in the details as follows:
Name: Provide a name for the event subscription related to recording.
Event Schema: Choose 'Event Grid Schema' from the dropdown menu.
Topic Types: Select 'Azure Communication Services' from the options.
Subscription: Pick your subscription from the list.
Resource Group: Choose the appropriate resource group.
Resource: Select the specific resource.
System Topic Name: This will be filled with the name of the system topic you created. If multiple values appear, select the correct system topic name.
Filter to Event Types: Apply filters for call recording, incoming calls, or SMS services as needed.
For recording services, choose 'Recording File Status Updated'.
Select 'SMS Received' and 'SMS Delivery Report Received' for SMS services.
For incoming calls, opt for 'Incoming Call'.
Next, set the Endpoint Type to 'Web Hook'. For the Endpoint, click 'Select an endpoint' and input the webhook endpoint for incoming calls, recording, or SMS services.
In the Additional Features tab, tick the 'Use Microsoft Entra Authentication' box and provide the following details:
Microsoft Entra Tenant ID: Input the tenant ID associated with your Azure resource.
Microsoft Entra Application ID or URI: Enter the application ID (from the app registration) for your Azure resource.
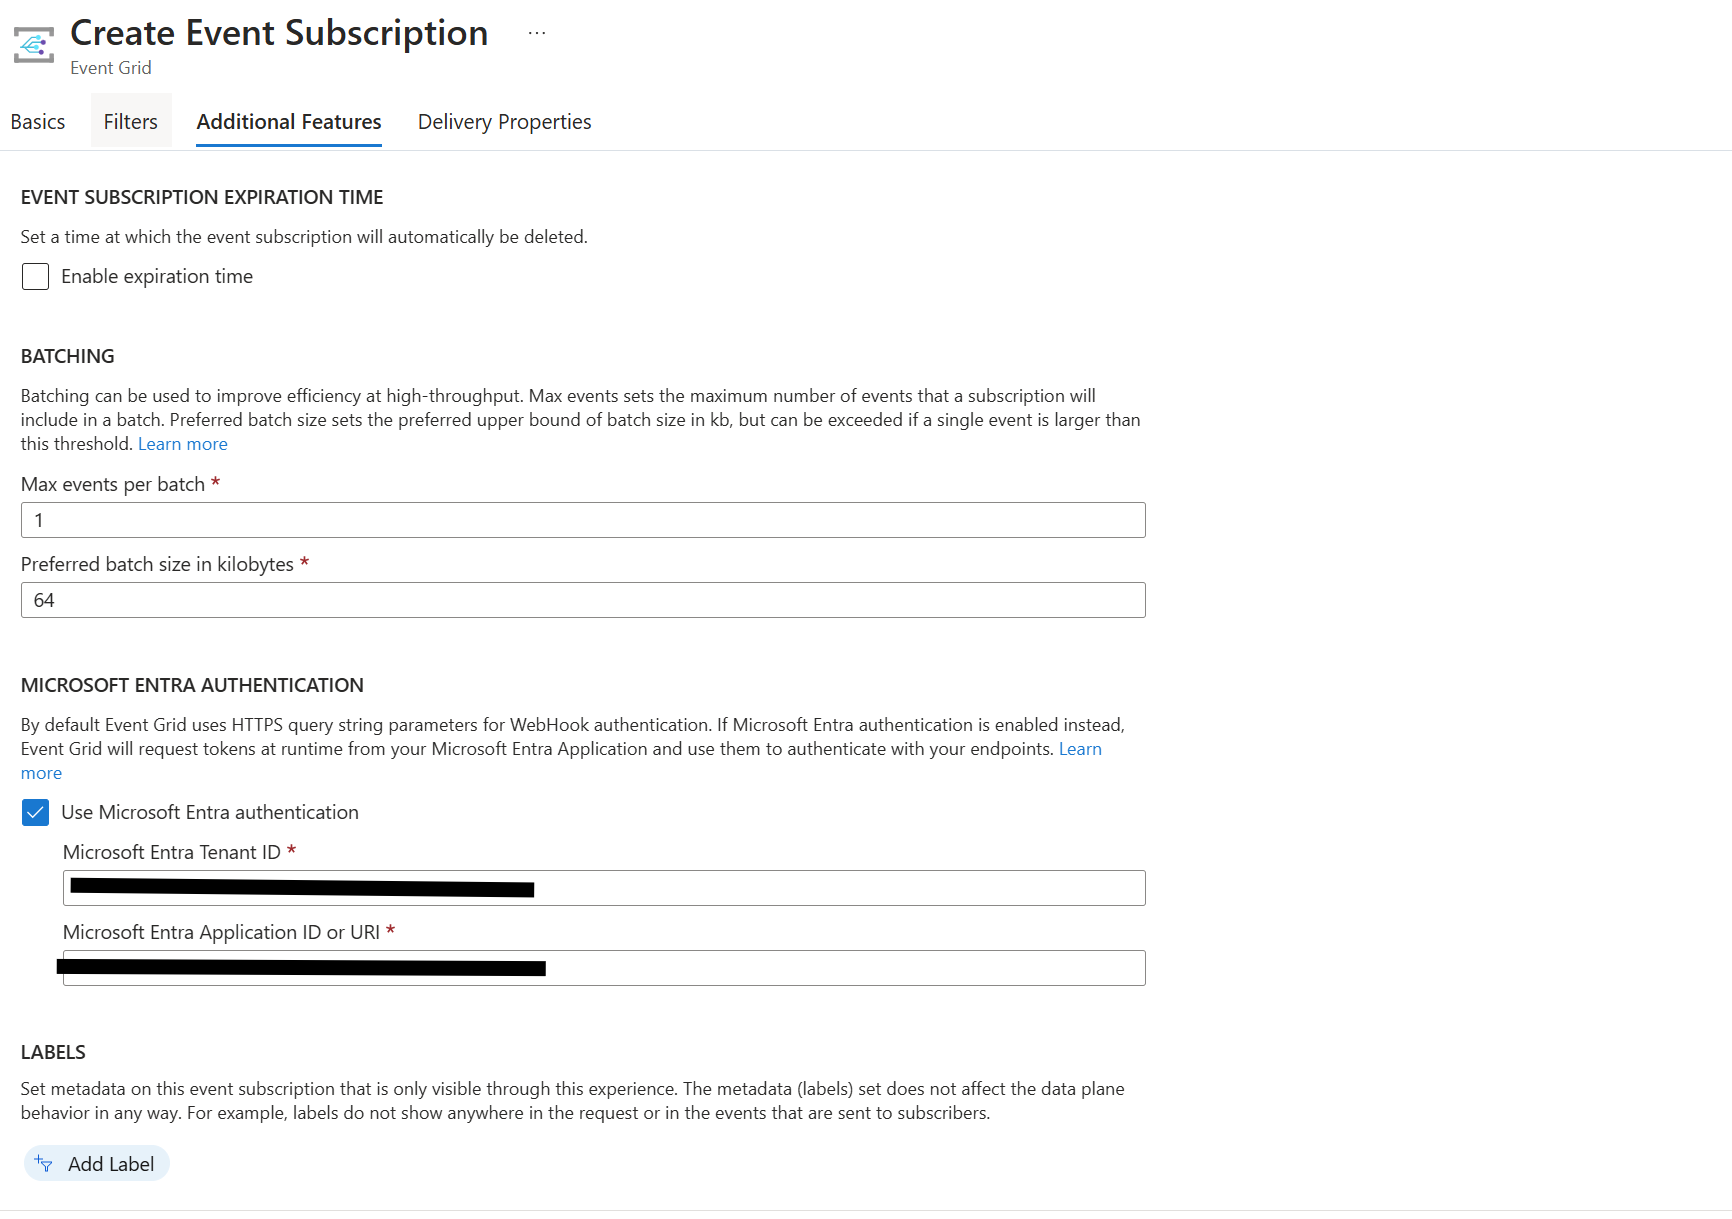
When done, it should look like the following.
Workstreams and Queues
To set up your workstreams and queues, you can create workstreams for unified routing in the Customer Service admin center app. For each workstream, you can define the type, such as Messaging, Record, or Voice, and associate it with a channel like live chat, voice, or case. You can also establish queues to collect and distribute workload among agents. You can create separate queues for different lines of business and configure routing rules to manage how work items are assigned to these queues.
Next steps
The upcoming article in our mini-series will guide you through integrating a voice bot into your workflow, enhancing your workstream with the power of speech recognition and interaction.
Conclusion
Integrating Dynamics 365's voice channel with Azure Communication Services significantly enhances customer service operations by providing a seamless and efficient communication platform. This integration streamlines the process for agents and ensures a unified view of customer interactions, leading to improved service quality and customer satisfaction. Organizations can optimize their customer service strategies and drive better outcomes by leveraging real-time AI features and comprehensive analytics. Stay tuned for the next article in our series, where we will explore how to further enhance your voice channel with a Copilot Studio Voice Bot.
Note: The author created this article with assistance from AI.
Subscribe to my newsletter
Read articles from Holger Imbery directly inside your inbox. Subscribe to the newsletter, and don't miss out.
Written by

Holger Imbery
Holger Imbery
I talk and write about conversational AI, robotic process automation, and things that keep an architect awake at night. Your feedback on my articles is highly appreciated, and I would like to invite you to a professional discussion. I'm a Principal Architect @NTTDATA focusing on Microsoft Power Platform and Azure.