Gobernando Identidades Corporativas
 Santiago Fernandez
Infraestructura
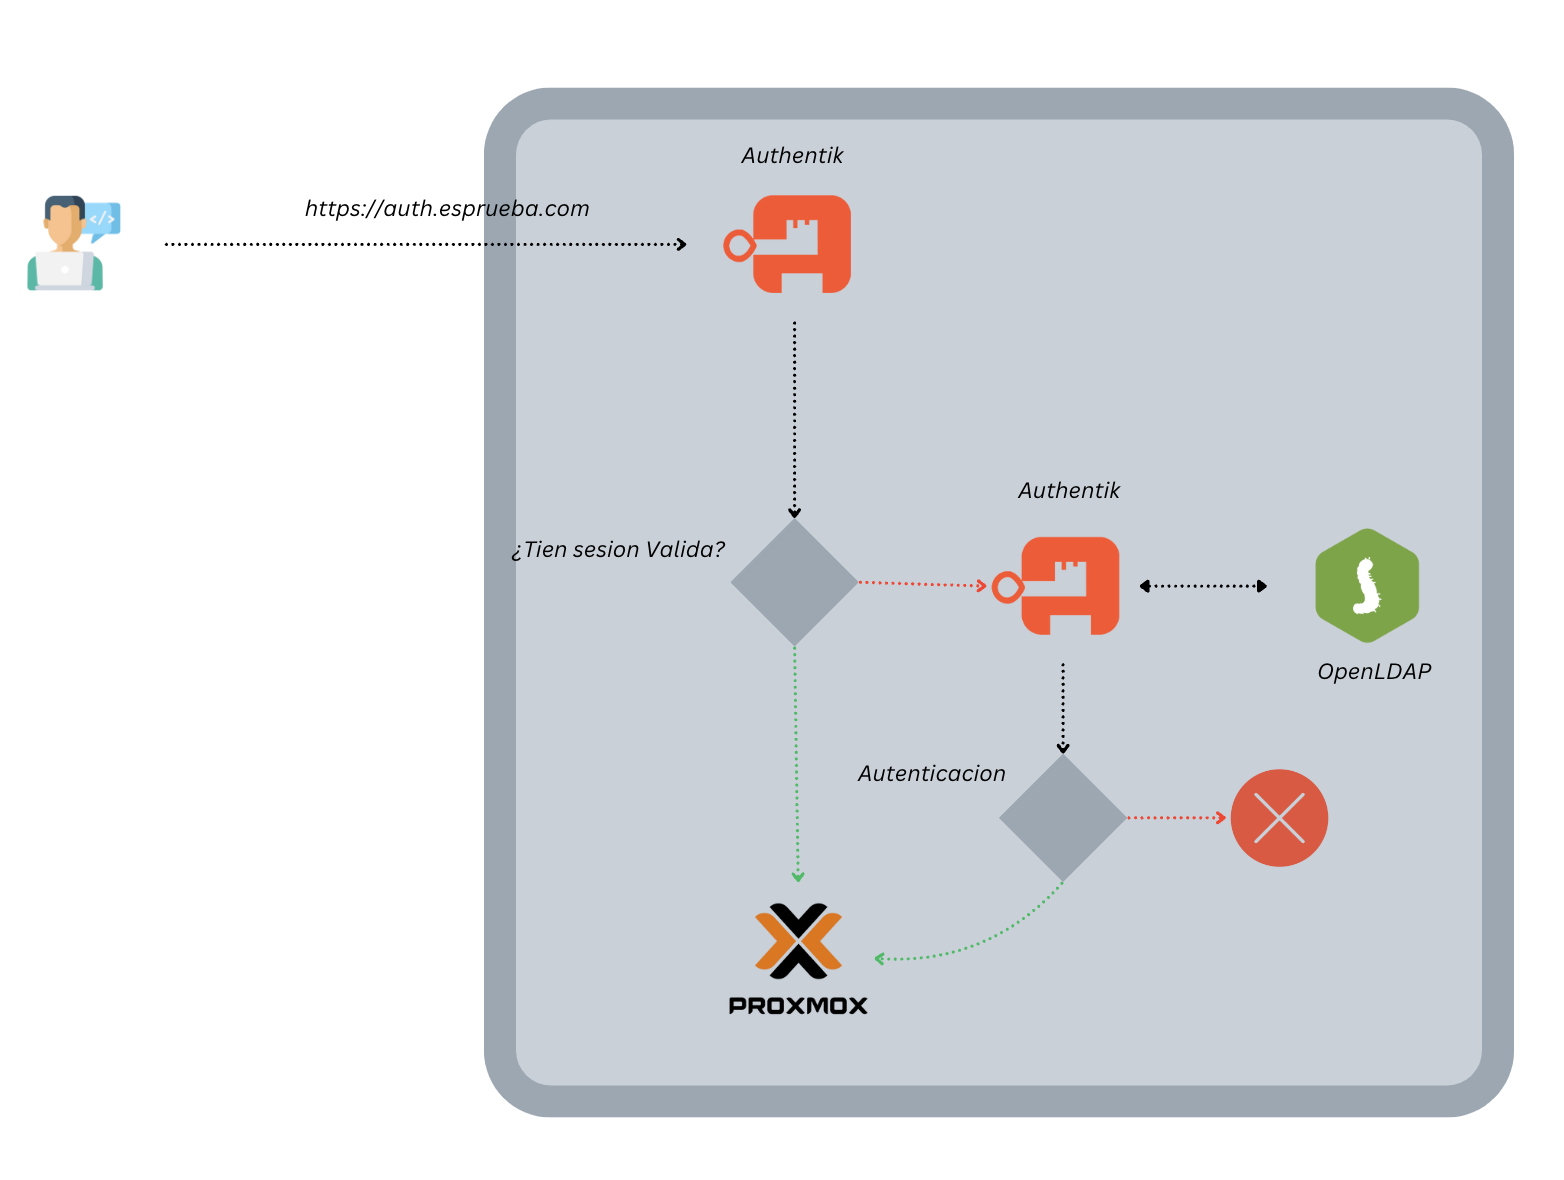
La idea es manejar nuestras identidades con Authentik. ¿Qué es Authentik? Es una solución que hará que el registro de nuestros usuarios sea más fácil, eliminando la necesidad de tareas manuales. Es una manera sencilla de integrarse con nuestro entorno actual, sin tener que hacer grandes cambios. Además, es compatible con la mayoría de los proveedores como OAuth2, SAML, LDAP y SCIM.
En nuestro caso tendremos las identidades corporativas en un IDP que sera OpenLDAP. La idea es que los usuarios que tenemos en este directorio activo logren ingresar a nuestro Proxmox via OAuth2 como SSO.
Docker Compose
Vamos a crear un ambiente para gobernar nuestras corporativas para ello vamos a correr nuestro docker-compose.yaml que es el siguiente:
services:
  postgresql:
    image: docker.io/library/postgres:16-alpine
    networks:
      - 'ldap-auth'
    restart: unless-stopped
    healthcheck:
      test: ["CMD-SHELL", "pg_isready -d $${POSTGRES_DB} -U $${POSTGRES_USER}"]
      start_period: 20s
      interval: 30s
      retries: 5
      timeout: 5s
    volumes:
      - database:/var/lib/postgresql/data
    environment:
      POSTGRES_PASSWORD: ${PG_PASS:?database password required}
      POSTGRES_USER: ${PG_USER:-authentik}
      POSTGRES_DB: ${PG_DB:-authentik}
    env_file:
      - .env
  redis:
    image: docker.io/library/redis:alpine
    networks:
      - 'ldap-auth'
    command: --save 60 1 --loglevel warning
    restart: unless-stopped
    healthcheck:
      test: ["CMD-SHELL", "redis-cli ping | grep PONG"]
      start_period: 20s
      interval: 30s
      retries: 5
      timeout: 3s
    volumes:
      - redis:/data
  server:
    image: ${AUTHENTIK_IMAGE:-ghcr.io/goauthentik/server}:${AUTHENTIK_TAG:-2024.8.3}
    networks:
      - 'ldap-auth'
    restart: unless-stopped
    command: server
    environment:
      AUTHENTIK_REDIS__HOST: redis
      AUTHENTIK_POSTGRESQL__HOST: postgresql
      AUTHENTIK_POSTGRESQL__USER: ${PG_USER:-authentik}
      AUTHENTIK_POSTGRESQL__NAME: ${PG_DB:-authentik}
      AUTHENTIK_POSTGRESQL__PASSWORD: ${PG_PASS}
    volumes:
      - ./media:/media
      - ./custom-templates:/templates
    env_file:
      - .env
    ports:
      - "${COMPOSE_PORT_HTTP:-9000}:9000"
      - "${COMPOSE_PORT_HTTPS:-9443}:9443"
    depends_on:
      - postgresql
      - redis
  worker:
    image: ${AUTHENTIK_IMAGE:-ghcr.io/goauthentik/server}:${AUTHENTIK_TAG:-2024.8.3}
    networks:
    - 'ldap-auth'
    restart: unless-stopped
    command: worker
    environment:
      AUTHENTIK_REDIS__HOST: redis
      AUTHENTIK_POSTGRESQL__HOST: postgresql
      AUTHENTIK_POSTGRESQL__USER: ${PG_USER:-authentik}
      AUTHENTIK_POSTGRESQL__NAME: ${PG_DB:-authentik}
      AUTHENTIK_POSTGRESQL__PASSWORD: ${PG_PASS}
    # `user: root` and the docker socket volume are optional.
    # See more for the docker socket integration here:
    # https://goauthentik.io/docs/outposts/integrations/docker
    # Removing `user: root` also prevents the worker from fixing the permissions
    # on the mounted folders, so when removing this make sure the folders have the correct UID/GID
    # (1000:1000 by default)
    user: root
    volumes:
      - /var/run/docker.sock:/var/run/docker.sock
      - ./media:/media
      - ./certs:/certs
      - ./custom-templates:/templates
    env_file:
      - .env
    depends_on:
      - postgresql
      - redis

  openldap:
    image: osixia/openldap:1.5.0
    networks:
      - 'ldap-auth'
    container_name: openldap
    environment:
      LDAP_LOG_LEVEL: "256"
      LDAP_ORGANISATION: "Example Inc."
      LDAP_DOMAIN: "esprueba.com"
      LDAP_BASE_DN: "dc=esprueba,dc=com"
      LDAP_ADMIN_PASSWORD: "admin"
      LDAP_CONFIG_PASSWORD: "config"
      LDAP_READONLY_USER: "false"
      #LDAP_READONLY_USER_USERNAME: "readonly"
      #LDAP_READONLY_USER_PASSWORD: "readonly"
      LDAP_RFC2307BIS_SCHEMA: "false"
      LDAP_BACKEND: "mdb"
      LDAP_TLS: "true"
      LDAP_TLS_CRT_FILENAME: "ldap.crt"
      LDAP_TLS_KEY_FILENAME: "ldap.key"
      LDAP_TLS_DH_PARAM_FILENAME: "dhparam.pem"
      LDAP_TLS_CA_CRT_FILENAME: "ca.crt"
      LDAP_TLS_ENFORCE: "false"
      LDAP_TLS_CIPHER_SUITE: "SECURE256:-VERS-SSL3.0"
      LDAP_TLS_VERIFY_CLIENT: "demand"
      LDAP_REPLICATION: "false"
      #LDAP_REPLICATION_CONFIG_SYNCPROV: 'binddn="cn=admin,cn=config" bindmethod=simple credentials="$$LDAP_CONFIG_PASSWORD" searchbase="cn=config" type=refreshAndPersist retry="60 +" timeout=1 starttls=critical'
      #LDAP_REPLICATION_DB_SYNCPROV: 'binddn="cn=admin,$$LDAP_BASE_DN" bindmethod=simple credentials="$$LDAP_ADMIN_PASSWORD" searchbase="$$LDAP_BASE_DN" type=refreshAndPersist interval=00:00:00:10 retry="60 +" timeout=1 starttls=critical'
      #LDAP_REPLICATION_HOSTS: "#PYTHON2BASH:['ldap://ldap.example.org','ldap://ldap2.example.org']"
      KEEP_EXISTING_CONFIG: "false"
      LDAP_REMOVE_CONFIG_AFTER_SETUP: "true"
      LDAP_SSL_HELPER_PREFIX: "ldap"
    tty: true
    stdin_open: true
    volumes:
      - /var/lib/ldap
      - /etc/ldap/slapd.d
      - /container/service/slapd/assets/certs/
    ports:
      - "389:389"
      - "636:636"
    # For replication to work correctly, domainname and hostname must be
    # set correctly so that "hostname"."domainname" equates to the
    # fully-qualified domain name for the host.
    domainname: "esprueba.com"
    hostname: "ldap-server"

  phpldapadmin:
    networks:
      - 'ldap-auth'
    image: osixia/phpldapadmin:latest
    container_name: phpldapadmin
    environment:
      PHPLDAPADMIN_LDAP_HOSTS: "openldap"
      PHPLDAPADMIN_HTTPS: "false"
    ports:
      - "8090:80"
    depends_on:
      - openldap

networks:
  ldap-auth:

volumes:
  database:
    driver: local
  redis:
    driver: local
Vamos a crear un archivo de variables de entorno. Se necesita generar una contraseña y una clave secreta. Utilice un generador de contraseñas seguro de su elección, como pwgen, o puede utilizar openssl de esta manera:
echo "PG_PASS=$(openssl rand -base64 36 | tr -d '\n')" >> .env
echo "AUTHENTIK_SECRET_KEY=$(openssl rand -base64 60 | tr -d '\n')" >> .env
En este archivo .env, también agregamos nuestro SMTP.
# SMTP Host Emails are sent to
AUTHENTIK_EMAIL__HOST=localhost
AUTHENTIK_EMAIL__PORT=25
# Optionally authenticate (don't add quotation marks to your password)
AUTHENTIK_EMAIL__USERNAME=
AUTHENTIK_EMAIL__PASSWORD=
# Use StartTLS
AUTHENTIK_EMAIL__USE_TLS=false
# Use SSL
AUTHENTIK_EMAIL__USE_SSL=false
AUTHENTIK_EMAIL__TIMEOUT=10
# Email address authentik will send from, should have a correct @domain
AUTHENTIK_EMAIL__FROM=authentik@localhost
Configuracion de OpenLDAP
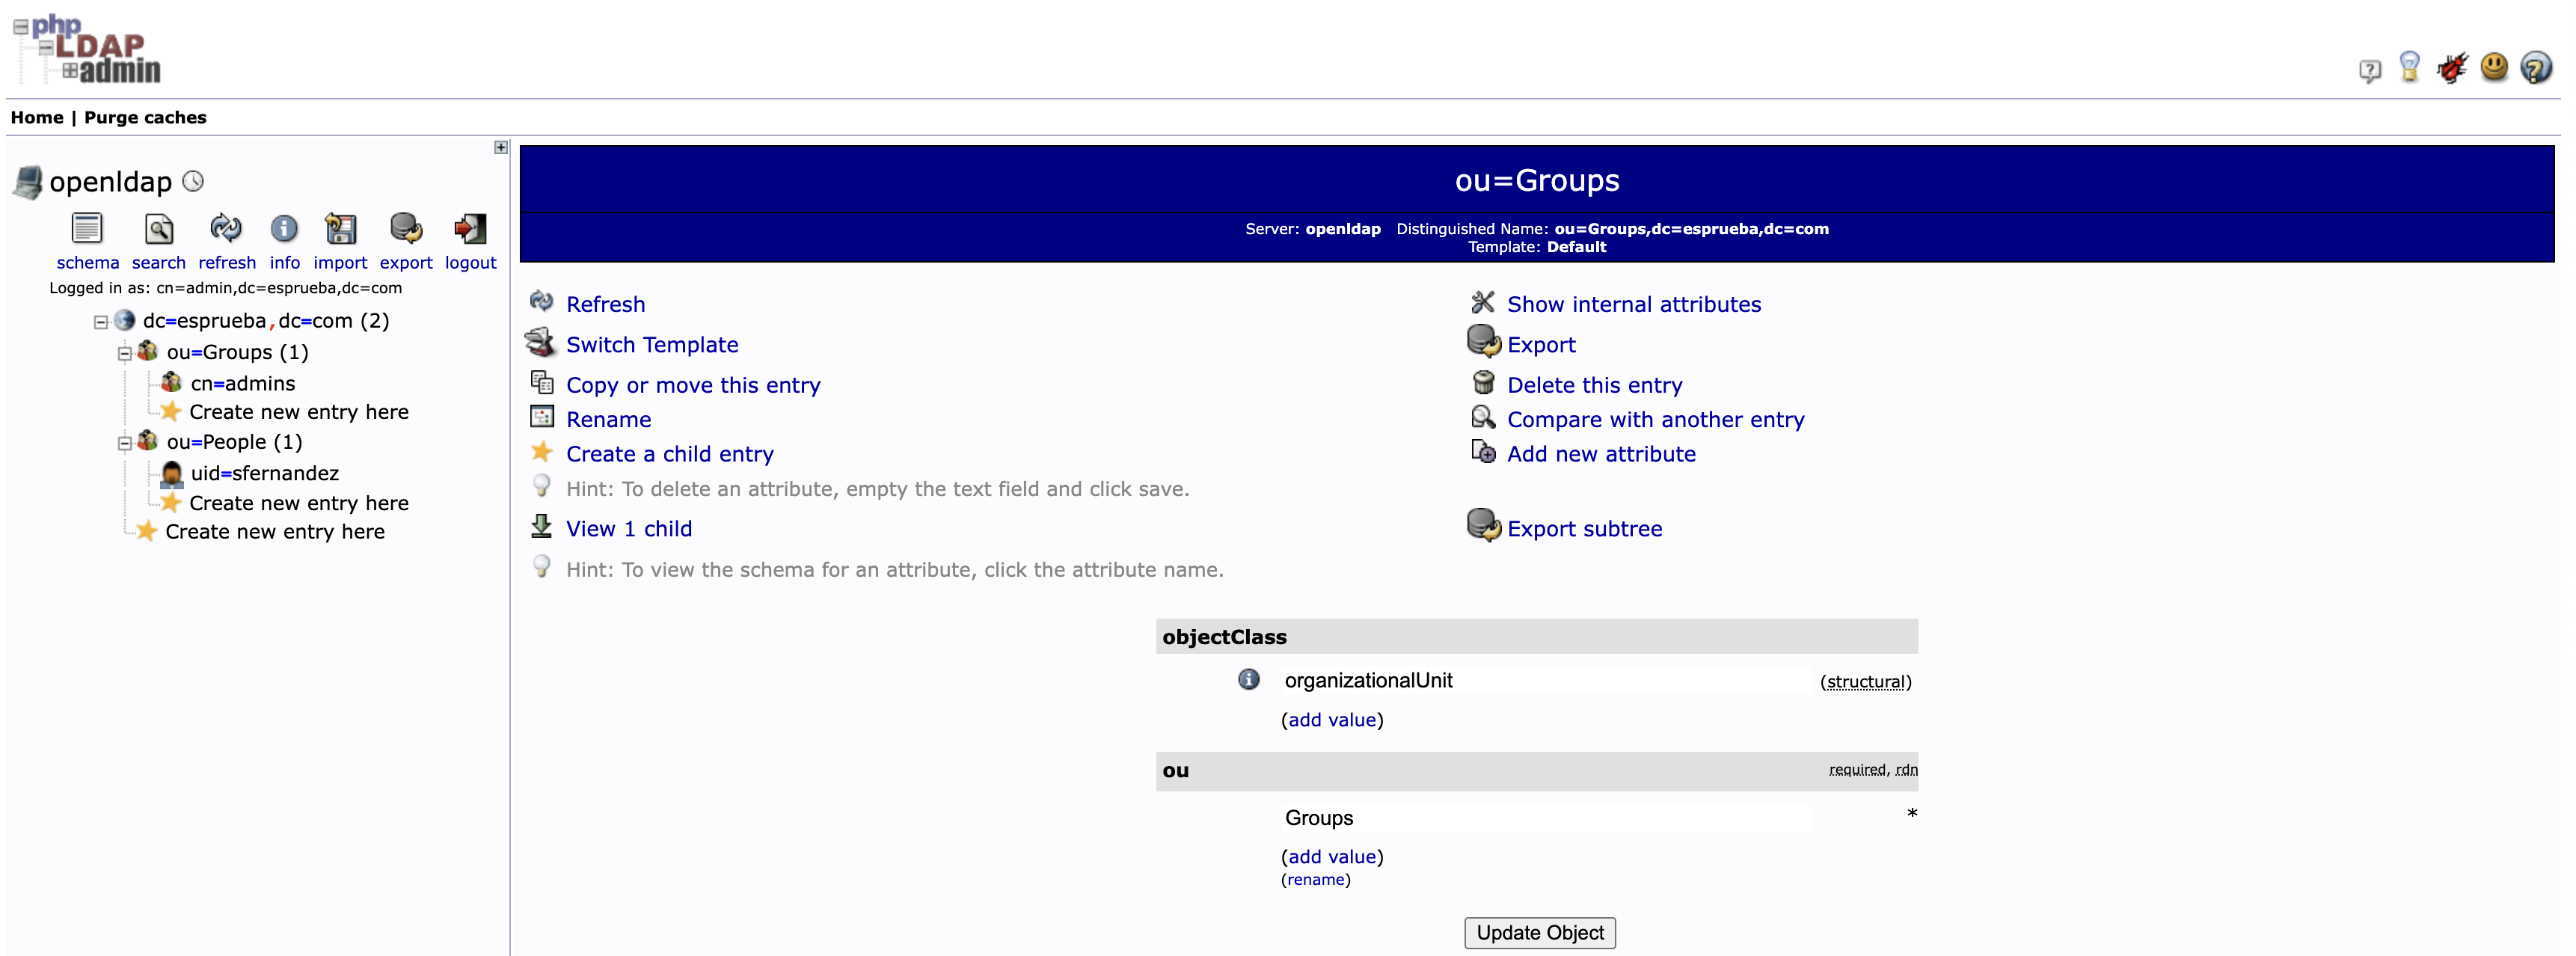
Vamos a popular nuestro OpenLDAP.Para ello generamos un archivo .ldif que creara la OU=Groups, OU=People & un Grupo admins y un usuario de prueba UID=sfernandez.
# ou_usuarios.ldif
dn: ou=People,dc=esprueba,dc=com
objectClass: organizationalUnit
ou: People

dn: ou=Groups,dc=esprueba,dc=com
objectClass: organizationalUnit
ou: Groups

# Crear grupo de prueba
dn: cn=admins,ou=Groups,dc=esprueba,dc=com
objectClass: top
objectClass: posixGroup
gidNumber: 10000
cn: admins

# Crear usuario de prueba
dn: uid=sfernandez,ou=People,dc=esprueba,dc=com
objectClass: inetOrgPerson
objectClass: posixAccount
objectClass: top
uid: sfernandez
sn: Fernandez
givenName: Santiago
cn: Santiago Fernandez
displayName: Santiago Fernandez
uidNumber: 1001
gidNumber: 10000
homeDirectory: /home/sfernandez
userPassword: {SSHA}passwordhash
Antes de agregar la configuracion corremos el comando para generar la constrasena de sfernandez y luego lo pegamos en el ldif.
slappasswd
Modificamos el archivo donde dice userPassword.
ldapadd -x -D "cn=admin,dc=esprueba,dc=com" -W -f ou_usuarios.ldif -W
¡Listo! Ya tenemos al usuario sfernandez dentro de OU=People. Vamos a verificarlo.
Configuracion Authentik
Podemos ir a nuestro navegador favorito y acceder a Authentik.

Para la configuración inicial del usuario admin, deben ingresar al link: http://{IP_ADDRESS}:{PORT}/if/flow/initial-setup/.
- username: akadmin
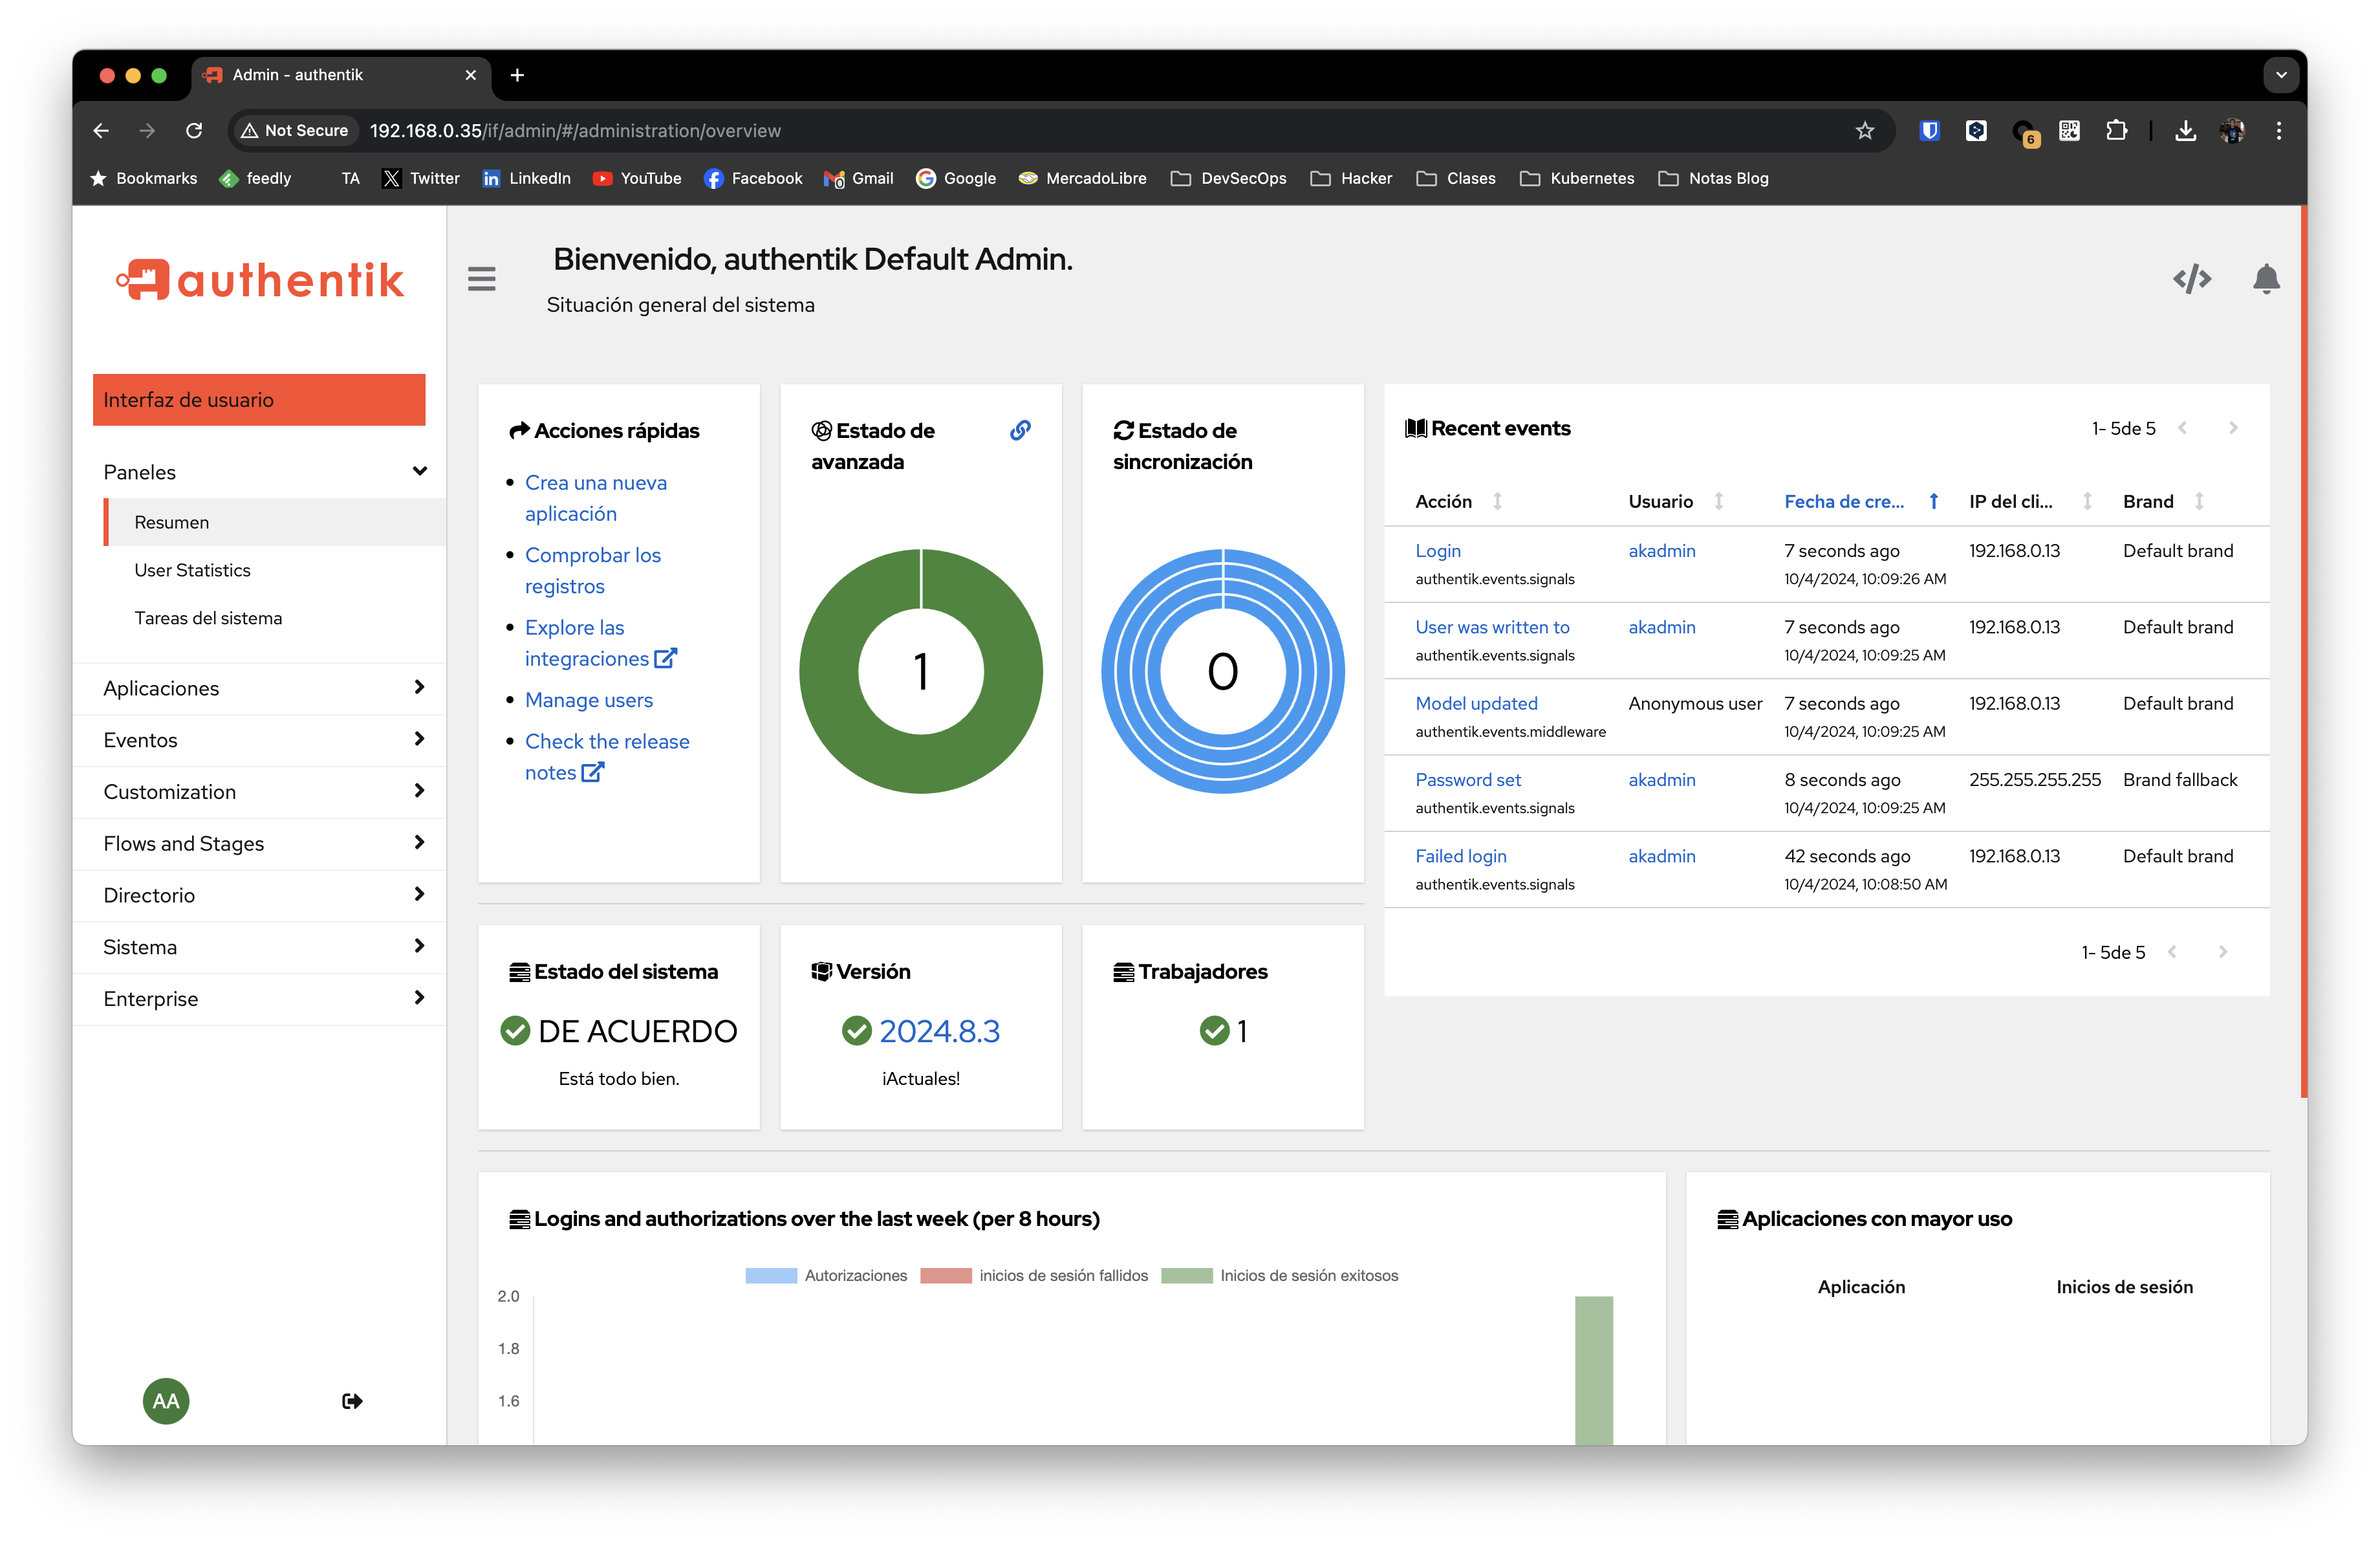
Hacemos el primer login para cambiar la contraseña.
LDAP como Identity Provider
Necesitamos que nuestro LDAP sea una fuente para nuestro manejador de identtidades.
Agregar OpenLDAP como Fuente
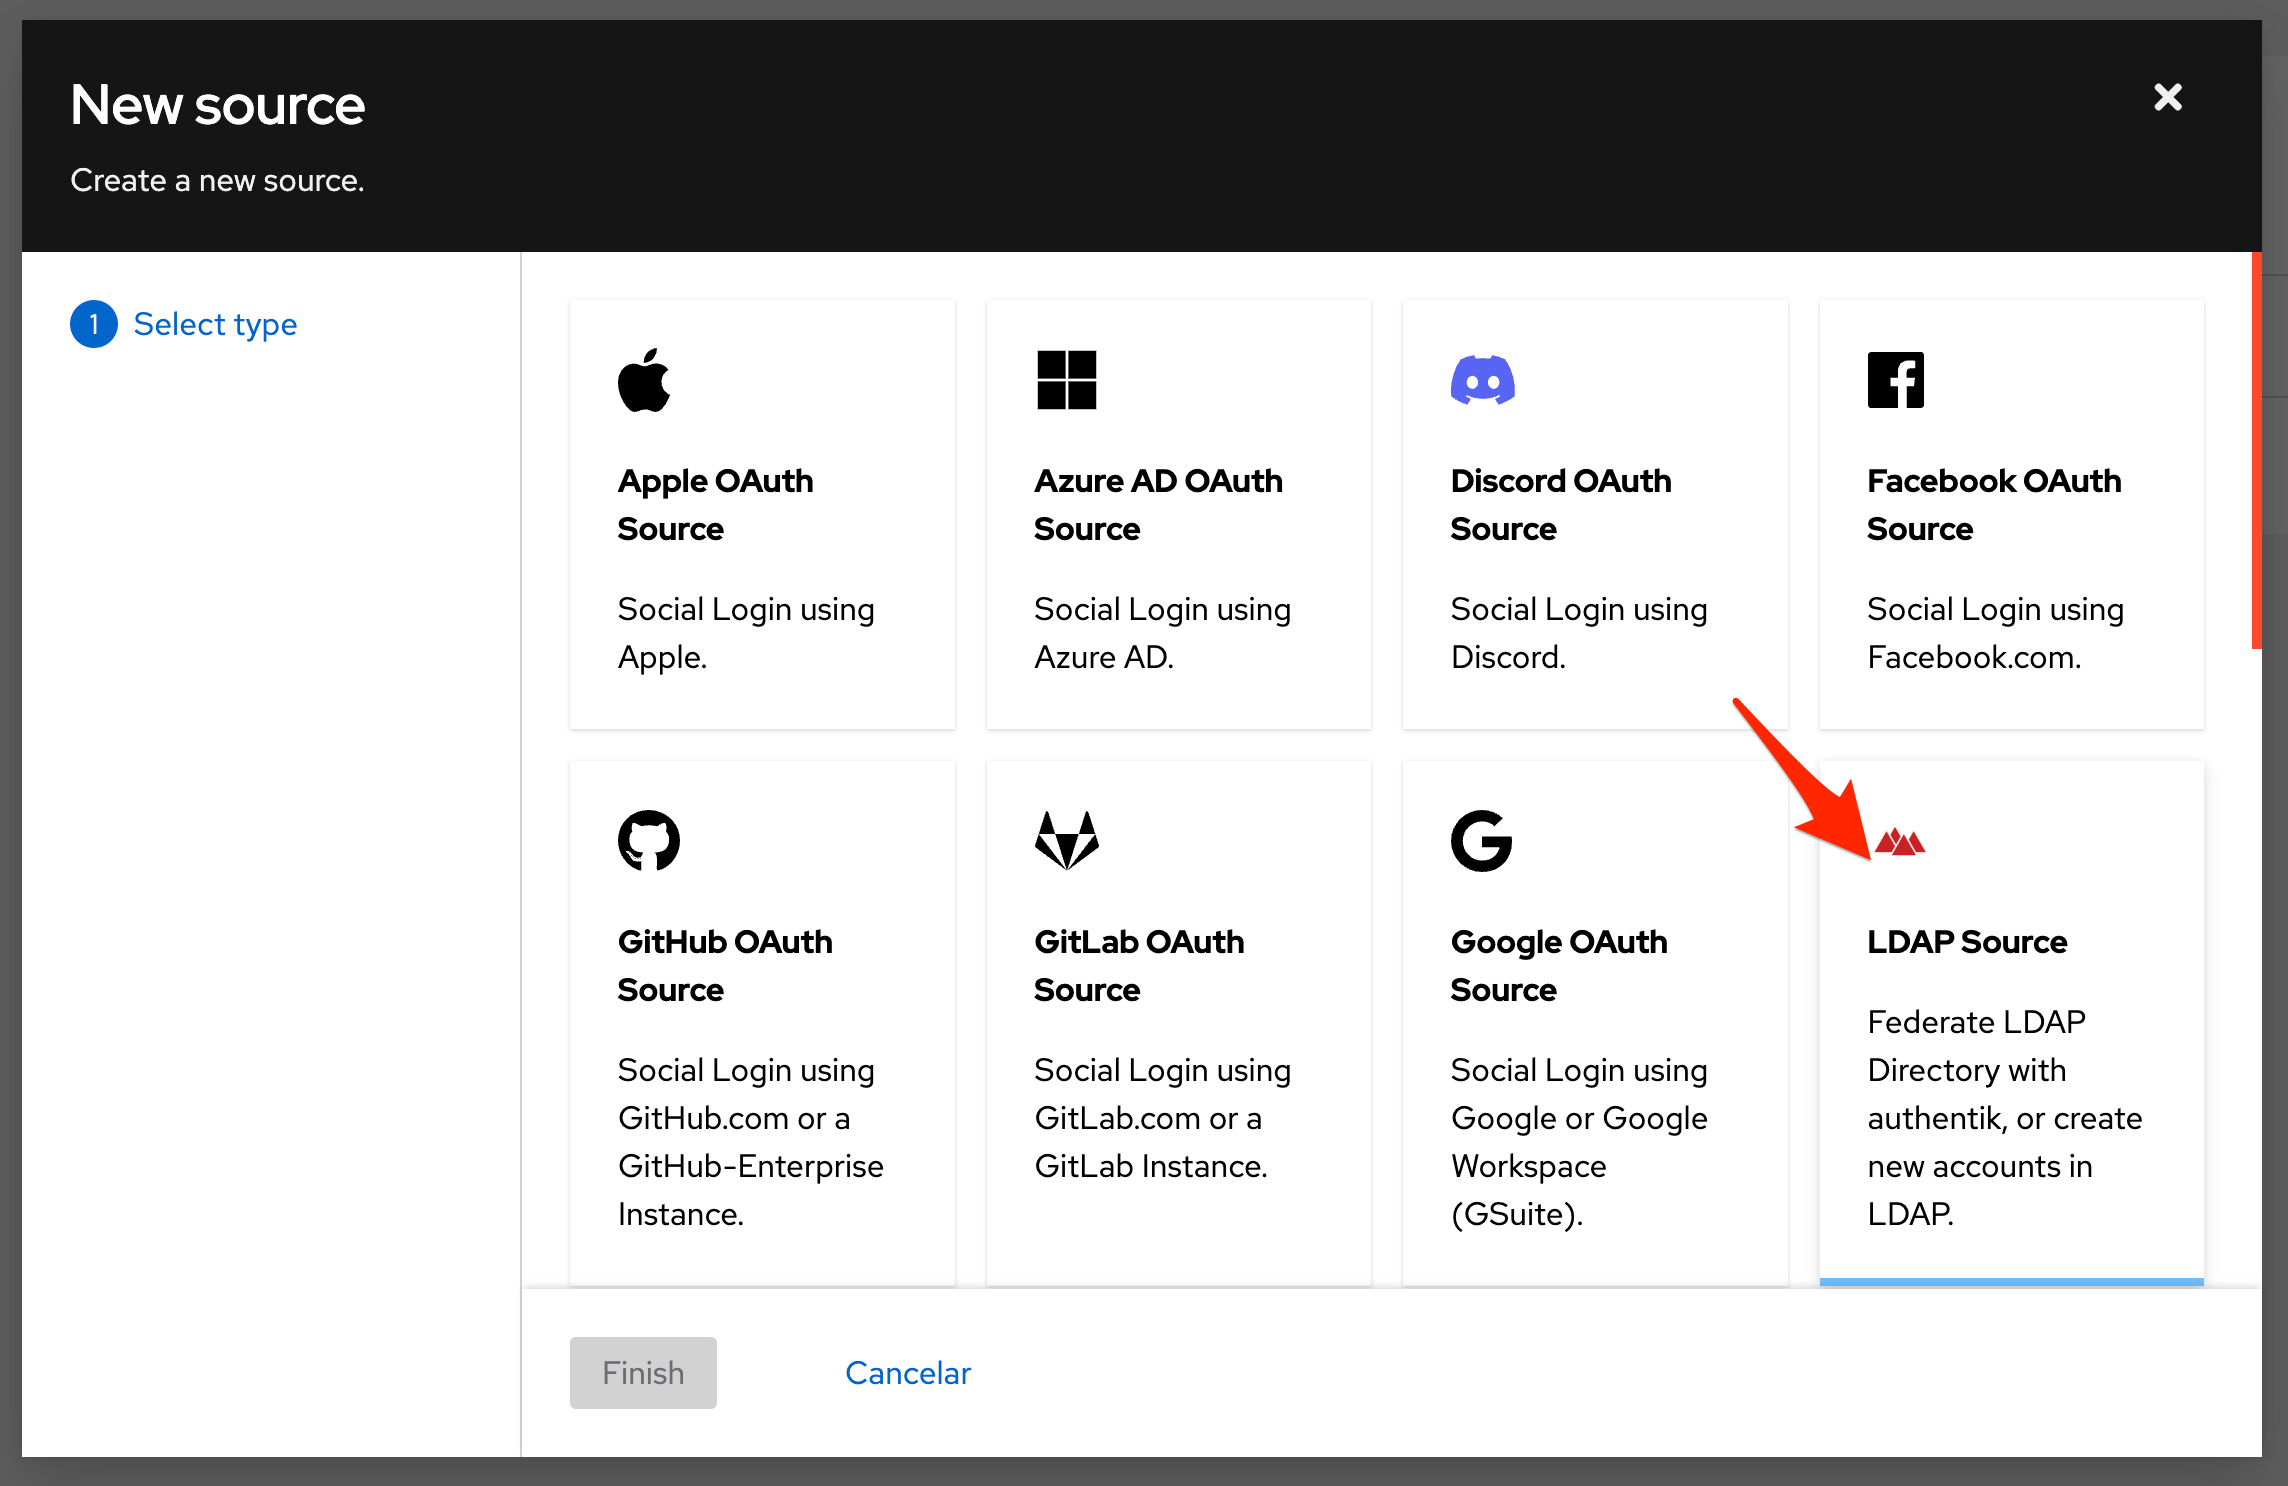
Vamos a Directorio, luego al apartado de Federacion y Social Login.
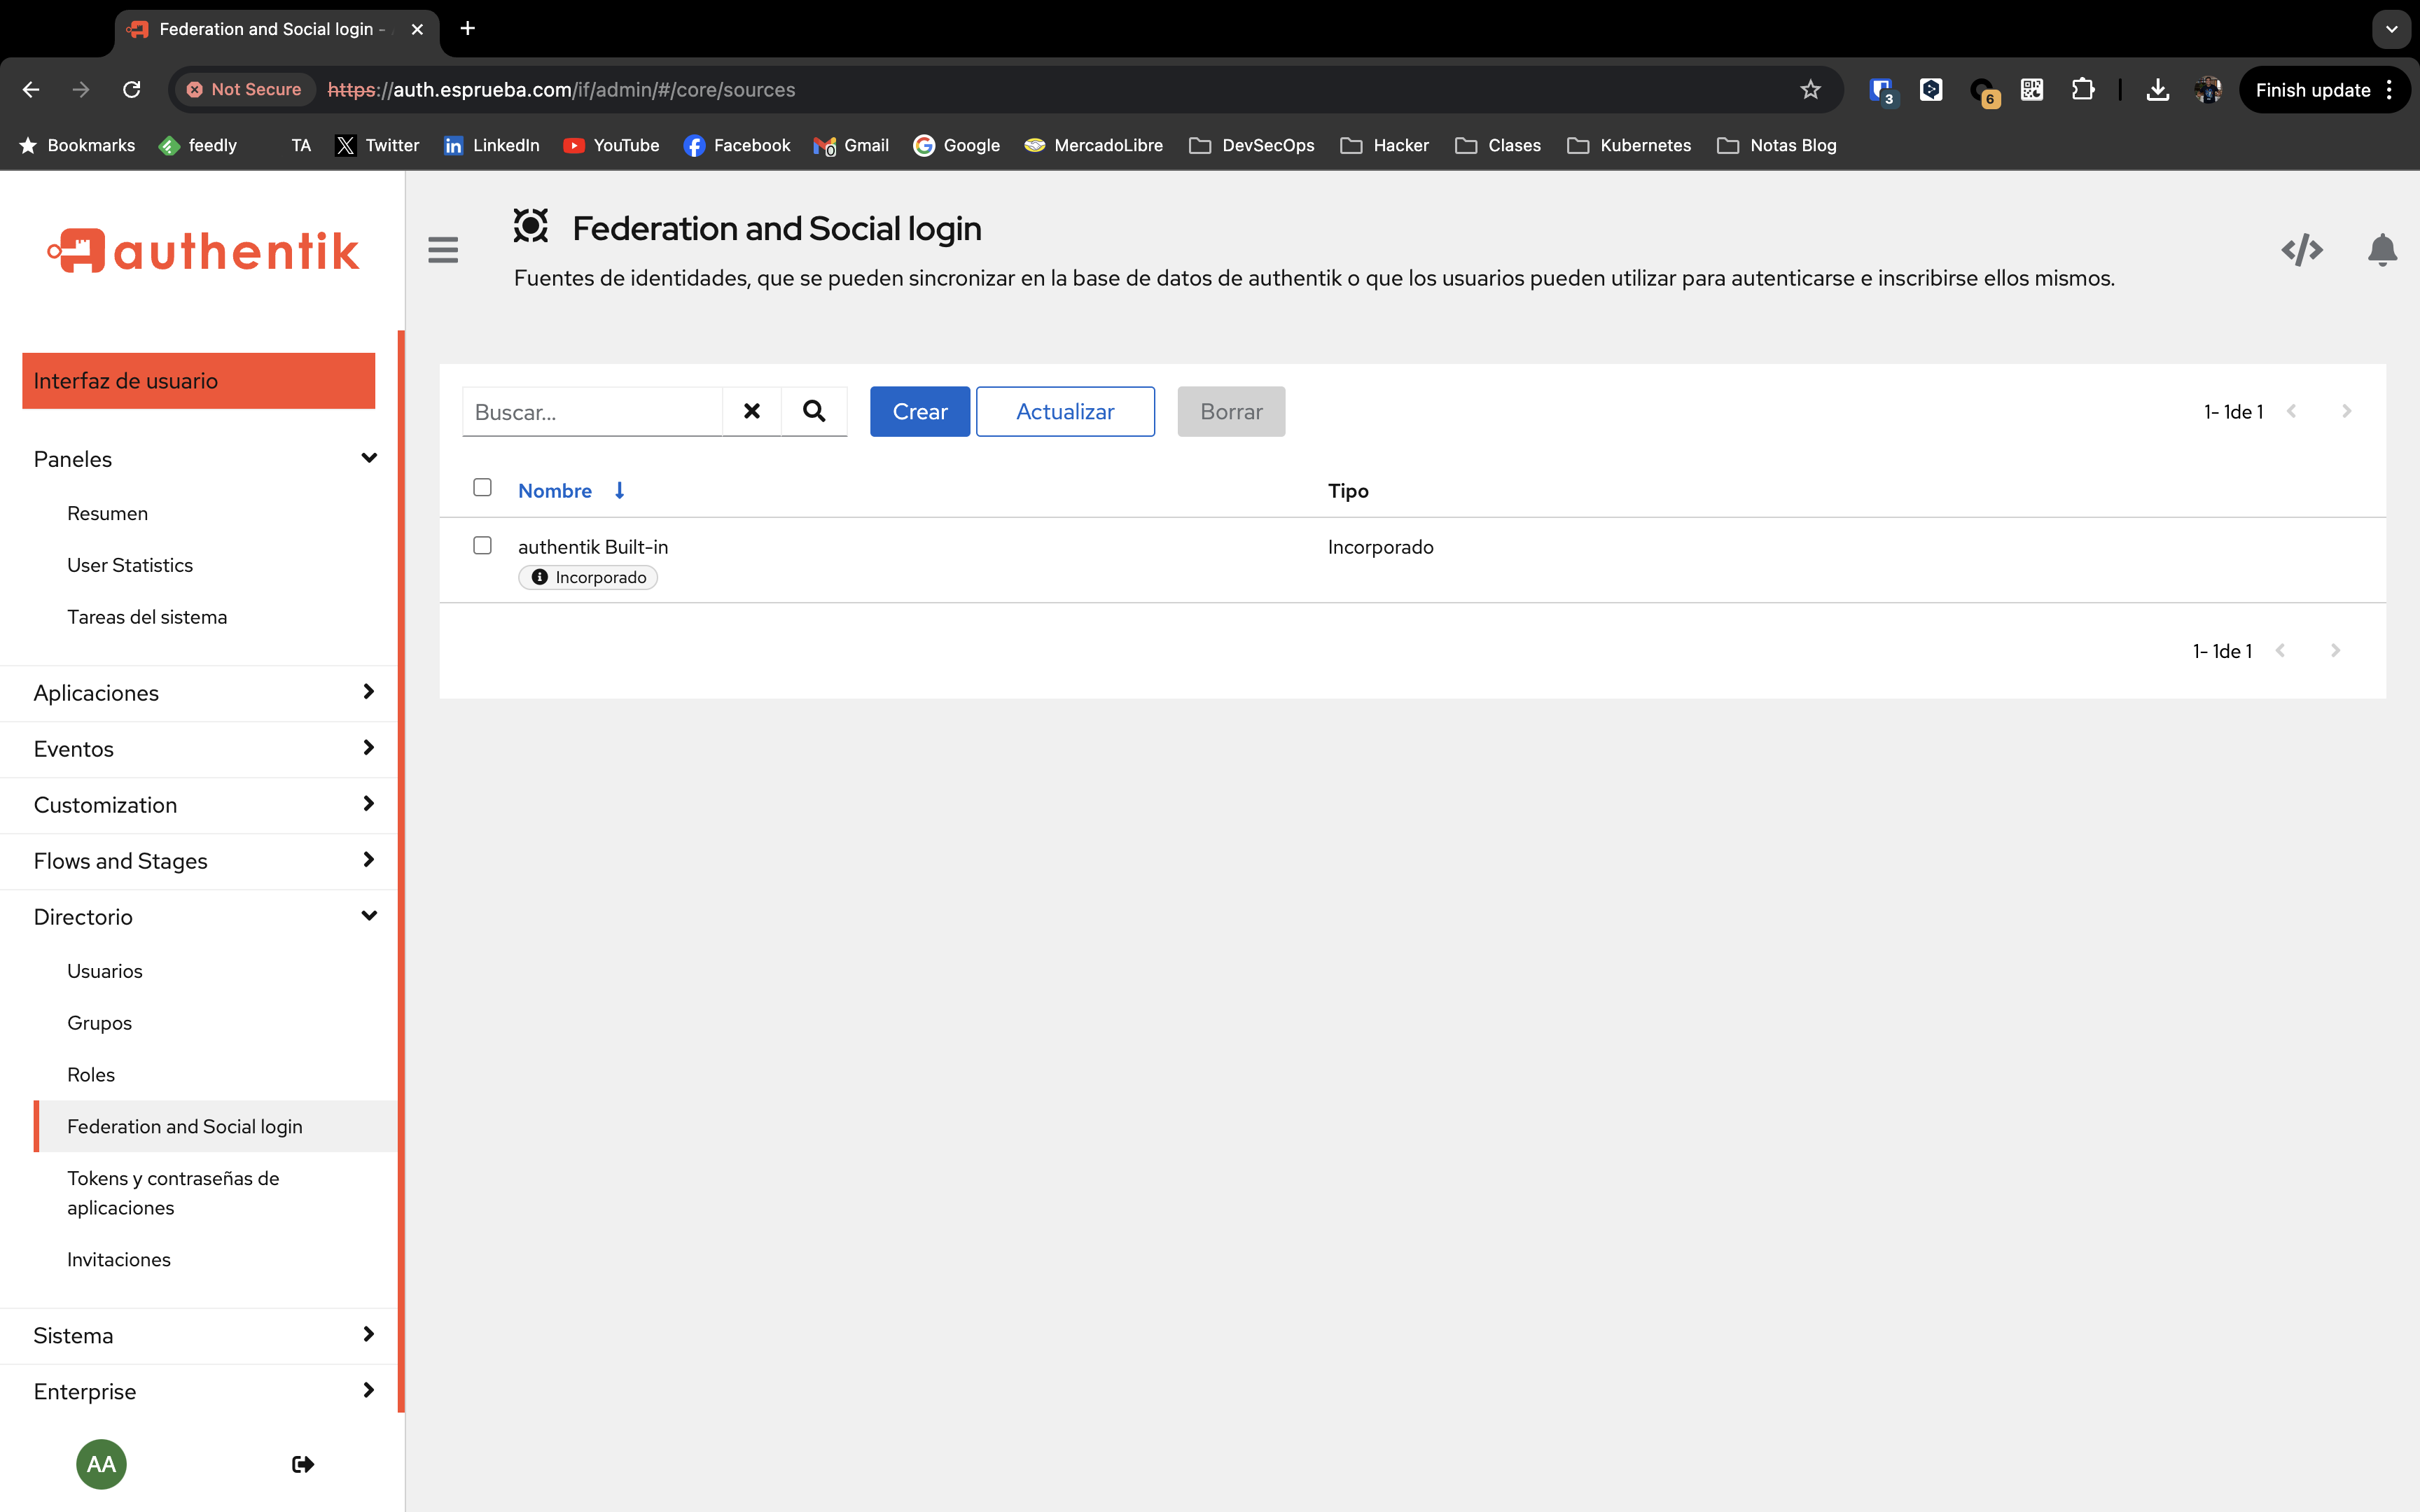
Logicamente vamos a configurar nuestro LDAP, como Source.
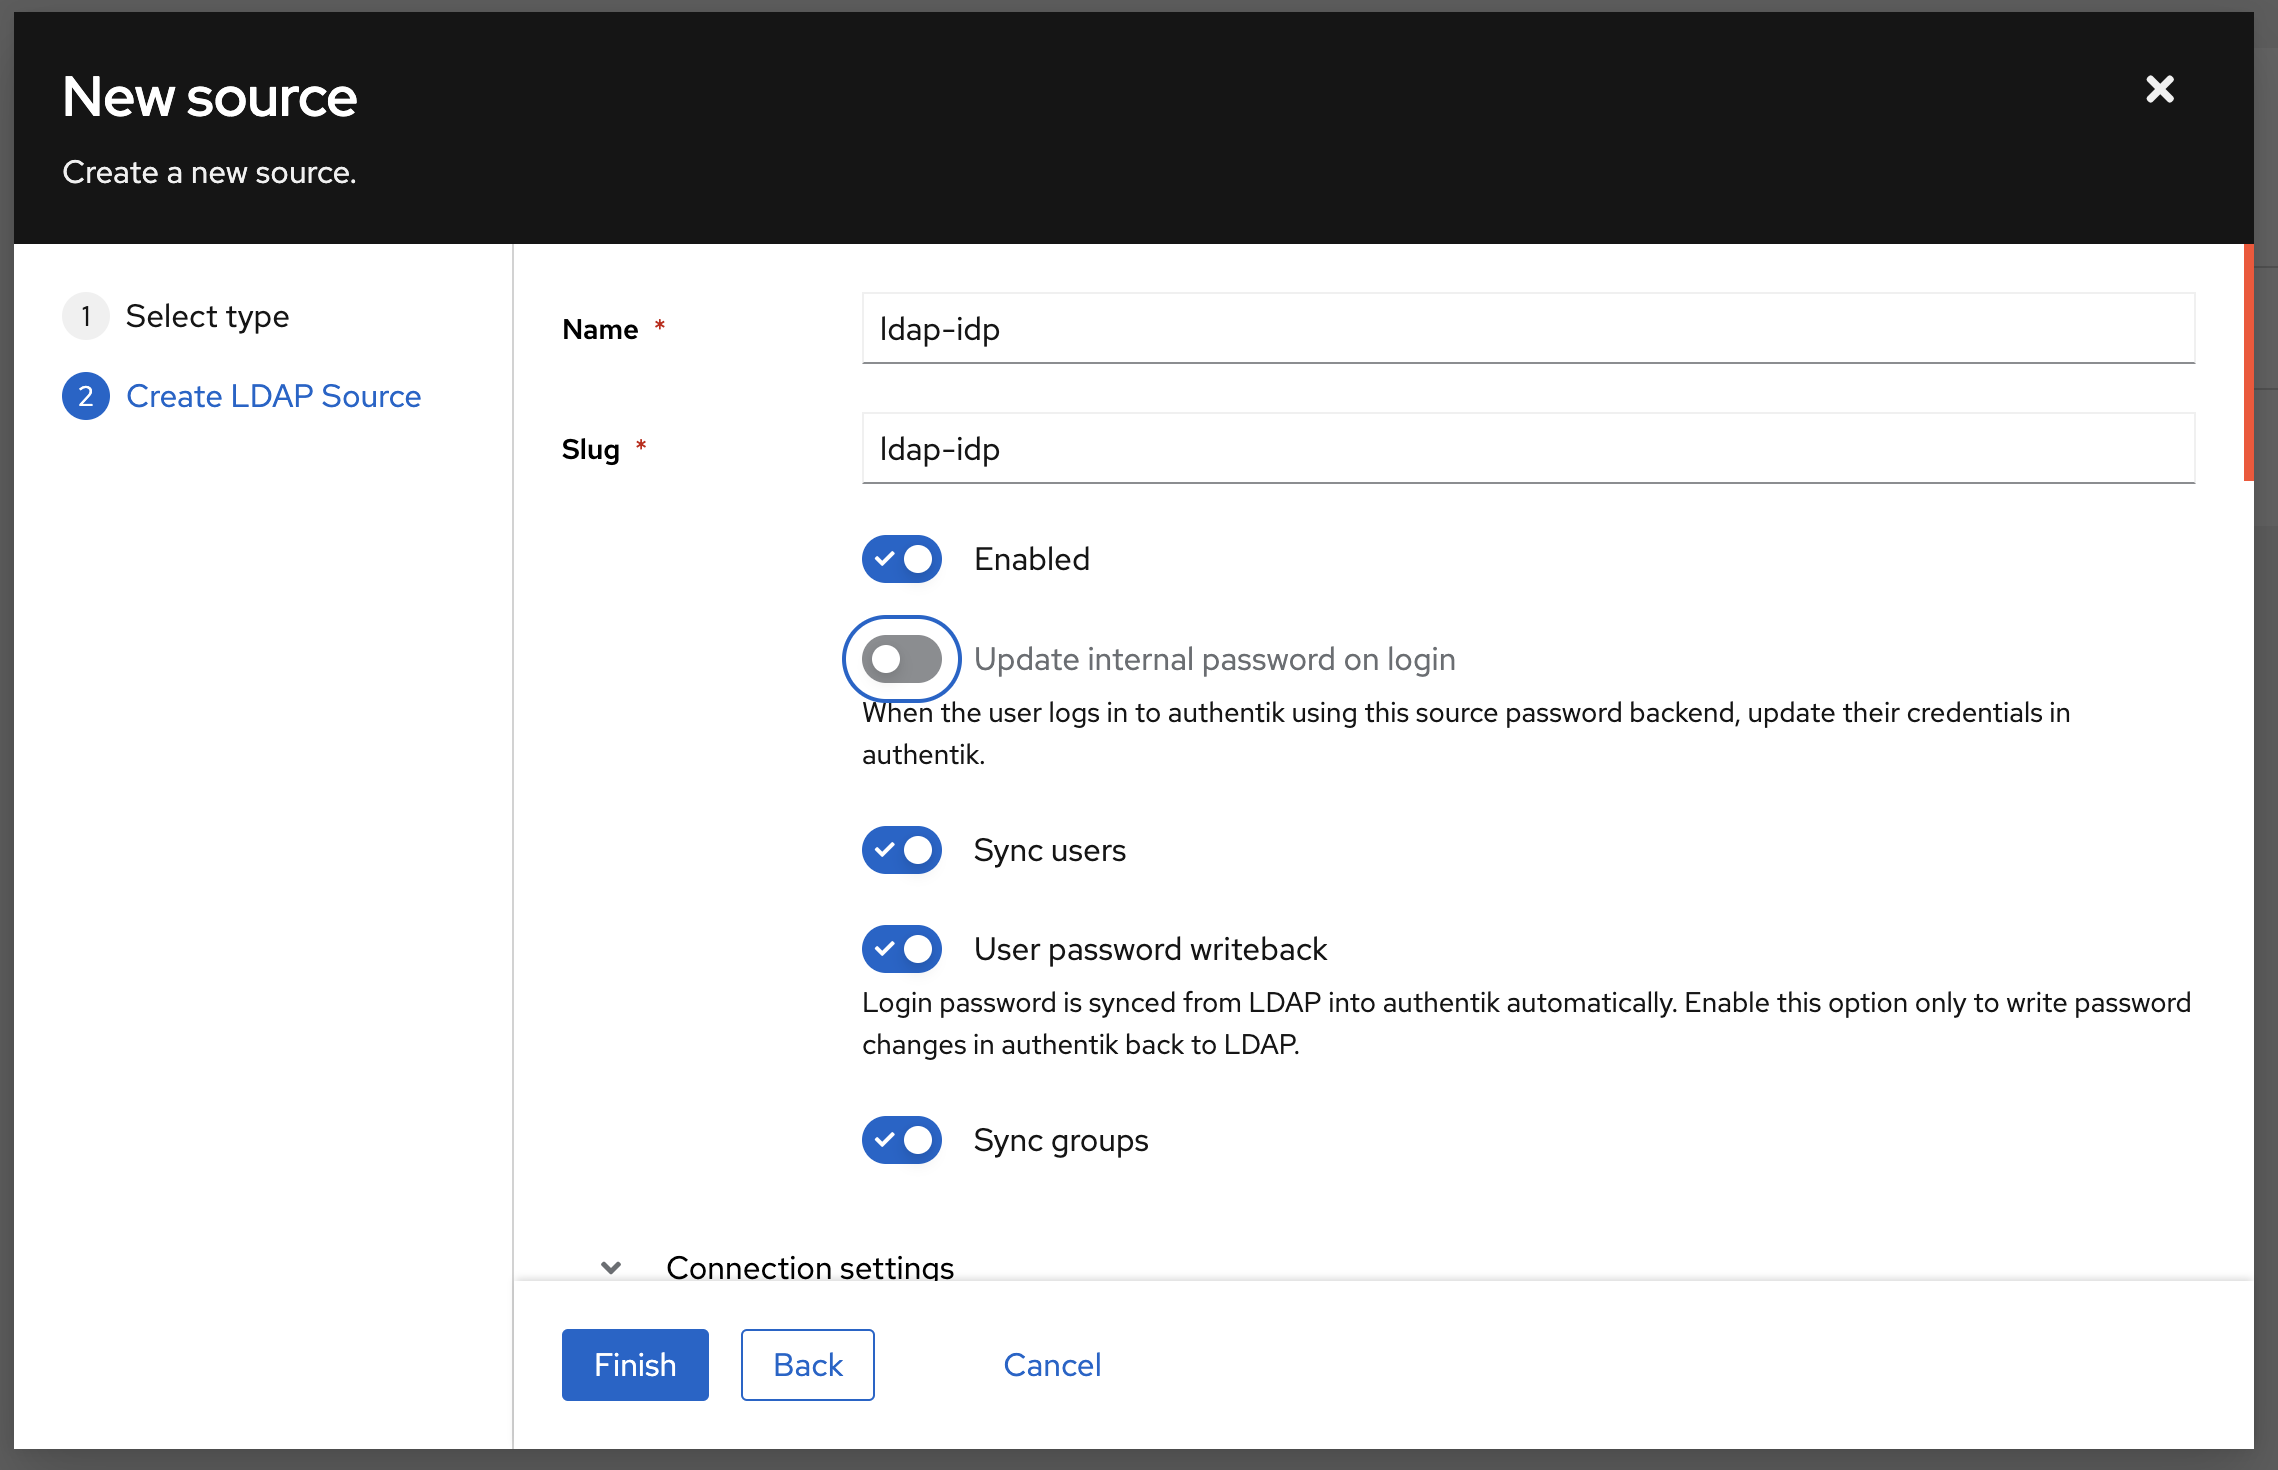
Vamos a identificarlo y dejar estas casillas activadas.
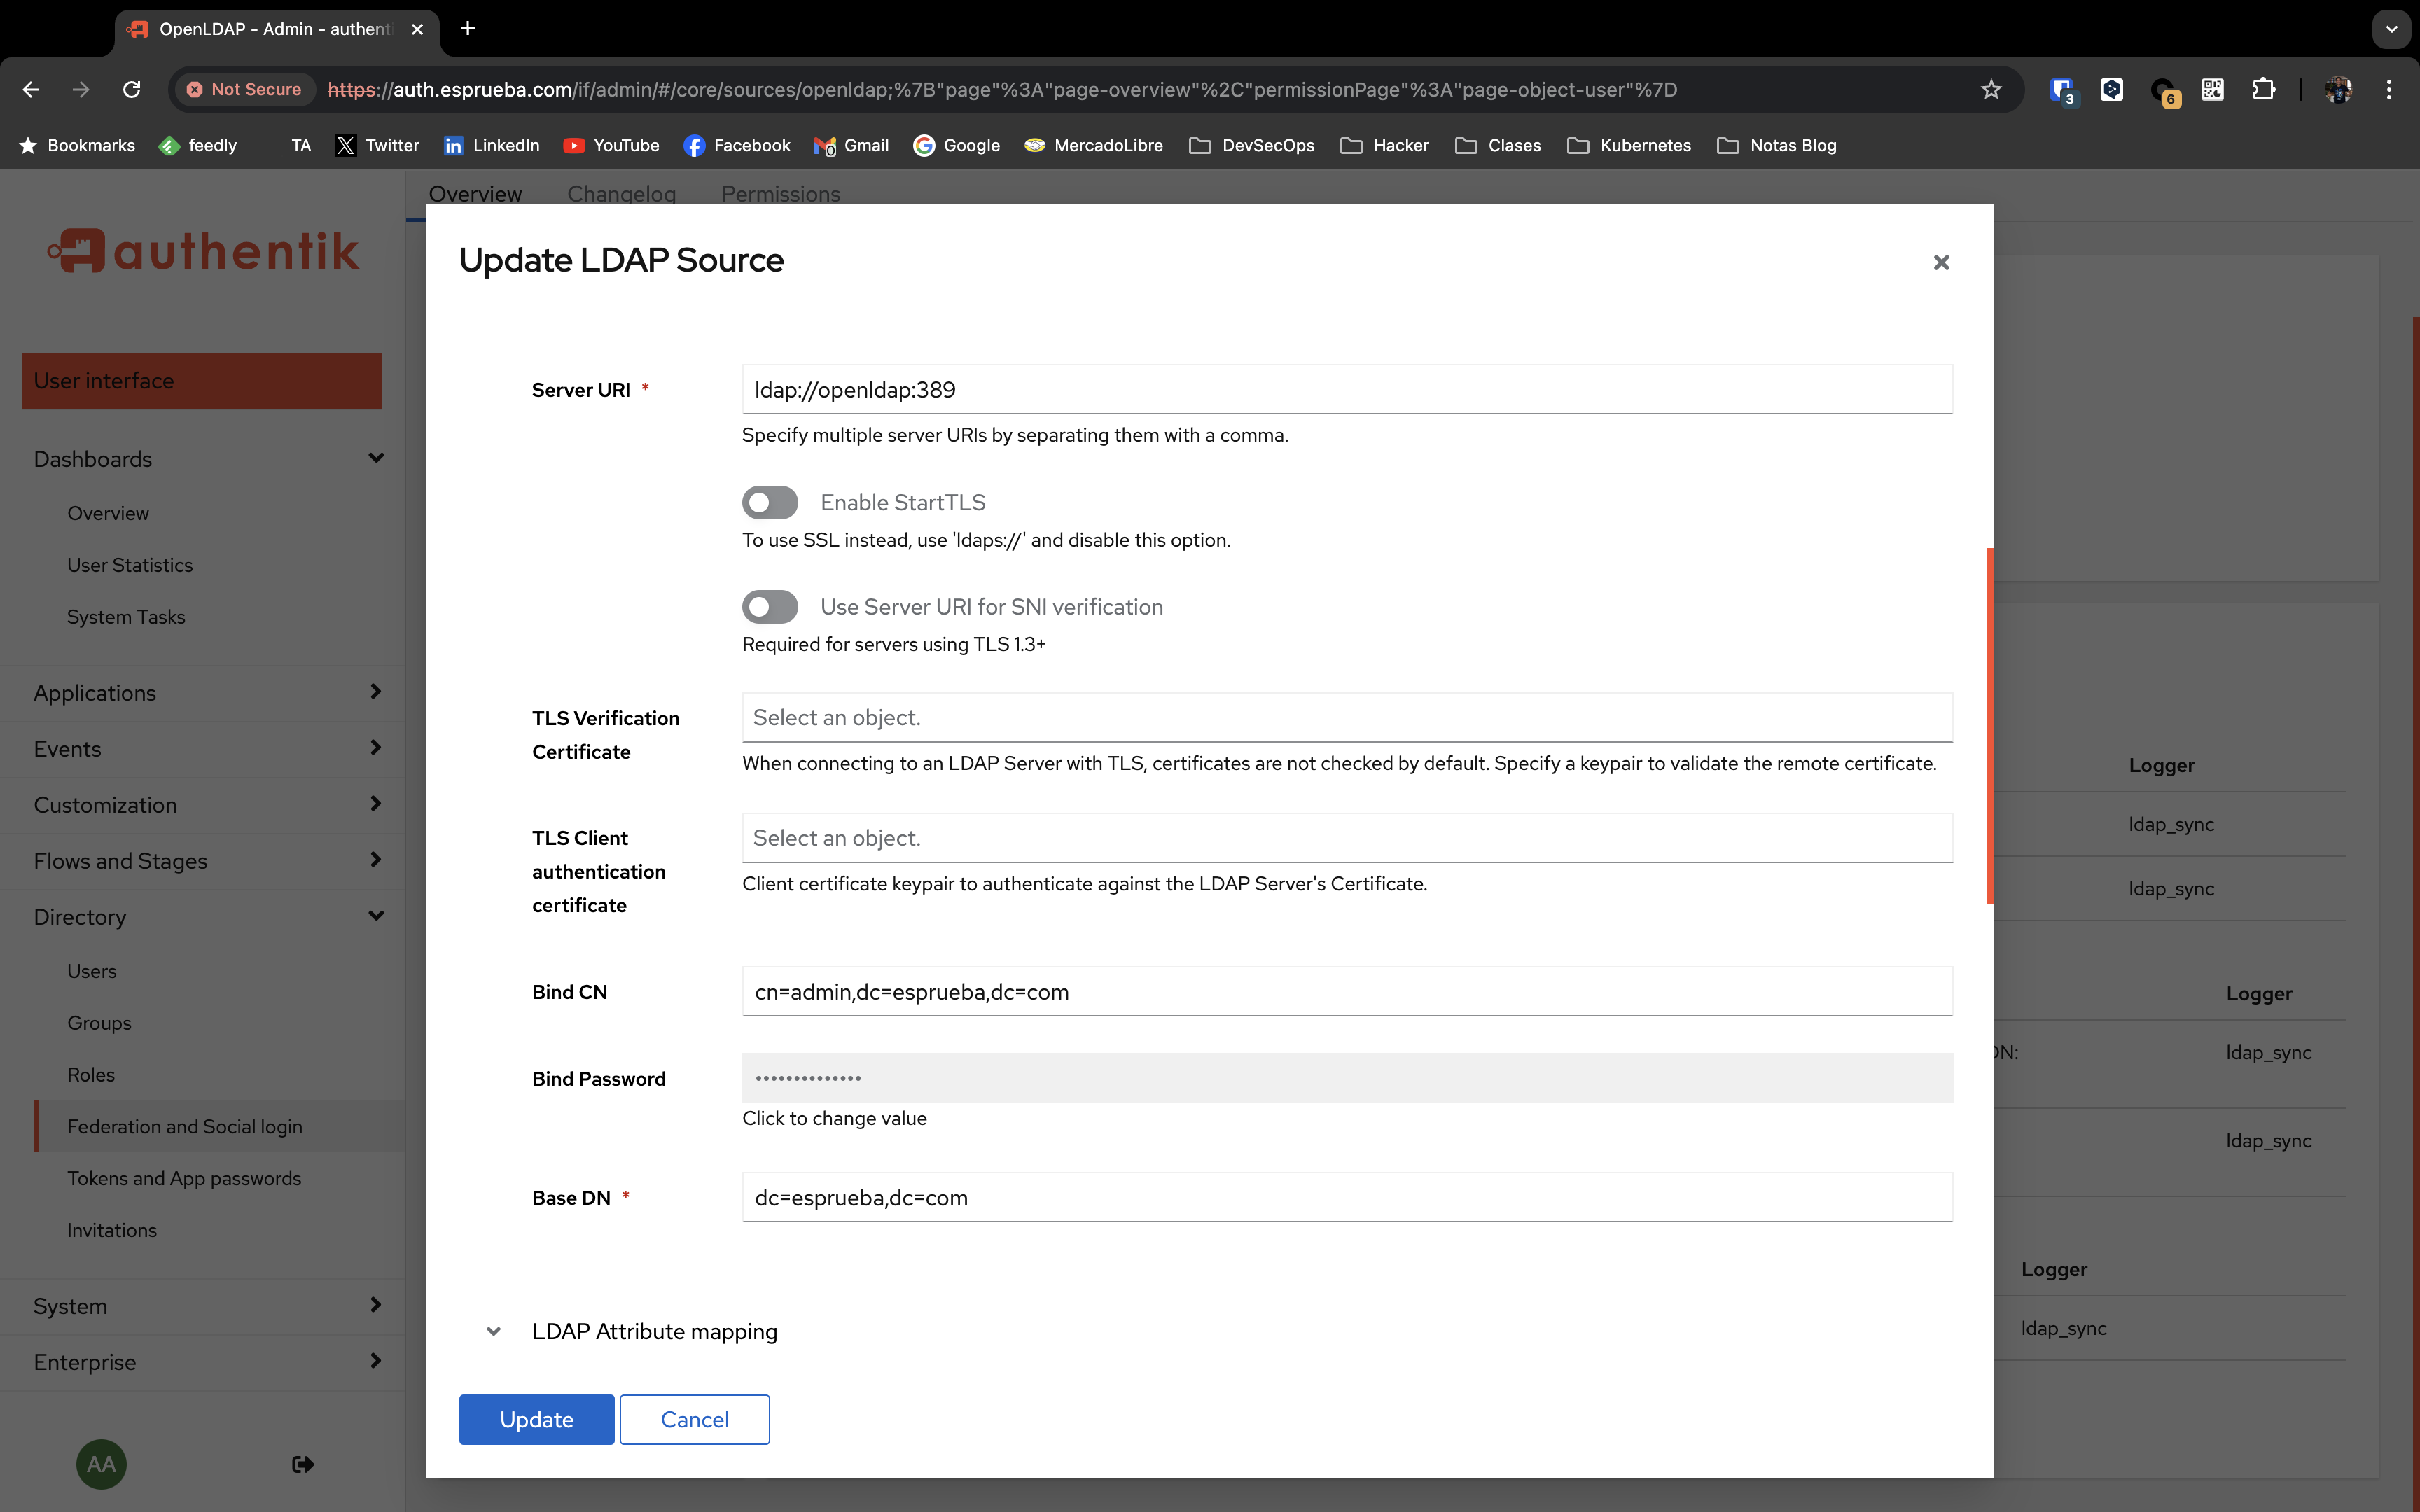
Para conocer la direccion IP de mi servidor LDAP, utilice este comando, sino pondemos el nombre del contenedor.
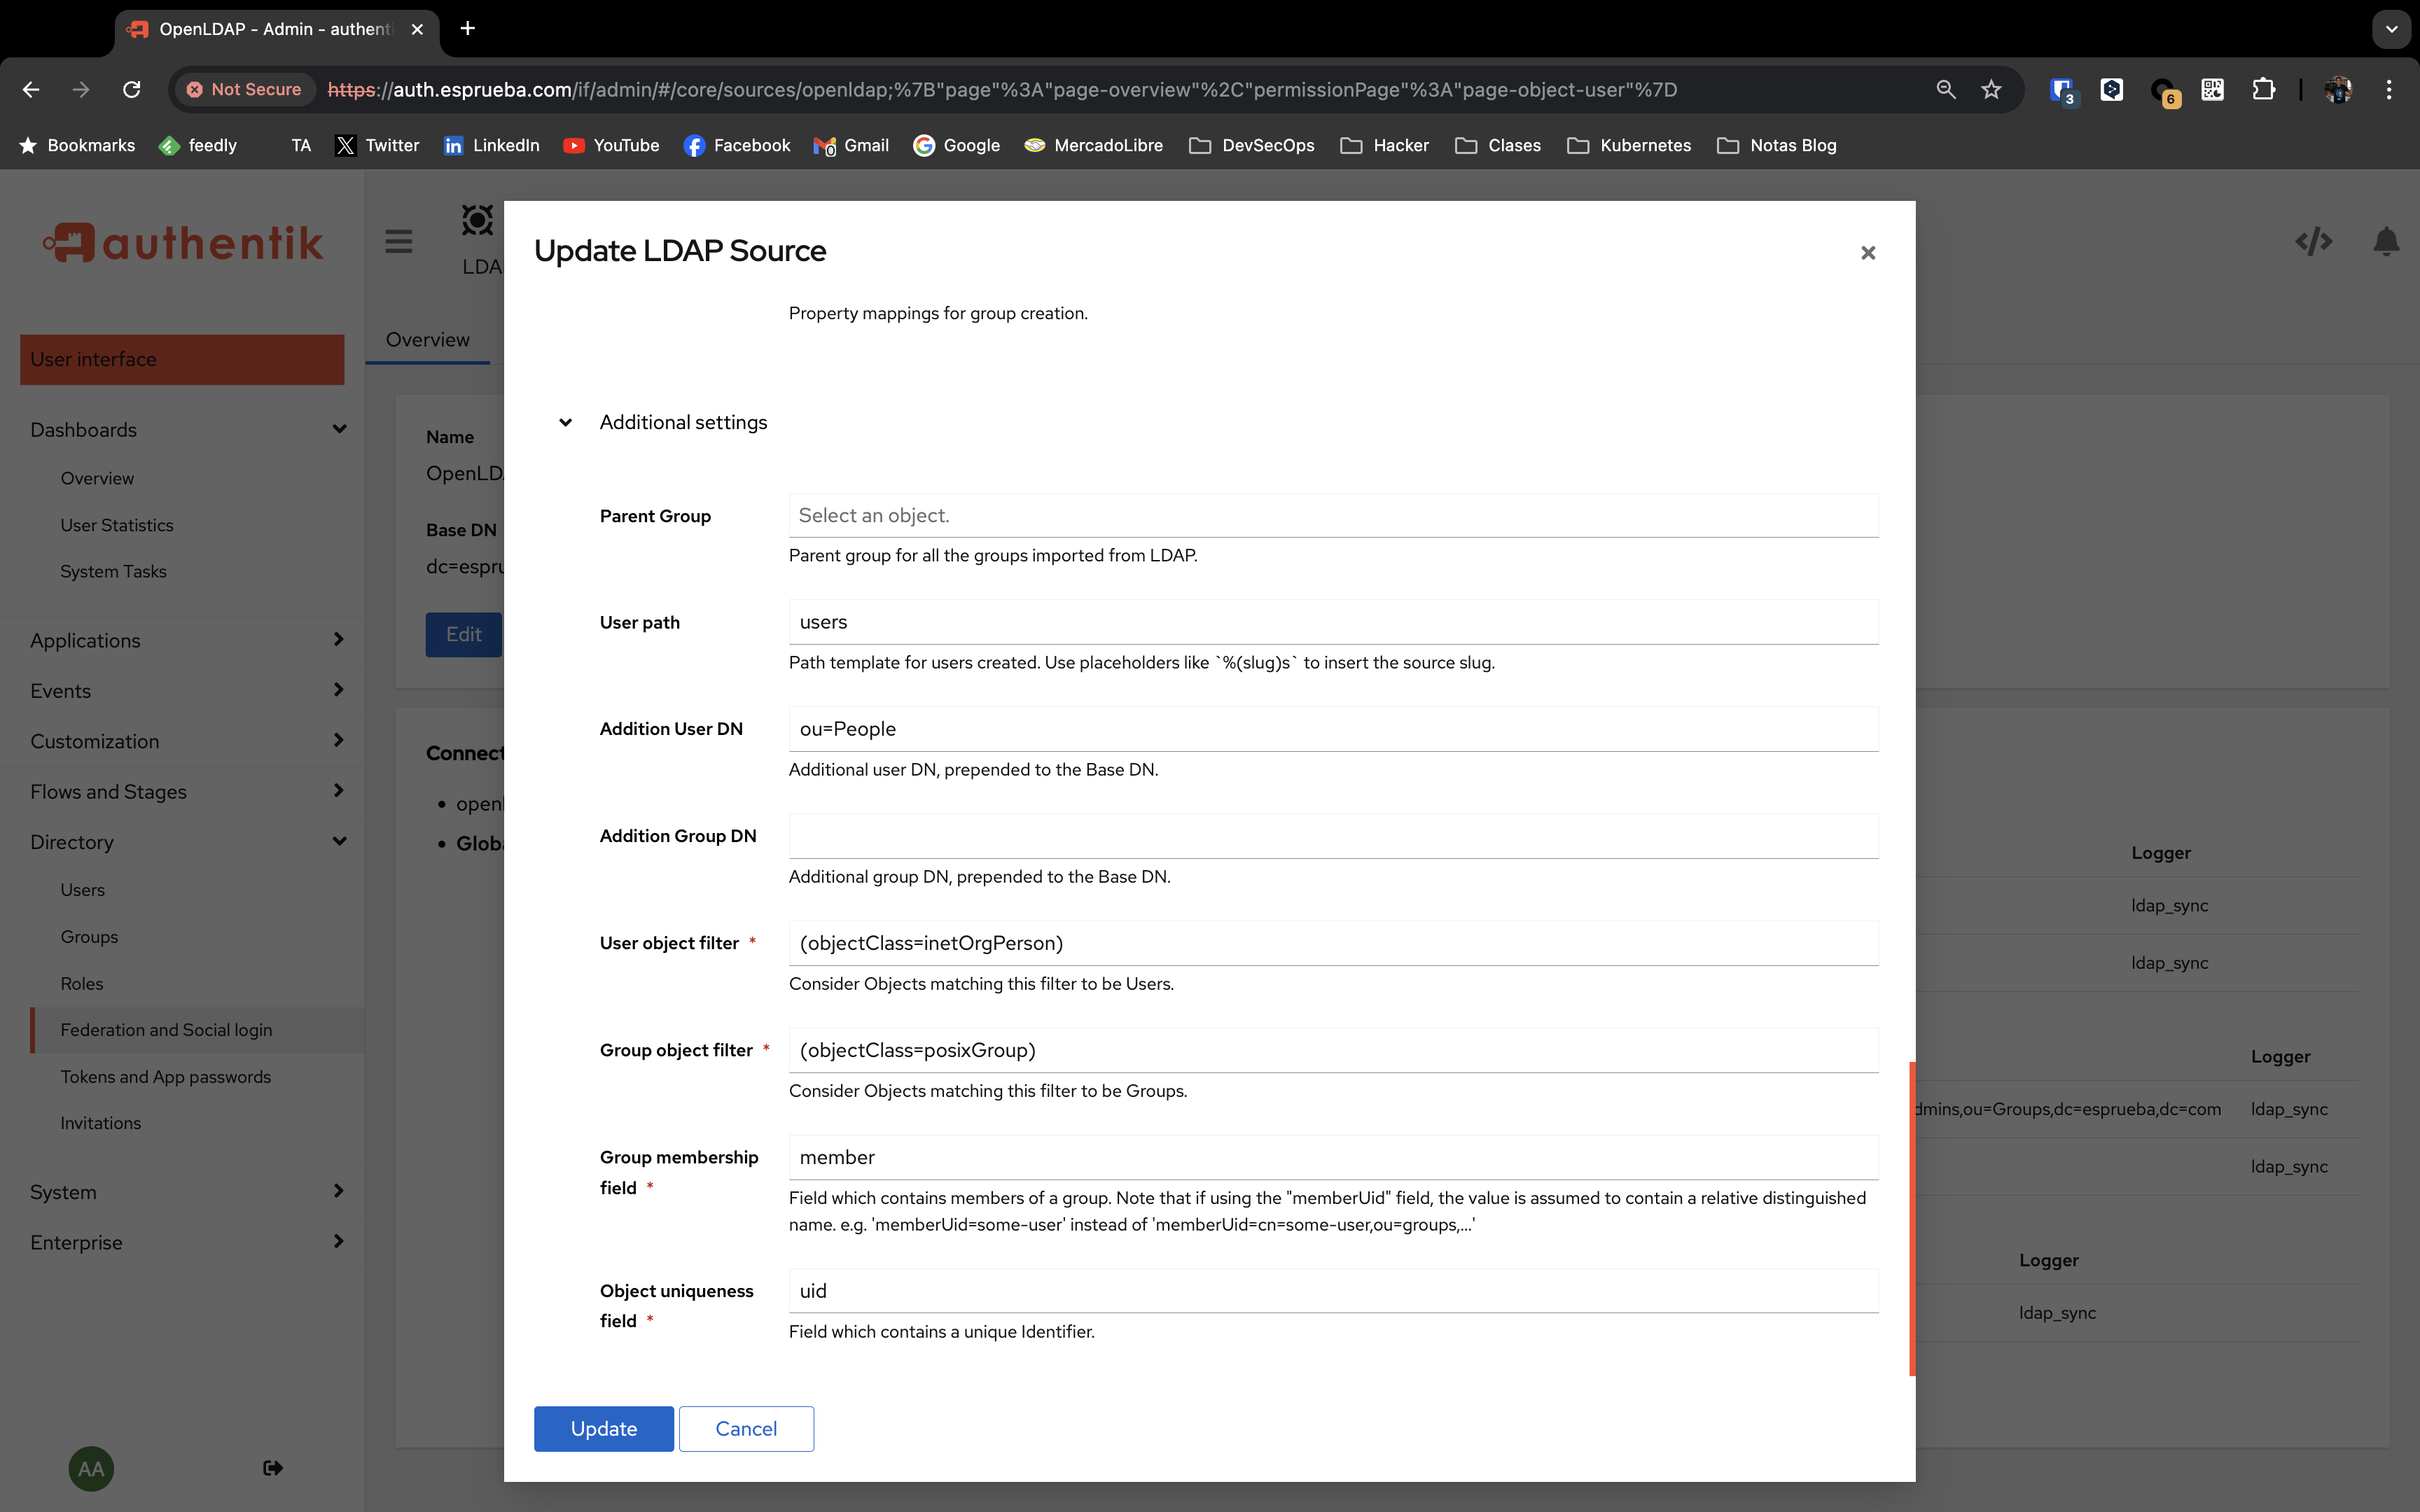
Mi configuracion quedo de esta manera.
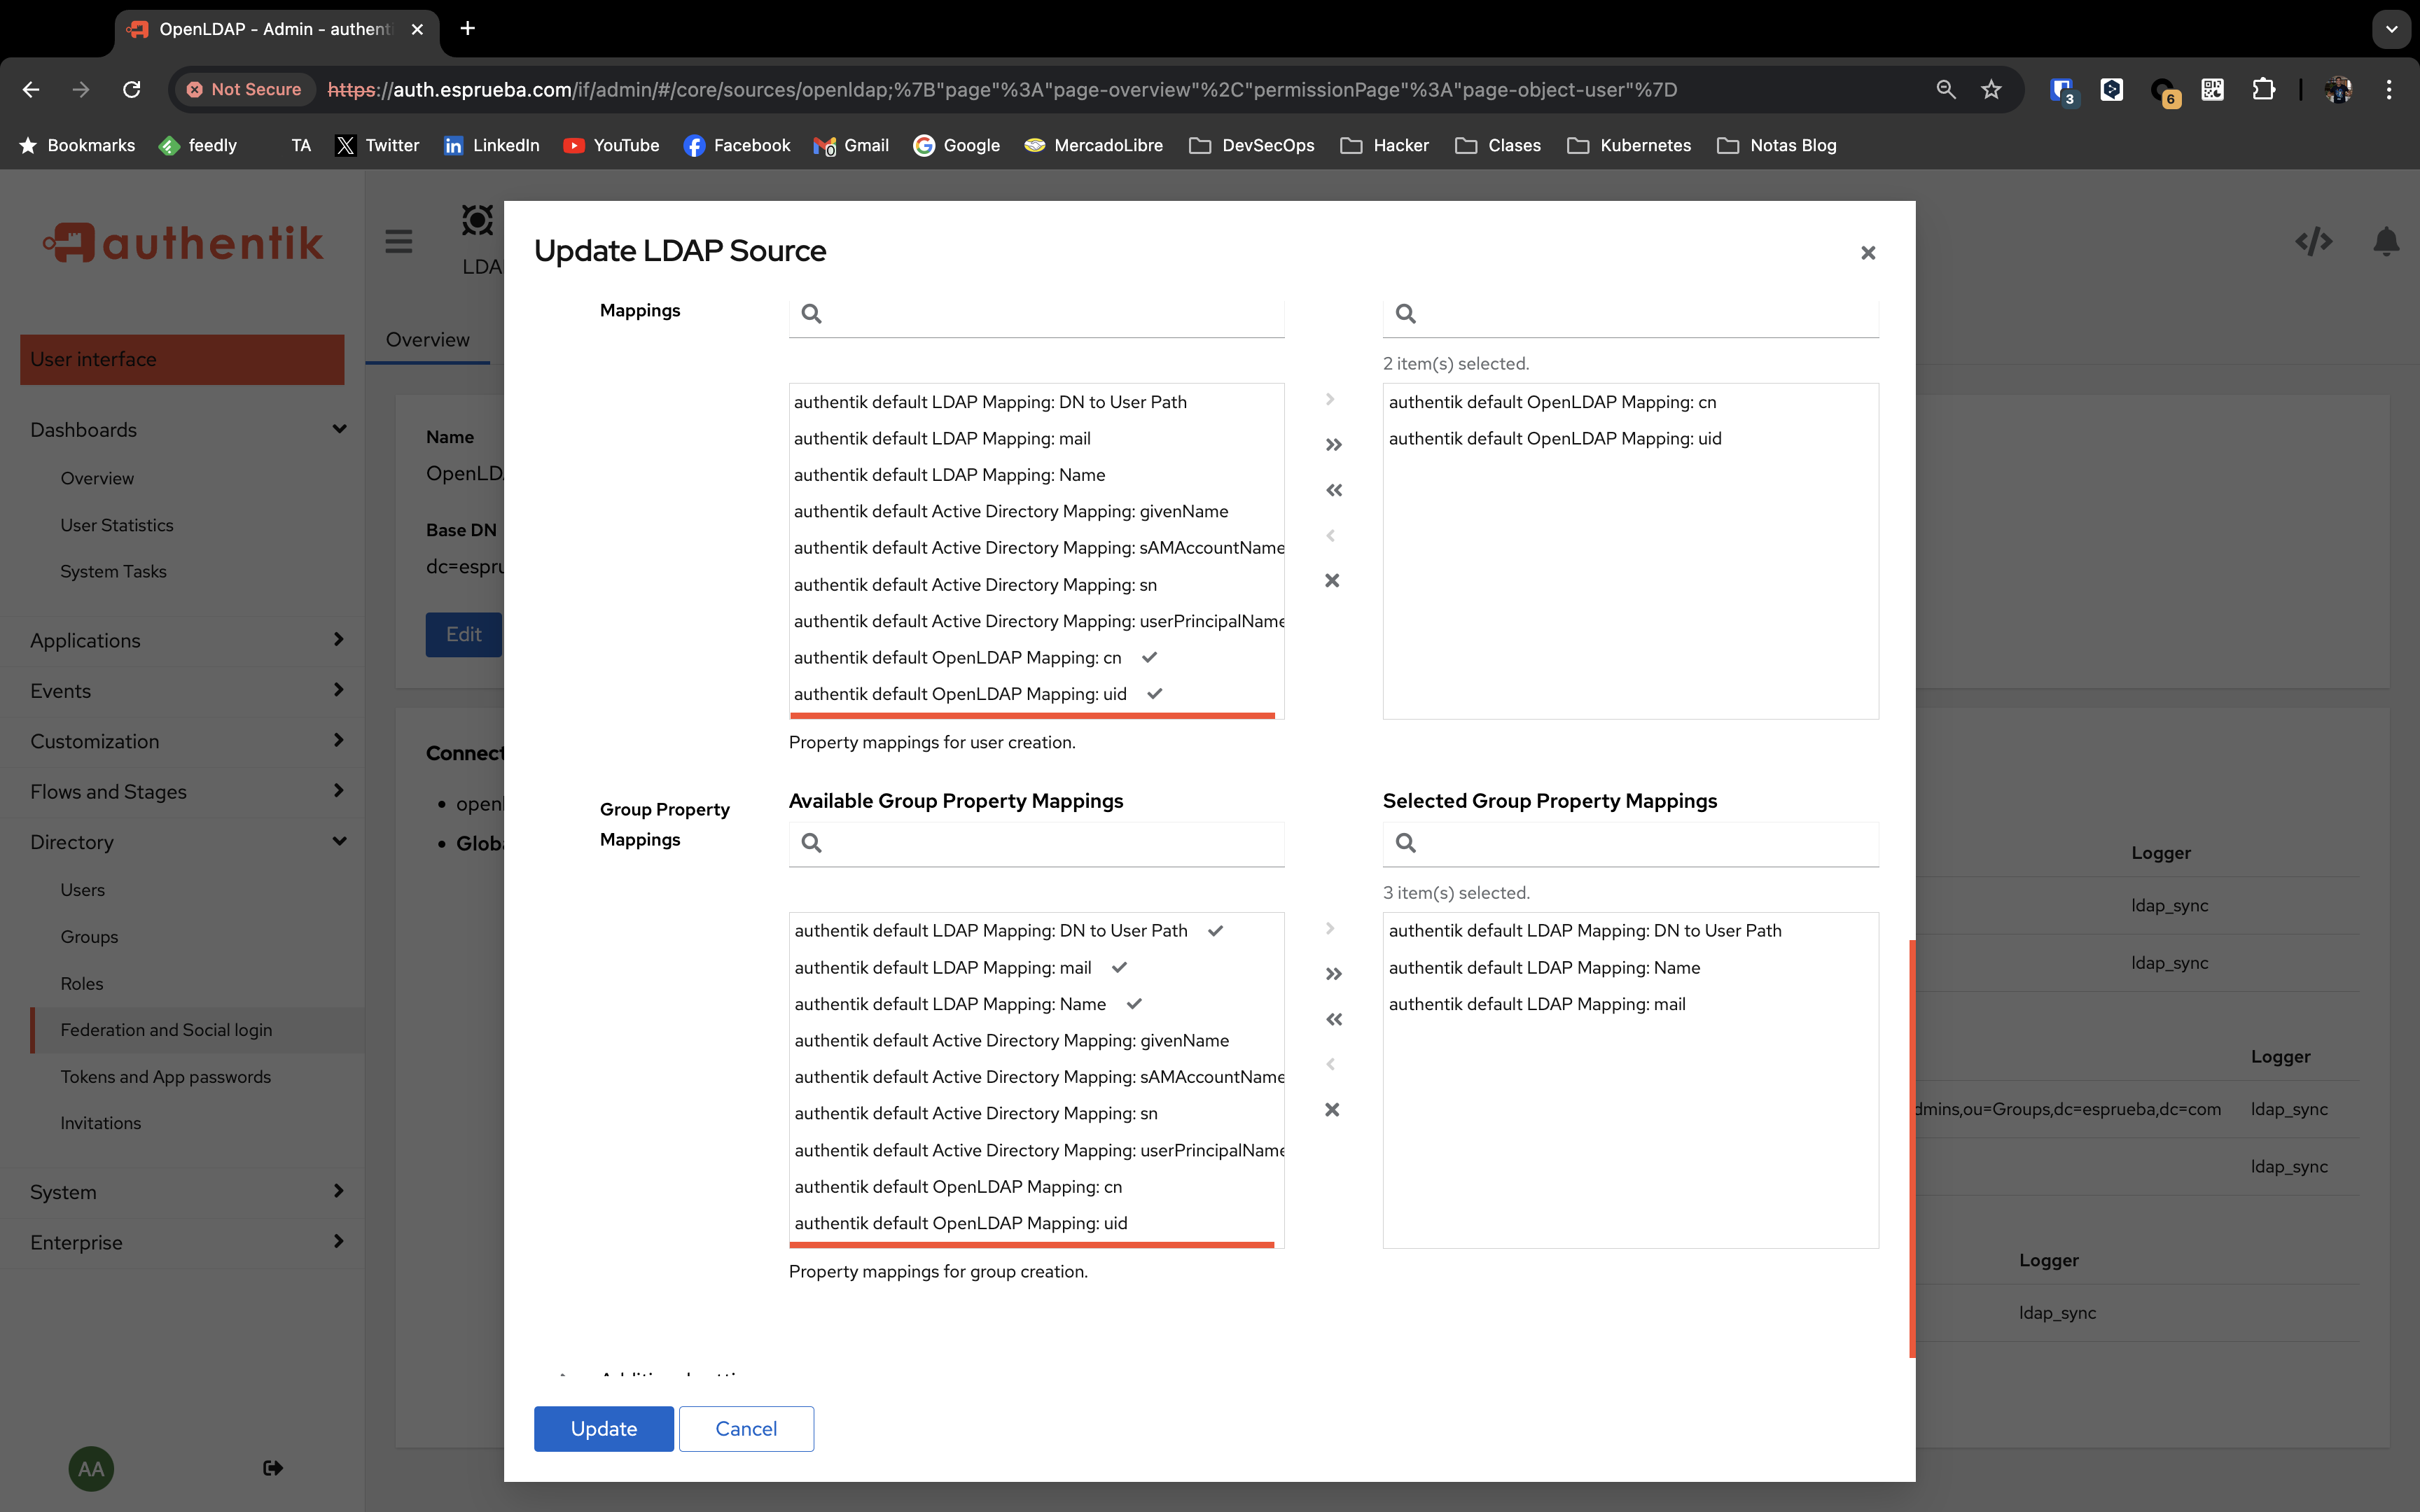
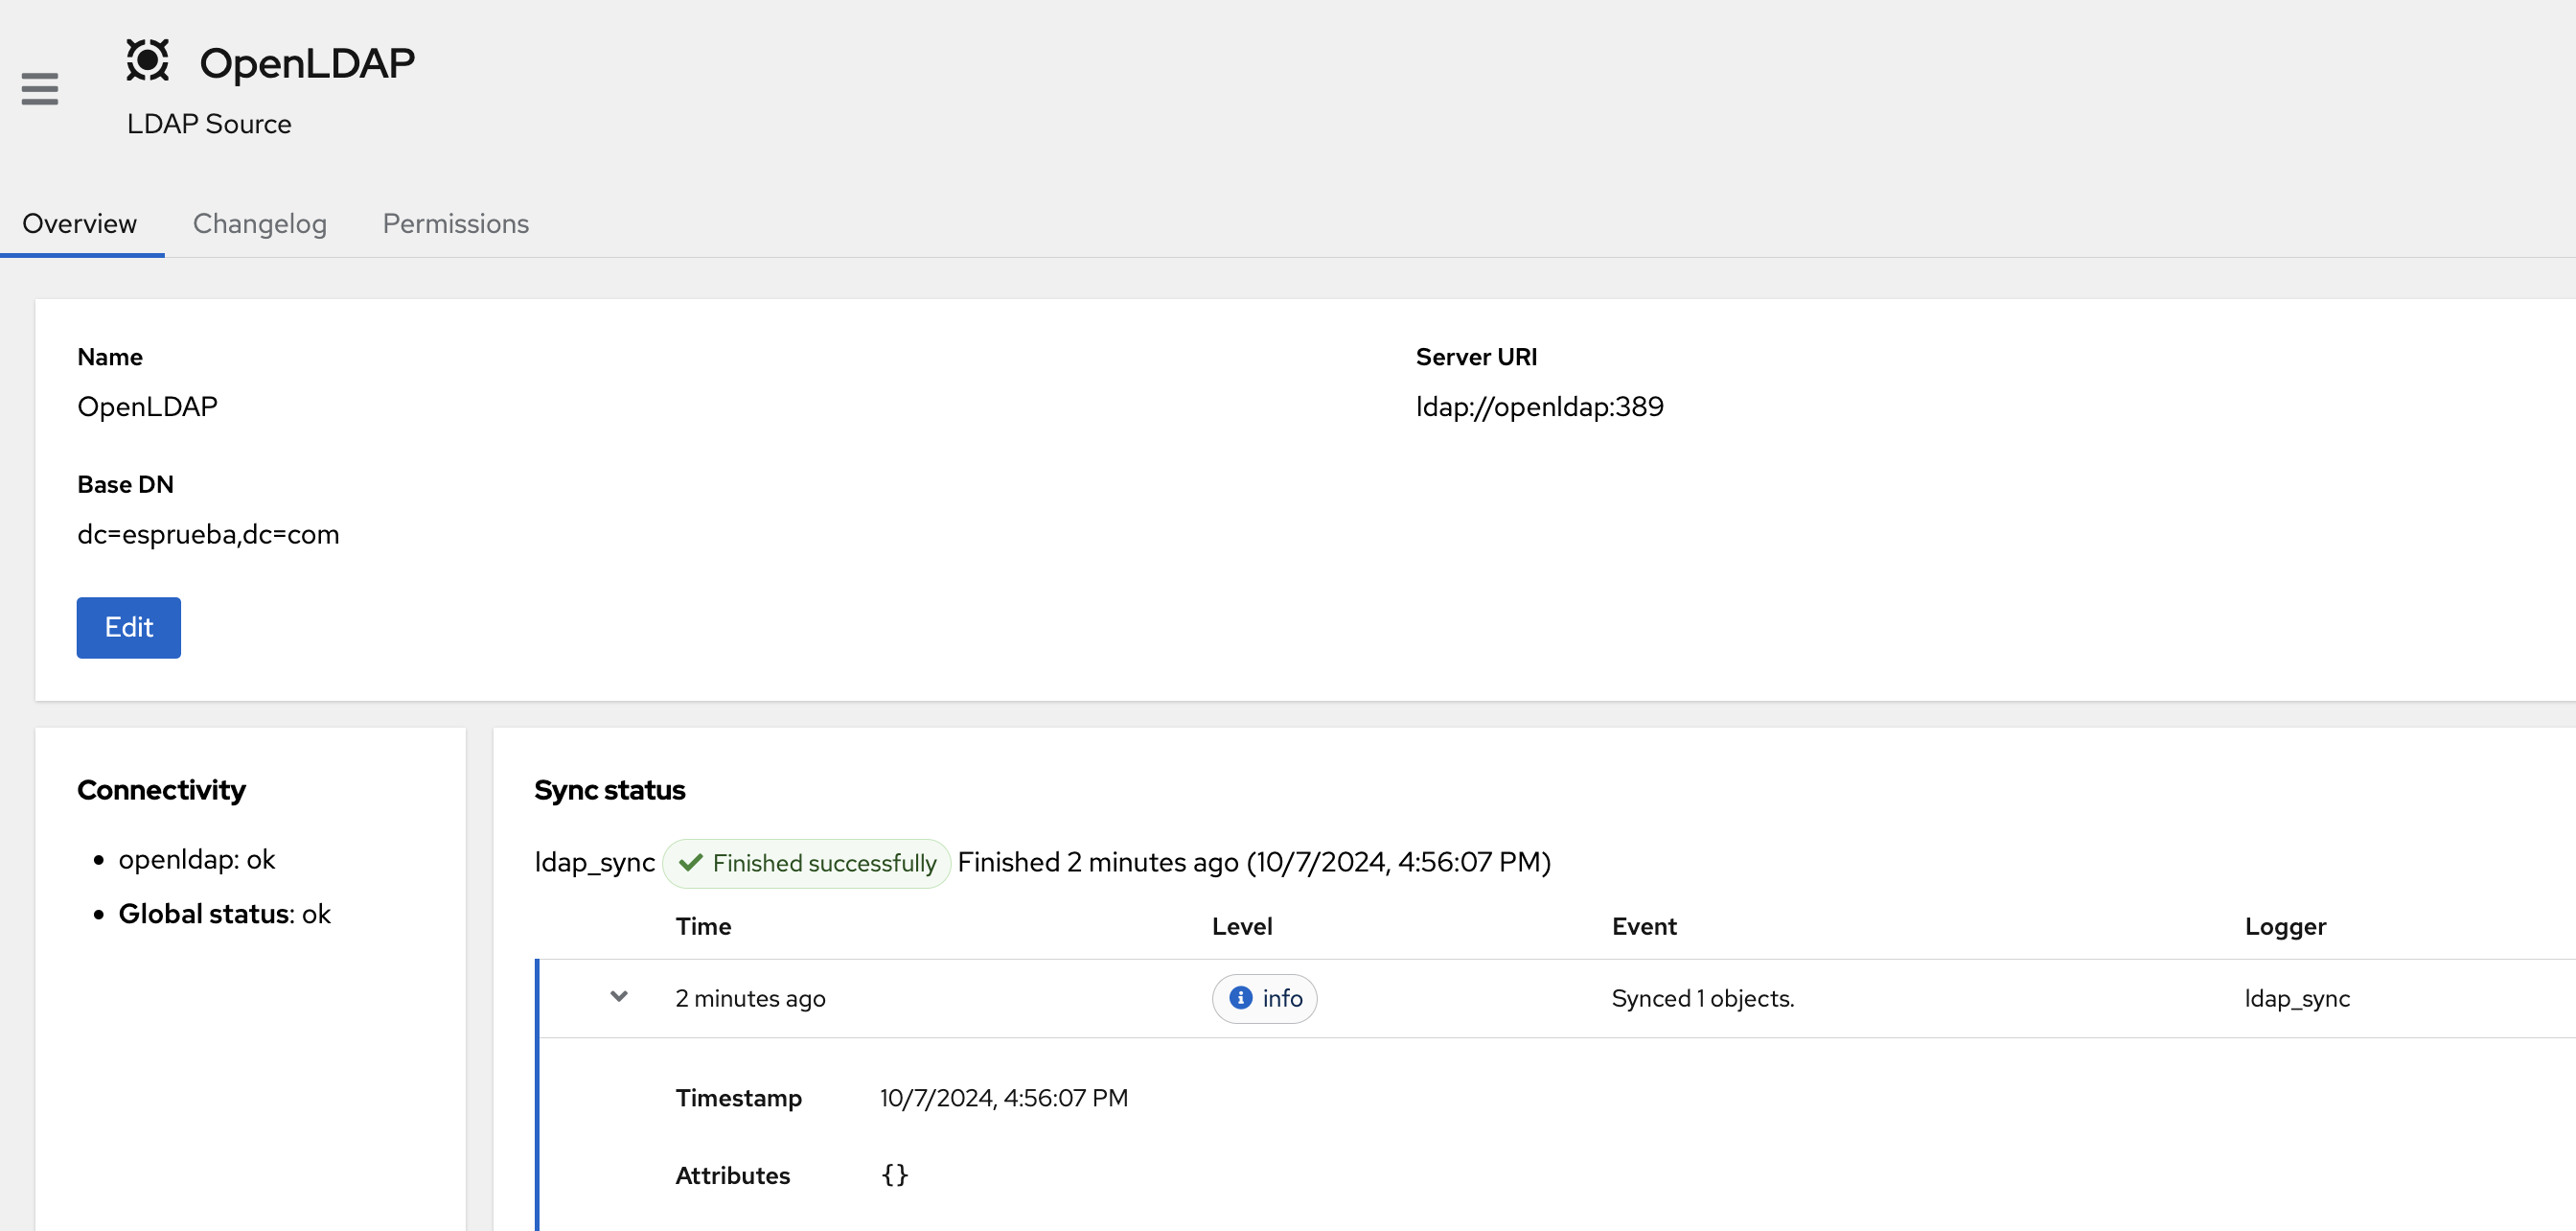
Sincronizamos y listo.
Configurar Aplicaciones
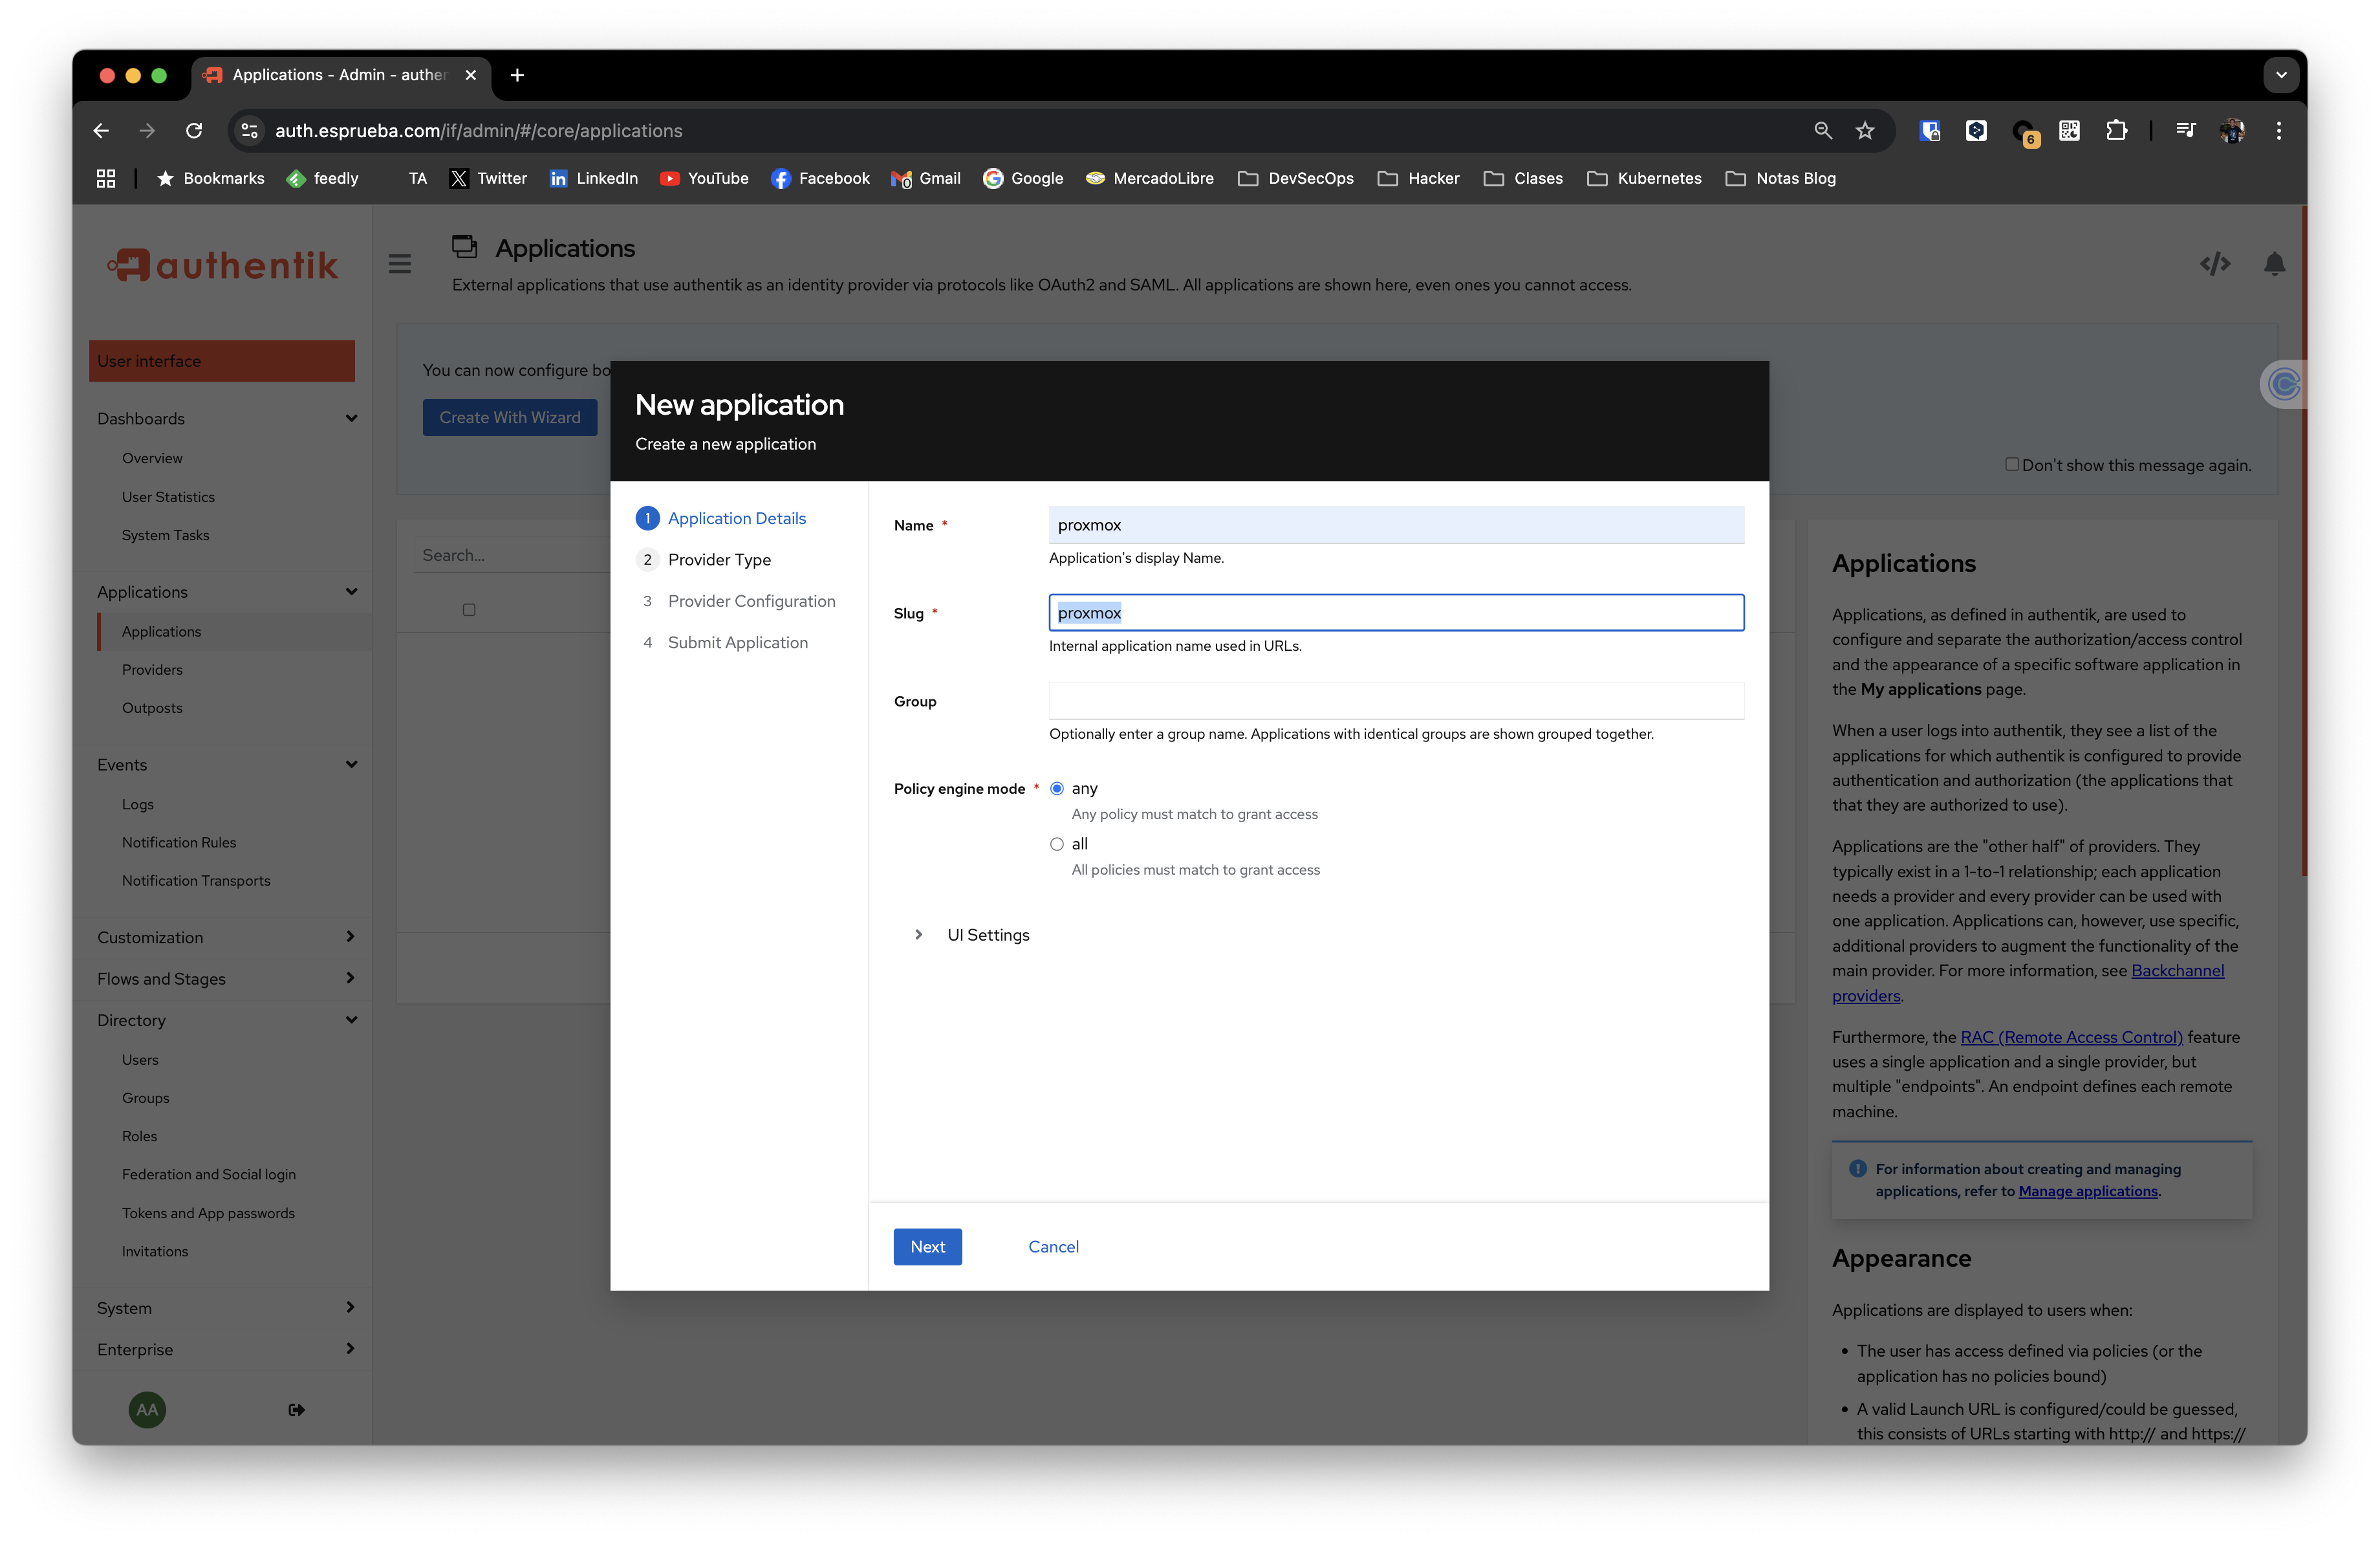
Voy a configurar mi Proxmox para que sea utilizado como aplicacion dentro del enterno del usuario sfernandez. Para ello vamos a configurar en base al protocolo OAuth2/OpenID. Vamos a crear la aplicacion. Para ello iniciamos el Wizard. Yo deseo agregar Proxmox.
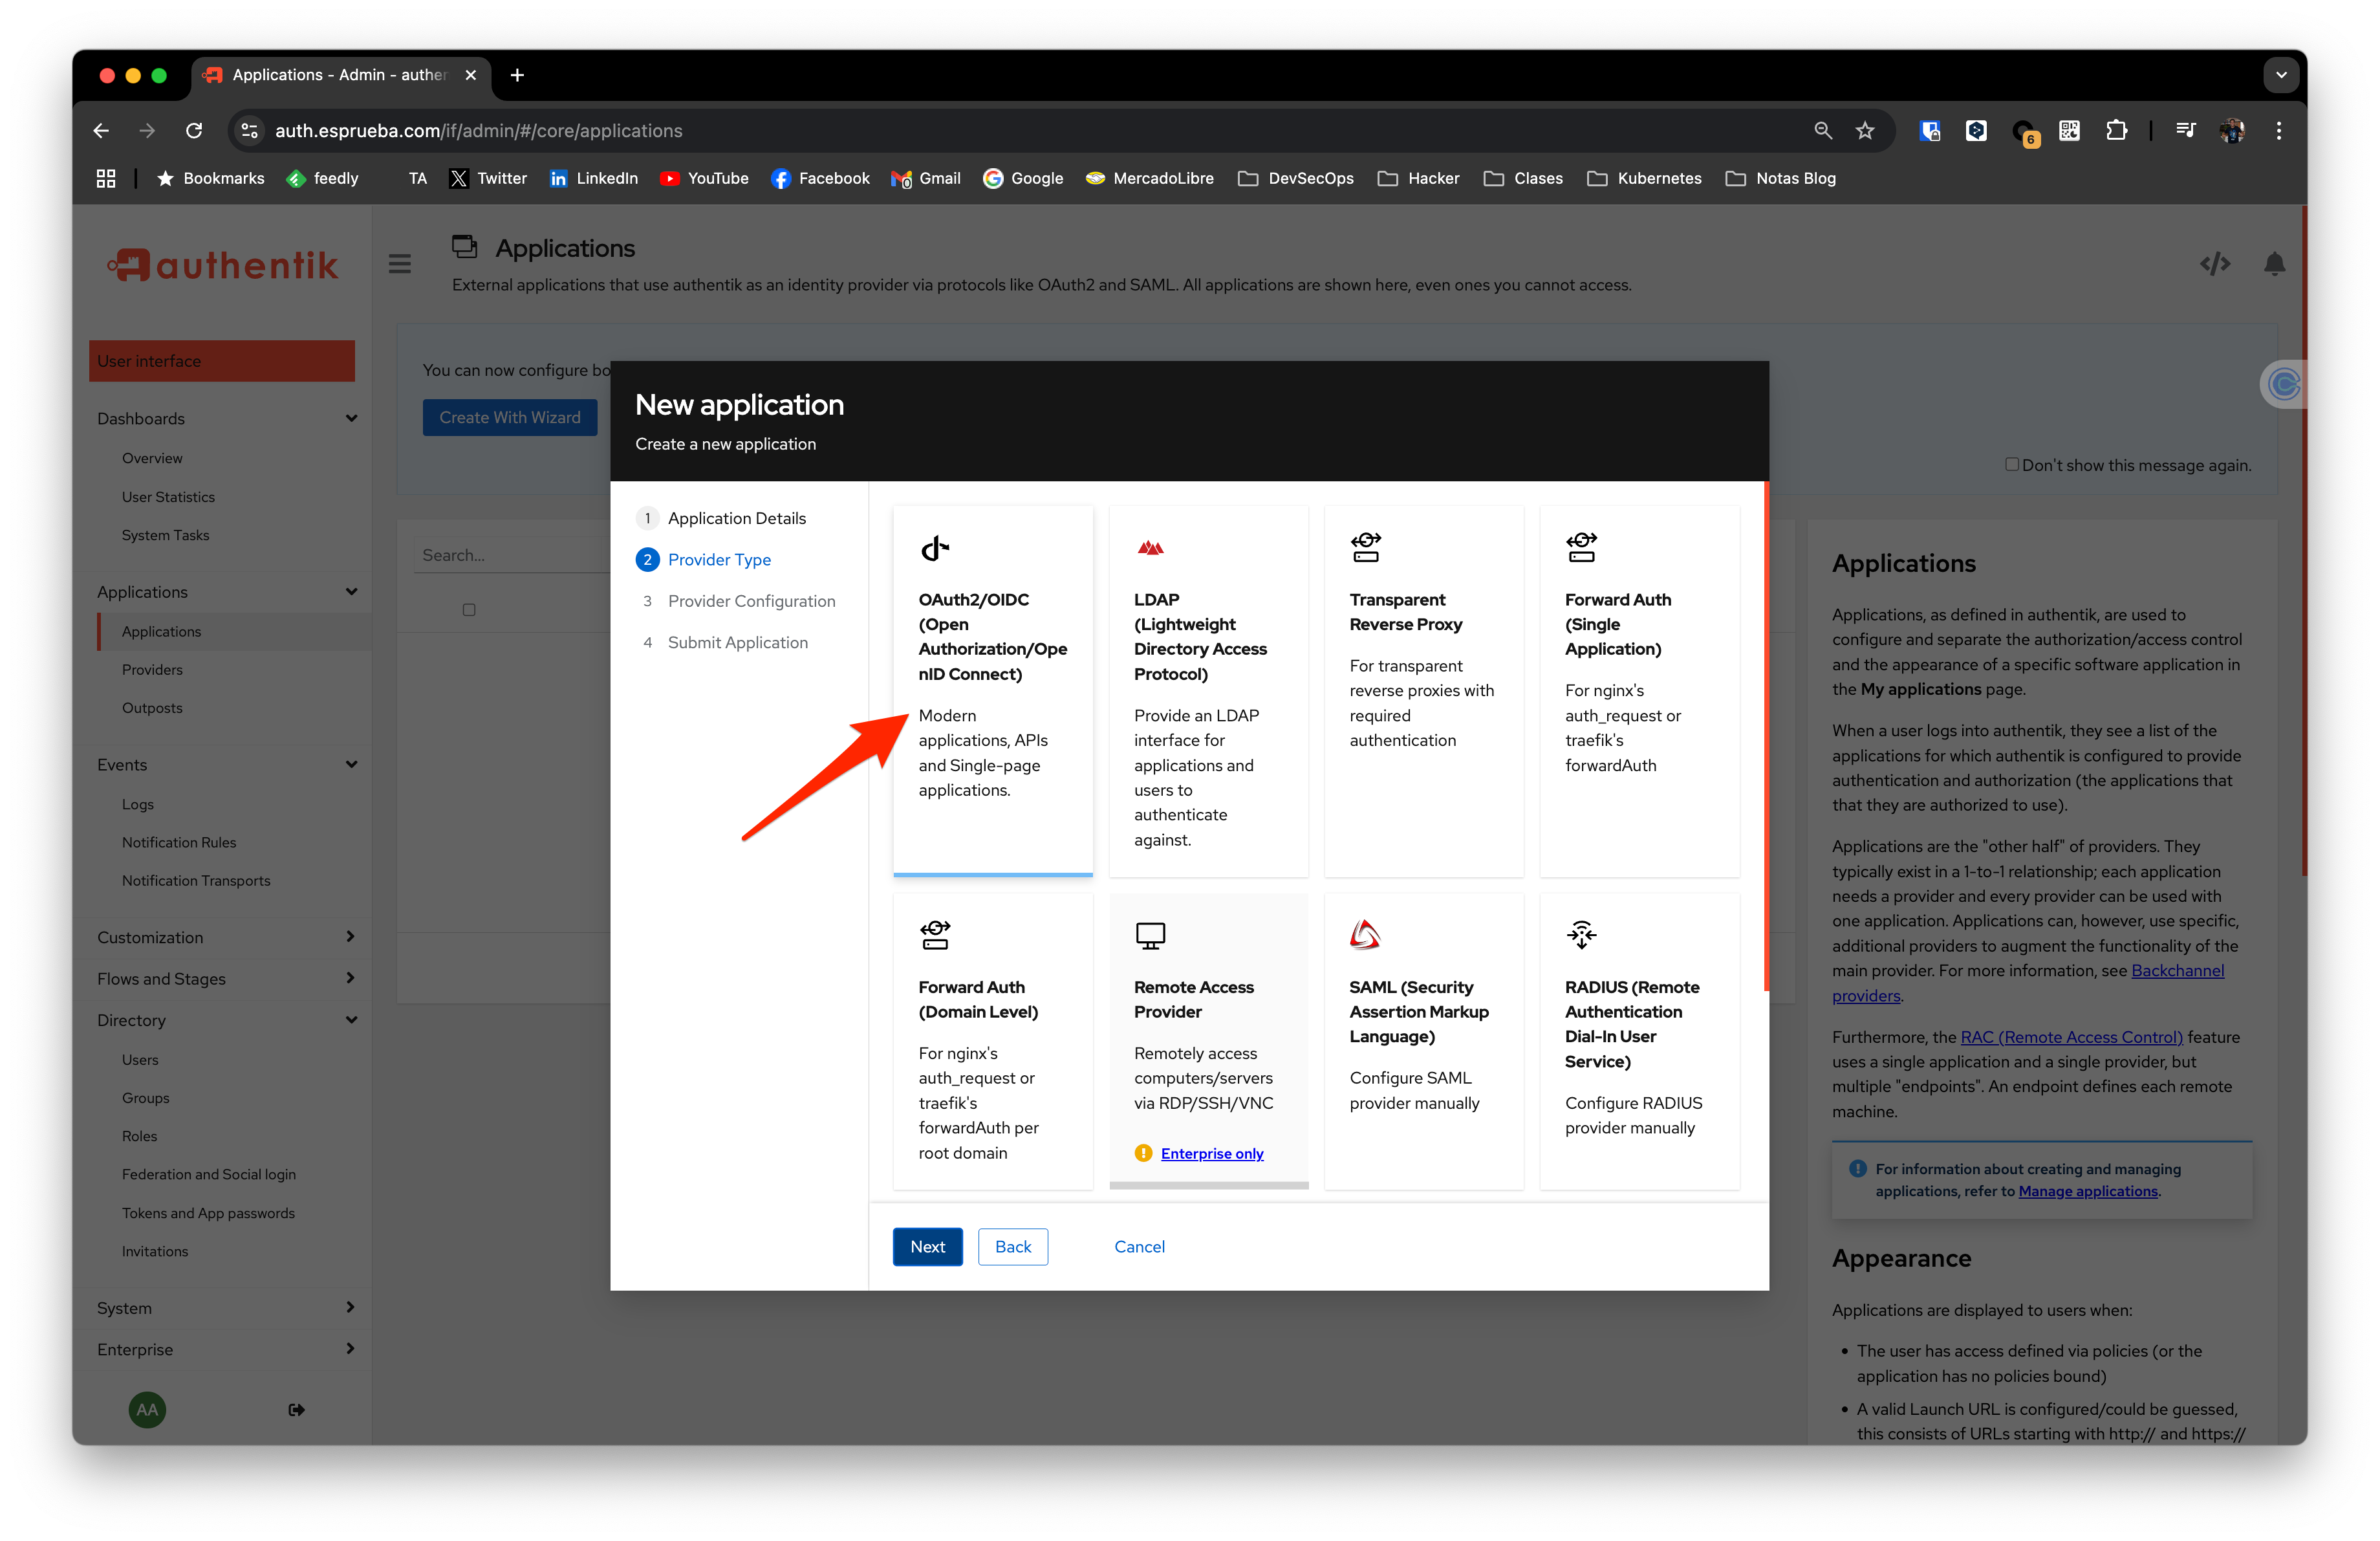
Selecciono el Single Sign On que utilizaremos.
Vamos a copiar los valores de Client ID & Client Secret.
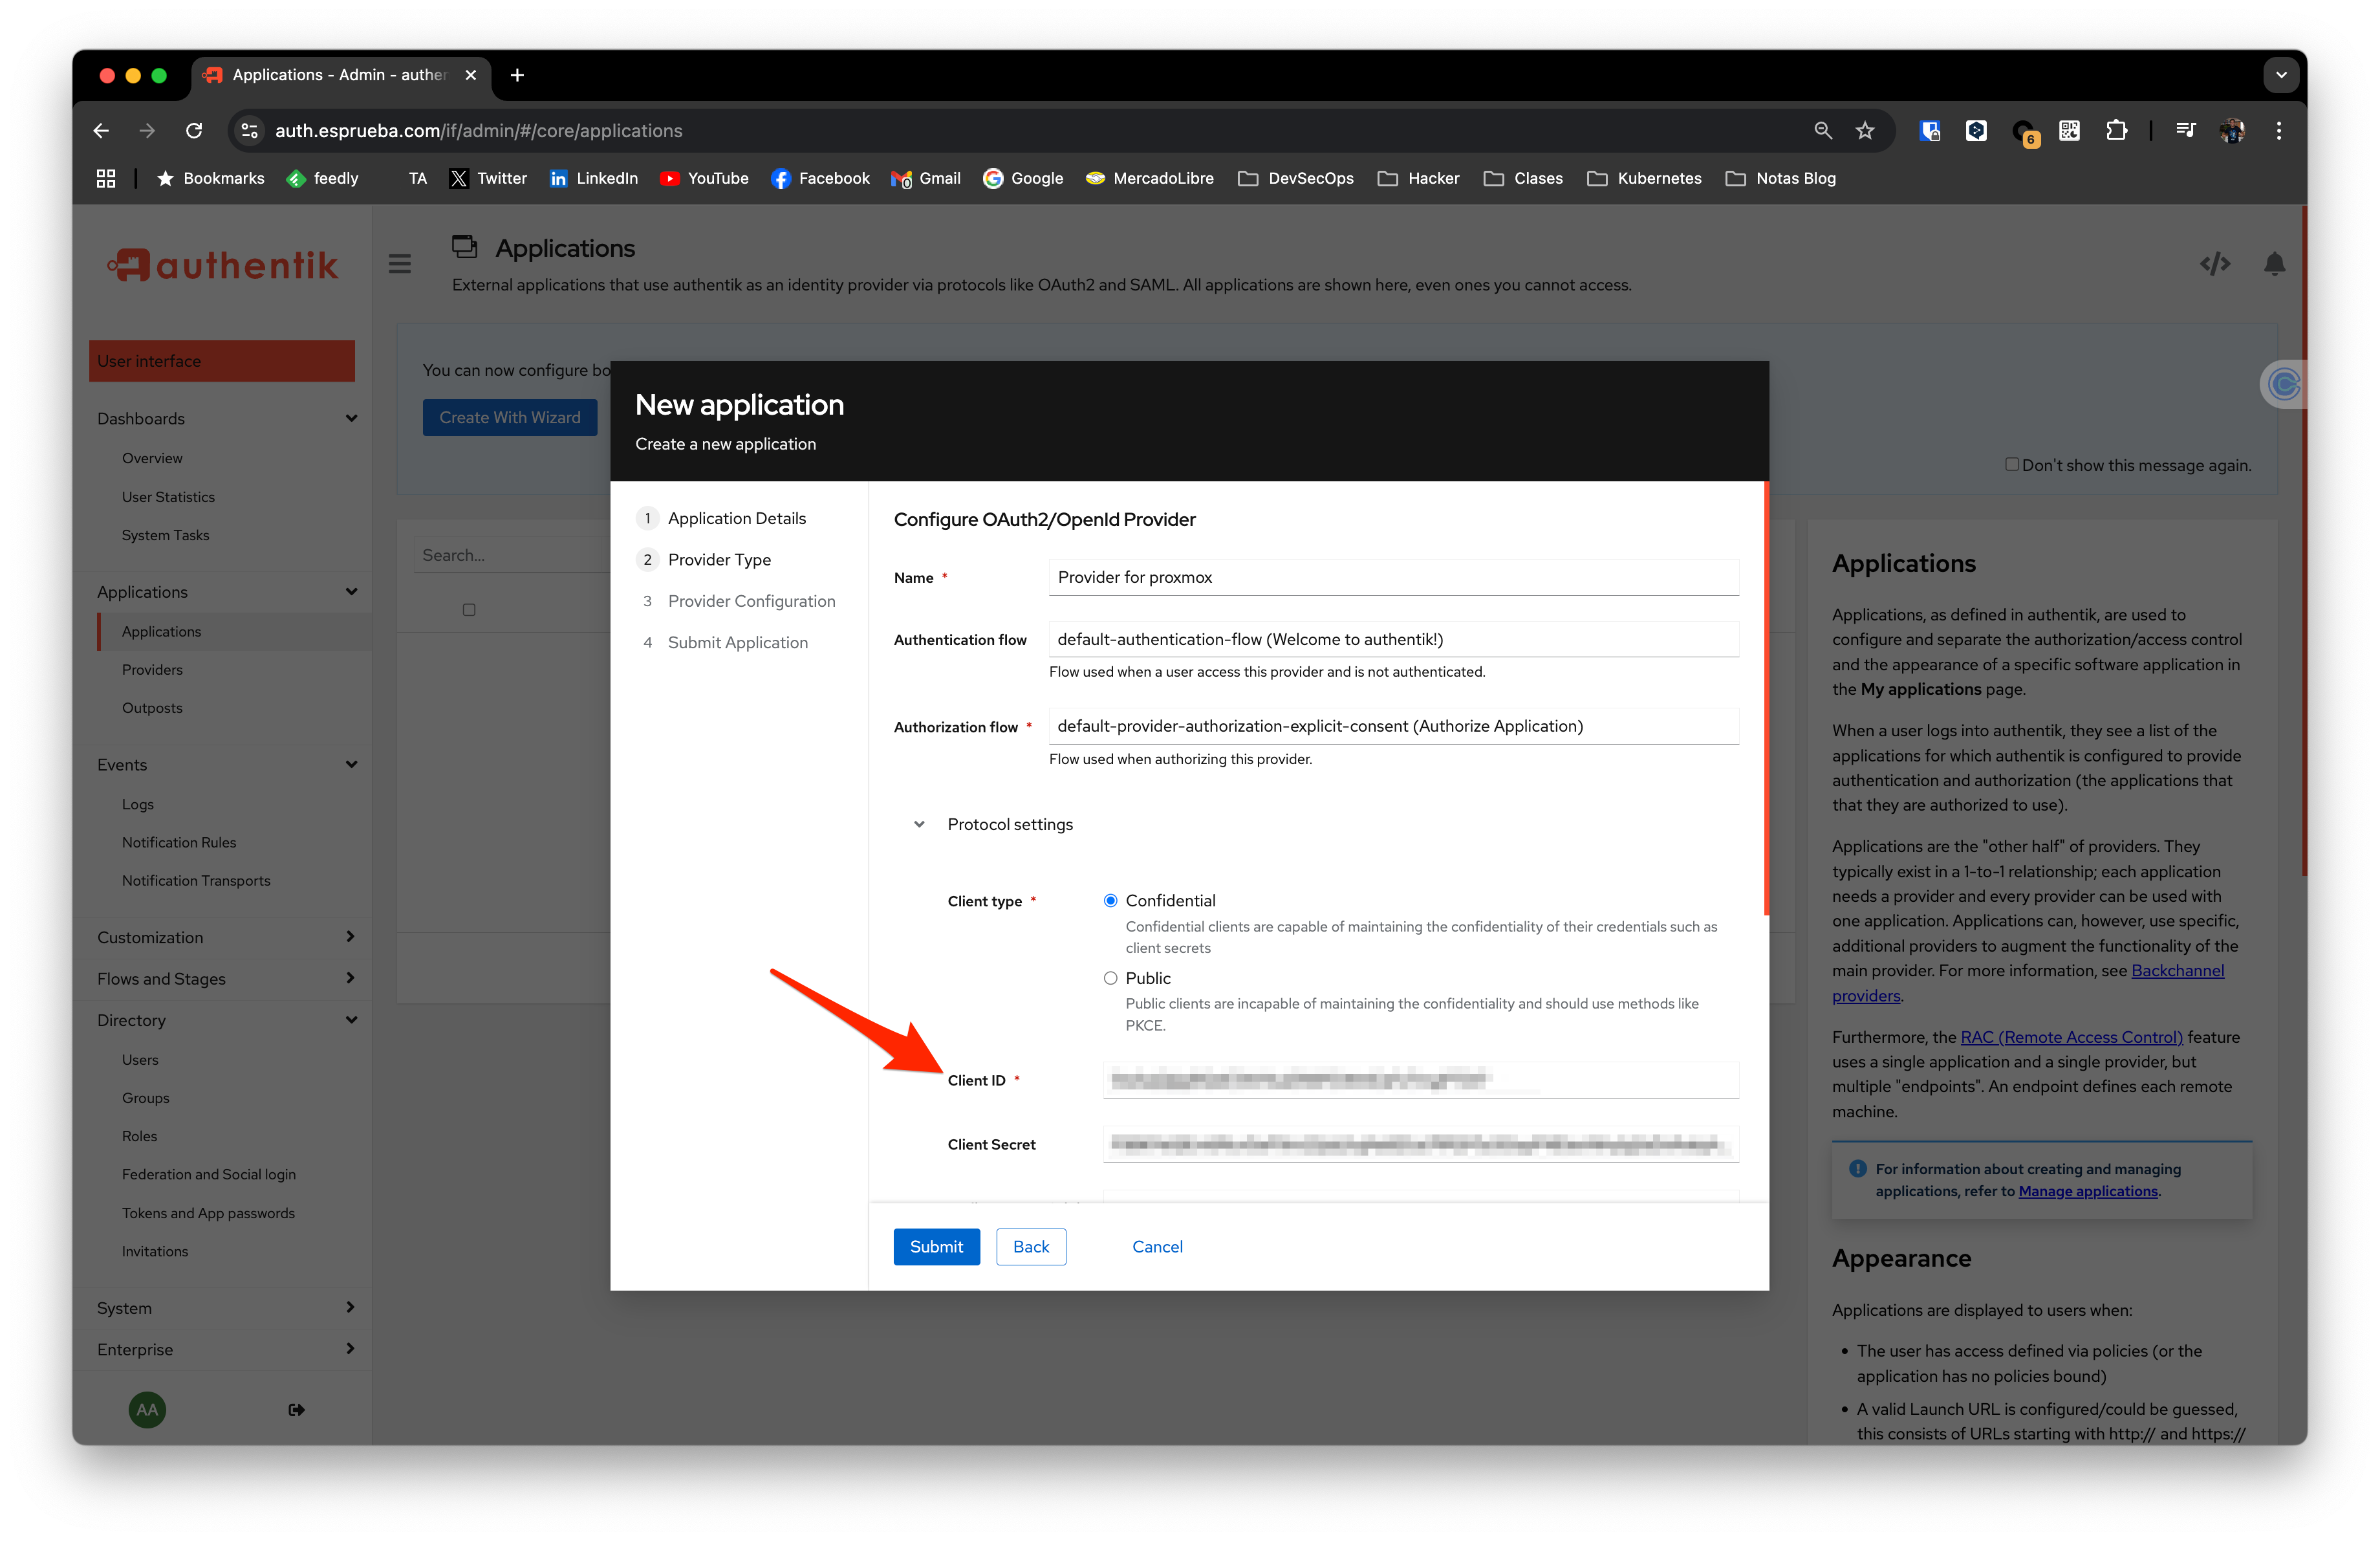
Vamos a agregar la aplicacion al usuario, para que sea parte de sus aplicativos.

Logico en un ambiente real lo manejariamos por grupos.
Configuracion de Proxmox
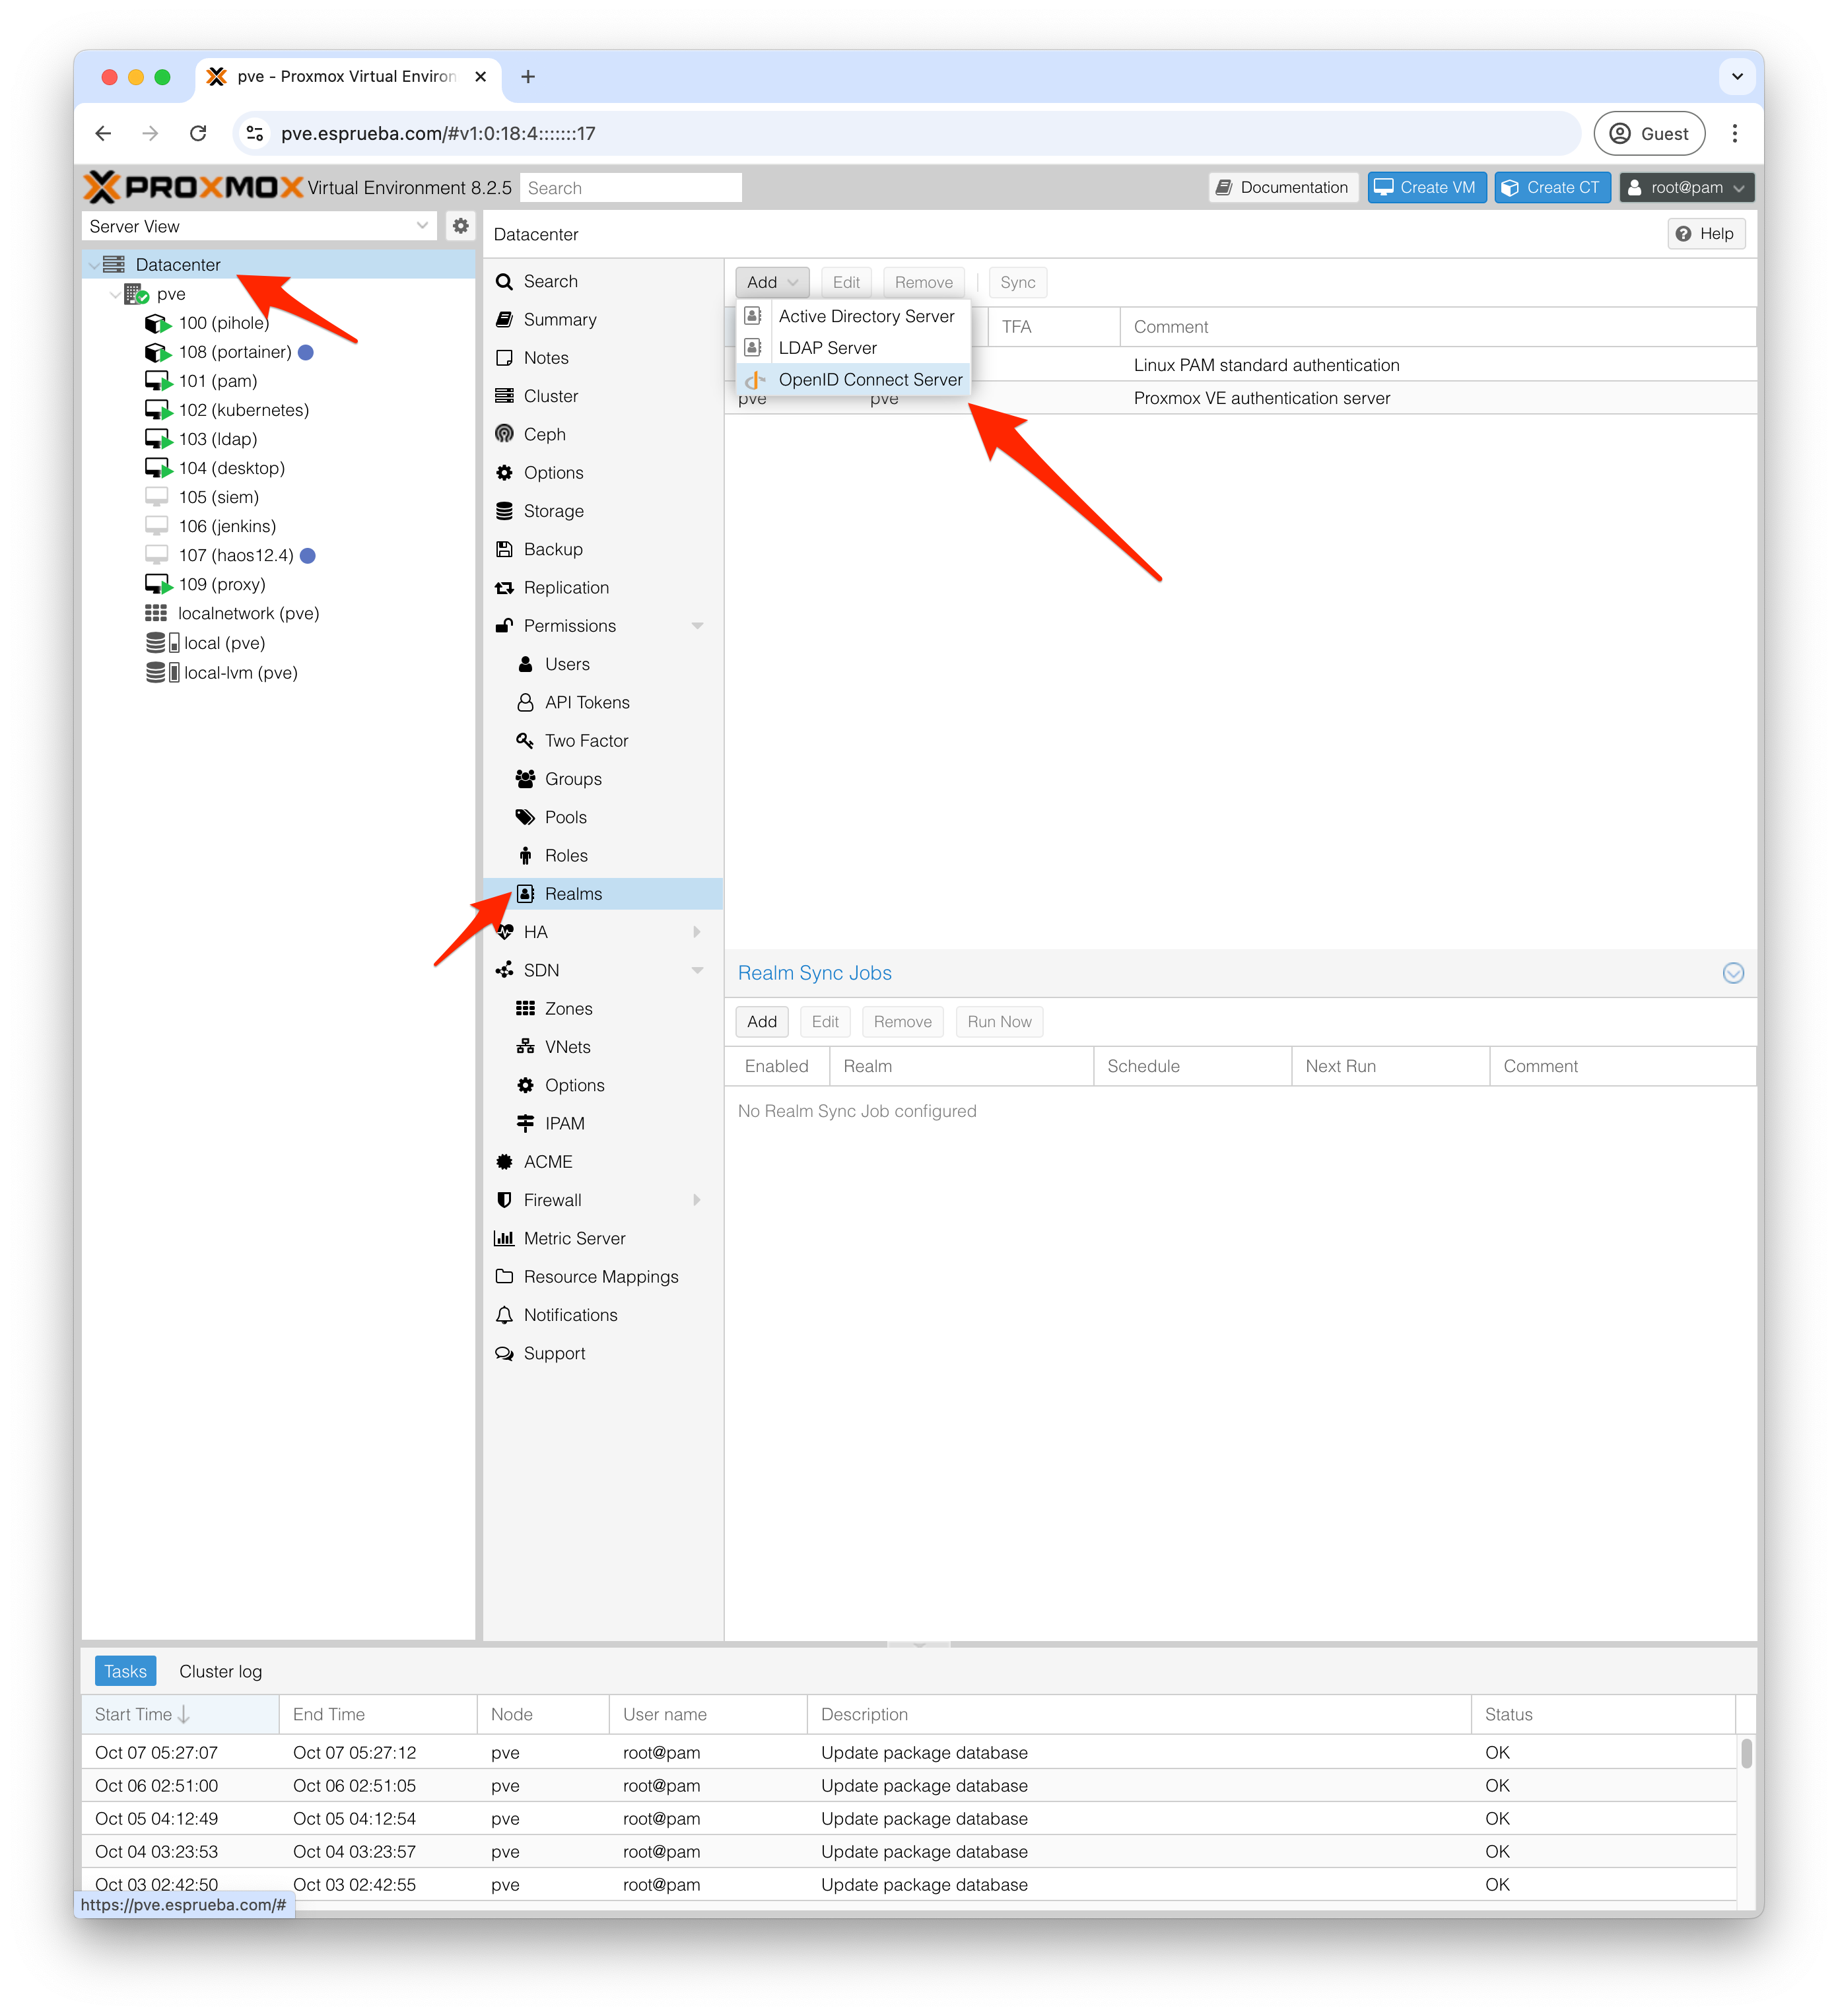
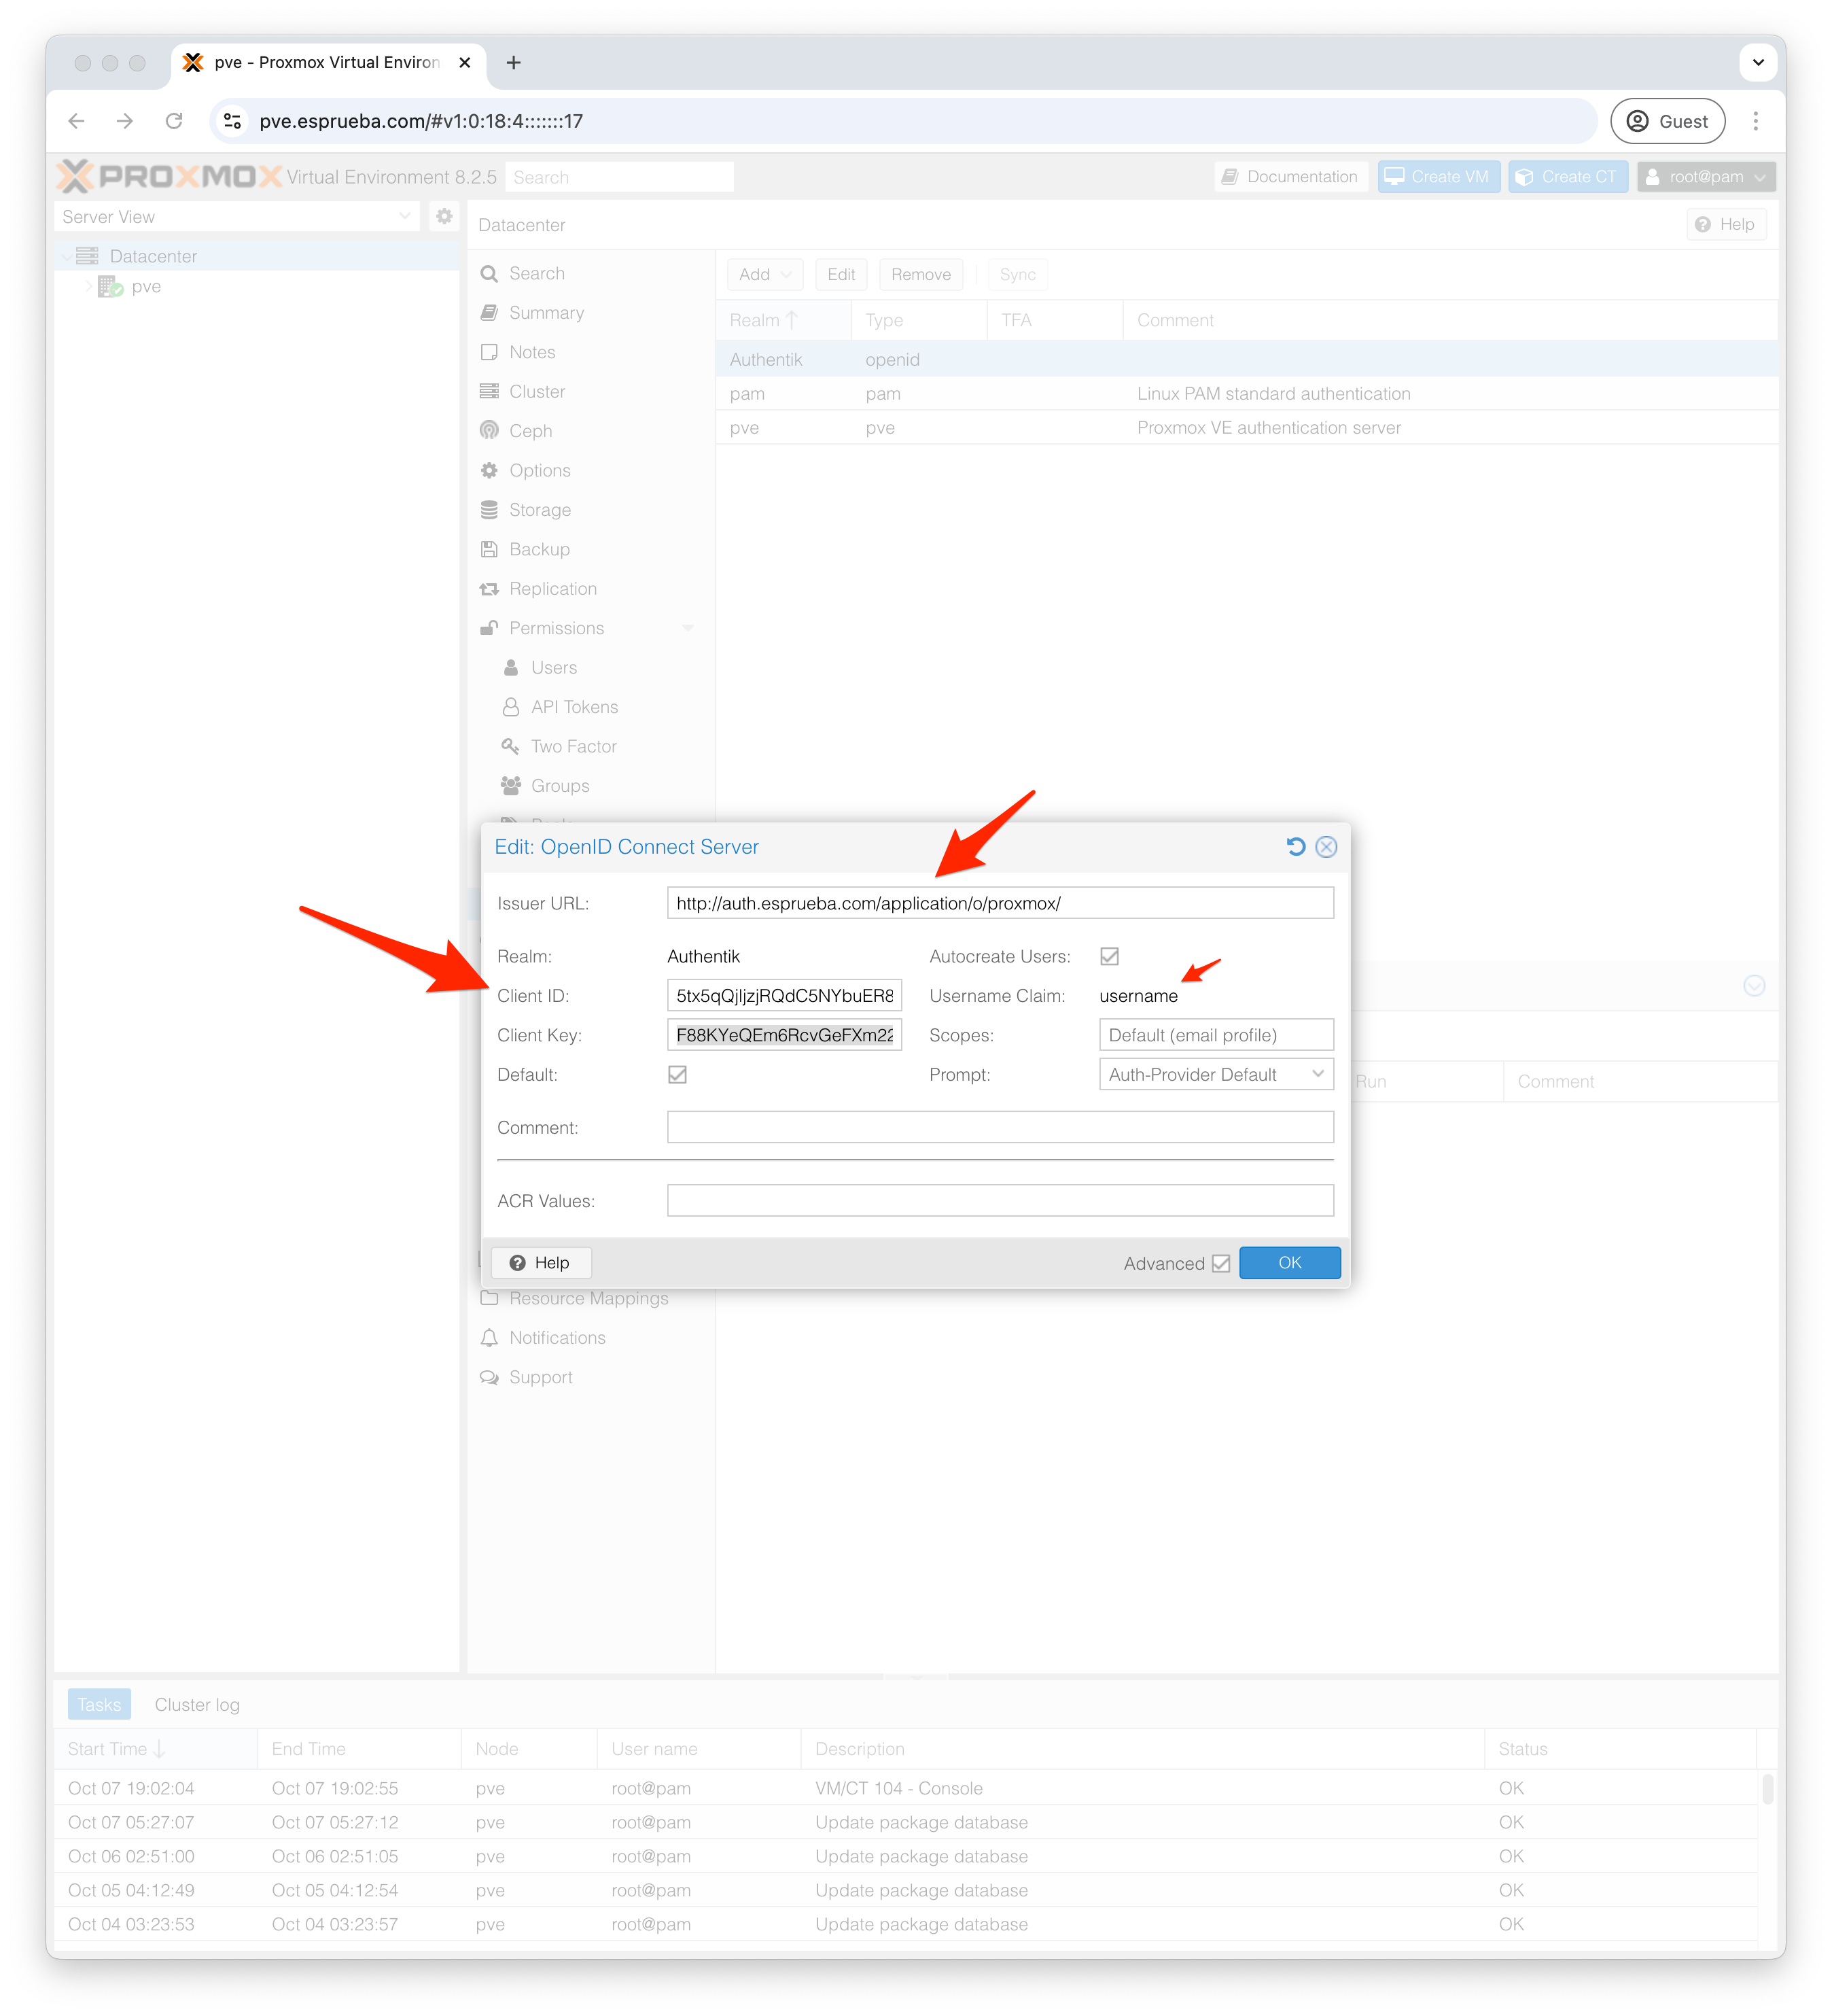
Ya en Proxmox vamos a ir a Datacenter, luego a Realms y configurar el OpenID Connect Server.
Dejamos la configuracion de esta manera.
Inicio de Sesion
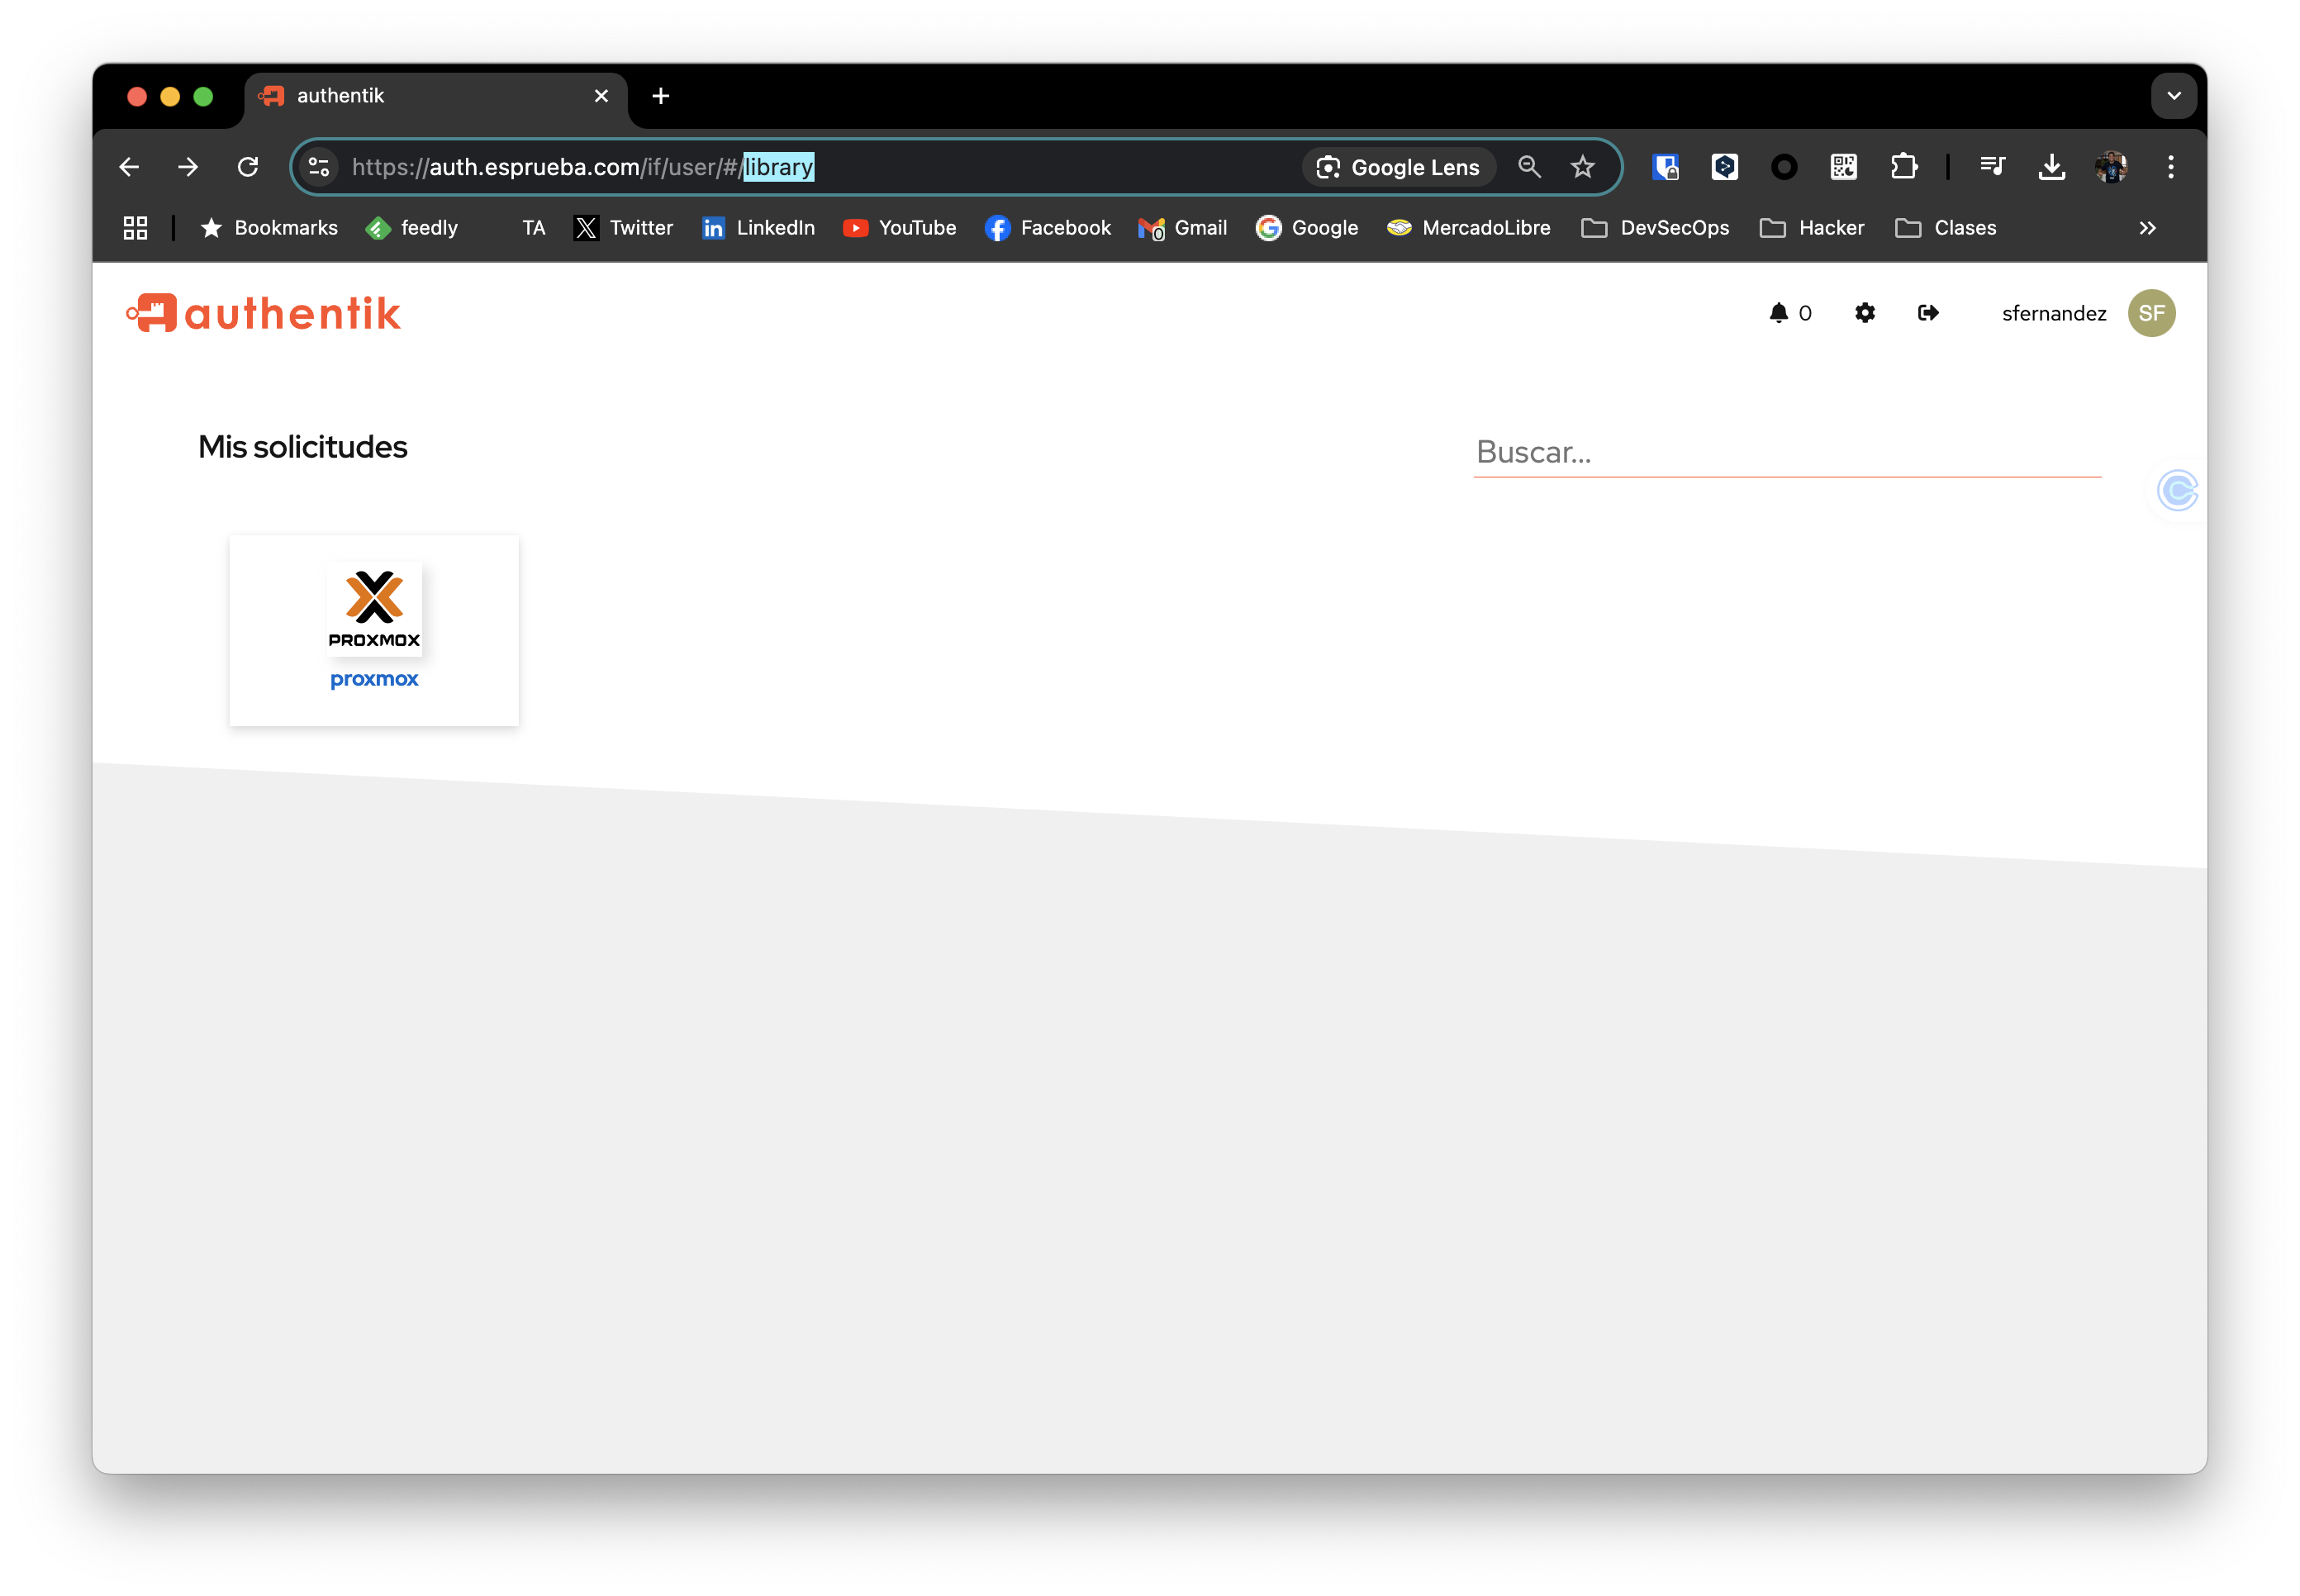
Ya todo listo para que sfernandez haga inicio de sesion en el portal de Authentik y aparezcan las aplicaciones asignadas para un comienzo ameno.
Referencias
Subscribe to my newsletter
Read articles from Santiago Fernandez directly inside your inbox. Subscribe to the newsletter, and don't miss out.
Written by

Santiago Fernandez
Santiago Fernandez
I have a bachelor's degree in Technology from the University of Palermo, a Master in Information Security from the University of Murcia and different certifications such as CISSP | CISM | CDPSE | CCSK | CSX | MCSA | SMAC™️ | DSOE | DEPC | CSFPC | CSFPC | 5x AWS Certified. He is currently CISO at Klar, a Mexican Fintech. He was fortunate to be awarded as CISO of the Year in Argentina in 2021 and was among the Top 100 CISO's in the World in 2022. A lover of new technologies, he has developed a career in DevSecOps and Cloud Security at Eko Party, the largest security conference in Latin America.